_GOTOBOTTOM
Cold War (1950-1974)
Discuss the aircraft modeling subjects during the Cold War period.
Hosted by Tim Hatton
RF-84F Kitbash
vanize
_VISITCOMMUNITY
Texas, United States
Joined: January 30, 2006
KitMaker: 1,954 posts
AeroScale: 1,163 posts
Posted: Thursday, August 07, 2008 - 12:35 PM UTC
Hi all,

I am officially starting my first 'official' build log on Aeroscale!

The subject is an RF-84F in 1/48th, hopefully to be completed in time to earn a ribbon in the "Paparazzi Club" (Photo Recon) campaign.

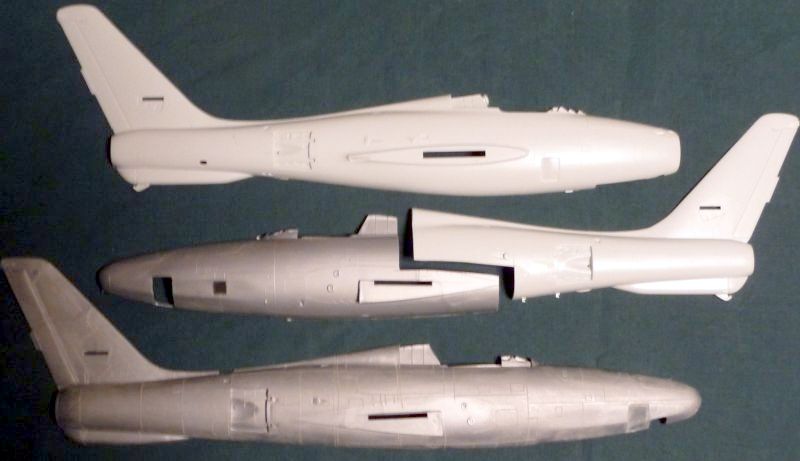
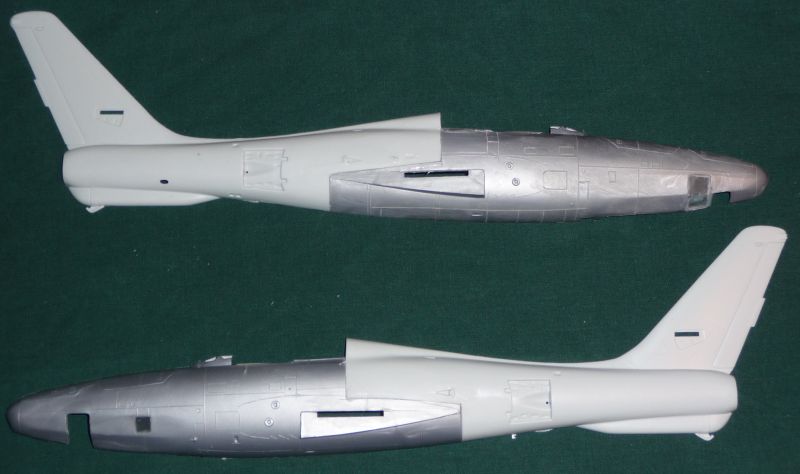
I'll be using the Heller RF-84F kit for te nose section and main wing structure (silver plastic). The Monogram F-84F kit (light greenish grey plastic) will donate the tail section, langing gear, and assundry details. I may even use a few bits from the Tamiya F-84G for the cockpit area (darker gray plastic). A chunk or two or spare resin orginally intended for other F-84 projects might will likely work their way in as well.

The reason for the kitbash?

The Heller kit is a dog, but the only RF-84F option there is in 1/48. While the nose section and wings are acceptable facsimiles of the orginal, the detail is soft (at best) and the back half of the fuselage is just plain not right (too thick and the dorsal spine is all wrong).

Despite the age of the monogram kit, the fuselage shape is more than accurate enough for my needs (way better than Heller's attempt) - hence the kitbash.

I'll be doing a camoflage finish (as opposed to NMF) to cover the kitbashed nature of the kit, and also because there are some cool schemes used by nato countries. Currently I am leaning to doing either a Danish or French bird.

The French one would look like this:


while the Danish one would be as so:
vanize
_VISITCOMMUNITY
Texas, United States
Joined: January 30, 2006
KitMaker: 1,954 posts
AeroScale: 1,163 posts
Posted: Thursday, August 07, 2008 - 12:41 PM UTC
So, the first step is to chop the fuselages up, which is a bit unnearving. Luckily both of these kits have been in my stash for so long that I no longer remember what I paid for them (so they were probably both quite cheap, right?)

After careful anaylsis of my detailing needs and balancing that with being realistic, I choose to cut along some common panel lines below the rear wing root and the back edge of the cockpit, connecting the two cuts with a third cut along the upper wing root:


Removed by original poster on 08/08/08 - 00:07:25 (GMT).
vanize
_VISITCOMMUNITY
Texas, United States
Joined: January 30, 2006
KitMaker: 1,954 posts
AeroScale: 1,163 posts
Posted: Thursday, August 07, 2008 - 01:03 PM UTC
Once the chop job was done on the left side, I taped the left Monogram tail section to the whole Monogram right side. I then fitted the left side Heller nose up to that combo so as to get a properly straight body line.

I discovered at this point that the Heller fuselage is a little wider than the Monogram one, so even though I had chosen cut points that had identical heights on each kit to make lining things up easy, I still had an alignment issue t deal with. The solution was to compress the Monogram tail section a bit top to bottom to make it warp out a little in the middle, and do a little of the opposite to the Heller kit.

Ultimately I found a happy medium that would require only a little filler, and so I tacked the mated halved together with a little CA glue (superglue).

Once the glue was set well enough to keep the warpages I had set in, I removed the mated left halves from the still whole Monogram right half and went about reinforcing the join on the backside with strip styrene:


After that set, I had a very strong join (i think if I bent the fuselage now, it would snap elsewhere, not on the seam). Going back to work on the exterior side, I used CA glue for filler and sanded the seam smooth:


The red rectangle shows where I am going to have to add material in the future to fair in the Monogram canopy. While the monogram kit is far more accurate in this area, I foresaw greater difficulties using the monogram structure past the rear edge of the cockpit, so I figured it would be easier for me to sculpt this area to suit later.

After all that, repeating the process for the right side was fairly easy (and of course came out a tad better). I decided I had to remove the Heller rear cockpit/canopy lift detail if I was ever going to get the Monogram clear parts (which are vastly superior to the Heller blob of clear plastic) to fit:


That was all about 3 or 4 hours of work, though in truth I had been planning and plotting this venture for more than a year, so...

anyway, that is where she stands as of now.
SGTJKJ
#041
_VISITCOMMUNITY
Kobenhavn, Denmark
Joined: July 20, 2006
KitMaker: 10,069 posts
AeroScale: 3,788 posts
Posted: Thursday, August 07, 2008 - 07:38 PM UTC
Interesting feature, Vance. Seems like a sensible idea and a good way to get an accurate RF-84F.

I hope you do the Danish version. Do you have decals?

I will follow your tread with interest
 _GOTOTOP