Hi all,
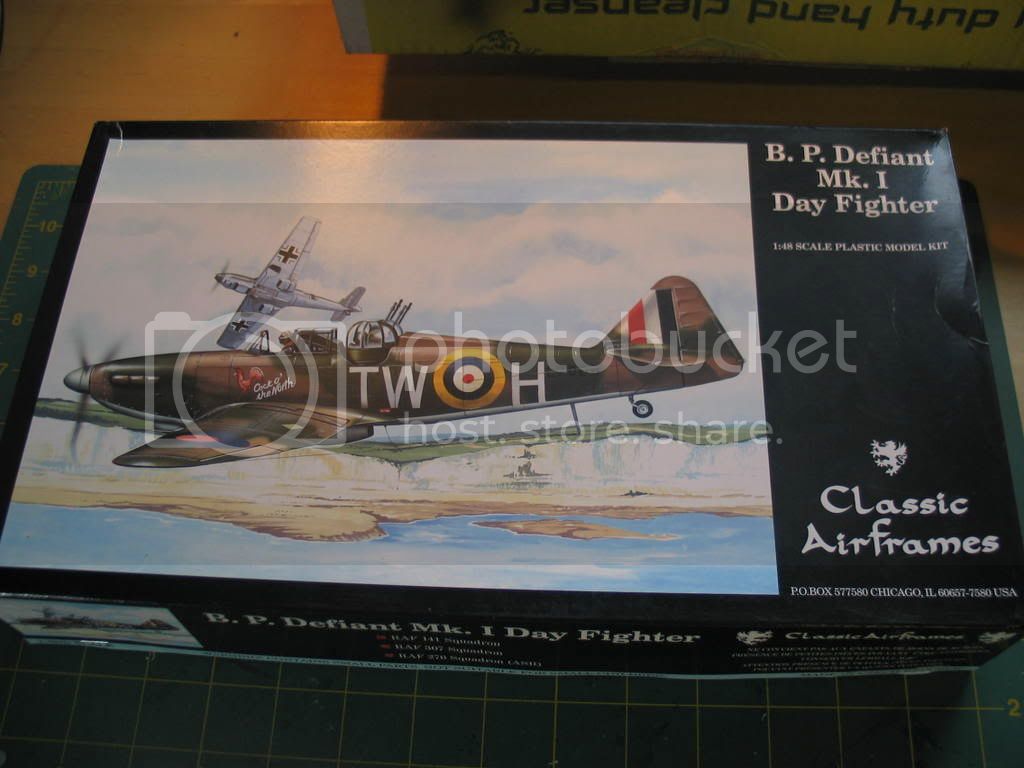
My latest project is continuing my Battle of Britain theme, and is Classic Airframes Boulton Paul Defiant Mk1.
It took about 4 hours to get all the resin cleaned up and some paint on the cockpit sides, floor and seat.
I have painted he fuselage interior also, but am awaiting some photos of the inside of the place where the turret goes so I haven't finished it yet. Also I have done some basic assembly on the turret, but need some data plate decals, I am visiting Hannants tomorrow so hopefully will get some then.
More soon, comments welcome, especially from anyone who has built the kit before as there seems to be a few fit and line up issues so any advice gratefully received.
Steve
World War II
Discuss WWII and the era directly before and after the war from 1935-1949.
Hosted by Rowan Baylis
Classic Airframes Defiant Mk1
AIRGUNNER
England - South East, United Kingdom
Joined: September 27, 2006
KitMaker: 246 posts
AeroScale: 234 posts
Joined: September 27, 2006
KitMaker: 246 posts
AeroScale: 234 posts
Posted: Wednesday, September 17, 2008 - 03:02 AM UTC
LongKnife
Jönköping, Sweden
Joined: April 25, 2006
KitMaker: 831 posts
AeroScale: 688 posts
Joined: April 25, 2006
KitMaker: 831 posts
AeroScale: 688 posts
Posted: Wednesday, September 17, 2008 - 03:33 AM UTC
That's a nice cockpit. Are the dials decals or have you toothpicked them?
Posted: Wednesday, September 17, 2008 - 03:58 AM UTC
He Steve
I agree with Tony, very nice!!!!
Edit: Picture removed
cheers
Steffen
I agree with Tony, very nice!!!!
Edit: Picture removed
cheers
Steffen
AIRGUNNER
England - South East, United Kingdom
Joined: September 27, 2006
KitMaker: 246 posts
AeroScale: 234 posts
Joined: September 27, 2006
KitMaker: 246 posts
AeroScale: 234 posts
Posted: Wednesday, September 17, 2008 - 07:33 AM UTC
Hi Tony and Steffen,
I pinched an idea from Nige (Lampie) for the instument panel. Paint the main colour first, in this case the green. Let it dry, then paint the dials etc. white. Let this dry. Then put the black on, and while still wet, rub your thumb across them and take the paint off the high spots. Then white should then show through.
Steffen,
I would touch the photos up, but do most of my uploading at work and am not allowed to put unauthorised software on ours PC's. I could however do it at home if I have time but don't have any photo editing software and can't afford PhotoShop. Do you know of anything I could use?
Cheers
Steve
Posted: Wednesday, September 17, 2008 - 07:42 AM UTC
Hi Steve o.k. I understand
I use Gimp it is freeware and works quite well (Unfortunately I have not much clue about processing photos).
cheers
Steffen
I use Gimp it is freeware and works quite well (Unfortunately I have not much clue about processing photos).
cheers
Steffen
AIRGUNNER
England - South East, United Kingdom
Joined: September 27, 2006
KitMaker: 246 posts
AeroScale: 234 posts
Joined: September 27, 2006
KitMaker: 246 posts
AeroScale: 234 posts
Posted: Wednesday, September 17, 2008 - 07:46 AM UTC
Hi Steffen,
Thanks for that, I will download and have a play.
Steve
Thanks for that, I will download and have a play.
Steve
Posted: Wednesday, September 17, 2008 - 09:49 AM UTC
Hi Steve
Excellent work on the cockpit! She's set to be a real beauty!
Once you start work on the exterior, don't forget that we've got a Walkaround of the RAF Museum's Defiant.
All the best
Rowan
Excellent work on the cockpit! She's set to be a real beauty!
Once you start work on the exterior, don't forget that we've got a Walkaround of the RAF Museum's Defiant.
All the best
Rowan
AIRGUNNER
England - South East, United Kingdom
Joined: September 27, 2006
KitMaker: 246 posts
AeroScale: 234 posts
Joined: September 27, 2006
KitMaker: 246 posts
AeroScale: 234 posts
Posted: Wednesday, September 17, 2008 - 09:59 AM UTC
Hi Rowan,
Thanks for the heads up on the walkaround. I was up at Hendon last week and took some photos of my own as well. I hope it will turn out ok, but from a first look there may be some fit issues around the turret area. There is no indication in the kit instructions on how far forward the cockpit tub should sit either, but once the turret is placed it should resolve itself.
Steve
Yeti123
Michigan, United States
Joined: February 11, 2008
KitMaker: 311 posts
AeroScale: 278 posts
Joined: February 11, 2008
KitMaker: 311 posts
AeroScale: 278 posts
Posted: Wednesday, September 17, 2008 - 01:39 PM UTC
Steve:
I love the Defiant. I can't wait to see this one finished. The cockpit shots are agreat indication that it is going to be first rate
Posted: Wednesday, September 17, 2008 - 10:23 PM UTC
Hi Steve and Steffen
The photos here show just how diffently things can look on different monitors more clearly than anything I've seen recently! When I first saw them at home last night on my old CRT monitor, I agreed with Steffen - they were very dark (hard to make out any details) and his quick fix was a huge improvement. At work now, looking at them on our Avid system's flat-screen LCD monitors, they appear a little dark (but not enough to worry about) and the "fixed" picture is seriously over-exposed.
Oh - the perils of computers!
All the best
Rowan
Posted: Wednesday, September 17, 2008 - 10:51 PM UTC
Hi Rowan
Sure you are right!
That is mostly a matter of setting up the viewing device (I have a monitor not that "darn" flat screens) ... and mine is surely not set up properly. Still I can sit in front of it all day long without getting a head ache so it is possibly not set up that bad either.
IMO, Steves pictures are good (sharp) but much too dark ..
Will remove "my" picture as it was really just a quick dirty job to show whats possible. I am sorry if I was all wrong and the pix are top notch and only degraded by my poor equipment .
all the best
Steffen
Posted: Wednesday, September 17, 2008 - 11:10 PM UTC
Quoted Text
Hi Rowan
... Will remove "my" picture as it was really just a quick dirty job to show whats possible. I am sorry if I was all wrong and the pix are top notch and only degraded by my poor equipment .
all the best
Steffen
Hi Steffen
As I say, your picture was much better on my home set-up - I couldn't make out much detail in the originals.
All the best
Rowan
Posted: Wednesday, September 17, 2008 - 11:16 PM UTC
What I wrote above!
My system is not calibrated (what your work equipment probably is) so it is likely just my monitior showing the stuff too dark ... I won't change that because I can work with it without irritation
cheers
Steffen
My system is not calibrated (what your work equipment probably is) so it is likely just my monitior showing the stuff too dark ... I won't change that because I can work with it without irritation
cheers
Steffen
Posted: Thursday, September 18, 2008 - 12:01 AM UTC
Hi Steffen
I've used the Photoshop set-up routine on both monitors, so it's a surprise to see quite such different results. This was the most extreme case I've come across.
It's a good example of why I advise anyone to be cautious judging colour charts etc. online.
All the best
Rowan
I've used the Photoshop set-up routine on both monitors, so it's a surprise to see quite such different results. This was the most extreme case I've come across.
It's a good example of why I advise anyone to be cautious judging colour charts etc. online.
All the best
Rowan
Posted: Thursday, September 18, 2008 - 05:51 AM UTC
Posted: Thursday, September 18, 2008 - 06:11 AM UTC
Hi Allen
Yes, I can vouch for Paint.NET. It's very good indeed.
All the best
Rowan
Yes, I can vouch for Paint.NET. It's very good indeed.
All the best
Rowan
AIRGUNNER
England - South East, United Kingdom
Joined: September 27, 2006
KitMaker: 246 posts
AeroScale: 234 posts
Joined: September 27, 2006
KitMaker: 246 posts
AeroScale: 234 posts
Posted: Friday, September 19, 2008 - 05:45 AM UTC
Hi all,
Maybe its just my rubbish photography, it really isn't my strong point
Steve
Maybe its just my rubbish photography, it really isn't my strong point
Steve
AIRGUNNER
England - South East, United Kingdom
Joined: September 27, 2006
KitMaker: 246 posts
AeroScale: 234 posts
Joined: September 27, 2006
KitMaker: 246 posts
AeroScale: 234 posts
Posted: Friday, March 13, 2009 - 04:32 AM UTC
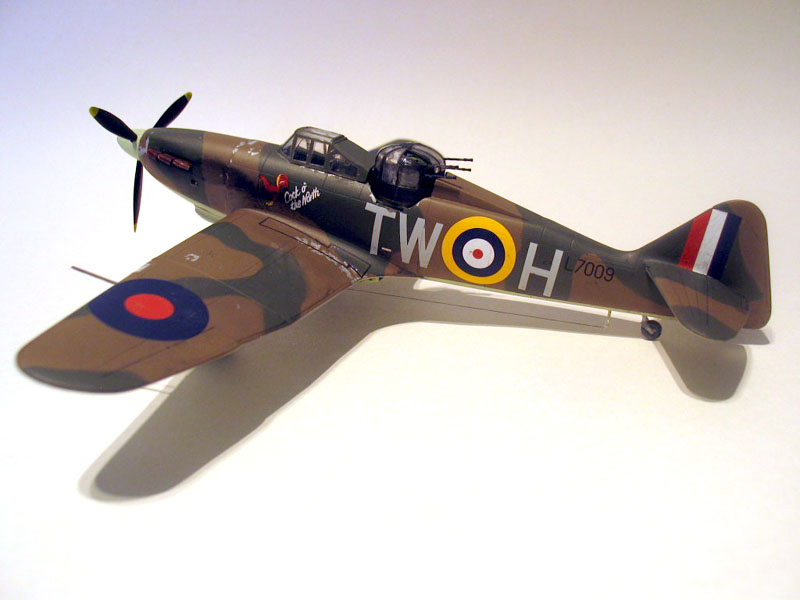
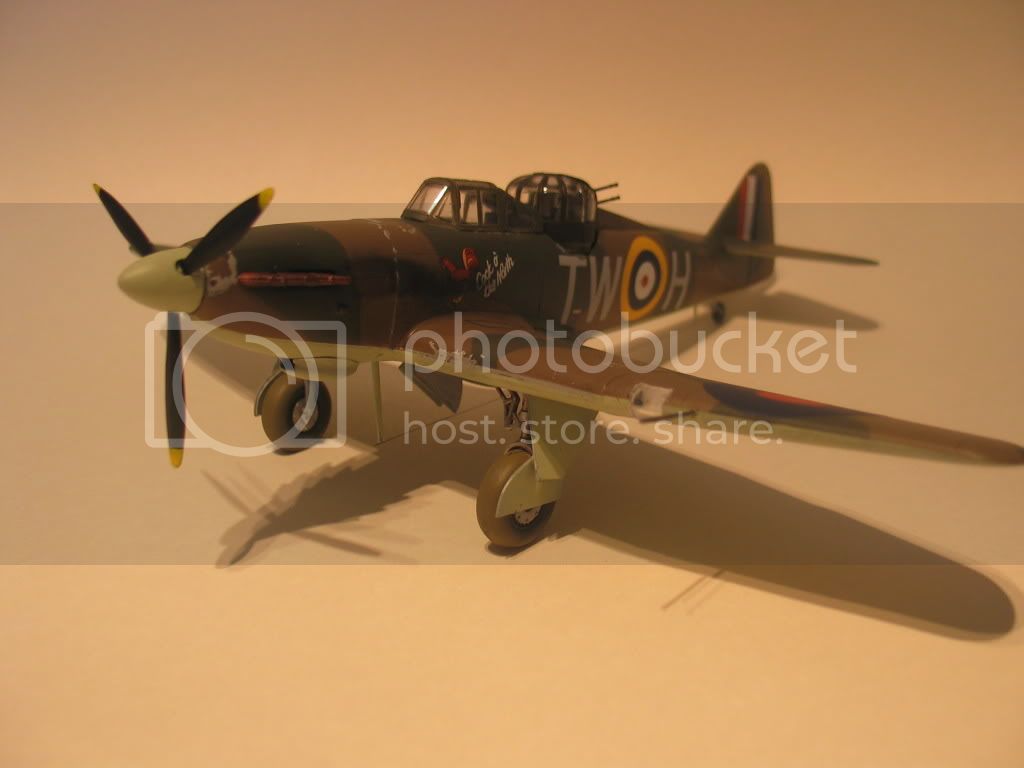
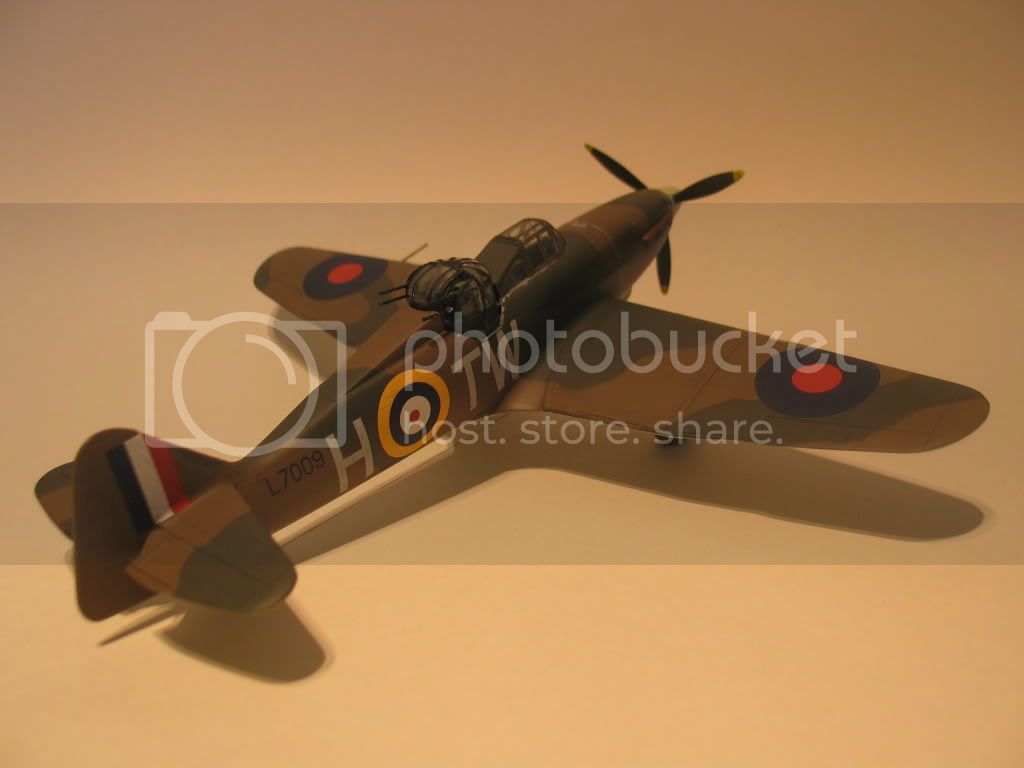
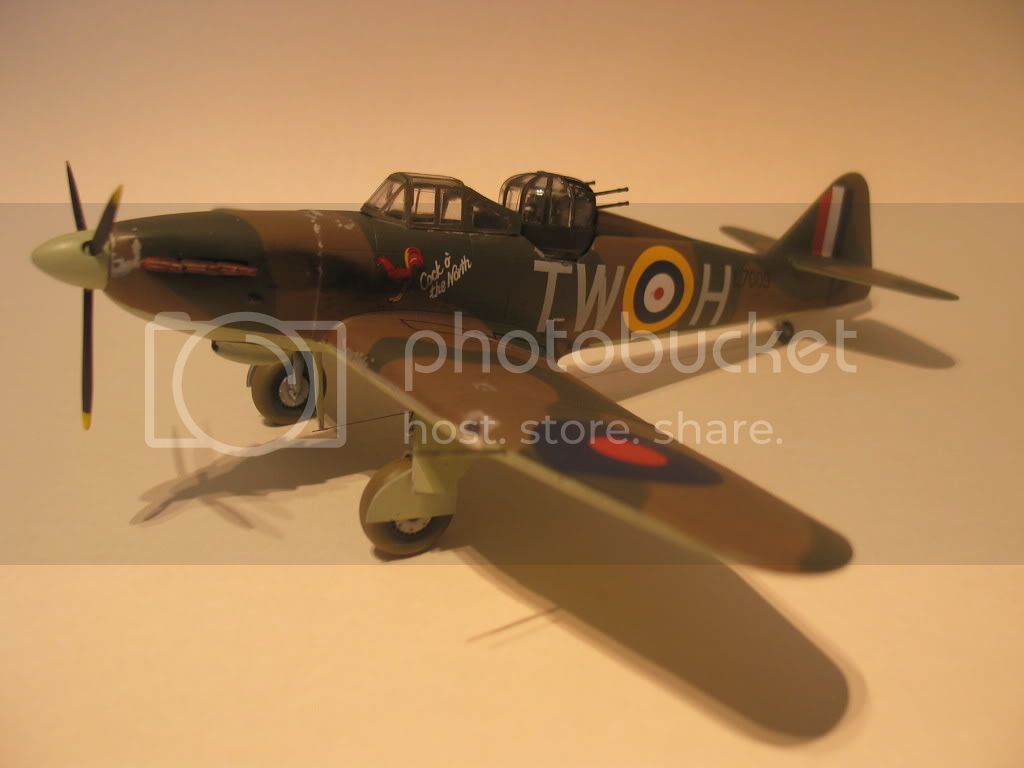
Well, after long hiatus due to work, I have managed to get back to the bench and finally got the thing finished.
It well together really well, the only problem I encountered was getting the turret to fit correctly. I still think it is sitting a liitle to high but, due to the comparitive rarity of this kit, I decided to leave well alone. Similarly, I wanted to open the cockpit to show the lovely detail the kit provides in there, but with the total unavailabilty of a replacement, I have left it untouched .
Just a word for the kit decals. Superb. Thin, high quality prints completly in register that reacted well to Microsol/set and snuggled down nicely in the panel lines.
I didn't go too mad with the weathering, I have seen photos of the night-fighters looking pretty shabby, but I don't think the day fighters were around long enough to get battered so I left it at a bit of paint chipping and exhaust staining.
Comments and critque more than welcome, good or bad.
Thanks for looking,
Steve
Posted: Friday, March 13, 2009 - 06:49 AM UTC
Hi Steve,
Apart from the pictures which I find too dark and too yellow, I think you've done nothing wrong with the model. In fact I'd love to publish a build feature about it!
Jean-Luc
Apart from the pictures which I find too dark and too yellow, I think you've done nothing wrong with the model. In fact I'd love to publish a build feature about it!
Jean-Luc
buggalugs
Australian Capital Territory, Australia
Joined: June 06, 2007
KitMaker: 135 posts
AeroScale: 115 posts
Joined: June 06, 2007
KitMaker: 135 posts
AeroScale: 115 posts
Posted: Friday, March 13, 2009 - 08:17 AM UTC
Hi Steve
I agree with Jean-Luc - very nice work! I'll have to drag my kit out one day if can stop getting distracted by Mustangs and Spitfires...
cheers Brad
I agree with Jean-Luc - very nice work! I'll have to drag my kit out one day if can stop getting distracted by Mustangs and Spitfires...
cheers Brad
Yeti123
Michigan, United States
Joined: February 11, 2008
KitMaker: 311 posts
AeroScale: 278 posts
Joined: February 11, 2008
KitMaker: 311 posts
AeroScale: 278 posts
Posted: Friday, March 13, 2009 - 01:49 PM UTC
Steve:
It looks great and I am glad to see you finished it. No critique here
Taylor
It looks great and I am glad to see you finished it. No critique here
Taylor
CMOT70
Victoria, Australia
Joined: August 23, 2007
KitMaker: 629 posts
AeroScale: 539 posts
Joined: August 23, 2007
KitMaker: 629 posts
AeroScale: 539 posts
Posted: Friday, March 13, 2009 - 05:34 PM UTC
Great work!
I've been looking for this kit, but the LHS hasn't had it for some time...you really have to get CA kits when they come out it seems, i'm also looking for their Fairy Battle (i can only find the target tug version) and the Supermarine Walrus. I'm hoping they'll give all them kits another release someday.
Andrew
vanize
Texas, United States
Joined: January 30, 2006
KitMaker: 1,954 posts
AeroScale: 1,163 posts
Joined: January 30, 2006
KitMaker: 1,954 posts
AeroScale: 1,163 posts
Posted: Saturday, March 14, 2009 - 12:43 AM UTC
there is supposedly a new tooling of the defiant available from classic airframes, though it is the target tug version - it is in their web catalog:
http://www.classicairframes.com/catalogue.htm
I wonder if it has the parts for the normal version in it too...
http://www.classicairframes.com/catalogue.htm
I wonder if it has the parts for the normal version in it too...
AIRGUNNER
England - South East, United Kingdom
Joined: September 27, 2006
KitMaker: 246 posts
AeroScale: 234 posts
Joined: September 27, 2006
KitMaker: 246 posts
AeroScale: 234 posts
Posted: Saturday, March 14, 2009 - 10:48 PM UTC
Hi all,
Many thanks for the positive comments, boosts the confidence immensly.
Jaen-Luc. Yes the photos are awful, but I only have my phone camera to take photos as my digital camera is U/S. In todays financially challenging times I just can't afford to replace it. These are the only pictures of the build I have so a feature may be a non starter?
Steve