1/48 Bristol F.2b Fighter
Joined: December 23, 2007
KitMaker: 1,596 posts
AeroScale: 1,275 posts
Posted: Thursday, October 23, 2008 - 07:11 AM UTC
Victoria, Australia
Joined: November 26, 2006
KitMaker: 608 posts
AeroScale: 602 posts
Posted: Thursday, October 23, 2008 - 09:05 AM UTC
Hi Michal and welcome.
This looks great!
Have you considered cutting masks from Tamiya Tape for your Roundels? I do it this way on Roden builds as I have trouble with their decals every time.
A great build and a great debut to this forum.
Cheers,
Hugh
Colorado, United States
Joined: January 25, 2004
KitMaker: 11,669 posts
AeroScale: 11,011 posts
Posted: Thursday, October 23, 2008 - 02:38 PM UTC
Greetings Michal;
For your first thread you did go in high style. Excellent build by the way. I have one of these brass sets I am doing for a diorama. Part of Poland is great stuff. Model On!
Here are earlier threads on the subjct as well.
Click Here.And click here.and one more.". . .The most important thing is to know why you build and then get the most that you can out of building." via D.D.
Alberta, Canada
Joined: January 19, 2008
KitMaker: 6,743 posts
AeroScale: 6,151 posts
Posted: Thursday, October 23, 2008 - 05:45 PM UTC
Welcome Micheal glad that you are joinning the stringbags ! Awesome build so far looking forward to the rest !
Mendoza, Argentina
Joined: June 14, 2006
KitMaker: 222 posts
AeroScale: 219 posts
Posted: Thursday, October 23, 2008 - 07:25 PM UTC
First biplane....outstanding!
If you are familiar with Corel Draw there is another option for the masks but you will have to re-draw the kit's decals and then cut them in self adhesive vinyl with a cutting plotter. Most of design shops uses this kind of equipment. I used this method in this build:
http://www.modelersite.com/Nov2006/English/FokkerDVII_Eng.htmPozdrowienia,

Claudio
I have always imagined that Paradise will be a kind of library.
Siempre imagine que el paraíso sería algún tipo de biblioteca.
Jorge Luis Borges
Joined: December 23, 2007
KitMaker: 1,596 posts
AeroScale: 1,275 posts
Posted: Friday, October 24, 2008 - 07:22 AM UTC
Thank you very much for your kind welcome. I really apreciate your very positive opinion.
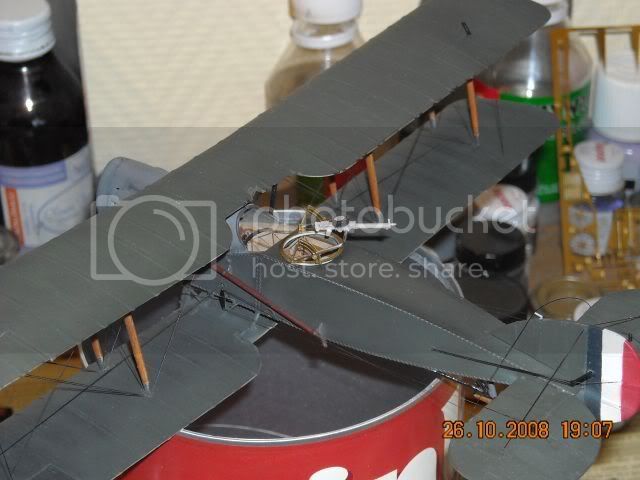
Steve: Part's brasses are really good, but somtimes they are pure fantasy, sometimes science-fiction (with a bit of science) so you have to be carefull. I didn't compare the F.2b brass with scientifical publication because I don't care so much. I just wanted to have a good looking model. Some of the details are useless in my opinion but I'm sure you have already noticed that and some other needs a bit of care to look correct (gunners ring and seatting belt)
Claudio: Pozdrowienia z Polski!

You have built a very good model indeed, I'm impresed. Hat off! I know Corel Draw a little bit and it wan't be a problem to re-draw the markings. Much bigger problem for me is to find a thin self-adhesive paper and cutting ploter. Fokker DVII is one of the models I'm going to build someday in polish national markings so I'm affraid I'll have to make my own masks. I'll ask for your tips&tricks then, ok?
Mendoza, Argentina
Joined: June 14, 2006
KitMaker: 222 posts
AeroScale: 219 posts
Posted: Friday, October 24, 2008 - 07:57 PM UTC
Quoted Text
Claudio: Pozdrowienia z Polski! You have built a very good model indeed, I'm impresed. Hat off! I know Corel Draw a little bit and it wan't be a problem to re-draw the markings. Much bigger problem for me is to find a thin self-adhesive paper and cutting ploter. Fokker DVII is one of the models I'm going to build someday in polish national markings so I'm affraid I'll have to make my own masks. I'll ask for your tips&tricks then, ok?
Yes, my grandfathers were Polish but I don't speak much, I only know a few words. About the mask, check with shops involved in advertising (posters, brochures, etc.). Most of them use vinyl cutter plotters for their projects.
I will be glad to help you with your Fokker project, just drop me a line.
Cheers,
Claudio
I have always imagined that Paradise will be a kind of library.
Siempre imagine que el paraíso sería algún tipo de biblioteca.
Jorge Luis Borges
Joined: December 23, 2007
KitMaker: 1,596 posts
AeroScale: 1,275 posts
Posted: Saturday, October 25, 2008 - 06:42 AM UTC
Thank's again Claduio, you helped me a lot. I have some ideas now where I can go and ask.
I'll ask you for help and feedback with Fokker for sure, but I would like to build an Airfix Spitfire IX first stashed away for some time... This is gonna be my next major project, then I'll start Fokker. As you see we have some time
Indiana, United States
Joined: May 14, 2007
KitMaker: 3,117 posts
AeroScale: 2,270 posts
Posted: Saturday, October 25, 2008 - 08:12 AM UTC
Welcome to the threads. That is a great looking build
"Treat 'em Rough", Current Builds--Wingnut Rumpler
I am frequently seen with blood shot eyes from staying up past my nap time to get the right colour scheme on my latest WWI model?
Joined: December 23, 2007
KitMaker: 1,596 posts
AeroScale: 1,275 posts
Posted: Saturday, June 06, 2009 - 04:10 AM UTC
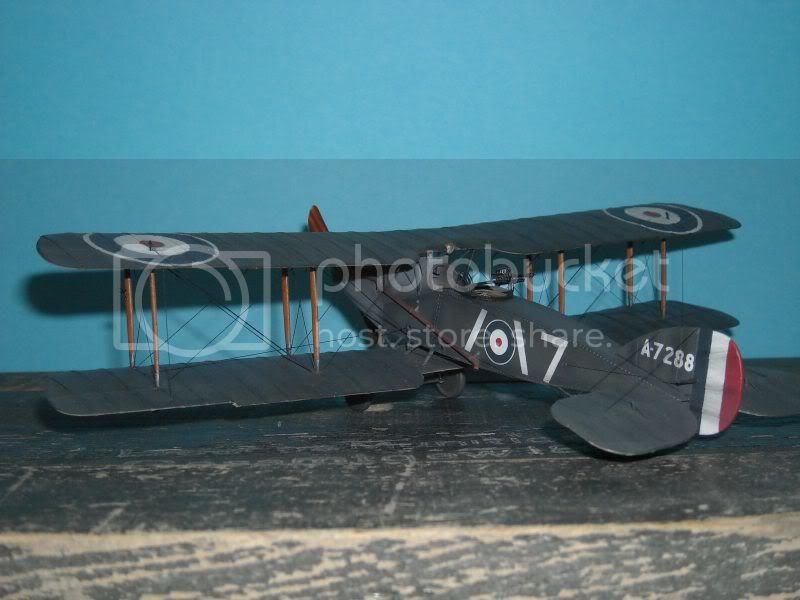
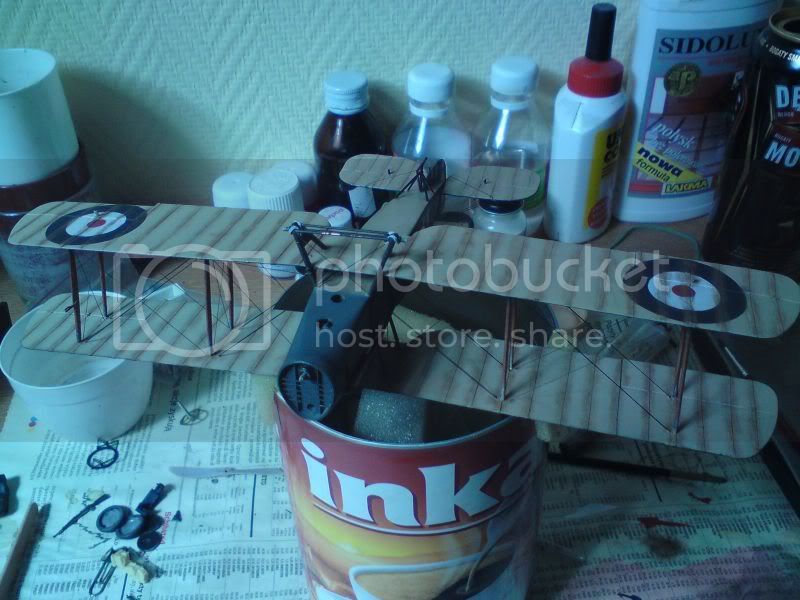
After a very, very, very long pause it's high time to post some update. The model is painted with semi-gloss so it shines a bit. It's gonna be painted flat matt soon.

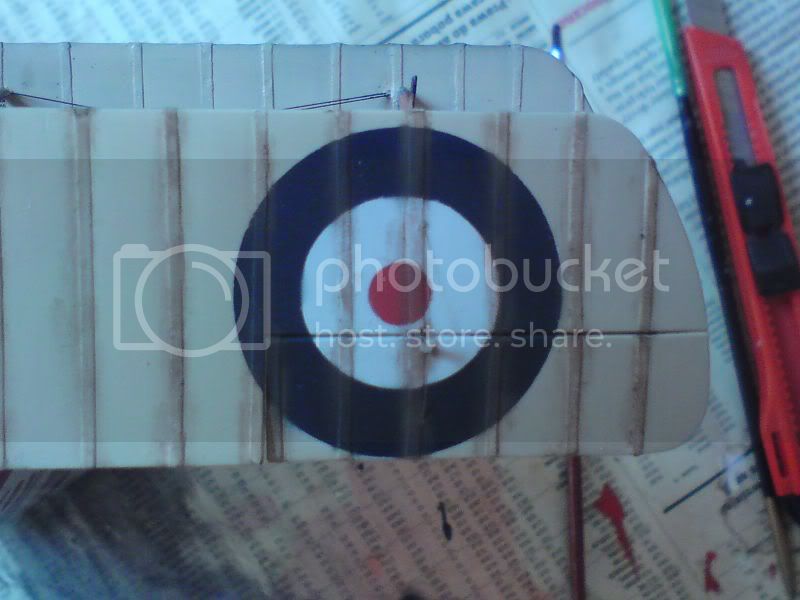
I swear, this model's gonna kill me oneday...I had to repaint all the lower wing surface because of the too thick layer of paint at the cocades. It's my first time with the painting masks and I had no experience with preparing the paint. They were awfull so I took some thinner, snading paper and removed them right up to the plastic. I don't know when but a few drops of thinner seeped somehow through the masking and damaged the colourless laquer at the upper surface. Do uoy have any advice how to repair it?
After sanding and polishing I painted again the linen colour, and today I painted the cocades. I hope it looks good enough not to repaint it once again

In the meantime I also painted other markings and done some wathering at the upper surfaces. Tonight I'm going to weather the lower surfaces and repair some other painting mishapens. I hope not to screw anyting else.
Thank's for watching!
Colorado, United States
Joined: January 25, 2004
KitMaker: 11,669 posts
AeroScale: 11,011 posts
Posted: Saturday, June 06, 2009 - 10:23 AM UTC
Quoted Text
". . .I swear, this model's gonna kill me oneday...I had to repaint all the lower wing surface because of the too thick layer of paint at the cocades. It's my first time with the painting masks and I had no experience with preparing the paint. They were awfull so I took some thinner, snading paper and removed them right up to the plastic. I don't know when but a few drops of thinner seeped somehow through the masking and damaged the colourless laquer at the upper surface. Do uoy have any advice how to repair it?.."
Lightly scrape the area. then add a few drops of the clear coat again.
". . .The most important thing is to know why you build and then get the most that you can out of building." via D.D.
Alberta, Canada
Joined: January 19, 2008
KitMaker: 6,743 posts
AeroScale: 6,151 posts
Posted: Sunday, June 07, 2009 - 04:22 AM UTC
Indiana, United States
Joined: May 14, 2007
KitMaker: 3,117 posts
AeroScale: 2,270 posts
Posted: Sunday, June 07, 2009 - 02:13 PM UTC
"Treat 'em Rough", Current Builds--Wingnut Rumpler
I am frequently seen with blood shot eyes from staying up past my nap time to get the right colour scheme on my latest WWI model?
Joined: December 23, 2007
KitMaker: 1,596 posts
AeroScale: 1,275 posts
Posted: Sunday, June 07, 2009 - 08:27 PM UTC
Thank you all for very kind words and Stephen for advice. Since thursday we have long weekend in Poland (4 days of not-going to work.....yeah!!) so I'll try to remove that s**t from the wing as Stephen recommends and maybe finish the model. I still have to do some minor rigging, weathering the lower wing and some painting. I'll post some pictures of course.
Joined: December 23, 2007
KitMaker: 1,596 posts
AeroScale: 1,275 posts
Posted: Saturday, June 13, 2009 - 03:57 AM UTC
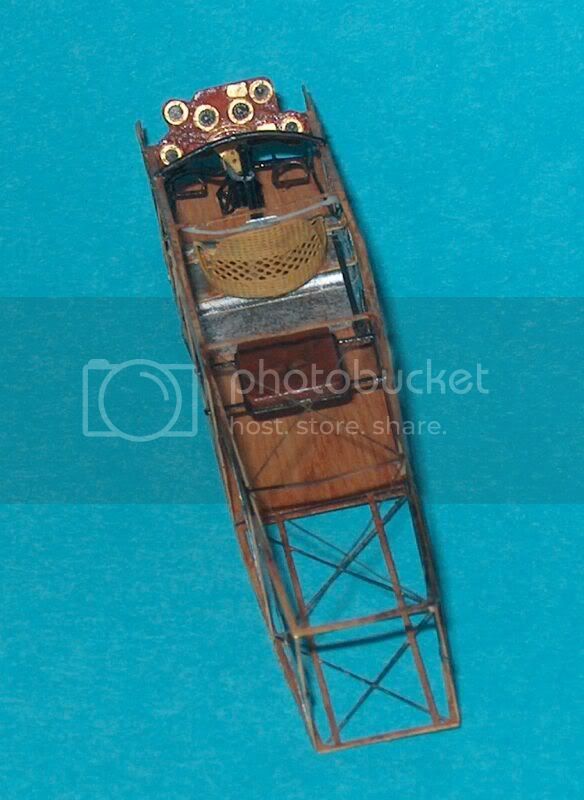
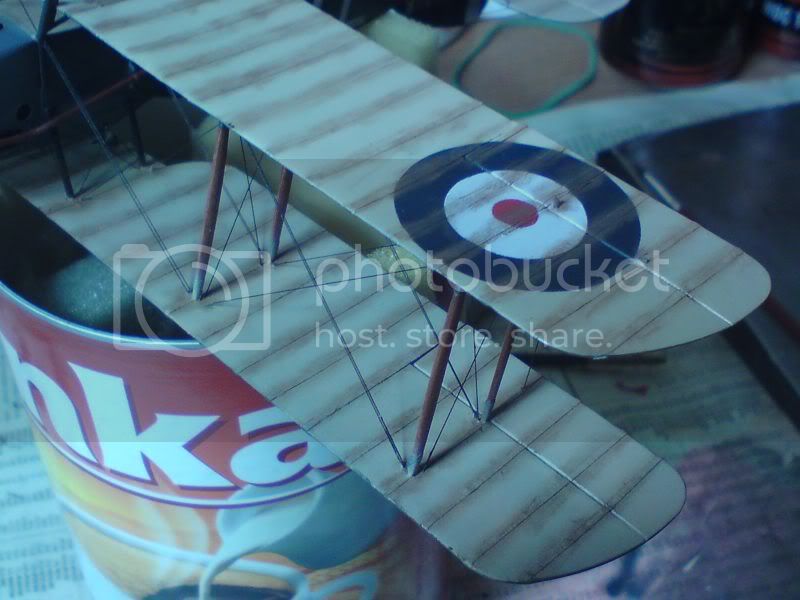
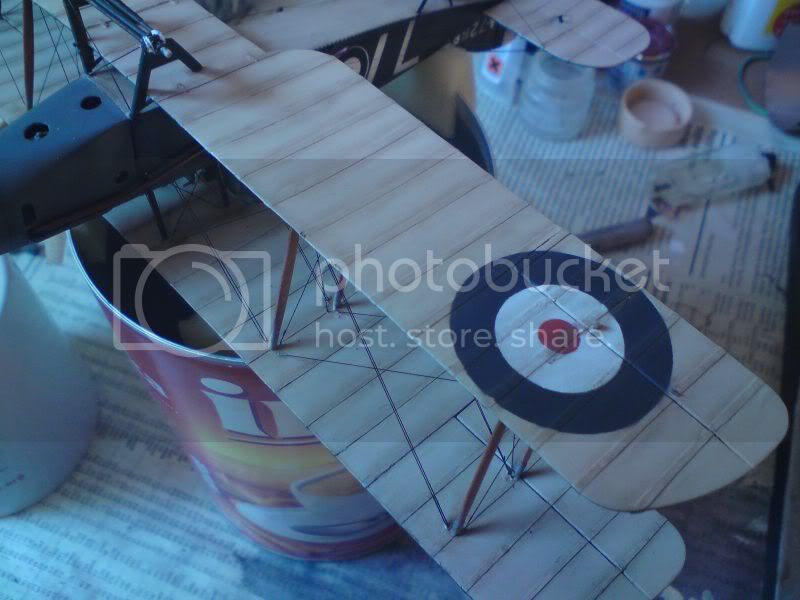
As I promised a week ago here are some pics showing my progress with this build. This time I also share my techniqe of weathering the lower surfaces of the wing. The same techniqe was used at the green surfaces of fuselage and wings. I used only dry pastels for this, nothing more. I'm sorry for the poor quality of pictures. I forgot to take my camera from the office so I had to use a my mobile...

Hey ho, let's go!
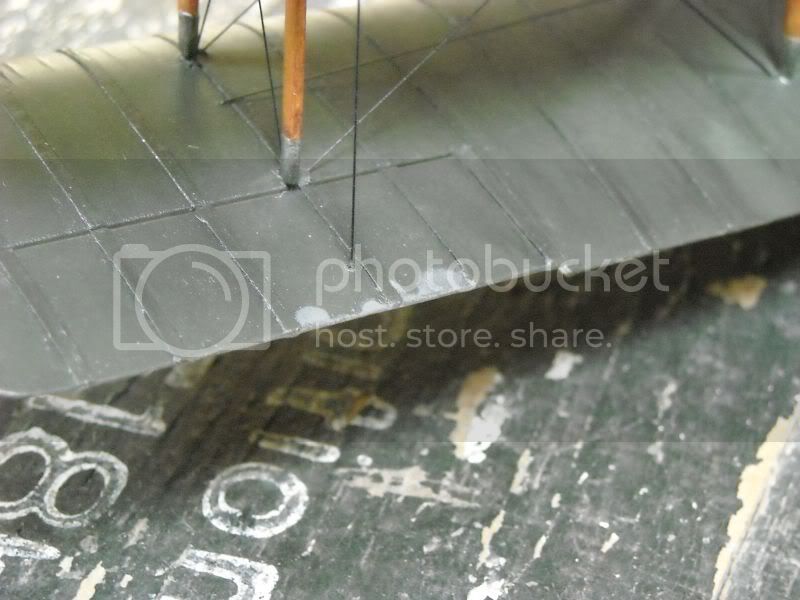
Using a small brush I applied the chalk on the wing.
Here you can see the difference between the clean and dirty wing.

I did it on the both wings. Does it qualify for the "Stripes in the sky" campaing? ;P
A little bit closer
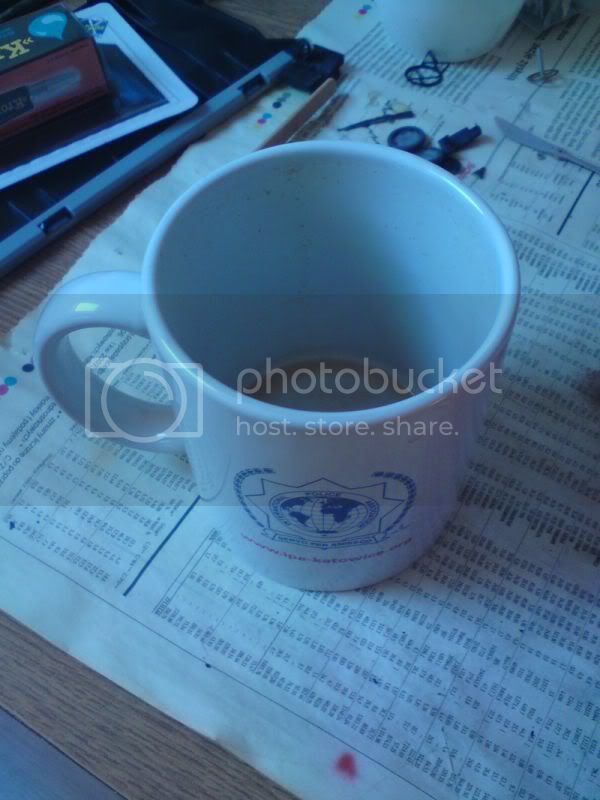
This is my main tool

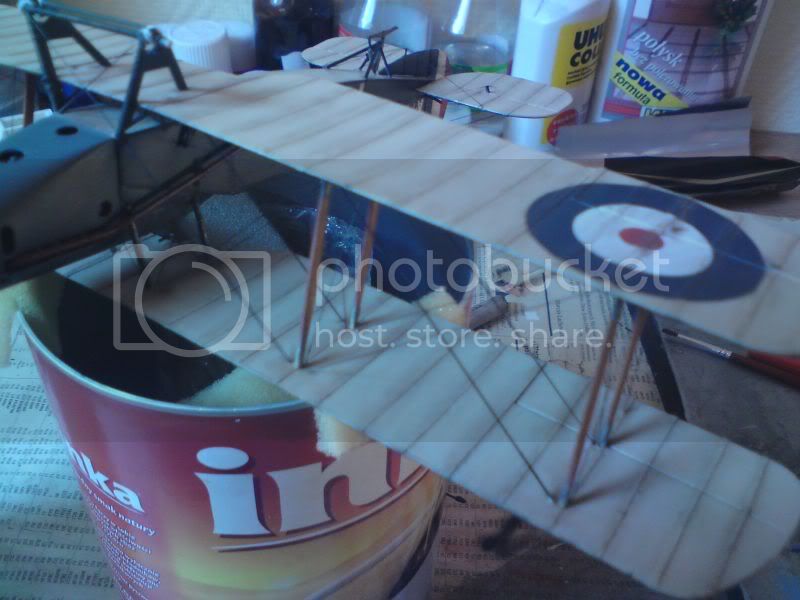
First I clean the chalk with a dry Q-tip. Then I do the same but with a Q-tip deeped in a water. Here is the result. If you want to keep it dirty simply just do not clean it too much.

I'm going back to work, see you next time. I hope I'll show you finished model then. Thank's for watching.
West Virginia, United States
Joined: December 18, 2006
KitMaker: 1,121 posts
AeroScale: 1,063 posts
Posted: Saturday, June 13, 2009 - 04:54 AM UTC
Nice work and technique, Michal.
Mark
Joined: December 23, 2007
KitMaker: 1,596 posts
AeroScale: 1,275 posts
Posted: Saturday, June 13, 2009 - 05:25 AM UTC
Thank's Mark, it sounds like a blessing from you

I'm watching your LVG C.VI...as always outstanding!
Time for a quick update. As you see this technique is pretty easy. How long does it take? Depends how long you drink a cup of coffee...
Here is the result after cleaning.
Alberta, Canada
Joined: January 19, 2008
KitMaker: 6,743 posts
AeroScale: 6,151 posts
Posted: Saturday, June 13, 2009 - 06:08 AM UTC
Nice weathering job Mike ! Are you going back over it with a lighter shade to feather it in ?
I have used this method a few times with great results . They have that more weathered look to them then paint .
What brand of pastel chalks do you use ?
Cheers mate on the excellent progress

Auckland, New Zealand
Joined: October 25, 2005
KitMaker: 949 posts
AeroScale: 493 posts
Posted: Saturday, June 13, 2009 - 11:32 AM UTC
Hi Mike
A fantastic build.
Having built the kit now,could you please give me your impressions both good and bad,as I'm considering buying the same kit.
I've built several WW2 aircraft and half built a fokker triplane.(doing a thunderbolt for the P-47 Group build with some extra detailing. Have a look ,shameless plug)
I'm basically a figure modeller/painter.
Thanks
Chris

"A Geek is someone who has found something more interesting than sex."
Neil Degrasse Tyson
Joined: December 23, 2007
KitMaker: 1,596 posts
AeroScale: 1,275 posts
Posted: Tuesday, June 16, 2009 - 09:06 AM UTC
Thank you Terri and Chris for very kind words.
Terri: I did not use anything else than I said. Just pastel chalk applied with smooth brush, then dry q-tip and next the wet one. That's all. No filters nor shades. I used Koh-I-Noor "Toison D'or" pastel chalk, 8500 series I think.
Chris: you already got my answer in your own thread about Rodens Bristols.
Hope to see you soon. Until then have a good
or
Joined: December 23, 2007
KitMaker: 1,596 posts
AeroScale: 1,275 posts
Posted: Monday, July 06, 2009 - 09:18 AM UTC
Colorado, United States
Joined: January 25, 2004
KitMaker: 11,669 posts
AeroScale: 11,011 posts
Posted: Monday, July 06, 2009 - 05:16 PM UTC
". . .The most important thing is to know why you build and then get the most that you can out of building." via D.D.
Alberta, Canada
Joined: January 19, 2008
KitMaker: 6,743 posts
AeroScale: 6,151 posts
Posted: Tuesday, July 07, 2009 - 01:42 AM UTC
A wonderful build , thanks for sharing it with us Michal

Joined: December 23, 2007
KitMaker: 1,596 posts
AeroScale: 1,275 posts
Posted: Tuesday, July 07, 2009 - 08:17 PM UTC
Thank you very much, indeed.
Modelling with you was a pleasure for me. I have never learned so much during single build that making this Bristol with you.
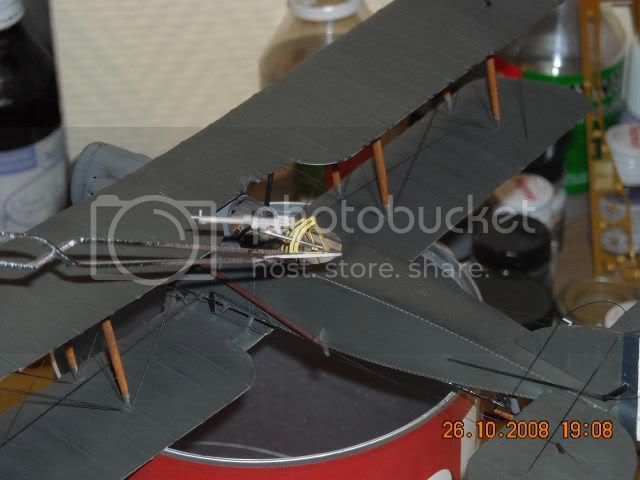
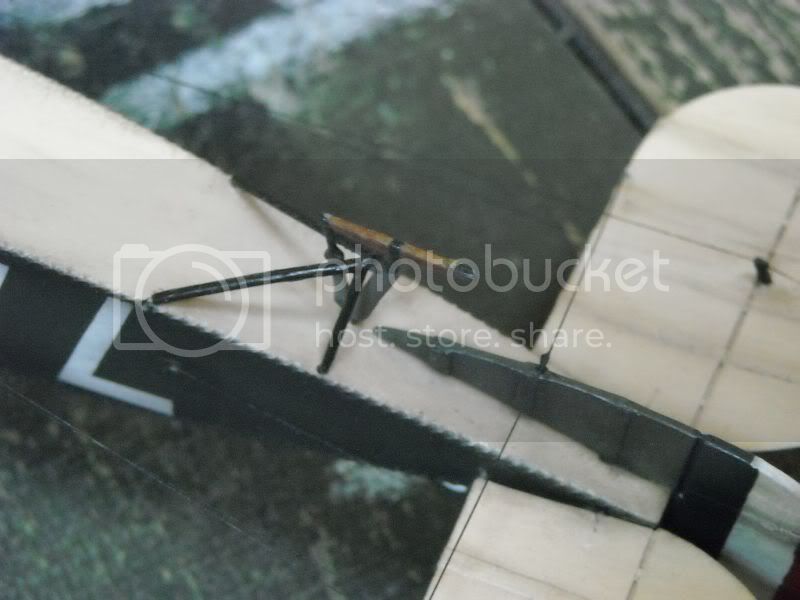
At one of the polish forum a guy offered me his spare propeller hub so I hope to fix the problem soon. Other guy also pointed that there is some rigging missing, shown at the picture below so I'll try to do it as well.

I'll be also practicing making better photographs without flash. Stay tuned because it's not the end yet