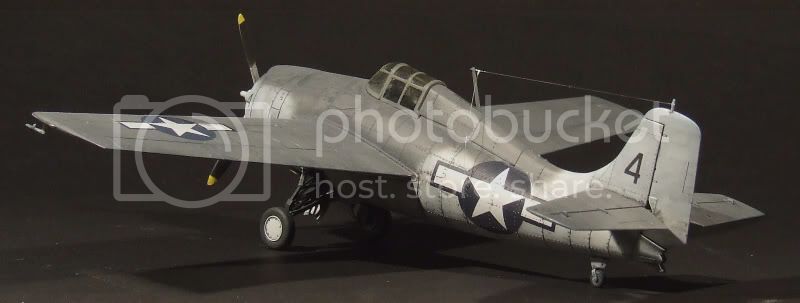
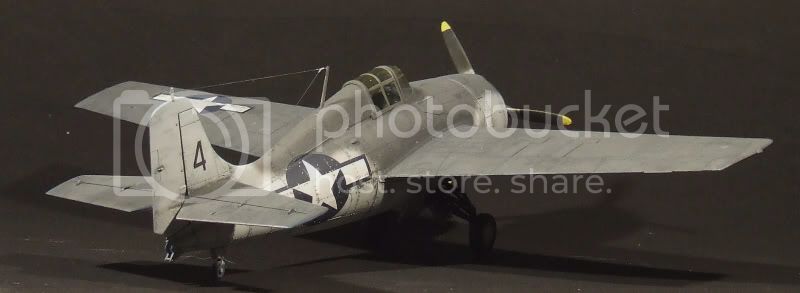
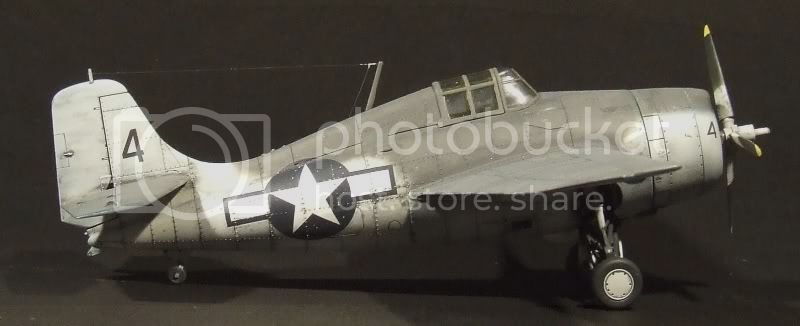
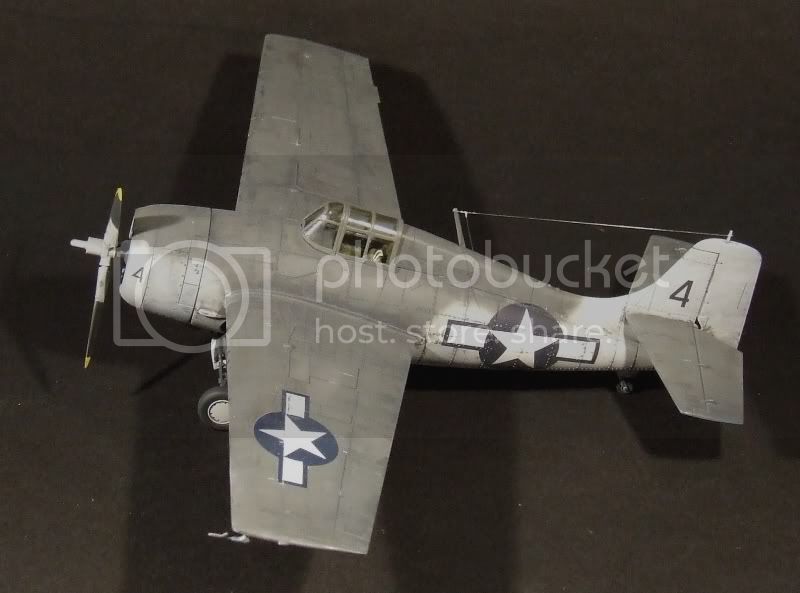
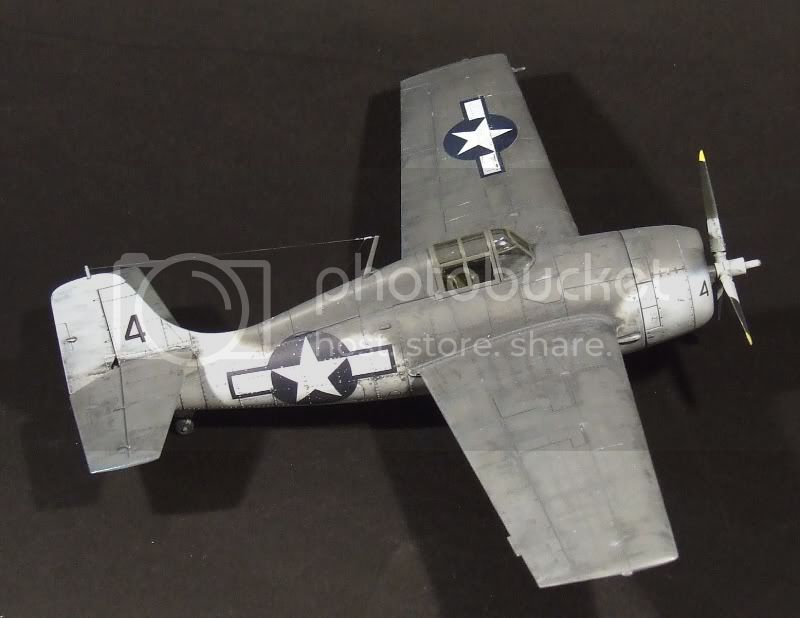
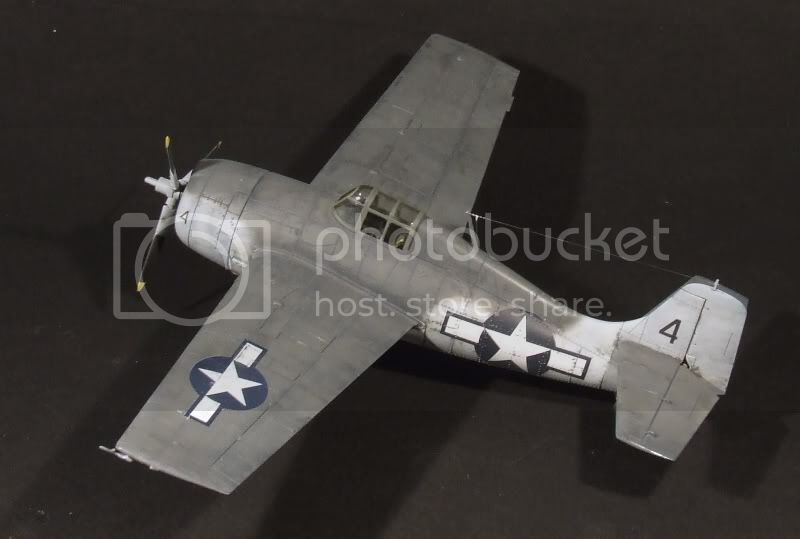
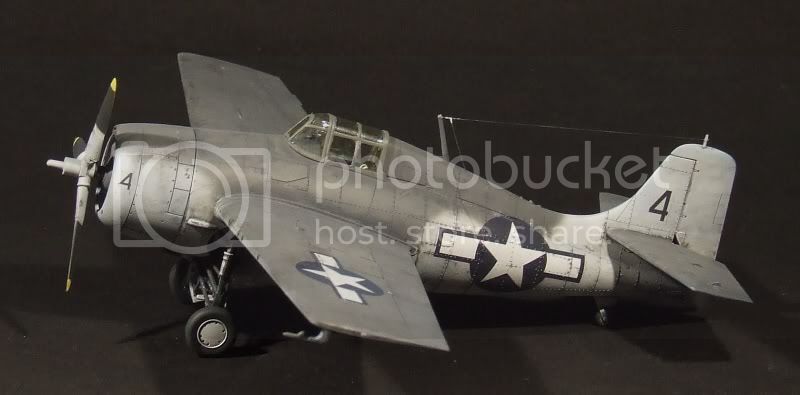
This is Tamiya's fantastic 1/48 Grumman F4F-4. Painted with Xtracrylics and Vallejo, weathered with Promodeller weathering wash. OOB apart from Eduard seatbelts, decals from the spares box and fishing line aerials. I found this "Atlantic Camo" scheme while googling and thought it was more atractive than the kit scheme.
All criticisms welcome.
Hosted by Rowan Baylis
Tamiya 1/48 Wildcat finished
brandydoguk
England - North, United Kingdom
Joined: October 04, 2002
KitMaker: 1,495 posts
AeroScale: 643 posts
Joined: October 04, 2002
KitMaker: 1,495 posts
AeroScale: 643 posts
Posted: Saturday, November 08, 2008 - 07:15 AM UTC
Posted: Saturday, November 08, 2008 - 07:38 AM UTC
Hi Martin.
No critisism from me, I think its a cracker!
Really interesting paint scheme as well.
Nige
No critisism from me, I think its a cracker!
Really interesting paint scheme as well.
Nige
Posted: Saturday, November 08, 2008 - 07:44 AM UTC
Hi Martin,
I think it is a great model and that it deserves to be on the frontpage of Aeroscale... photo feature maybe?
Jean-Luc
I think it is a great model and that it deserves to be on the frontpage of Aeroscale... photo feature maybe?
Jean-Luc
lespauljames
England - South West, United Kingdom
Joined: January 06, 2007
KitMaker: 3,661 posts
AeroScale: 369 posts
Joined: January 06, 2007
KitMaker: 3,661 posts
AeroScale: 369 posts
Posted: Saturday, November 08, 2008 - 12:33 PM UTC
that looke real!! its an immense build,
in what way did you paint, and coat the kit? looks spot on
brandydoguk
England - North, United Kingdom
Joined: October 04, 2002
KitMaker: 1,495 posts
AeroScale: 643 posts
Joined: October 04, 2002
KitMaker: 1,495 posts
AeroScale: 643 posts
Posted: Saturday, November 08, 2008 - 01:14 PM UTC
Thanks for the kind comments, much appreciated.
I gave the kit a primer coat of light grey, then airbrushed patches of white randomly. I preshaded the panel lines, and also along the lines of rivets with black. I mixed a little light grey into white just to take the brightness out of it and airbrushed the white areas. Then I freehanded the dark grey.
The preshading actually shows better than in the photos, especially the white areas which have been slightly bleeched out when I lit the model for the pics. Next a coat of Future, decals and another coat of Future.
The weathering was done with Promodellers Dark Wash. I covered the entire kit, allowed it to dry and started removing it with a slightly damp tissue. By varying how much I removed it gave a nice "used" look. Finally a matt varnish coat.
I you haven't used Promodellers Washes I can highly reccommend them. They can be used to darken panel lines, or as here to weather down paintwork. They are simple and relatively quick and can be rinsed off with water if you don't like the effect.
Quoted Text
that looke real!! its an immense build,
in what way did you paint, and coat the kit? looks spot on
I gave the kit a primer coat of light grey, then airbrushed patches of white randomly. I preshaded the panel lines, and also along the lines of rivets with black. I mixed a little light grey into white just to take the brightness out of it and airbrushed the white areas. Then I freehanded the dark grey.
The preshading actually shows better than in the photos, especially the white areas which have been slightly bleeched out when I lit the model for the pics. Next a coat of Future, decals and another coat of Future.
The weathering was done with Promodellers Dark Wash. I covered the entire kit, allowed it to dry and started removing it with a slightly damp tissue. By varying how much I removed it gave a nice "used" look. Finally a matt varnish coat.
I you haven't used Promodellers Washes I can highly reccommend them. They can be used to darken panel lines, or as here to weather down paintwork. They are simple and relatively quick and can be rinsed off with water if you don't like the effect.