_GOTOBOTTOM
Pre-Flight Check
Constructive critique of your finished or in-progress photos.
P-40N Build Log
hellvetier
_VISITCOMMUNITY
Bern, Switzerland
Joined: April 17, 2008
KitMaker: 264 posts
AeroScale: 88 posts
Posted: Sunday, November 09, 2008 - 10:04 PM UTC
Hello to all members!

This'll be my first build log. I'll try to keep it updated with my building progress.
This is my second on an aicraft in 1/48 scale since i'm back in modelling.

I chose to build the p-40n hasegawa because i got the eduard PE set cheap at ebay and the kit too.


first i was searching for the eduard kit of the p-40n with the skull decal but didn't found any...

Since it is my second attempt in a 1/48 aircraft please comment and give advice

So lets start!
hellvetier
_VISITCOMMUNITY
Bern, Switzerland
Joined: April 17, 2008
KitMaker: 264 posts
AeroScale: 88 posts
Posted: Sunday, November 09, 2008 - 10:15 PM UTC
I started with the cockpit and added many pe details.

First I preshaded with black, then painted the interior with Tamiya xf-4 yellow green mixed with some drops of white with my aztek.

After drying I sprayed the whole with a gloss coat from the can wich dried very fast.

Then I added the chipping with a more lightened yellow green and the flat aluminium from tamiya. I used a sponge to get the effect, though i'm not too happy with the result.

My last step was to give it an oil wash (burnt umber mixed with ivory black) in all the recesses.

Should I drybrush the higher parts (with what colors) ? Or assemble the cockpit and continue the construction?


jaypee
_VISITCOMMUNITY
Scotland, United Kingdom
Joined: February 07, 2008
KitMaker: 1,699 posts
AeroScale: 1,384 posts
Posted: Sunday, November 09, 2008 - 10:38 PM UTC
Looks great just as it is from the photos anyway. If I could achieve results like that I would just leave it.
hellvetier
_VISITCOMMUNITY
Bern, Switzerland
Joined: April 17, 2008
KitMaker: 264 posts
AeroScale: 88 posts
Posted: Monday, November 10, 2008 - 12:58 AM UTC
A little more progress on a rainy monday afternoon:

I added to the wheel wells and the air intake the PE an preshaded them.

Second step was again the tamiya yellow green. It needed some layers to cover the preshading.


Has someone got an idea if the cables in the wheel wells are colored? or if there are more cables to add? Are there paint chips in the wheel wells?


Next step would be chipping and a wash with the oil colors as done in the cockpit. Drybrushing?


hellvetier
_VISITCOMMUNITY
Bern, Switzerland
Joined: April 17, 2008
KitMaker: 264 posts
AeroScale: 88 posts
Posted: Monday, November 10, 2008 - 01:04 AM UTC

Quoted Text

Looks great just as it is from the photos anyway. If I could achieve results like that I would just leave it.


I need to get a better light for taking pictures. Now i have an IKEA lamp for 15 Swiss Francs and it's not satisfying to work with.

Thanks for your compliment! I'm afraid, that with every further step (drybrushing, ... ) the cockpit could look worse...
hellvetier
_VISITCOMMUNITY
Bern, Switzerland
Joined: April 17, 2008
KitMaker: 264 posts
AeroScale: 88 posts
Posted: Monday, November 10, 2008 - 01:11 AM UTC
Here's the Eduard PE set i'm using: without the landing flaps...


Yeti123
_VISITCOMMUNITY
Michigan, United States
Joined: February 11, 2008
KitMaker: 311 posts
AeroScale: 278 posts
Posted: Monday, November 10, 2008 - 03:17 PM UTC
A.W.:
P40s could get really dirty as they were used in some of the most remote theaters of WW2. My refrences show the wheel wells on many aircraft to be highly worn. Chipped paint on the stringers was not uncommon. I believe your plane, if your using the decals reflected on the box art, was a training aircraft and probably well maintained.

This site might help:
http://www.p40warhawk.com/

Your off to a great start

Taylor
hellvetier
_VISITCOMMUNITY
Bern, Switzerland
Joined: April 17, 2008
KitMaker: 264 posts
AeroScale: 88 posts
Posted: Tuesday, November 11, 2008 - 10:19 PM UTC
A little progress on the wheel wells, they are finished now. I made some scratches with a highlighted yellow-green an aluminium color, then added an oil wash.


Then i glued the cockpit in the fuselage and glued them together.


Greetings from Bern, Switzerland...


hellvetier
_VISITCOMMUNITY
Bern, Switzerland
Joined: April 17, 2008
KitMaker: 264 posts
AeroScale: 88 posts
Posted: Wednesday, November 12, 2008 - 08:54 PM UTC
Yesterday evening i got some time to continue this plane.

I begann to fill and sand the nose of the plane. This afternoon i'm going to buy some primer from the can, to quickly see if I sanded enough. I'm too lazy to get my airbrush ready just for this task...


Then i glued the tail in place. It too need some filler and sanding.


After I glued the wing components together (Wheel wells, some PE Detail, shell opening), I put everything together.


Everything fitted perfect except some gaps at the wing roots.


Are they too big, that they need filler or super glue? I think I'll try the superglue method. There shouldn't be any gap!

I hope you like it !
hellvetier
_VISITCOMMUNITY
Bern, Switzerland
Joined: April 17, 2008
KitMaker: 264 posts
AeroScale: 88 posts
Posted: Sunday, November 16, 2008 - 10:16 AM UTC
A little update:

- Glued the gap between the fuselage and wings with superglue


- Primed the seams on the model with tamiya primer to check my sanding progress. Fitting was overall very good, except the fuselage half with the rear compartment.


- Made some corrections with Mr. Surfacer 500

- Assembled some little parts


Next step:

- Prime the whole model

- Paint the wheel bay on the wings and on the rear with tamiya yellow green

Here are some shots:

Always happy about some criticism and comments...


hellvetier
_VISITCOMMUNITY
Bern, Switzerland
Joined: April 17, 2008
KitMaker: 264 posts
AeroScale: 88 posts
Posted: Monday, November 17, 2008 - 01:48 AM UTC
Now i have completed my yellow-green-painting-task and masked everything off so I could pre-shade the entire model.


The first bad incident happend after pre-shading... : i cleand my paint cup and the aztek airbrush nozzle. Suddenly the nozzle sliped into the sink. eaten by the sewer monster luckily there are some other aztek nozzles to buy over ebay (the fine line - tan colored ones). Already ordered one more.

Here's the paint scheme I want to try:


Olive Drab body with white tail and neutral grey underside. I have a grey, turquoise and red nozzle left for my aztek. wich one should I use to paint the model if I don't want to wait for the tan nozzle to arrive? Please give me a hint

Thanks for looking!
jaypee
_VISITCOMMUNITY
Scotland, United Kingdom
Joined: February 07, 2008
KitMaker: 1,699 posts
AeroScale: 1,384 posts
Posted: Monday, November 17, 2008 - 02:39 AM UTC
I bet the nozzle is still in the u bend if you fancy a mucky plumbing job.
Bummer. For large surfaces the grey one should be OK not sure what the other
two do. But I used the grey before I got the tan (I think it is General purpose as opposed
to fine line)
Don't want you to wait for it either. Get down that sink or get spraying
That's a nice scheme I'm doing a similar one for my p39 although at nowhere near your pace.
hellvetier
_VISITCOMMUNITY
Bern, Switzerland
Joined: April 17, 2008
KitMaker: 264 posts
AeroScale: 88 posts
Posted: Monday, November 17, 2008 - 07:36 AM UTC

Quoted Text

I bet the nozzle is still in the u bend if you fancy a mucky plumbing job.
Bummer. For large surfaces the grey one should be OK not sure what the other
two do. But I used the grey before I got the tan (I think it is General purpose as opposed
to fine line)
Don't want you to wait for it either. Get down that sink or get spraying
That's a nice scheme I'm doing a similar one for my p39 although at nowhere near your pace.


Thanks for you answer JP! I thought about the plumbing job but the U-bend is old and overpainted. Don't know if it would leak after opening it but that slows me down. Anyway I need a new tan nozzle because the needle began to stick inside the nozzle. I'm going to try if the grey one would work too.

Hmmm... I always wanted to build a P-39 have you already posted some pictures, wich kit you build? Do you know what colors you're going to use for the olive drab?


hellvetier
_VISITCOMMUNITY
Bern, Switzerland
Joined: April 17, 2008
KitMaker: 264 posts
AeroScale: 88 posts
Posted: Monday, November 17, 2008 - 07:37 AM UTC
Should I use for the white tail plain flat tamiya white or should I put some drops of buff (or another color) in it to tone it a little bit down?
hellvetier
_VISITCOMMUNITY
Bern, Switzerland
Joined: April 17, 2008
KitMaker: 264 posts
AeroScale: 88 posts
Posted: Friday, November 21, 2008 - 05:34 AM UTC
Finally I got today my new nozzle in the mail. It took 5 days from UK to Switzerland. So i got to have some time to work for my studies But today i began painting the white tail.

- Masked with tape

- Sprayed with Tamiya Flat white mixed with some drops of xf-55 deck tan

I don't know if the preshading is bleeding too much through. I used for preshading flat black, next time i take a lighter shade nato black, or what do you guys prefer? Perhaps you could comment my pics...

Still I have no idea how to mix the olive drab from tamiya colors. And how to paint the exhaust...

And I worked a little bit on the landing gear , bomb and external fuel tank. (I forgot to take some pics next time... )

What next, the underside in neutral grey or the olive drab?

Have a nice evening... !!!


jaypee
_VISITCOMMUNITY
Scotland, United Kingdom
Joined: February 07, 2008
KitMaker: 1,699 posts
AeroScale: 1,384 posts
Posted: Friday, November 21, 2008 - 08:23 AM UTC
dunno about paint order. I'd guess grey then od.
I'm right behind you though as I've the same scheme to do for my p39.
White looks good, i wouldn't have bothered masking it as the od is going over it. That's just
cos I'm lazy.
Keep it up fella
hellvetier
_VISITCOMMUNITY
Bern, Switzerland
Joined: April 17, 2008
KitMaker: 264 posts
AeroScale: 88 posts
Posted: Saturday, November 22, 2008 - 02:54 AM UTC
hello folks, it's snowing and storming really hard outside the little planes that are landing on the runway near my house have many troubles

I airbrushed the underside of my p-40 with tamiya xf-53 neutral gray mixed with some drops of white. I didn't highlighted some panels, because they seem already very different from each other from the mserable preshading Hard to see on the pictures...
I tried to experiment with my compressor, so i turned down the psi and i left it at around 25-30 psi wich worked out very well. No spiderwebs and too much color on one place.

Perhaps I've got some more time until the evening to put paint the olive drab, it depends on my girlfriend when she's coming home
I'll mix something with Tamiya OliveD xf-62, Olive Green xf-58 and white. Or other suggestions?

I hope you agree, that I've done a good job if not please comment, critics very welcome! (Thanks JT!)


hellvetier
_VISITCOMMUNITY
Bern, Switzerland
Joined: April 17, 2008
KitMaker: 264 posts
AeroScale: 88 posts
Posted: Saturday, November 22, 2008 - 06:52 AM UTC
Ok, I managed to paint the Olive Drab.

First I masked of the grey underside and the white tail, then i began to mix an olive drab from the tamiya colors.


The first few layers were very brown , but after drying it turned out very well for me.


After the paint dried a few minutes i took of the mask, so that the color wont 'crack' if it's too dry. Then I sprayed gloss from a can over it. Suddenly there were some drops on the plane!
I cleaned the nozzle from the can and it worked well... But it was very annoying
You can see it on the pic. The wing on the steerboard side.


So what do you think? Am I going too fast to let you comment my progress or is it boring because it's the 2'000'000 P-40n built ?

Have a nice evening...
jaypee
_VISITCOMMUNITY
Scotland, United Kingdom
Joined: February 07, 2008
KitMaker: 1,699 posts
AeroScale: 1,384 posts
Posted: Saturday, November 22, 2008 - 10:48 AM UTC
I'm all ears to your build, A.W. Can you tell the ratios you used for the OD or was it just mixed by eye?
Looks good to me. I think I will mask like you did to avoid the white overspray showing through the OD.

Yeti123
_VISITCOMMUNITY
Michigan, United States
Joined: February 11, 2008
KitMaker: 311 posts
AeroScale: 278 posts
Posted: Saturday, November 22, 2008 - 03:25 PM UTC
A.W.
Things are looking great. I think your preshading looks excellent. Keep posting

Taylor
hellvetier
_VISITCOMMUNITY
Bern, Switzerland
Joined: April 17, 2008
KitMaker: 264 posts
AeroScale: 88 posts
Posted: Sunday, November 23, 2008 - 07:28 AM UTC
Hey guys!

A little accident happend but first to your question about the OD jaypee:

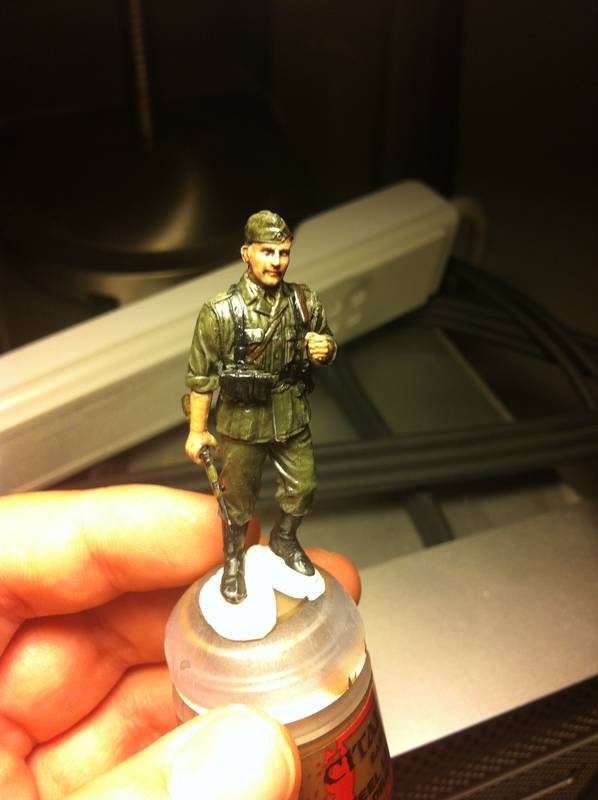
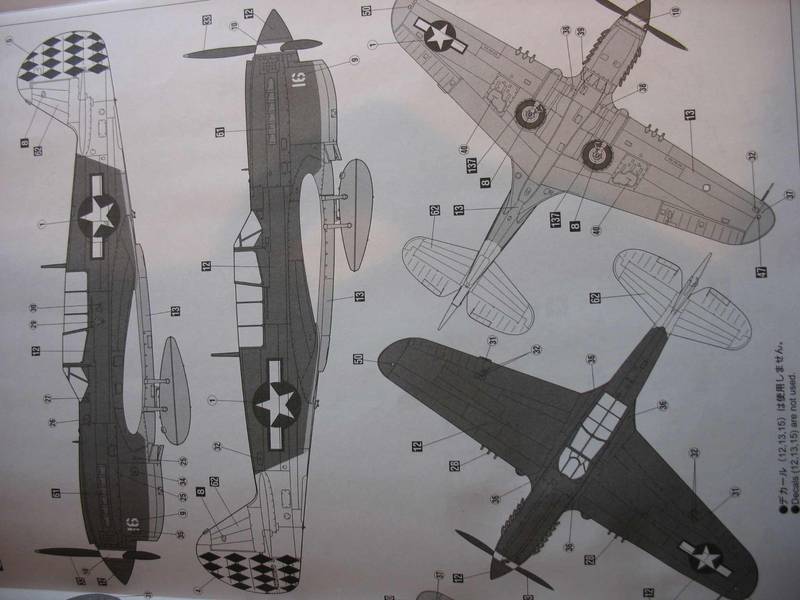
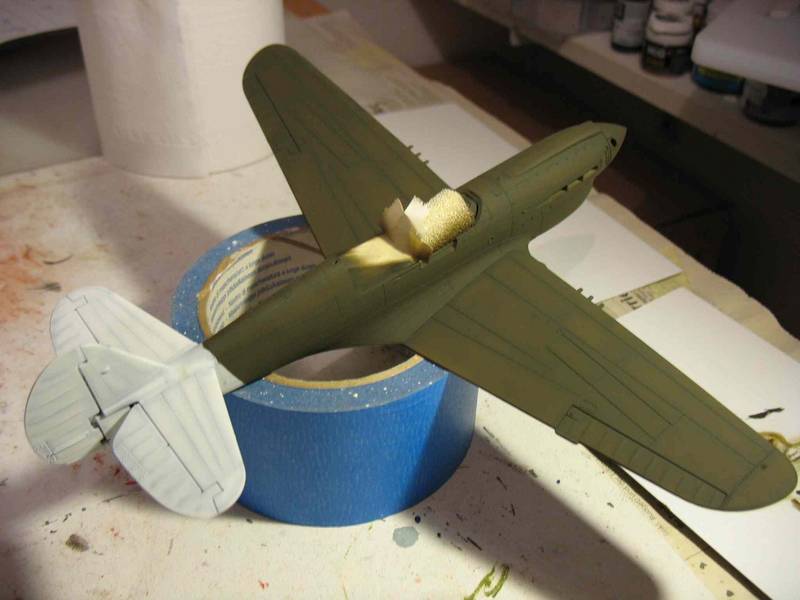
I took a pic of the colors I used put don't remember the ratio. First I started as a base with the tamiya OD then added white. Second was the olive green and dark green, because the OD was too brown for my opinion. I added the last two colors after i sprayed one of the wings, because it looked very light brown. But after some minutes it turned more to green (luckily) , as I mentioned before. But the mixture is still more in to the brown color than to dark green wich I aimed for. Next time i'll try the color with an already mixed one from an other brand.
I found one in my stash after my painting job, Vallejo USA Olive Drab. But I'm not so sure if i would have used it, because my last tank project was sprayed with these vallejo colors (the standard ones not Vallejo Air) and the paint was a bit weird...
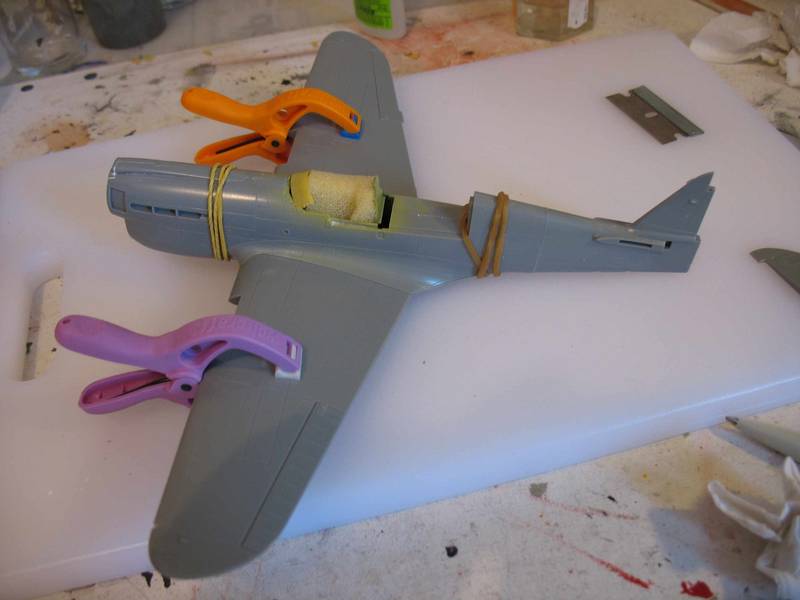
Now to my accident
I sprayed a gloss finish from a can over my model, because in Switzerland there isn't any Future. Perhaps there's an other brand with the same chemicals, I have to look next time in the 'do-it-yourself-store'. Anyway the lacquer was based on water, and when I applied the decals it came a bit off. 
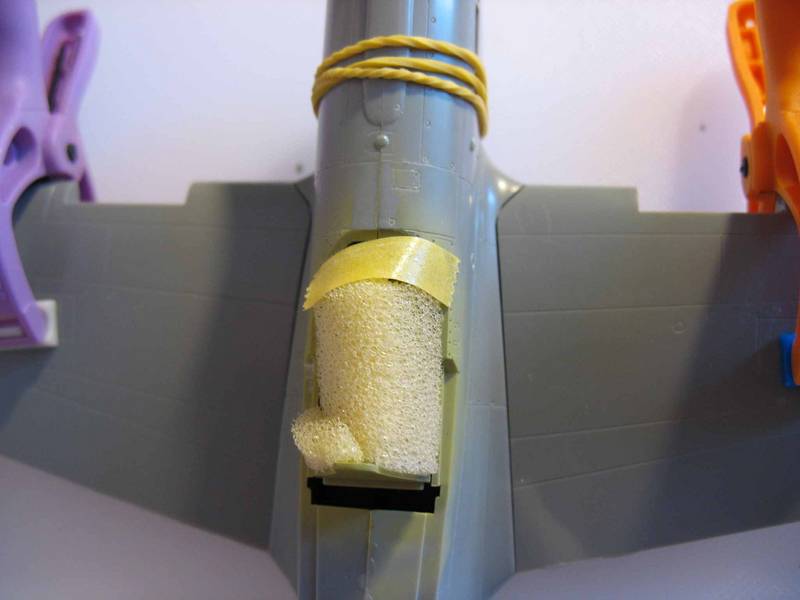
But that wasn't the worst part...
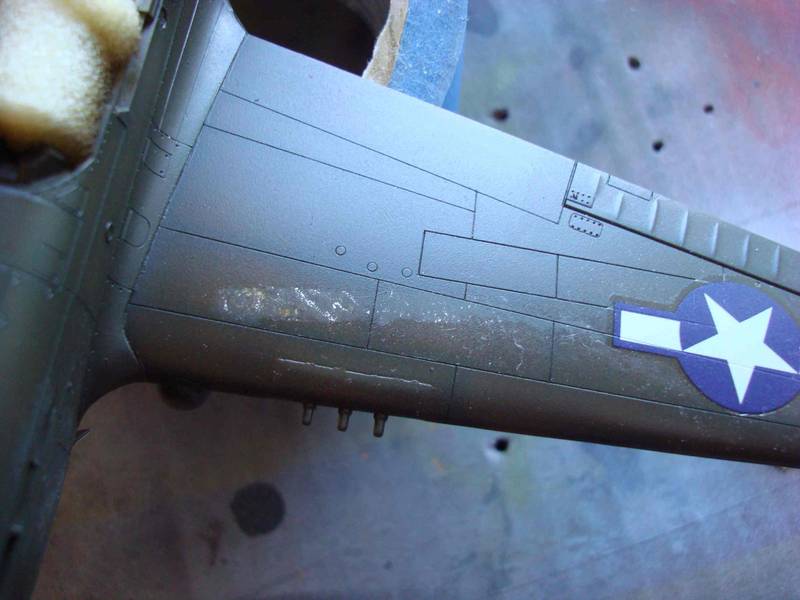
The Hasegawa decals were very hard to apply, although they snuggle very well to the model. I used too much of Mr.Softer wich began to run over the wing and began to tear of the gloss varnish AND THE PAINT as I was trying to wipe it away...


I know it was my fault... I should have waited till Monday and go to the store to buy a good gloss varnish... But I'm very enthusiastic to finish this model LESSON LEARND

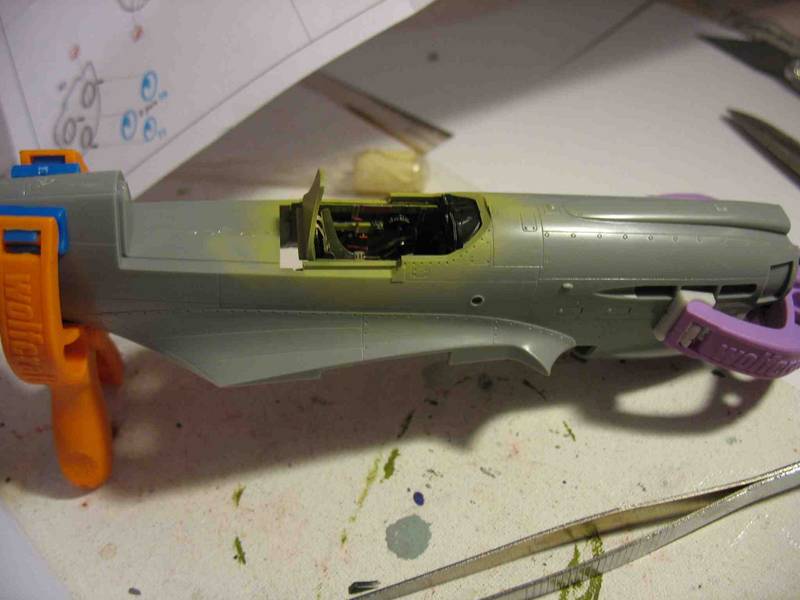
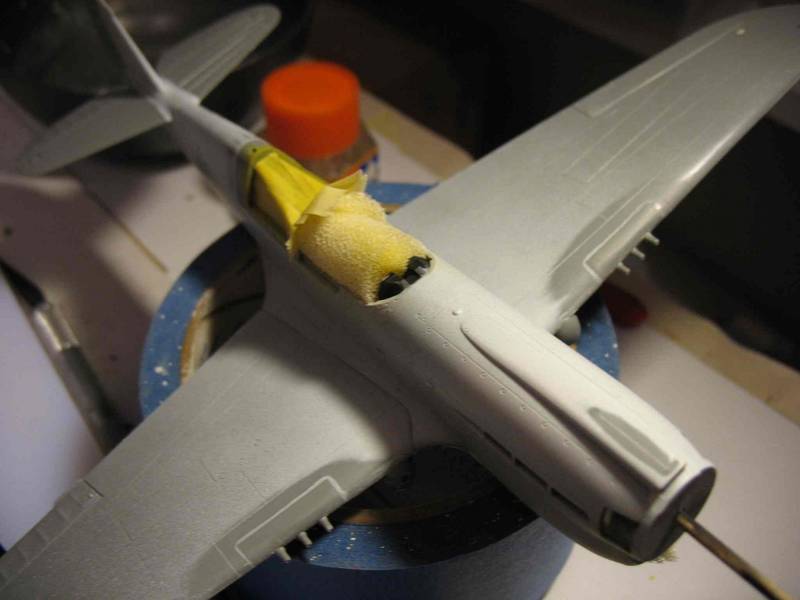
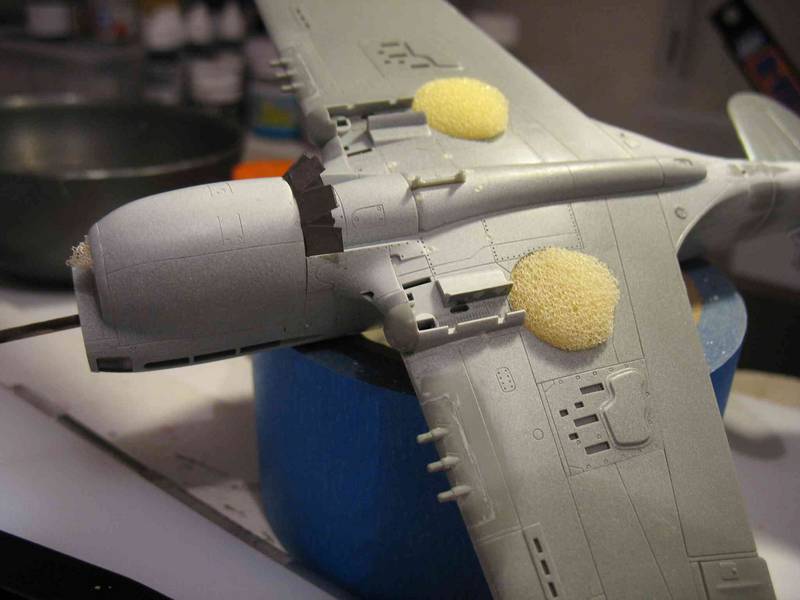
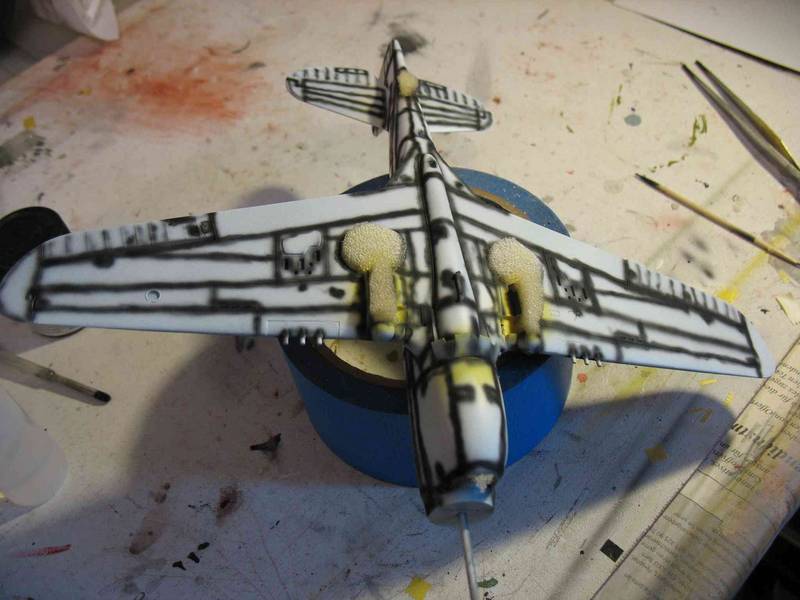
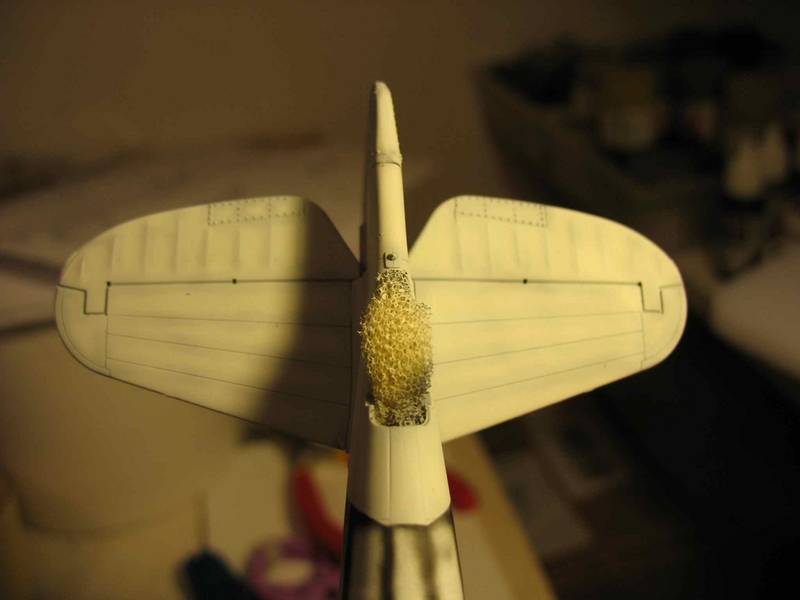
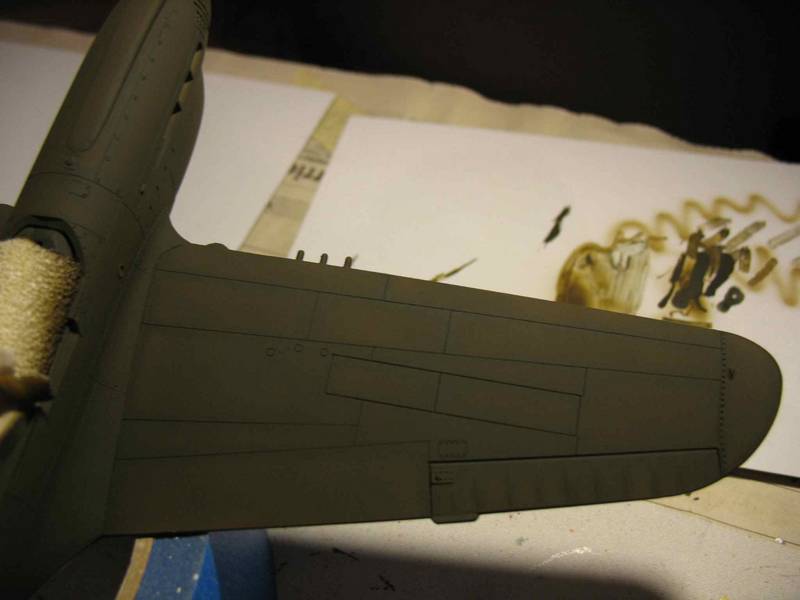
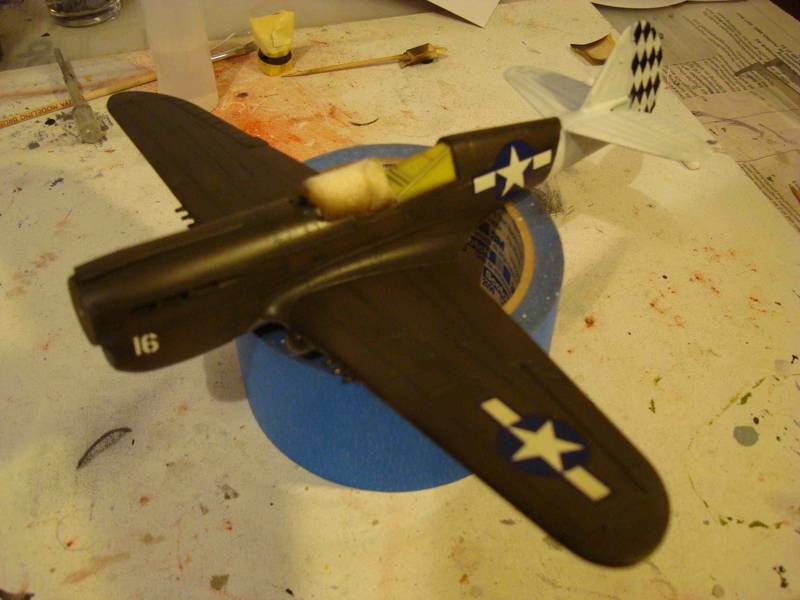
So I prepeard my airbrush, this time only with very thinned olive drab and begann with the corrections, wich turned out ok, or what do you think?


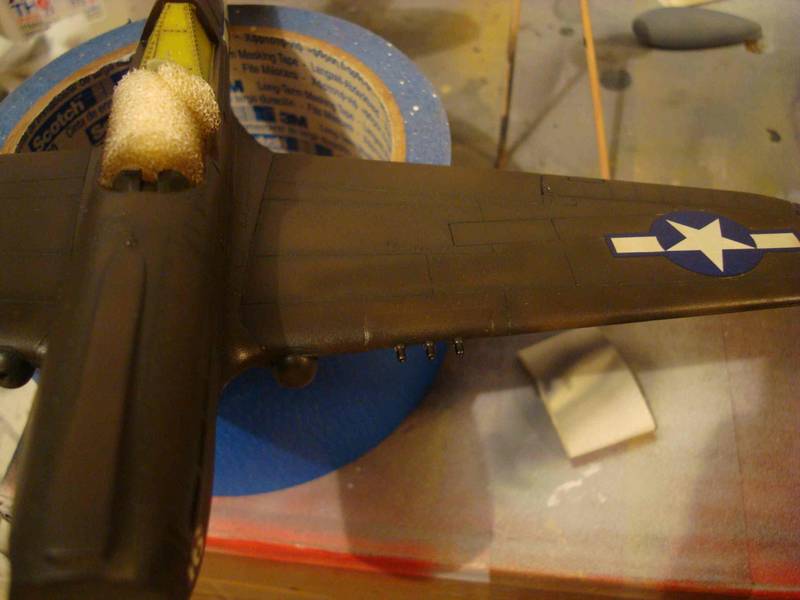
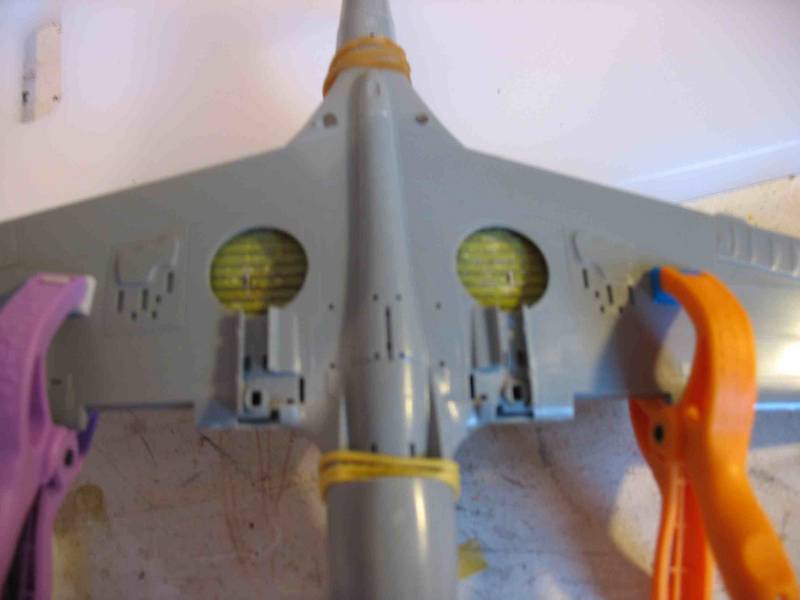
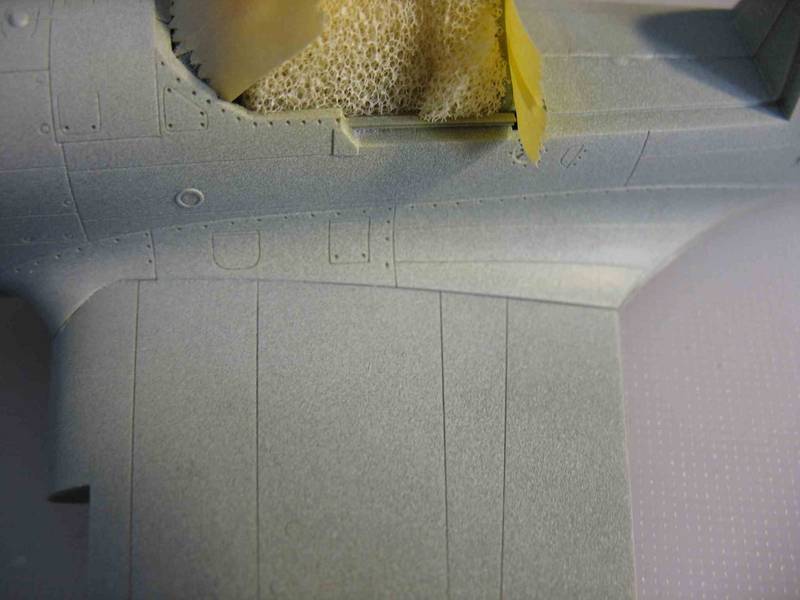
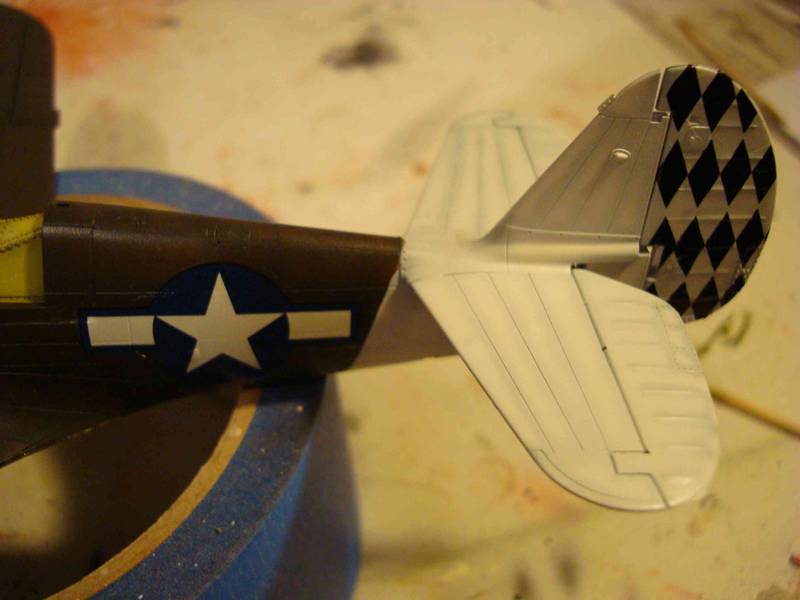
Here's a close up from the decals


There you'll see my bad work on the back of the cockpit, should have corrected it.

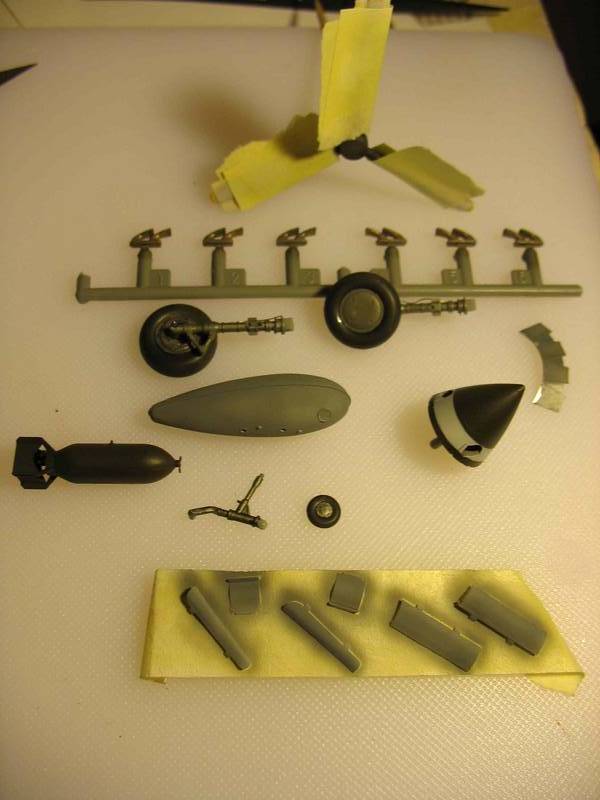
The rest of my freetime I built the landing gear and colored wheels and other little parts. Time consuming stuff. Pictures another time...

Now I'm enjoying the rest of the evening I got distraction from my girlfriend and indiana jones 4

Till Monday!
hellvetier
_VISITCOMMUNITY
Bern, Switzerland
Joined: April 17, 2008
KitMaker: 264 posts
AeroScale: 88 posts
Posted: Monday, November 24, 2008 - 08:48 AM UTC
It's Monday an a little update from my project. I went this morning after university into the city. Today people celebrated in Bern the onion-market-day


This took a while, till I got home But I brought a new can of a gloss coat.

First thing I did was another gloss coat and then after drying, applying the rest of the decals, wich went pretty well.


Then I finished most of the little stuff:


I'm happy with the result of the mufflers I'm curious how they look on the plane.


Still have to get a better lamp

Tomorrow I'll begin with the final steps. Assemble the little stuff and perhaps beginn with a panel line wash.

Thanks fo looking!
jaypee
_VISITCOMMUNITY
Scotland, United Kingdom
Joined: February 07, 2008
KitMaker: 1,699 posts
AeroScale: 1,384 posts
Posted: Monday, November 24, 2008 - 09:00 PM UTC
Those are some great onions!

Did you drill out the ends of the mufflers? or just paint them black?
You asked about my p-39. Its on the paparazzi campaign thread or on my flickr account
http://www.flickr.com/photos/jaypee_/
hellvetier
_VISITCOMMUNITY
Bern, Switzerland
Joined: April 17, 2008
KitMaker: 264 posts
AeroScale: 88 posts
Posted: Wednesday, November 26, 2008 - 10:53 AM UTC
Hei, Jaypee!
Took a glimps at your P-39 and liked what I saw, keep me up to date I just painted the muffler tips black. I haven't got a good drill.

Ok, here we go

The panel line wash with oil colors wasn't that successful, but it's ok... don't know what went wrong. Perhaps it's still something with the gloss finish.
Then i added all the little stuff and finished the prop with the decals. The canopy was masked and painted wich took a while. The olive drab on the frame looks a bit strange. First with yellow green for the interior, then with OD.


After assembling everything i made with flat aluminium some scratches at the bolts and on the walking surfaces, perhaps I overdone it a little.
Then I airbrushed everything with tamiya flat. And tried my best in exhaust stains.
The positioning lights still have to be painted. BUT---

hhhmmmmmmmm...... what can I say, I think the P-40N job is finished, if you agree? Comments are very welcome!
I'll post the model in the finished category.


hellvetier
_VISITCOMMUNITY
Bern, Switzerland
Joined: April 17, 2008
KitMaker: 264 posts
AeroScale: 88 posts
Posted: Wednesday, November 26, 2008 - 10:54 AM UTC
A little preview...


 _GOTOTOP