_GOTOBOTTOM
Pre-Flight Check
Constructive critique of your finished or in-progress photos.
Bf 109 D from Trondheim Norway.
LongKnife
_VISITCOMMUNITY
Jönköping, Sweden
Joined: April 25, 2006
KitMaker: 831 posts
AeroScale: 688 posts
Posted: Tuesday, November 25, 2008 - 12:47 AM UTC
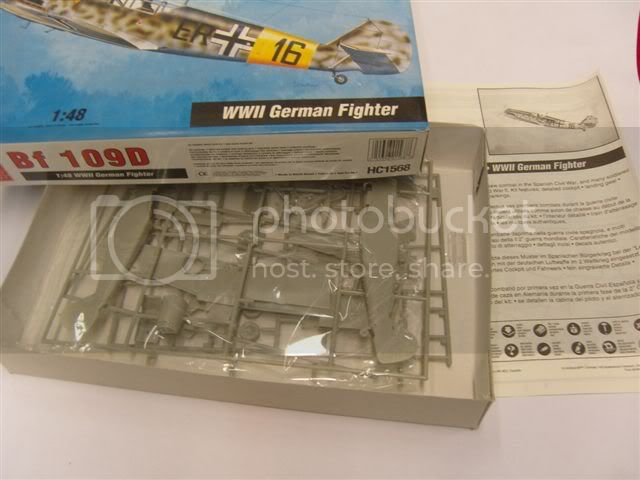
After the Bf 109 K4 for the Battle of Europe, which took time, I decided to take something easy on my hands and go fast and simple. This HobbyCraft early 109 seemed right.


I also fount a rather simple paintjob in the D's based in Norway, roughly at the time for the Battle of Britain. Two greens on blue, no mottling and numbers that can be painted on. This one is 8, but I've decided that 7 is easier to mask.


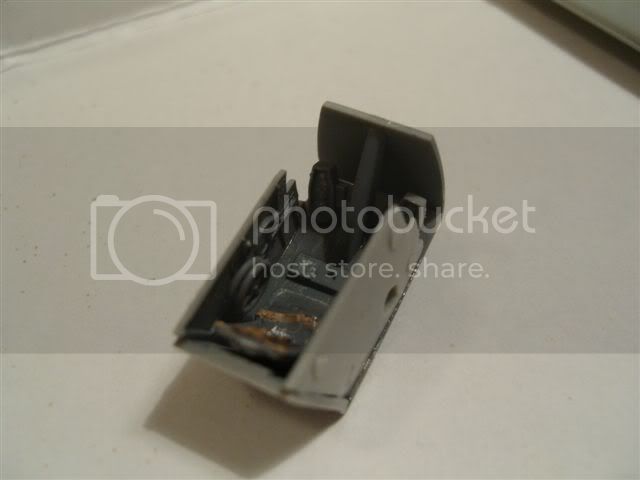
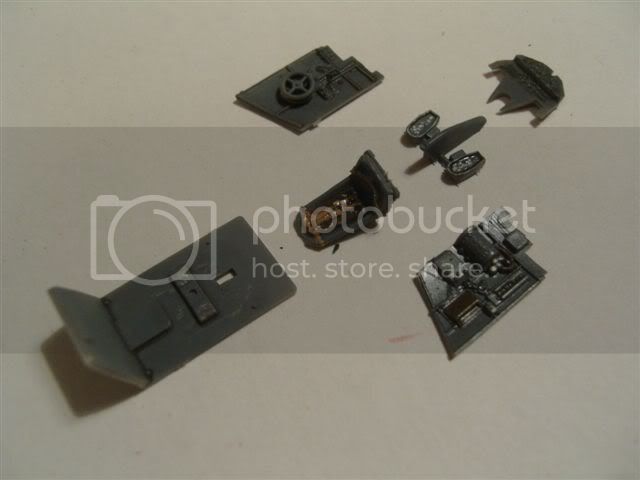
As usual cockpit tub comes first. A half-dark grey acts as base.
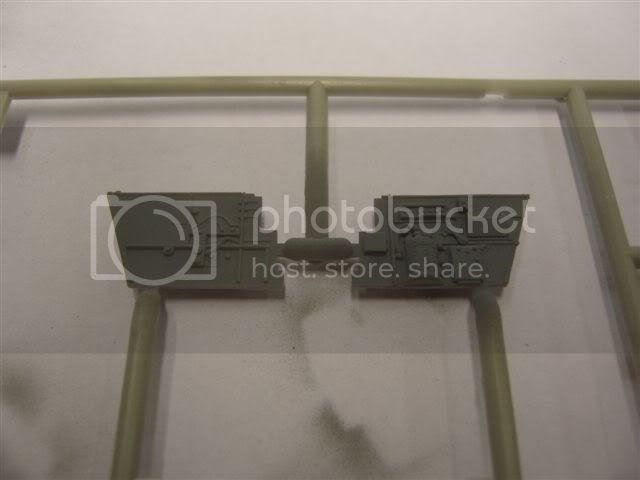

A little drybrushed silver and some oil wash and that was good to put together.


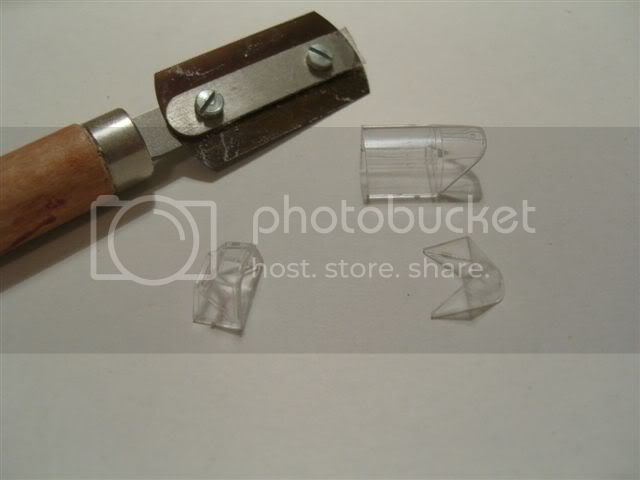
The canopy is one single piece on this, so I decided to use the rear and mid portions from a Hasegawa G-2 but needed the front from this. On with the razor saw. I hope I get this straight in the end.

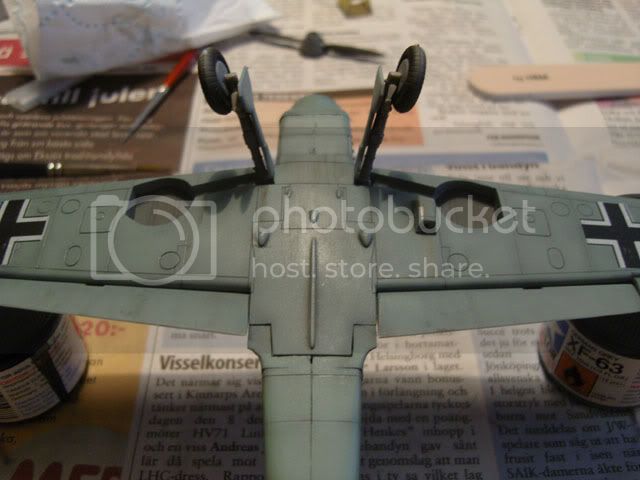
After this it was time for primer, but I will wait with the canopy installation. I fit the landing gear doors with some tape, just to protect the gear wells. It seems to work just with a little masking tape cut a bit too big.
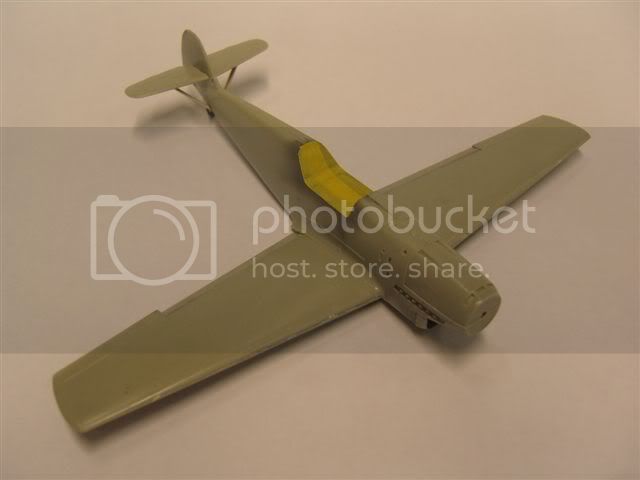
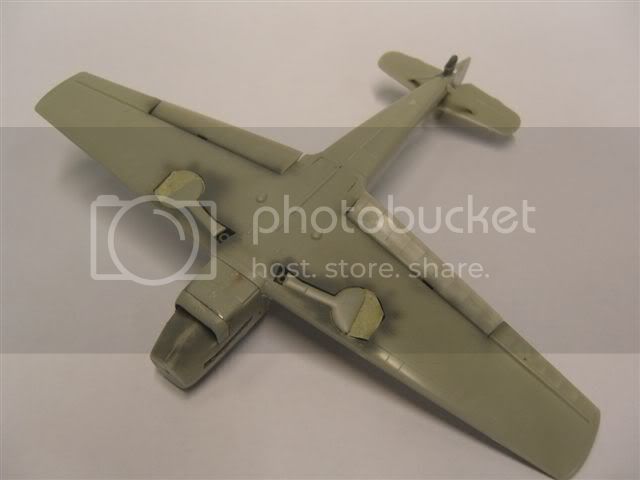


I've got a bit further, but haven't got the pics ready, so I'll be back tomorrow, with the painting stages.
CMOT70
_VISITCOMMUNITY
Victoria, Australia
Joined: August 23, 2007
KitMaker: 629 posts
AeroScale: 539 posts
Posted: Tuesday, November 25, 2008 - 01:11 AM UTC
Good job Tony. Using the landing gear doors to help mask the wheel wells is something i never really thought of before, but pretty simple now that i think about it!

I like these kits, even though a lot of people don't because of some innacuracies. But they are only noticeable if you know what to look for anyway, and they are so cheap compared to the Classic Airframes kits that you can buy 3 (under the Academy label) and still have change left over.
And that is what i plan to do to use up some of the excellent decals that i have left from the CA kits.

Andrew
LongKnife
_VISITCOMMUNITY
Jönköping, Sweden
Joined: April 25, 2006
KitMaker: 831 posts
AeroScale: 688 posts
Posted: Tuesday, November 25, 2008 - 01:46 AM UTC
Hi Andrew. Your'e right that the models leave a bit to wish for, but i got three (B, C and D) for €15 so they are perfect in these situations (gotta make something fast to feel good). The decals however, are so thick that I almost had to cut them in the panellines to get them to go down, when I made a B in spaish livery earlier.
It's a bit weird though, I will build more than ten 109's if my plan works out. I have made four to the date, but only consider one finished. The rest are to be considered as method practice. I hope this one will meet the standard. If not - it will be a Classic Airframe one later.

The doors work well as mask, but if you use some pressure on the gun you should support them wit a blob of bluetac in the thin end. I found that the air wanted to press them a bit down in the well.
LongKnife
_VISITCOMMUNITY
Jönköping, Sweden
Joined: April 25, 2006
KitMaker: 831 posts
AeroScale: 688 posts
Posted: Tuesday, November 25, 2008 - 08:44 PM UTC
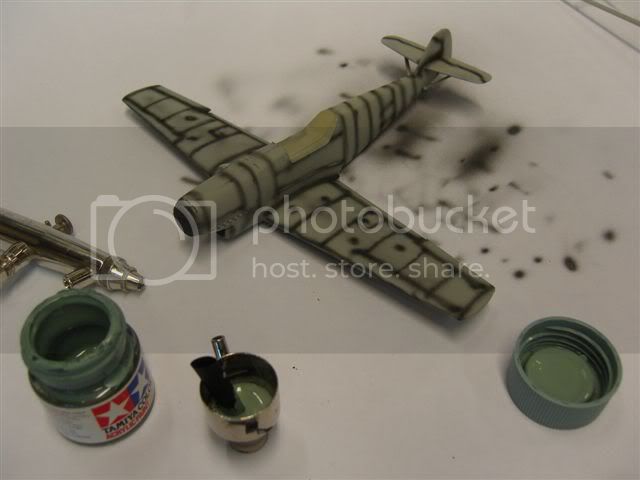
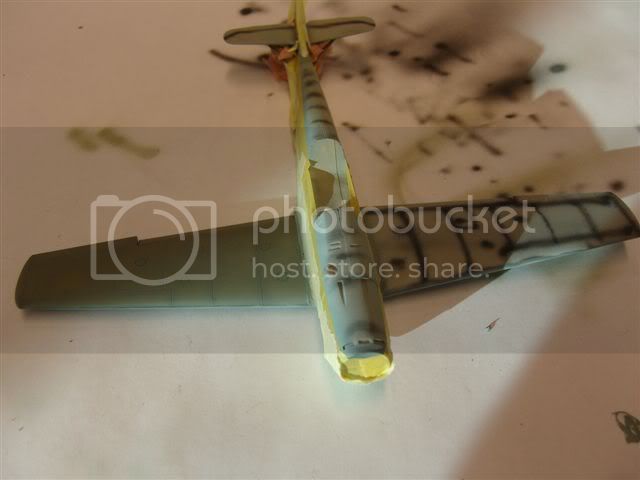
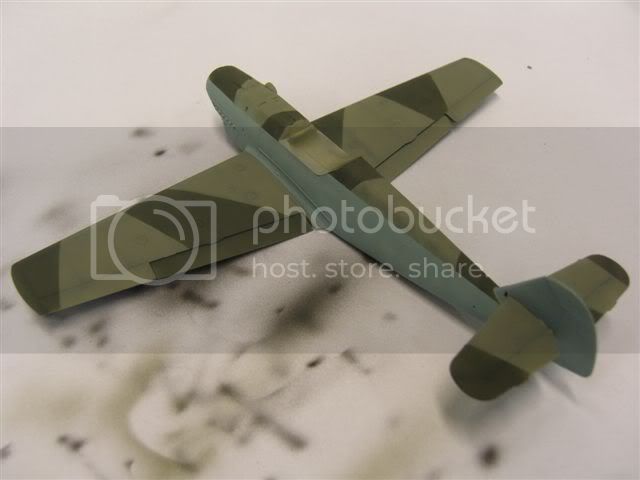
Ok, next step was primer. I use a light grey rattle can primer for cars. It's easy enough to handle, gives really bad seams away, and makes it easier to forgive not so bad seams.

On top of that it was preshading time. Tamiya acrylic black, diluted with window cleaner, and sprayed with my Badger. It doesnt give the thinnest lines, but what the heck, you need to learn how to mask too.


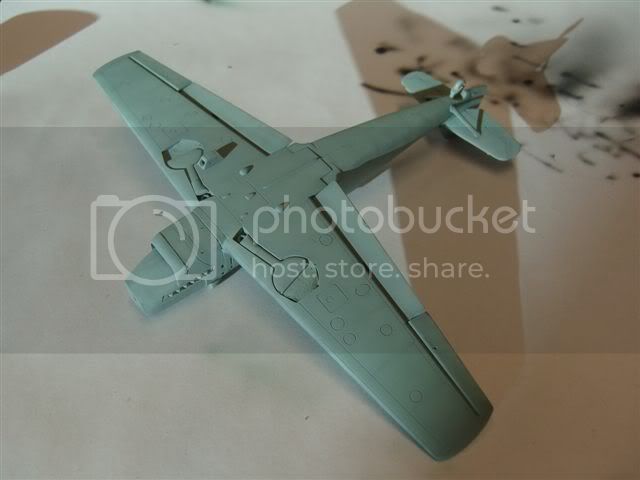
After the primer I painted the blue underside and fuselage sides, trying to leave just a trace of the preshading. I never really succeed, but this one will be rather worn, so that is ok.


Then it was masking time. I decided to keep a rather sharp line between the blue and the green shades, so I masked the sides and wing roots off with Tamiya tape and sprayed the lighter grey-green on the black preshading.


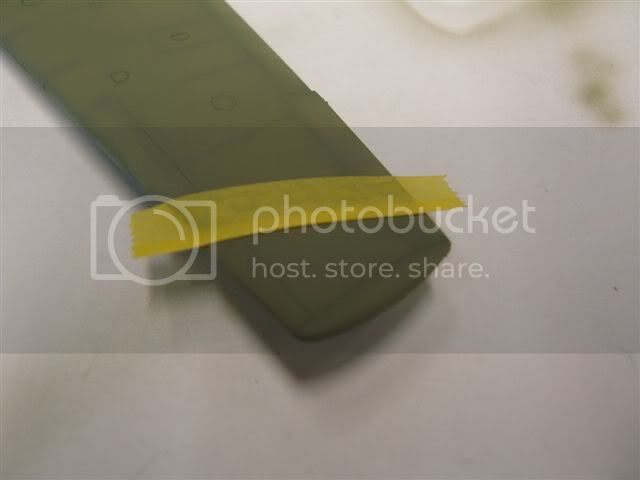
Next step was the darker green, and here I wanted a bit more feathered paint line. I just got the impression you mask real planes more thoroughly on vertical surfaces, to avoid running, than you do on horizontal flat surfaces. I folded the edge of the tape to get the line a bit less sharp, and ended up with a not-so-straight line too, as you often can see on invation stripes and such.


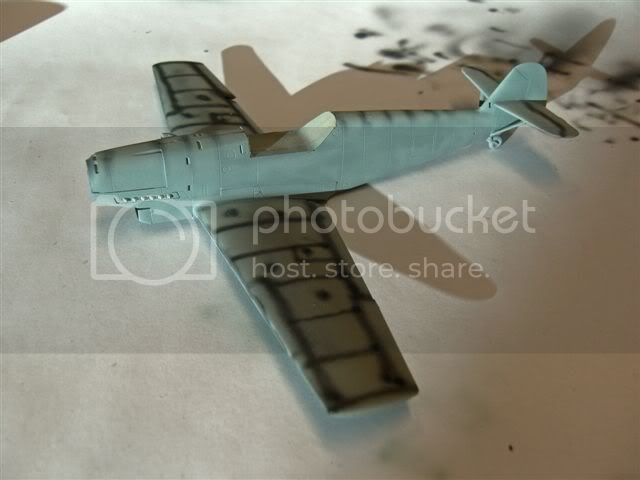
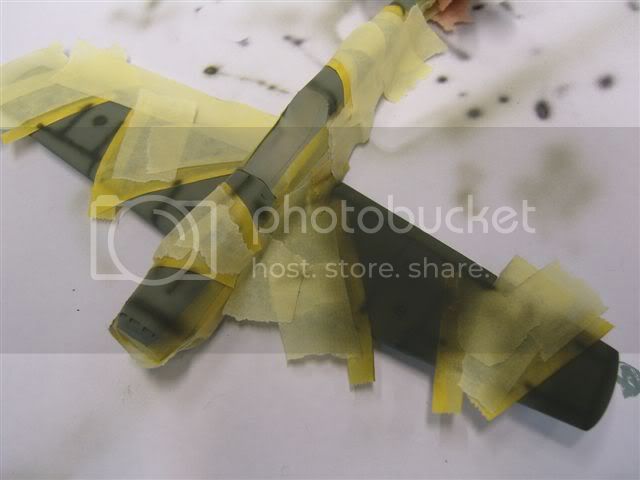
With the whole plane masked I preshaded with the dark green on the light colour, and then whent on with the main surfaces so I got a good shading here too. It seems like dark colours can be preshaded by themselves while light colours need something darker.


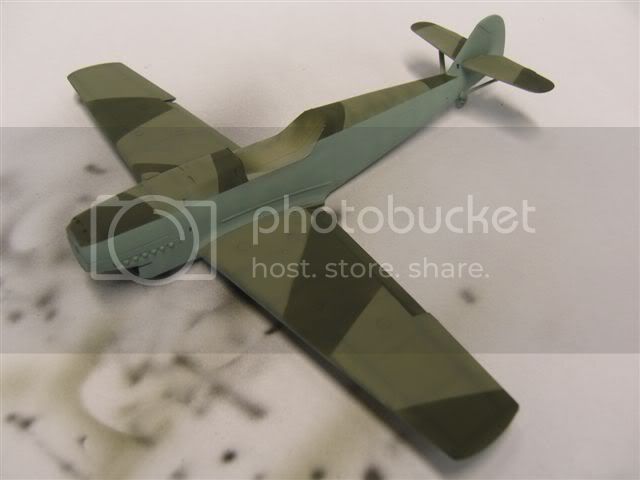
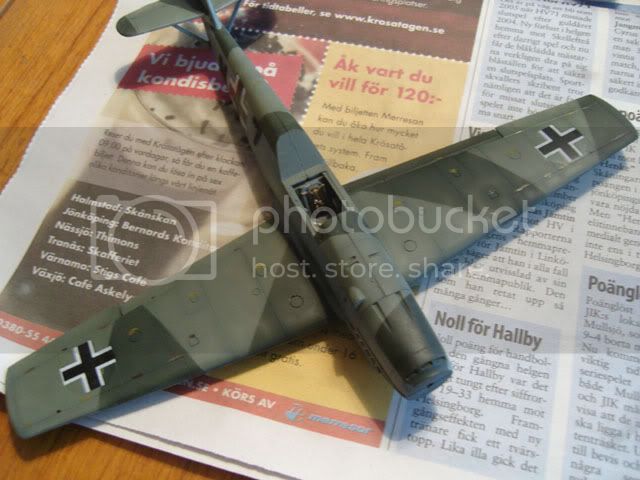
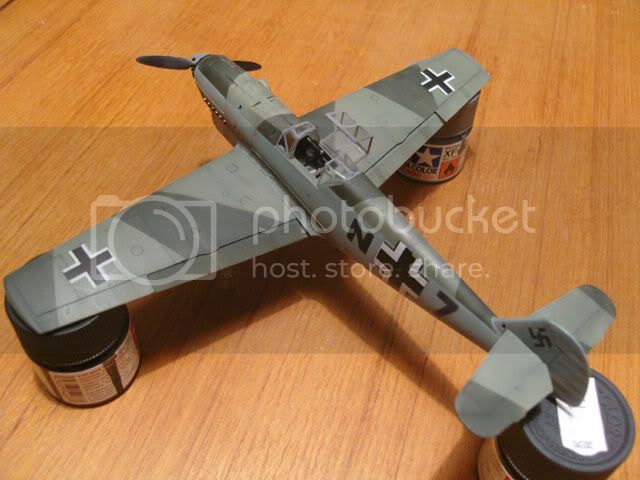
And finally I ended up with this. So far I'm rather pleased, but we'll se what happens with decals and weathering later.


Bye for now
jaypee
_VISITCOMMUNITY
Scotland, United Kingdom
Joined: February 07, 2008
KitMaker: 1,699 posts
AeroScale: 1,384 posts
Posted: Tuesday, November 25, 2008 - 10:09 PM UTC
Nice trick with the double preshading. Like it a lot. I would almost be tempted to pre shade the dark colours with a light colour like buff or something as an experiment. [rant]Hope my compressor arrives soon am totally fed up with propellant cans[/rant].
LongKnife
_VISITCOMMUNITY
Jönköping, Sweden
Joined: April 25, 2006
KitMaker: 831 posts
AeroScale: 688 posts
Posted: Wednesday, November 26, 2008 - 12:52 AM UTC
I know what you mean, but my problem is the other way around.


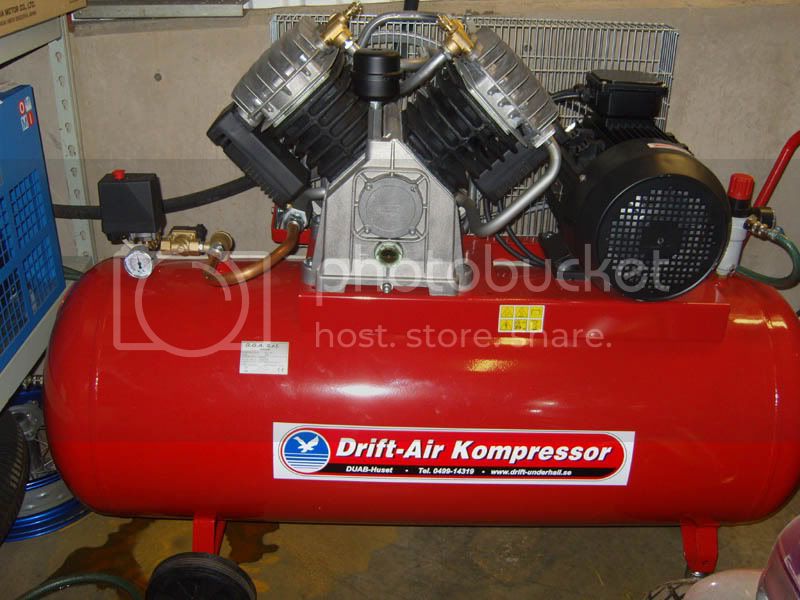
I have this at work, and it never lets me down. Two points on the downside though. I need to fit extra filters, so I get no moist out from it and of course, it's at work. Dangerous places after hours If you're too close, you might get sucked in to working...
jaypee
_VISITCOMMUNITY
Scotland, United Kingdom
Joined: February 07, 2008
KitMaker: 1,699 posts
AeroScale: 1,384 posts
Posted: Wednesday, November 26, 2008 - 12:58 AM UTC
Best use of a guzzi I've ever seen.
LongKnife
_VISITCOMMUNITY
Jönköping, Sweden
Joined: April 25, 2006
KitMaker: 831 posts
AeroScale: 688 posts
Posted: Wednesday, November 26, 2008 - 01:56 AM UTC
But JP! Thou shalt not mock the Italians, when they excel in their favourite game!
LongKnife
_VISITCOMMUNITY
Jönköping, Sweden
Joined: April 25, 2006
KitMaker: 831 posts
AeroScale: 688 posts
Posted: Friday, November 28, 2008 - 03:48 AM UTC
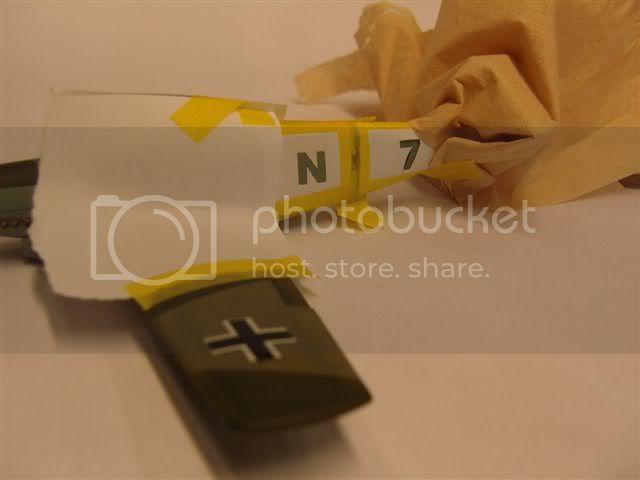
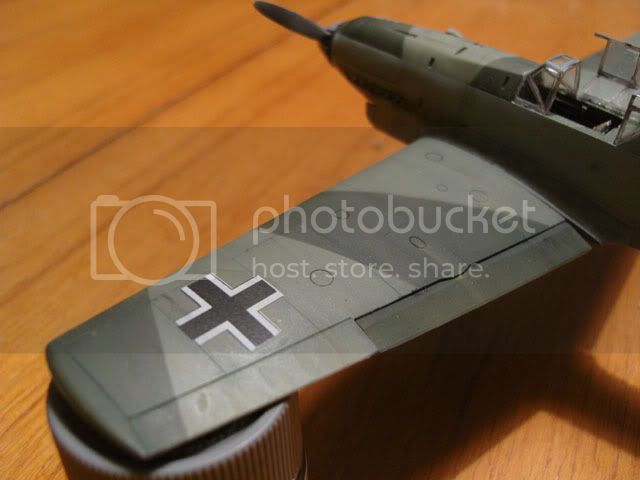
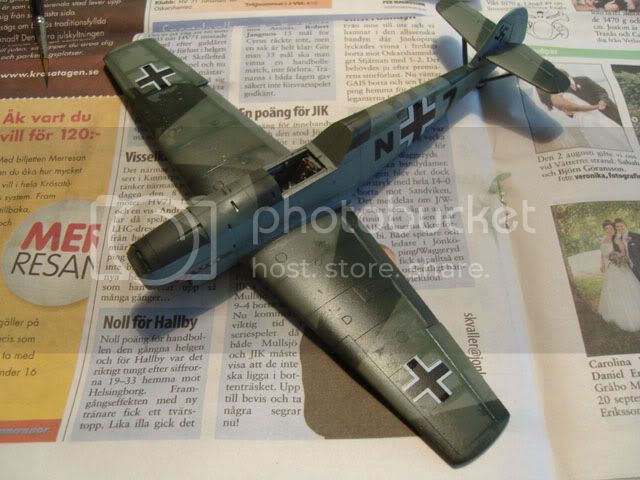
Ok, time for an update again. Decals are on and I didn't find anything really flimsy to copy the numbers on, so I took normal paper.


With a little tape in between it worked decent, but I guess tape will be my next choice. The contours are a bit on the soft side.


You can also see traces of a try to put exhaust stains on by airbrush. NOT again, not with that airbrush anyway. I'll stick to drybrushing instead. That was far too hard to control.

Next step will be the main weathering. Be back soon
FalkeEins
_VISITCOMMUNITY
England - South East, United Kingdom
Joined: March 07, 2005
KitMaker: 868 posts
AeroScale: 690 posts
Posted: Friday, November 28, 2008 - 05:37 AM UTC

Quoted Text

You can also see traces of a try to put exhaust stains on by airbrush. NOT again, not with that airbrush anyway. I'll stick to drybrushing instead. That was far too hard to control.


..couldn't do it either Tony - I'm no expert (far from it!), but I reckon I get an acceptable exhaust stain by dry brushing with oil paints. You can just keep wiping it off until you get it right..
Good work!
jaypee
_VISITCOMMUNITY
Scotland, United Kingdom
Joined: February 07, 2008
KitMaker: 1,699 posts
AeroScale: 1,384 posts
Posted: Friday, November 28, 2008 - 08:49 AM UTC
I like powders/chalk applied with a cotton bud onto a flat coat and then another flat coat over
the top. It's been the easiest controlled way i've tried in the 5 or 6 models i've completed so far.
Fair play if you can control an airbrush in the same way.
chris1
_VISITCOMMUNITY
Auckland, New Zealand
Joined: October 25, 2005
KitMaker: 949 posts
AeroScale: 493 posts
Posted: Friday, November 28, 2008 - 08:50 AM UTC
Hi Tony,
Looking good so far.
I'm following your build with interest.
I can get Academy reboxed kits for about 1/2 the price of other brands in fact their 1/48th scale are cheaper than most Tamiya 1/72nd scale.

I'm seriously looking at their 109s for builds next year.

Chris

LongKnife
_VISITCOMMUNITY
Jönköping, Sweden
Joined: April 25, 2006
KitMaker: 831 posts
AeroScale: 688 posts
Posted: Saturday, November 29, 2008 - 12:33 AM UTC
Hi guys, and thanks for the comment. My choice at the moment is oils, but the chalk method seems interesting. A friend of mine (who has gone to the dark, armoured side) uses that happily both for mudstains and exhausting his tanks. I guess a local group build is in place here for christmas

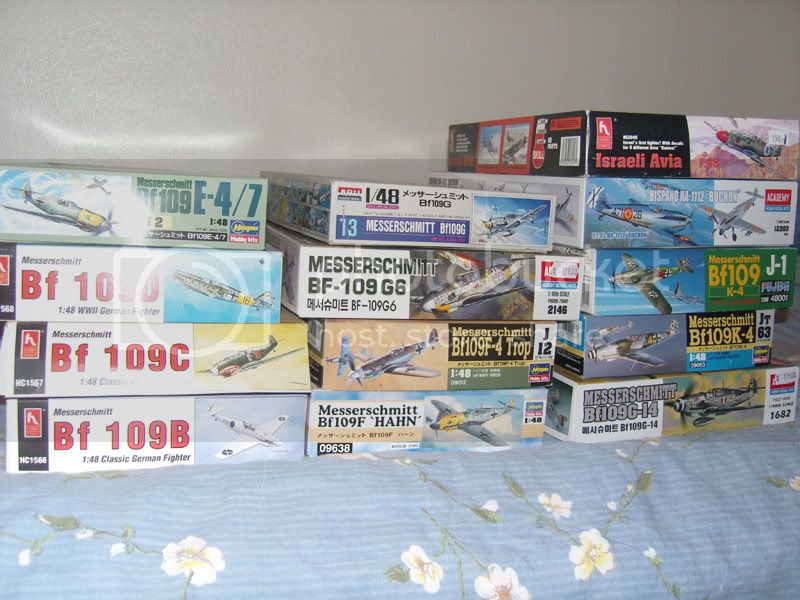
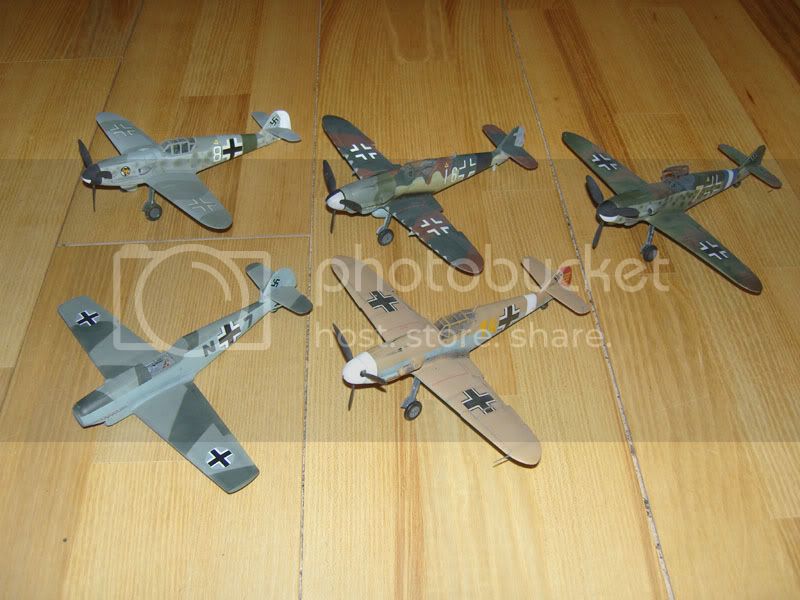
When it comes to 109's in this scale I must recommend Hasegawa, but these, as well as Academys, are good. Especially as they cover more types. I got an Academy G, as well as their Avia S-199 and Hispano Buchon coming up in the future.


I guess I'm into 109's


From bottom left I's a HobbyCraft D and a Hasegawa F. The white 8 is an Arii G - which was decent - a Fujimi K - very much like a Hasegawa, and finally the venerable Monogram G-10. The monogram came more or less on one sprue, but also with the pride of an archeological find. Nice to have done that one, really.
jaypee
_VISITCOMMUNITY
Scotland, United Kingdom
Joined: February 07, 2008
KitMaker: 1,699 posts
AeroScale: 1,384 posts
Posted: Saturday, November 29, 2008 - 04:49 AM UTC
i'll give oils a try too. After all what are exhaust stains but oil and soot! A real method weather would be too mix your own unburnt fuel mixture

nice collection tony. must admit i only really like the a-e seris after that it just doesnt look rugged enough. the buchon looks interesting too.
LongKnife
_VISITCOMMUNITY
Jönköping, Sweden
Joined: April 25, 2006
KitMaker: 831 posts
AeroScale: 688 posts
Posted: Sunday, November 30, 2008 - 08:54 PM UTC
Hi JP. Cool idea to use the real stuff for exhaust stains. Unfortunately I have cleaned the pipes on my 125 Yam roadracer, otherwise that could have put a new dimension to a model. Exhaust stains that actually smell of power!
LongKnife
_VISITCOMMUNITY
Jönköping, Sweden
Joined: April 25, 2006
KitMaker: 831 posts
AeroScale: 688 posts
Posted: Tuesday, December 02, 2008 - 04:14 AM UTC
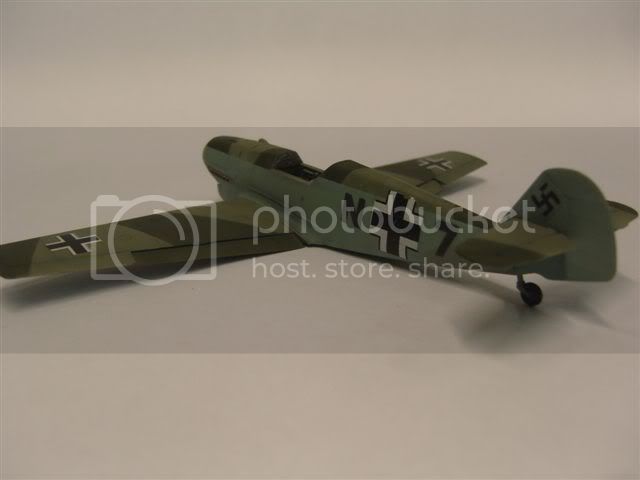
Time for the next update. Oil washes.

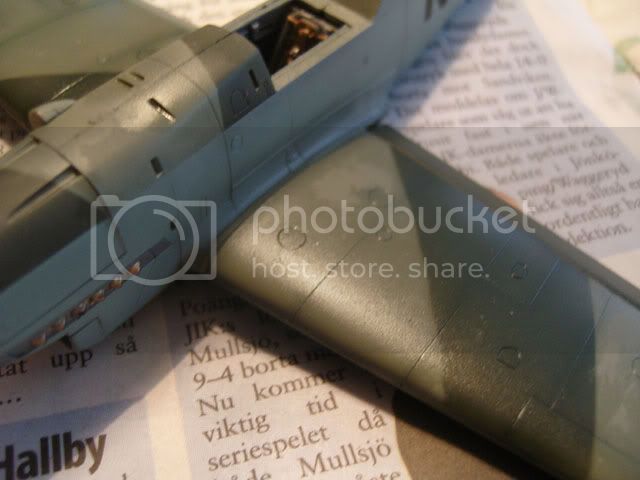
First I mixed a very lean mix of black/brown artist oil with turpentine (kinda thingy). That was brushed over all panel lines, both top and bottom.


After that I watched an episode of Top Gear while the whole thing set a bit. (Jeremy in the Mercedes beat Richard and James to Oslo) Then I tried to smear small blotches of different colour of oil direct from the tube on different hatches, joinings and places where I could imagine fluids lived.

Bummer. Clicked the wrong button. More in the next post below.

LongKnife
_VISITCOMMUNITY
Jönköping, Sweden
Joined: April 25, 2006
KitMaker: 831 posts
AeroScale: 688 posts
Posted: Tuesday, December 02, 2008 - 04:19 AM UTC
Here we have the oilpaste in different shades.


That was stroked out with a brush dipped in turpentine, and finally I did the same with exhaust stains. Random blotches in some brown and more black, mixed and hazed rearwards.


Now the prop and gear has come on too, so the only thing left is some details picked out and a flat varnish over everything.
ShawnM
_VISITCOMMUNITY
Missouri, United States
Joined: November 24, 2008
KitMaker: 564 posts
AeroScale: 510 posts
Posted: Wednesday, December 03, 2008 - 02:22 AM UTC
looks great!
but dont forget dirt streaks from the wheel wells
LongKnife
_VISITCOMMUNITY
Jönköping, Sweden
Joined: April 25, 2006
KitMaker: 831 posts
AeroScale: 688 posts
Posted: Wednesday, December 03, 2008 - 04:10 AM UTC
True, Shawn. Thanks for that. I guess it's allways a good call to wait with the final coat, since there is allways one more thing that should be done.

As an engineer I have learned that you never find the second-to-last flaw (missed dimension, typo, wrong tolerance code or - God have mercy - american view placement) until you've finally printed the drawing. The last will not be found until the drawing is e-mailed to the supplier.
 _GOTOTOP