_GOTOBOTTOM
World War II: Germany
Aircraft of Germany in WWII.
Hosted by Rowan Baylis
Dragon 1/72 Arado 234C-4
magnusf
_VISITCOMMUNITY
Stockholm, Sweden
Joined: May 02, 2006
KitMaker: 1,953 posts
AeroScale: 1,902 posts
Posted: Friday, December 26, 2008 - 04:16 AM UTC
I'm starting a build blog for my Arado even though I am half way through the project. This one was started for the Paparazzi Club campaign.

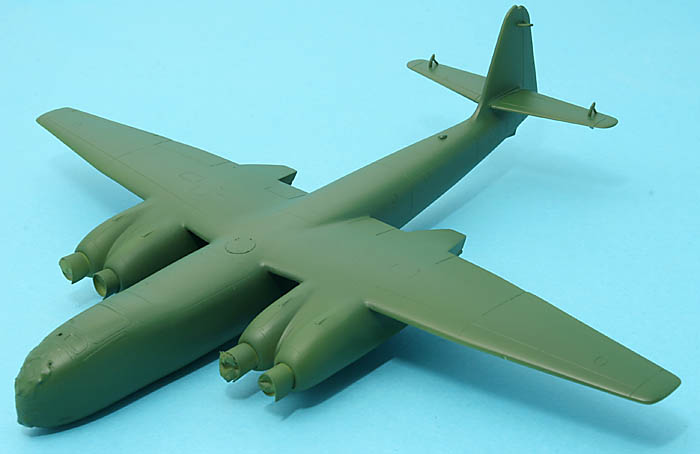
I got it in an exchange deal more or less by mistake, I thought this was Luftwaffe 1946 when I got the kit but it actually was a semi-operational PR machine with almost 20 aircraft built. The kit is from Dragon, from the early 1990s and well known for its fit issues!


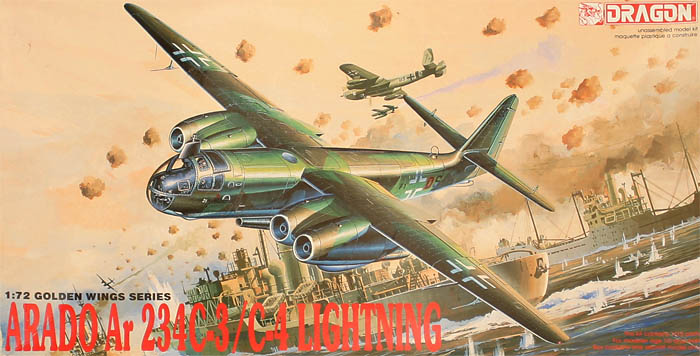
Box art is rather speedy!


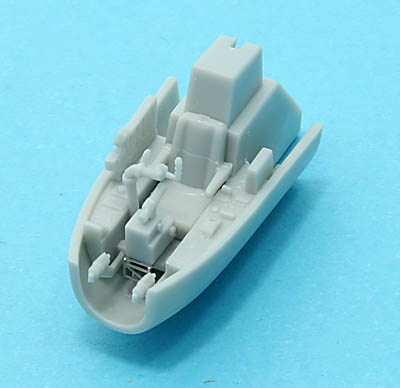
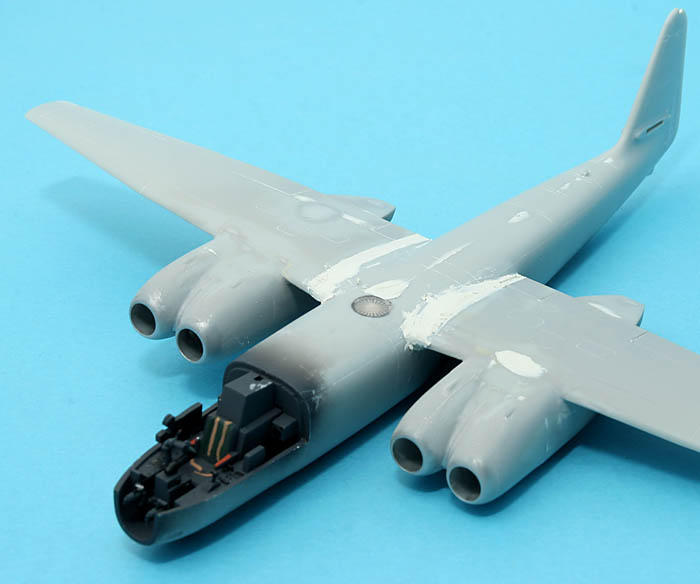
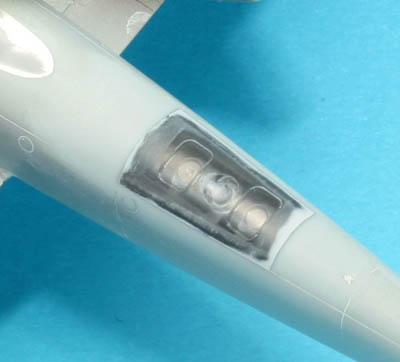
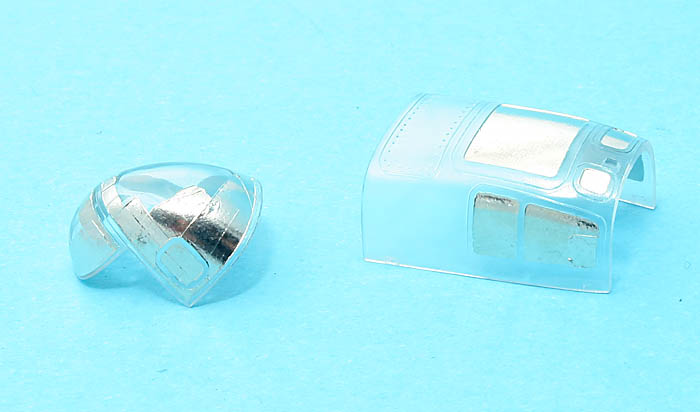
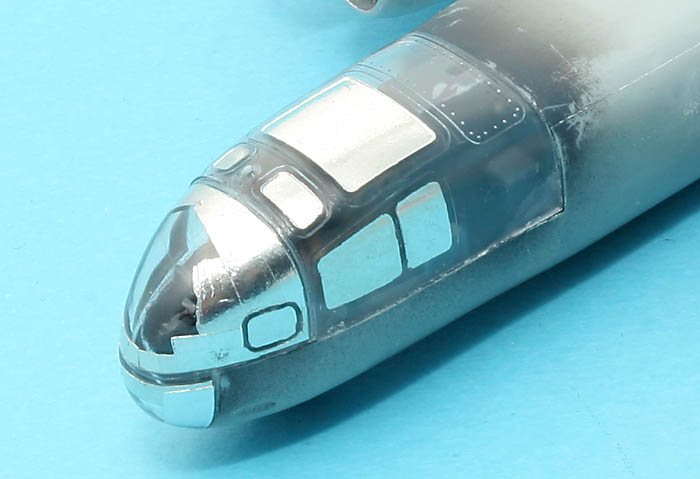
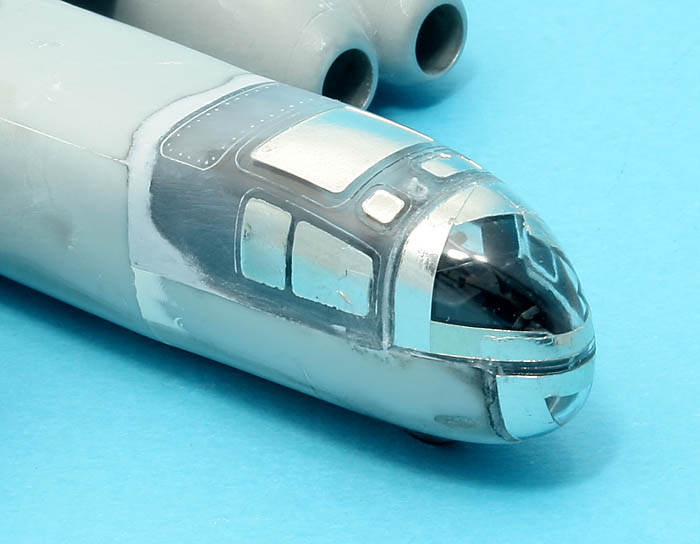
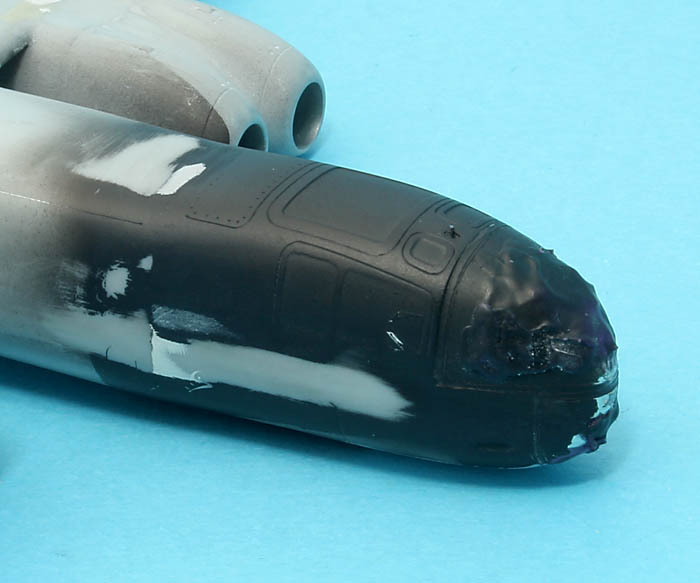
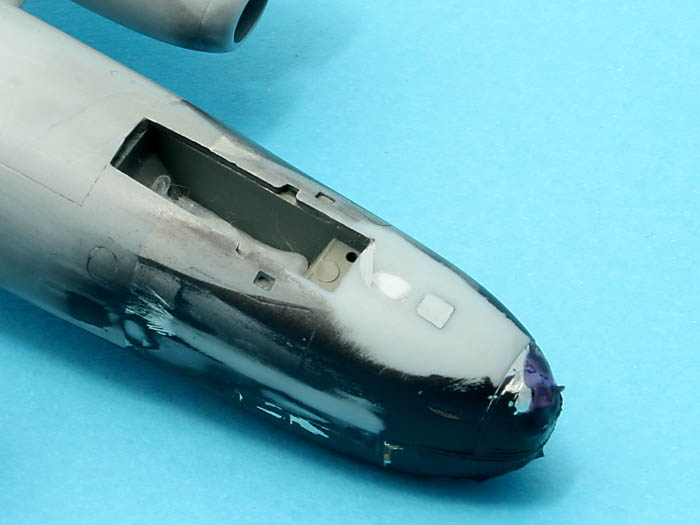
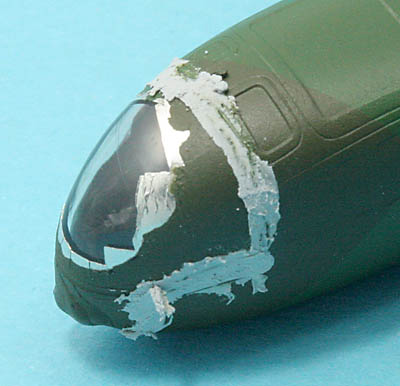
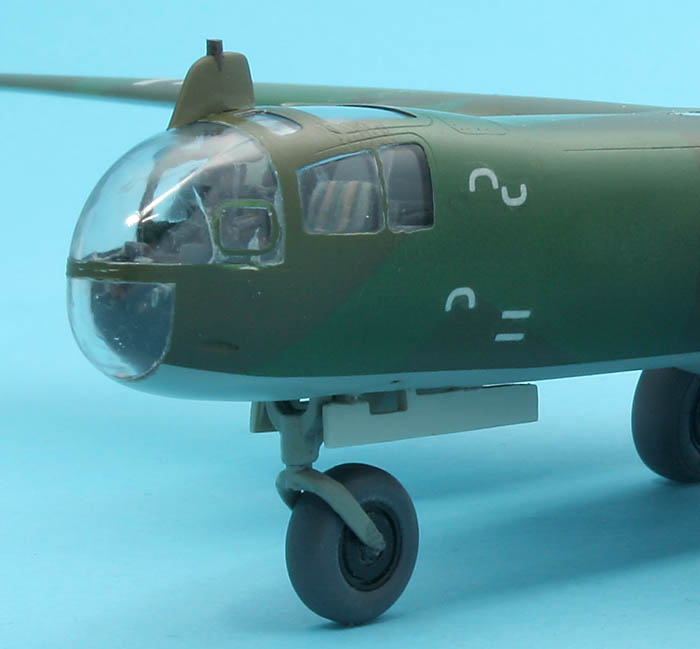
Cockpit! Lots of detail here...


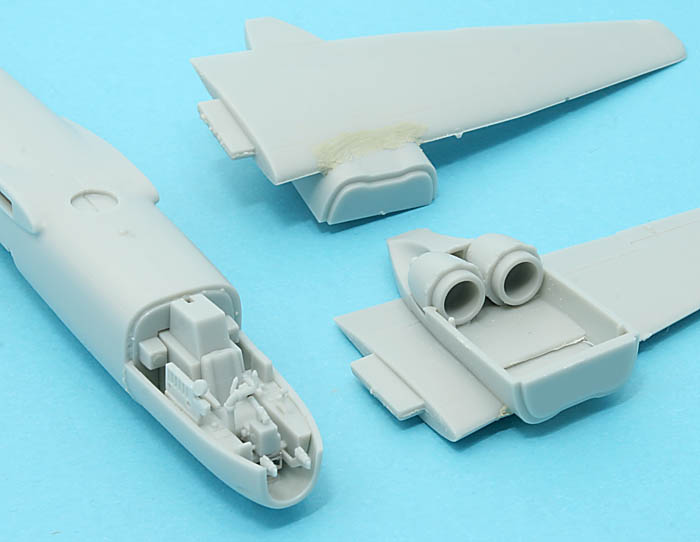
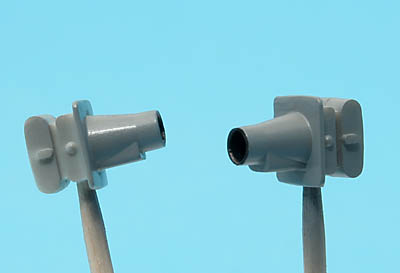
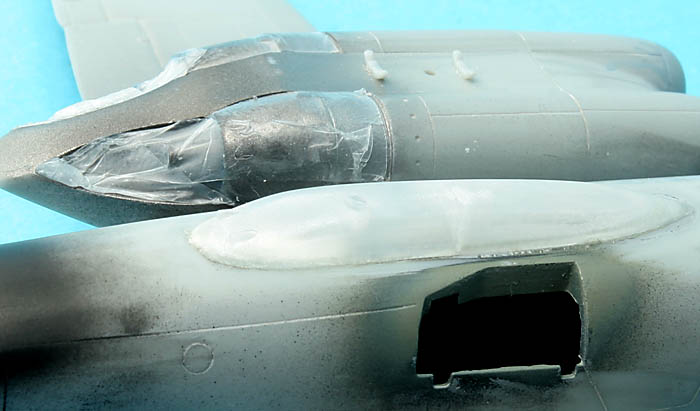
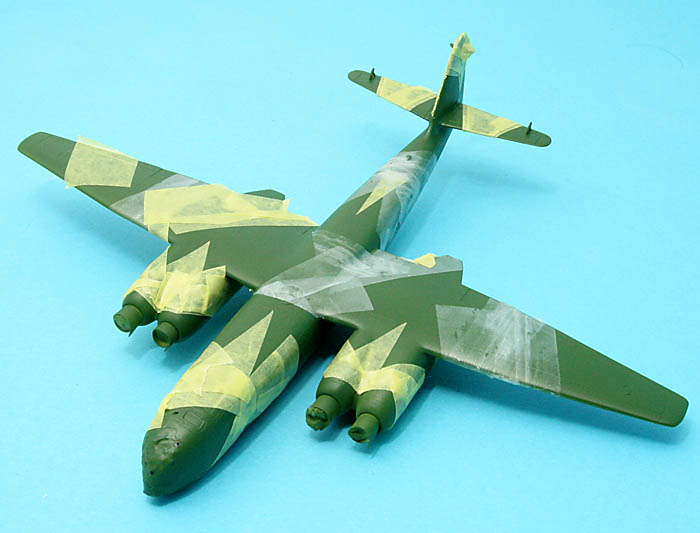
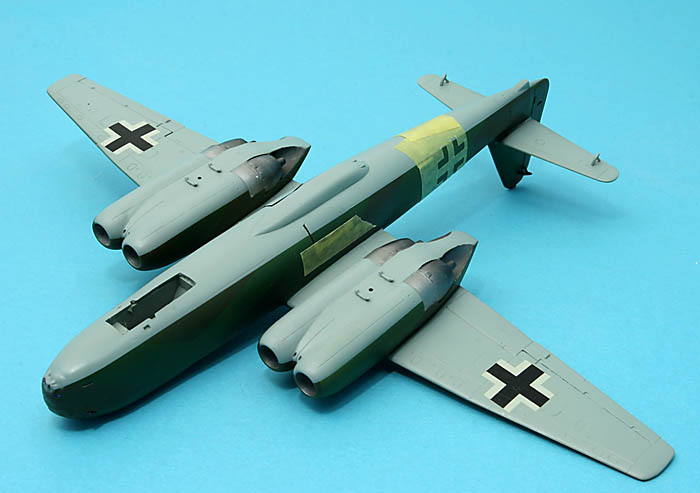
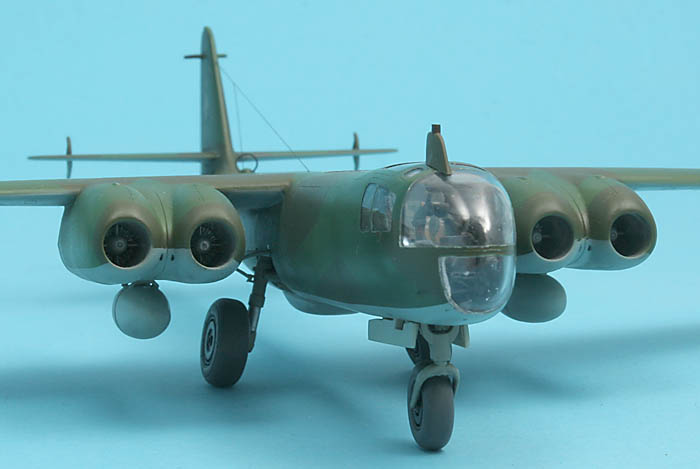
Engine nacelles were rather troublesome. I should have spent more time dry fitting the parts to avoid filling around the exhaust parts.


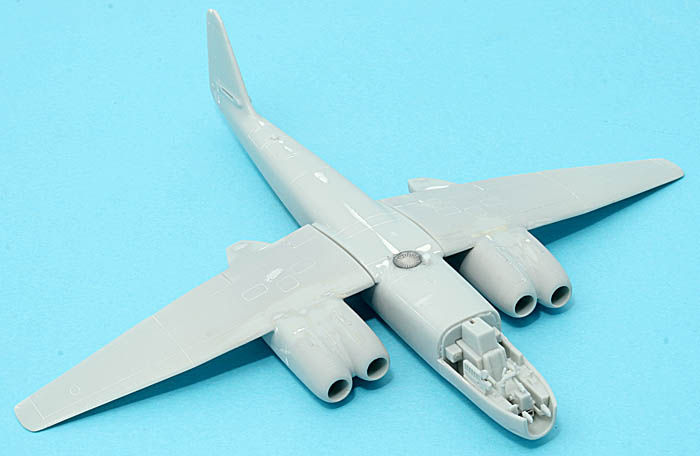
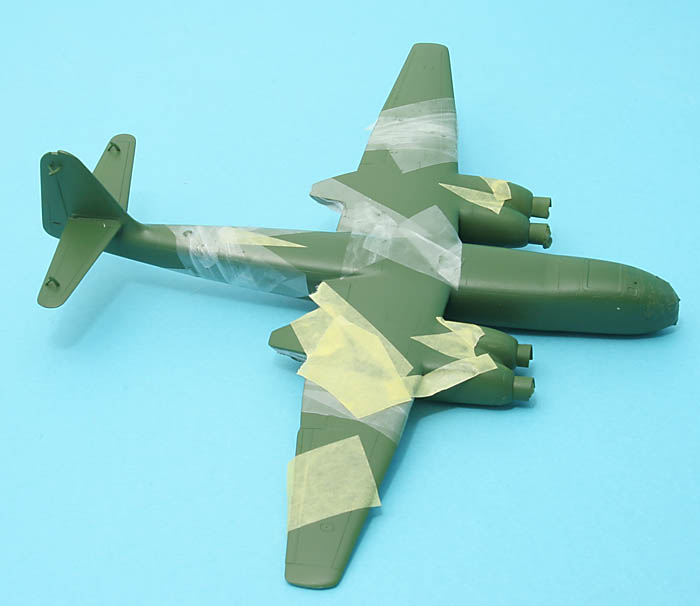
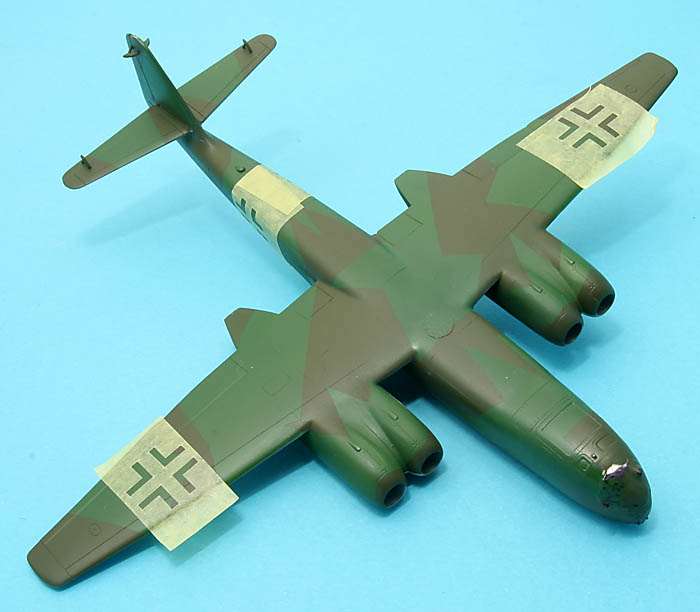
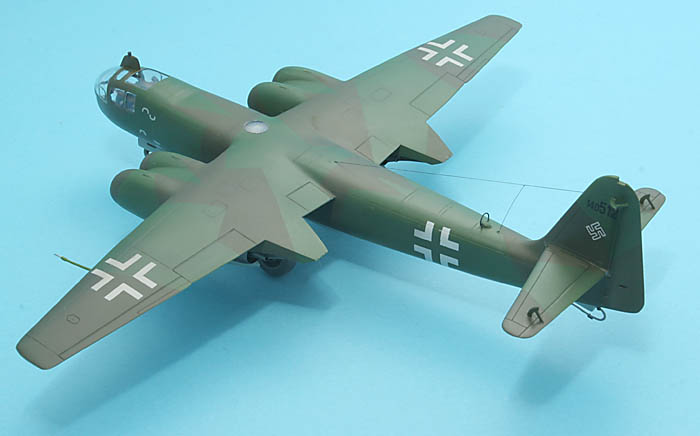
Wings have been temporarily stuck to the fuselage. A bit of filler is needed here and there. The fit isn't bad, filler is mostly due to sink marks. The Naxos antenna is supplied as a photo etch part covered with a clear window.


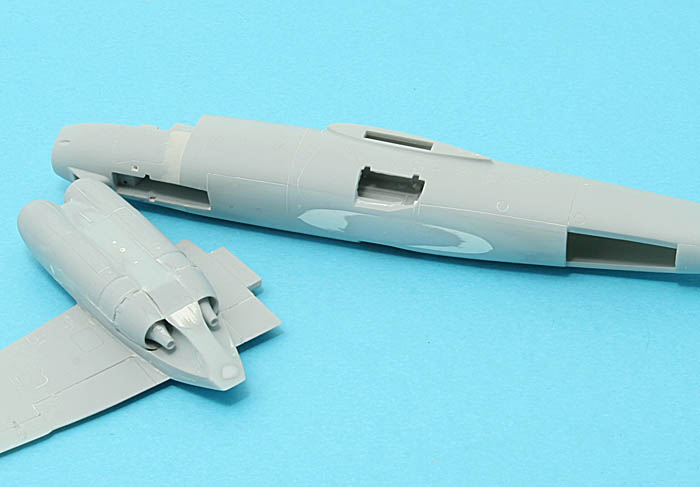
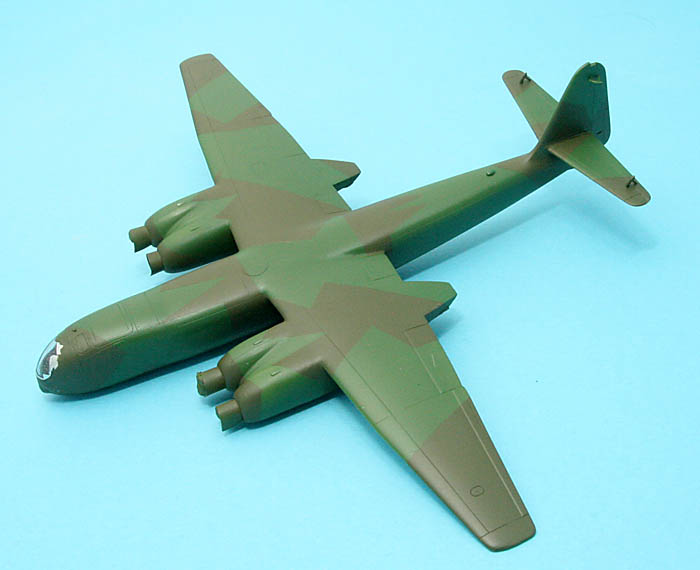
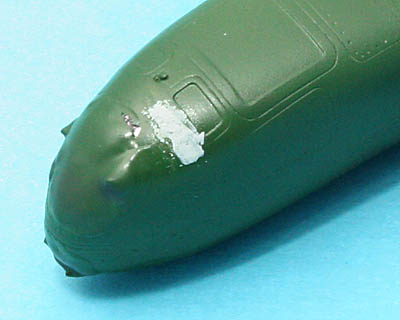
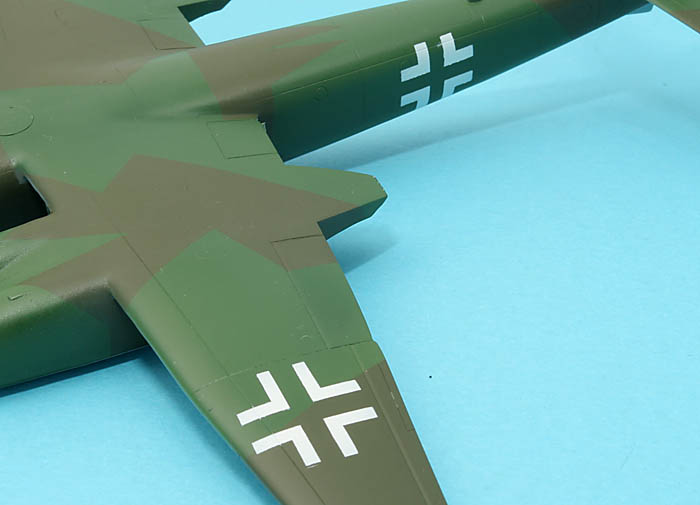
I have filled in a huge recess for some kind of odd-looking explosive device under the fuselage. Dragon lists the kit as a C-3/C-4 but I think it lacks some parts for being a true C-4. One thing I think it had in reality was a belly gun pack and the decals are only for a C-3. There is a magnificent drawing in my Monogram "Monarch"-book on the 234 showing a camouflaged C-4 with nothing more than the standard late-war simplified national markings so I might get away easily with the markings!

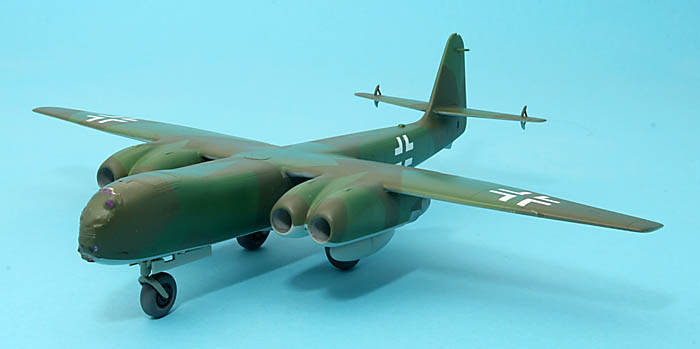
I'll opt for an unarmed aircraft with a set of drop tanks below the engine nacelles. Information is scarce but it is at least a plausible configuration, especially considering that this aircraft (the C-4 variant) was the fastest of the WWII jets meaning defensive armament probably was un-necessary!


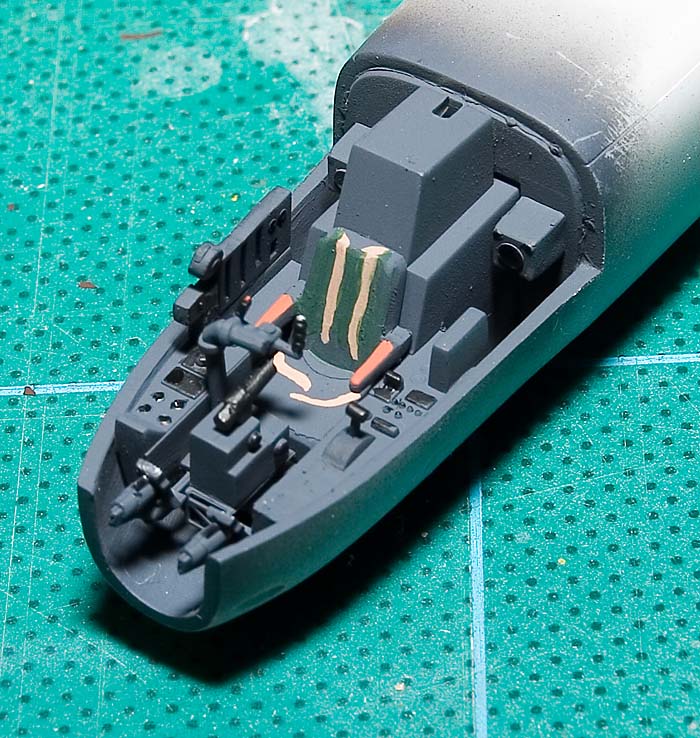
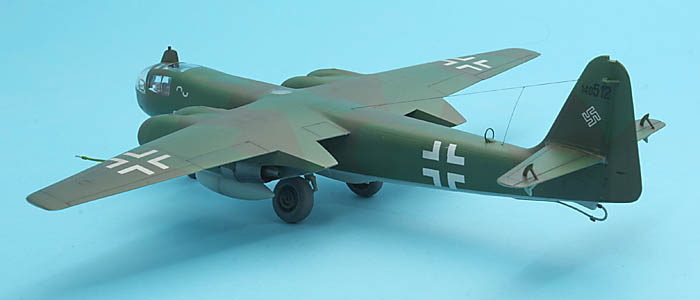
I am not sure that my cockpit work should be seen in this magnification... There is less clear areas than one might think around the cockpit so I might just get away with it :-) !


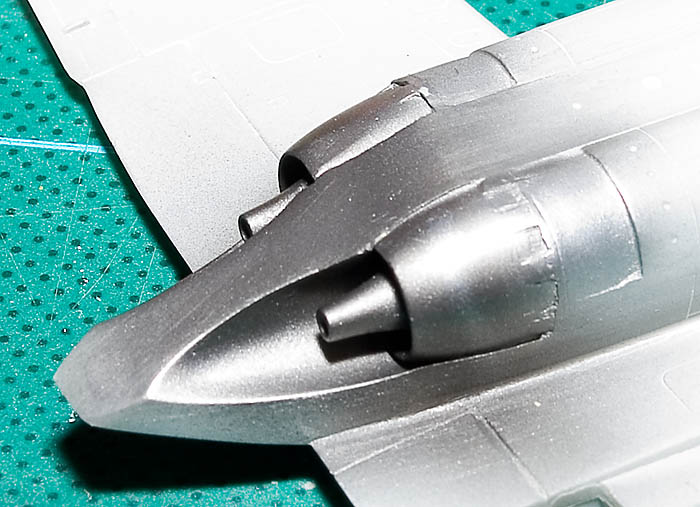
Engine exhaust areas painted using Games Workshop metal colours.


Magnus
magnusf
_VISITCOMMUNITY
Stockholm, Sweden
Joined: May 02, 2006
KitMaker: 1,953 posts
AeroScale: 1,902 posts
Posted: Saturday, January 03, 2009 - 09:16 AM UTC
Project is moving on into the new year!


Wings are on! A generous amount of Milliput is needed to blend in the wing with the fuselage. Tomorrow is sanding day.


I am not sure that I will be able to show the cameras after installation but here is proof that there are two of them included in the kit at least. The front lenses will be added tomorrow.


A bunch of wheels....


Magnus
magnusf
_VISITCOMMUNITY
Stockholm, Sweden
Joined: May 02, 2006
KitMaker: 1,953 posts
AeroScale: 1,902 posts
Posted: Saturday, January 10, 2009 - 09:45 AM UTC
Another small update.

I am a bit obsessed with the "camera must show"-requirement. They haven't completely disappeared yet!


Cameras are really nicely done! I would have preferred simpler cameras and the required belly gun pack instead :-( ...


The same kind of panel as there is on my Canberra. Guess what? This one didn't fit either! You can still see the cameras...

Regarding that gun pack that I can't let go off: I have ordered a Revell Ar-240 Night Fighter to pilfer one from. Or if I feel ambitious; to make a resin casting from!


Magnus
magnusf
_VISITCOMMUNITY
Stockholm, Sweden
Joined: May 02, 2006
KitMaker: 1,953 posts
AeroScale: 1,902 posts
Posted: Wednesday, January 14, 2009 - 08:11 AM UTC
Another update!

I have just passed one of those worrying steps: the cockpit glazing!


Masking applied to the clear parts. The perspex areas were deeply indented, facilitating cutting the foil a lot.


It really looks like some kind of menacing insect! This will be set aside to dry until tomorrow.


Magnus
Emeritus
_VISITCOMMUNITY
Uusimaa, Finland
Joined: March 30, 2004
KitMaker: 2,845 posts
AeroScale: 1,564 posts
Posted: Wednesday, January 14, 2009 - 07:37 PM UTC
Looking good!

Oh man, I got the Ar-234P version in my stash, and have had in mind to eventually build it as a regular-nosed 234 (I don't like the new nose), leaving the belly gunpack unused.
Do I recall incorrectly, but didn't you mention this earlier somewhere, before ordering that Ar-240?
magnusf
_VISITCOMMUNITY
Stockholm, Sweden
Joined: May 02, 2006
KitMaker: 1,953 posts
AeroScale: 1,902 posts
Posted: Wednesday, January 14, 2009 - 07:48 PM UTC

Quoted Text

Looking good!

Oh man, I got the Ar-234P version in my stash, and have had in mind to eventually build it as a regular-nosed 234 (I don't like the new nose), leaving the belly gunpack unused.
Do I recall incorrectly, but didn't you mention this earlier somewhere, before ordering that Ar-240?


The gun pack has been my main worry since I started the kit this summer, I have mentioned it in the campaign thread.

I'll PM you, I am interested in obtaining that gun pack!


Magnus
magnusf
_VISITCOMMUNITY
Stockholm, Sweden
Joined: May 02, 2006
KitMaker: 1,953 posts
AeroScale: 1,902 posts
Posted: Saturday, January 24, 2009 - 12:54 AM UTC
Thanks to Eetu, I now have the gun pack I was looking for. After some thinking, I attached it facing rearwards since this is said to have been an option for the C-4. OK, I admit, I don't have a clue! This will end up as a generic C-4 since I have realised that nobody knows what they really looked like...


Fairing in the cockpit glazing. The separate front part and the rear fuselage are of different cross sections and the glazing doesn't fit that well either. Or rather, it is split in such a way that it has to fit perfectly and when it doesn't it is almost impossible to conceal.


Painting and sanding and painting again...


I removed the bomb sight bulge from below the nose as per the profile in the Monogram book.


Eetu's gun pod installed below the fuselage. For some reason it was cast in clear plastic! Sway braces below the engine pods are there to hold one 300 litre drop tank below each engine pod.


Magnus
Emeritus
_VISITCOMMUNITY
Uusimaa, Finland
Joined: March 30, 2004
KitMaker: 2,845 posts
AeroScale: 1,564 posts
Posted: Saturday, January 24, 2009 - 05:19 AM UTC
Glad to see the part being useful.
Looks nice.

The gun pack was moulded on the same clear sprue as the different canopy of the radar-equipped P-variant. I guess there was no point in making a separate sprue for only two parts making the gun pack.

Interesting to see you installing it backwards. But I guess it makes sense since this a bomber and not meant to engage enemy aircraft. And didn't some of the regular twin-engined Ar-234s have a pari of rear-firing MG 151s aimed with a periscopic sight from the cockpit?
magnusf
_VISITCOMMUNITY
Stockholm, Sweden
Joined: May 02, 2006
KitMaker: 1,953 posts
AeroScale: 1,902 posts
Posted: Sunday, January 25, 2009 - 09:32 AM UTC

Quoted Text


Interesting to see you installing it backwards. But I guess it makes sense since this a bomber and not meant to engage enemy aircraft. And didn't some of the regular twin-engined Ar-234s have a pari of rear-firing MG 151s aimed with a periscopic sight from the cockpit?


There were several ideas for different rear firing weapons. The most sophisticated solution had the guns mounted internally where the cameras are on "my" version. The external pod was a "Rustsatz" bolt-on conversion. The C-version also has two 20mm MG besides the cockpit.

Painting has finally started. I have an Me-262 that I built in 1994 and I like the colours of that one a lot. And guess what? I wrote down the recipe in 1994 and I was able to find it today! I am obviously not a real modeller...


A very green Arado.


I really hate masking.


Magnus
magnusf
_VISITCOMMUNITY
Stockholm, Sweden
Joined: May 02, 2006
KitMaker: 1,953 posts
AeroScale: 1,902 posts
Posted: Tuesday, January 27, 2009 - 07:51 PM UTC

Masking is finally finished!


And the result... When accidentally removing the masking from the front perspex I noticed lots of dust. On the inside... I am thinking about prying it open. The risk is that I might ruin more than I save...


Magnus
FalkeEins
_VISITCOMMUNITY
England - South East, United Kingdom
Joined: March 07, 2005
KitMaker: 868 posts
AeroScale: 690 posts
Posted: Tuesday, January 27, 2009 - 11:28 PM UTC

very nice neat tidy (..and patient!) work Magnus...

interested to know what you've masked the beast with there..aside from the Tamiya tape ..is that clear film? ...had a problem with dust recently on a very glossy finish..ended up painting it outside in the end.
magnusf
_VISITCOMMUNITY
Stockholm, Sweden
Joined: May 02, 2006
KitMaker: 1,953 posts
AeroScale: 1,902 posts
Posted: Wednesday, January 28, 2009 - 01:23 AM UTC
Hi Neil and thanks for the encouragement!

Tape isn't Tamiya even if it looks so: it is Tesa-tape that seems to be exactly the same but for a small fraction of the price. Made for full-scale painters! The clear masking is Parafilm, it's a laboratory product used for sealing test tubes that has its uses in modelling as well. The great advantage is that there is no glue whatsoever on it, it works a bit like cling film but sticks even better.


Magnus
magnusf
_VISITCOMMUNITY
Stockholm, Sweden
Joined: May 02, 2006
KitMaker: 1,953 posts
AeroScale: 1,902 posts
Posted: Thursday, January 29, 2009 - 09:34 PM UTC
The horror story continues! I decided that I had to open up the canopy to get rid of the dust. I managed to break it free but not without a few cracks developing. This one will never be a competition winner...

Putty applied around the edges...


Painting completed and some more putty...

So, what have I learnt from this? A cockpit has to be sealed off, more or less hermetically, in order to avoid dust on the inside...


Magnus
magnusf
_VISITCOMMUNITY
Stockholm, Sweden
Joined: May 02, 2006
KitMaker: 1,953 posts
AeroScale: 1,902 posts
Posted: Wednesday, February 04, 2009 - 09:32 AM UTC
After finally getting the basic camo painted I have started with the markings. Top surfaces and fuselage carries late-war simplified crosses. After scanning the decals and fiddling around a bit in Photoshop, I ended up with black crosses on a white background. These were printed on plain paper and taped to a piece of plastic from a document pouch to act as a template for cutting masks.


Fuselage cross mask in place.


And the wing top crosses...


For the lower surfaces I used the kit supplied decals. They behaved excellently even though they are more than fifteen years old.

Painting tomorrow!


Magnus
magnusf
_VISITCOMMUNITY
Stockholm, Sweden
Joined: May 02, 2006
KitMaker: 1,953 posts
AeroScale: 1,902 posts
Posted: Thursday, February 05, 2009 - 01:45 AM UTC

Crosses painted! They look very white, why I don't know since I use "Pergament White" for them. I'll have to mix in some grey or brown next time.


And now it is standing on its own!

Detail painting and weathering still to do.


Magnus
magnusf
_VISITCOMMUNITY
Stockholm, Sweden
Joined: May 02, 2006
KitMaker: 1,953 posts
AeroScale: 1,902 posts
Posted: Saturday, February 14, 2009 - 03:51 AM UTC
So, time to move this one to the display cabinet. I've found an obscure spot at the rear for it. Hopefully I one day will do a Hercules, the main purpose of the Herc will be to hide the Arado from view...

OK, I am not happy at all with this one but it is finished, and on time!


No individual markings on this one. I suppose there were other, more pressing things, to worry about in April 1945! Note also spurious werke number.


Late war camouflage consisting of two greens, all mixed from Gunze paints.


Nose view. It really could have used a Falcon canopy. And less glue on the clear parts as well...


Canopy is make it or break it on this kit. Mostly break it this time. I could blame it on a bird strike or something but it really is my fault, it cracked when I opened it to get rid of some dust on the inside.

OK, as you probably have realised by now: I could have been happier with this one but some consolation is that the flaws aren't that easy to spot in reality.


Magnus
B24Liberator
_VISITCOMMUNITY
Minnesota, United States
Joined: November 07, 2008
KitMaker: 134 posts
AeroScale: 113 posts
Posted: Monday, February 16, 2009 - 12:29 AM UTC
Magnus --

Knowing what a 'beast' some of those DML kits are like ( One of my club members once said that DML stood for Don't Match Lines ) you did a great job making it look good!!

Skol!
magnusf
_VISITCOMMUNITY
Stockholm, Sweden
Joined: May 02, 2006
KitMaker: 1,953 posts
AeroScale: 1,902 posts
Posted: Monday, February 16, 2009 - 02:07 AM UTC

Quoted Text

Magnus --

Knowing what a 'beast' some of those DML kits are like ( One of my club members once said that DML stood for Don't Match Lines ) you did a great job making it look good!!

Skol!


Thanks Johannes, I feel a lot better now !

Skål to you too!


Magnus
alphalimafoxtrot64
_VISITCOMMUNITY
Virginia, United States
Joined: September 13, 2008
KitMaker: 57 posts
AeroScale: 29 posts
Posted: Monday, July 27, 2009 - 03:53 AM UTC
This build really looks great, Magnus - even with the canopy troubles! I am about to begin a "retro-build" on a 1:72 Frog version of the Arado and your stunning build gives me some confidence. I am an "old-school" plastic modeler recently returned to small scale aircraft & armor building.

Your Arado - the 4-engined, C-variant, has to be one of my favorite examples of the early military jets - very ahead of its time in appearance.

Great model!

Adam Lee
magnusf
_VISITCOMMUNITY
Stockholm, Sweden
Joined: May 02, 2006
KitMaker: 1,953 posts
AeroScale: 1,902 posts
Posted: Wednesday, July 29, 2009 - 07:58 AM UTC
Adam: Thanks for the kind comments! I am not sure that the Frog kit is such a bad choice despite its age, the way the Dragon kit is split to make way for the C-variants means trouble whatever version you are doing from it!


Magnus
alphalimafoxtrot64
_VISITCOMMUNITY
Virginia, United States
Joined: September 13, 2008
KitMaker: 57 posts
AeroScale: 29 posts
Posted: Thursday, July 30, 2009 - 12:35 AM UTC

Quoted Text

Adam: Thanks for the kind comments! I am not sure that the Frog kit is such a bad choice despite its age, the way the Dragon kit is split to make way for the C-variants means trouble whatever version you are doing from it!


Magnus


Honestly, the job you completed was great - but I do understand the feeling about getting something not "quite perfect" after exerting lots of effort - which was always MY excuse for halting a model in mid-build and watching it become a "dust magnet" for a few years!

Magnus, I was wondering if you had collected any reference photos or weblinks for your Ar234 project that you'd be willing to share, either on or off-line. I'd appreciate more imagery to work with for ideas and details. I am seriously considering mocking my old Frog 234 as a "Luftwaffe '46" C-variant with extra bits like a Schraege Musik in the upper fuselage, a Rustsaetze installation of belly guns, twin 20mm rear-firing guns in better detail, maybe even turn it into some sort of wicked "Nachtjaeger" variant with Lichtenstein radar array - who knows!

I'm really thinking about doing a night fighter/bomber paint scheme as well - love those patterns. Which is why it would fit better as a Luft '46.....a completely fictional scheme!

Adam
 _GOTOTOP