_GOTOBOTTOM
Rotary Wing
Discuss helicopters and other rotary wing aircraft from any era.
Kiowa Warrior
Mario_HR
_VISITCOMMUNITY
Croatia Hrvatska
Joined: June 28, 2006
KitMaker: 376 posts
AeroScale: 21 posts
Posted: Thursday, January 08, 2009 - 12:51 AM UTC
I would like to show you my current WIP. It's the same build that i posted on ARC but figured i could show it here as well .Hope no one minds. Seeing as i got everything i need, and then some I' would like to show you my WIP.

First thing's first. I would have never been able to start this without mr.Floyd Werner's help. He provided the detail sets as well as getting me the walkaround book i needed, and if anything, he is a true kind person.

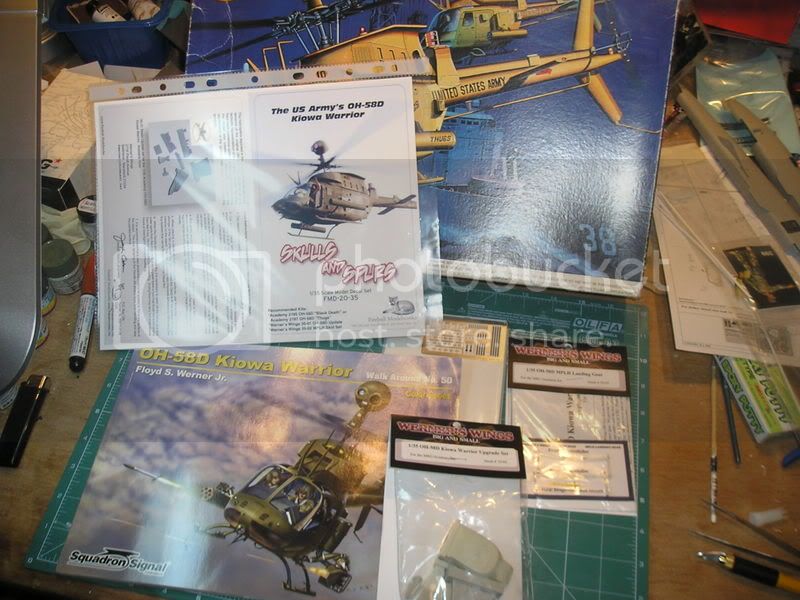
This is what I got so far:

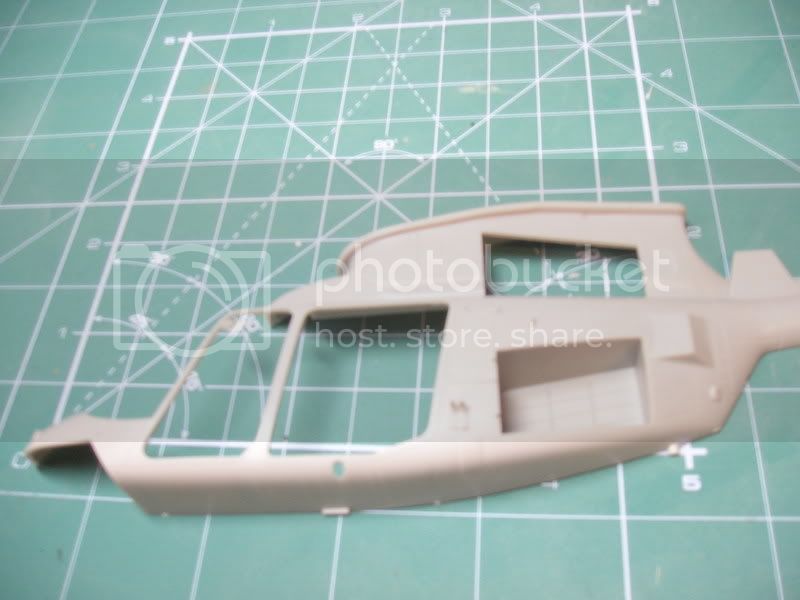
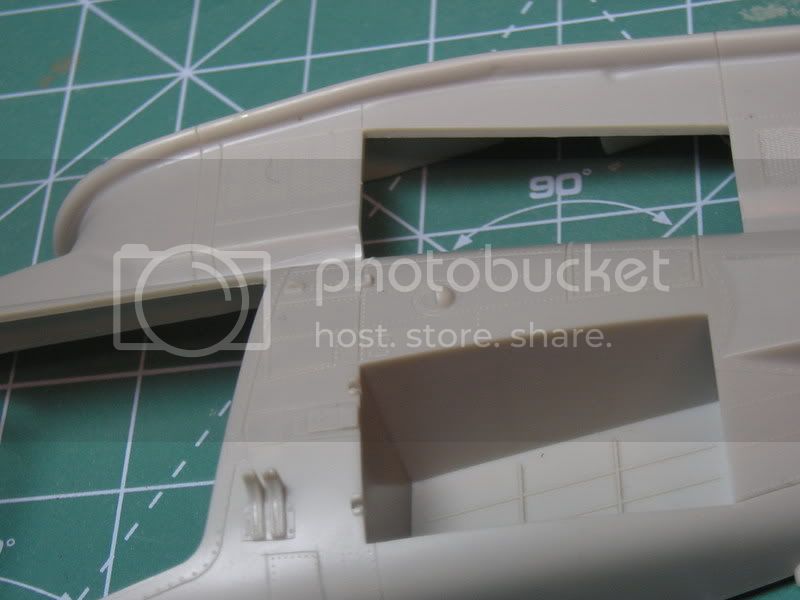
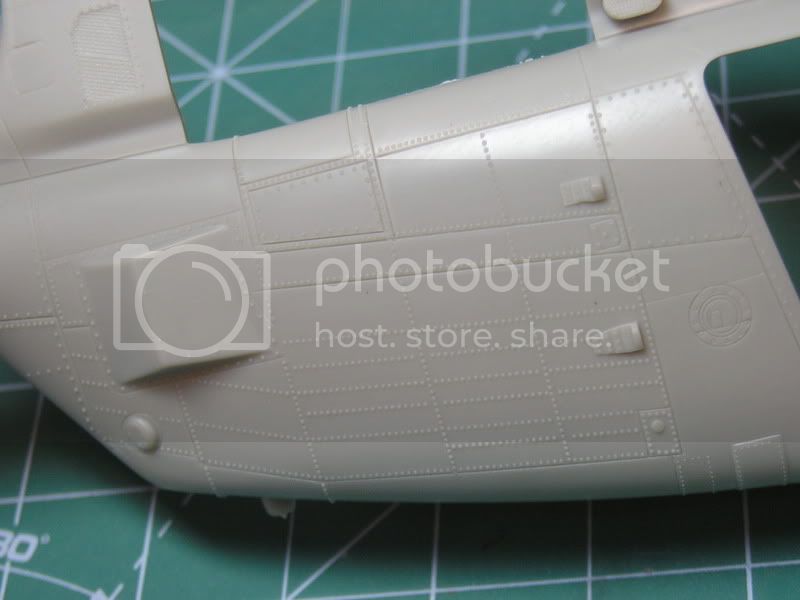
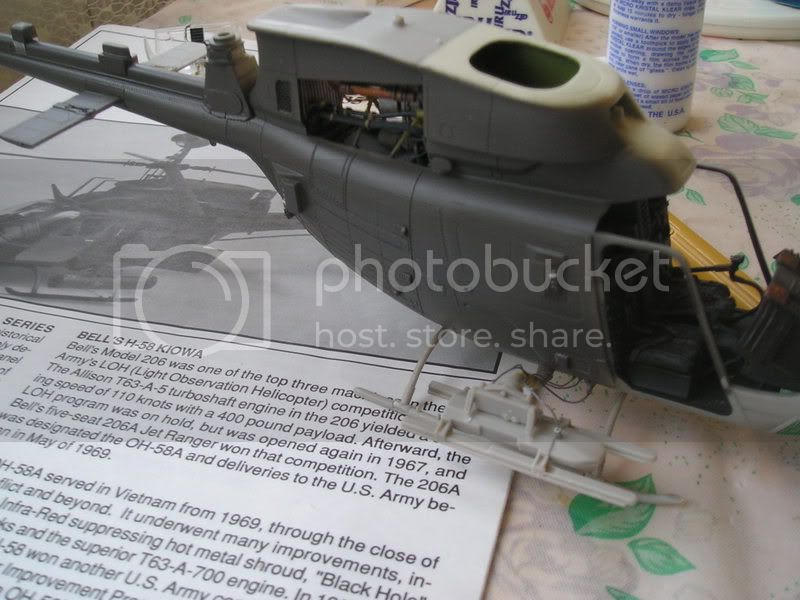
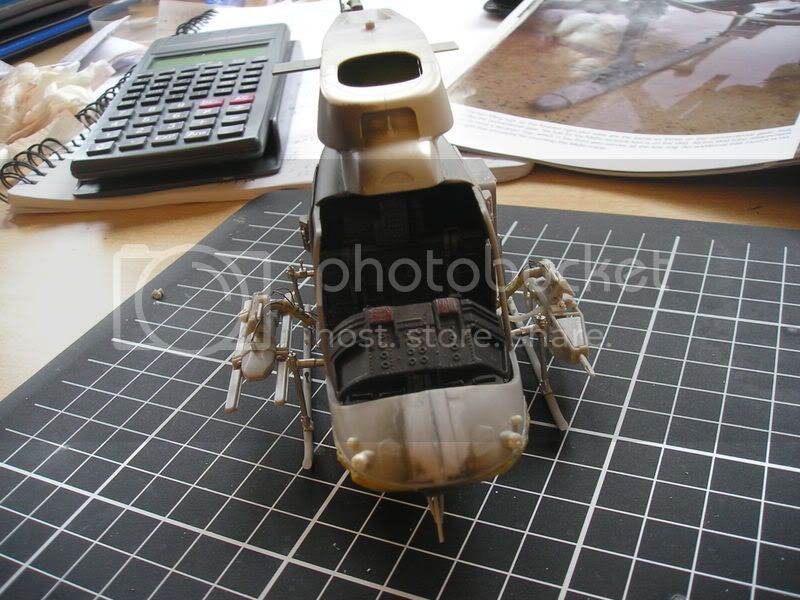
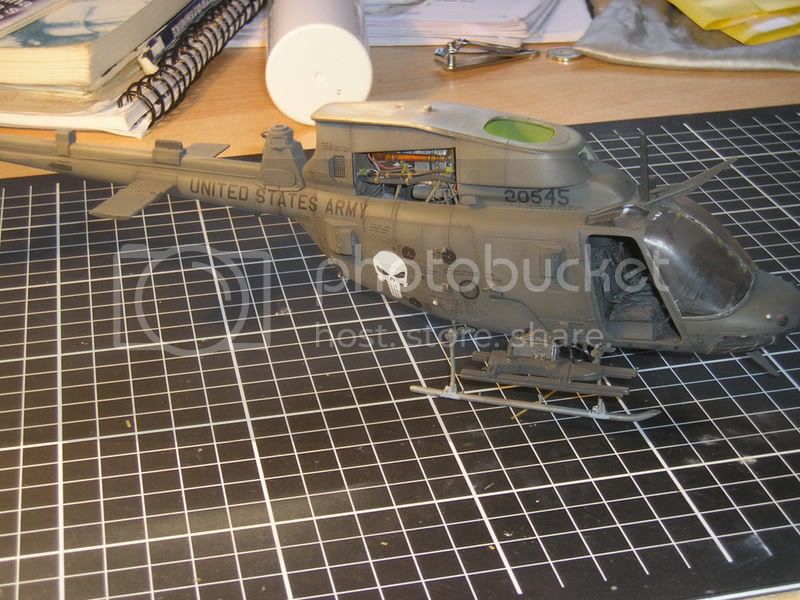
- MRC OH-58D Kiowa Warrior kit (Thugs boxing)
- Werner Wings Resin update set
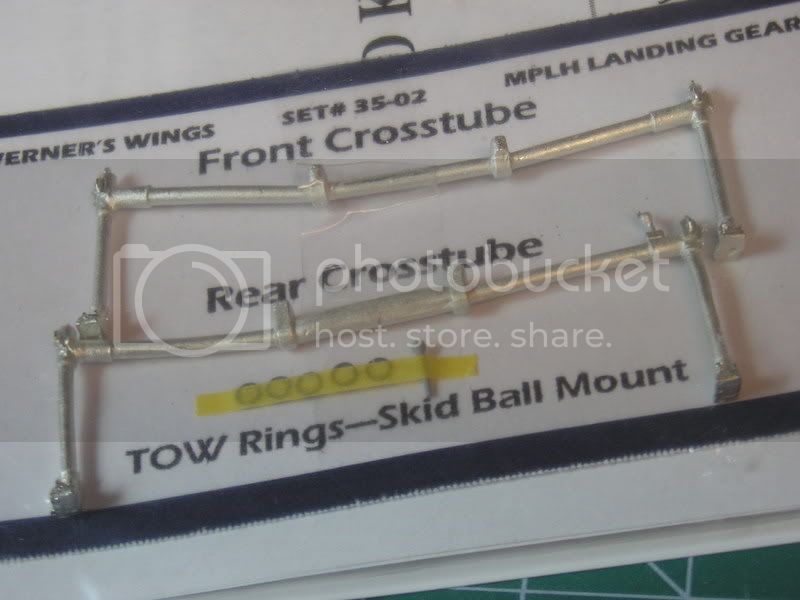
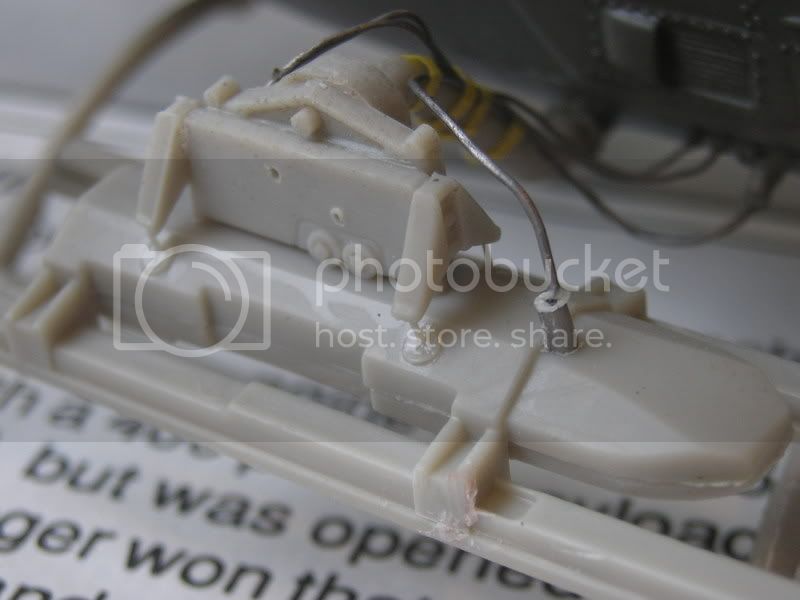
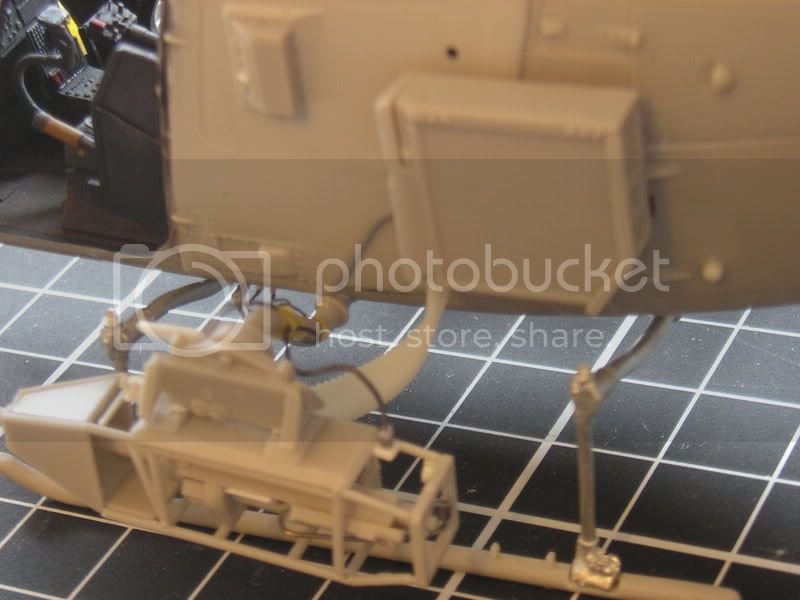
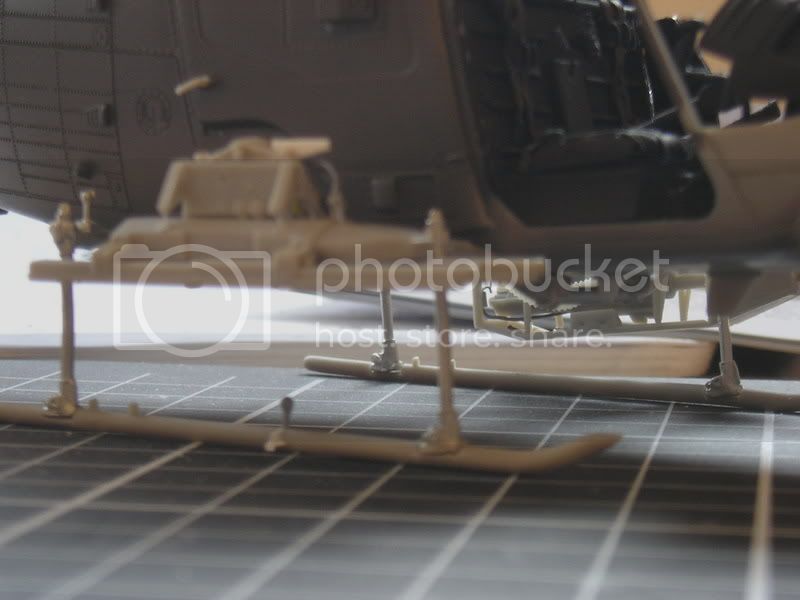
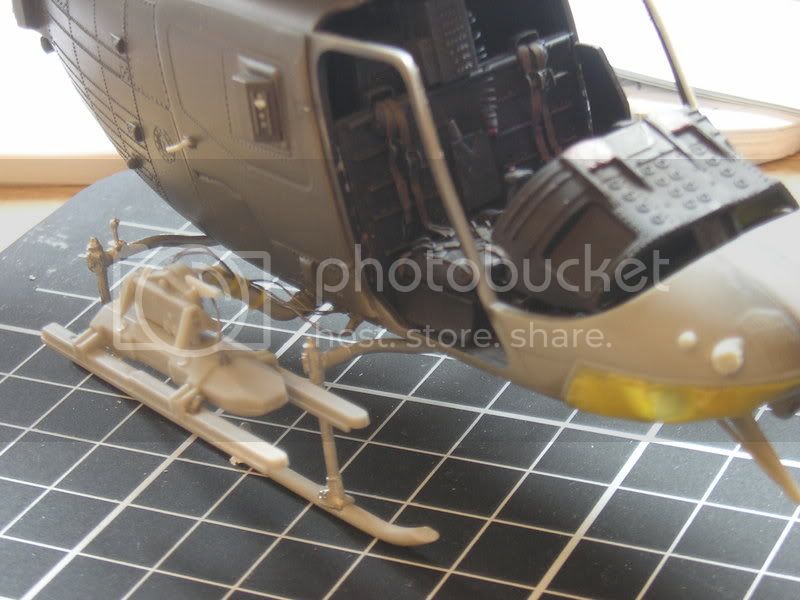
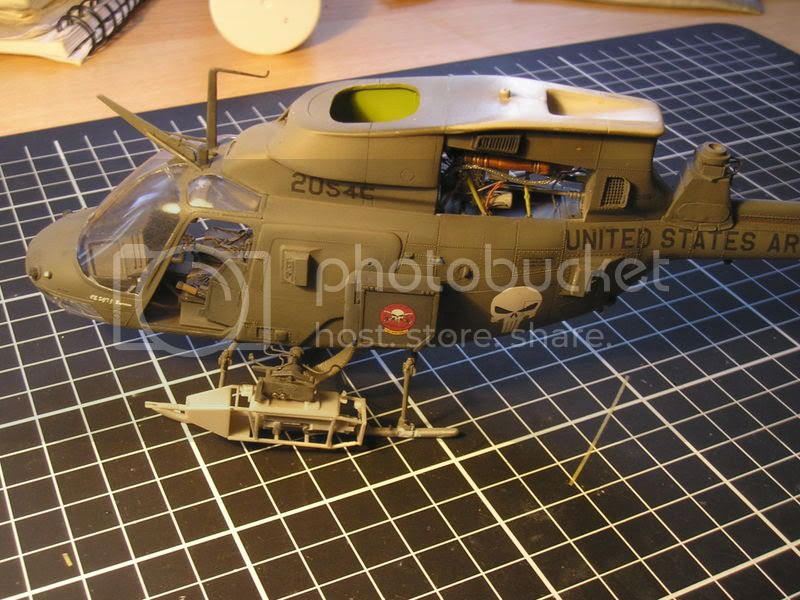
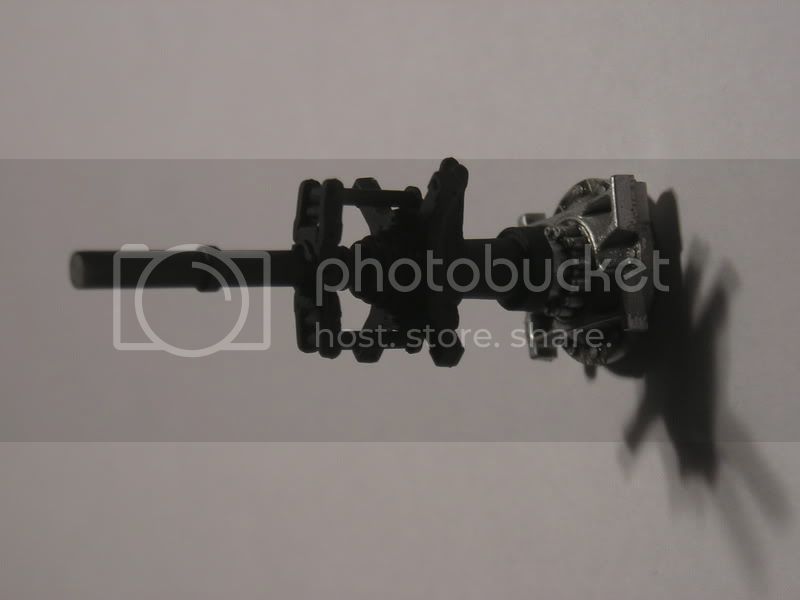
- Werner Wings MPLH landing gear
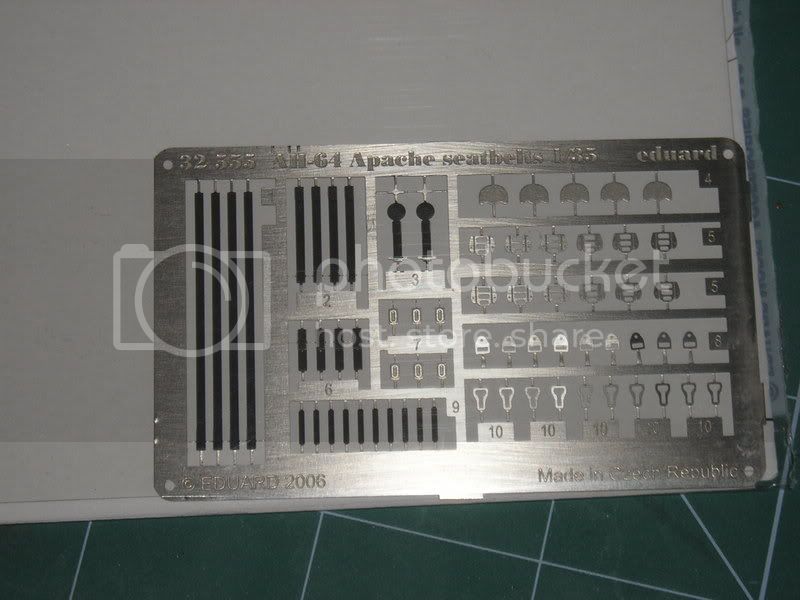
- Eduard 5-point seatbelts (they do not come specifically for the Kiowa, but most modern helo seatbelts look pretty much the same to me so these ones will do)
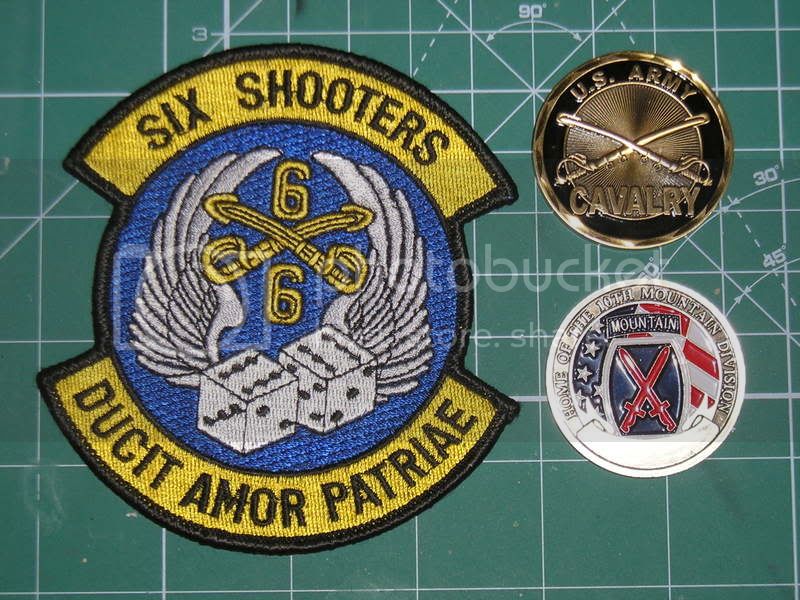
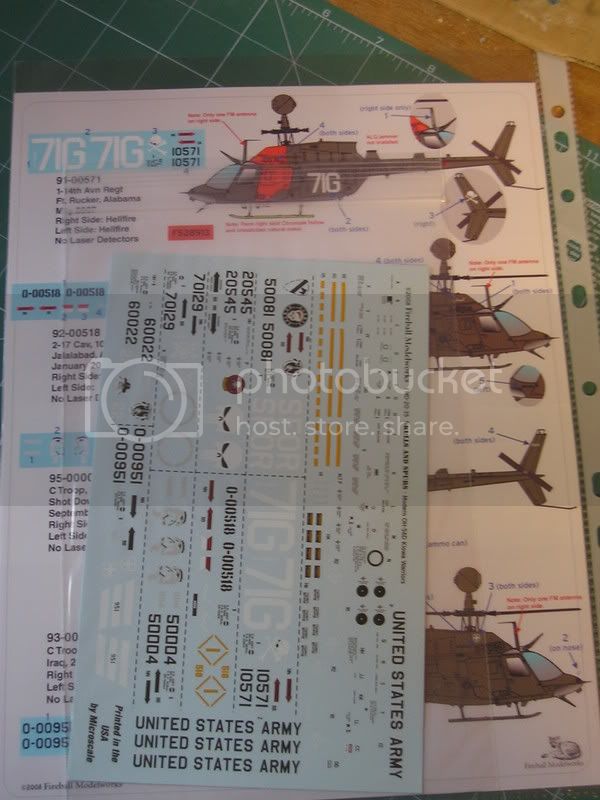
- Fireball decals (amazing set of decals for 8 different versions)

So without much of excess talk:
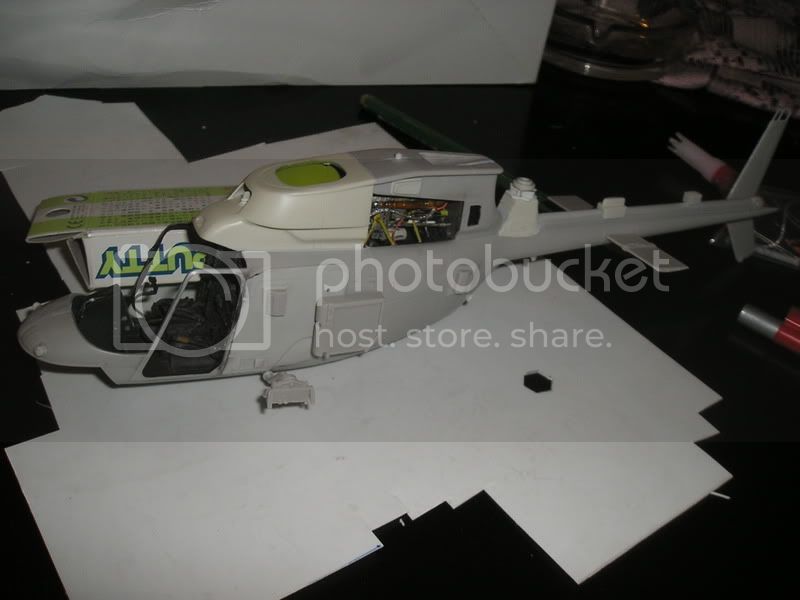
The whole lot:


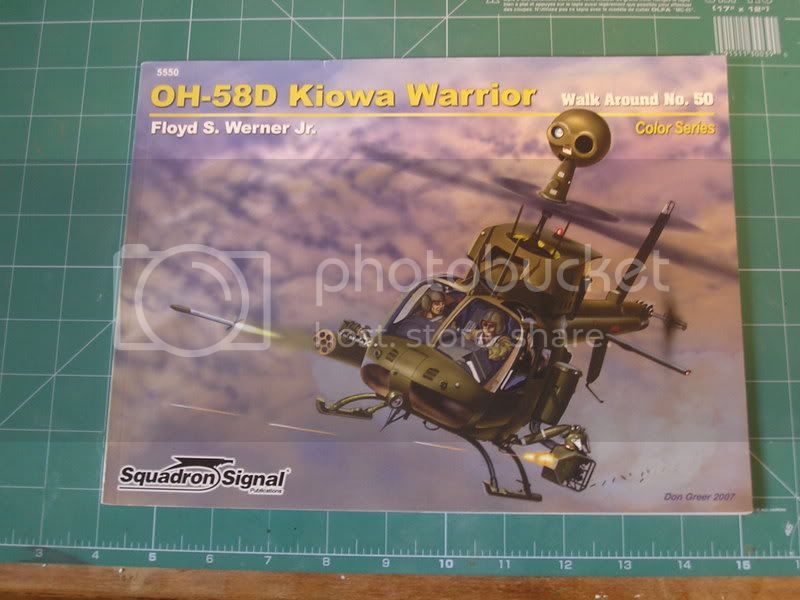
The best reference out there... I even had the honor of mr.Werner signing it for me


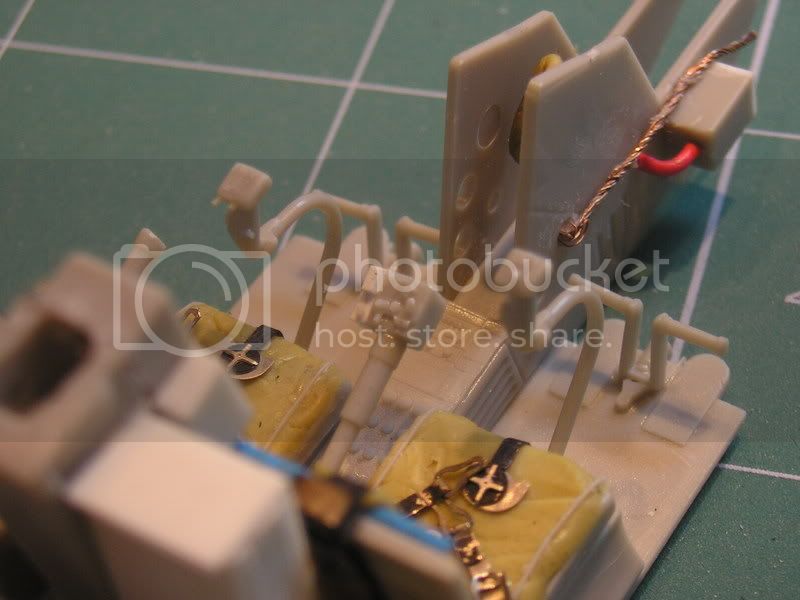
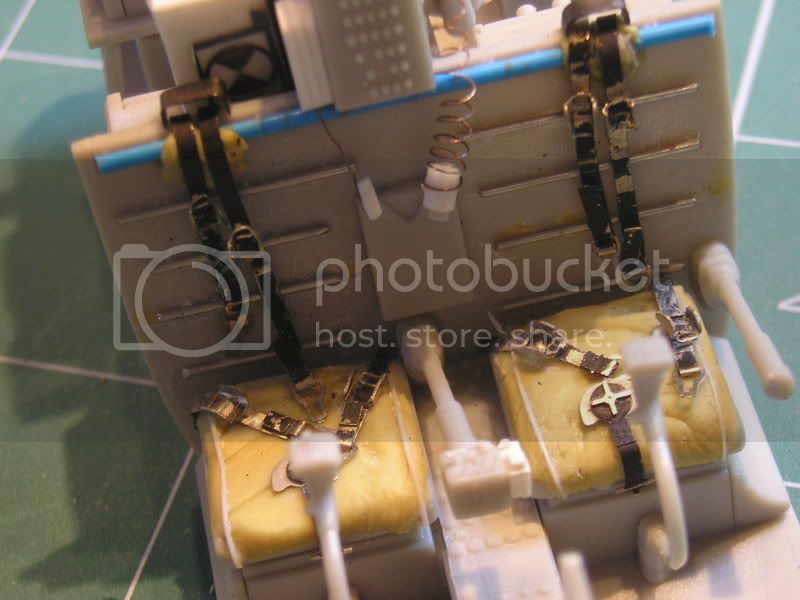
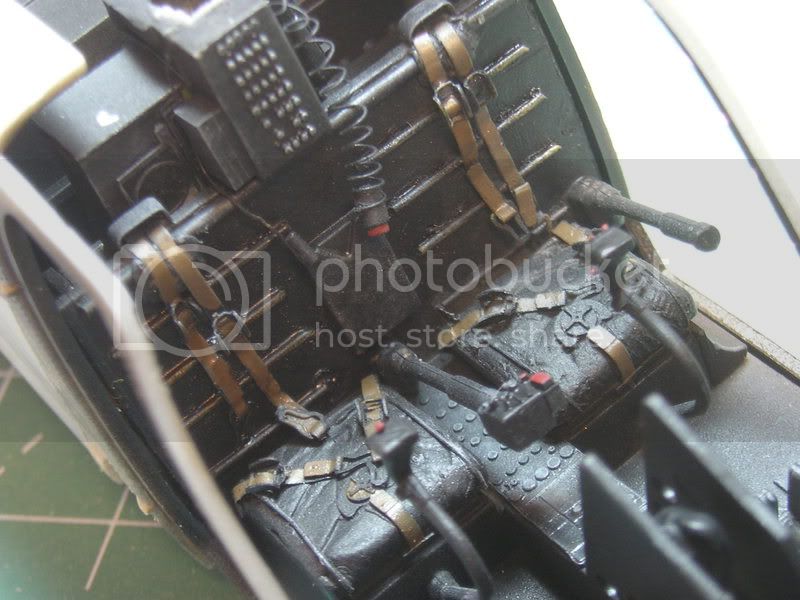
The seatbelts. They look like they will fit the bill


The amazing decal sheet... so many things to build, so i+ll definitely get me more of these


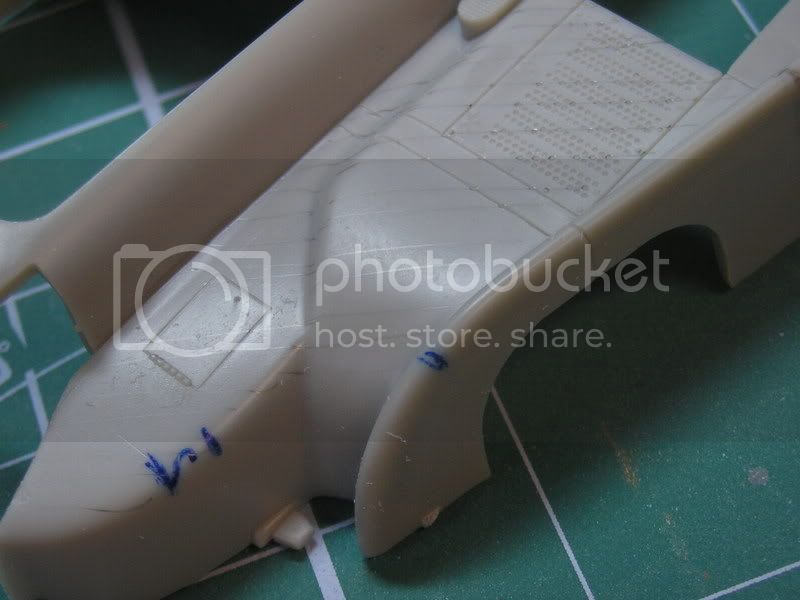
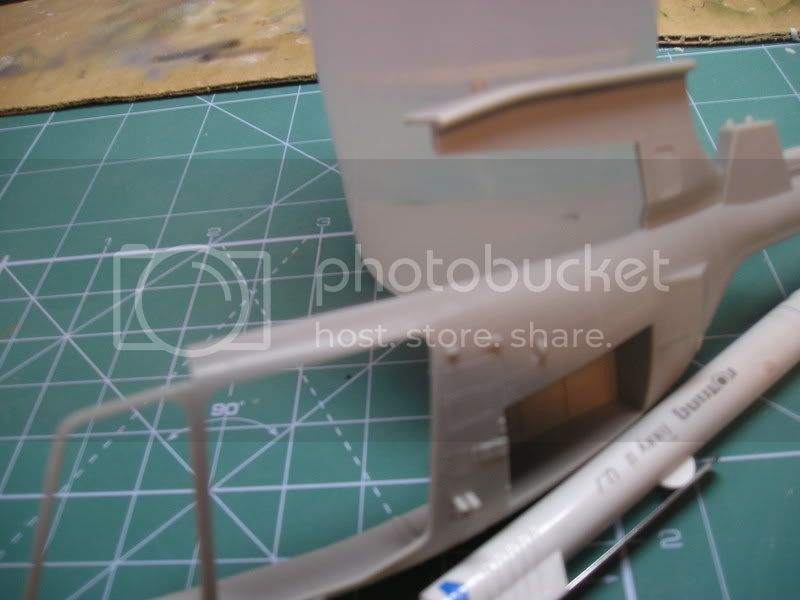
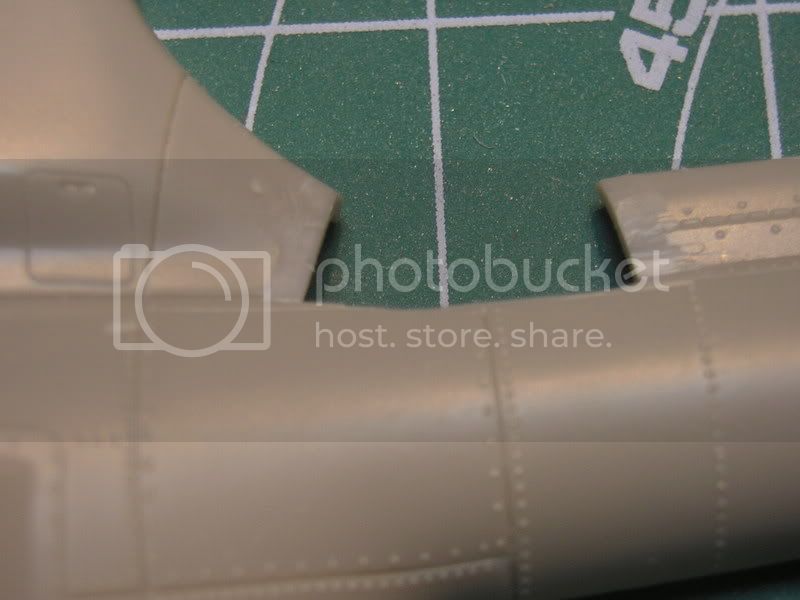
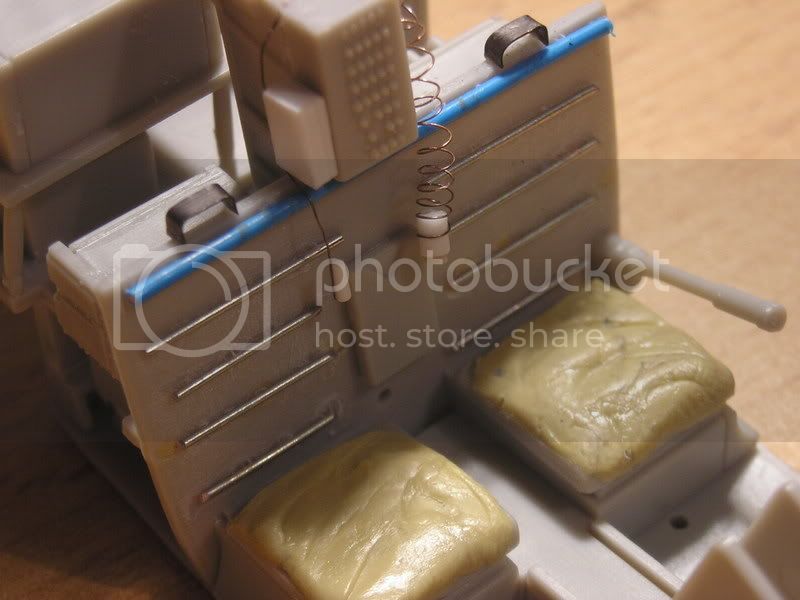
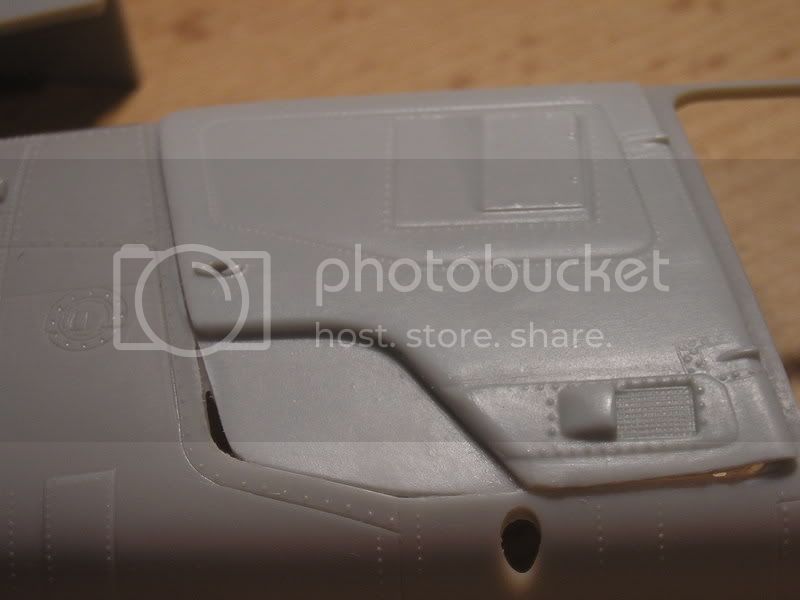
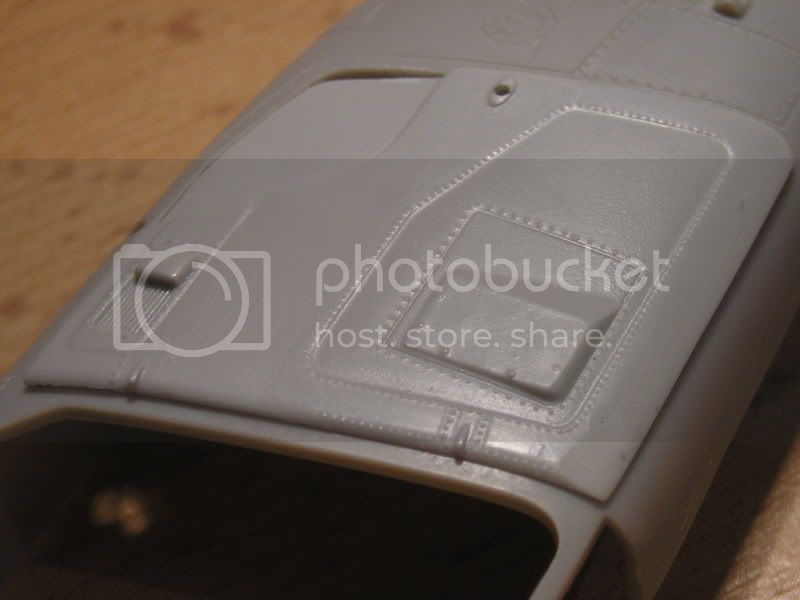
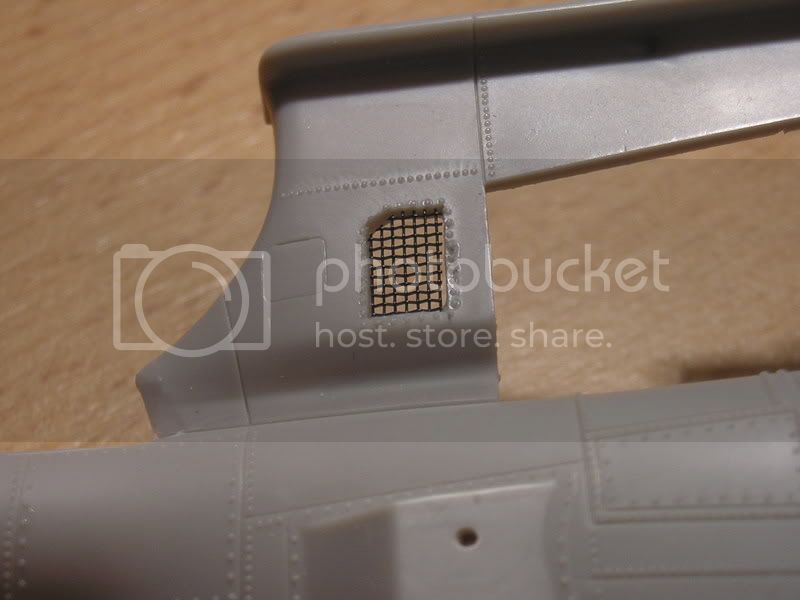
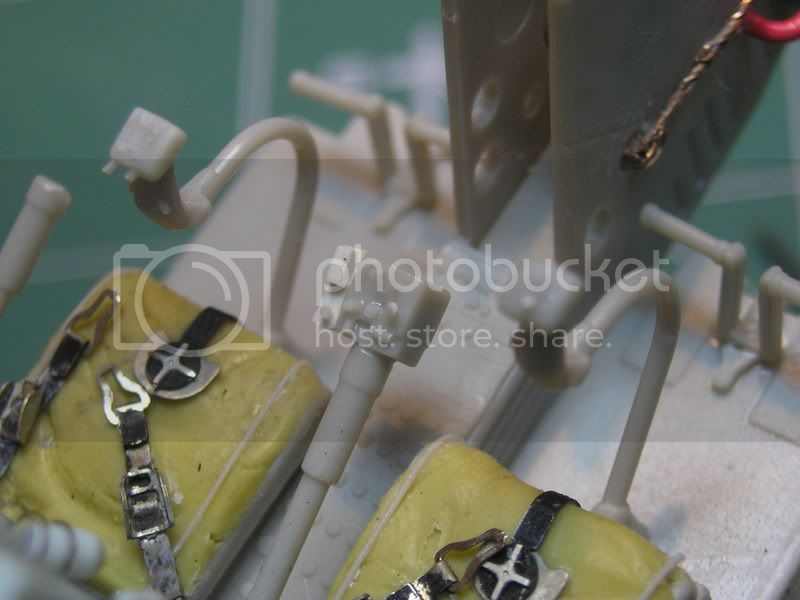
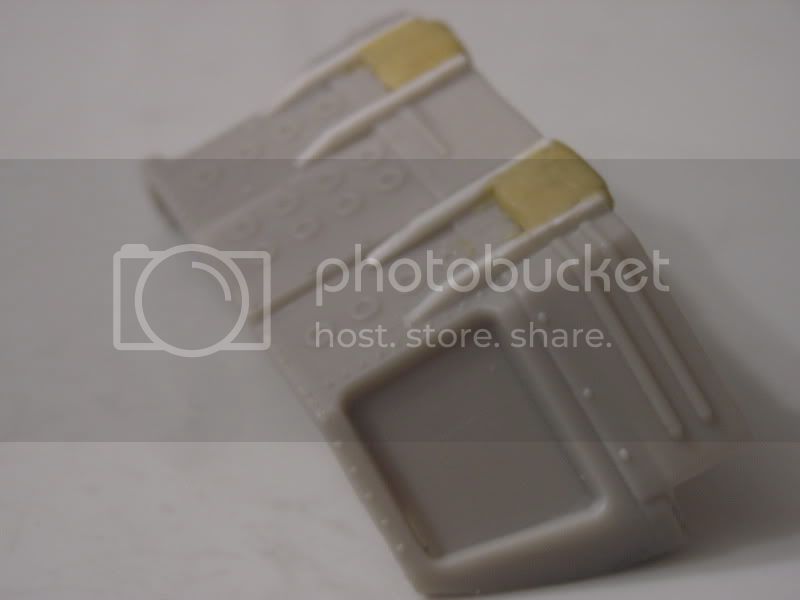
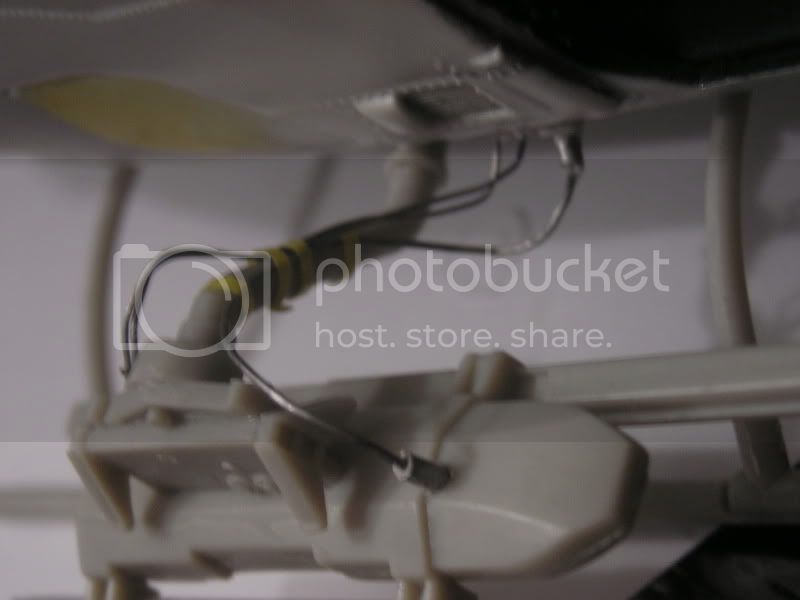
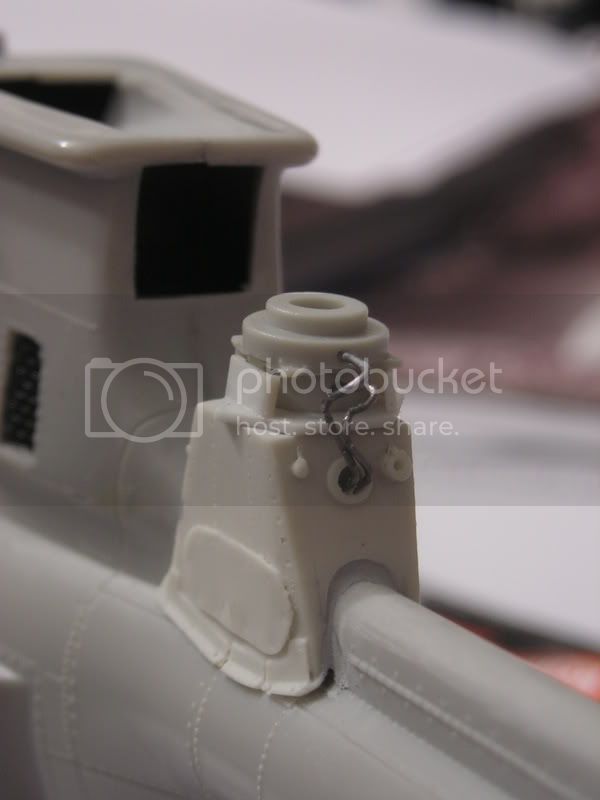
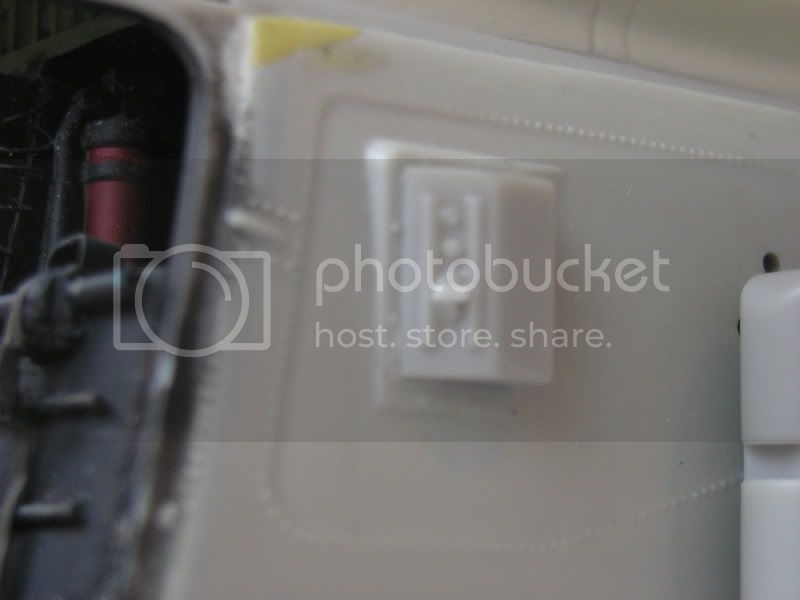
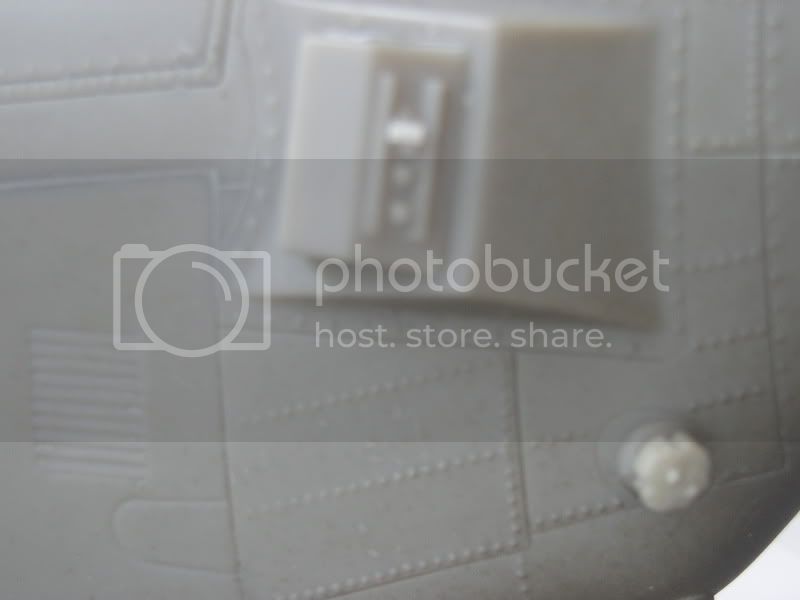
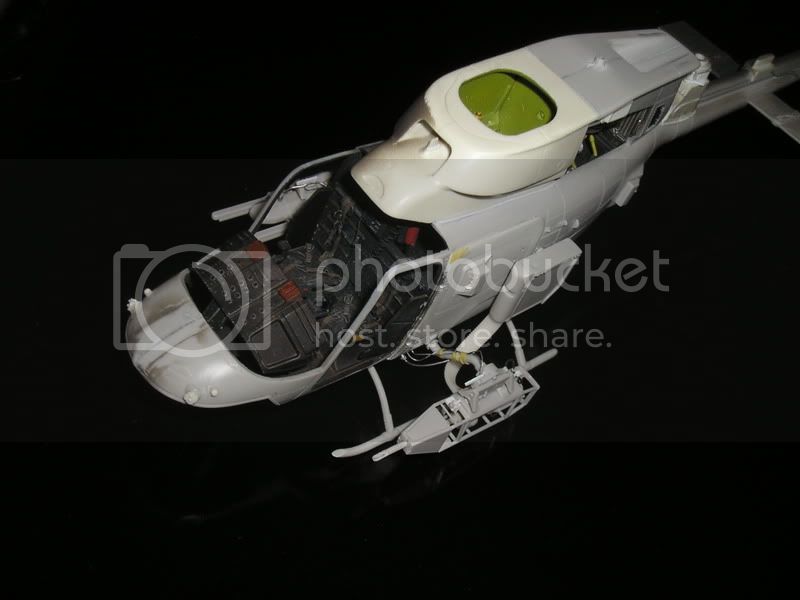
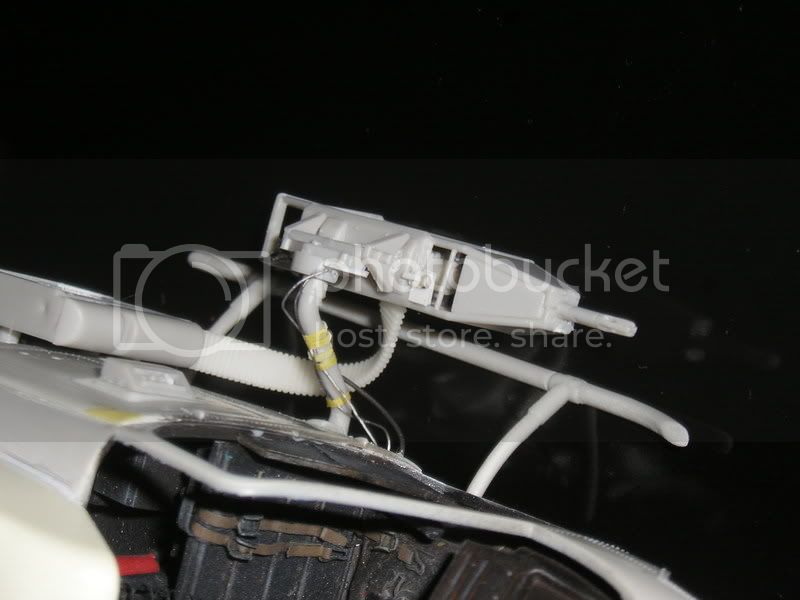
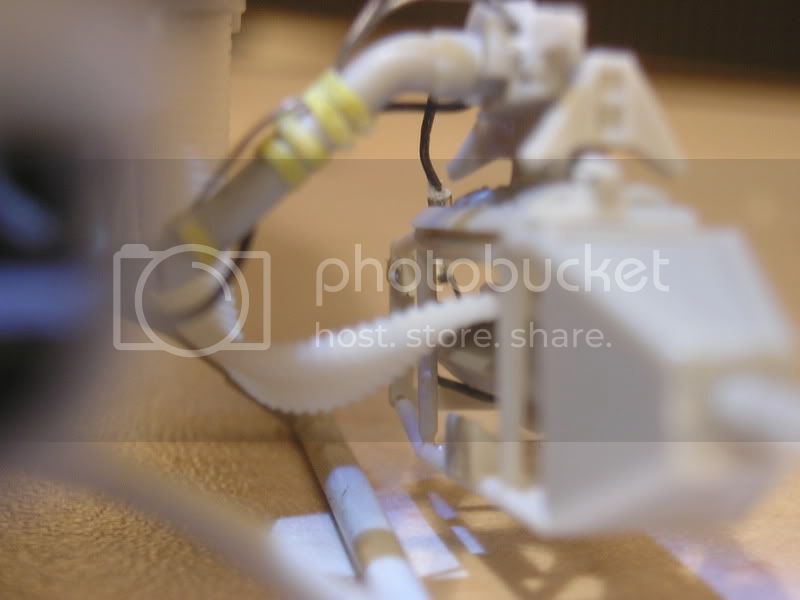
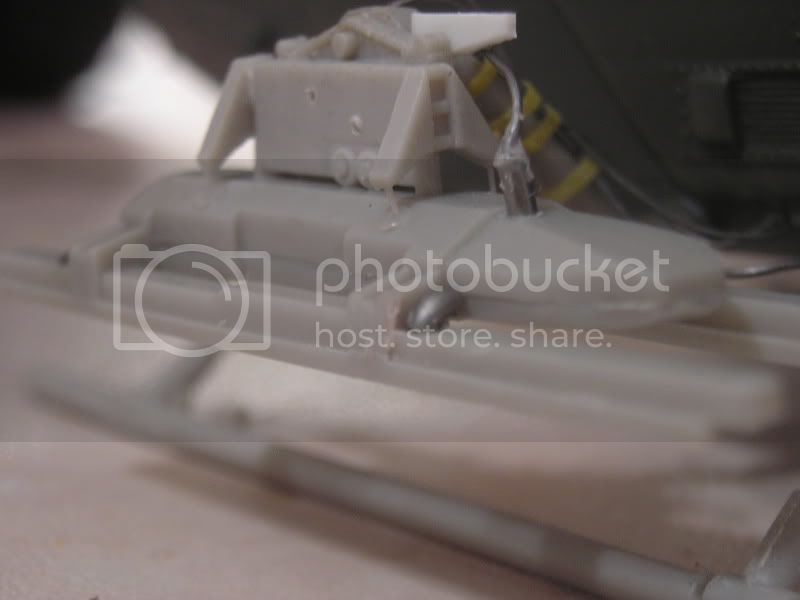
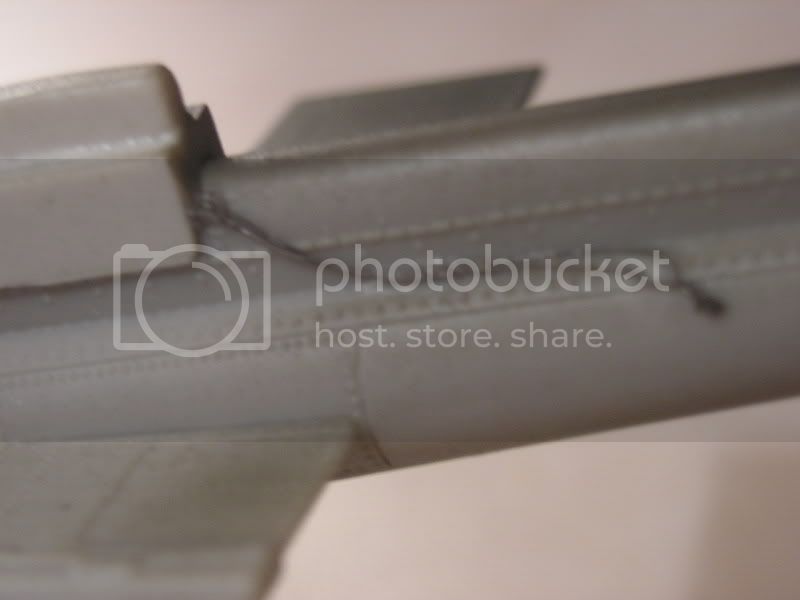
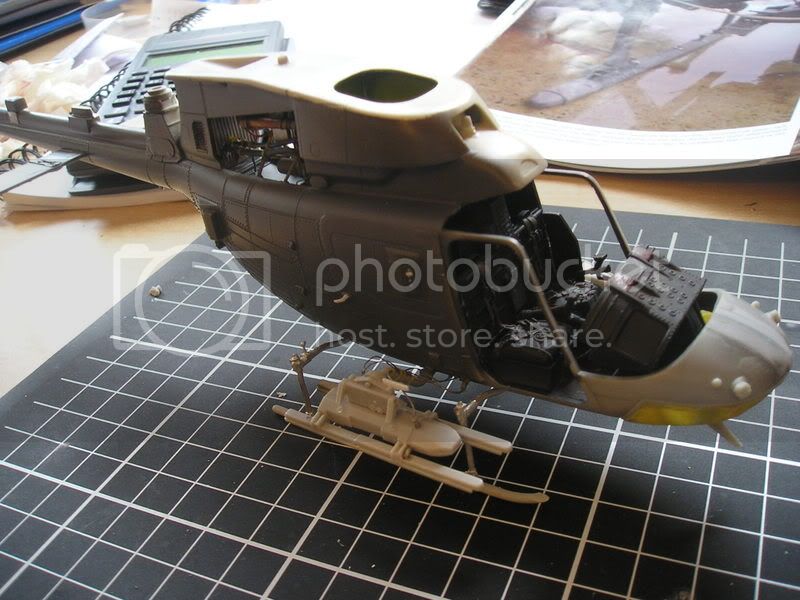
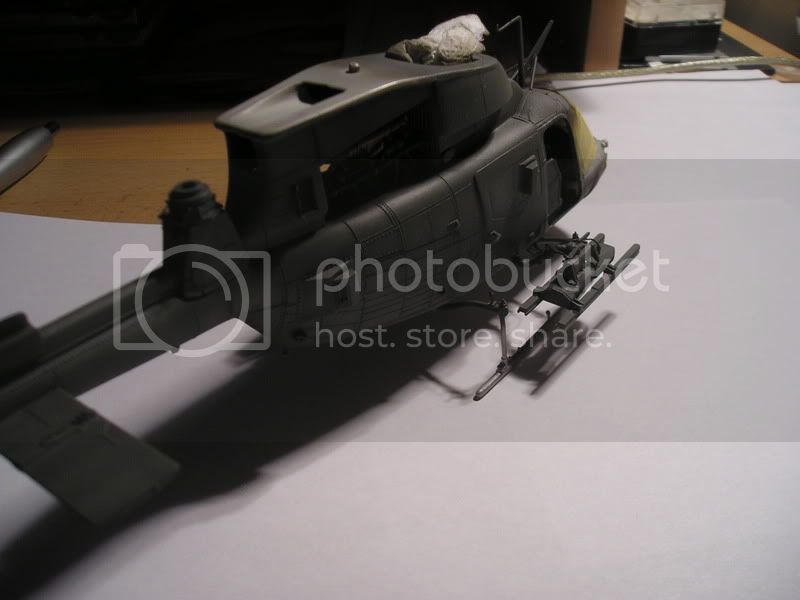
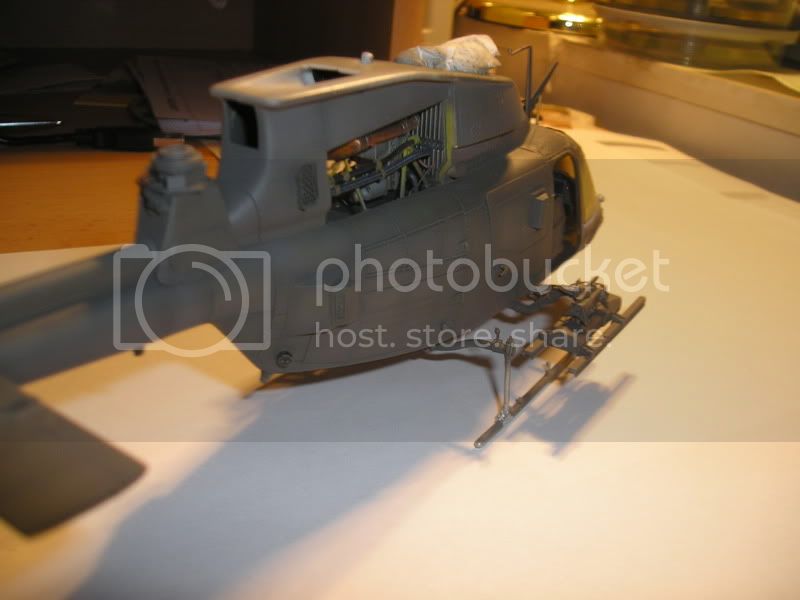
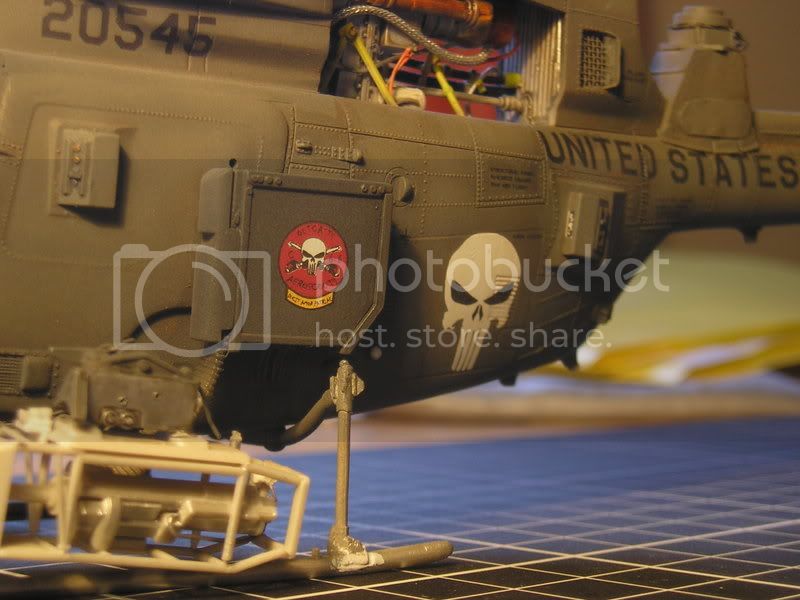
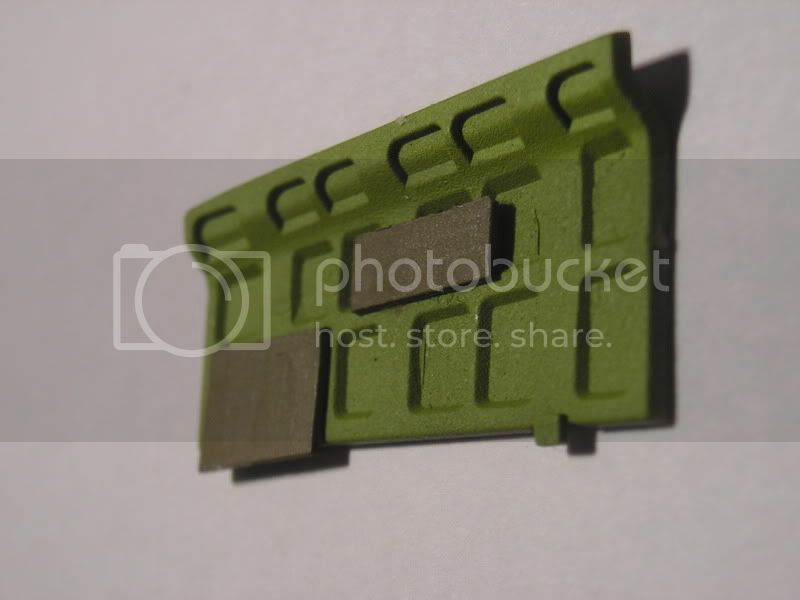
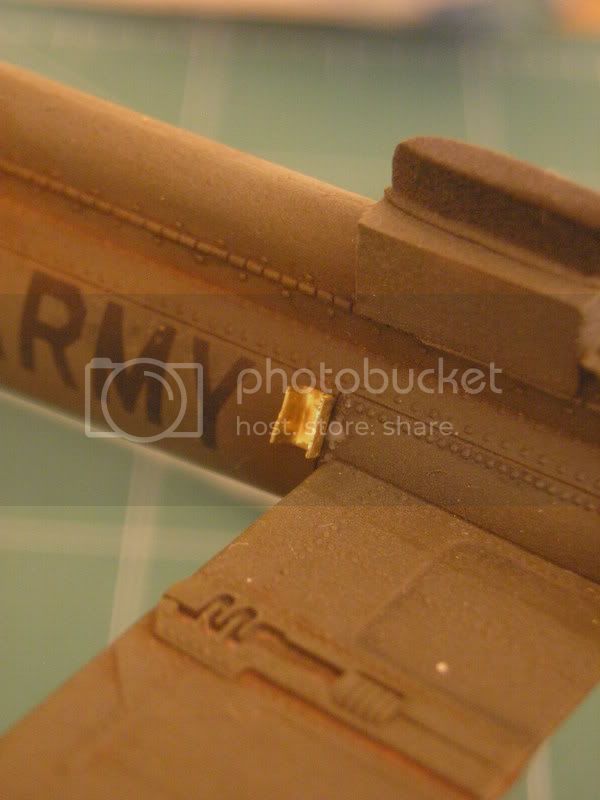
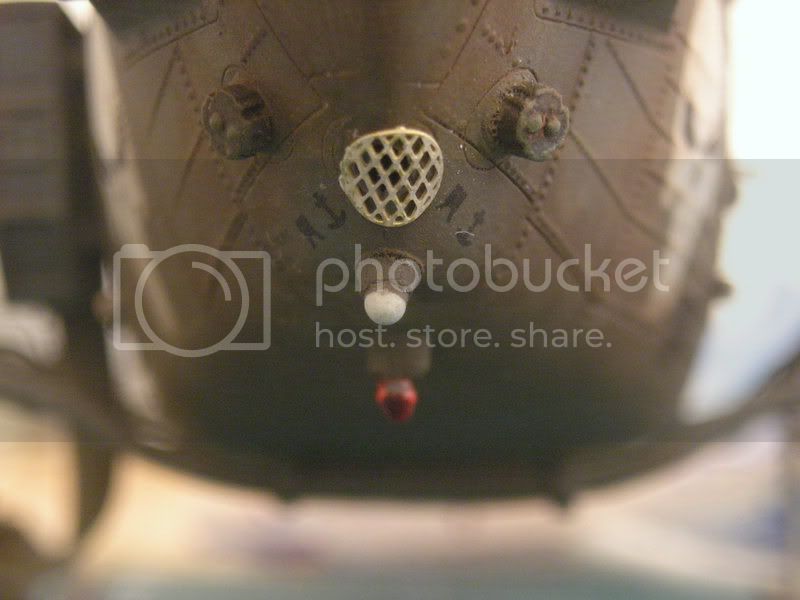
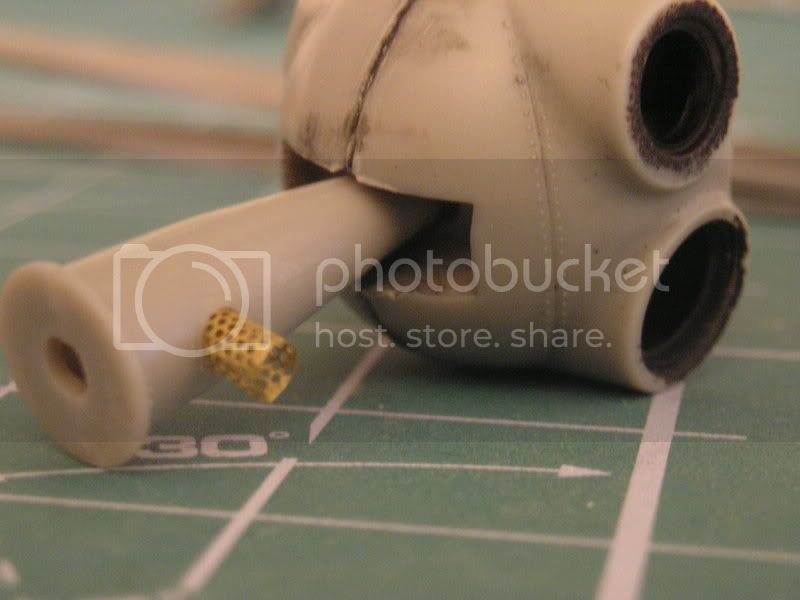
The resin update set needs a few words for itself. The resin is beautifully casted without any bubbles, errors of any kind, and it's not even greasy so no need for cleanup. They are a drop-in replacement with the biggest piece correcting the outdated doghouse on the model. Great set and a must-have if you+re building a newer Kiowa. The instructions are well made and if you do what is told, there is absolutely no problems in getting the parts to fit


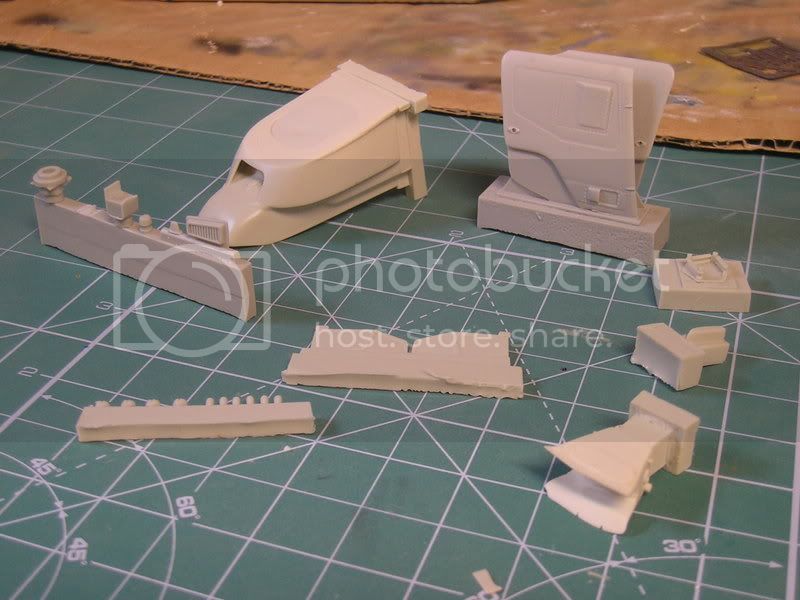
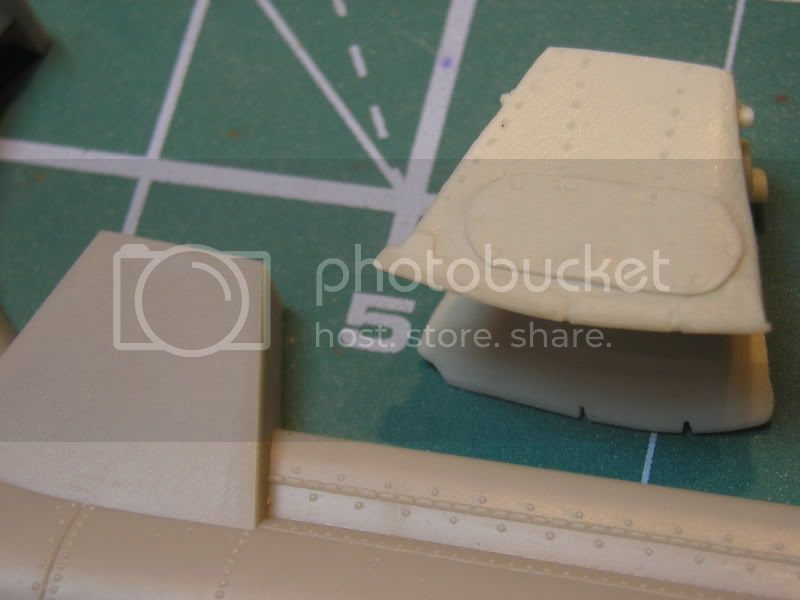
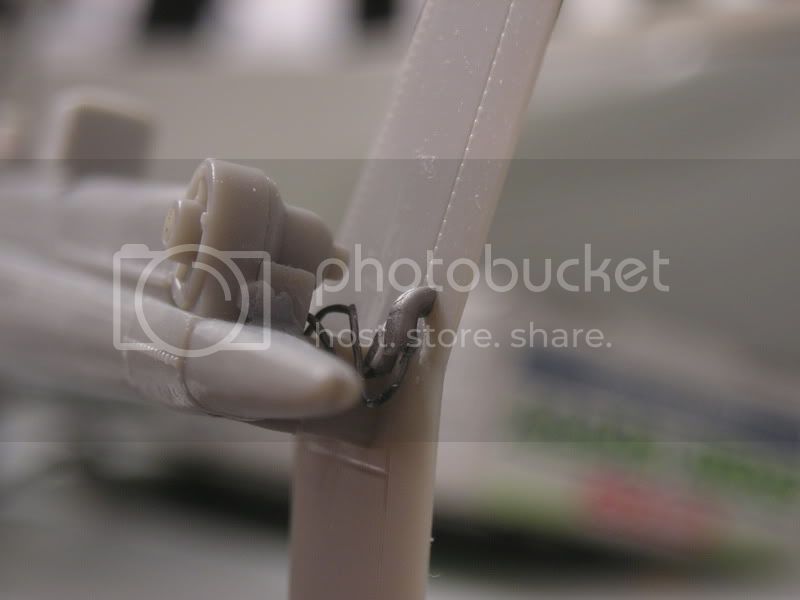
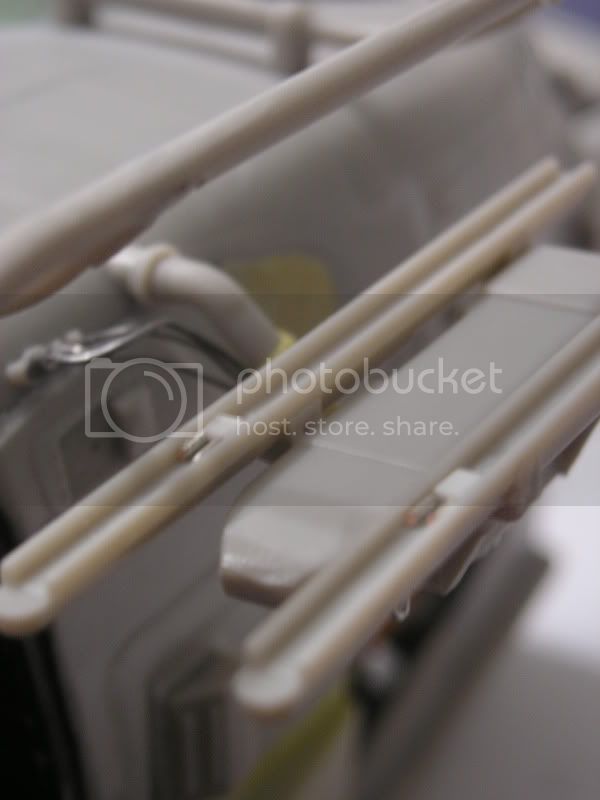
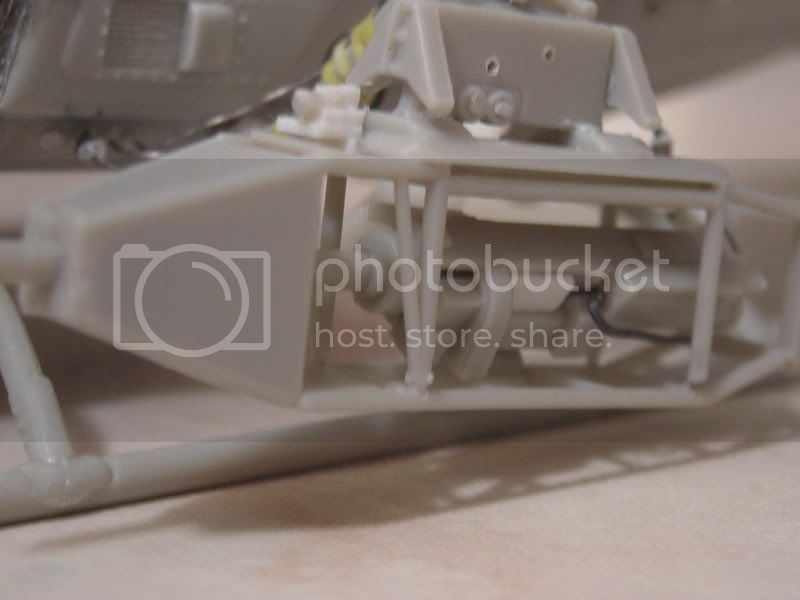
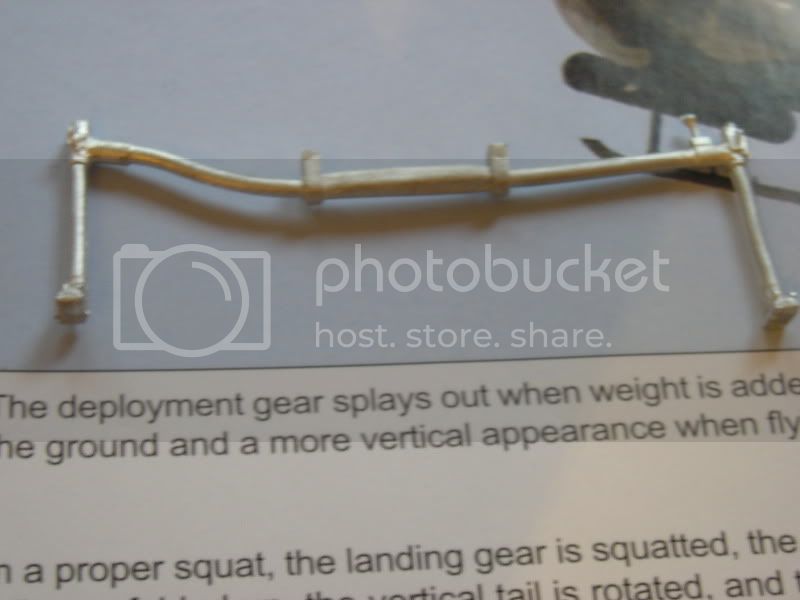
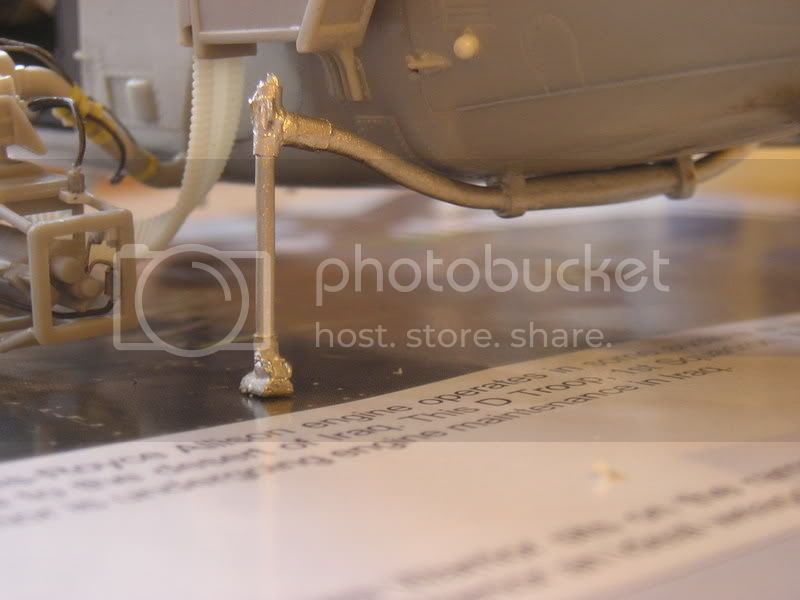
The MPLH landing gear set is not a necessity due to the fact that not all Kiowa's retain them during their service, although for my model they are required. Again great detail, cast in white metal, only needing small amount of preparation before usage

Mario_HR
_VISITCOMMUNITY
Croatia Hrvatska
Joined: June 28, 2006
KitMaker: 376 posts
AeroScale: 21 posts
Posted: Thursday, January 08, 2009 - 12:52 AM UTC
This is what you start with. A great little kit, has nice recessed panel lines, rivet details and all-round good fit.


I first marked what needs to be cut out for the new doghouse. It's not very visible due to lightning but it will be obvious


A dremel tool of some kind comes great here... Care needs to be taken when cutting, to ensure that the edge the old doghouse is not cut out entirely. The same goes for the other side...


This image shows the incorrect and simplified ALQ mount, and the resin update and the detail difference


Cut out section. Fits great, no trouble whatsoever


I've cut both part so far, and will add both once i seal up the fuselage.
Mario_HR
_VISITCOMMUNITY
Croatia Hrvatska
Joined: June 28, 2006
KitMaker: 376 posts
AeroScale: 21 posts
Posted: Thursday, January 08, 2009 - 12:54 AM UTC
I chose to remove the back cushions, add various details, but still more to go.
I made seat cushions b and added some electronic boxes up front behind the pedals. Still need to add a few things to the pilot's cyclic and more wiring. Oh yeah, and the PE belts are done but didn't take any pics yet. they area pain to assembly


I tried to fit in the resin doors as well to avoid any fit problems and the problem is the chunky part on the back that does not have the slot cut out. I tried to shave of a bit, but i took out too much but it fits now. The other door went with less problems.


Mario_HR
_VISITCOMMUNITY
Croatia Hrvatska
Joined: June 28, 2006
KitMaker: 376 posts
AeroScale: 21 posts
Posted: Thursday, January 08, 2009 - 12:54 AM UTC
Here's some more progress:


More details on the controls


some paint


drilled out a helmet and found and M-4


enigne colour

Mario_HR
_VISITCOMMUNITY
Croatia Hrvatska
Joined: June 28, 2006
KitMaker: 376 posts
AeroScale: 21 posts
Posted: Thursday, January 08, 2009 - 12:55 AM UTC
Here are couple of pics to show the fuselage is all put together, and i did a bit of scratch building. I made the entire part behind the engine where the filter is located, and of course now it can't be seen at all :bandhead2: i made few parts of the hydraulics in the doghouse, but more pics soon. Also i managed to break the IR jammer base plate (the hexagonal thingie) as in no way i could get it off the resin block, so i made a new from a bit of styrene. Not exactly what i had in mind, but it will do.
Cheers!


Mario_HR
_VISITCOMMUNITY
Croatia Hrvatska
Joined: June 28, 2006
KitMaker: 376 posts
AeroScale: 21 posts
Posted: Thursday, January 08, 2009 - 12:56 AM UTC
Here are some more pics... I've made the CABS stiffeners and the airbag? system with 2part epoxy. I think i got it about right but i didn't have more pics of the glare shield.


Also i added the small tail-fin adapter thingies with lead wire


Ive also added the tail fin, and the UWP's which are underdetailed but i didn't reallg go too much with those. It's starting to look like a kiowa now


There's still lots to do! Cheers for now
Mario_HR
_VISITCOMMUNITY
Croatia Hrvatska
Joined: June 28, 2006
KitMaker: 376 posts
AeroScale: 21 posts
Posted: Thursday, January 08, 2009 - 12:57 AM UTC
I did some small stuff here...

The wiring for the hellfire launcher: I'm not too sure where the 2 thinner wires go to so i winged it.


Some details on the bottom, not yet done


I wired the IR jammer


and added the huge cable running down the canopy...


Mario_HR
_VISITCOMMUNITY
Croatia Hrvatska
Joined: June 28, 2006
KitMaker: 376 posts
AeroScale: 21 posts
Posted: Thursday, January 08, 2009 - 12:58 AM UTC
Since the kit detectors were lacking all detail I added some form small bits of styrene and streched sprue


Also i added small bits to the Hellfire launcher - again styrene and streched sprue


And one for fun.... ok and to see if i got the seams correctly

Mario_HR
_VISITCOMMUNITY
Croatia Hrvatska
Joined: June 28, 2006
KitMaker: 376 posts
AeroScale: 21 posts
Posted: Thursday, January 08, 2009 - 12:58 AM UTC
Here's some more progress;

I added the .50 cal on the left side


It's still a WIP so i didn't add all the wiring and the details yet. I did add the triangular thingie on top of the UWP (a wire cutter?) and the boresight upfront. It's not the most accurate thing but it will do for now:


I added some plumbing to the Hellfire launcher as well :


as well as started to wire the tailboom


So much for now,
Cheers, Mario
Mario_HR
_VISITCOMMUNITY
Croatia Hrvatska
Joined: June 28, 2006
KitMaker: 376 posts
AeroScale: 21 posts
Posted: Thursday, January 08, 2009 - 12:59 AM UTC
Here's what i did: the first picture shows the MPLH gear set which i partially fixed to show the difference - left side bent, right side not, this gave the height issue i was talking about, and the fix only took 2 and a half minutes with a tweezer :woot.gif:


I placed the back strut to see how it looks like on the fuselage.


The MPLH set really makes big difference in the whole look.
Removed by original poster on 01/08/09 - 13:00:45 (GMT).
Mario_HR
_VISITCOMMUNITY
Croatia Hrvatska
Joined: June 28, 2006
KitMaker: 376 posts
AeroScale: 21 posts
Posted: Thursday, January 08, 2009 - 01:01 AM UTC
This is where i got so far. More pics to come soon.
Cheers, Mario
MLD
_VISITCOMMUNITY
Vermont, United States
Joined: July 21, 2002
KitMaker: 3,569 posts
AeroScale: 419 posts
Posted: Thursday, January 08, 2009 - 02:03 AM UTC
Beautiful build. It looks like a real labor of love.

Are/did you having any fit issues with the instrument coaming/glare shield and the canopy?

I am still not sure where I managed to mess mine up, but the issue was between the glare shield and the canopy.

I do remember at the time thinking the fit between the instruments and the shield was loose, but since I got to build only in small increments at the time I was not able to dryfit the canopy at the time.

Looking forward to seeing this beauty in paint.

Mike
Mario_HR
_VISITCOMMUNITY
Croatia Hrvatska
Joined: June 28, 2006
KitMaker: 376 posts
AeroScale: 21 posts
Posted: Saturday, January 10, 2009 - 10:09 PM UTC
Hi Mike,thanks for the nice words and yeah, the canopy is the worst fit of the entire kit. The problem is that the IP is pushing the glare shield upwards, and the glare shield is pushing the canopy out. I'm still fitting it though. Here are some more pics I managed to put it on the MPLH gear:


HeavyArty
_VISITCOMMUNITY
Florida, United States
Joined: May 16, 2002
KitMaker: 17,694 posts
AeroScale: 1,728 posts
Posted: Sunday, January 11, 2009 - 08:09 PM UTC
Hi Mario. Saw this one over at ARC too. Like I said there, looking great. I had heard about the canopy/IP issue. I didn't have any problem with mine, but I have hear that you sould install the IP after the canopy. Some say to trim/sand down the bottom of the IP to help the fit too.
Mario_HR
_VISITCOMMUNITY
Croatia Hrvatska
Joined: June 28, 2006
KitMaker: 376 posts
AeroScale: 21 posts
Posted: Saturday, January 17, 2009 - 05:26 AM UTC
All the exams finally got to me, so I haven't had much free time. Sorry for the quick-done crappy pics but this is my progress so far:


I've painted most of the fuselage, and am still messing around with the canopy. Still lot's to do but I'm getting there. There are more details I would like to put on the Hellfire launcher and then I can start glossing her up and start playing with the rotor assembly
Mario_HR
_VISITCOMMUNITY
Croatia Hrvatska
Joined: June 28, 2006
KitMaker: 376 posts
AeroScale: 21 posts
Posted: Monday, January 26, 2009 - 01:18 AM UTC
I've been busy a lot these past few days, so I decided to do something other than just build. I have a few parts more to take care of, but i give you:

the Punisher:


I added protective flaps on the oil-filter intake form some leftover PE as they were missing, and decided to do some painting and general decaling. I did mess up the front windshield but i will buff out eventually. I decided that painting the exhaust part and the MPLH gear as well as the .50 cal will wait a bit. This way it's more fun

Avus
_VISITCOMMUNITY
Roma, Italy
Joined: March 10, 2006
KitMaker: 302 posts
AeroScale: 112 posts
Posted: Monday, January 26, 2009 - 06:57 PM UTC
That is one great looking masterpiece!

Looking at the "unpainted" pitures it was very promising but now that it's "colored" it's really amazing.

Personally I very much like the "Punisher" skull!
Mario_HR
_VISITCOMMUNITY
Croatia Hrvatska
Joined: June 28, 2006
KitMaker: 376 posts
AeroScale: 21 posts
Posted: Tuesday, January 27, 2009 - 07:49 AM UTC
Thanks Avus i really enjoy seeing your work!

Here's the weathering stage - this is what i was going for (all pics copyrighted by their authors, i took them from the net, primeportal and kiowapilots.com just for discussion purposes) : the sand apparently gets everywhere, but mainly stays put on the aft section and near the engine, guess that's where are the greasy parts. Also most KW's show distinctive wet patterned spots, guess mostly fuel spills and other fluid leakages. Here are some samples


Here's the dirty part - the weathering is not so pronounced, but the pics make it look a bit harsh than it really is. It will get toned down with a final flat cote


did some subtle streaking to the tail fin


Yeah, i guess it now turned out to be a well weathered warrior. I guess AFV style weathering got to me ,)


Cheers for now

Mario_HR
_VISITCOMMUNITY
Croatia Hrvatska
Joined: June 28, 2006
KitMaker: 376 posts
AeroScale: 21 posts
Posted: Sunday, February 01, 2009 - 12:29 AM UTC
Here's some progress, not much thanks to being sick like a dog these past 10 days, and crappy pics but here goes. I started work on the ET, and added at least a dozen parts inside the dome, and now if the lens shows up I'm happy . Added a couple styrene pieces to the engine cover to act as kevlar plates, still need to find some white stenciling to go with it, and i started work on the rotor mast as well.

Cheers, everyone!


Mario_HR
_VISITCOMMUNITY
Croatia Hrvatska
Joined: June 28, 2006
KitMaker: 376 posts
AeroScale: 21 posts
Posted: Monday, February 16, 2009 - 06:20 AM UTC
Hi everyone, I'm back with a small update:

got some motivation thingies - no luck finding anything with the outcasts ;(


I played around with some leftover PE that i found in my spares box

I added some parts on both sides of the tail boom that are used to connect the blade fold gear, they came a bit crooked, but the pieces are very small and i have ginormous fingers I will have them painted and fix up the paint scratch that i made


Added some vent cover on the lower fuselage, and a hole drilled beneath (used a M1A1 Abrams APU vent cover )
It is slightly offset but i couldn't get a better fit due to complex shape to bend


Started fiddling around with the ET - I hacked off his and changed it out with some spare mesh. A punched out styrene disc will be on top. It was just a full plastic protrusion before


That's it for now. I'm still fixing the canopy though
Cheers,
Mario
SnakeEye
_VISITCOMMUNITY
Rodopi, Greece / Ελλάδα
Joined: June 23, 2004
KitMaker: 310 posts
AeroScale: 9 posts
Posted: Monday, February 16, 2009 - 10:19 AM UTC
It becomes beautiful. Congratulations for your good work.
punisher2-2
_VISITCOMMUNITY
North Carolina, United States
Joined: January 01, 2009
KitMaker: 50 posts
AeroScale: 1 posts
Posted: Thursday, February 26, 2009 - 12:58 PM UTC
I got a pic of my wife standing next to the 10th mountain Kiowa with those same punisher etc markings during the Summer air show when i was stationed at drum last year! Nicely done man! My buddy flys a kiowa up at drum as well...it's always good to see something this nice put together so detailed!
rhenders
_VISITCOMMUNITY
Arizona, United States
Joined: July 09, 2005
KitMaker: 159 posts
AeroScale: 11 posts
Posted: Thursday, February 26, 2009 - 05:34 PM UTC
Nice build I just built one as well for my buddies mom..He was in the 10th mountain as well..He was shot down and killed Jan. 26 2009. CW2 Ben Todd from Colville, WA...
Mario_HR
_VISITCOMMUNITY
Croatia Hrvatska
Joined: June 28, 2006
KitMaker: 376 posts
AeroScale: 21 posts
Posted: Monday, March 02, 2009 - 02:54 AM UTC
Thnx guys I appreicate the nice words! I kinda neglected this build a bit, with some studying to do but I will post more stuff soon. Also if anyone has reference pics they are willing to share since i only have one, please post or send some my way!

cheers
 _GOTOTOP