Hi All
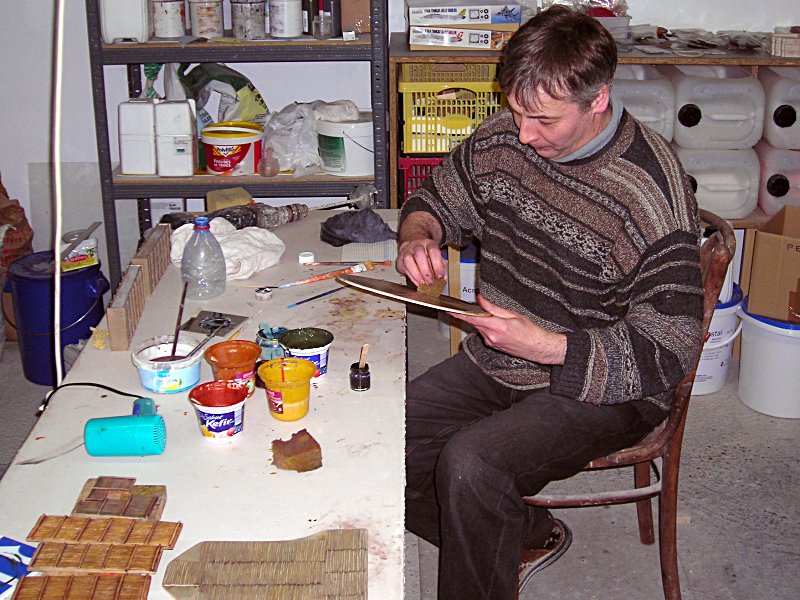
Yesterday I visited Marc Toillie in Niederseebach, just across the Rhine from here. It was a very enjoyable visit .. at least for me ... hope Marc was not too upset because I stayed until sunset
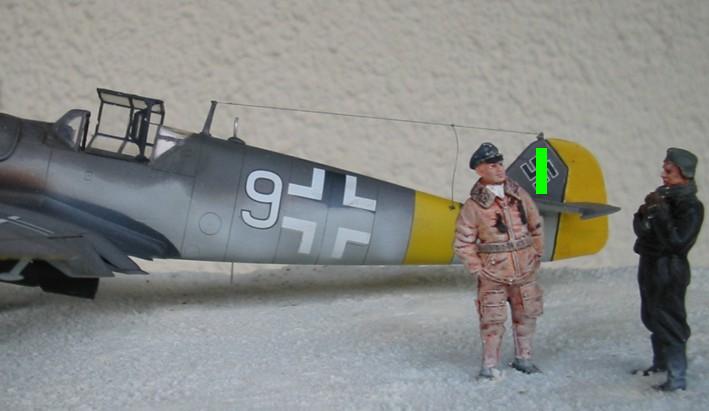
I took a few pix:
(click img)
Initially I wanted to add this to the thread of Jean-Luc's report about his visit some time ago, but strangly I could not find it ...
cheers
Steffen
P.S. ruined a shirt and got pretty dirty .. but it was well temperated in the work shop
General Aircraft
This forum is for general aircraft modelling discussions.
Hosted by Jim Starkweather
Visit to Mark.58 & Ostfront shelter build log
Posted: Wednesday, January 14, 2009 - 12:15 AM UTC
Posted: Thursday, January 15, 2009 - 10:23 PM UTC
Hi Steffen
Thanks for sharing the pictures of your visit to Mark58. It brings back some memories of the first times I've been there. Now I see Marc every two or three months.
Time really passes by too quickly when you are there isn't? I can't wait to see the results you achieved with Marc's techniques...
Jean-Luc
Posted: Thursday, January 15, 2009 - 10:38 PM UTC
Hi Jean-Luc
yes it was fun!! sadly (or luckily) my budget allowed only one item (well not really but it will be one Dio). Generously Marc gave me one of his new products for review and a slightly damaged base as bonus.
Yesterday I started on my small dio when I found out that I will have a pretty large empty area. So I had to order Tamiyas Flak Vierling to fill that space (it will cost me another two sets from Hauler and maybe another 2 Ammo sets from the same manufacturer ... not to mention 4 barrels from Schatton):
This is how it looked this morning. Meanwhile I did a bit more "paper work" .....
cheers
Steffen
Posted: Saturday, January 17, 2009 - 09:13 AM UTC
I just want to share that Marc's new webshop is online:
http://www.mark58.oxatis.com/
still some glitches to iron out, but it is there.
all the best
Steffen
http://www.mark58.oxatis.com/
still some glitches to iron out, but it is there.
all the best
Steffen
Posted: Sunday, January 18, 2009 - 12:04 AM UTC
Hi gang
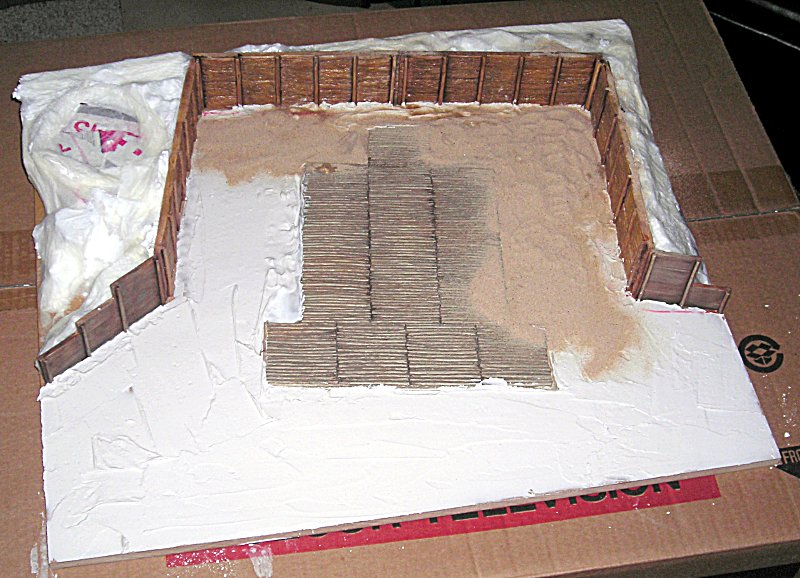
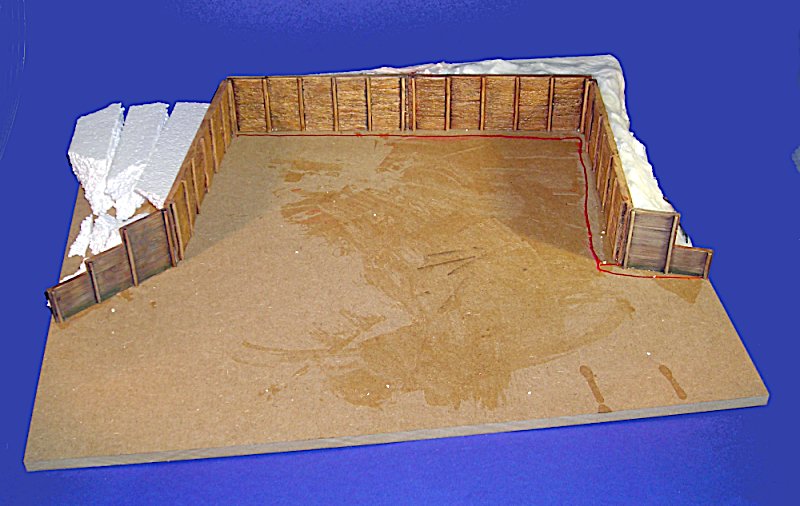
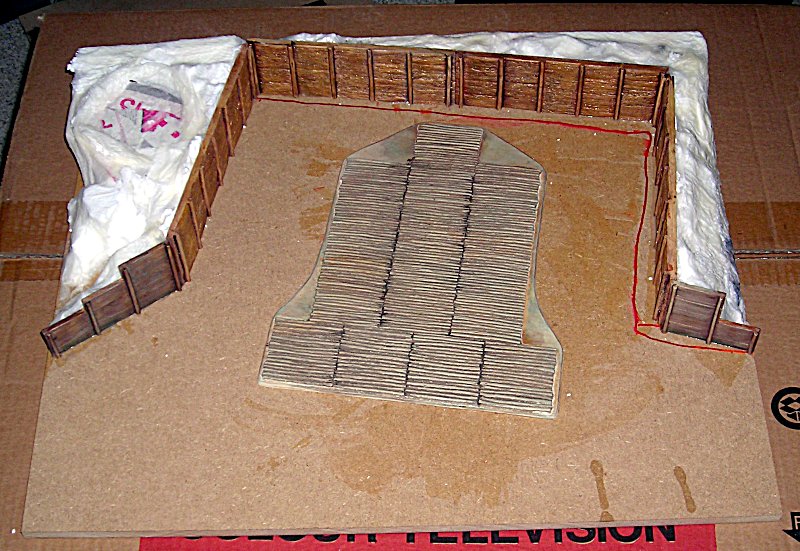
Well, I am using this thread to show some pix of my Ostfront hard stand. I used Mark.58 wood logs base, brush-wood/adobe Hardstand and planks as a forward "gate". When I placed it all on a MDF board I noticed a larger gap in the upper left corner. So I decided I must get a Tamiya Flakvierling. To save myself some money I will build it without the shield, but with Schatton barrels and Hauler set (maybe to add some magazines and transport boxes later).
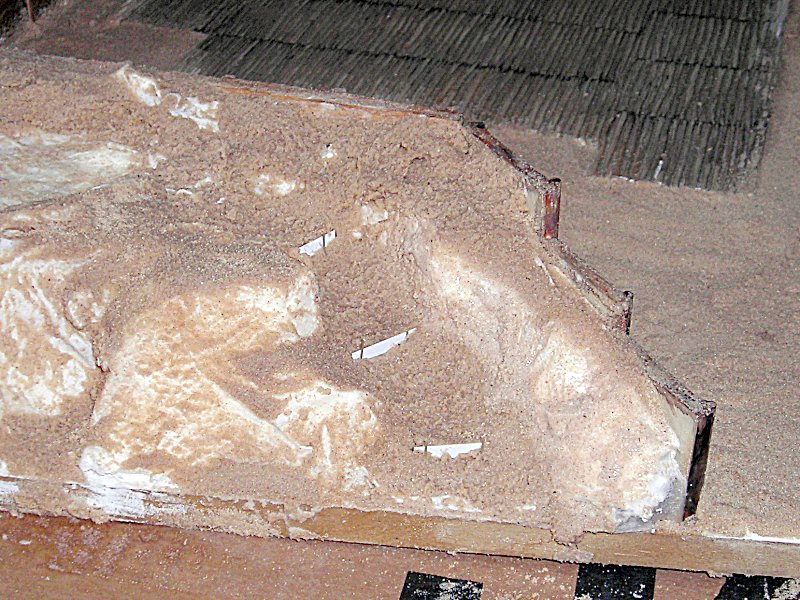
Here is a short description of the whole thing: With 50cm by 40 cm it is too large for my desk, so I use a box my TV came in as a working base. I first glued the hardstand wilh some packing material as reinforcement and base for the later to come "sand armor". I shaped the landscape with kitchepaper and white glue (thinned with water). Then I glued the base plate in place. After all was dry (today) I mixed some Moltofill with water and white glue to blend the plate in. I started to spread some terrarium sand directly on the ground. Most of this will stay loose, but another coat of thinned white glue after the Moltofill has dried will make it stick.
Pic 1 is in the post above...
The other landscape will follow later when the groundwork of the principal plane is done
all the best
Steffen
thegirl
Alberta, Canada
Joined: January 19, 2008
KitMaker: 6,743 posts
AeroScale: 6,151 posts
Joined: January 19, 2008
KitMaker: 6,743 posts
AeroScale: 6,151 posts
Posted: Sunday, January 18, 2009 - 05:28 PM UTC
Cool Steffen ! I'll be watching this one .
Posted: Sunday, January 18, 2009 - 11:44 PM UTC
Thanks Terri
it may take a while until I can finish this. Actually I am doing some more ground work.
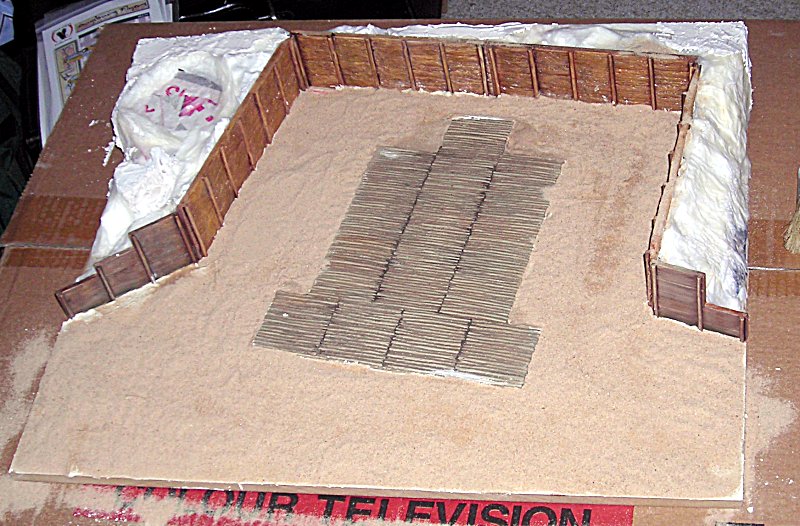
This is how it looked this morning: The excess sand is already removed:
Another - blurry - picture without flash to show some of the structure
The right side was pretty easy as it is simply a hill .. on the left side I have my Flak position. I wante a small path.
This is not yet done, but I want to let the stuff dry for a day.
cheers
Steffen
Posted: Tuesday, January 20, 2009 - 11:53 PM UTC
Hi Terri (you seem to be the only one interested)
So I post this stuff for you and the silent lurkers
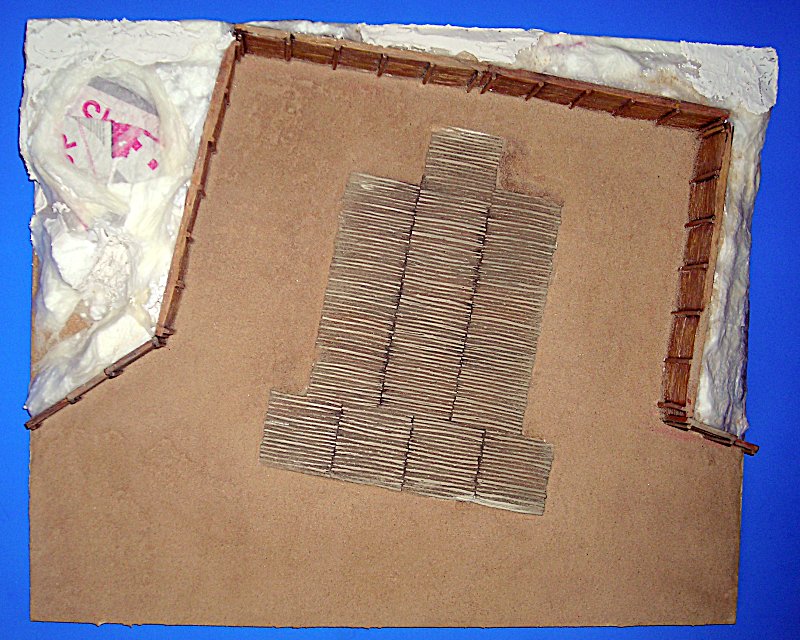
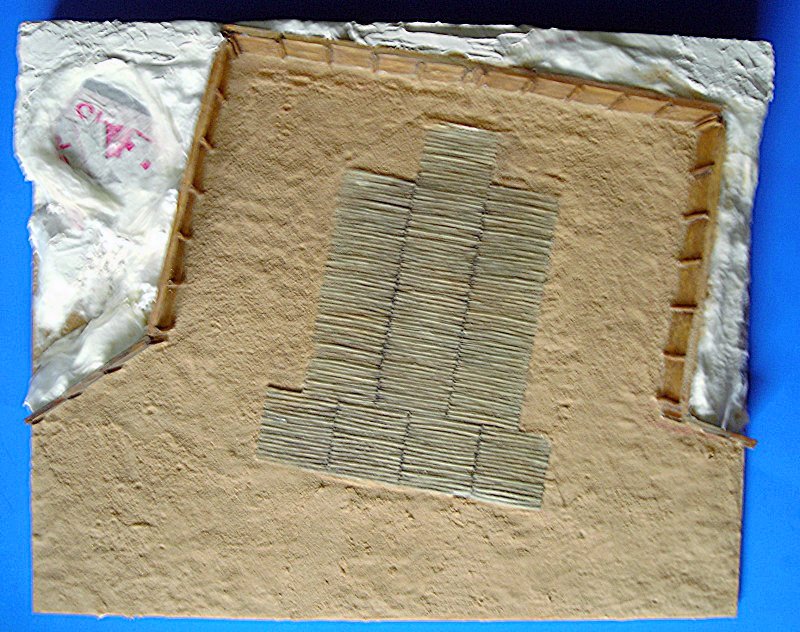
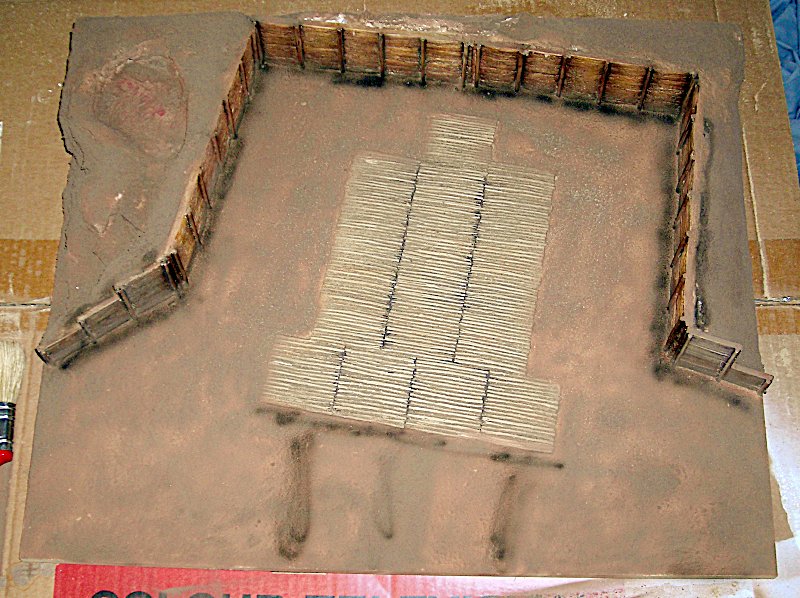
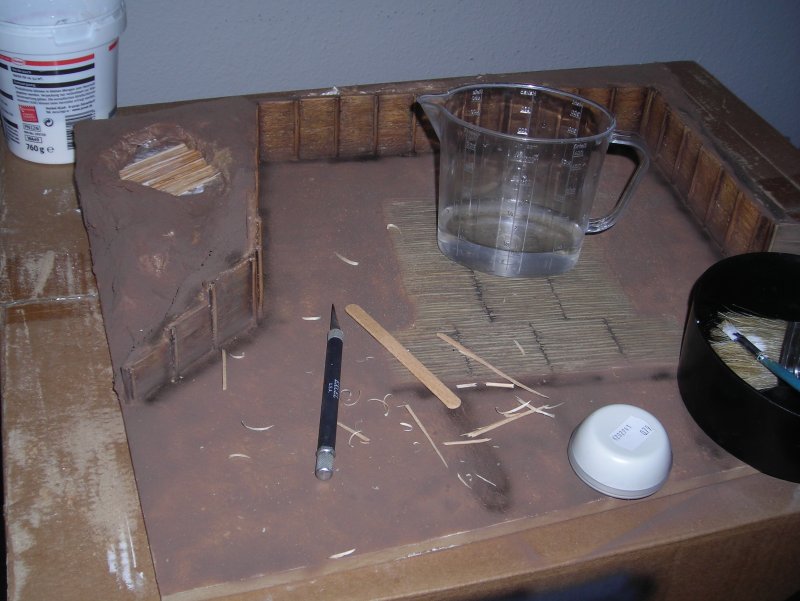
After two days drying time I actually had to do some more sand, but i wanted something different, so I started laying some kind of base colour. The table top is 50x40 cm so I needed about half a jar of Tamiya Flat Earth. I sprayed it irregularily and I accentuated smoe areas with black. The following pic is taken with flash and looks horrible, but shows pretty well what I did.
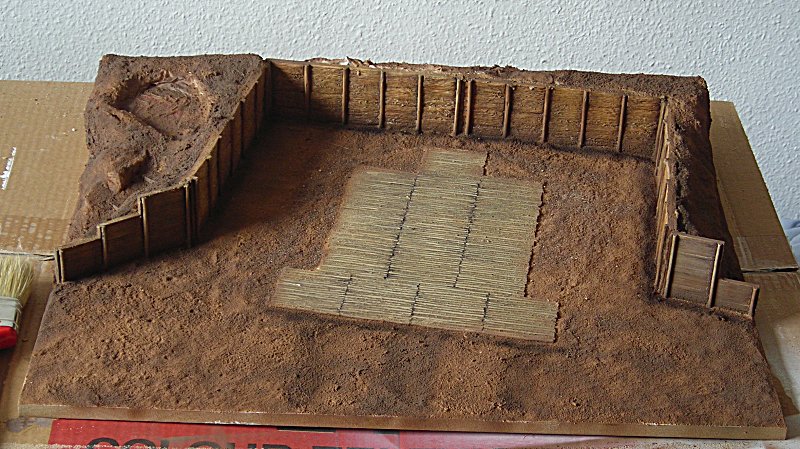
You see that I also accentuated the wood logs of the shelter and that the upper center needs more groundwork. The flash eliminated much of what is really there:
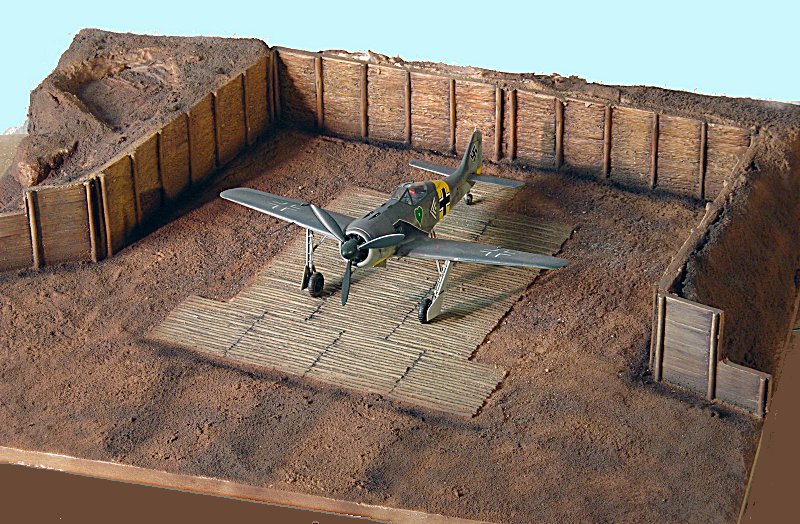
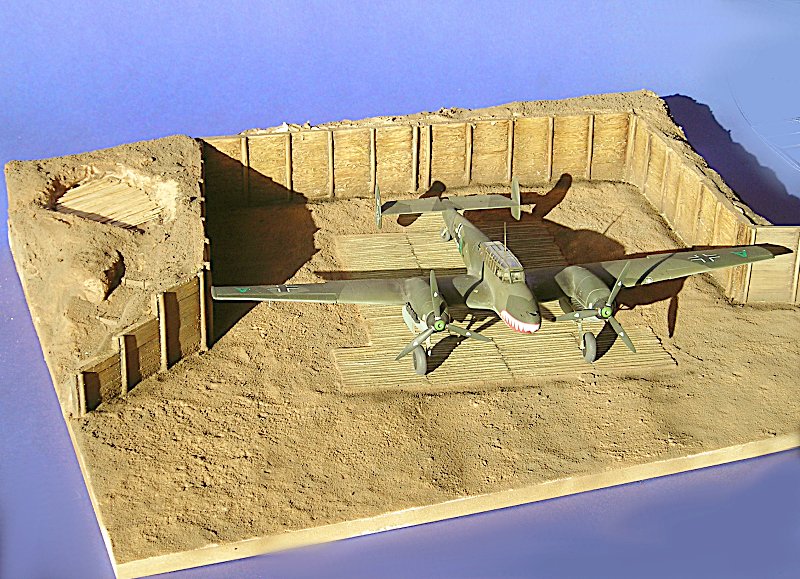
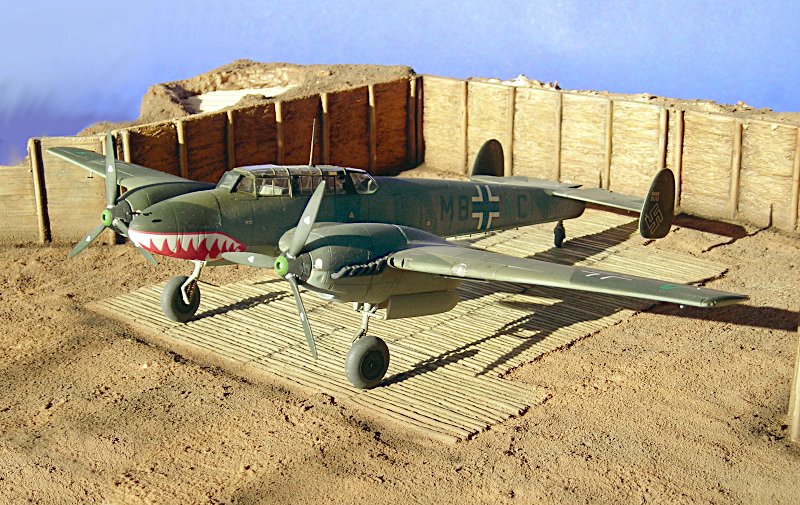
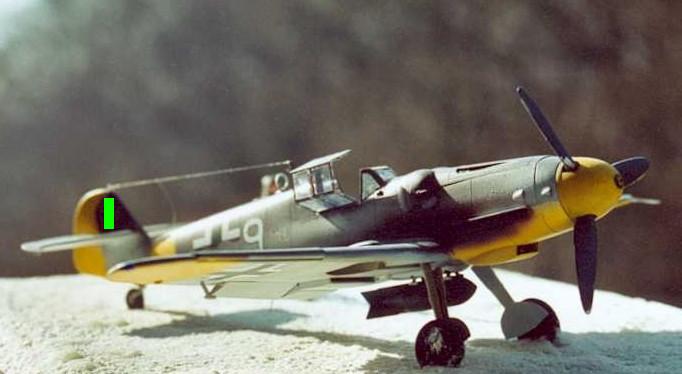
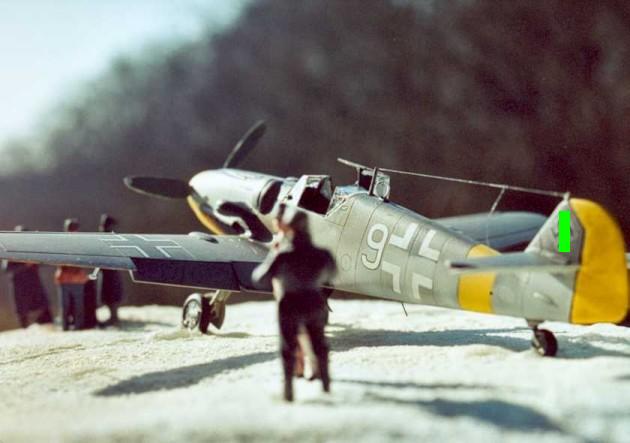
And here is a picture with an aircraft model which is not Ostfront but pretends to be (I only have a few finished models here in Ettlingen the majority is home in Schwerin with my parents). The shelter is intended to be for a "Schlächter" ...
all the best
Steffen
Posted: Wednesday, January 21, 2009 - 09:32 AM UTC
Hi Steffen,
I'm lurking with great interest...
Jean-Luc
I'm lurking with great interest...
Jean-Luc
Posted: Wednesday, January 21, 2009 - 10:07 AM UTC
Thanks Jean-Luc
I was feeling a bit lonely and was about to write myself some comments, warnings and critique
You can see it in person soon and it does not look as bad as in some of the pictures ...
here is what I did this afternoon:
It was really fun .... but dangerous ---- normally i cut myself at least twice before I "rest" for a day.... I was lucky this time.
cheers
Steffen
Posted: Wednesday, January 21, 2009 - 10:26 AM UTC
Hi again Steffen,
I just spoke with Marc this afternoon and we talked about your diorama. I told him you will probably enjoy building it because it makes a nice change from handling tiny plastic or PE parts. Not mentioning rigging.
But believe me, once you will be done with it, you will want to build a plastic kit again and vice versa...
I can't wait to see it finished and in flesh. I hope it won't take my sleeping area away!
Jean-Luc
Posted: Wednesday, January 21, 2009 - 10:43 AM UTC
Hello again
I run on "round robin" schedule. I actually rig that darn Avia (the kit was fun only the rigging is killing me), then I build on my Marder III (which is now primed), I have started the Tamiya Zero for the smell of plastic glue in the morning and finally I build this table top (I hesitate calling it diorama ... just look over at Armorama what roudeleiw, cheyenne, docdios or jba are doing (and those are just a few names).
It will not be finished by then as I do not have the Flak yet and I must do some testfitting for the sand bags.
You can choose between two rooms here. One is my working-living-eating-sleeping-younameit-room with my library and modelling area. The other is my storage room with my model kit "collection" ... it is all a filthy and dirty, but my "First Reich". There is enough space as I do not have much furniture You do not need to decide now, but can have a look first
cheers
Steffen
I run on "round robin" schedule. I actually rig that darn Avia (the kit was fun only the rigging is killing me), then I build on my Marder III (which is now primed), I have started the Tamiya Zero for the smell of plastic glue in the morning and finally I build this table top (I hesitate calling it diorama ... just look over at Armorama what roudeleiw, cheyenne, docdios or jba are doing (and those are just a few names).
Quoted Text
I can't wait to see it finished and in flesh. I hope it won't take my sleeping area away!
It will not be finished by then as I do not have the Flak yet and I must do some testfitting for the sand bags.
You can choose between two rooms here. One is my working-living-eating-sleeping-younameit-room with my library and modelling area. The other is my storage room with my model kit "collection" ... it is all a filthy and dirty, but my "First Reich". There is enough space as I do not have much furniture You do not need to decide now, but can have a look first
cheers
Steffen
Posted: Thursday, January 22, 2009 - 12:05 AM UTC
Hello visitor
Rowan was so kind to change the thread title a bit so that the contents becomes a bit clearer. Thanks, mate!
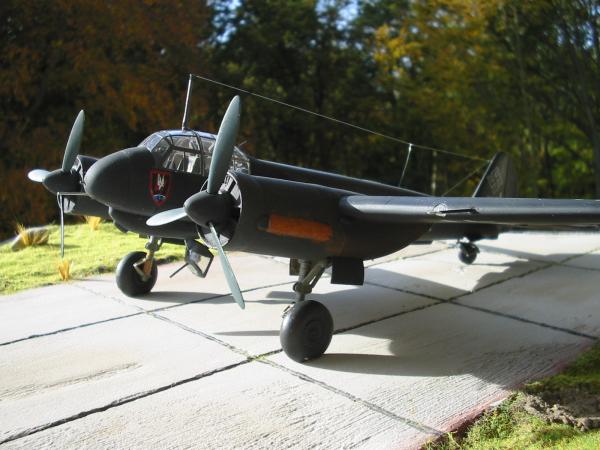
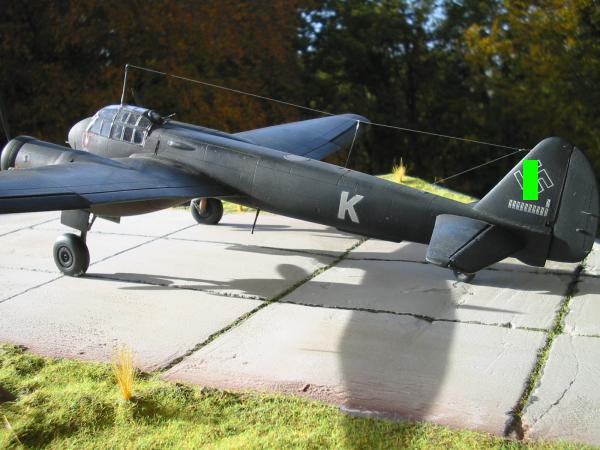
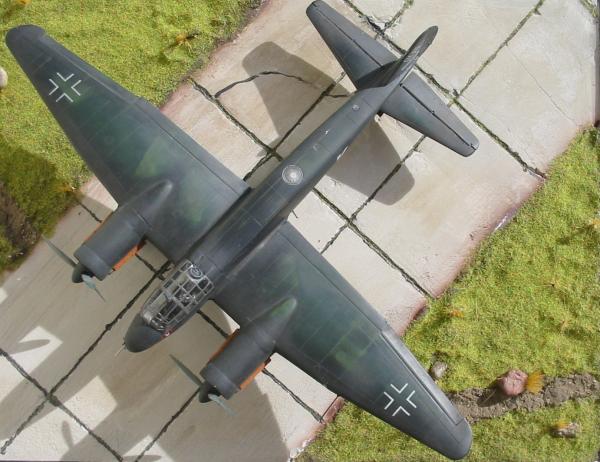
The weather is very nice today, so I took two more pictures. The direct sunlight also kiss a bit of contrast, but it is much better than the flash light. The timber base for the Flak is almost dry. Hope HLJ will send the kit soon (it is paid and in stock). So I think I will again do some groundwork and I will try to get some more static gras and some gras tufts.
The hard stand is a bit too small for the 110 (the way I built it) but it is intended for Hs 123, Hs 129 or Fw 190 Jabos and these fit nicely.
all the best
Steffen
Posted: Thursday, January 22, 2009 - 12:50 AM UTC
Hi Steffen.
I'm lurking and learning
Looks great, but I cant really comment as I know nothing about dioramas so I'm just learning as you go.
One thing I do know is that those bases are really stunning!
Nige
I'm lurking and learning
Looks great, but I cant really comment as I know nothing about dioramas so I'm just learning as you go.
One thing I do know is that those bases are really stunning!
Nige
Posted: Thursday, January 22, 2009 - 01:33 AM UTC
Many thanks, Nige!
Well, as with my models I have a picture in mind how I want this to look before I even start .. in most cases (well, honestly always) I am not totally satisfied with the result. I am new to diorama building so there is not much to learn from me. ... you can just watch me fail and do better
all the best
Steffen
thegirl
Alberta, Canada
Joined: January 19, 2008
KitMaker: 6,743 posts
AeroScale: 6,151 posts
Joined: January 19, 2008
KitMaker: 6,743 posts
AeroScale: 6,151 posts
Posted: Thursday, January 22, 2009 - 04:13 AM UTC
Wow , you did a fantastic job Steffen . This has been fun watching . Have learned a few things and when I make my first one , some thing for when I take pic's of a finished model
I'm armed with a little knowledge know . Keep up the great work and look forward to more !
Posted: Thursday, January 22, 2009 - 06:09 AM UTC
Hi Terri
Well, I have done a few base plates already, but nothing like this yet. It will make a nice presentation display for a modelshow ... when and if I finish it.
Today I had some duties outside and thus I browsed a few model railroad shops .. I already had the applicator bottle and a bag of medium green static grass, but I wanted something a bit darker for contrast application .. well the right bag is new and it is a bit darker but I should have taken a shade more. Anyway whats the airgun for..
I also wanted some grass tufts from Silhouette/MiniNatur, which are just great and pretty good priced. Sadly this stuff was out, but luckily there was a substitue from Noch .. not as nice as MiniNatur (and more expensive), but it will do the job.
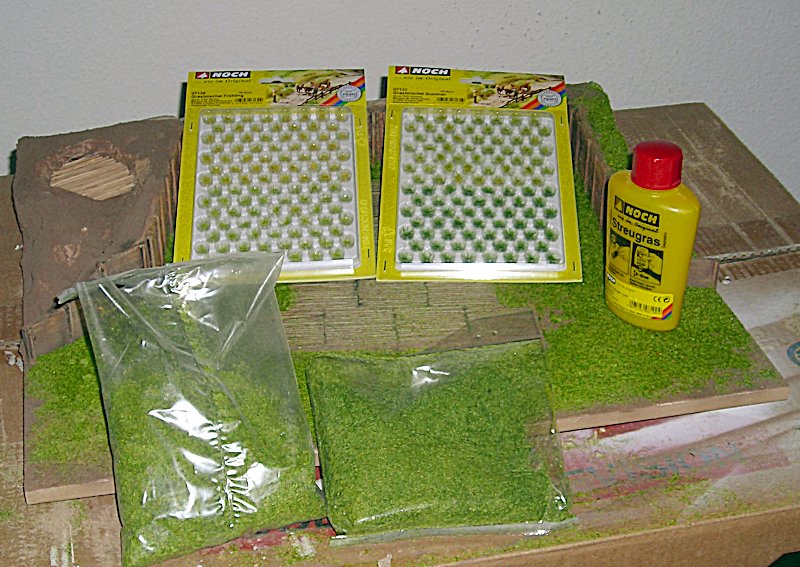
Here we see the first layer of the darker shade on. I brushed a smaller area with thinned white glue and the applied the ctatic grass with that plastic bottle ... I never get that thing to really work as it should, but it is a bit cleaner than sprinkeling the grass on by hand.
After the whole ground level (I see the a/c + dio stuff and hardstand as layer 2 and the flak scene as layer 3) was covered I scrapped a few places clean (e.g. the track) free. I have a thin water-white glue mix in a bottle of houshold cleaner (like the stuff you use for moistening plants) .. I applied it over the gras after I had cleaned all areas that shall not be furry and then sprinkeled a layer of the lighter gras on. The surprise will be tomorrow when I remove the excess gras (a really dirty job). I proceeded with the right side wall. I am not sure how to tackle the flak stand, so I leave that to think it over. The rest white glue in the jar was mixed with sand and applied to the area that was not covered yet and "painted" on the backside to even that area out.
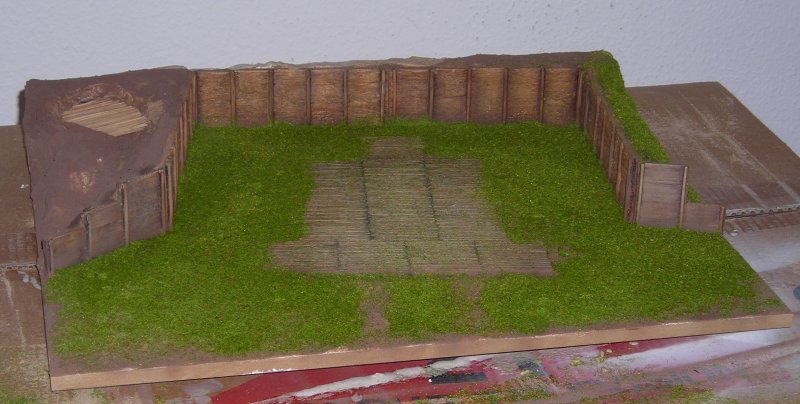
more tomorrow (if there is some progress)
all the best
Steffen
Posted: Thursday, January 22, 2009 - 11:21 PM UTC
"Any customer can have a car painted any colour that he wants so long as it is black" (Henry Ford)
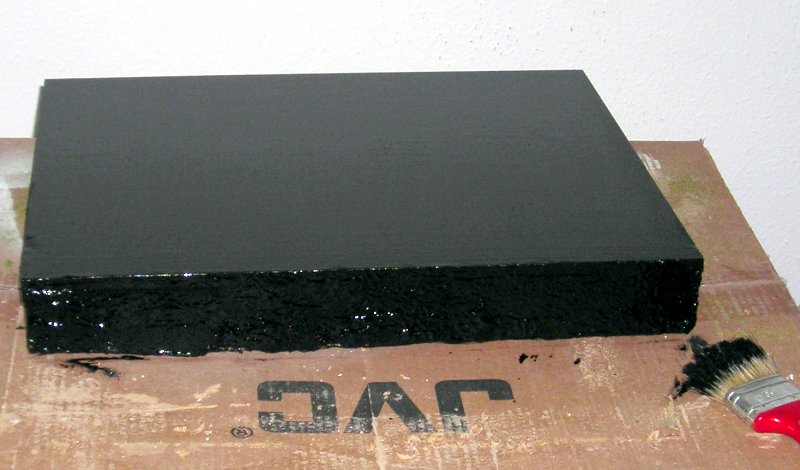
Not much progress today .. I started the day painting the MDF plate black laquer ... it is still wet (I had hoped for a faster drying time) ... so I guess it will be the work for today.
cheers
Steffen
Not much progress today .. I started the day painting the MDF plate black laquer ... it is still wet (I had hoped for a faster drying time) ... so I guess it will be the work for today.
cheers
Steffen
_H_Dori
England - East Anglia, United Kingdom
Joined: November 09, 2006
KitMaker: 295 posts
AeroScale: 276 posts
Joined: November 09, 2006
KitMaker: 295 posts
AeroScale: 276 posts
Posted: Friday, January 23, 2009 - 12:22 AM UTC
Coming on great Steffen, really enjoying your write up.
I'm looking forward to seeing this all done up with the flak position in place.
Keep it up mate
Now....I wonder if Mark58 do one that will fit a HE-219
Howard
I'm looking forward to seeing this all done up with the flak position in place.
Keep it up mate
Now....I wonder if Mark58 do one that will fit a HE-219
Howard
Posted: Friday, January 23, 2009 - 12:47 AM UTC
Thank you Howard
I just got the shipping notice for the Flak today and I hope to get some Schatton barrels from Robert in Nuremberg.
That should be no problem as the whole system is modular. See this pic:
The parts in the foreground were used for this table top. Two short modules as backwall and two of the longer ones as side walls ... I think two long walls as backend should work for the He 219 .. but I will search my stash and make a testfit ...
cheers
Steffen
P.S. I checked the kits and wingspan is just 5 cm more than of the Bf 110 (see above how close it almost fit my shelter model. So taking 4 long modules for the box should work out (you could also build it more trapezoid) .. or you make the sides a bit longer using 6 modules as the He 219 is almost as long as wide
I just got the shipping notice for the Flak today and I hope to get some Schatton barrels from Robert in Nuremberg.
Quoted Text
Now....I wonder if Mark58 do one that will fit a HE-219
That should be no problem as the whole system is modular. See this pic:
The parts in the foreground were used for this table top. Two short modules as backwall and two of the longer ones as side walls ... I think two long walls as backend should work for the He 219 .. but I will search my stash and make a testfit ...
cheers
Steffen
P.S. I checked the kits and wingspan is just 5 cm more than of the Bf 110 (see above how close it almost fit my shelter model. So taking 4 long modules for the box should work out (you could also build it more trapezoid) .. or you make the sides a bit longer using 6 modules as the He 219 is almost as long as wide
Posted: Friday, January 23, 2009 - 04:49 AM UTC
Hi all,
As Steffen said, some components made by Mark58 are modular so you can do very big dioramas. One modeler made a big base for a Fw 200 with those products!
Steffen, nice progress. You plan to put the diorama on the black base? It has something from the movie 2001 Space Odyssey...
Jean-Luc
Quoted Text
Now....I wonder if Mark58 do one that will fit a HE-219
As Steffen said, some components made by Mark58 are modular so you can do very big dioramas. One modeler made a big base for a Fw 200 with those products!
Steffen, nice progress. You plan to put the diorama on the black base? It has something from the movie 2001 Space Odyssey...
Jean-Luc
Posted: Friday, January 23, 2009 - 05:24 AM UTC
Hi again
Heinkel 219 : I though about it and I would suggest a different style of walls for a shelter. Marc sadly has only his bases online until now so I cannot show a pic but you would need taller side walls ..
Black: Yes I find that is the best colour for non-wood bases. You have a border to the underlaying sheet (mostly blue) and also to the base. And it does not distract from the scene. Of course mahogany or teak looks cool but to pretend being mahogany is just cheap ..
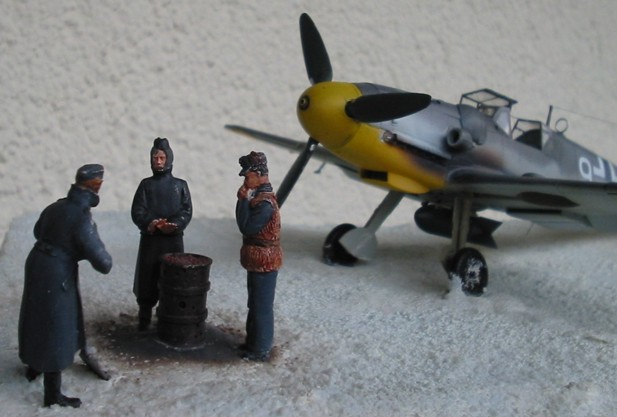
Here are a few pix of the first base/scene I made in my life:
and another one
i was pretty proud of it .. and I am still pleased how both turned out even if I would do some things different now.
cheers
Steffen
Posted: Friday, January 23, 2009 - 10:07 PM UTC
Hi
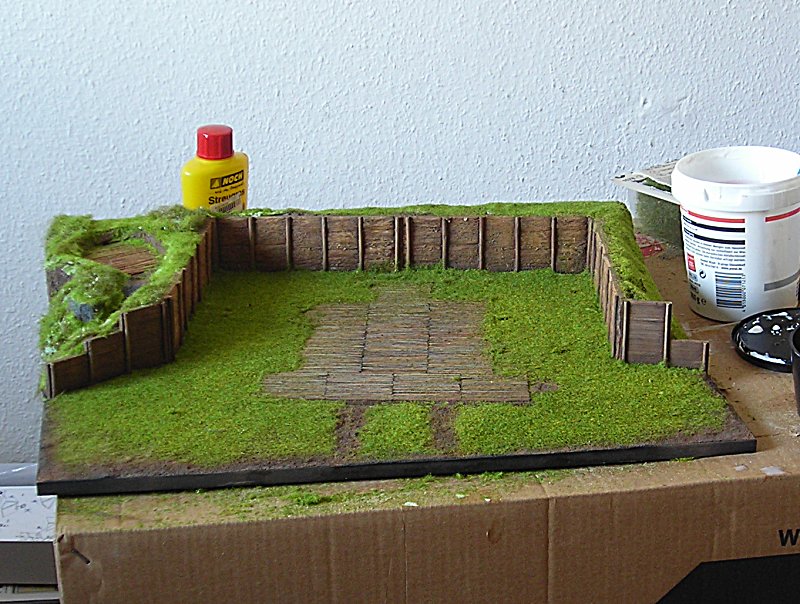
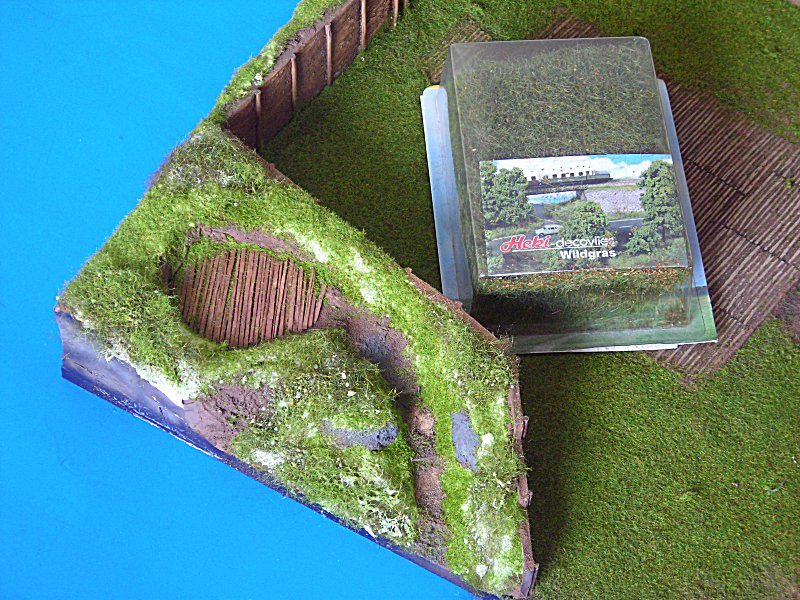
Today I tried to finish up the ground work. I resprayed some areas with brown and some (later to become) rocks in grey. The border did not quite work out, as I cannot get the MDF really smooth. So I will use "Kantenumleimer" (I could not find a proper translation .. that is kind of veneer which is ironed on) ...
Then I put on some static grass and finally some "Wildgras" from Heki in areas where no sheep has gone before. I will wait how that all turns out and wil add the tufts later.
P.S. I forgot to add that I did a wash with vanDyke Brown on the Flak-base and the wood log base yesterday
all the best
Steffen
thegirl
Alberta, Canada
Joined: January 19, 2008
KitMaker: 6,743 posts
AeroScale: 6,151 posts
Joined: January 19, 2008
KitMaker: 6,743 posts
AeroScale: 6,151 posts
Posted: Saturday, January 24, 2009 - 01:38 AM UTC
Awesome Steffen , you are doing a fastactic job ! I like the colour of the ground work . Will you be toning the shade down a bit to take the bite of the green back some ?
Posted: Saturday, January 24, 2009 - 01:52 AM UTC
Hi Steffen,
Nice work! I don't know how you do to work that fast...
That's always the big question about grass. The problem is that you can't rely on a photograph as it will never reproduce exactly the same shade of green used by the modeler. Sometimes the color appears way too bright but is in reality very different. And grass here in Europe can be VERY green!
Jean-Luc
Nice work! I don't know how you do to work that fast...
Quoted Text
Will you be toning the shade down a bit to take the bite of the green back some ?
That's always the big question about grass. The problem is that you can't rely on a photograph as it will never reproduce exactly the same shade of green used by the modeler. Sometimes the color appears way too bright but is in reality very different. And grass here in Europe can be VERY green!
Jean-Luc