This is an entry for "my" campaign, Swing-wing 2008. Anigrand has a reputation for doing quality kits so this will be a perfect first resin kit for me I hope.
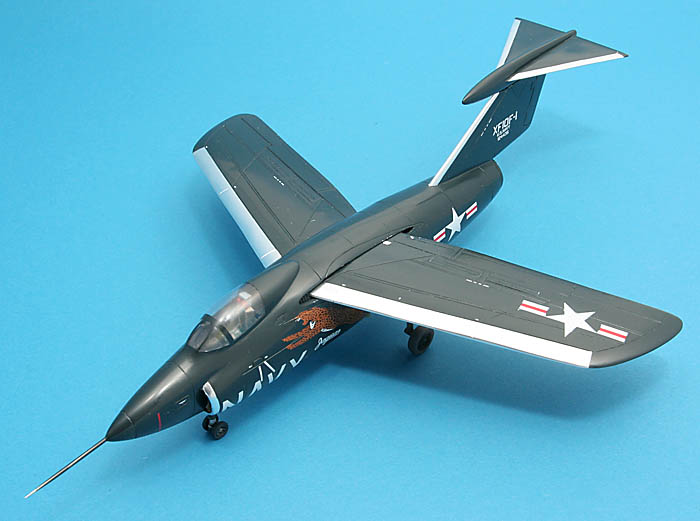
The XF-10F was designed as a means of operating heavy, high-performance fighters from aircraft carriers of WWII vintage. The swing wing concept gave a straight wing for slow approaches and catapult launches combined with a swept wing for high speed once airborne. According to Corky Meyer, later of Tomcat fame, the wing sweep concept worked excellently with a stalling speed as low as 90 mph - sadly most of the rest of the design was hopeless! The aircraft was first flown in 1952 and flew only 32 times, all flights by Corky Meyer, when finally both Grumman and the US Navy realised that the testing was leading nowhere.
The kit is all-resin from Hong Kong based Anigrand Craftswork. Parts are of reasonable quality, a few air bubbles and I had some obvious mould failure traces on the wings but it was easily fixable.
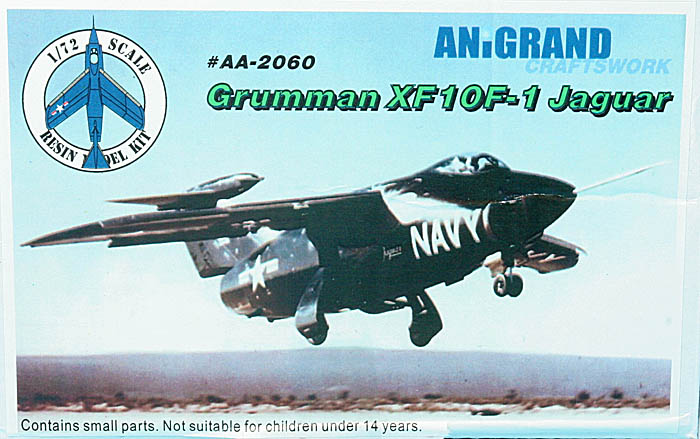
Boxart consists of one of the few photos I have found of this odd bird.
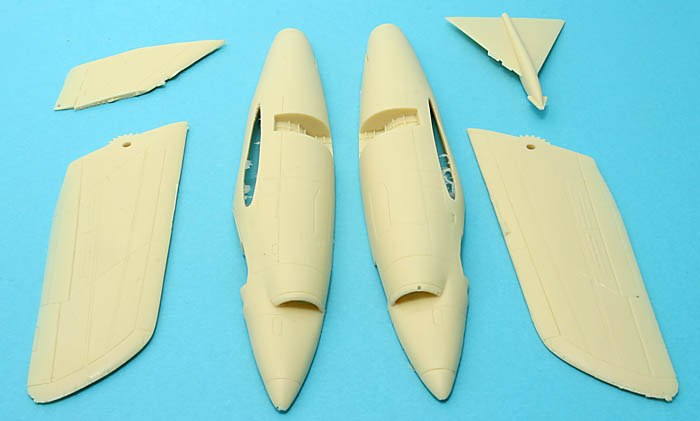
Larger parts...
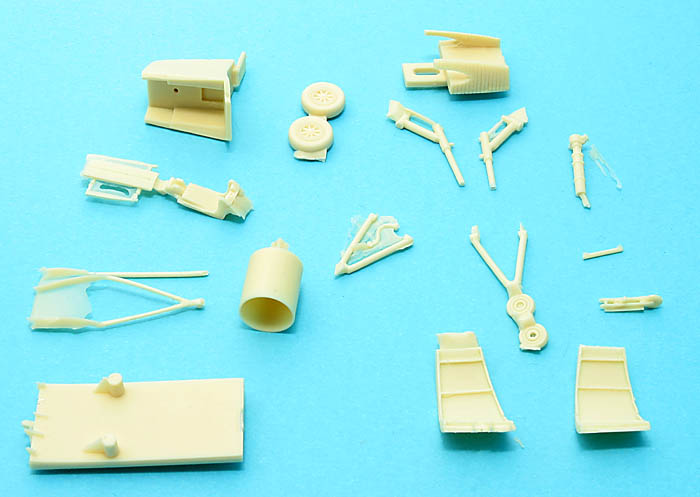
...and smaller ones...
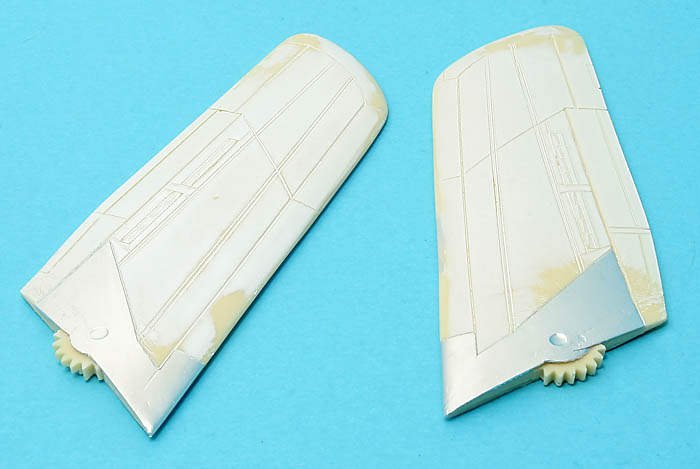
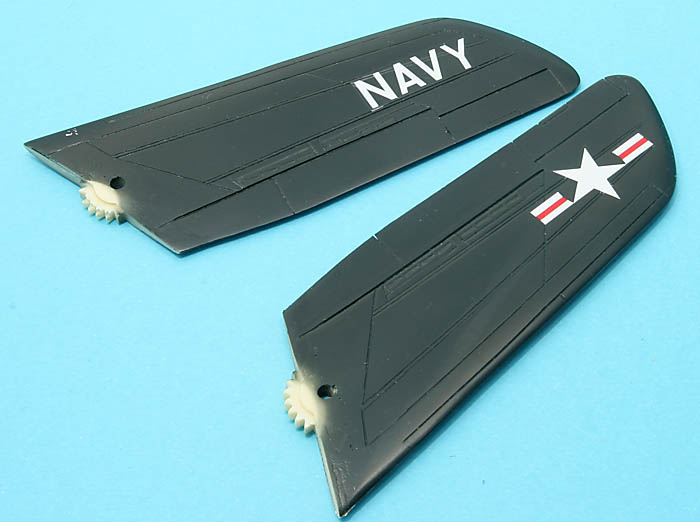
Lets start with something easy, the one-piece wings! I have been using Tamiya primer on them, resin always worries me when it comes to paint adherence.
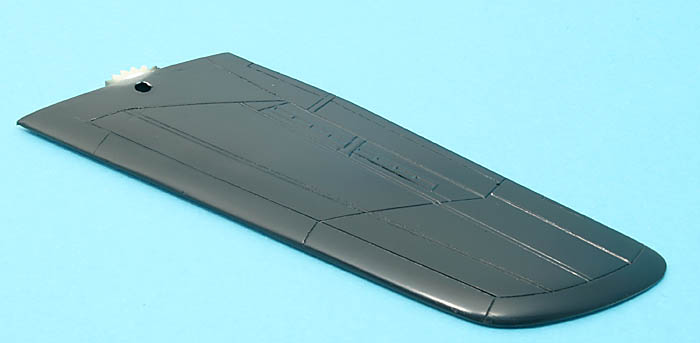
And then a coat of Xtracrylics Navy Blue. They will get a light sanding tonight and one further thin coat of paint to get rid of some surface imperfections and dust particles.
Magnus
Cold War (1950-1974)
Discuss the aircraft modeling subjects during the Cold War period.
Hosted by Tim Hatton
Anigrand XF-10F Jaguar
magnusf
Stockholm, Sweden
Joined: May 02, 2006
KitMaker: 1,953 posts
AeroScale: 1,902 posts
Joined: May 02, 2006
KitMaker: 1,953 posts
AeroScale: 1,902 posts
Posted: Saturday, January 24, 2009 - 03:33 AM UTC
magnusf
Stockholm, Sweden
Joined: May 02, 2006
KitMaker: 1,953 posts
AeroScale: 1,902 posts
Joined: May 02, 2006
KitMaker: 1,953 posts
AeroScale: 1,902 posts
Posted: Wednesday, February 04, 2009 - 09:39 AM UTC
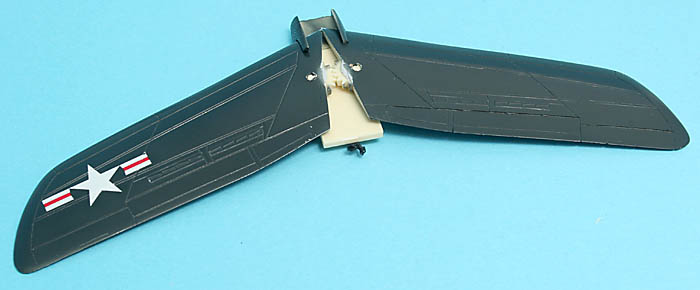
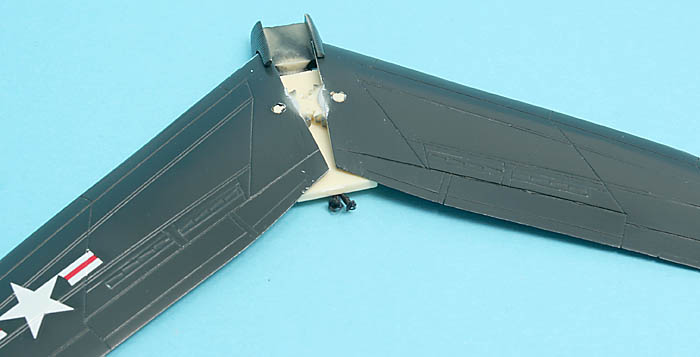
I will have to finish the wings before starting the fuselage since the swing-wing mechanism will make it hard to paint the whole plane as a unit. I wish they had solved it the same way as Hasegawa did in their Tomcats: the wings can be inserted after the model is finished.
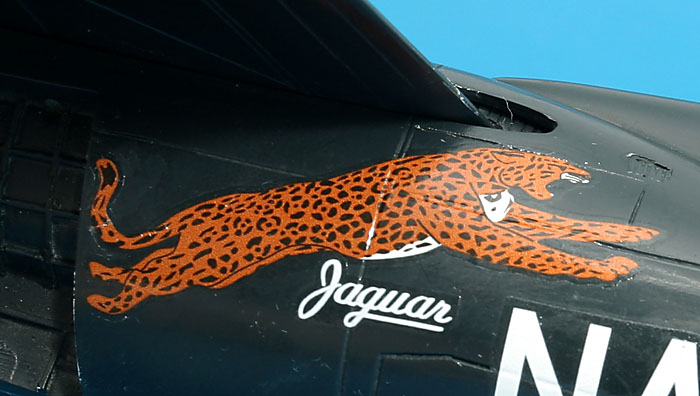
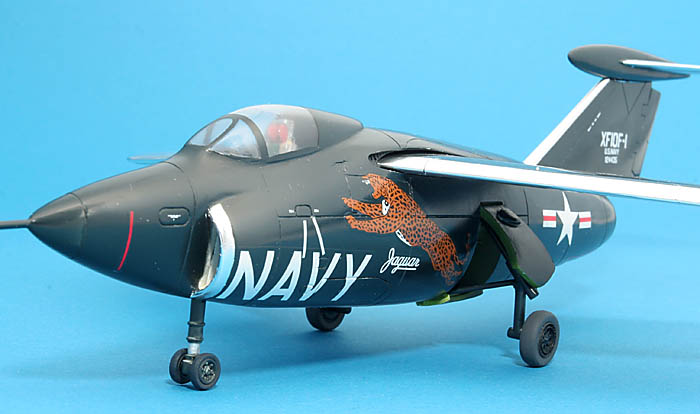
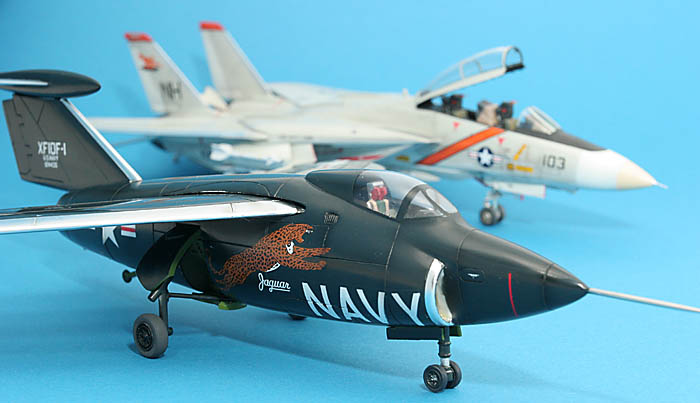
No doubt who is the owner of this bird! Decals are excellent, the white is really white even on the dark background.
Magnus
No doubt who is the owner of this bird! Decals are excellent, the white is really white even on the dark background.
Magnus
magnusf
Stockholm, Sweden
Joined: May 02, 2006
KitMaker: 1,953 posts
AeroScale: 1,902 posts
Joined: May 02, 2006
KitMaker: 1,953 posts
AeroScale: 1,902 posts
Posted: Saturday, February 14, 2009 - 09:42 AM UTC
With the Arado safely in the display cabinet, I will concentrate on the Jaguar from now on!
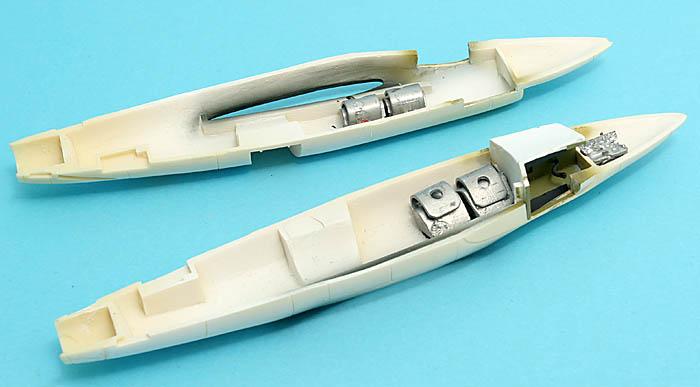
I've added lots of weight in the fuselage, with that big fin and stabiliser it is a potential tail-sitter. I wonder if the resin landing gear are up to the task?
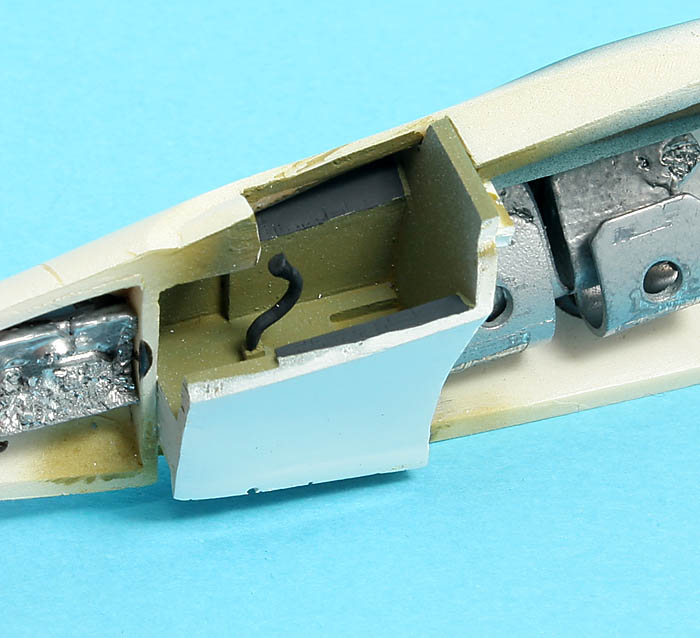
I won't spend any time super-detailing in the cockpit. With seat in place and a closed canopy, not much will be seen anyway.
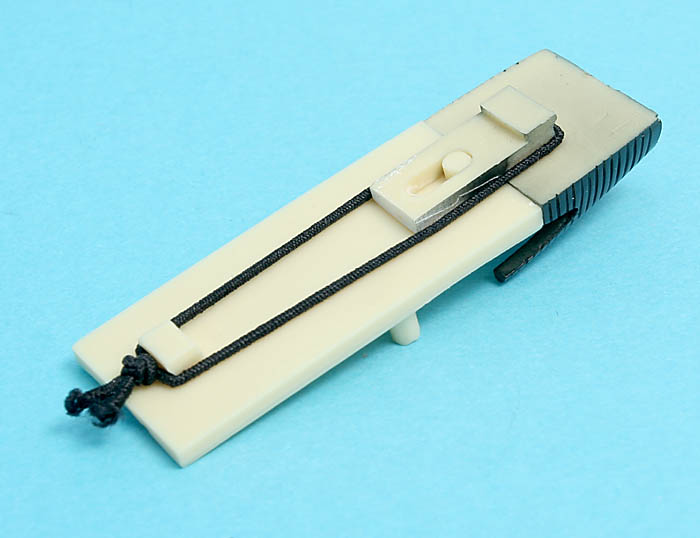
The main parts of the wing sweep mechanism. That elastic string would have been my main worry if I was the pilot, no wonder the aircraft was so unpopular
It actually works quite well. In take-off and landing configuration...
...and off we go at full speed!
With the mechanism tested I can confidently go forward with the project!
Magnus
warreni
South Australia, Australia
Joined: August 14, 2007
KitMaker: 5,926 posts
AeroScale: 2,201 posts
Joined: August 14, 2007
KitMaker: 5,926 posts
AeroScale: 2,201 posts
Posted: Saturday, February 14, 2009 - 02:33 PM UTC
Now you have finished that Arado thing you should make good progress on this project. Certainly is esoteric.. But at least the paint job shouldn't be too hard.. if you, unlike me, can find the right blue!
magnusf
Stockholm, Sweden
Joined: May 02, 2006
KitMaker: 1,953 posts
AeroScale: 1,902 posts
Joined: May 02, 2006
KitMaker: 1,953 posts
AeroScale: 1,902 posts
Posted: Saturday, February 14, 2009 - 07:18 PM UTC
Quoted Text
Now you have finished that Arado thing you should make good progress on this project. Certainly is esoteric.. But at least the paint job shouldn't be too hard.. if you, unlike me, can find the right blue!
Paint is easy this time: "Out of the bottle" from Xtracrylix, it doesn't come easier than that !
Magnus
magnusf
Stockholm, Sweden
Joined: May 02, 2006
KitMaker: 1,953 posts
AeroScale: 1,902 posts
Joined: May 02, 2006
KitMaker: 1,953 posts
AeroScale: 1,902 posts
Posted: Monday, February 16, 2009 - 06:19 AM UTC
Looking more like a flying fish than an aircraft, especially since it is missing its fin! It's a chubby piece of machinery, I wonder why they went so over the top with the design when the main purpose was to demonstrate the feasibility of the swing wing concept?
I finally got around to glue the warped fuselage halves together using super glue and clothes pins. I am a bit worried over the strength of the seam, I have a bad history with things going crack at the least convenient moment... Stay tuned!
Magnus
I finally got around to glue the warped fuselage halves together using super glue and clothes pins. I am a bit worried over the strength of the seam, I have a bad history with things going crack at the least convenient moment... Stay tuned!
Magnus
Posted: Monday, February 16, 2009 - 09:22 AM UTC
Hi Magnus
This is a fascinating thread - and such an unusual kit! I've never seen a swing-wing mechanism in resin before!
All the best
Rowan
This is a fascinating thread - and such an unusual kit! I've never seen a swing-wing mechanism in resin before!
All the best
Rowan
CRS
California, United States
Joined: July 08, 2003
KitMaker: 1,936 posts
AeroScale: 1,168 posts
Joined: July 08, 2003
KitMaker: 1,936 posts
AeroScale: 1,168 posts
Posted: Monday, February 16, 2009 - 10:27 AM UTC
Magnus - This is a great thread, very informative. I've had my eye on this kit for some time now. I hope to get my hands on one soon to complete my Grumman Cat collection.
magnusf
Stockholm, Sweden
Joined: May 02, 2006
KitMaker: 1,953 posts
AeroScale: 1,902 posts
Joined: May 02, 2006
KitMaker: 1,953 posts
AeroScale: 1,902 posts
Posted: Monday, February 16, 2009 - 05:52 PM UTC
Rowan! Yes, it is fascinating but it certainly isn't a good idea! I am already starting to regret that I didn't fix them at one angle. One annoying thing is that moving the wings (no, I don't play with the model but a certain amount of swing winging is unavoidable when working on it ) scratches the paint on the wings. I clad the wing roots in bare metal foil to avoid scratching down to the resin but it is already starting to show a lot of wear.
Chuck! Apart from the wing attachment, the moulding quality could be a bit better but it is nothing disastrous either. There are other alternatives by the way but I think they are all vacforms.
Magnus
Chuck! Apart from the wing attachment, the moulding quality could be a bit better but it is nothing disastrous either. There are other alternatives by the way but I think they are all vacforms.
Magnus
Tarok
Victoria, Australia
Joined: July 28, 2004
KitMaker: 10,889 posts
AeroScale: 174 posts
Joined: July 28, 2004
KitMaker: 10,889 posts
AeroScale: 174 posts
Posted: Monday, February 16, 2009 - 06:00 PM UTC
What a truly interesting subject! You've certainly got my attention
Wanting to know just a bit about the plane, I had a look at the Wiki page (yes, yes, I know Wiki ), and loved this comment: Test pilot Corwin "Corky" Meyer, the only pilot to fly the Jaguar, described it as entertaining to fly "because there was so much wrong with it."
Looking forward to your next update
Rudi
magnusf
Stockholm, Sweden
Joined: May 02, 2006
KitMaker: 1,953 posts
AeroScale: 1,902 posts
Joined: May 02, 2006
KitMaker: 1,953 posts
AeroScale: 1,902 posts
Posted: Wednesday, February 18, 2009 - 12:23 AM UTC
Rudi! I have read about Corky Meyer´s unhappy experiences in the Jaguar somewhere on the Net but I can't find that link now. He almost got killed, several times...
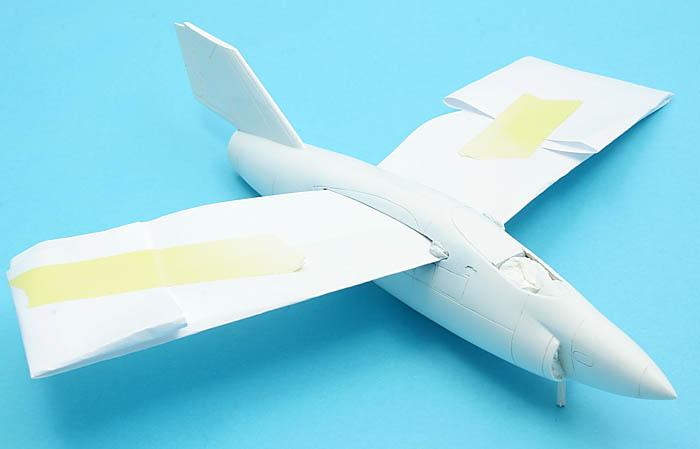
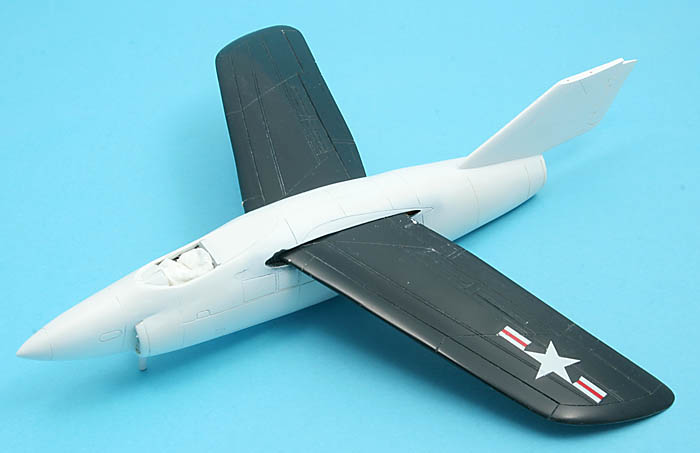
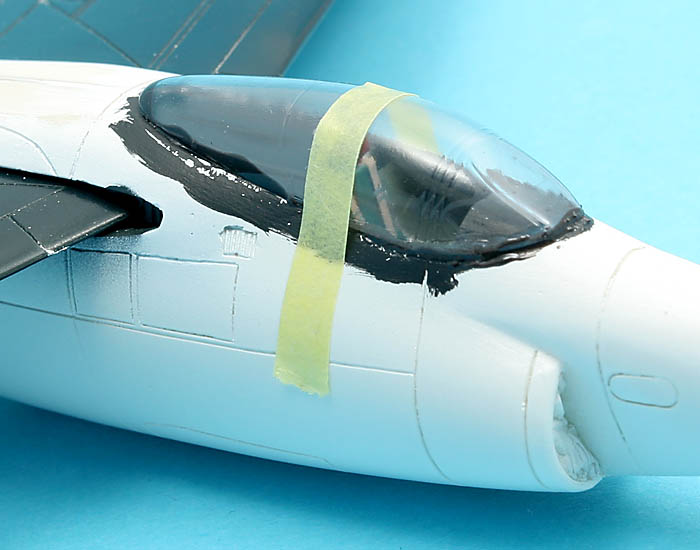
The fuselage got a shot of Tamiya primer today.
I masked the wings with ordinary office paper, folded and taped. I don't want to use anything that is sticky on the wings since I consider them "finished" apart from the natural metal leading edges.
Quite good-looking in white and blue!
Magnus
The fuselage got a shot of Tamiya primer today.
I masked the wings with ordinary office paper, folded and taped. I don't want to use anything that is sticky on the wings since I consider them "finished" apart from the natural metal leading edges.
Quite good-looking in white and blue!
Magnus
magnusf
Stockholm, Sweden
Joined: May 02, 2006
KitMaker: 1,953 posts
AeroScale: 1,902 posts
Joined: May 02, 2006
KitMaker: 1,953 posts
AeroScale: 1,902 posts
Posted: Thursday, February 19, 2009 - 09:21 AM UTC
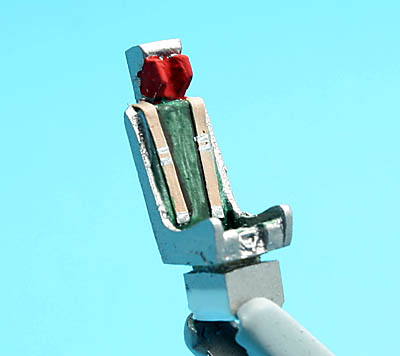
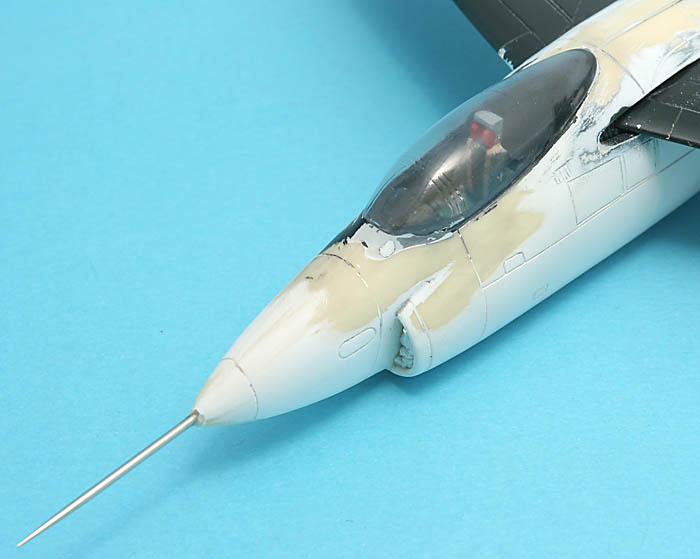
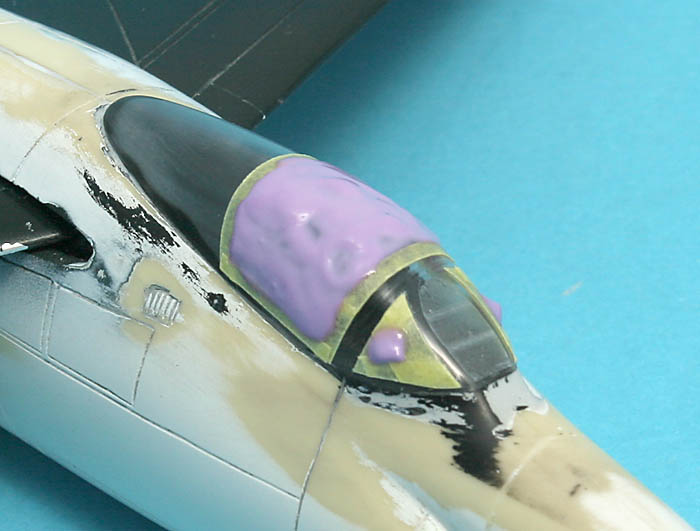
Another small but important update, the ejection seat!
I have no clue at all as to what kind of seat this was. When looking at the photos I have found on the Internet, the seat is natural metal without any upper ejection handles and generally very few details. The red headrest is based on photos of other contemporary seats. Kit supplied seat with masking tape harness.
Magnus
magnusf
Stockholm, Sweden
Joined: May 02, 2006
KitMaker: 1,953 posts
AeroScale: 1,902 posts
Joined: May 02, 2006
KitMaker: 1,953 posts
AeroScale: 1,902 posts
Posted: Friday, February 20, 2009 - 09:07 AM UTC
This is what I have been gathering courage for during the last few days...
Canopy finally in place! I used epoxy glue for this since it sticks well to any material and it doesn't fog clear plastic. It is also quite strong.
Magnus
Canopy finally in place! I used epoxy glue for this since it sticks well to any material and it doesn't fog clear plastic. It is also quite strong.
Magnus
vanize
Texas, United States
Joined: January 30, 2006
KitMaker: 1,954 posts
AeroScale: 1,163 posts
Joined: January 30, 2006
KitMaker: 1,954 posts
AeroScale: 1,163 posts
Posted: Friday, February 20, 2009 - 04:59 PM UTC
wow, really cool subject choice! very unique
magnusf
Stockholm, Sweden
Joined: May 02, 2006
KitMaker: 1,953 posts
AeroScale: 1,902 posts
Joined: May 02, 2006
KitMaker: 1,953 posts
AeroScale: 1,902 posts
Posted: Monday, February 23, 2009 - 09:13 AM UTC
With a bit of luck it will be all blue tomorrow night!
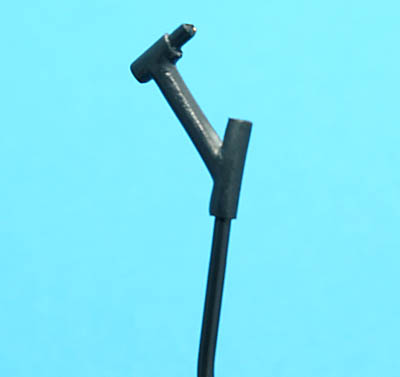
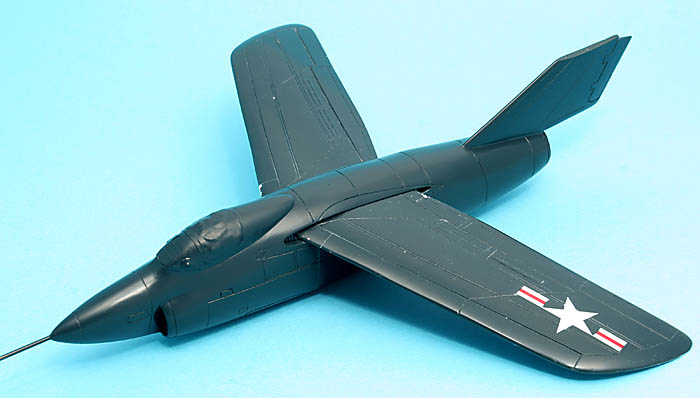
Canopy has been faired in. Fit was about OK, could have been better! Nose probe is a sewing needle, I borrowed it from my wife for scribing, promising that I would hand it back in good shape... Under a coat of paint I hope she won't recognize it!
Masking in place. I have sanded the model a lot to get rid of the surface imperfections. The more I sand, the more I find so I have called it a day for now.
See you soon!
Magnus
Canopy has been faired in. Fit was about OK, could have been better! Nose probe is a sewing needle, I borrowed it from my wife for scribing, promising that I would hand it back in good shape... Under a coat of paint I hope she won't recognize it!
Masking in place. I have sanded the model a lot to get rid of the surface imperfections. The more I sand, the more I find so I have called it a day for now.
See you soon!
Magnus
LongKnife
Jönköping, Sweden
Joined: April 25, 2006
KitMaker: 831 posts
AeroScale: 688 posts
Joined: April 25, 2006
KitMaker: 831 posts
AeroScale: 688 posts
Posted: Tuesday, February 24, 2009 - 04:47 AM UTC
Good call Magnus. It would not be easy to recognize the plane when reduced to powder.
I love the pilots comment about the real plane, but does the same go for the model? Great work so far anyway.
Tony
I love the pilots comment about the real plane, but does the same go for the model? Great work so far anyway.
Tony
magnusf
Stockholm, Sweden
Joined: May 02, 2006
KitMaker: 1,953 posts
AeroScale: 1,902 posts
Joined: May 02, 2006
KitMaker: 1,953 posts
AeroScale: 1,902 posts
Posted: Tuesday, February 24, 2009 - 09:29 AM UTC
Quoted Text
Good call Magnus. It would not be easy to recognize the plane when reduced to powder.
The only thing my wife ever have broken when it comes to my models is a Mirage III accidentally dropped when I had left it on the window sill in our kitchen. I still remember here about this every now and then! It was fixable though...
Quoted Text
I love the pilots comment about the real plane, but does the same go for the model? Great work so far anyway.
Thanks! I am not overly happy with it. I am not really used to resin and to get that top result out of it would take a lot more work than I am prepared to invest in it. There is also a marked difference in quality between this Anigrand kit and my Ardpol TS-8 Bies, both when it comes to casting and the general finesse of the parts, the Ardpol kit is clearly superior. On the other hand, I once bought a Magna Models kit that was very expensive and actually little more than a lump of coagulated resin... Scott Van Aken of Modeling Madness usually refer to the Anigrand kits as "quite OK" and I am prepared to agree with him.
Enough of the words and on to tonight´s photo:
It did get a coat of paint! Actually two with some more sanding in between...
Magnus
magnusf
Stockholm, Sweden
Joined: May 02, 2006
KitMaker: 1,953 posts
AeroScale: 1,902 posts
Joined: May 02, 2006
KitMaker: 1,953 posts
AeroScale: 1,902 posts
Posted: Thursday, February 26, 2009 - 09:21 AM UTC
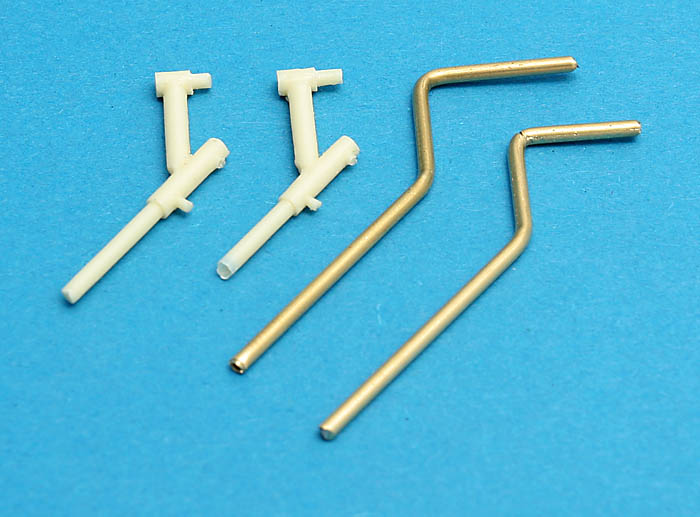
Modelling is not a hobby, it is my main source of worries and the main reason for my bad temper... One of my worries for the last few days has been the weight of the kit compared with the strength (or lack thereof) of the resin landing gear. As in real life, my Jaguar is seriously heavy (and underpowered as well...).
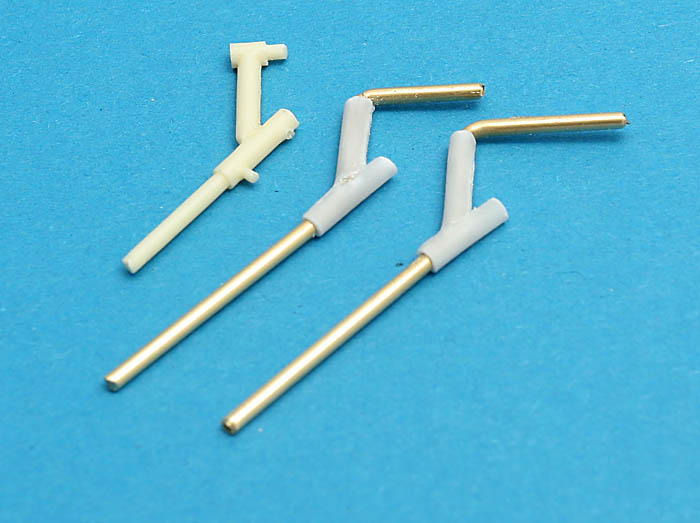
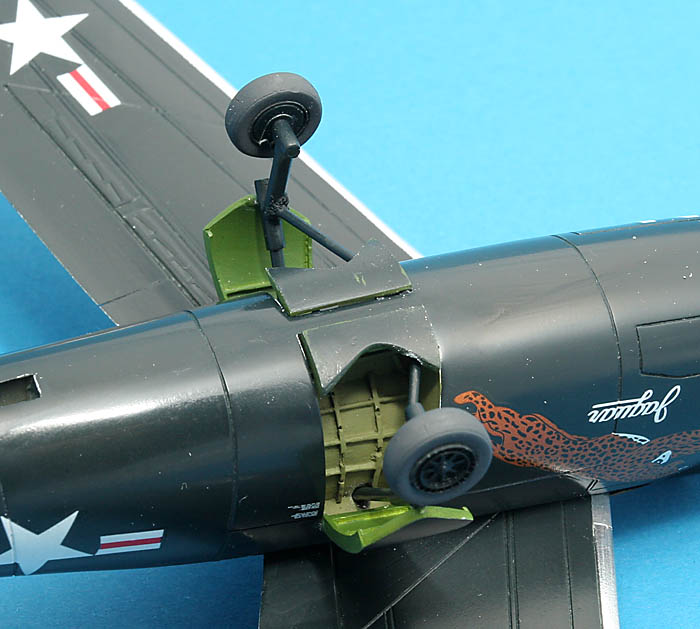
So, some brass tubing and piano wire later, this is what I have come up with:
Resin gear acts as pattern and inspiration!
Dressing up the framework with styrene tubing. I have slitted it to be able to slide it over the brass, gluing and filling using CA-glue.
Easier than I thought, and this will probably carry the weight a lot better!
Magnus
magnusf
Stockholm, Sweden
Joined: May 02, 2006
KitMaker: 1,953 posts
AeroScale: 1,902 posts
Joined: May 02, 2006
KitMaker: 1,953 posts
AeroScale: 1,902 posts
Posted: Saturday, February 28, 2009 - 09:51 AM UTC
I've spent the night decalling, this is the result!
This is the one decal I didn't want to mess up. Chances are slim to find another one in the scrap box!
Magnus
This is the one decal I didn't want to mess up. Chances are slim to find another one in the scrap box!
Magnus
magnusf
Stockholm, Sweden
Joined: May 02, 2006
KitMaker: 1,953 posts
AeroScale: 1,902 posts
Joined: May 02, 2006
KitMaker: 1,953 posts
AeroScale: 1,902 posts
Posted: Sunday, March 08, 2009 - 09:00 AM UTC
Not too much left now!
One of my home-made landing gears after painting.
And this is what it looks like when in place. Using unsharp mask in Photoshop really makes all blemishes stand out! It doesn't look this spotty in real life.
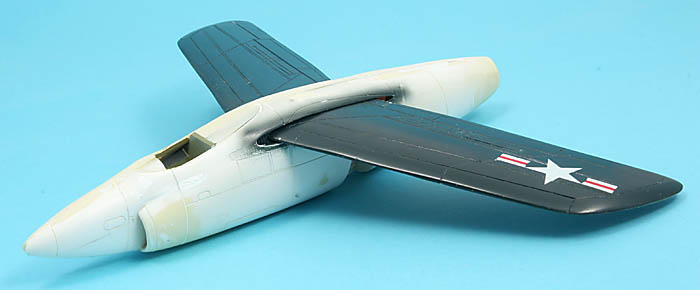
Complete with the tail in place! All leading edges are clad with Bare Metal "Matte Aluminium". The problem is that it doesn't stay that matte when burnishing it to get it to conform to the wing!
Odd looking bird...
Magnus
magnusf
Stockholm, Sweden
Joined: May 02, 2006
KitMaker: 1,953 posts
AeroScale: 1,902 posts
Joined: May 02, 2006
KitMaker: 1,953 posts
AeroScale: 1,902 posts
Posted: Wednesday, March 11, 2009 - 06:44 AM UTC
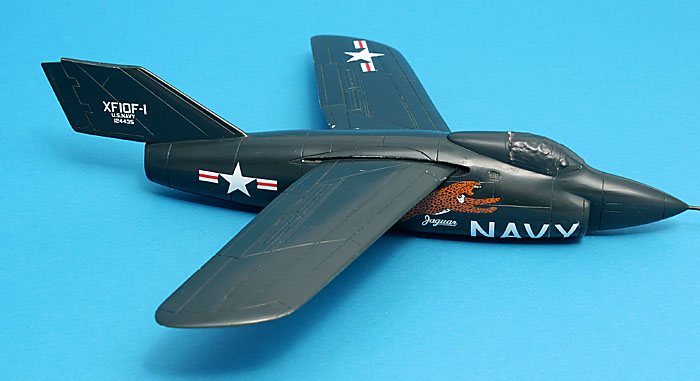
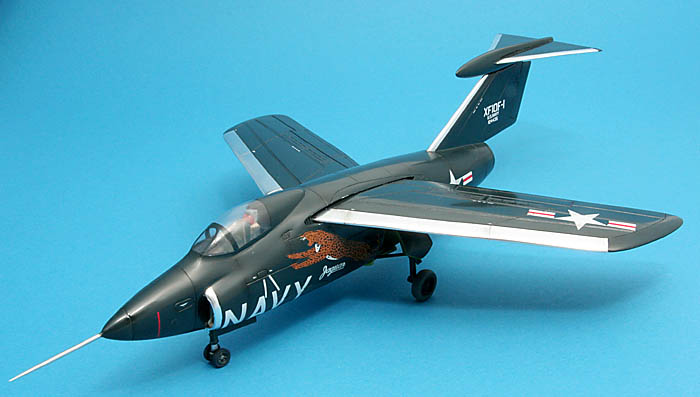
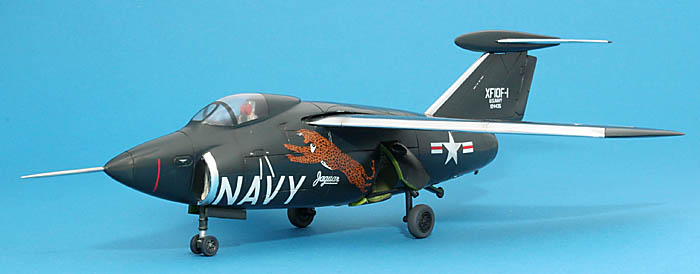
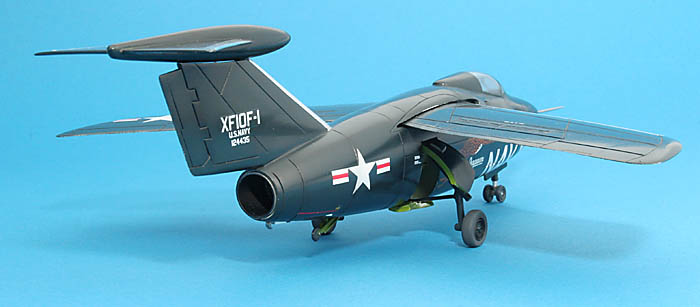
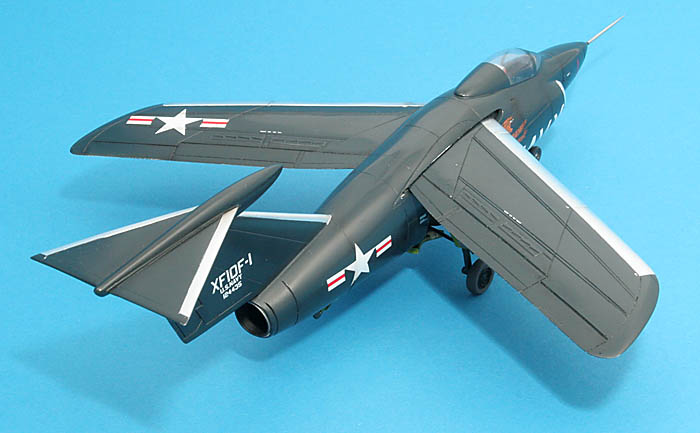
Finally finished!
It has been an interesting project and the final result reached the "OK"-level at least... The kit was nice but it needed its fair share of work. I should have spent more time fixing the surface imperfections, there are quite a few blemishes that can be seen at the top surfaces of the wings. The all-blue semi-gloss paint scheme doesn't conceal them all that well either...
When it comes to detailing, I should have added some of the parts that can be seen behind the seat, it looks empty now. On the other hand, I pilfered a lot of white stencilling from a Daco RF-84F-sheet and that at least added some interest to the outside!
Finally, if someone else builds this one some day: rebuild the swing wing mechanism so that it is possible to attach the wings after painting. The swing wing mechanism is quite exotic but it really doesn't work that well, the main problem is that it scratches the paintwork.
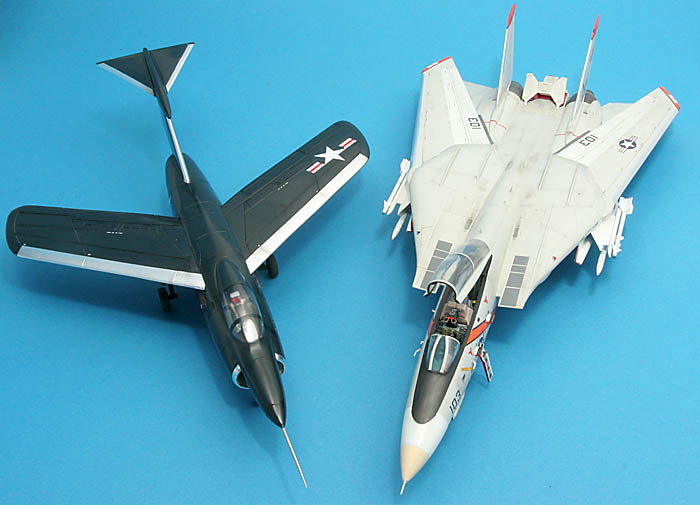
The XF10F was the immediate predecessor to the Tomcat. The Tomcat is huge but the Jaguar isn't that much smaller!
Magnus