_GOTOBOTTOM
Cold War (1950-1974)
Discuss the aircraft modeling subjects during the Cold War period.
Hosted by Tim Hatton
Xtrakit 1/72 Gloster Meteor T7
magnusf
_VISITCOMMUNITY
Stockholm, Sweden
Joined: May 02, 2006
KitMaker: 1,953 posts
AeroScale: 1,902 posts
Posted: Thursday, March 12, 2009 - 08:36 PM UTC
Another Meteor, another Xtrakit kit...

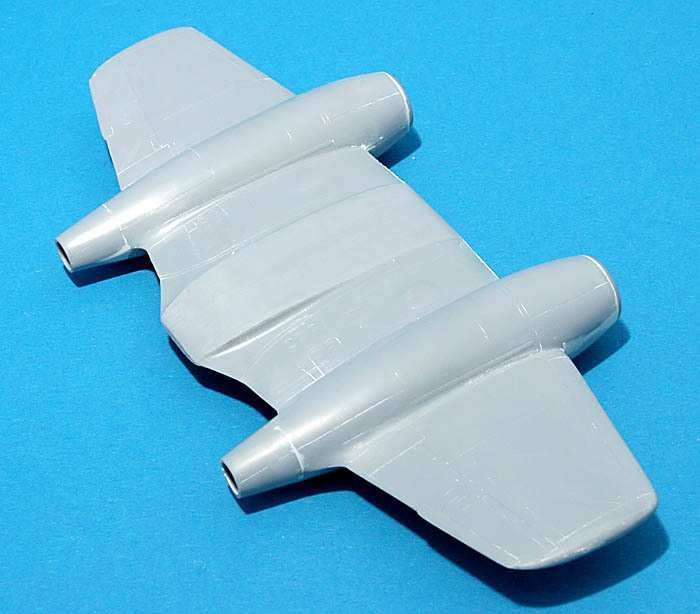
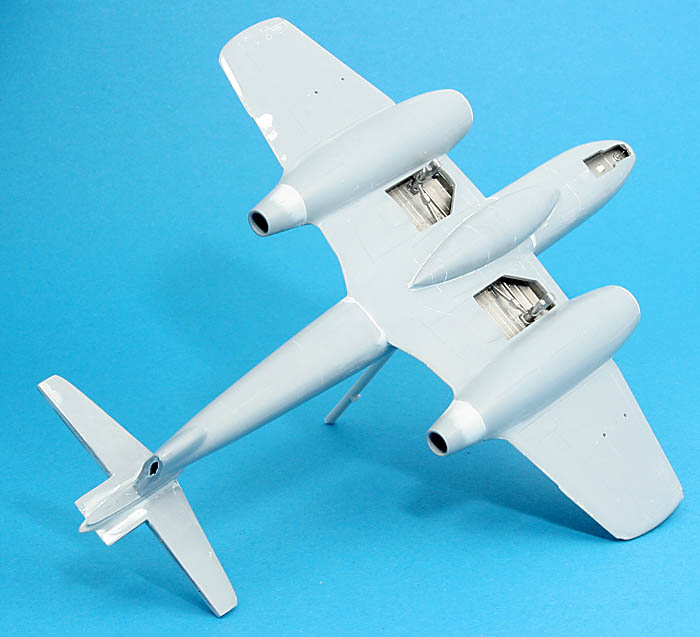
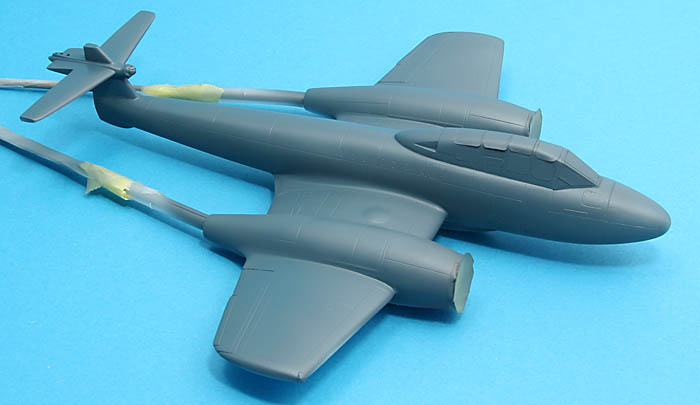
This one will become an Israeli trainer from the late sixties, one of three used by the "Knights of the North" Vautour-squadron for twin engine training. A quick inspection of the kit shows that it is very much like the earlier Xtrakit Mk 8 but with new fuselage halves, interior and canopy of course!


Nice box art as usual. There is a colour photo of this aircraft on the cover of the Gloster Meteor Warpaint book (No. 22) showing large dayglo areas that are missing from both the box art and the decals.


A good looking decal sheet...


...still lacking the drop tank sling marks and with the same excellent spelling as in the Mk 8 kit...


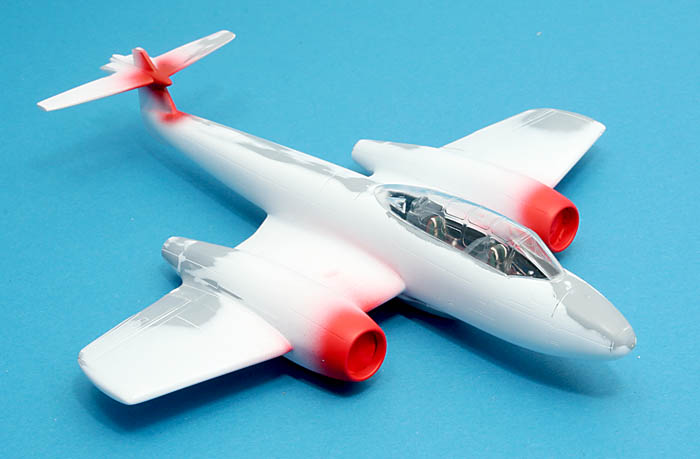
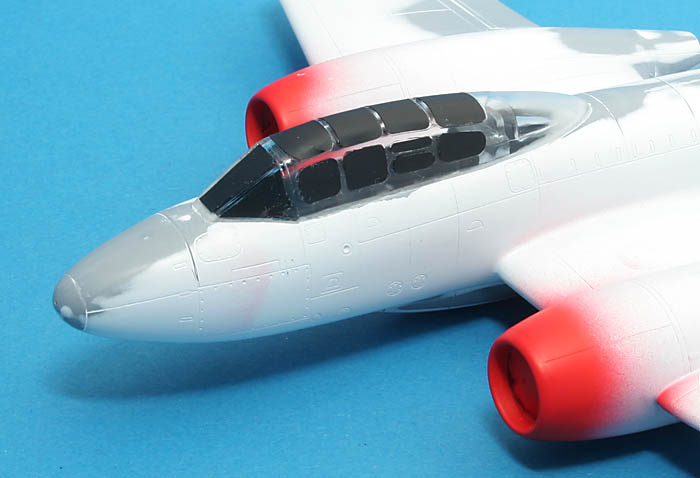
A nice and clear canopy, once again cast in one piece. I won't attack this one with the saw since I still remember my misadventures with the Mk 8...


IsraDecal will supply the markings, without doubt the best possible choice when it comes to Israeli aircraft. I haven't counted the options but you can probably do whatever Meteor you like (F8, T7, NF13) from any time period during its service in the Israeli air force. And they have sling marks and correctly spelled stencilling for the tanks as well, lots of them! Finally, there are markings for both Egypt and Syria as well. Check their web site!


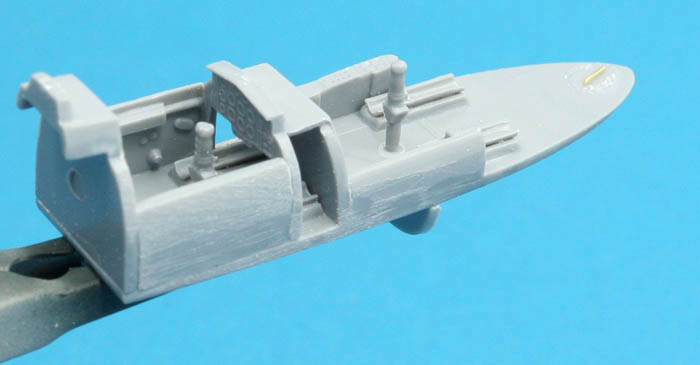
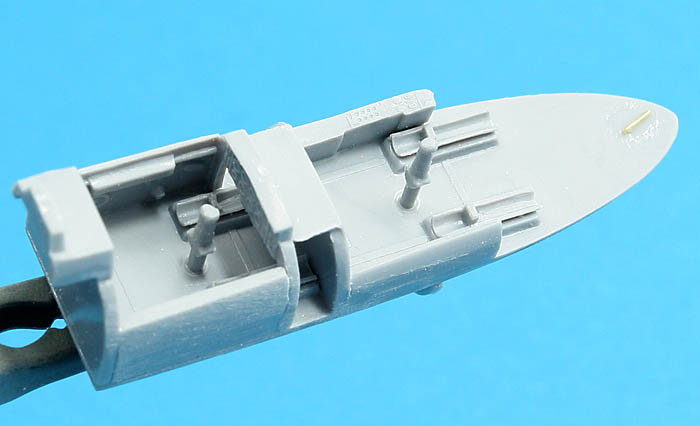
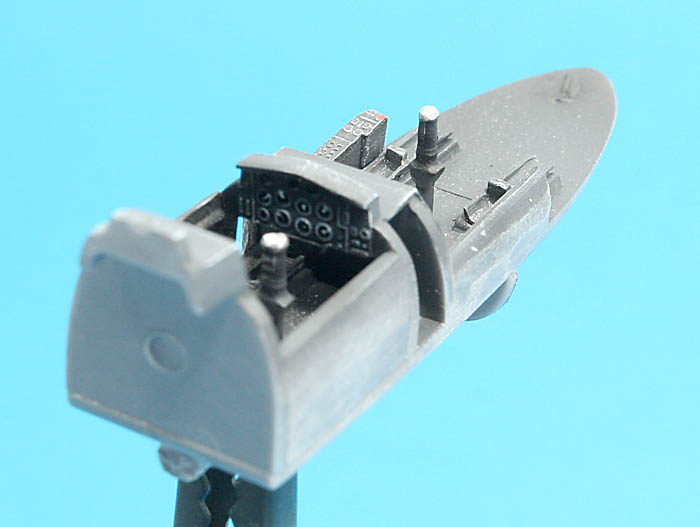
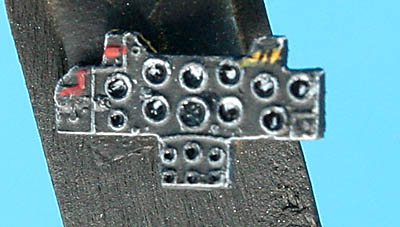
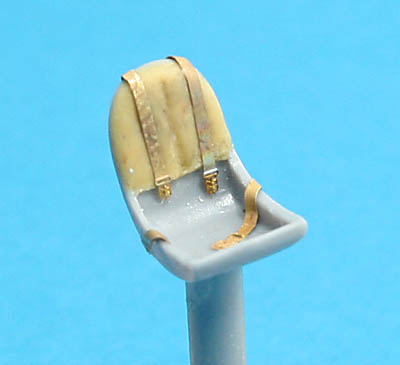
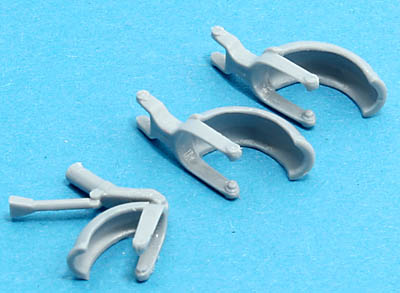
As usual, work starts in the cockpit! I won't add any details here since not much will be seen through a closed canopy, I will however add belts to the seats.

While on the subject of seats: Does any of you out there have interior photos of the T7 showing the seats, preferably colour photos? Was it bakelite or metal? Where did the seat harness attach?

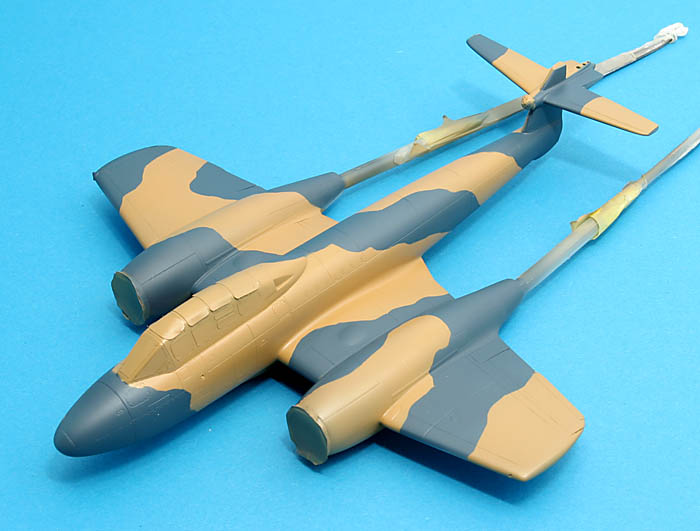
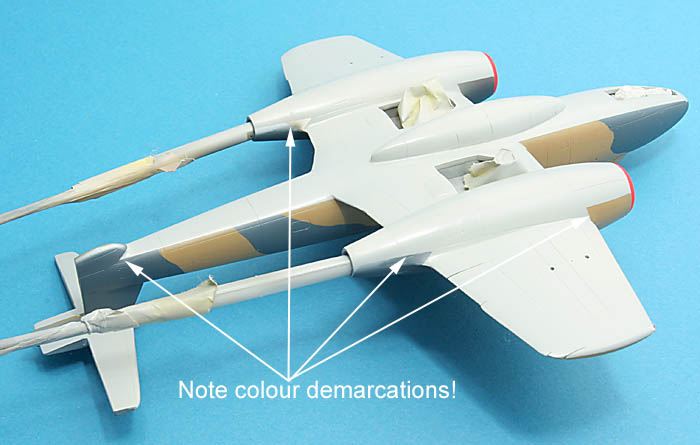
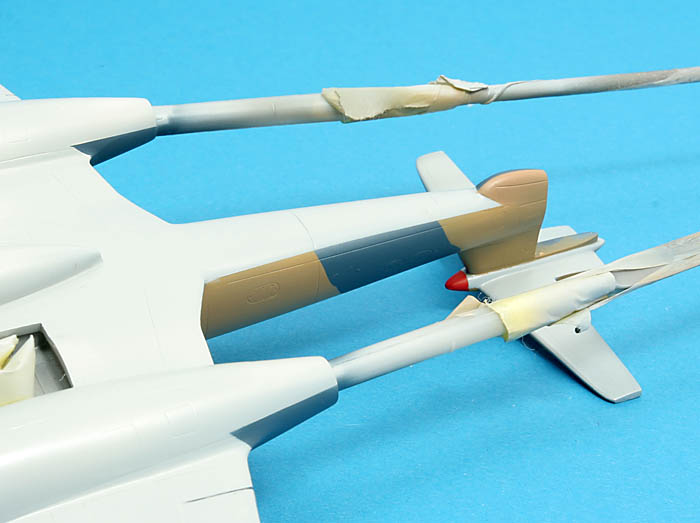
Paint scheme will be the blue/tan scheme of the fifties. Since I am in asking mode right now I wonder if any of you have a good recipe for this camouflage, if possible acrylics of some kind?


Magnus
magnusf
_VISITCOMMUNITY
Stockholm, Sweden
Joined: May 02, 2006
KitMaker: 1,953 posts
AeroScale: 1,902 posts
Posted: Saturday, March 14, 2009 - 09:33 AM UTC
Cockpit finished tonight and fuselage halves glued. With plenty of lead shot in the nose!


British cockpits from the fifties: a study in black! I hoped for some colour spots but on the photos I have found, everything is rather monochrome. Even the artificial horizon is black and white instead of the modern blue/brown instrument.


Front instrument panel, dry-brushed with white and instrument "glass" from drops of Tamiya clear.


Magnus
magnusf
_VISITCOMMUNITY
Stockholm, Sweden
Joined: May 02, 2006
KitMaker: 1,953 posts
AeroScale: 1,902 posts
Posted: Monday, March 16, 2009 - 09:14 AM UTC
Project continues...


A completed fuselage!


As usual I do something I immediately regret: I wish I hadn't cut off the rudder and the elevators! Well, if I manage to get them back on they will add a bit of interest to the model.


Magnus
magnusf
_VISITCOMMUNITY
Stockholm, Sweden
Joined: May 02, 2006
KitMaker: 1,953 posts
AeroScale: 1,902 posts
Posted: Friday, April 24, 2009 - 07:55 AM UTC
More than a month since last update. Well, I've been working even if I haven't been posting!


Wings have been filled and sanded.


Fit is better on the top surfaces but nothing alarming here either...


A complete Meteor before priming...


...with a very practical handle!

And then there are the bits and pieces:


Home made tread pattern. The wheels were bare (or worn out, I don't know which!) and the pattern can be seen clearly on photos. One evening's worth of work with scriber and scalpel and I ended up with this! It looks a bit irregular in the photos but the look in real life is perfectly OK.


Kit seat dressed up with a putty back cushion and photo etch seat belts from Reheat. I glued the etch with diluted white glue and ended up with strong joints and no mess. No more CA-glue for me when glueing photo etch in the future!

The model is primed and I am stuck in my usual mid-model-crisis. I don't even worry anymore, I know it will move forward again as soon as I start painting!


Magnus
CMOT70
_VISITCOMMUNITY
Victoria, Australia
Joined: August 23, 2007
KitMaker: 629 posts
AeroScale: 539 posts
Posted: Friday, April 24, 2009 - 03:03 PM UTC
It's looking good so far...and like a typical MPM moulded model it has a bit of filler here and there! I've really come to enjoy building kits by them actually, though i've never built one of their Xtrakit products.

Is your practical handle actually glued on? I take a much more scientific approach to primering. I put on a latex glove, hold the model in my hand by one end and spray the rest. I then walk around the house holding it for the next 10-15 minutes until it's dry enough to hold. Then i spray primer on the part where i was holding before. This is all because i've had my practical handles fall off in the past...at very bad times.

Andrew
magnusf
_VISITCOMMUNITY
Stockholm, Sweden
Joined: May 02, 2006
KitMaker: 1,953 posts
AeroScale: 1,902 posts
Posted: Friday, April 24, 2009 - 06:16 PM UTC

Quoted Text

It's looking good so far...and like a typical MPM moulded model it has a bit of filler here and there! I've really come to enjoy building kits by them actually, though i've never built one of their Xtrakit products.

Is your practical handle actually glued on? I take a much more scientific approach to primering. I put on a latex glove, hold the model in my hand by one end and spray the rest. I then walk around the house holding it for the next 10-15 minutes until it's dry enough to hold. Then i spray primer on the part where i was holding before. This is all because i've had my practical handles fall off in the past...at very bad times.

Andrew


Hi Andy!

I have two kids who wouldn't accept daddy just walk around the house for 15 minutes, otherwise it sounds like an excellent idea !

The handle is glued securely to the inside of the fuselage, it will be cut off using nippers before canopy is installed. And yes, I admit, I have had handle problems as well in the past. This one is however quite safe!

MPM and Xtrakit are perfectly the same, no difference at all in model quality. And like MPM, quality goes a bit up and down. The Meteor and the Canberra are very nice I think, the Sea Vixen is not so good.


Magnus
magnusf
_VISITCOMMUNITY
Stockholm, Sweden
Joined: May 02, 2006
KitMaker: 1,953 posts
AeroScale: 1,902 posts
Posted: Wednesday, June 03, 2009 - 08:37 AM UTC
I've been doing just about anything except modelling the last few weeks but now things seem to lighten up a bit!


Since last time I have painted the red rings around the engines and the acorn fairing and canopy is now on as well.


Magnus
Tomcat31
#042
_VISITCOMMUNITY
England - North East, United Kingdom
Joined: November 18, 2006
KitMaker: 2,828 posts
AeroScale: 1,720 posts
Posted: Thursday, June 04, 2009 - 01:14 AM UTC
Some amazing work yet again Magnus. Ii'll have a look in the Meteor book i have if you still need info on the seats.

I'm currently building three in different schemes for a magazine and Agree with the lead shot in the nose I filled every nook and cranny I could find but still ended up with a tail sitter on one of them. I'll try and post a picture when they're finished.

Cheers

Allen
magnusf
_VISITCOMMUNITY
Stockholm, Sweden
Joined: May 02, 2006
KitMaker: 1,953 posts
AeroScale: 1,902 posts
Posted: Thursday, June 04, 2009 - 01:37 AM UTC

Quoted Text

Some amazing work yet again Magnus. Ii'll have a look in the Meteor book i have if you still need info on the seats.


I went for bakelite but I have yet to see a photo of it... It really doesn't matter now since I won't break the canopy open for a repaint anyway !


Quoted Text

I'm currently building three in different schemes for a magazine and Agree with the lead shot in the nose I filled every nook and cranny I could find but still ended up with a tail sitter on one of them. I'll try and post a picture when they're finished.

Cheers

Allen


Good luck with your builds, I look forward to seeing them!


Magnus
magnusf
_VISITCOMMUNITY
Stockholm, Sweden
Joined: May 02, 2006
KitMaker: 1,953 posts
AeroScale: 1,902 posts
Posted: Thursday, June 04, 2009 - 09:26 AM UTC

Rudders and elevators on parade, ready for priming tomorrow. I've built up the curved areas that attach to fin and stabilizers using Tamiya epoxy putty.


Magnus
magnusf
_VISITCOMMUNITY
Stockholm, Sweden
Joined: May 02, 2006
KitMaker: 1,953 posts
AeroScale: 1,902 posts
Posted: Friday, June 05, 2009 - 09:52 AM UTC
Finally I've got the first coat of paint on!


Paint masks are included with the kit. I am not that impressed by them, the fit against the outlines of the windows could have been better and they are quite stiff as well making them hard to conform to the top windows in the canopy. I might have a bit of a window cleaning job to do when I remove them...


Masking in place and the canopy has been over painted in black to simulate the interior colour.


An IAF-blue Meteor, or rather my interpretation of IAF-blue! For those who are curious, paint is Gunze: H56, H333 and H15 in proportions 4:2:1.


Magnus
magnusf
_VISITCOMMUNITY
Stockholm, Sweden
Joined: May 02, 2006
KitMaker: 1,953 posts
AeroScale: 1,902 posts
Posted: Saturday, June 06, 2009 - 09:27 AM UTC
This is another traditional part of my build blogs: I hate masking tape!


With a bit of luck it will be finished on Monday and then there is the usual five minutes of painting time and ten minutes of de-masking...


Magnus
Tomcat31
#042
_VISITCOMMUNITY
England - North East, United Kingdom
Joined: November 18, 2006
KitMaker: 2,828 posts
AeroScale: 1,720 posts
Posted: Sunday, June 07, 2009 - 06:20 AM UTC

Quoted Text

Paint masks are included with the kit. I am not that impressed by them, the fit against the outlines of the windows could have been better and they are quite stiff as well making them hard to conform to the top windows in the canopy. I might have a bit of a window cleaning job to do when I remove them...

I fully agree, I would have preferred to have Kabuki tape masks supplied. In saying that though the one i have finished came out with minimal overspray.
magnusf
_VISITCOMMUNITY
Stockholm, Sweden
Joined: May 02, 2006
KitMaker: 1,953 posts
AeroScale: 1,902 posts
Posted: Tuesday, June 09, 2009 - 09:38 AM UTC

Quoted Text

I fully agree, I would have preferred to have Kabuki tape masks supplied. In saying that though the one i have finished came out with minimal overspray.


I hope I am as lucky as you were Allen but looking at my photos it doesn't look to promising

Anyway, half a roll of masking tape later I am at least finished with this tiring phase of the process...


See you tomorrow, then we'll see how the camo turned out!


Magnus
magnusf
_VISITCOMMUNITY
Stockholm, Sweden
Joined: May 02, 2006
KitMaker: 1,953 posts
AeroScale: 1,902 posts
Posted: Wednesday, June 10, 2009 - 09:29 AM UTC
Other half of the upper surface camo is done!


Contrast is maybe a little extreme but it will all be evened out with weathering! Brown is Gunze H310 with a few drops of yellow H4 in it.


Magnus
magnusf
_VISITCOMMUNITY
Stockholm, Sweden
Joined: May 02, 2006
KitMaker: 1,953 posts
AeroScale: 1,902 posts
Posted: Thursday, June 11, 2009 - 09:31 AM UTC
Still stuck in masking tape hell! And I'll probably be busy with the tape tomorrow night as well...


Just to show that I am at least doing something creative! I had a bit of trouble attaching the gear doors to my Mk 8 so this time I am fabricating "hinges" from card.


Magnus
jaypee
_VISITCOMMUNITY
Scotland, United Kingdom
Joined: February 07, 2008
KitMaker: 1,699 posts
AeroScale: 1,384 posts
Posted: Thursday, June 11, 2009 - 07:05 PM UTC
how did i miss this. great thread.
will be following you to end now magnus. nice work with hinges
magnusf
_VISITCOMMUNITY
Stockholm, Sweden
Joined: May 02, 2006
KitMaker: 1,953 posts
AeroScale: 1,902 posts
Posted: Friday, June 12, 2009 - 09:50 AM UTC
Jaypee I'll do my best to keep you entertained . Not tonight though, I'm still stuck in tape... Glad you liked the gear doors, I know I will love them when it comes to put them on the model


Magnus
magnusf
_VISITCOMMUNITY
Stockholm, Sweden
Joined: May 02, 2006
KitMaker: 1,953 posts
AeroScale: 1,902 posts
Posted: Saturday, June 13, 2009 - 09:20 AM UTC
Finally out of masking tape hell!


I went for the "all masking tape look" this time! Against better judgement as usual since tape has a tendency to stick but I got away lucky...


...with a nicely painted Meteor! I am quite pleased with myself!

Paint mix is Gunze H334 and white in proportions 5:2. H334 is actually labelled "Barley Grey". Well, who cares?


I'll have to do some touch ups. The colour demarcations are wrong in the profiles, on photos (in the same book as the profiles of course) one can see that the upper surface pattern extends below the nacelle centre lines and also that the fin "keel" is in the upper surface colours. No, I am not irritated, not at all...

I'll have a look around for a Tamiya TS-can with clear lacquer this week, the Gunze paints doesn't withstand decal solutions very well.


Magnus
magnusf
_VISITCOMMUNITY
Stockholm, Sweden
Joined: May 02, 2006
KitMaker: 1,953 posts
AeroScale: 1,902 posts
Posted: Sunday, June 14, 2009 - 09:11 AM UTC
Touch ups finished!


I've ordered a can of Tamiya TS-13 clear, the model will take a rest until the postman gets here with it. I'll continue with the small parts tomorrow.


Magnus
magnusf
_VISITCOMMUNITY
Stockholm, Sweden
Joined: May 02, 2006
KitMaker: 1,953 posts
AeroScale: 1,902 posts
Posted: Monday, June 15, 2009 - 09:19 AM UTC
It has been small parts evening tonight. Just me, Miles Davis on Spotify and the glue bottle. Ain't life good ?


Meteor landing gear bits and pieces. They are very nice as they come in the model, with some detailing they will be absolutely cracking!


Magnus
warreni
_VISITCOMMUNITY
South Australia, Australia
Joined: August 14, 2007
KitMaker: 5,926 posts
AeroScale: 2,201 posts
Posted: Monday, June 15, 2009 - 09:46 AM UTC

Quoted Text

I'll have a look around for a Tamiya TS-can with clear lacquer this week, the Gunze paints doesn't withstand decal solutions very well.


Hi Magnus.

Looking good so far. I use Gunze paints almost exclusively and have never had a problem with decal setting solution damaging the paint. I use Micro-Set or Micro0SOl.. sometimes both!! :-)

You could always Future your model before applying the decals. That would protect the paint as well.

Warren
magnusf
_VISITCOMMUNITY
Stockholm, Sweden
Joined: May 02, 2006
KitMaker: 1,953 posts
AeroScale: 1,902 posts
Posted: Sunday, June 21, 2009 - 08:53 AM UTC

Quoted Text


Quoted Text

I'll have a look around for a Tamiya TS-can with clear lacquer this week, the Gunze paints doesn't withstand decal solutions very well.


Hi Magnus.

Looking good so far. I use Gunze paints almost exclusively and have never had a problem with decal setting solution damaging the paint. I use Micro-Set or Micro0SOl.. sometimes both!! :-)

You could always Future your model before applying the decals. That would protect the paint as well.

Warren


Hi Warren!

I tend to get kind of a "melting"-effect using Sol over Gunze and Tamiya clear. I find them quite soft and susceptible to finger prints and when I use fabric gloves I easily get impressions from the gloves when handling the model. Anyway, you'll get a report when I have tried the TS clear!

Not much of interest done lately, all the remaining parts like drop tanks and gear doors have been primed tonight. Landing gear are nearing completion as well, I might even have some photos for you tomorrow!


Magnus
magnusf
_VISITCOMMUNITY
Stockholm, Sweden
Joined: May 02, 2006
KitMaker: 1,953 posts
AeroScale: 1,902 posts
Posted: Wednesday, July 08, 2009 - 09:43 AM UTC
More gardening and cycling than modelling lately. I guess it is just that time of the year now!

Anyway, a few decals have been added tonight.


Decals are absolutely stunning, among the best I have ever used. There are some minor glitches when it comes to the instructions (they indicate the wrong stars to be used for this machine) but decal-wise they are fantastic!

I got my rattle can with Tamiya TS-13 clear and tried it on an old paint victim: It wrinkles the Gunze paint below. I am so happy that I for once did something clever and didn't try it on the Meteor! I will experiment some more in the future with thinner layers and a better paint job below as well, my paint victim has more than ten years of paint trials on it so it might have something to do with that...


Magnus
magnusf
_VISITCOMMUNITY
Stockholm, Sweden
Joined: May 02, 2006
KitMaker: 1,953 posts
AeroScale: 1,902 posts
Posted: Tuesday, August 25, 2009 - 09:13 AM UTC
With less than a week to go before the campaign is over, I'll better get this one done!


I have peeled off the canopy masks, the overspray was less than I had anticipated even if the fit of the masks was less than optimal. A worse problem was some kind of residue that had developed on the inside forcing me to break in to the cockpit to clean it.


Some more filling, sanding and touching-up to do!

I have no luck with my canopies nowadays...


Magnus
 _GOTOTOP