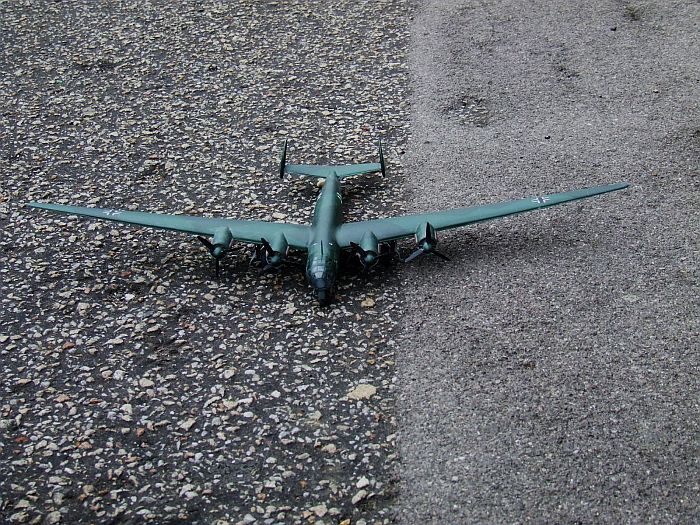
Thanks for the comments..the plane is a real beast to construct..anyone with any experience of Special Hobby kits will know they are not the easiest to build and the instructions can be somewhat vague at the best of times..luckily i plodded alone with it and it came out ok to my mind...i was especially pleased with the cockpit glass area as i did it by hand..it does need a LOT of weight in the nose to balance the model on it's front wheel with such a huge tail area pulling down at the back though!! To get the centre of gravity right i had to carve part ot the cockpit out at the back within the fuselage area..luckily it doesn't show...there's not really a lot to the kit to be honest..it's very sparce on detail..it is rather big though..around a 2 feet wing span...the wings are the killers though to construct along with the tail rudder area...the thing is this plane has a distinct angle the wings sit on the fuselage as does the tail section...if you look at it head on you can see how obvious it is..they all have to be in line at angles or it looks really bad...seeing as there are no lugs to locate the wings and you only have bare plastic on the wing roots and side of fuselage it really is murder to get the wings exactly right..in fact when i did it ages ago i had to really sand down the edges to join the wings to the fuselage and seeing as these glued joints are all that hold the wings on i used a bit of superglue just too make sure..(i held the wings in position for over an hour!!)..then filled the rest in with filler and rubbed it down..none of the parts are what you'd call a great fit and the whole kit is covered in excessive flash..the undercarriage wheel wells are done in resin as are the engine fronts the cockpit bulkhead and various other details in the cockpit and the front undercarriage door on the nose wheel..the resin wheel wells take a lot of cleaning up to even start to fit between the two halves of the wings...the wings are meant to sit at 3 degrees to the fuselage looking at it head on..i really tried to achieve this,but i'm not sure how far out i am..the tail sits at 4 degrees and the rudder are 90 degrees to the tail..you need to do a LOT of filling on this kit as well..i will give it full marks for the near perfect cockpit canopy that comes in 2 pieces..and the front wheel undercarriage support runs through the bottom of the glass canopy as it should on the real thing..it fits perfectly..the cockpit although sparce in detail is more than adequate when the plane is built up..as i say..IT NEEDS A LOT OF WEIGHT TO NOT BE A TAIL SITTER! The instruction say at least 60 grms of weight to get it on it's front wheel..depending how forward you place it it's enough..Seeing as this model was one of the two versions available and that was it in this scale i really had to have a crack at building it.
I will get more pics of it so you can see it better...it needs dusting off though before i can do anything with it as it's on a shelf in my back bedroom at the moment awaiting a decent cabinet to put it in..
Sreve in the UK


 would love to see some more pics preferably up-close


