_GOTOBOTTOM
Pre-Flight Check
Constructive critique of your finished or in-progress photos.
P-39 Eduard 1/48
hellvetier
_VISITCOMMUNITY
Bern, Switzerland
Joined: April 17, 2008
KitMaker: 264 posts
AeroScale: 88 posts
Posted: Wednesday, May 13, 2009 - 01:52 AM UTC
Hello guys

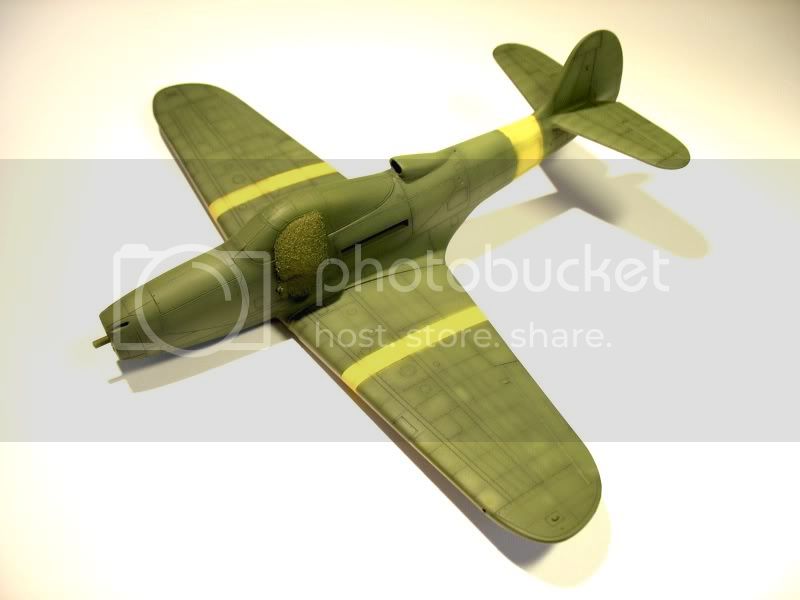
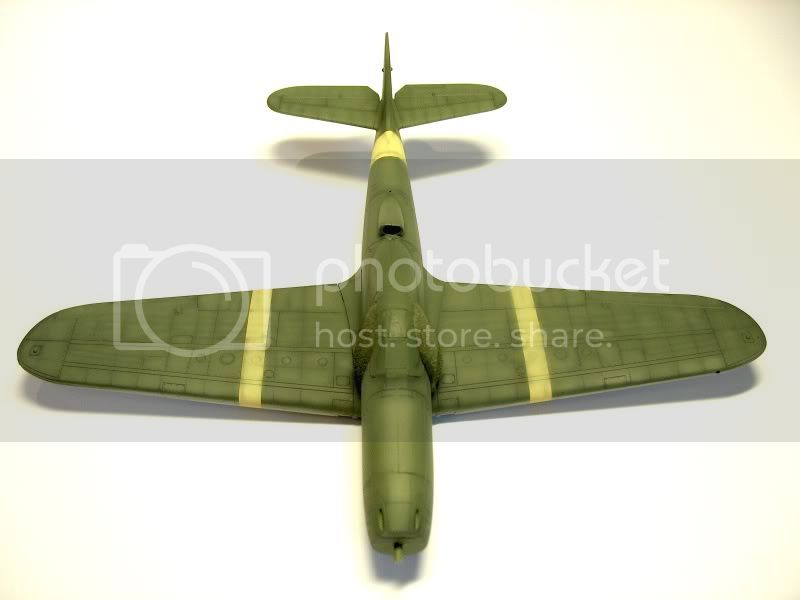
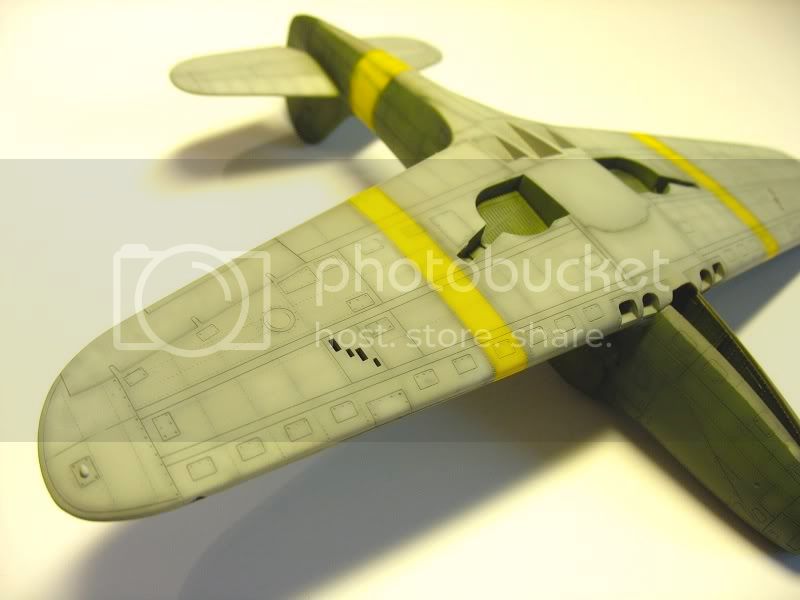
Just wanted to show you my progress on the p-39 1/48 which I purchased sometime ago. The kit is great! No need of putty what so ever. Though the stencil decal sheet was missing, so I sent a mail to Eduard and they said that my LHS where I bought the kit is responsible to order a new one.

So next steps will be a clear coat, put on the decals I have and beginn with the other parts, like wheels, etc.

Criticism like always very welcome!


LongKnife
_VISITCOMMUNITY
Jönköping, Sweden
Joined: April 25, 2006
KitMaker: 831 posts
AeroScale: 688 posts
Posted: Wednesday, May 13, 2009 - 01:59 AM UTC
Sweeeet finish. Is it just preshaded or have you lightened the panels too?

Get a mirror for this one to stand on.
Tony
cinzano
_VISITCOMMUNITY
Indiana, United States
Joined: January 13, 2009
KitMaker: 419 posts
AeroScale: 378 posts
Posted: Wednesday, May 13, 2009 - 04:18 AM UTC
I must confess that the paint work is exceptional (and I really like the using of foam to help mask the cockpit. I'm always on the search for more efficient ways to mask off wheel wells and cockpits).

If its OK, I'd like to offer a critique too.

The paint job is superior, but the best finish in the world won't conceal weaknesses in construction. There are several places (wing root, leading edges, air intake etc...) that I see seams or gaps. You've got a quality kit. I think you'd have been rewarded by working the seams a little more thoroughly before proceeding to the paint.

Hawkeye has a great thread titled "Reading the Seams". I've been modeling for decades yet was amazed at how beneficial to my builds Hawkeye's tutorials are.

All in all, your build is coming along well, but I think more attention to construction would transform a good build to an outstanding build.

Cheers,
Fred
hellvetier
_VISITCOMMUNITY
Bern, Switzerland
Joined: April 17, 2008
KitMaker: 264 posts
AeroScale: 88 posts
Posted: Wednesday, May 13, 2009 - 09:07 PM UTC
@ Tony: Thanks for your comment! 1. base coat 2. shading the panel lines 3. lightening the panels 4. lighter base coat over the whole model to get a uniform look.

@ Fred: You're absolutly right I should have invested more time in the construction. But now I know the kit and it's properties and can do it better with the second p-39. I worked too fast and didn't took enough time. Thanks for the ciritque!!!
stm
_VISITCOMMUNITY
Florida, United States
Joined: March 07, 2004
KitMaker: 98 posts
AeroScale: 96 posts
Posted: Saturday, May 30, 2009 - 03:09 PM UTC
The seams at the wing roots are rather prominent. That was a smooth fillet on the real aircraft. If you have not decaled the model yet you can still fix these seams
drabslab
_VISITCOMMUNITY
European Union
Joined: September 28, 2004
KitMaker: 2,186 posts
AeroScale: 1,587 posts
Posted: Monday, June 01, 2009 - 11:26 PM UTC
very nice finish!!!
SGTJKJ
#041
_VISITCOMMUNITY
Kobenhavn, Denmark
Joined: July 20, 2006
KitMaker: 10,069 posts
AeroScale: 3,788 posts
Posted: Tuesday, June 09, 2009 - 12:54 AM UTC
Hi AW, looks excellent. Good to hear this kit has an excellent fit. I have two of these birds in my stash. It will be interesting to follow your build.

As already pointed out you did a great job on the paint scheme.

You also have the Eduard Dual combo?
PanzerMike
_VISITCOMMUNITY
Hamilton, New Zealand
Joined: May 09, 2007
KitMaker: 298 posts
AeroScale: 120 posts
Posted: Thursday, August 13, 2009 - 03:16 PM UTC
Nice Cobra there , i have the P400 one of these to build.They are nice little kits.
Dirkpitt289
_VISITCOMMUNITY
New Jersey, United States
Joined: May 24, 2008
KitMaker: 346 posts
AeroScale: 307 posts
Posted: Wednesday, January 06, 2010 - 03:04 PM UTC
Great job on the pre shading and the over all paint job
 _GOTOTOP