#042
England - North East, United Kingdom
Joined: November 18, 2006
KitMaker: 2,828 posts
AeroScale: 1,720 posts
Posted: Saturday, July 04, 2009 - 03:32 AM UTC
Hi All,
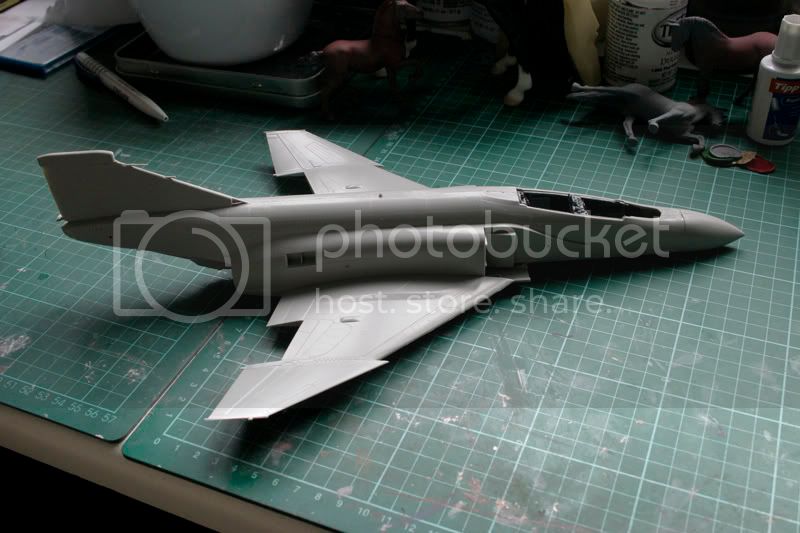
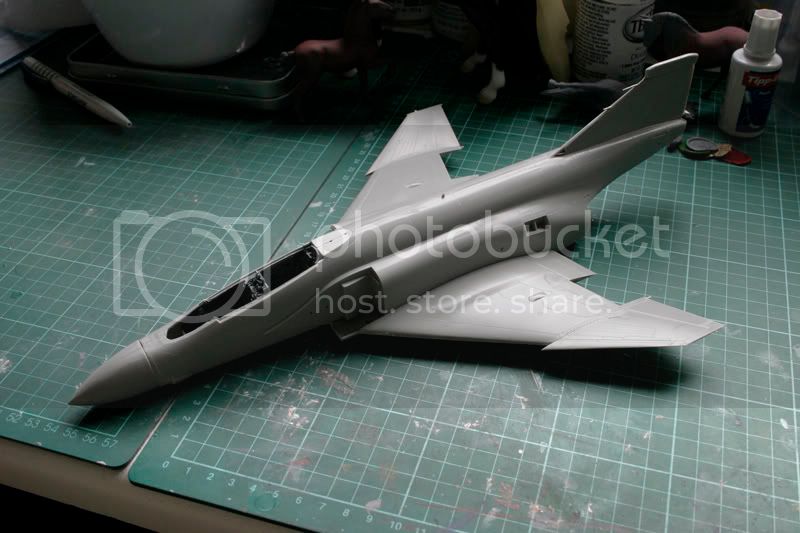
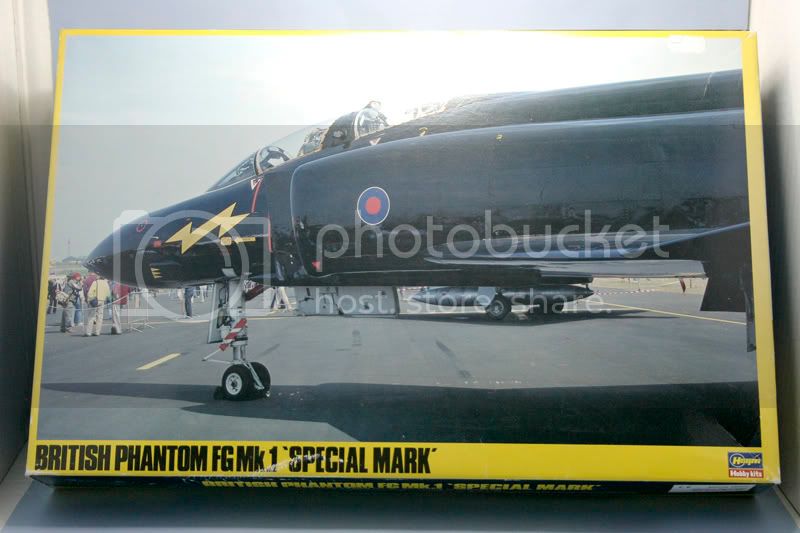
Well it's nearly time to start another project and this time its, as the title suggests, a Phantom FGR1. I'm building this for a client and he has requested for the finish to be that of the commanders plane of 892 Sqn. Royal Navy on it's final cruise of the HMS Ark Royal.
This will be the donor for all the extra's that are going in it.
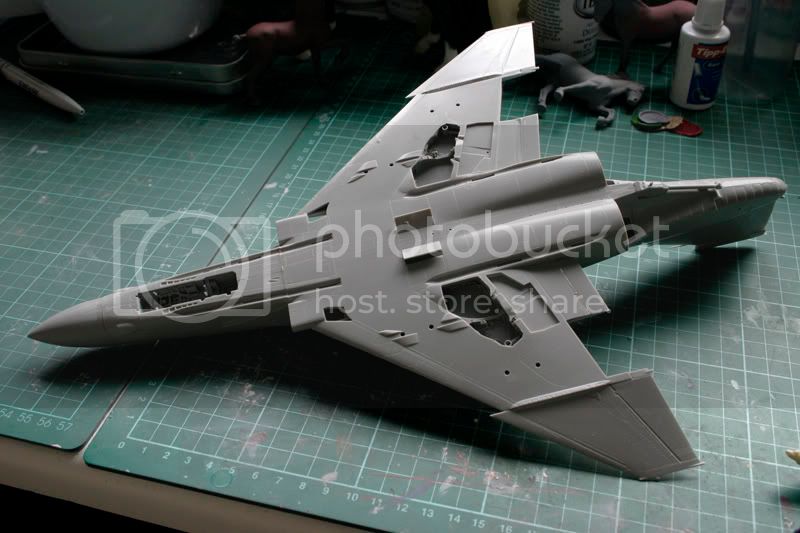
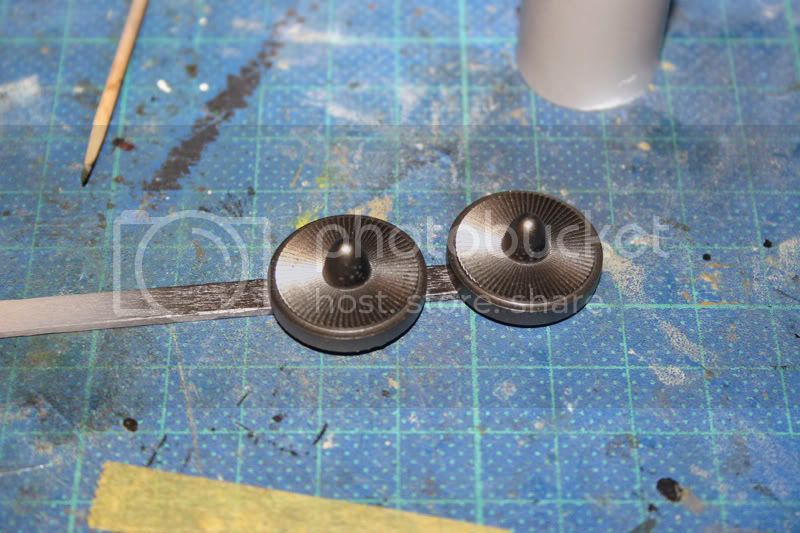
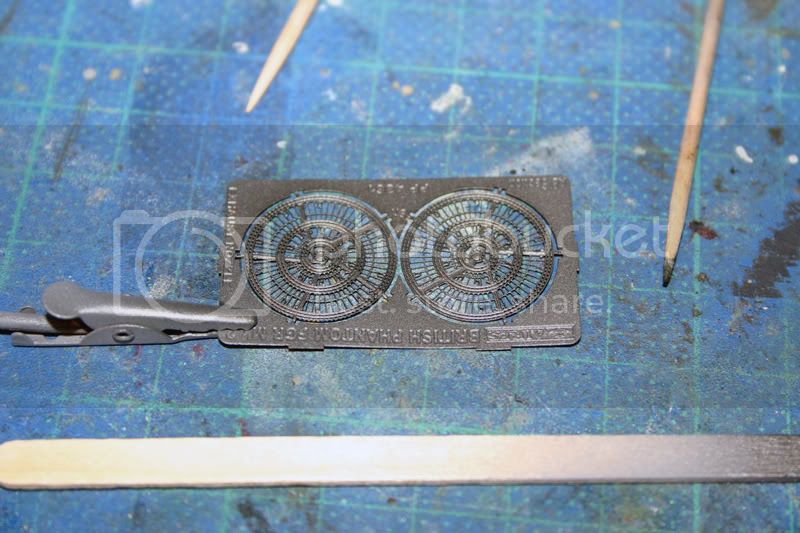
And here's the first few extras
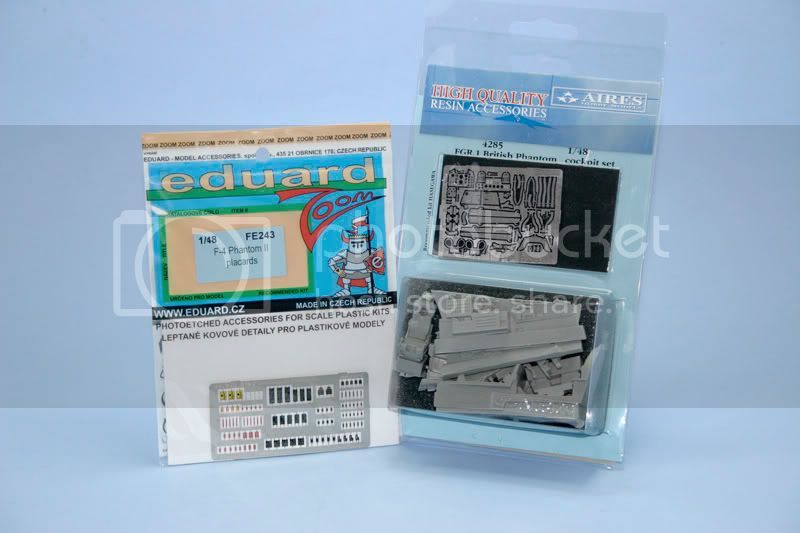
I'm hoping to add the following as well Aries wheel bay set, Aries FGR1 Exhaust nozzles, possibly Flightpath's Phantom Ladders, and maybe some parts from Eduard's FGR2 etch set. Hopefully these will be ordered at the end of the month.
Modellers Creed: This is my toolbox. There are many like it, but this one is mine. My toolbox is my best friend. It is my life. I must master it as I must master my life. My toolbox, without me, is useless. Without my toolbox, I am useless.
Scotland, United Kingdom
Joined: June 01, 2006
KitMaker: 1,707 posts
AeroScale: 1,119 posts
Posted: Saturday, July 04, 2009 - 05:49 AM UTC
This will be interesting indeed!

"I´m going back to the front to relax"
"THE BLACK CATS FLIES TONIGHT"
"Find your enemy and shoot him down - everything else is unimportant"
"When you're out of F-8's... You're out of fighters!"
#042
England - North East, United Kingdom
Joined: November 18, 2006
KitMaker: 2,828 posts
AeroScale: 1,720 posts
Posted: Saturday, July 04, 2009 - 08:42 AM UTC
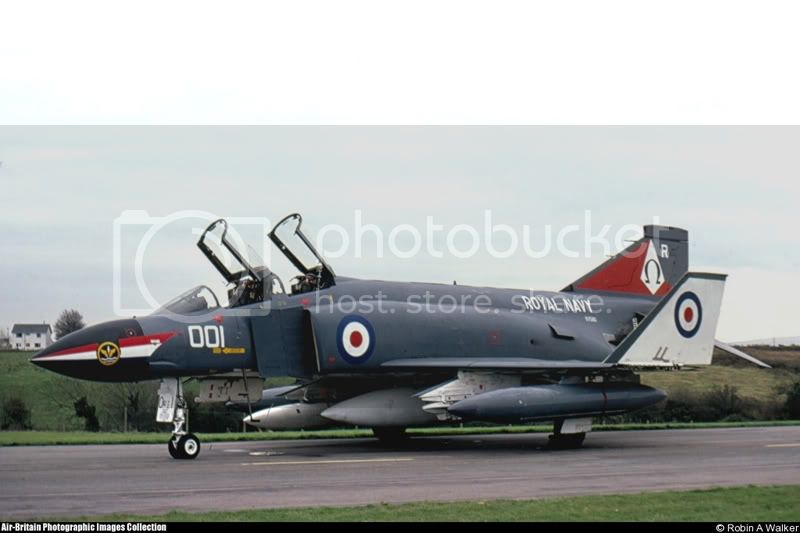
First problem is that although i'm using the "Special Mark" kit, the kit aslo includes decals for 892 Sqn. but the red and white nose flash has 77 as the decal options (as this scheme was adopted for the Queen's Silver Jubilee) like the picture below and it looks like the changed it to what looks like a versionof the sqn emblem. (as can be seen in my first post)

I'm googling and finding nothing to resemble it so I can make my own decals

Modellers Creed: This is my toolbox. There are many like it, but this one is mine. My toolbox is my best friend. It is my life. I must master it as I must master my life. My toolbox, without me, is useless. Without my toolbox, I am useless.
England - South East, United Kingdom
Joined: June 27, 2006
KitMaker: 2,487 posts
AeroScale: 575 posts
Posted: Saturday, July 04, 2009 - 12:34 PM UTC
Quoted Text
First poblem is that although i'm using the "Special Mark" kit, the kit aslo includes decals for 892 Sqn. but the red and white nose flash has 77 as the decal options (as this scheme was adopted for the Queen's Silver Jubilee) like the picture below and it looks like the changed it to what looks like a versionof the sqn emblem. (as can be seen in my first post)
I'm googling and finding nothing to resemble it so I can make my own decals
Surely the bigger problem you have will be remembering to deliver the kit!!!
Looking forward to seeing your progess on this one Allen. It's a great kit.
Andy
It's not the same, better, but not the same...
IPMS NO 10636
Florida, United States
Joined: November 13, 2005
KitMaker: 189 posts
AeroScale: 129 posts
Posted: Sunday, July 05, 2009 - 07:00 AM UTC
Cool project. I can't wait to see it come together.
#042
England - North East, United Kingdom
Joined: November 18, 2006
KitMaker: 2,828 posts
AeroScale: 1,720 posts
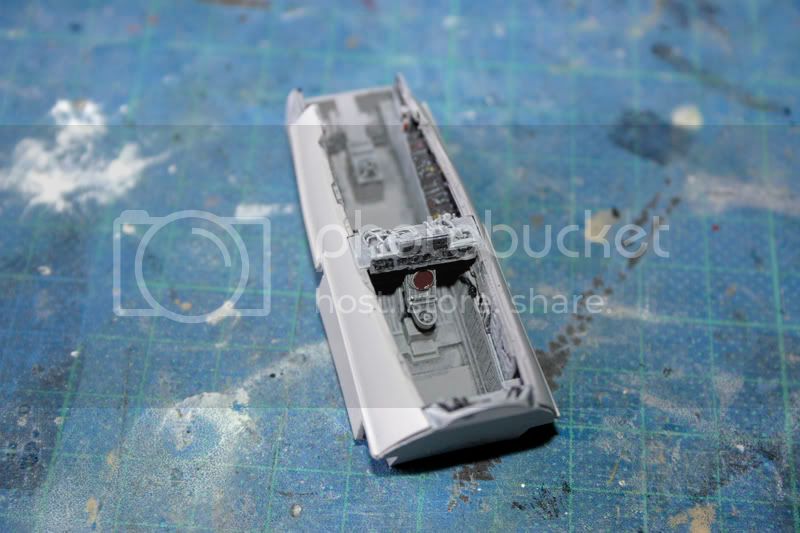
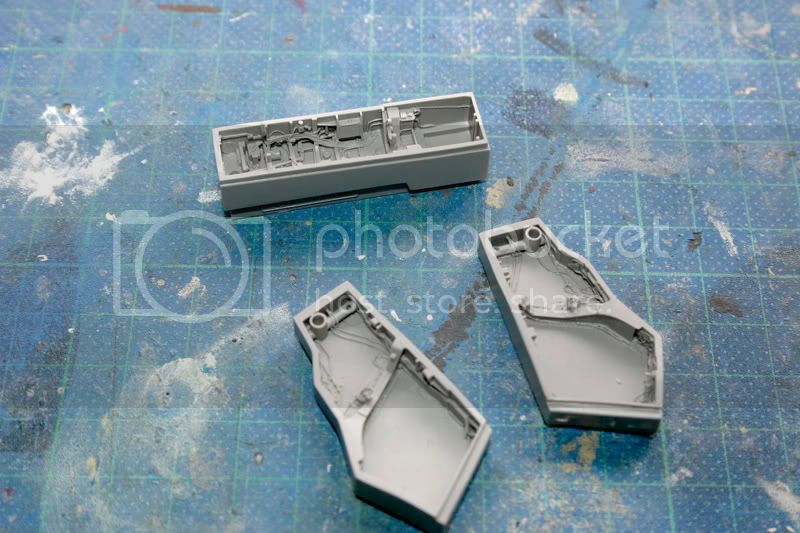
Posted: Monday, July 20, 2009 - 01:22 AM UTC
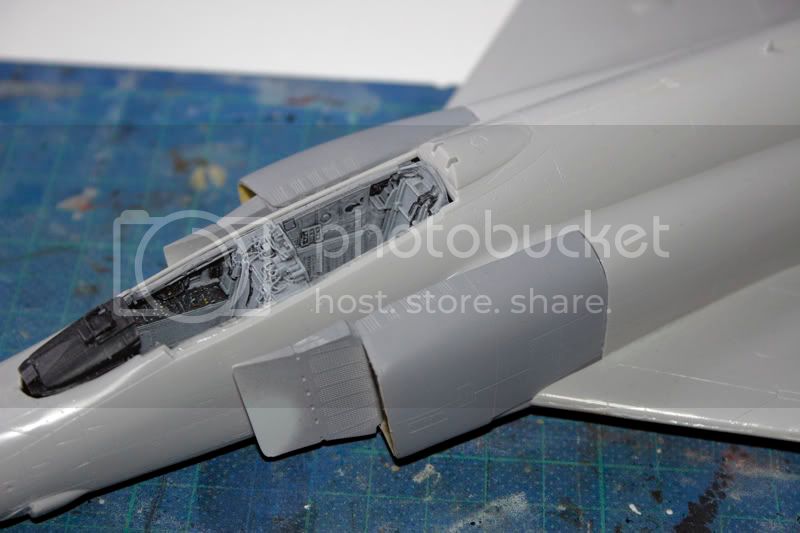
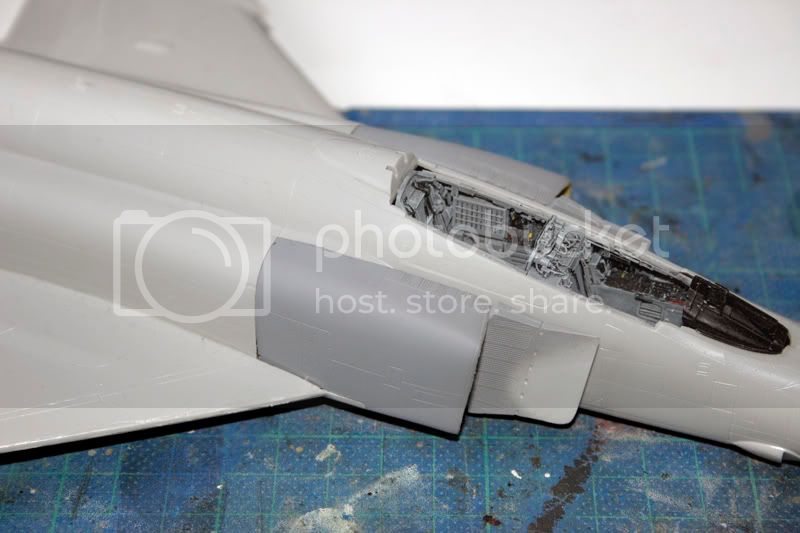
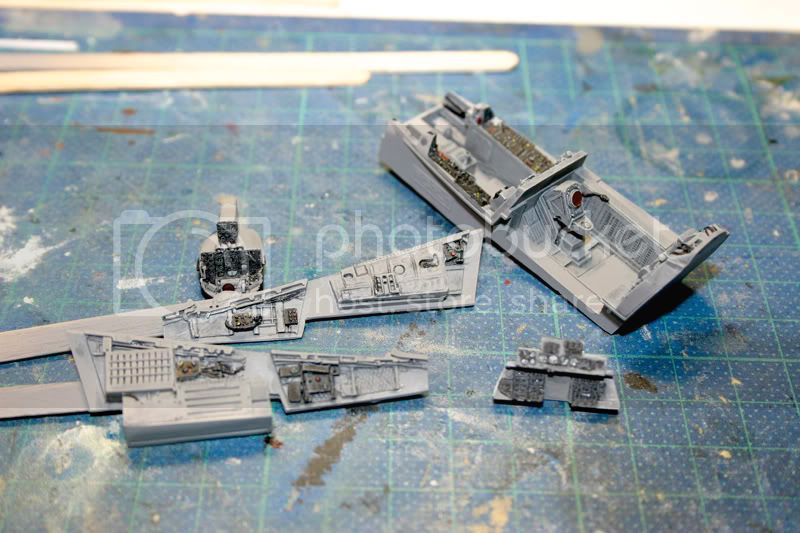
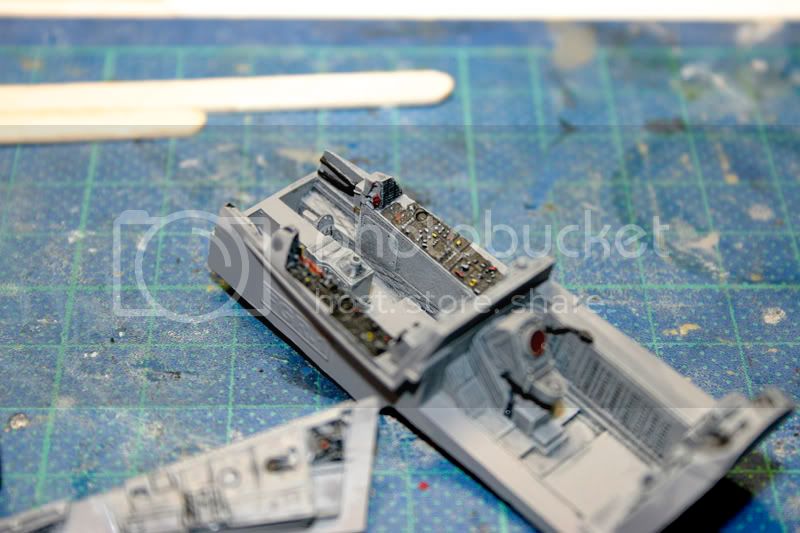
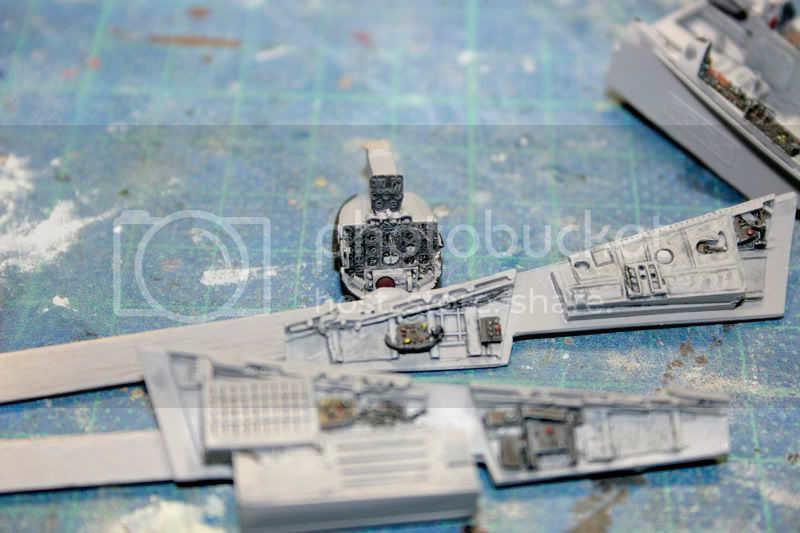
Quick update.
I got some work done to the cockpit this weekend. Here's some progress pics of when it was up to last night although there's still some work to be done in there yet. (unfortunately the falsh makes it look alot greyer than it is)
Cheers
Modellers Creed: This is my toolbox. There are many like it, but this one is mine. My toolbox is my best friend. It is my life. I must master it as I must master my life. My toolbox, without me, is useless. Without my toolbox, I am useless.
#042
England - North East, United Kingdom
Joined: November 18, 2006
KitMaker: 2,828 posts
AeroScale: 1,720 posts
Posted: Sunday, August 16, 2009 - 05:15 AM UTC
Modellers Creed: This is my toolbox. There are many like it, but this one is mine. My toolbox is my best friend. It is my life. I must master it as I must master my life. My toolbox, without me, is useless. Without my toolbox, I am useless.
Florida, United States
Joined: June 03, 2003
KitMaker: 1,095 posts
AeroScale: 52 posts
Posted: Sunday, August 16, 2009 - 04:33 PM UTC
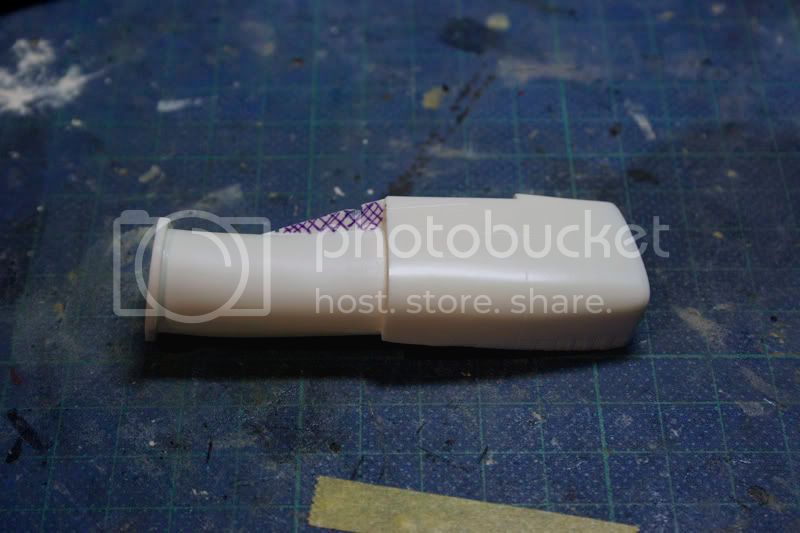
If you can get a hold of D-Molds F-4 intakes for spey engined phantoms, they are just awesome, and very easy to work with and install.
Andy
Fideli Certa Merces -- "to the faithful there is certain reward"
#042
England - North East, United Kingdom
Joined: November 18, 2006
KitMaker: 2,828 posts
AeroScale: 1,720 posts
Posted: Tuesday, September 01, 2009 - 08:13 AM UTC
Quoted Text
If you can get a hold of D-Molds F-4 intakes for spey engined phantoms, they are just awesome, and very easy to work with and install.
Andy
I Wish you hadn't told me about them as I'd like to get some now

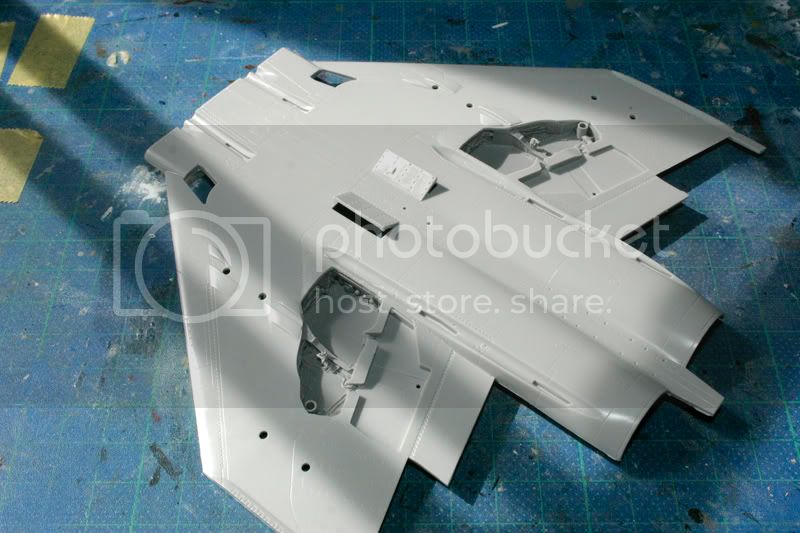
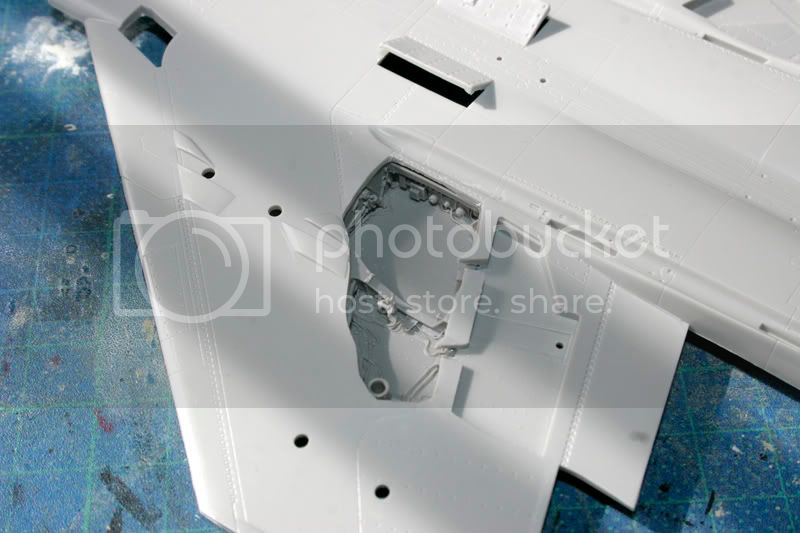
Quick update: I've spent the last few weeks slowly carving the resin tub and wheel well to get the to fit. First the wheel well was glued in place.
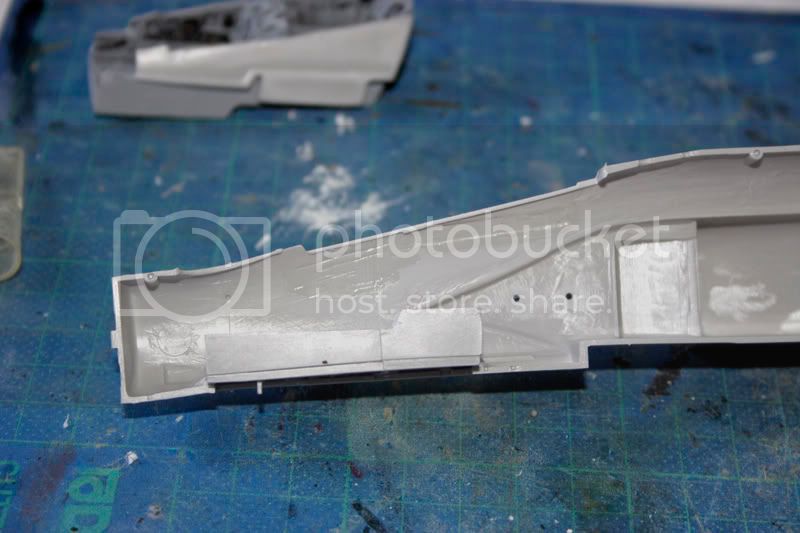
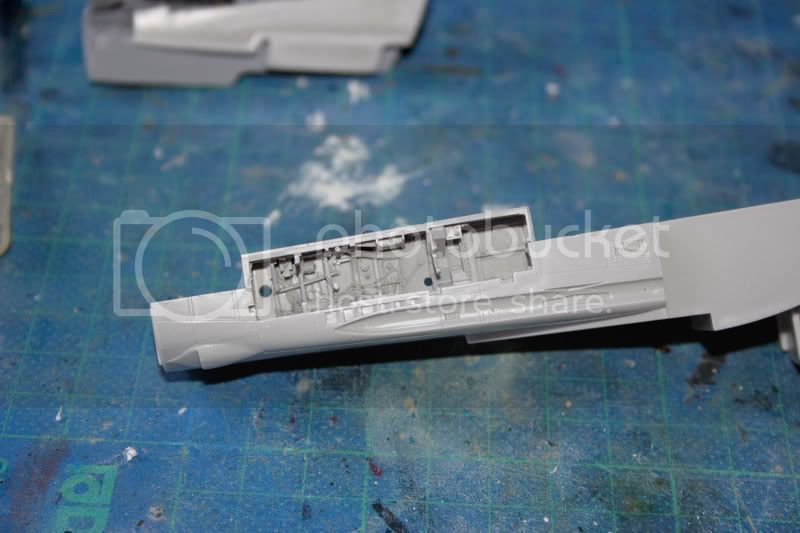
And more light sanding continued until the cockpit tub fitted
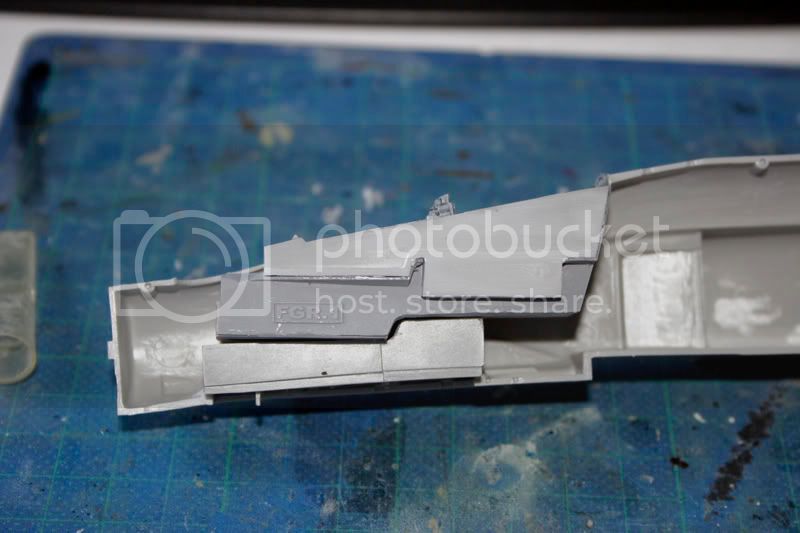
There's still some fine adjusting to do but it's getting there (slowly) i'm hoping once i get the fuselage together this project will pick up some pace
Modellers Creed: This is my toolbox. There are many like it, but this one is mine. My toolbox is my best friend. It is my life. I must master it as I must master my life. My toolbox, without me, is useless. Without my toolbox, I am useless.
#042
England - North East, United Kingdom
Joined: November 18, 2006
KitMaker: 2,828 posts
AeroScale: 1,720 posts
Posted: Sunday, September 20, 2009 - 10:52 AM UTC
Modellers Creed: This is my toolbox. There are many like it, but this one is mine. My toolbox is my best friend. It is my life. I must master it as I must master my life. My toolbox, without me, is useless. Without my toolbox, I am useless.
#042
England - North East, United Kingdom
Joined: November 18, 2006
KitMaker: 2,828 posts
AeroScale: 1,720 posts
Posted: Wednesday, October 07, 2009 - 09:51 AM UTC
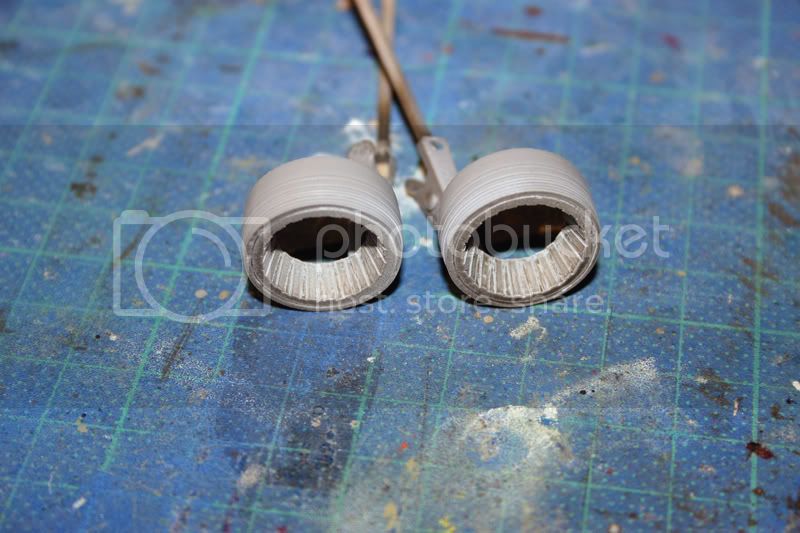
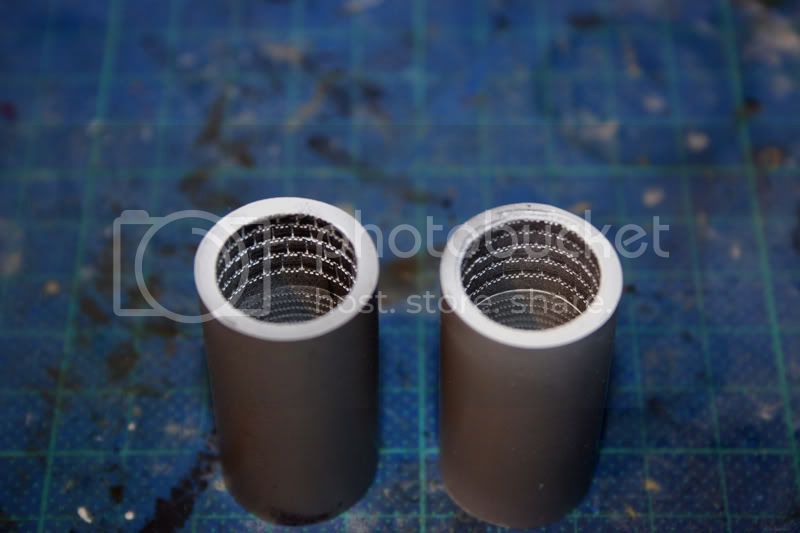
Well the model has been sat on the side for the last few weeks while i waited for these to arrive
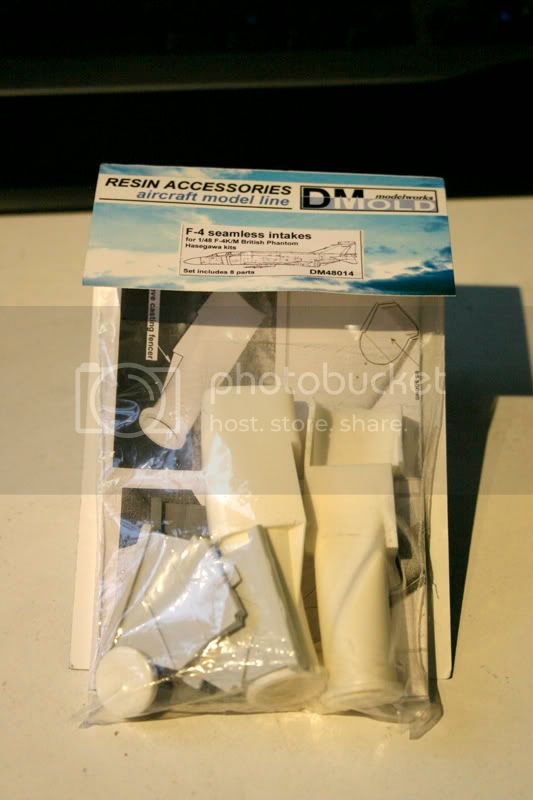
I'm at a show this weekend but work to install these will continue shortly
Modellers Creed: This is my toolbox. There are many like it, but this one is mine. My toolbox is my best friend. It is my life. I must master it as I must master my life. My toolbox, without me, is useless. Without my toolbox, I am useless.
New South Wales, Australia
Joined: March 18, 2008
KitMaker: 347 posts
AeroScale: 223 posts
Posted: Wednesday, October 07, 2009 - 09:56 PM UTC
Love the Phantom, especially the British version for some reason. Cant wait to see it all come together.
Assumption is the mother of all f*#k ups.
#042
England - North East, United Kingdom
Joined: November 18, 2006
KitMaker: 2,828 posts
AeroScale: 1,720 posts
Posted: Saturday, November 21, 2009 - 12:07 AM UTC
Modellers Creed: This is my toolbox. There are many like it, but this one is mine. My toolbox is my best friend. It is my life. I must master it as I must master my life. My toolbox, without me, is useless. Without my toolbox, I am useless.
England - East Midlands, United Kingdom
Joined: February 07, 2004
KitMaker: 911 posts
AeroScale: 415 posts
Posted: Sunday, November 22, 2009 - 05:51 AM UTC
Really nice work on a classic subject. I like seeing talented people building tricked out models

"Nelson be damned.......Lets get the hell out of here!"
#042
England - North East, United Kingdom
Joined: November 18, 2006
KitMaker: 2,828 posts
AeroScale: 1,720 posts
Posted: Monday, December 07, 2009 - 10:56 AM UTC
Quoted Text
Really nice work on a classic subject. I like seeing talented people building tricked out models
Thanks for the compliment but I wouldn't say I was talented

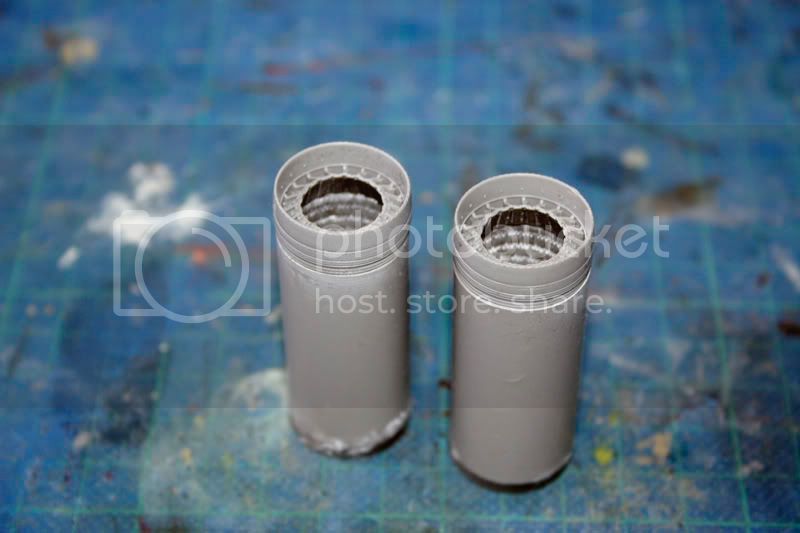
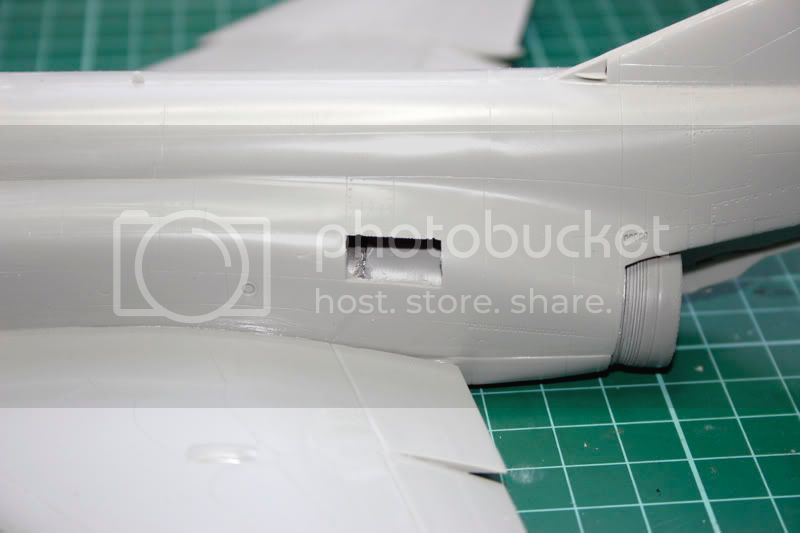
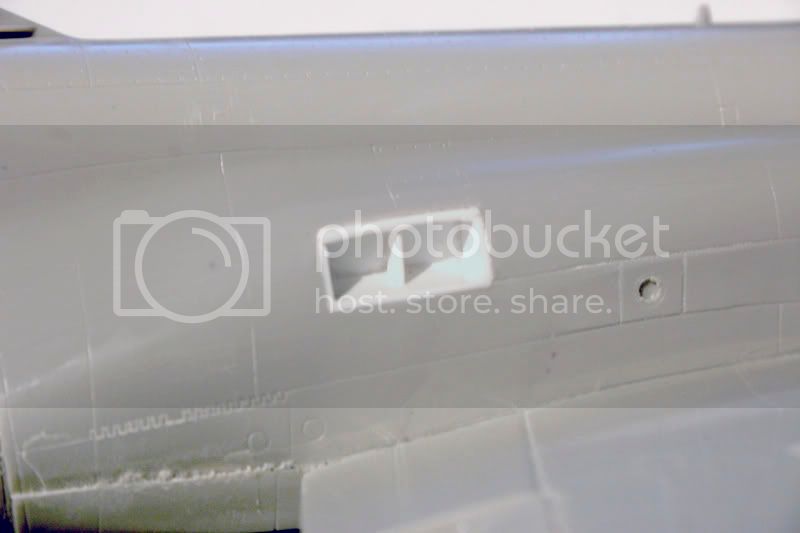
Not much of an update I test fitted the exhausts but wasn't happy with the angle they sat at compared to my references. After many expletives I came to the conclusion that the small "bays" on the side of the fuselage was what was causing the issue.
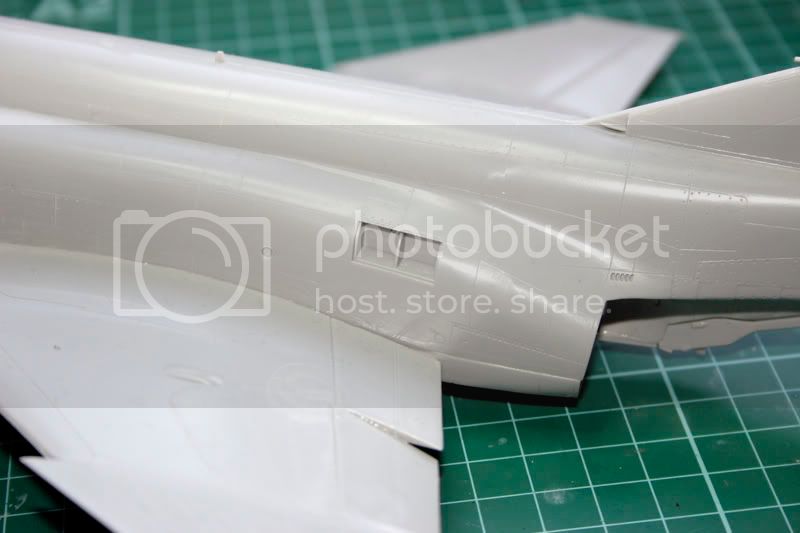
So out came the dremmel and they were removed
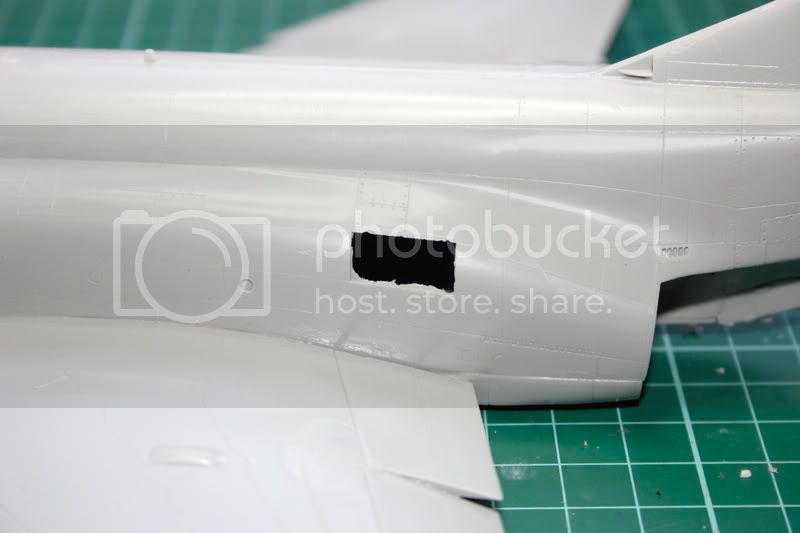
and the exhaust fit fine now
down side is I'll have to scratch some new "bays" but the doors will hide most of the detail
As always comments welcomed

Modellers Creed: This is my toolbox. There are many like it, but this one is mine. My toolbox is my best friend. It is my life. I must master it as I must master my life. My toolbox, without me, is useless. Without my toolbox, I am useless.
Tennessee, United States
Joined: September 20, 2005
KitMaker: 1,747 posts
AeroScale: 1,673 posts
Posted: Monday, December 07, 2009 - 11:46 AM UTC
Got to love the Phabulous Phantom don't you, know matter what service or colors it flies in! Looking forward to seeing your build. Russell
To Thine Own Self Be True
Siderius
A.K.A., RTA
Florida, United States
Joined: November 13, 2005
KitMaker: 189 posts
AeroScale: 129 posts
Posted: Sunday, December 20, 2009 - 02:59 AM UTC
I like th progress you have made. It should be pretty impressive when your done.
New Jersey, United States
Joined: May 24, 2008
KitMaker: 346 posts
AeroScale: 307 posts
Posted: Sunday, December 27, 2009 - 08:32 AM UTC
Allen
I just found this build and am impressed with what you've done so far. I just got an F-4 Phantom (1/72) for Christmas and look forward to following your build. I can us all the inspiration I can get.
#042
England - North East, United Kingdom
Joined: November 18, 2006
KitMaker: 2,828 posts
AeroScale: 1,720 posts
Posted: Sunday, January 10, 2010 - 08:20 AM UTC
Glad you all like the progress so far, I just hope my client will as well
Not much of an update as I've been finishing my P-47 Campaign entry today but I have got the little bays scratch built
Hopefully it'll be close to applying some paint

Modellers Creed: This is my toolbox. There are many like it, but this one is mine. My toolbox is my best friend. It is my life. I must master it as I must master my life. My toolbox, without me, is useless. Without my toolbox, I am useless.
#042
England - North East, United Kingdom
Joined: November 18, 2006
KitMaker: 2,828 posts
AeroScale: 1,720 posts
Posted: Sunday, March 14, 2010 - 08:28 AM UTC
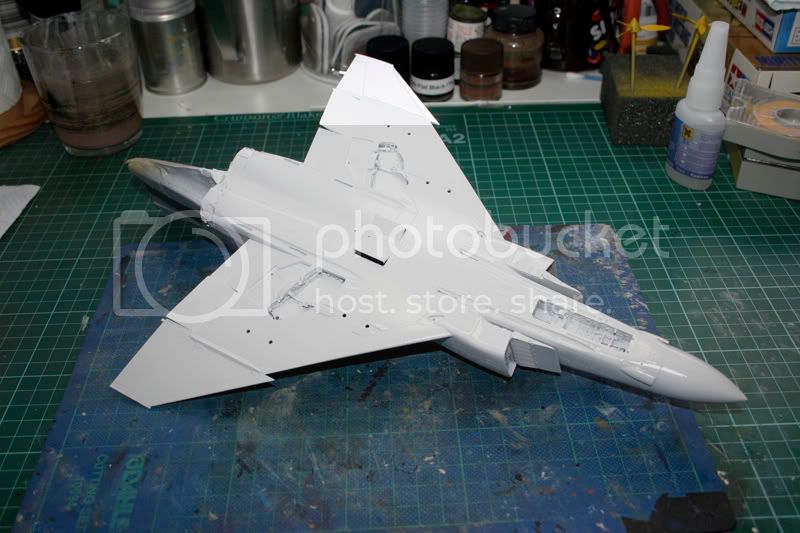
I've not been keeping up to date with my blog lately but here's a quick run down of what I've done since my last update.
All seams were checked and re-scribed where necessary. the canopy was masked off and the plane was primed. The rear tail section was sprayed with Alclad Steel and other areas picked out with Alclad Magnesium. These were then masked of and the underside was sprayed with Halford's Gloss Appliance White. Once dry this was masked off ready for the Extra Dark Sea Grey but unfortunately I couldn't find my tin of paint today so I'll have to see if I can get to the LHS this week to get some more.
Here's a photo before masking off the white.
Modellers Creed: This is my toolbox. There are many like it, but this one is mine. My toolbox is my best friend. It is my life. I must master it as I must master my life. My toolbox, without me, is useless. Without my toolbox, I am useless.
#042
England - North East, United Kingdom
Joined: November 18, 2006
KitMaker: 2,828 posts
AeroScale: 1,720 posts
Posted: Saturday, April 03, 2010 - 08:34 AM UTC
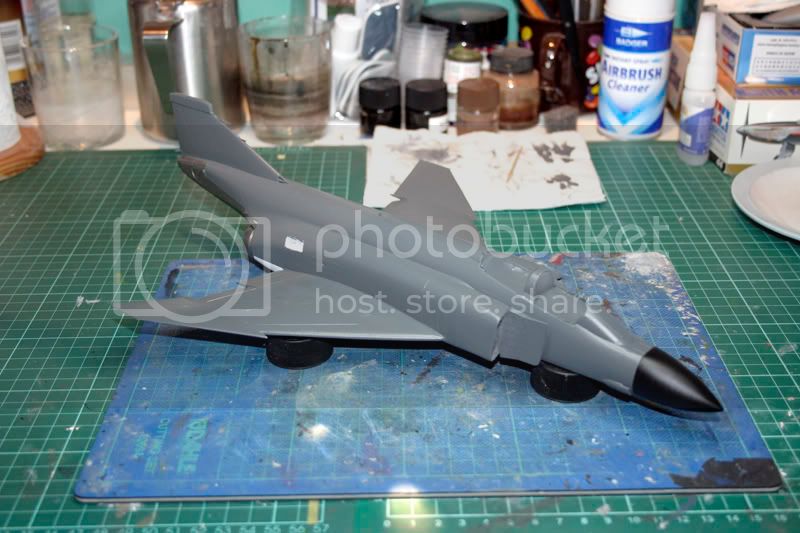
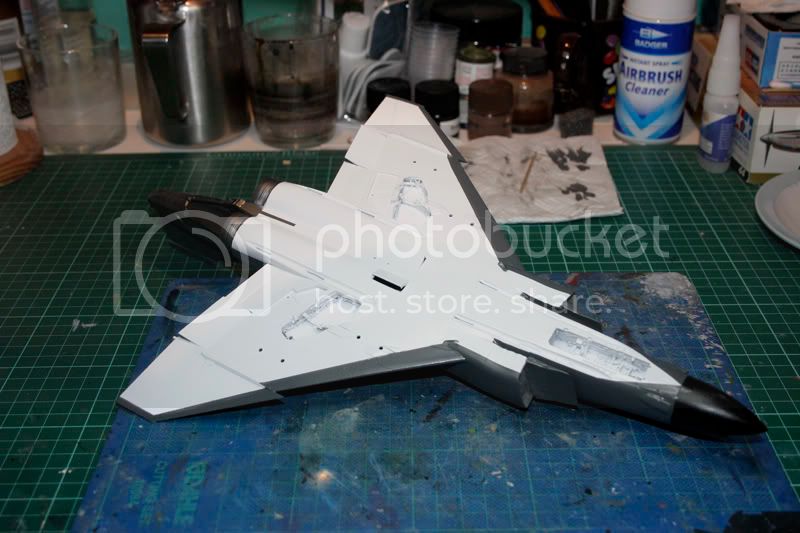
Another quick update the paint is on and decaling started yesterday Here's the pictures before decaling commenced.
More to follow
Modellers Creed: This is my toolbox. There are many like it, but this one is mine. My toolbox is my best friend. It is my life. I must master it as I must master my life. My toolbox, without me, is useless. Without my toolbox, I am useless.
Florida, United States
Joined: November 13, 2005
KitMaker: 189 posts
AeroScale: 129 posts
Posted: Saturday, April 03, 2010 - 05:37 PM UTC
Lookin good. Makes me want to break mine out of the stash.

New South Wales, Australia
Joined: March 18, 2008
KitMaker: 347 posts
AeroScale: 223 posts
Posted: Sunday, April 04, 2010 - 10:18 AM UTC
Cant wait to see the end result Allen, keep the posts coming in

Assumption is the mother of all f*#k ups.
litespeed
 News Reporter
England - North West, United Kingdom
Joined: October 15, 2009
KitMaker: 1,976 posts
AeroScale: 1,789 posts
Posted: Thursday, May 20, 2010 - 10:24 PM UTC
Hi Allen
That Phantom is looking realy good after the money you must have invested in it. Looks well worth it, nice one.
tim
#042
England - North East, United Kingdom
Joined: November 18, 2006
KitMaker: 2,828 posts
AeroScale: 1,720 posts
Posted: Friday, May 21, 2010 - 01:35 AM UTC
Thanks Tim, Hopefully if the weather doesn't keep me outside this weekend I might get the stencils on and ready for weathering
Modellers Creed: This is my toolbox. There are many like it, but this one is mine. My toolbox is my best friend. It is my life. I must master it as I must master my life. My toolbox, without me, is useless. Without my toolbox, I am useless.