_GOTOBOTTOM
World War II: USA
Aircraft of the United States in WWII.
Hosted by Rowan Baylis
1/72 Academy P-51B Old Crow
jaypee
_VISITCOMMUNITY
Scotland, United Kingdom
Joined: February 07, 2008
KitMaker: 1,699 posts
AeroScale: 1,384 posts
Posted: Thursday, July 23, 2009 - 02:00 AM UTC
Hi folks. I'm probably being over ambitious with this build but I'd like to stretch my skills at bit.
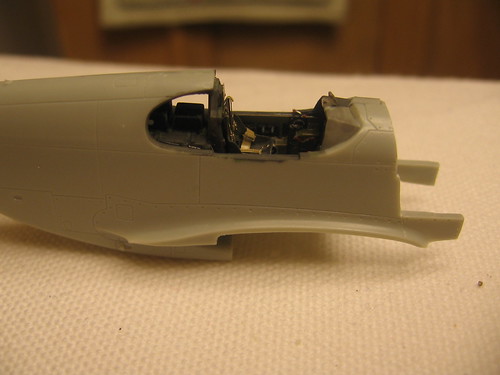
This is the well known acadmey p51b. I'll use the box decals of Bud Andersons Old Crow.
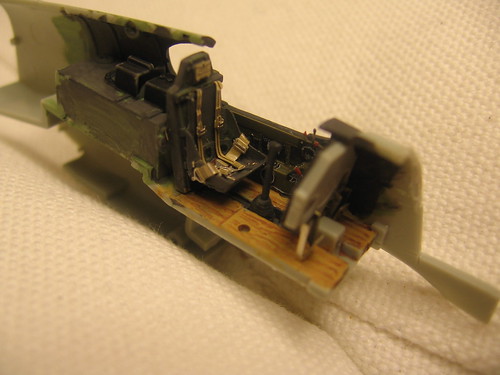
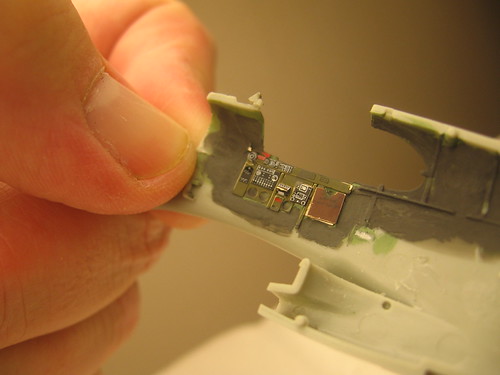
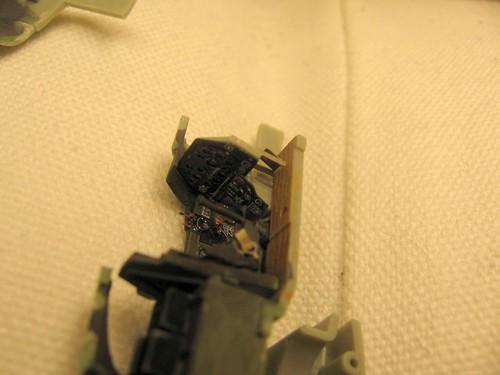
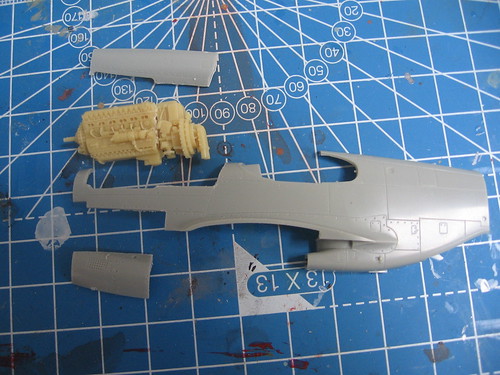
Also I've got eduard PE interior and exterior set. And a beautifully cast Aires packard merlin.
All this from a bargin bucket for about £12.
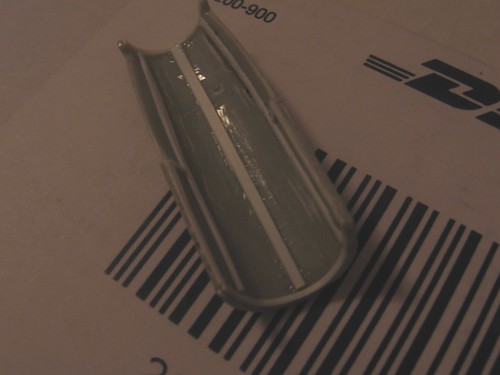
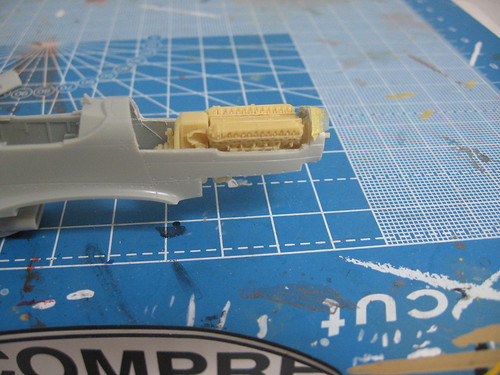
I've just got to show some of that engine detail so some surgery is required. Using a JLC razor saw carefully remove some engine bay panels.

p51
p51

As I say this will be a learning curve so please keep me right with comments and advice.
Next up. Thin down the engine bay and cut some engine mounts.
FalkeEins
_VISITCOMMUNITY
England - South East, United Kingdom
Joined: March 07, 2005
KitMaker: 868 posts
AeroScale: 690 posts
Posted: Thursday, July 23, 2009 - 03:39 AM UTC

..good luck JP...lovely kit, horrible decals (mine went on with white glue & Klear), better just check the fit of that canopy too, otherwise you could be 'plunge-moulding' a new one ... I haven't had one that sits right yet.
jaypee
_VISITCOMMUNITY
Scotland, United Kingdom
Joined: February 07, 2008
KitMaker: 1,699 posts
AeroScale: 1,384 posts
Posted: Friday, July 24, 2009 - 05:43 AM UTC
Thanks for the heads up Neil. I'll dry fit that tonight. Got a few rough plans drawn for the
engine mounting brackets, it'll require some fettling I'm sure. I've not even thinned the walls yet.
The decals are giving me "the fear" already. Esp the checked nose.
jaypee
_VISITCOMMUNITY
Scotland, United Kingdom
Joined: February 07, 2008
KitMaker: 1,699 posts
AeroScale: 1,384 posts
Posted: Friday, July 24, 2009 - 01:06 PM UTC
tried the front windscreen and the malcolm hood and they seem to fit fine. Can you remember what you had a problem with, Neil?
Found some nice shots of the firewall and the engine being mounted on a restored p51d. The B isn't all that different there. I think it'll probably take me two or three attempts to get a method for making the framing.
FalkeEins
_VISITCOMMUNITY
England - South East, United Kingdom
Joined: March 07, 2005
KitMaker: 868 posts
AeroScale: 690 posts
Posted: Saturday, July 25, 2009 - 07:20 AM UTC
..the canopy on the three examples I've built as always been too small around the side glazing - I ended up cutting those parts of the hood and filling the gaps with clear sheet & posing the canopy open. Yes the decals are a little recalcitrant - glueing them on worked fine though - diluted juice of white glue followed by Klear. Not as hopeless as has been suggested elsewhere. Still likely to silver a lot though...

jaypee
_VISITCOMMUNITY
Scotland, United Kingdom
Joined: February 07, 2008
KitMaker: 1,699 posts
AeroScale: 1,384 posts
Posted: Sunday, July 26, 2009 - 10:53 PM UTC
Cheers Neil. Good weather means no modelling. But check this out.
Jack Rousch's rebuild of Old Crow.
Perfect. Perhaps tonight I'll try some patterns.

lampie
#029
_VISITCOMMUNITY
England - East Midlands, United Kingdom
Joined: December 23, 2005
KitMaker: 6,249 posts
AeroScale: 3,270 posts
Posted: Monday, July 27, 2009 - 12:33 AM UTC
Looking very good Jaypee, and that Merlin is a lovely piece of work!
I must echo what others have said about the Academy decals.
I would be very tempted with a project involving this much work to splash out on a set of AM decals.
Keep posting
Nige
jaypee
_VISITCOMMUNITY
Scotland, United Kingdom
Joined: February 07, 2008
KitMaker: 1,699 posts
AeroScale: 1,384 posts
Posted: Monday, July 27, 2009 - 09:15 PM UTC
Thanks Nigel. When the time comes I'll spray the invasion stripes, and possibly the checks too.
The fact the cowling is cut into pieces should make that easier.

I had planned to use coke tin for the panels but I can't get it to form round the kit part
and stay there, any tips on that? Or alternatives? I'll ask on the forums.

Smash molding clear sheet I've done for canopies, could this be used with clear or white sheet for the cowlings?

I cut some patterns for the engine supports and they look kind of plausible.
I need to cut six out. Each side will be 3 sandwiched together. As you can see
the structure is kind of a box section.

If I can't get the aluminum to form I'll bevel the edges of the plastic cowling to make it
look thinner.
jaypee
_VISITCOMMUNITY
Scotland, United Kingdom
Joined: February 07, 2008
KitMaker: 1,699 posts
AeroScale: 1,384 posts
Posted: Tuesday, July 28, 2009 - 09:43 PM UTC
Got rubbish results from smask molding and forming.

Took a skew chisel to the inside of the kit part.
Here are the the results of a first pass. I think I'll thin it some more as it looked ok before detailing so I need a further .05 off.

The framing is a fiction, but looks convincing enough. Refs appreciated.
Have squadron walkaround and a modelling guide for p51 but neither show
the inside of the cowling

p51 cowling

Update!
The upper cowling is in two parts. Damn and I've glued it with cement. out with the saw again I think.

robot_
_VISITCOMMUNITY
United Kingdom
Joined: March 08, 2009
KitMaker: 719 posts
AeroScale: 691 posts
Posted: Friday, August 21, 2009 - 01:46 AM UTC
J-P: How's this project getting on?

We don't see enough 1/72 models with their cowlings off!
jaypee
_VISITCOMMUNITY
Scotland, United Kingdom
Joined: February 07, 2008
KitMaker: 1,699 posts
AeroScale: 1,384 posts
Posted: Friday, August 21, 2009 - 02:16 AM UTC
Hi robot thanks.

Well, I've not done any modelling bar one evening decalling in the past three weeks.

I have received the p51d maintainence manual on CD last week A riveting read it is I must say!

I realise I've cut the cowling along the wrong panel line at the nose. It should be fixable though.

I've also made patterns for the engine mounts from the pictures in the manual.
Will need some tweaking to actually fit the model (the plans probably aren't 100% accurate anyway).

I think an evening building the cockpit will help motivate me along this build.
jaypee
_VISITCOMMUNITY
Scotland, United Kingdom
Joined: February 07, 2008
KitMaker: 1,699 posts
AeroScale: 1,384 posts
Posted: Thursday, October 01, 2009 - 09:13 PM UTC
Near a whole month of delays to this project. But I've finially got the cockpit done.
Eduards colour cockpit set is lovely maybe the wrong colour for interior green but some P51s where more dull dark green anyway. I've only shots of Jack roush's warbird which is interior green. Anyway I wasn't about to repaint the PE.
Here is the progress so far
img_0542.jpgimg_0544.jpg
img_0543.jpgimg_0546.jpg

Now this is buttoned up it provides a stable base for scratching a firewall and engine mounts.
robot_
_VISITCOMMUNITY
United Kingdom
Joined: March 08, 2009
KitMaker: 719 posts
AeroScale: 691 posts
Posted: Friday, October 02, 2009 - 12:25 AM UTC
John-Paul, your cockpit looks really, really nice! The Colour PE is so good, and your painting of the wooden floor is great.

I'll be watching eagerly, as I plan to do both a spitfire and a hurricane in 1/72 with merlins exposed. The spitfire I have engine mounts for, but will be scratch-building the rest. It will be good to see how you do yours.

I hope we won't have to wait a month for the next installment
jaypee
_VISITCOMMUNITY
Scotland, United Kingdom
Joined: February 07, 2008
KitMaker: 1,699 posts
AeroScale: 1,384 posts
Posted: Friday, October 02, 2009 - 01:02 AM UTC
Thanks Ben but I cheated. Academy has the texture moulded on. enamel dunkelgelb followed by a wash of brown
brings it up nicely. Deskills the entire process perfect. The cockpit set is lovely and busy and 3d.
I'm looking forward the next bit it was just too frustrating trying to measure against the unbuilt parts.
hellvetier
_VISITCOMMUNITY
Bern, Switzerland
Joined: April 17, 2008
KitMaker: 264 posts
AeroScale: 88 posts
Posted: Friday, October 02, 2009 - 02:23 AM UTC
Hello Jaypee

interesting build you have! Especially the add-ons are great. In my last build I had an Aires cockpit but it didn't fit well, even after sanding... Next time I'll use PE for the cockpit and Resin parts for the engine, like you.

Looking forward to see more!

Cheers
magnusf
_VISITCOMMUNITY
Stockholm, Sweden
Joined: May 02, 2006
KitMaker: 1,953 posts
AeroScale: 1,902 posts
Posted: Friday, October 02, 2009 - 04:32 AM UTC
Didn't notice you were working on this one J-P! I like the kit a lot but mine wears German clothing so I haven't tried to wrestle the decals. Good luck, I'll follow your build!


Magnus
jaypee
_VISITCOMMUNITY
Scotland, United Kingdom
Joined: February 07, 2008
KitMaker: 1,699 posts
AeroScale: 1,384 posts
Posted: Friday, October 02, 2009 - 05:11 AM UTC
@magnusf Why do you think I'm cutting the kit up? It's to make the decals go on easier. I may go and get aftermarket ones if they turn out really bad. It is only the checks I have a fear of as I'll paint the invasion stripes. I hate big decals.

@hellvetier Thanks I've followed most of your builds on here and v inspiring. What happened the p-39 is it done?
 _GOTOTOP