im currently on my 5th build, Revell's 1:48 F-105G, its a decent size and actually a really good kit (only £7 in hobbycraft too) and its got a nicely detailed cockpit tub and panels etc, so i want to do a decent job on it. CUrrently i have tried to pick out the switches with my thinnest brush but they look more like blobs of paint.
Does anyone have any tips of how to pick out all switches/controls? how do you pros do it?
Thanks
Rich
Start Here (for Beginners)
This forum is for younger modelers or people just starting out in the hobby.
This forum is for younger modelers or people just starting out in the hobby.
Hosted by Jim Starkweather
painting cockpits
RichPrag

Joined: September 24, 2007
KitMaker: 26 posts
AeroScale: 24 posts

Posted: Tuesday, September 22, 2009 - 03:06 AM UTC

jaypee

Joined: February 07, 2008
KitMaker: 1,699 posts
AeroScale: 1,384 posts

Posted: Tuesday, September 22, 2009 - 03:39 AM UTC
depending on what is ypu want to do you might try drybrushing to lift up the details
or use a toothpick to paint in detail. You can even paint in missing details like levers
etc, certianly in 1/72 maybe not so much in this scale.
Good luck, post pictures with you questions too.
or use a toothpick to paint in detail. You can even paint in missing details like levers
etc, certianly in 1/72 maybe not so much in this scale.
Good luck, post pictures with you questions too.
Tin_Can

Joined: January 26, 2002
KitMaker: 1,560 posts
AeroScale: 750 posts

Posted: Tuesday, September 22, 2009 - 04:25 AM UTC
Dito on the dry brushing. A good dry brushing will make all the cockpit detail pop out against the base paint job.
Posted: Tuesday, September 22, 2009 - 11:36 AM UTC
Hi Rich,
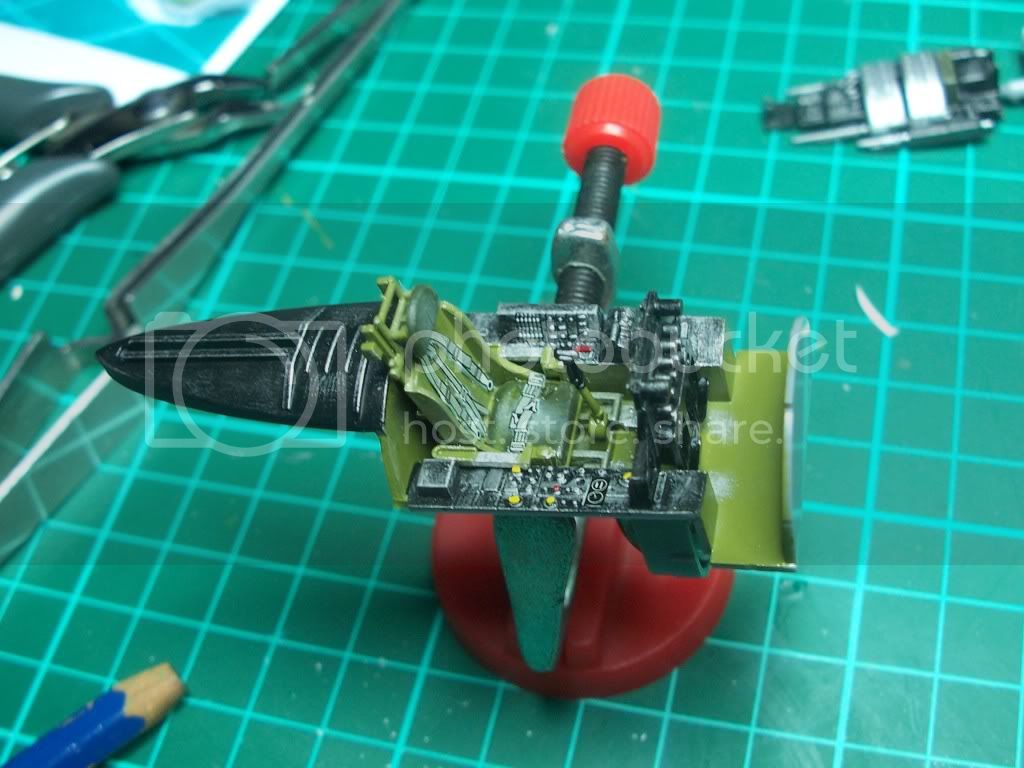
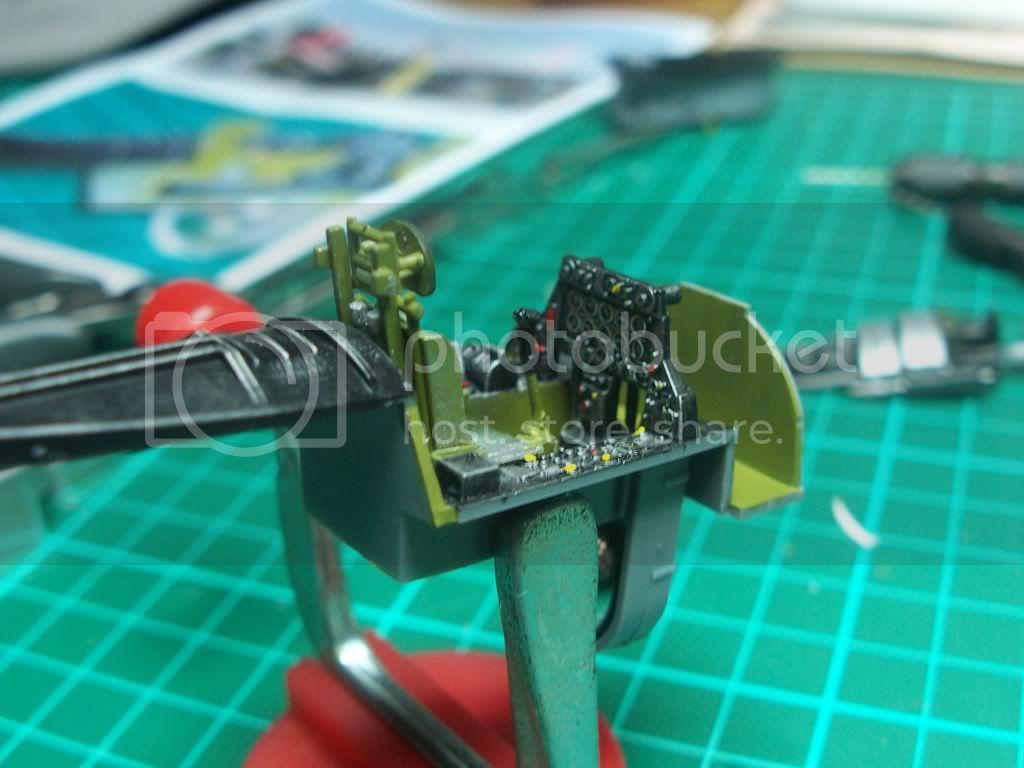
These 2 shots are from my F-84G in 1/48 for the Aluminium campaign. They are not in the league of some of the guys here but they do show what dry-brushing and picking out controls with a toothpick can look like. The paints are all Gunze or Tamiya acrylics.
(Please don't look at the seatbelts though, not happy with those hehe.)


Please post some shots of your build for us
Cheers, D
These 2 shots are from my F-84G in 1/48 for the Aluminium campaign. They are not in the league of some of the guys here but they do show what dry-brushing and picking out controls with a toothpick can look like. The paints are all Gunze or Tamiya acrylics.
(Please don't look at the seatbelts though, not happy with those hehe.)


Please post some shots of your build for us
Cheers, D
Posted: Tuesday, September 22, 2009 - 11:50 AM UTC
Hi Rich.
Just echoing what the other guys have said about dry brushing.
For the switches just a tiny drop of paint is needed,try keeping a piece of sprue at the side of the part of the cockpit your painting and only move the brush over to the kit part when your happy with the coverage your getting on the scrap sprue.
Best tip I can give you for cockpits, and more specifically instrument panels is to add a drop of Klear to the dials.
Heres a couple of mine
1:48th

And 1:72nd

Nige

Just echoing what the other guys have said about dry brushing.
For the switches just a tiny drop of paint is needed,try keeping a piece of sprue at the side of the part of the cockpit your painting and only move the brush over to the kit part when your happy with the coverage your getting on the scrap sprue.
Best tip I can give you for cockpits, and more specifically instrument panels is to add a drop of Klear to the dials.
Heres a couple of mine
1:48th
And 1:72nd

Nige


mvfrog

Joined: August 25, 2008
KitMaker: 369 posts
AeroScale: 104 posts

Posted: Tuesday, September 22, 2009 - 12:56 PM UTC
Lampie and Damian: beautiful work...you are artists.
Matt
Matt


Keeperofsouls2099

Joined: January 14, 2009
KitMaker: 2,798 posts
AeroScale: 2,443 posts

Posted: Tuesday, September 22, 2009 - 04:43 PM UTC
photo etch awsome stuff 

Holy_Cow

Joined: September 30, 2009
KitMaker: 6 posts
AeroScale: 4 posts

Posted: Wednesday, September 30, 2009 - 09:01 AM UTC
Wow really nice work on the cockpit 

£7 for a 1:48 scale model wows, theres only one shop in my area i know of that sells models and all the 1:48 scale kits are 10-£15.


£7 for a 1:48 scale model wows, theres only one shop in my area i know of that sells models and all the 1:48 scale kits are 10-£15.
hkopper

Joined: March 01, 2008
KitMaker: 529 posts
AeroScale: 340 posts

Posted: Wednesday, September 30, 2009 - 11:42 AM UTC
I agree with the previous posts. I you don't mind spending the extra $$, I would get a set of pre-painted PE (ie from Eduard). Otherwise, dry brushing goes a long way to bring out the details of the tub.
Hermann
Hermann
 |


