This will be a Mirage IIIC in air defence blue for this campaign: La Marseillaise.
I have built one of these before so I know what to expect ...
Box art is as usual a bit odd...
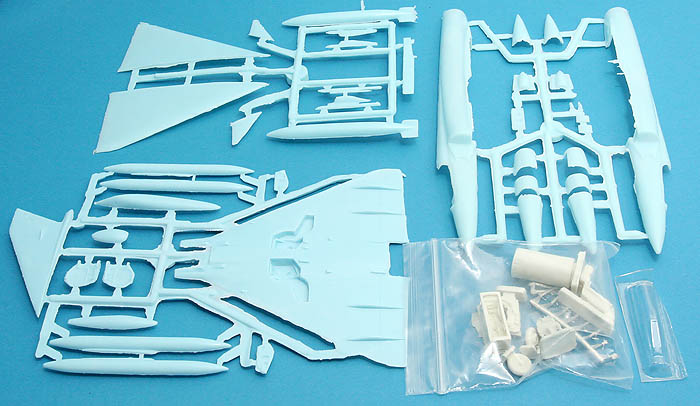
Three sprues of blue plastic, a bag of nice resin parts and a very clear canopy. Only one so be sober and alert while cutting it!
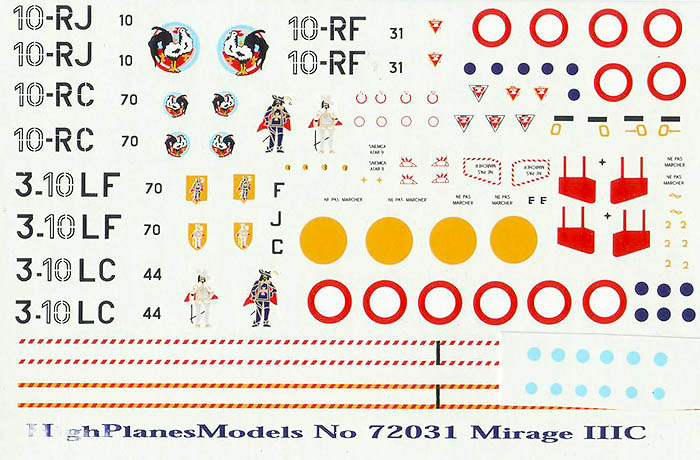
Decals for several French machines in either natural metal, air defence blue or desert (Djibouti based aircraft) schemes. No Israeli options in the box but such decals are easily obtained from other sources!
A close-up of the resin parts. Not really Czech quality but perfectly adequate! A resin engine outlet had been welcome as well, all later Mirage versions from High Planes have resin engines but the Atar 9B of the IIIC kits is injected.
I have been working a bit on and off on this one during the last few weeks, here is the result so far:
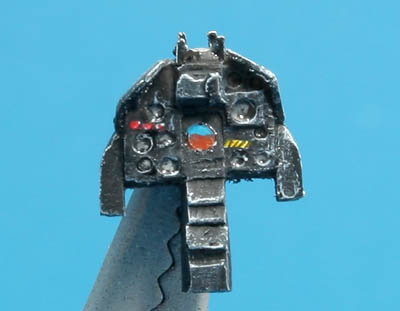
Finished instrument panel (hugely magnified...).
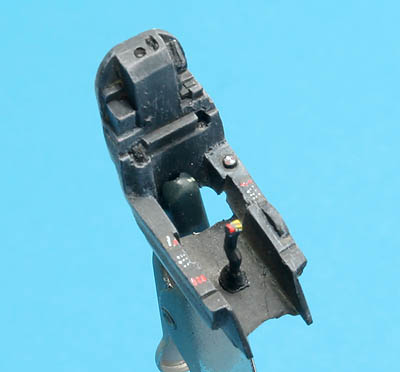
The Interior. Side consoles could have been better detailed but a paintbrush can do marvels as well, especially under a closed canopy!
Biggest problem with all High Planes models I have built is usually closing the fuselage. Plastic is rather thick and interior parts are often a bit on the large side. The fuselage sides have been thinned down as much as I dared, even then I had to file out a recess from the cockpit (hidden from view by the ejection seat later) to be able to get it all to fit. I have also added a bunch of lead shot to avoid tail sitting.
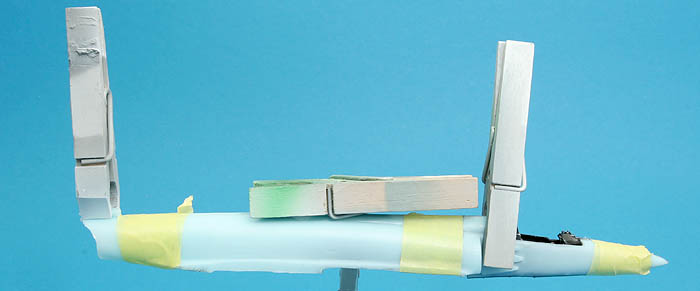
Everything buttoned up and set aside for drying overnight!
I wonder if I can finish this one in a month...
Magnus
Cold War (1950-1974)
Discuss the aircraft modeling subjects during the Cold War period.
Hosted by Tim Hatton
High Planes Mirage IIIC
magnusf
Stockholm, Sweden
Joined: May 02, 2006
KitMaker: 1,953 posts
AeroScale: 1,902 posts
Joined: May 02, 2006
KitMaker: 1,953 posts
AeroScale: 1,902 posts
Posted: Wednesday, October 07, 2009 - 01:08 AM UTC
Tango-India-Mike
Western Australia, Australia
Joined: August 31, 2009
KitMaker: 88 posts
AeroScale: 79 posts
Joined: August 31, 2009
KitMaker: 88 posts
AeroScale: 79 posts
Posted: Wednesday, October 07, 2009 - 03:20 AM UTC
Aha! Another one I'll be keeping an eye on, Magnus...I have the IIIO kit here, which is going to look beautiful in the bare metal finish our RAAF Mirages wore in the 1960s. Of course, I remember them camouflaged in green and grey in the '70s (and they were still beautiful), so I guess I'll have to buy another kit eventually!
In the meantime I'll just watch you build yours so I know what I'm in for! Masses of flash and rough edges on the one I have here, as I can see on yours too, but there's an absolute gem of a model amongst it all...that's for certain. I love High Planes kits!
Cheers!
Tim.
In the meantime I'll just watch you build yours so I know what I'm in for! Masses of flash and rough edges on the one I have here, as I can see on yours too, but there's an absolute gem of a model amongst it all...that's for certain. I love High Planes kits!
Cheers!
Tim.
magnusf
Stockholm, Sweden
Joined: May 02, 2006
KitMaker: 1,953 posts
AeroScale: 1,902 posts
Joined: May 02, 2006
KitMaker: 1,953 posts
AeroScale: 1,902 posts
Posted: Thursday, October 08, 2009 - 09:16 AM UTC
Tim! You seem to know the trick already: careful cleanup and dry fitting are the keys to success! Without it you will simply not be able to glue many of the parts together!
After a bit more than an hour at the building table tonight:
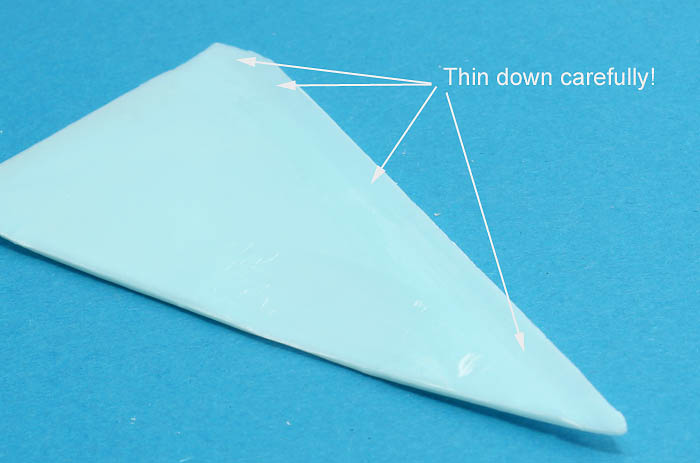
This is the make it or break it of this kit: the wing leading edges! The Mirage has very characteristic drooped leading edges that have been included in the kit but there is lots of excess plastic as well. The top wing halves need to be carefully thinned using a curved scalpel blade. The lower wings are easier to thin with a file.
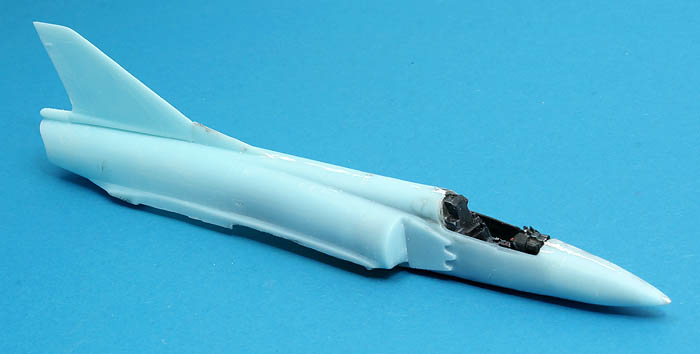
Rear end thinned and sanded round, profile adjusted with sand paper as well. The separate fin have also been attached.
One piece of French-looking delta wing!
Magnus
PolarBear
Västra Götaland, Sweden
Joined: February 23, 2005
KitMaker: 820 posts
AeroScale: 629 posts
Joined: February 23, 2005
KitMaker: 820 posts
AeroScale: 629 posts
Posted: Thursday, October 08, 2009 - 10:03 AM UTC
Ooaah! Mirage IIIC!!! My favorite! Looking forward to the blue scheme! I'd actually would love to build one myself! Do you know which FS matches the blue-grey? I've searched, but haven't found any info.
I actually received the amazing SMS resin detailing set for the Eduard Mirage IIIC in 1/48 by mail today (yes, I will cross the line into the BIG scale). Given my current building pace, I do not believe that I will be able to enter her in the Marseillaise campaign. But then there's the Aluminium campagn... and the there's the Aces High Two campaign... Somehow, I plan to get myself a nice little ribbon with this kit.
You know what they say, blue is for boys and...
As always, bon chance!
// PolarBear
magnusf
Stockholm, Sweden
Joined: May 02, 2006
KitMaker: 1,953 posts
AeroScale: 1,902 posts
Joined: May 02, 2006
KitMaker: 1,953 posts
AeroScale: 1,902 posts
Posted: Thursday, October 08, 2009 - 07:01 PM UTC
Thanks for the profile but I think I'll avoid that one. I have the story and a few photos of it in the DTU book on the Mirage IIIC and in reality the pink was painted on rather roughly. It didn't stick very well either, the natural metal area in front of the windscreen had to be wiped clean in order not to get pink paint all over the canopy when flying. And yes, it did fly - once!
As for the colour choice for blue Mirages, High Planes states FS 35164 (about PRU Blue). I think it looks a lot brighter than PRU blue but that's me... Another possibility comes with the Hasegawa Mirage F.1C that suggests a mix of Gunze paints: 80% H75 10% H54 10% H1. (For the mathematically inclined: yes I have checked that it adds up to about 100 % ).
That Mirage kit is also an easy way to get a Matra R530 for the centreline pylon. Probably mostly carried for deterrent or possibly centre of gravity reasons since reliable sources state that it was almost impossible to hit anything with it!
I'll try to keep you entertained for a month and so, and good luck with your big scale Mirage Björn!
Magnus
magnusf
Stockholm, Sweden
Joined: May 02, 2006
KitMaker: 1,953 posts
AeroScale: 1,902 posts
Joined: May 02, 2006
KitMaker: 1,953 posts
AeroScale: 1,902 posts
Posted: Friday, October 09, 2009 - 10:06 AM UTC
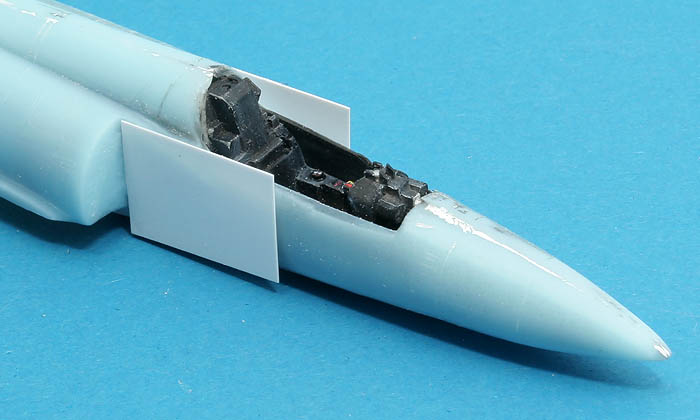
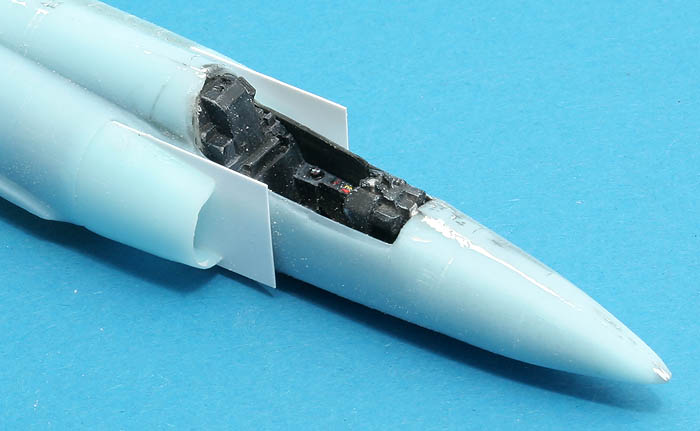
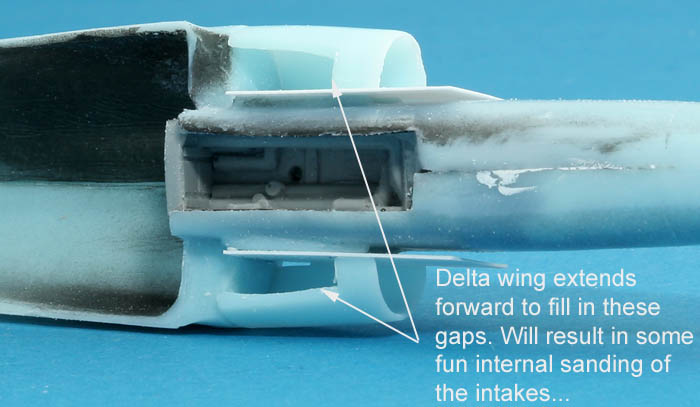
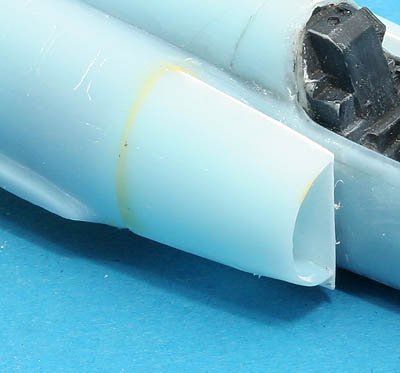
Some more work on the fuselage. The intakes are another potential trouble area on these kits. On my first IIIC I cut off the "wing extensions" and added them to the intake halves. That way I didn't have to do any internal sanding but it was quite fiddly to assemble them and keep their shape at the same time. Enough of complaining and on to the model:
Splitter plates added using the thinnest plasticard I could find.
The intakes. Plates will be trimmed to size when all is dry!
You see the problem... There should be an "intake bullet" in the opening that severely restricts what can be seen, that will help a bit. On my first IIIC I even made intake trunking that extended halfway down the fuselage. No one has seen any of it after the bullets were installed !
Magnus
Posted: Friday, October 09, 2009 - 10:51 AM UTC
Hi Magnus
When I saw "High Planes... ", I thought it has to be you!
That resin seat looks very decent indeed.
As always, your builds are hugely inspiring - great subjects, unusual kits, and informative solutions to the problems along the way... what more could one ask for?!
All the best and keep 'em coming!
Rowan
PolarBear
Västra Götaland, Sweden
Joined: February 23, 2005
KitMaker: 820 posts
AeroScale: 629 posts
Joined: February 23, 2005
KitMaker: 820 posts
AeroScale: 629 posts
Posted: Saturday, October 10, 2009 - 09:37 AM UTC
Impressive work, Magnus! I'm amazed that you have the stamina! I thought the AML Mirage II kits were difficult, but that was before I saw what you have to cope with!
EDIT: I found this decent walk-around that might come in handy. Unfortunalely, the seat is rather stripped!
http://www.cocardes.org/models/articles.php?lng=fr&pg=962
I still need a good colour photo of the seat. Any leads?
Bon chance!
// PolarBear
EDIT: I found this decent walk-around that might come in handy. Unfortunalely, the seat is rather stripped!
http://www.cocardes.org/models/articles.php?lng=fr&pg=962
I still need a good colour photo of the seat. Any leads?
Bon chance!
// PolarBear
magnusf
Stockholm, Sweden
Joined: May 02, 2006
KitMaker: 1,953 posts
AeroScale: 1,902 posts
Joined: May 02, 2006
KitMaker: 1,953 posts
AeroScale: 1,902 posts
Posted: Sunday, October 11, 2009 - 09:39 AM UTC
Rowan! Glad you like my blogs and choices of kits! The blogs are as much for myself as for everyone else, I keep them as diaries of my builds that are fun to visit a few builds later. "High Planes" is just the tip of an iceberg, you should see my stash !
Björn! As usual, things aren't as bad as they seem. Seat is black with black details . My favourite reference for what's under the hatches of a Mirage is Verlinden's lock-on on Belgian Mirages. I'll PM you on the subject of seats! And thank's for the link!
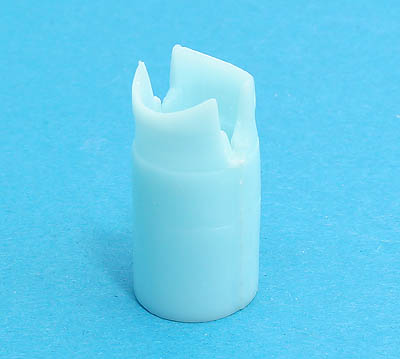
Atar 9B. Fun engine with the eyelids, doesn't really look like anything else!
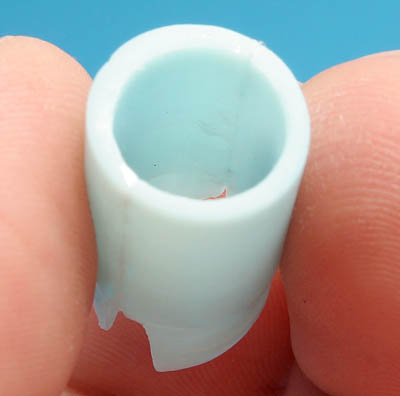
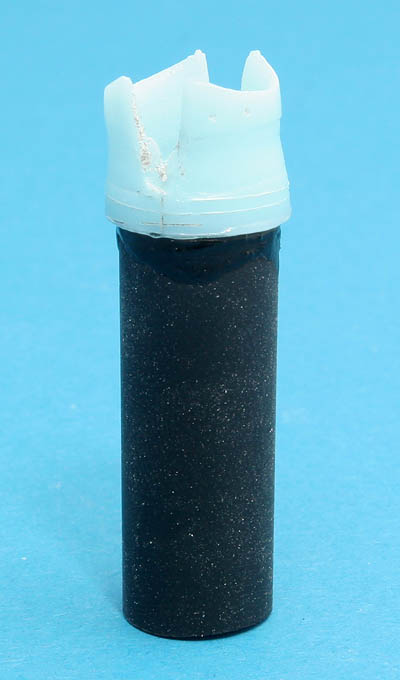
As I wrote earlier: Biggest problem is all the things that go inside and engine is no exception. It is much bigger than the hole in the rear end of the fuselage and I don't feel like sanding away all that excess plastic. Note also that wall thickness is about as uneven as this photo is out of focus and that's a lot !
Fixing the engine meant sudden death for a pen of suitable diameter. It also adds some very inaccurate but interesting internal detailing!
Intakes after sanding. Not bad or what do you think Björn?
Magnus
magnusf
Stockholm, Sweden
Joined: May 02, 2006
KitMaker: 1,953 posts
AeroScale: 1,902 posts
Joined: May 02, 2006
KitMaker: 1,953 posts
AeroScale: 1,902 posts
Posted: Monday, October 12, 2009 - 07:35 PM UTC
Did the last of the wing-fitting yesterday so now we have a complete delta fighter!
Magnus
Magnus
magnusf
Stockholm, Sweden
Joined: May 02, 2006
KitMaker: 1,953 posts
AeroScale: 1,902 posts
Joined: May 02, 2006
KitMaker: 1,953 posts
AeroScale: 1,902 posts
Posted: Thursday, October 29, 2009 - 09:38 AM UTC
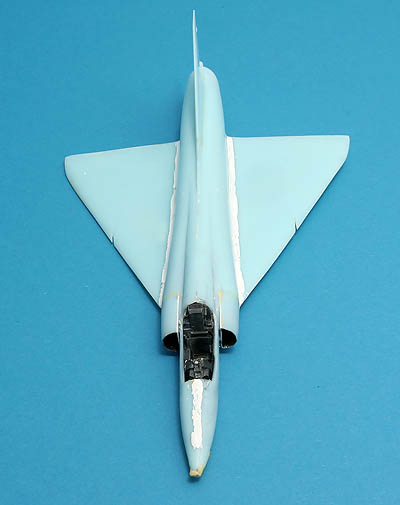
Back again two weeks later! It has been filling-and-sanding party lately...
The small dorsal fin has to be added from plastic card. A sketch is provided in the instructions.
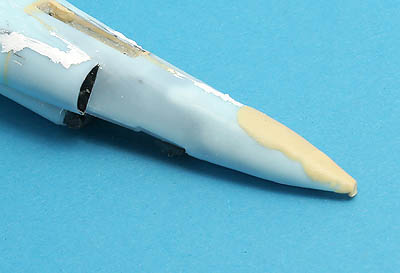
I realised that the nose wasn't round in section, it was seriously flat on the lower side. I built it up using Tamiya putty that will be sanded to section tomorrow.
Delta fighter!
Magnus
The small dorsal fin has to be added from plastic card. A sketch is provided in the instructions.
I realised that the nose wasn't round in section, it was seriously flat on the lower side. I built it up using Tamiya putty that will be sanded to section tomorrow.
Delta fighter!
Magnus
drabslab
European Union
Joined: September 28, 2004
KitMaker: 2,186 posts
AeroScale: 1,587 posts
Joined: September 28, 2004
KitMaker: 2,186 posts
AeroScale: 1,587 posts
Posted: Thursday, October 29, 2009 - 08:57 PM UTC
now this is some serious "back to basics" modelling
very interesting, i love it
magnusf
Stockholm, Sweden
Joined: May 02, 2006
KitMaker: 1,953 posts
AeroScale: 1,902 posts
Joined: May 02, 2006
KitMaker: 1,953 posts
AeroScale: 1,902 posts
Posted: Thursday, November 12, 2009 - 09:03 AM UTC
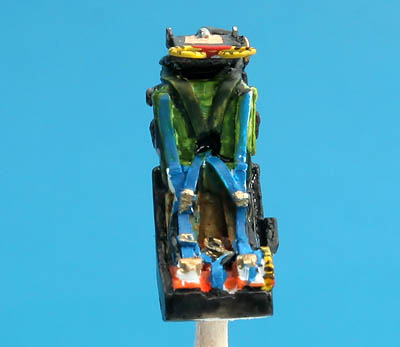
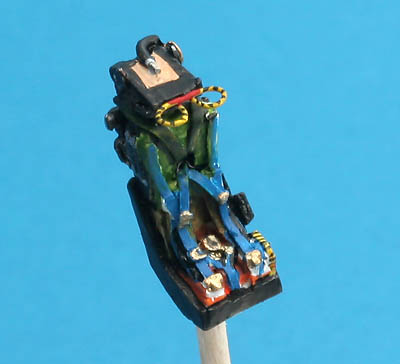
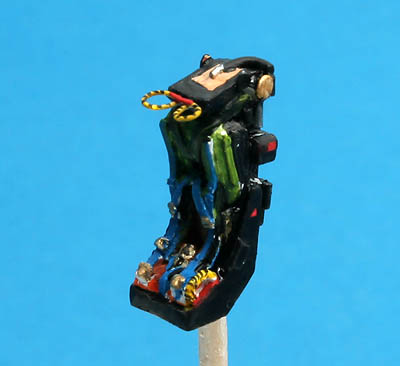
I haven't forgotten the Mirage altogether... With the seat painted, the only thing to do before closing the canopy is adding the HUD glass.
I primed the seat white and painted it "backwards" this time, starting with the details and finishing with the black. Not a bad idea since it made it so much easier to get the paint to cover.
Verlinden "Lock-On" on Belgian Mirages has lots of detail photos including several photos of the seat and is of great help when it comes to painting!
Magnus
magnusf
Stockholm, Sweden
Joined: May 02, 2006
KitMaker: 1,953 posts
AeroScale: 1,902 posts
Joined: May 02, 2006
KitMaker: 1,953 posts
AeroScale: 1,902 posts
Posted: Saturday, November 14, 2009 - 10:11 AM UTC
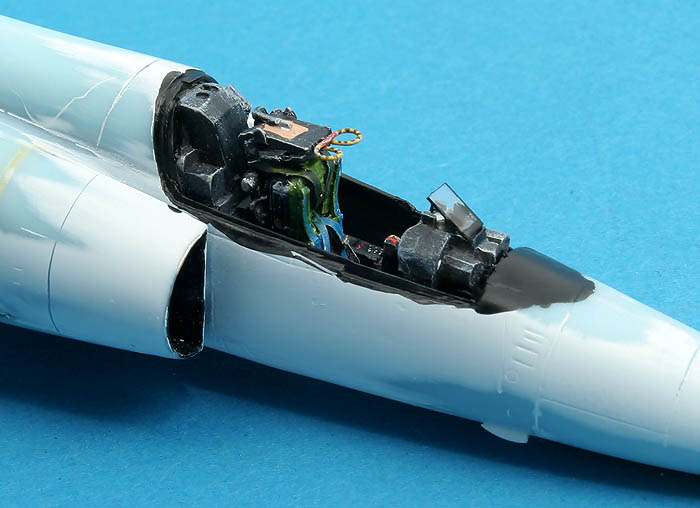
Seat installed and cockpit finished!
Canopy glued using epoxy. I use a glue called "J-B Kwik" that sets in a few minutes and it doesn't set "rubbery" as many other epoxies making it possible to sand. I often use it as a kind of filler as well around canopies.
Magnus
Canopy glued using epoxy. I use a glue called "J-B Kwik" that sets in a few minutes and it doesn't set "rubbery" as many other epoxies making it possible to sand. I often use it as a kind of filler as well around canopies.
Magnus
PolarBear
Västra Götaland, Sweden
Joined: February 23, 2005
KitMaker: 820 posts
AeroScale: 629 posts
Joined: February 23, 2005
KitMaker: 820 posts
AeroScale: 629 posts
Posted: Thursday, November 26, 2009 - 07:32 AM UTC
Hi Magnus!
I truly enjoy following your build! The horror of the 1/72 Mirage kits, the struggle to get everything in shape, and the beautiful results that follow...
BTW, guess what I'm building!?
More pictures will be posted on the Aluminium campaign thread!
Cheers! // PolarBear
I truly enjoy following your build! The horror of the 1/72 Mirage kits, the struggle to get everything in shape, and the beautiful results that follow...
BTW, guess what I'm building!?
More pictures will be posted on the Aluminium campaign thread!
Cheers! // PolarBear
magnusf
Stockholm, Sweden
Joined: May 02, 2006
KitMaker: 1,953 posts
AeroScale: 1,902 posts
Joined: May 02, 2006
KitMaker: 1,953 posts
AeroScale: 1,902 posts
Posted: Thursday, November 26, 2009 - 07:36 AM UTC
Quoted Text
Hi Magnus!
I truly enjoy following your build! The horror of the 1/72 Mirage kits, and struggle to get everything in shape, and the beautiful results that follow...
BTW, guess what I'm building!?
More pictures will be posted on the Aluminium campaign thread!
Cheers! // PolarBear
Anyone can see that it's a Big Bird Björn!
BTW, the Mirage ain't dead, just hibernating for the moment (look, a bear-connection...)
Magnus
PolarBear
Västra Götaland, Sweden
Joined: February 23, 2005
KitMaker: 820 posts
AeroScale: 629 posts
Joined: February 23, 2005
KitMaker: 820 posts
AeroScale: 629 posts
Posted: Thursday, November 26, 2009 - 07:58 AM UTC
It is indeed a BIG bird (see there - a "Magnus"-connection!). 1/48, no less. My first!
Cheers! // PolarBear
magnusf
Stockholm, Sweden
Joined: May 02, 2006
KitMaker: 1,953 posts
AeroScale: 1,902 posts
Joined: May 02, 2006
KitMaker: 1,953 posts
AeroScale: 1,902 posts
Posted: Saturday, December 10, 2011 - 09:02 PM UTC
OK, campaign is closed since two years but this Mirage is still around! Too much work invested in it just to let it lay around the bench unfinished!
Canopy masked using Bare Metal foil...
...and airbrakes and intake lips painted red using Vallejo "Scarlet".
I realised that most small part have been cleaned up and prepared for painting already so most of the boring part of the project has been done while all the fun is left to do and can be started immediately !
Magnus
vertigo
Dublin, Ireland
Joined: November 11, 2004
KitMaker: 388 posts
AeroScale: 225 posts
Joined: November 11, 2004
KitMaker: 388 posts
AeroScale: 225 posts
Posted: Sunday, December 11, 2011 - 12:38 AM UTC
Some great work on what looks to be a difficult kit, it should look very striking in air defense blue.
I have the Hasegawa F1.C you mentioned earlier in the thread, about two years ago ( ), I'm hoping to convert it to a F1.EQ if possible.
magnusf
Stockholm, Sweden
Joined: May 02, 2006
KitMaker: 1,953 posts
AeroScale: 1,902 posts
Joined: May 02, 2006
KitMaker: 1,953 posts
AeroScale: 1,902 posts
Posted: Sunday, December 11, 2011 - 09:05 AM UTC
Vertigo! Kit is not too bad, I have built one before so I know what to expect! The F.1 looks like a nice kit, I have several of them but I have yet to build one. Try to beat me to it, would be nice if someone else had found the pitfalls!
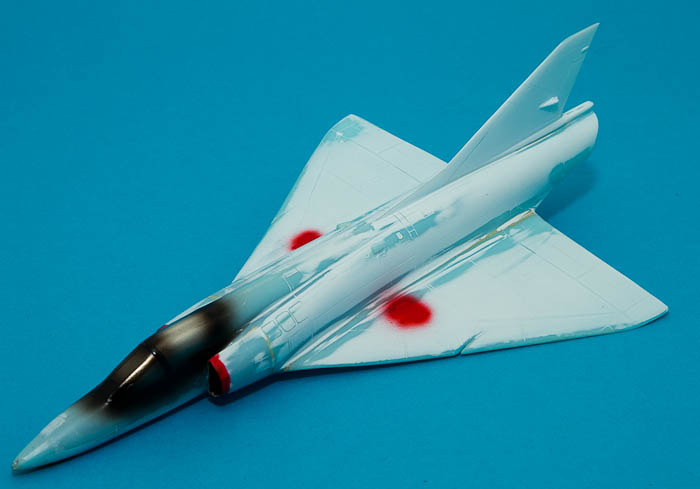
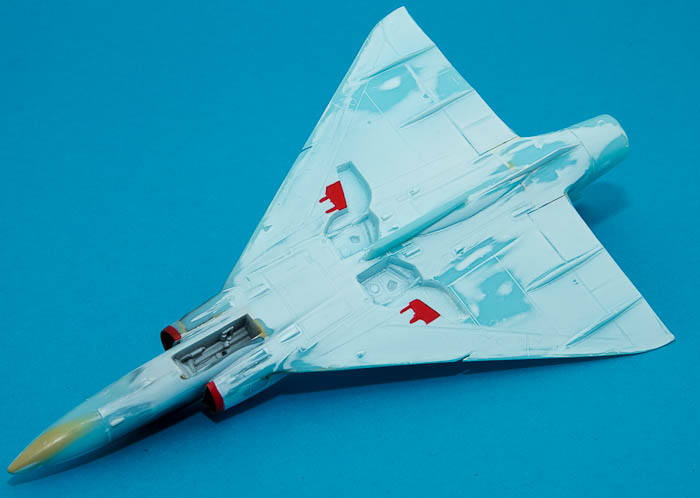
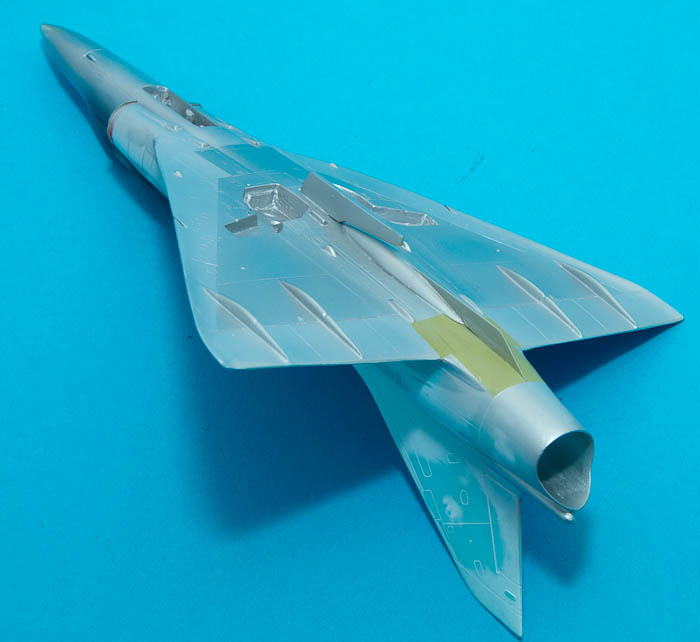
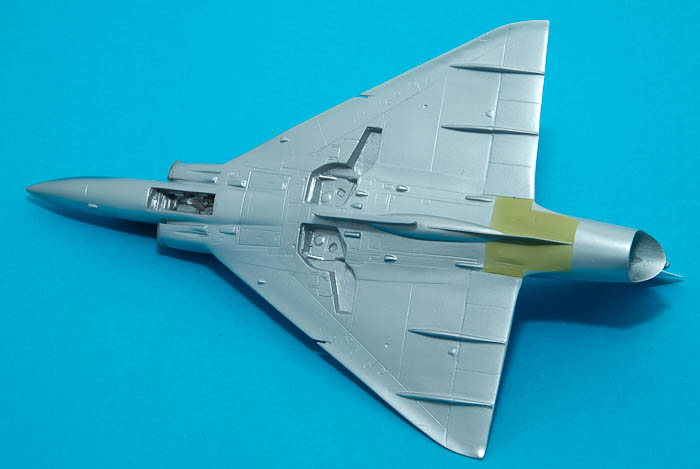
I have had a field day with the airbrush! Silver finish is mostly Games Workshop "Mithril Silver" and "Chain mail" thinned with Tamiya thinner.
Contrast looks better in real life, I will work the lower surfaces to get a really grimy look when this first coat is thoroughly set.
Magnus
I have had a field day with the airbrush! Silver finish is mostly Games Workshop "Mithril Silver" and "Chain mail" thinned with Tamiya thinner.
Contrast looks better in real life, I will work the lower surfaces to get a really grimy look when this first coat is thoroughly set.
Magnus
vertigo
Dublin, Ireland
Joined: November 11, 2004
KitMaker: 388 posts
AeroScale: 225 posts
Joined: November 11, 2004
KitMaker: 388 posts
AeroScale: 225 posts
Posted: Monday, December 12, 2011 - 03:17 AM UTC
Quoted Text
Vertigo! The F.1 looks like a nice kit, I have several of them but I have yet to build one. Try to beat me to it, would be nice if someone else had found the pitfalls!
Magnus
It could be quite a while before I get to the Mirage to be honest. My big project for next will hopefully be a pair of Iranian jets, a Tomcat and a Phantom.
The F.1 does look nice though even with finely raised panel lines.
magnusf
Stockholm, Sweden
Joined: May 02, 2006
KitMaker: 1,953 posts
AeroScale: 1,902 posts
Joined: May 02, 2006
KitMaker: 1,953 posts
AeroScale: 1,902 posts
Posted: Friday, December 16, 2011 - 10:26 AM UTC
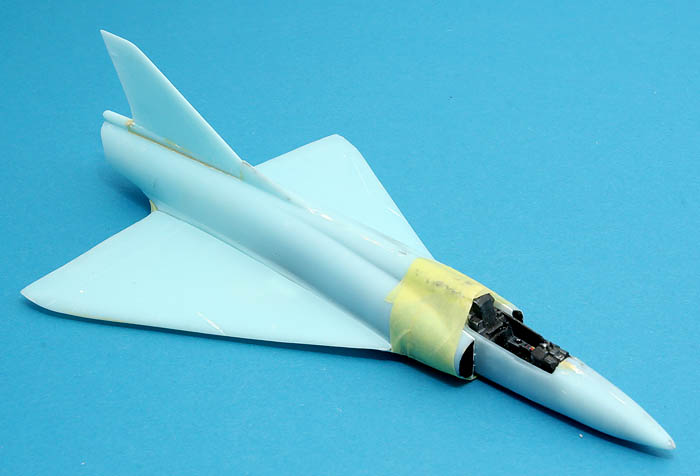
I hoped I would be at the painting stage now but when I did the lower surfaces I realised that I had managed to sand the top surface of the nose flat...
A bit of putty and some sanding! I hope I'm back to profile again...
Magnus
A bit of putty and some sanding! I hope I'm back to profile again...
Magnus
magnusf
Stockholm, Sweden
Joined: May 02, 2006
KitMaker: 1,953 posts
AeroScale: 1,902 posts
Joined: May 02, 2006
KitMaker: 1,953 posts
AeroScale: 1,902 posts
Posted: Friday, December 30, 2011 - 09:49 AM UTC
Nose profile adjustment dealt with and a couple of VERY shiny supersonic tanks! Finish on them is Tamiya TS-76 Mica Silver directly from the rattle can
Magnus
Magnus
realpainter
Kirklareli, Turkey / Türkçe
Joined: September 02, 2015
KitMaker: 1 posts
AeroScale: 1 posts
Joined: September 02, 2015
KitMaker: 1 posts
AeroScale: 1 posts
Posted: Thursday, September 03, 2015 - 10:56 PM UTC
Dear Sir,
While searching for an alternative completion on the very last model plane I am working on -1/48 scale Mirage III C - , I came across your topic."high planes Mirage III "
I have decided to finish my model plane to resemble that "Rose Bonbon Mirage III C No 55 10-RO" , also with the biggest share of my little daughter's desire.You have written in this topic that you have a few photos.Unfortunately i have only two photos .
May I request more detailed photos -especially taken from top and bottom side - if there are ? May I also request your instructions and help on this task?
Thank you very much for your help in advance.
İ will look for your kind reply.
Sincerely
Hakan Nacar
magnusf
Stockholm, Sweden
Joined: May 02, 2006
KitMaker: 1,953 posts
AeroScale: 1,902 posts
Joined: May 02, 2006
KitMaker: 1,953 posts
AeroScale: 1,902 posts
Posted: Sunday, September 06, 2015 - 12:13 AM UTC