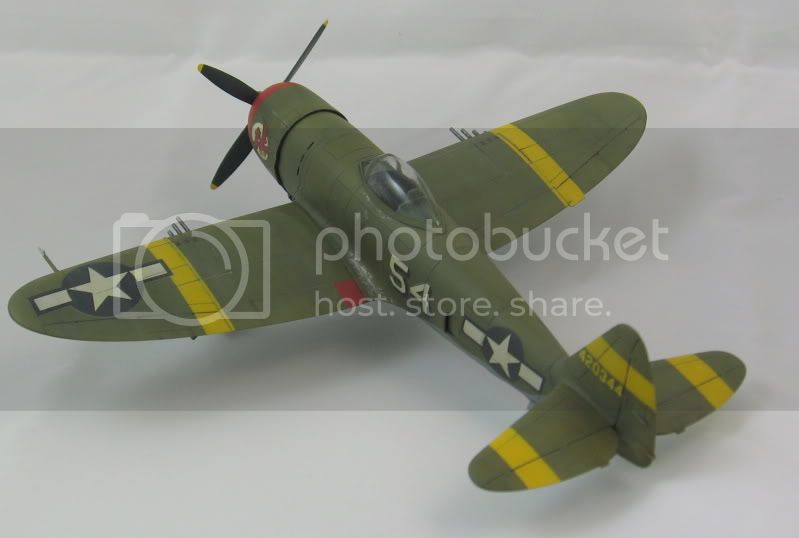
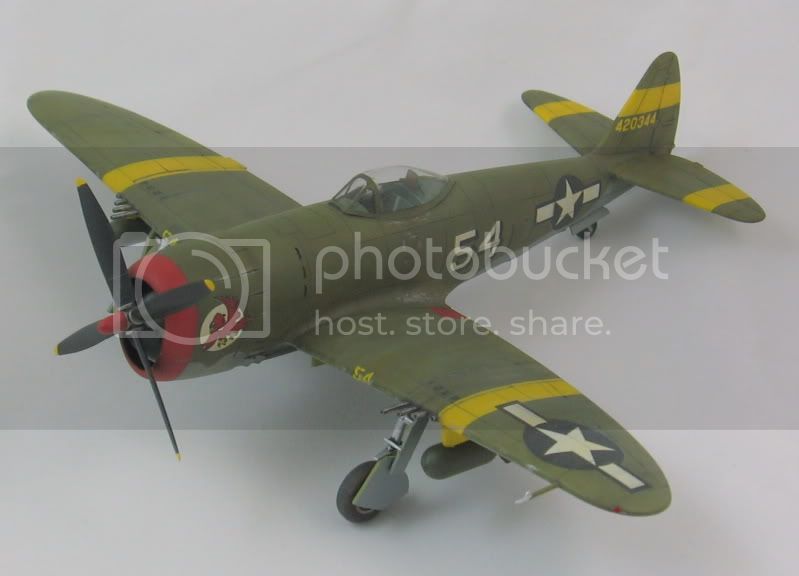
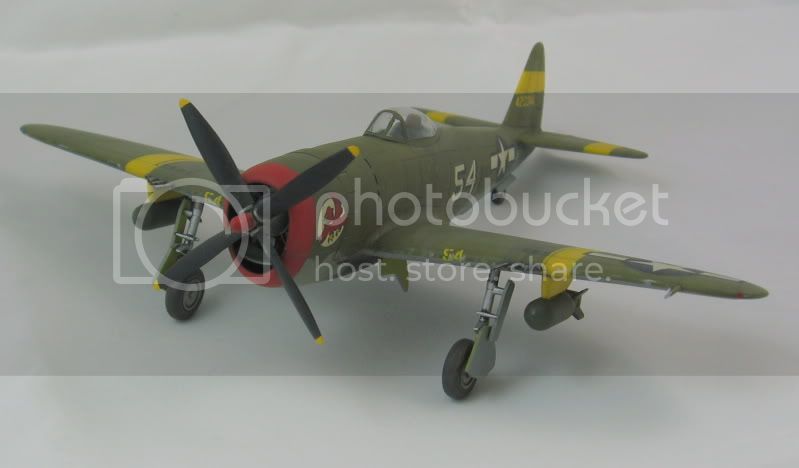
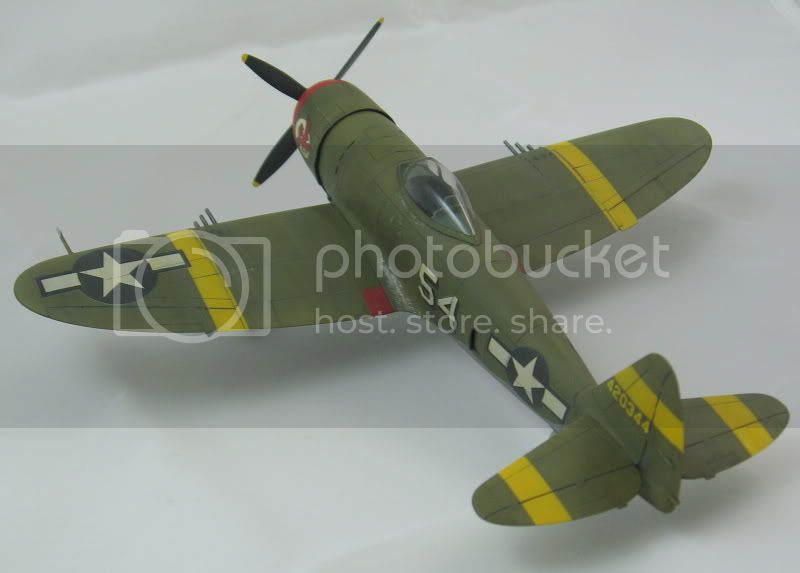
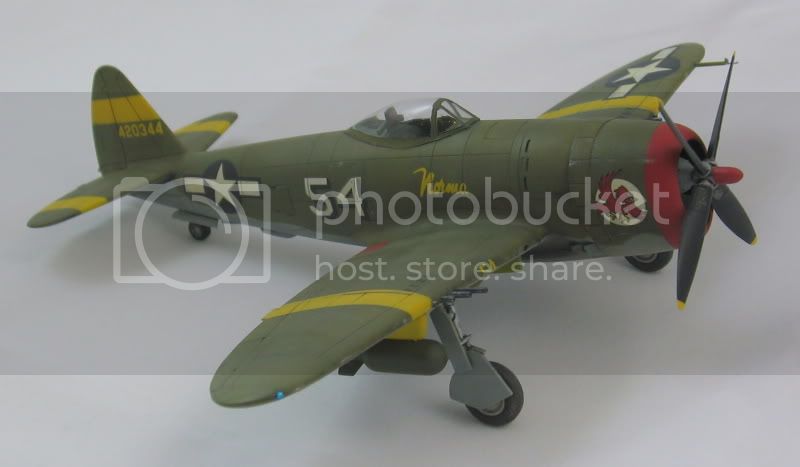
It took about three to four months for me to finish this baby. It's Hasegawa's 1/72 P-47D, built straight OOB. The only thing I added were masking tape seatbelts, bits of styrene for sidewall details, and a stretched sprue stick. The cockpit is extremely spartan, but is nearly invisible once the canopy is on. I wanted to give it the look of a well-used, war-weary bird, so I weathered relatively heavily. Here's what I came up with:
Here's a closeup where you can see the weathering a bit better:
Let me know what you think!
Hosted by Rowan Baylis
My first wingy-thing in more than a decade
DeskJockey
Virginia, United States
Joined: July 17, 2006
KitMaker: 1,558 posts
AeroScale: 12 posts
Joined: July 17, 2006
KitMaker: 1,558 posts
AeroScale: 12 posts
Posted: Monday, October 12, 2009 - 02:35 PM UTC
mj
Illinois, United States
Joined: March 16, 2002
KitMaker: 1,331 posts
AeroScale: 325 posts
Joined: March 16, 2002
KitMaker: 1,331 posts
AeroScale: 325 posts
Posted: Monday, October 12, 2009 - 03:03 PM UTC
Well - I think you should build more "wingy-things".
Looks like a great build to me. I think weathering is difficult to pull off, but you managed to give the paint job a real "been around for a while" look to it. How did you do the panel lines - they really look good.
Congrats on a really nice build. I hope it won't be 10 years before we see another out of you.
cheers,
Mike
Posted: Monday, October 12, 2009 - 03:03 PM UTC
Great job Lucas, I think you should convert exclusively to "wingy-thingys" from now on.
The weathering is nicely done, it sure looks weary.
Cheers, D
The weathering is nicely done, it sure looks weary.
Cheers, D
thegirl
Alberta, Canada
Joined: January 19, 2008
KitMaker: 6,743 posts
AeroScale: 6,151 posts
Joined: January 19, 2008
KitMaker: 6,743 posts
AeroScale: 6,151 posts
Posted: Monday, October 12, 2009 - 03:19 PM UTC
For some one who hasn't built a wingy thingy in ten years , you sure did one fantastic job !
Hope to see some more of your aircraft in the pages
Siderius
Tennessee, United States
Joined: September 20, 2005
KitMaker: 1,747 posts
AeroScale: 1,673 posts
Joined: September 20, 2005
KitMaker: 1,747 posts
AeroScale: 1,673 posts
Posted: Monday, October 12, 2009 - 04:14 PM UTC
I think you did a great job, really. I hope to see more of your work. I guess this bird was based in the MTO? Russell
PanzerMike
Hamilton, New Zealand
Joined: May 09, 2007
KitMaker: 298 posts
AeroScale: 120 posts
Joined: May 09, 2007
KitMaker: 298 posts
AeroScale: 120 posts
Posted: Monday, October 12, 2009 - 07:53 PM UTC
thats a pretty pimpin looking T Bird there nice work
Posted: Tuesday, October 13, 2009 - 12:34 AM UTC
Woo-Hoo! Way to go Lucas. Whatever you had 10 years ago is still there. want to weather my 1/32 bird efforts?
Cheers!
Rick
Cheers!
Rick
Tojo72
North Carolina, United States
Joined: June 06, 2006
KitMaker: 4,691 posts
AeroScale: 238 posts
Joined: June 06, 2006
KitMaker: 4,691 posts
AeroScale: 238 posts
Posted: Tuesday, October 13, 2009 - 05:41 AM UTC
Very nice paint job and weathering,just right for me.
DeskJockey
Virginia, United States
Joined: July 17, 2006
KitMaker: 1,558 posts
AeroScale: 12 posts
Joined: July 17, 2006
KitMaker: 1,558 posts
AeroScale: 12 posts
Posted: Tuesday, October 13, 2009 - 10:28 AM UTC
Thanks, folks!
Mike--I did the panel lines with a standard sludge wash made with Polly S grimy black and dish soap. I found the recipe for it in an old FSM article.
Russell--yes, this aircraft was from the 65th Squadron, 57th Fighter Group in Italy in 1944, according to Hasegawa's instructions.
For the weathering, I tried out a new technique used on armor models fairly often--the dot painting method. I dabbed on small dots of oil paint over the flat coat and brushed them down until they were almost gone. On the OD surfaces, I used white, yellow, blue, and brown oil paints (concentrating the lighter colors on top surfaces), while on the bottom I used blue, Payne's gray, white, and brown. This build was a fun learning experience overall. For my next aircraft project, I'm thinking of tackling a NMF F-86. I hope I won't be biting off more than I can chew with that one!