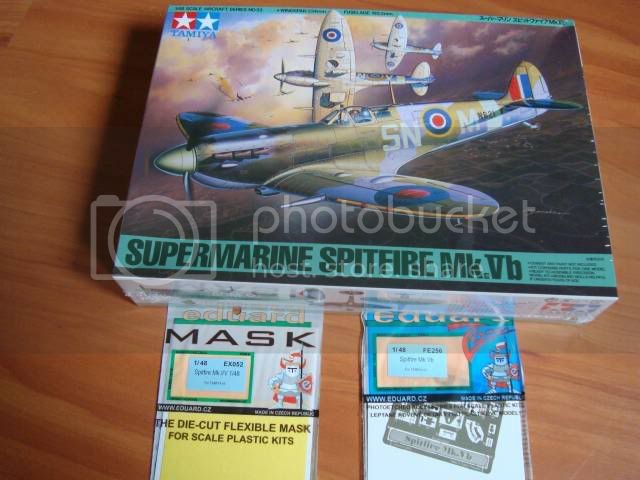
1/48 Tamiya Supermarine Spitfire Mk.Vb
Florida, United States
Joined: March 01, 2008
KitMaker: 529 posts
AeroScale: 340 posts
Posted: Monday, October 19, 2009 - 12:15 AM UTC
Current projects:
Revell F-15E (1:48)
AussieReg
 Associate Editor
#007
Victoria, Australia
Joined: June 09, 2009
KitMaker: 8,156 posts
AeroScale: 3,756 posts
Posted: Monday, October 19, 2009 - 01:24 AM UTC
Looking great so far Hermann, I look forward to more progress on this one.
Cheers, D
ON the bench
Revell 1/24 '53 Corvette (building as '54)
Revell 1/24 BMW 507 Coupe and Cabrio
Italeri 1/48 Me262 B-1a/U1 Nightfighter
Monogram 1/24 '57 Chevy Nomad
Dragon 1/350 USS Frank Knox DD-742
Germany
Joined: September 07, 2005
KitMaker: 5,609 posts
AeroScale: 5,231 posts
Posted: Monday, October 19, 2009 - 01:29 AM UTC
Very Nice Hermann!!!
I guess this is much more straight forward than the Eduard kit, isn't it

all the best
Steffen
DULCE ET DECORUM EST PRO HOBBY MORI
Florida, United States
Joined: March 01, 2008
KitMaker: 529 posts
AeroScale: 340 posts
Posted: Monday, October 19, 2009 - 03:27 AM UTC
Current projects:
Revell F-15E (1:48)
Florida, United States
Joined: March 01, 2008
KitMaker: 529 posts
AeroScale: 340 posts
Posted: Thursday, October 22, 2009 - 12:53 AM UTC
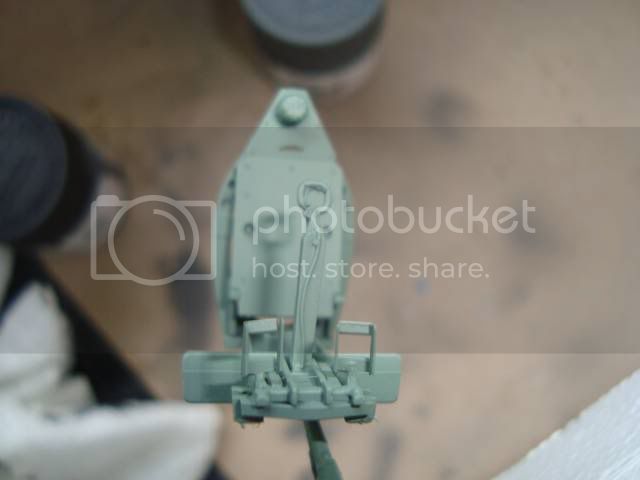
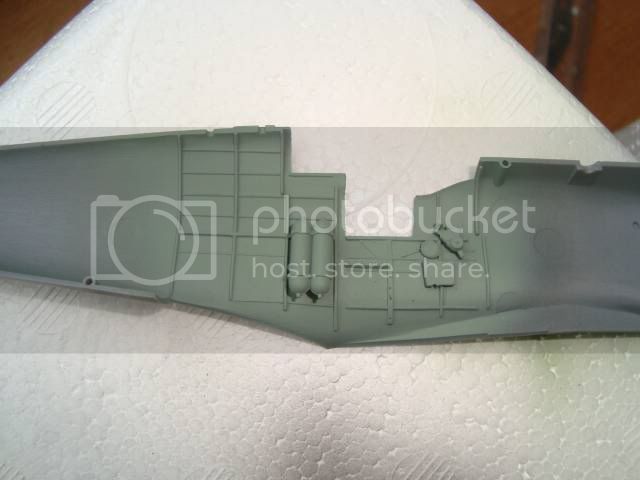
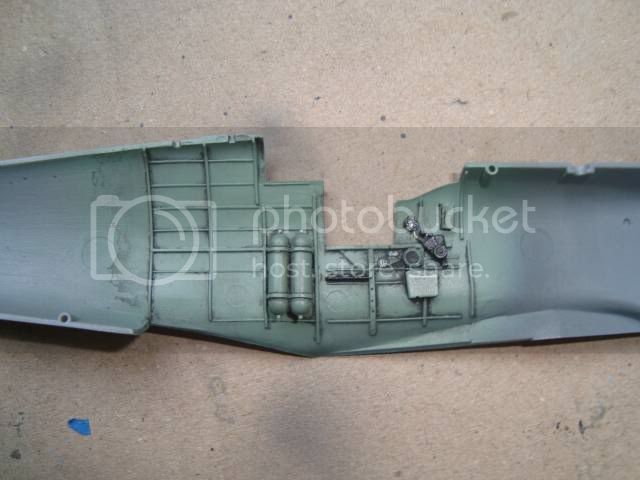
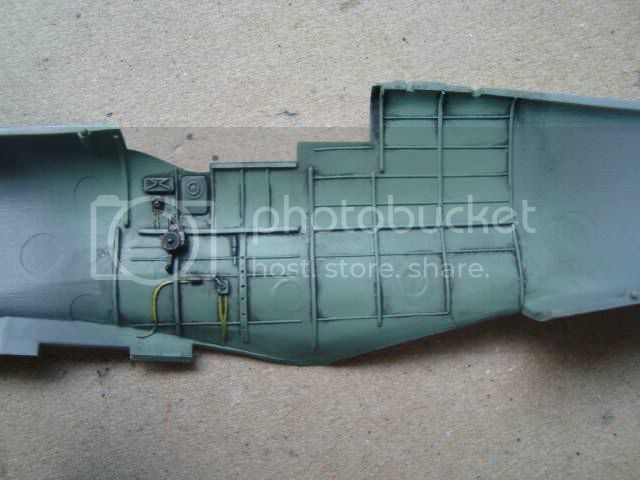
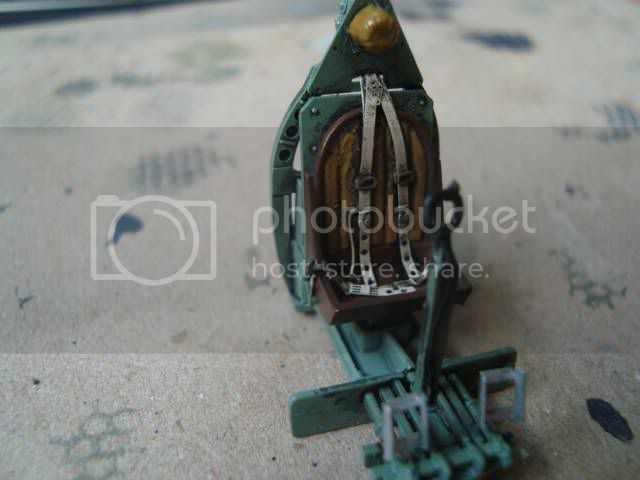
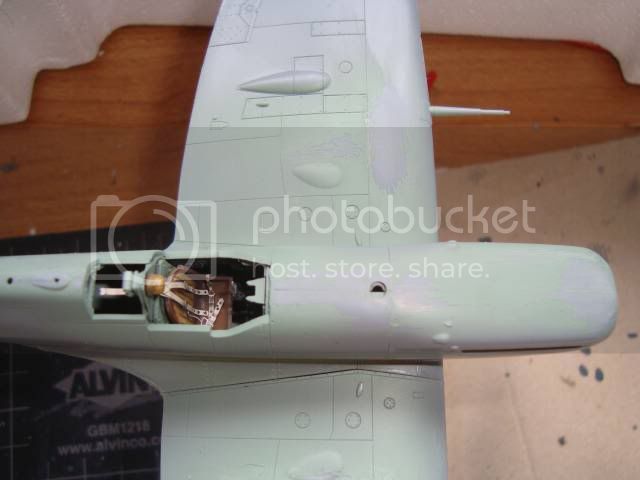
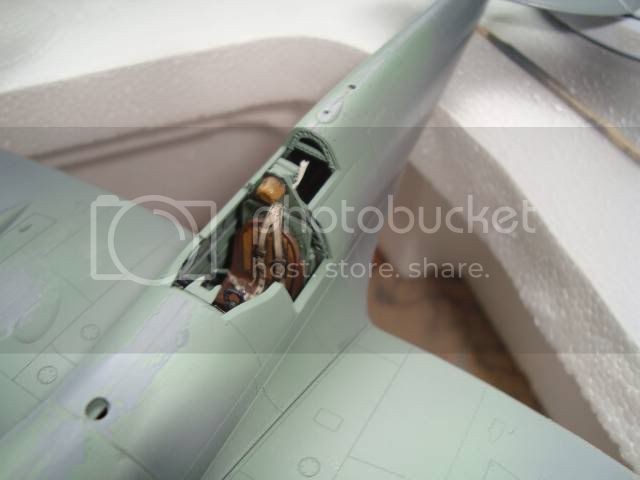
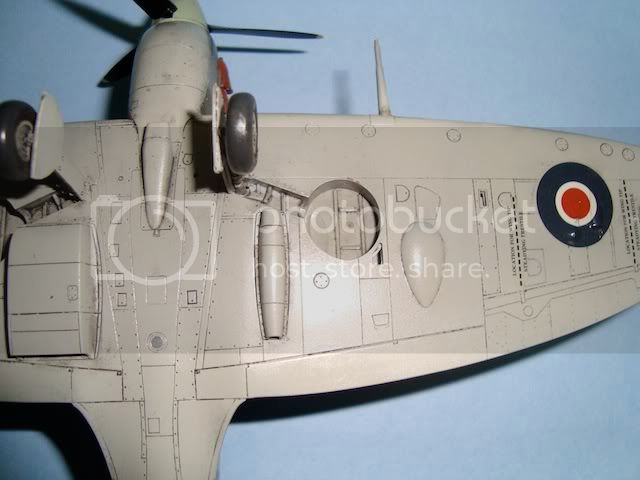
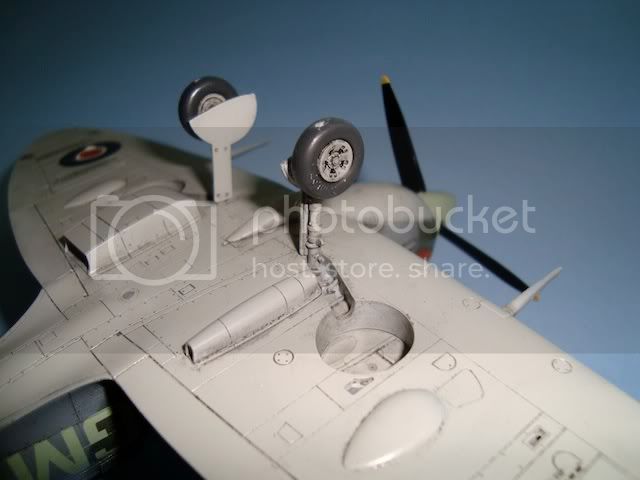
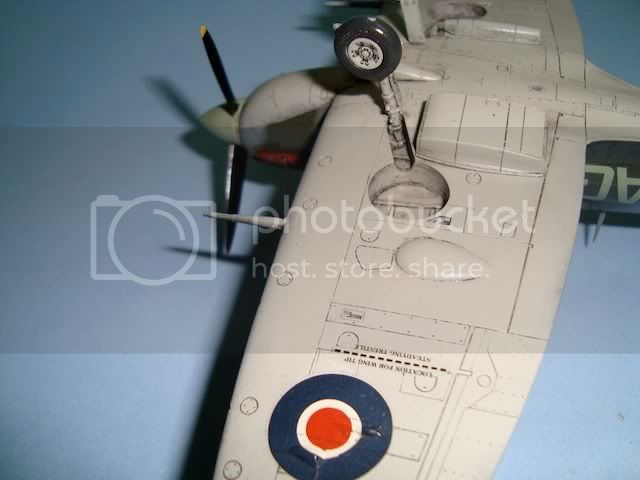
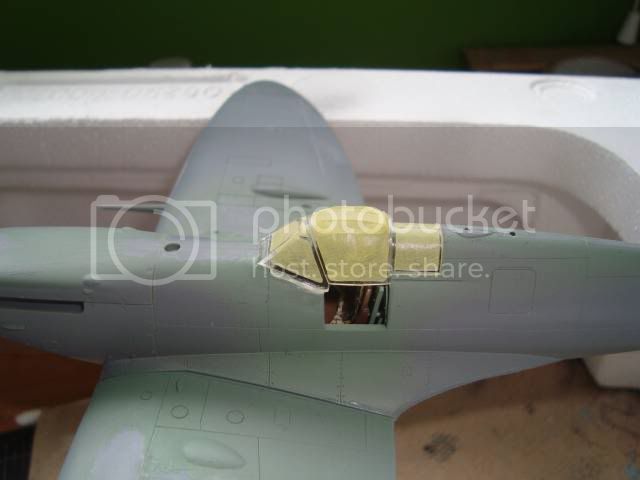
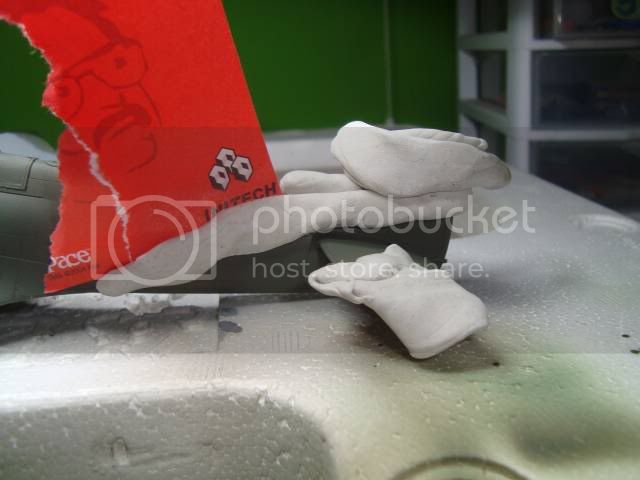
The undercarriage is built and the canopy was masked using Eduard's mask set for this kit (i know...im just too lazy to cut out the tape myself and sticky tape is not one of my best friends).


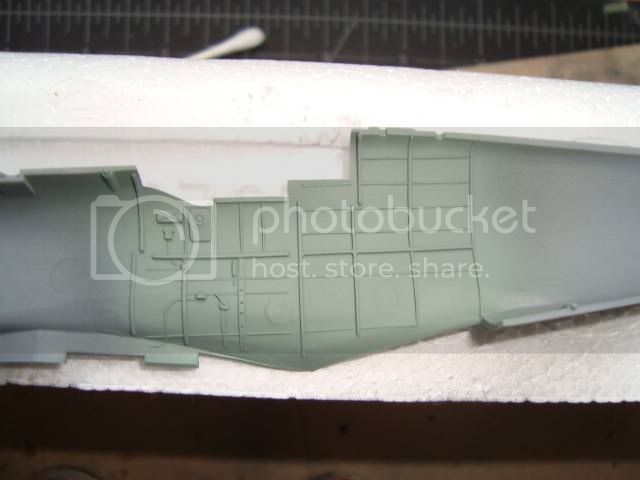
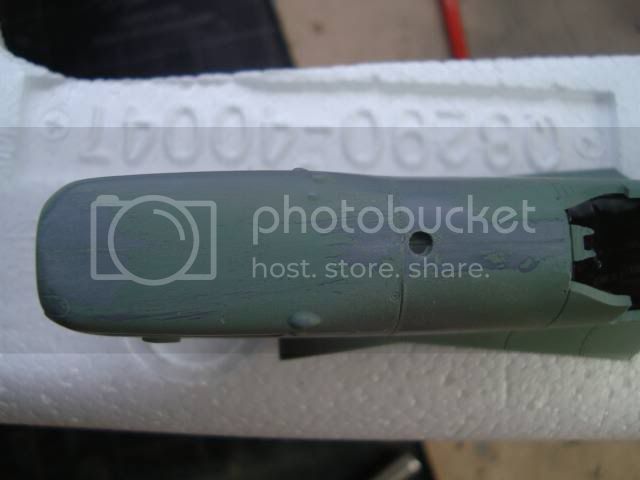
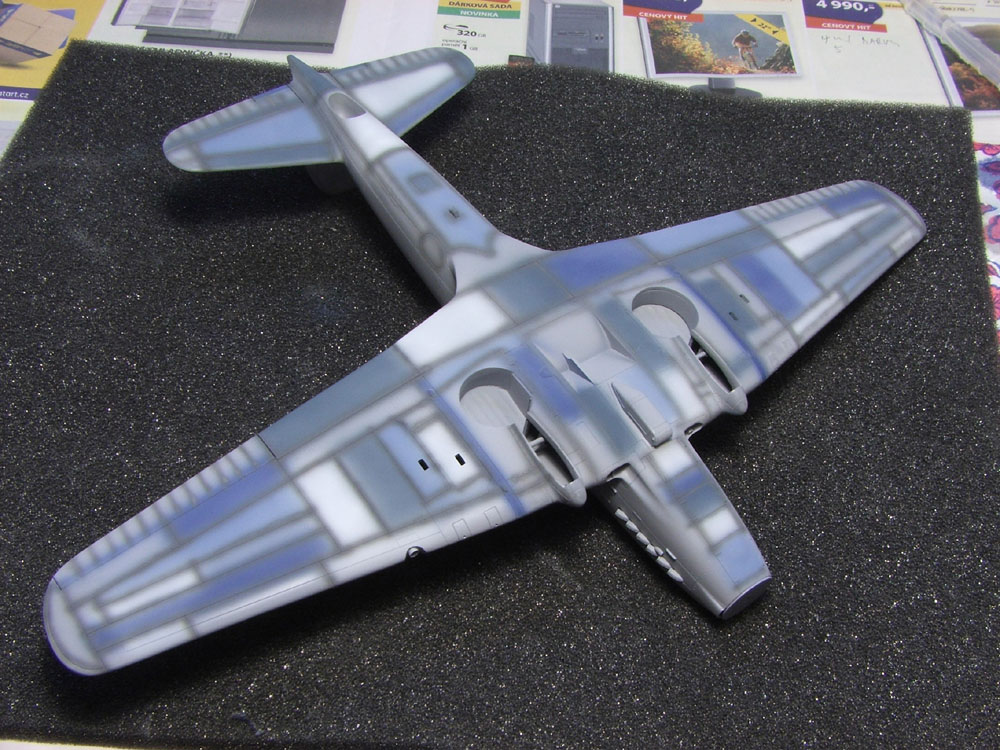
Next step was to prime the kit and add the preshade. This time around, I'm trying out Tamiya's Fine surface primer and thank you to all that recommended this product for it worked wonderful.


Now it's time to let it all dry before we start with the main painting and cammo. For that stage, I'm going to use ModelMaster's acrylics. The cammo with receive RAF dark green and dark gull grey. The underside will receive flat gull grey. The first thing that I'm going to do will be to paint the cammo starting with the dark green followed by the gull grey. More of that to come.
Hermann
Current projects:
Revell F-15E (1:48)
Germany
Joined: September 07, 2005
KitMaker: 5,609 posts
AeroScale: 5,231 posts
Posted: Thursday, October 22, 2009 - 01:11 AM UTC
Hi Hermann
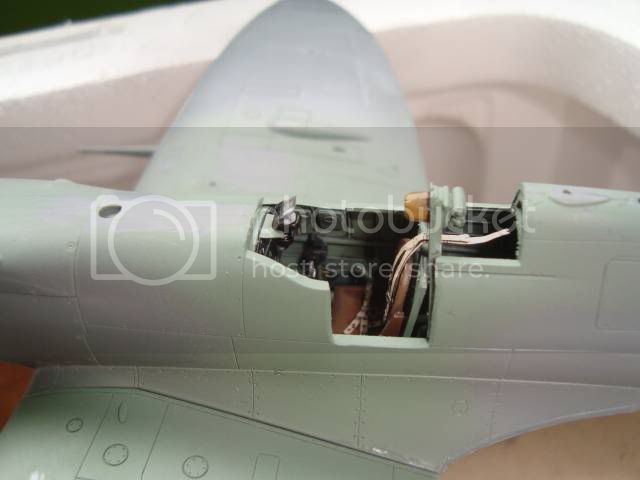
Very nice progress!... personally I am not a big fan of preshading because mine always looks like your last pic .. evreything black and when I added the bottom colour nothing is left of the effect ... maybe cosider a method I had seen at Jakub "Kubrt" Vilingr's Avia B-33

(the pix are larger but i forced them to 800 px width -->right click > show pic)
all the best
Steffen
DULCE ET DECORUM EST PRO HOBBY MORI
Florida, United States
Joined: March 01, 2008
KitMaker: 529 posts
AeroScale: 340 posts
Posted: Saturday, October 24, 2009 - 12:14 PM UTC
Steffen, thanks for sharing that technique ..I'll have to research it a bit more since the results are stunning. You also seem to have beat me to the punch since I recently started my Tamiya P-47D "bubbletop" as well. I'll have to post build soon. The reason was that I bent the needle to my Iwata AB and wanted to use the idle time wisely as I waited for spare parts. I've managed to assemble as much of the cockpit, wings and ordinace that I could before it came time to paint those parts. The needle arrived yesterday so I should be back in business soon.
P.S. I ordered my first modern jet yesterday so we'll see how well that goes. I ordered Revell's F-15E and EF-2000 Typhoon along with an assortment of Eduard PE and masks for them.
Cheers,
Hermann
Current projects:
Revell F-15E (1:48)
Florida, United States
Joined: March 01, 2008
KitMaker: 529 posts
AeroScale: 340 posts
Posted: Saturday, October 24, 2009 - 10:58 PM UTC
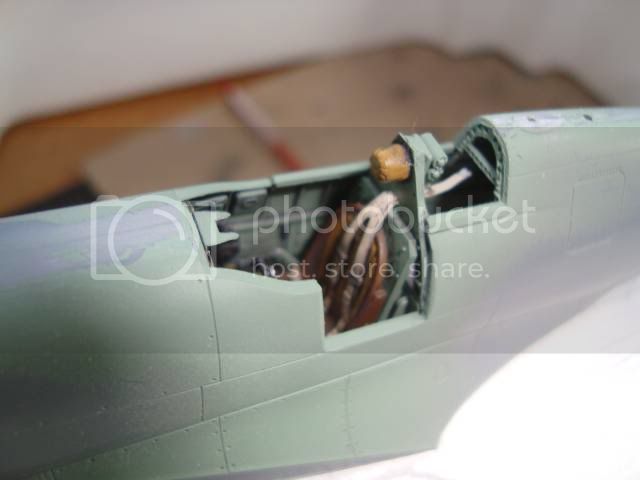
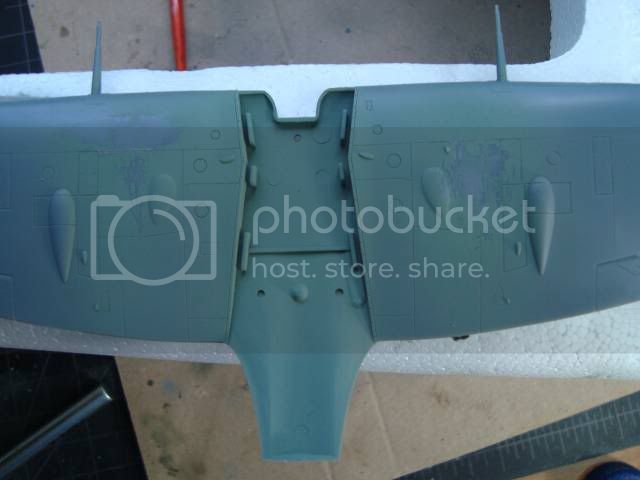
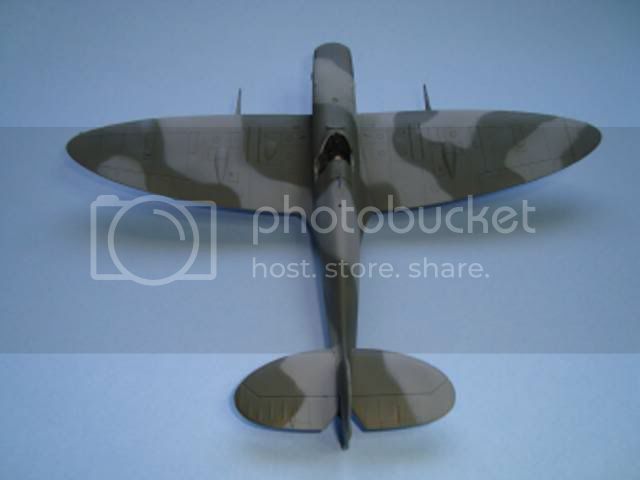
We are back in business ...I primed the kit using Tamiya's fine surface primer and proceeded to paint the upper surface with a coat of ModelMaster's acrylic RAF dark green.
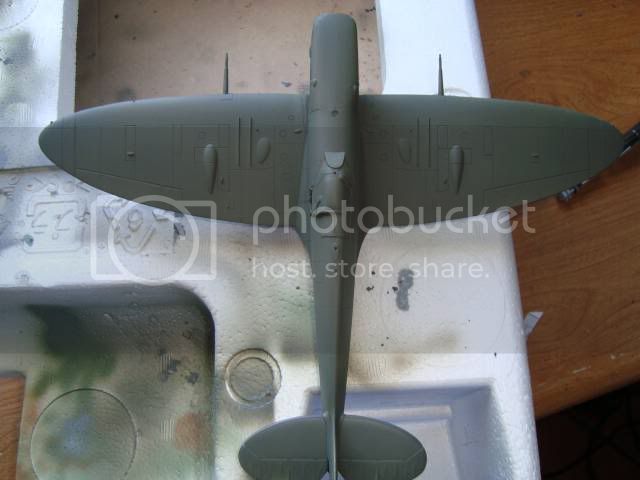
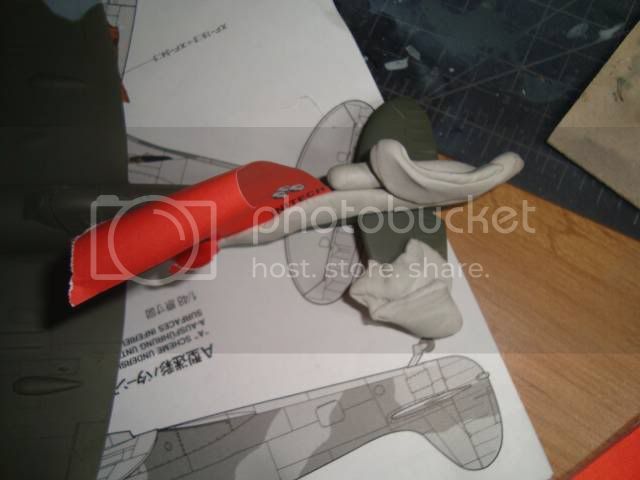
I then proceeded to mask the craft to apply the individual cammo strands using ModelMaster dark gull grey
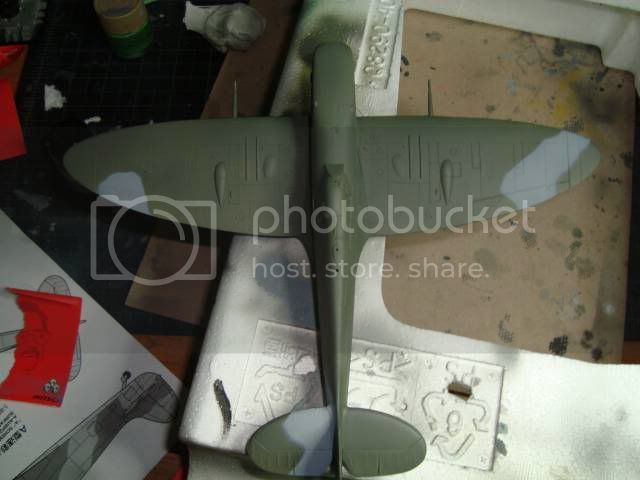


I think that we get the point ..this will take some time so I'll post when the cammo has been fully applied. Thanks again for watching.
Cheer,
Hermann
Current projects:
Revell F-15E (1:48)
Germany
Joined: September 07, 2005
KitMaker: 5,609 posts
AeroScale: 5,231 posts
Posted: Sunday, October 25, 2009 - 02:41 AM UTC
Hi Hermann
looks good so far!!
May I ask why you applied the darker colour first? My normal procedure would be vice versa .. except special cases (difficult masking and the like)
all the best
Steffen
DULCE ET DECORUM EST PRO HOBBY MORI
Florida, United States
Joined: March 01, 2008
KitMaker: 529 posts
AeroScale: 340 posts
Posted: Sunday, October 25, 2009 - 03:10 AM UTC
Thanks Steffen! The main reason was that I figured the dark green covered more real estate. Thus, it would make masking for the gull gray a bit easier.
Current projects:
Revell F-15E (1:48)
Florida, United States
Joined: January 14, 2009
KitMaker: 2,798 posts
AeroScale: 2,443 posts
Posted: Monday, October 26, 2009 - 01:44 PM UTC
Looking really good hermon cant wait to see it finished.
ill be watching till the end.
Build On,
Justin

"From time to time, the tree of liberty must be watered with the blood of
tyrants and patriots."
- Thomas Jefferson
IPMS#47611
Florida, United States
Joined: March 01, 2008
KitMaker: 529 posts
AeroScale: 340 posts
Posted: Monday, October 26, 2009 - 02:45 PM UTC
Thanks Justin ..I'm happy to have you along for the ride. This is the fun part of the build but I'm finding it hard to allocate the time needed to finish. Slowly but surely it will be finished. By the way, what part of the sunshine state are you from?
Cheers,
Hermann
Current projects:
Revell F-15E (1:48)
Alberta, Canada
Joined: January 19, 2008
KitMaker: 6,743 posts
AeroScale: 6,151 posts
Posted: Tuesday, October 27, 2009 - 01:26 AM UTC
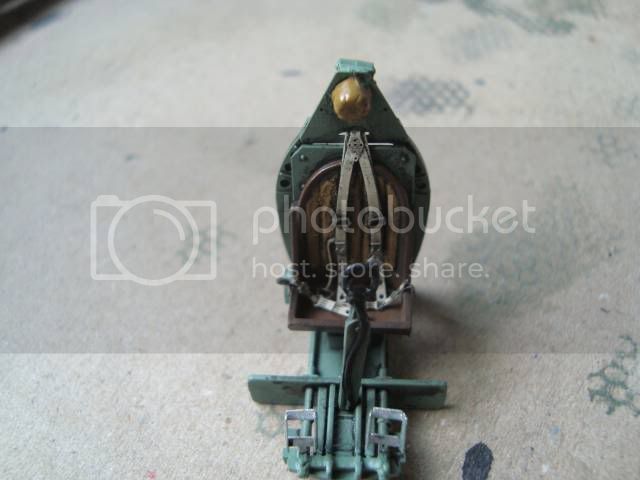
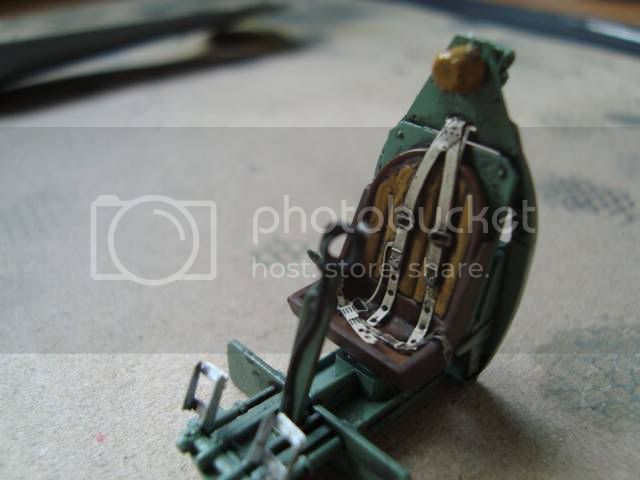
Very nice job done in the pit ! Looking forward to more progress
North Carolina, United States
Joined: November 28, 2005
KitMaker: 2,216 posts
AeroScale: 1,080 posts
Posted: Tuesday, October 27, 2009 - 11:51 AM UTC
Hermann, nice name by the way.
Your cockpit looks awsome. The overall quality of this build so far is also great.
I noticed you're using Model Master acrylic paints. I use them quite a bit on smaller bits and pieces but have had major problems with the paint sticking to large plastic surfaces. Seems no matter how long I let the base coat set, as soon as I lay tape on it it will peel the paint right back off. Is there any secret you are using?
Hermon

"Those who would give up Essential Liberty
to purchase a little Temporary Safety,
deserve neither Liberty nor Safety."
Benjamin Franklin
Florida, United States
Joined: March 01, 2008
KitMaker: 529 posts
AeroScale: 340 posts
Posted: Tuesday, October 27, 2009 - 01:10 PM UTC
Thanks Hermon. I do like the use of modelmaster's acrylics because of it's consistency ..it's quite runny and usually does not clog up my AB. But as a result, I do need to prime the kit before I paint. This usually reduces the amount of chipping when I remove the mask and allows the paint to grip on the kit. The primer that I almost always use is Tamiya's fine primer. Besides the primer, Tamiya also has a nice line of masking tape that works like a charm and rarely chips the paint when it's removed. Another thing that I tend to do is let the primer and paint settle ..usually a couple of hours for the primer and a day for the actual paint job. Hope that this helps!
Cheers,
Hermann
p.s. I almost forgot to include that I tend to seal the coat of paint with Future.
Current projects:
Revell F-15E (1:48)
North Carolina, United States
Joined: November 28, 2005
KitMaker: 2,216 posts
AeroScale: 1,080 posts
Posted: Wednesday, October 28, 2009 - 12:06 PM UTC
Must be the primer. Other than that I do the same thing as you on everything else. Even the Tamiya tape peels the MM acrylic off. Next project I'll try the primer as you do. Other than the whole peeling thing, I love MM acrylic especially since they have the German colors available without haveing to mix 3 bottles of Tamiya just to get one shade.
Hermon
"Those who would give up Essential Liberty
to purchase a little Temporary Safety,
deserve neither Liberty nor Safety."
Benjamin Franklin
Florida, United States
Joined: March 01, 2008
KitMaker: 529 posts
AeroScale: 340 posts
Posted: Thursday, October 29, 2009 - 05:23 AM UTC
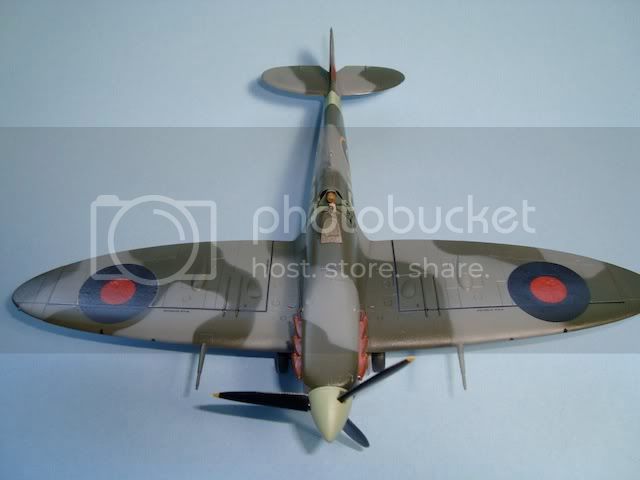
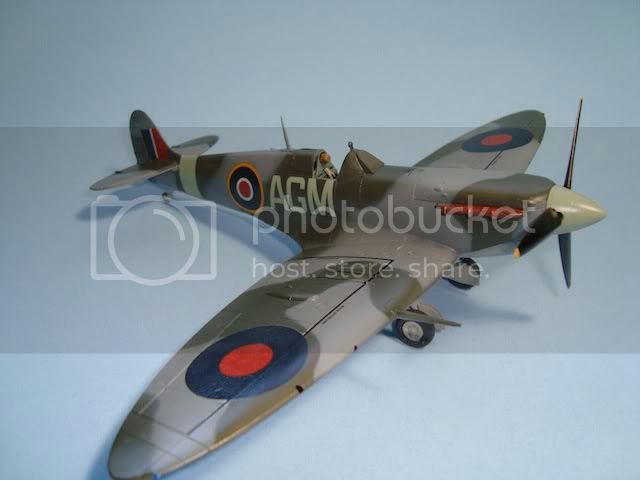
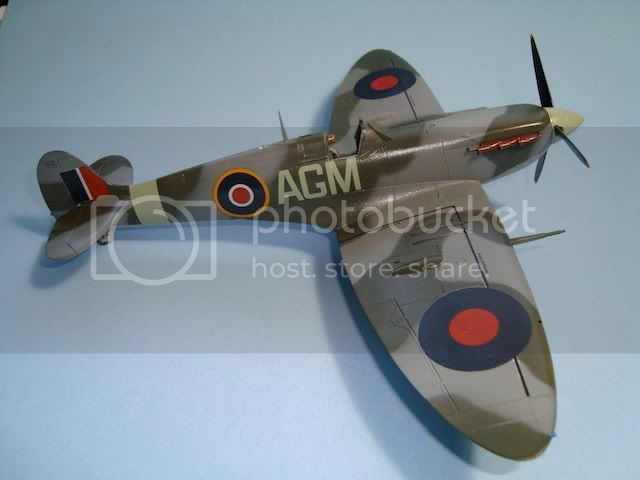
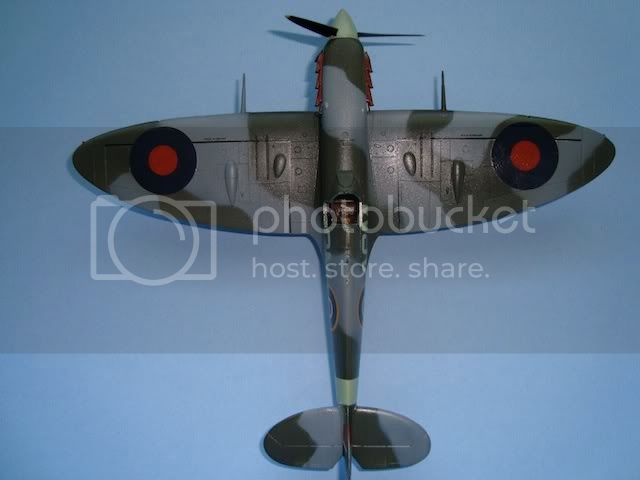
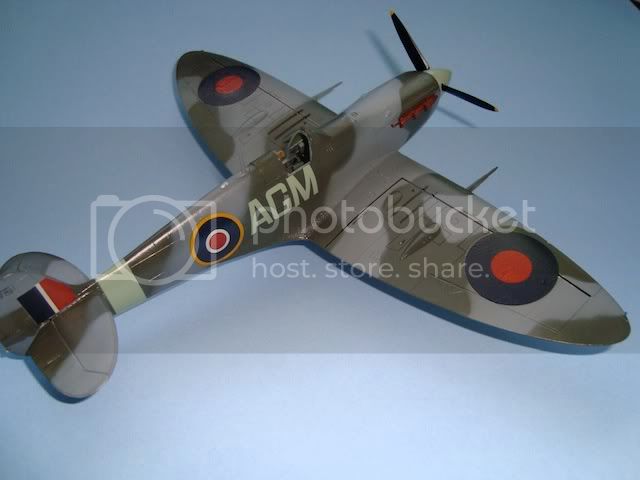
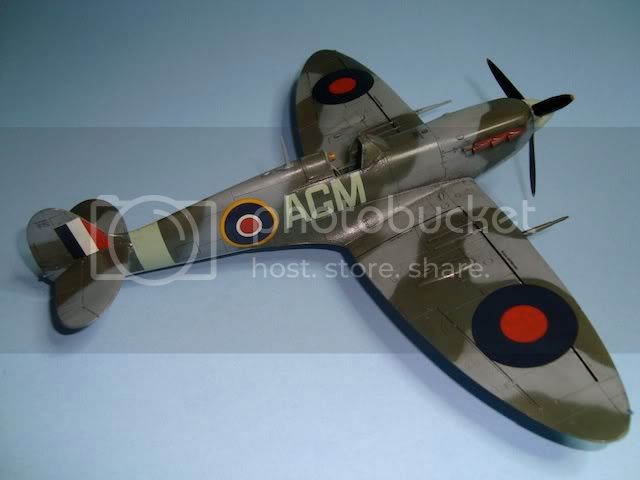
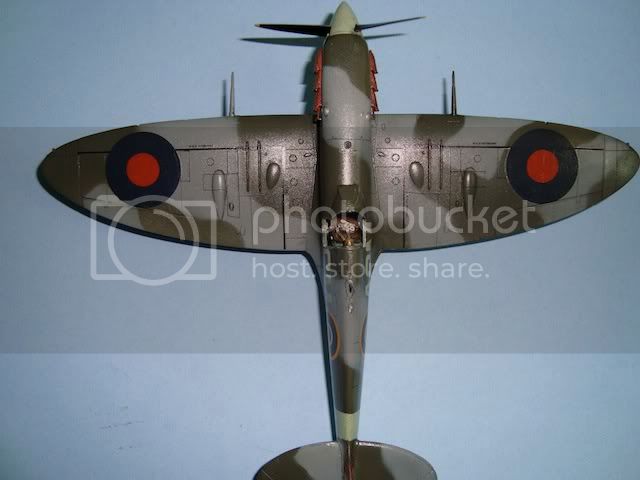
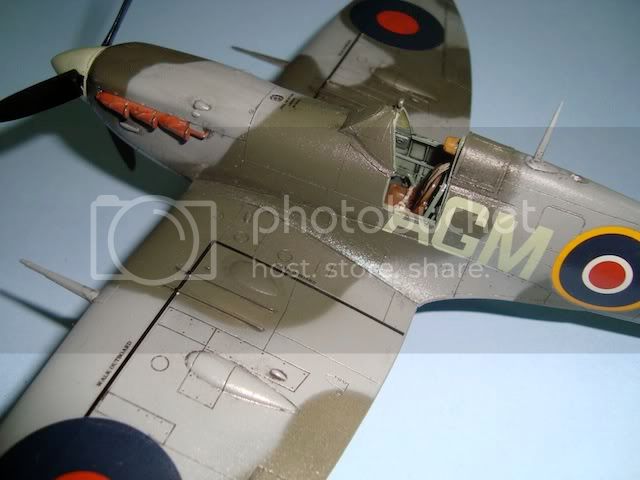
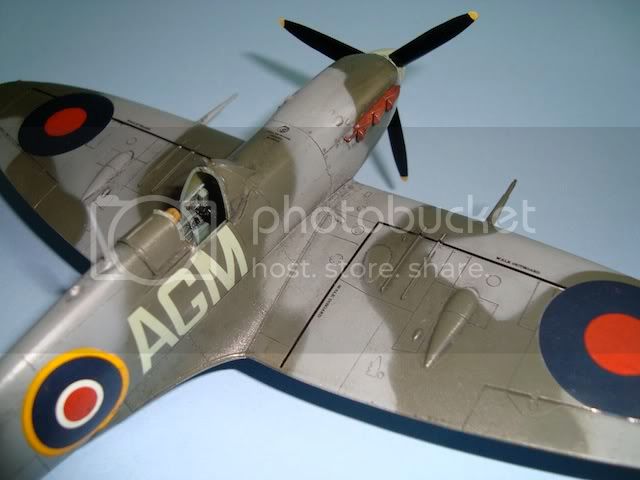
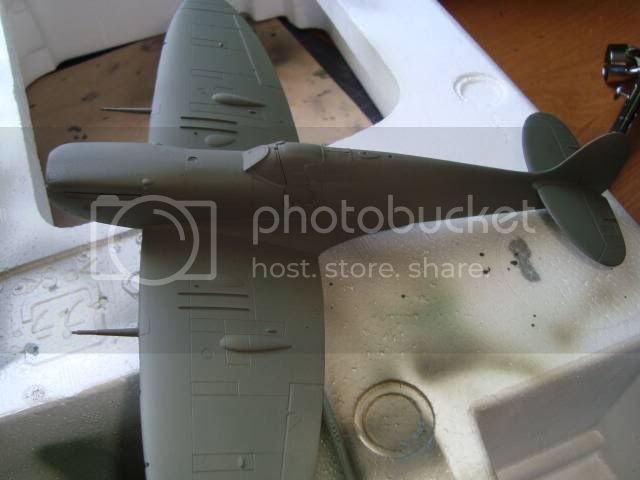
Made a bit of progress ...was able to finish painting the upper portion of the aircraft by applying the remainder of the dark gull grey.
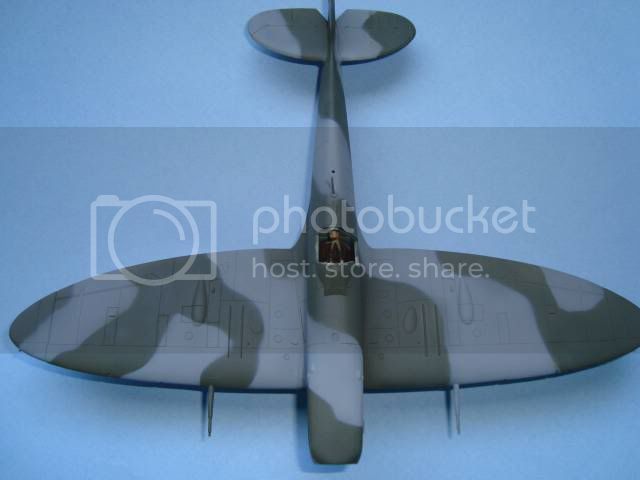
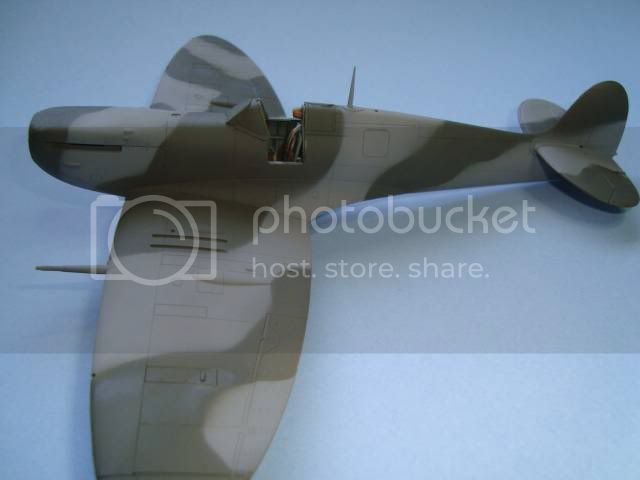
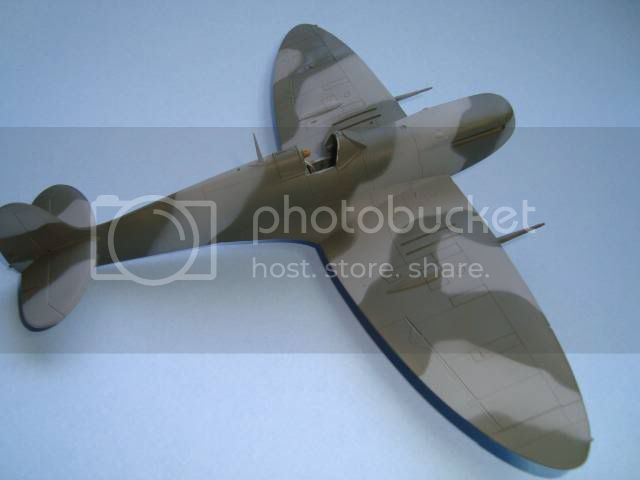
The next part will be the lower part of the aircraft. That will require the use of ModelMaster's flat gull grey. Will report when that is done. Till then, thanks for watching!
Cheers,
Hermann
Current projects:
Revell F-15E (1:48)
Germany
Joined: September 07, 2005
KitMaker: 5,609 posts
AeroScale: 5,231 posts
Posted: Thursday, October 29, 2009 - 05:34 AM UTC
Looks very nice Hermann! .. should be finished soon!
all the best
Steffen
DULCE ET DECORUM EST PRO HOBBY MORI
Florida, United States
Joined: March 01, 2008
KitMaker: 529 posts
AeroScale: 340 posts
Posted: Friday, October 30, 2009 - 12:26 AM UTC
Thank you Steffen. I would have finished much quicker but finding time to dedicate to the hobby is much harder then before. I'm adjusting to the constant needs of my new baby girl and my work schedule. Until next time, thanks for watching.
Current projects:
Revell F-15E (1:48)
Florida, United States
Joined: March 01, 2008
KitMaker: 529 posts
AeroScale: 340 posts
Posted: Tuesday, November 03, 2009 - 01:08 AM UTC
Current projects:
Revell F-15E (1:48)
Germany
Joined: September 07, 2005
KitMaker: 5,609 posts
AeroScale: 5,231 posts
Posted: Tuesday, November 03, 2009 - 01:15 AM UTC
Very nice, Hermann!!
Need to build Adolf's machine too .. one day
cheers
Steffen
DULCE ET DECORUM EST PRO HOBBY MORI
Florida, United States
Joined: January 14, 2009
KitMaker: 2,798 posts
AeroScale: 2,443 posts
Posted: Wednesday, November 04, 2009 - 03:23 PM UTC
sorry kopper havent checked in lately because i was trying to get my F4U finished.
WOW good work it came along nicely.
And im from winter haven FL.

And You?
Build on,
Justin
"From time to time, the tree of liberty must be watered with the blood of
tyrants and patriots."
- Thomas Jefferson
IPMS#47611
Auckland, New Zealand
Joined: October 25, 2005
KitMaker: 949 posts
AeroScale: 493 posts
Posted: Wednesday, November 04, 2009 - 04:31 PM UTC
Hi Hermann,
NIce build, very cool.
A question? in your photos showing the pre shading are these all done with an airbrush or have you tried another technique?
The look almost as if they were done with a pen.
Chris
"A Geek is someone who has found something more interesting than sex."
Neil Degrasse Tyson
Florida, United States
Joined: March 01, 2008
KitMaker: 529 posts
AeroScale: 340 posts
Posted: Wednesday, November 04, 2009 - 05:40 PM UTC
Current projects:
Revell F-15E (1:48)
Florida, United States
Joined: January 14, 2009
KitMaker: 2,798 posts
AeroScale: 2,443 posts
Posted: Thursday, November 05, 2009 - 12:13 AM UTC
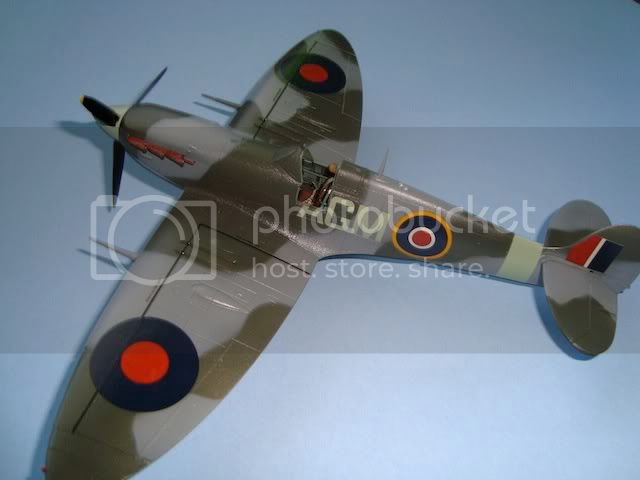
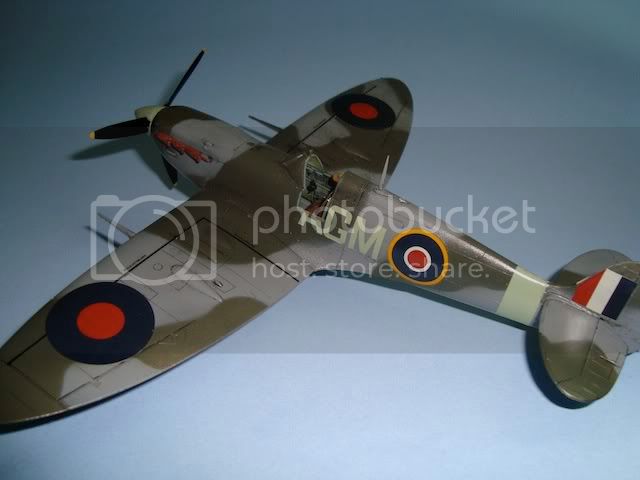
Nice Job

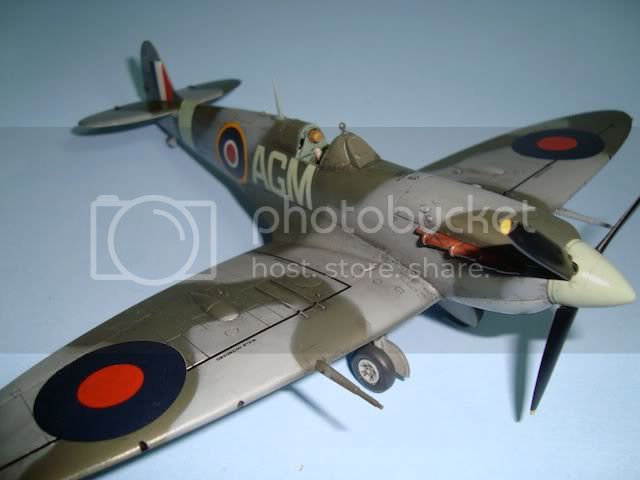
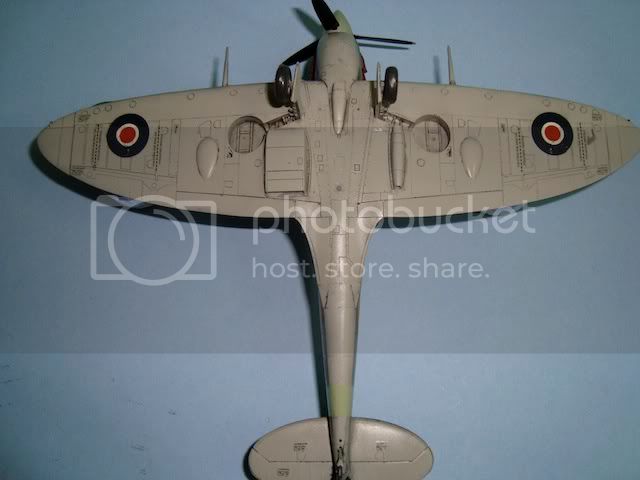
The wash made the details stand out alot more
Build on,
Justin
"From time to time, the tree of liberty must be watered with the blood of
tyrants and patriots."
- Thomas Jefferson
IPMS#47611