_GOTOBOTTOM
World War II
Discuss WWII and the era directly before and after the war from 1935-1949.
Hosted by Rowan Baylis
Tamiya P-47D (1/48)
hkopper
_VISITCOMMUNITY
Florida, United States
Joined: March 01, 2008
KitMaker: 529 posts
AeroScale: 340 posts
Posted: Thursday, December 17, 2009 - 07:37 AM UTC
I started this build about a month ago on P-47 site as part of the on going campaign. Since I'm not confident that I would finish the build on time, I decided to bring the build to here. The build is going to be straight OOB with the exception of interior PE details from Eduard Here are some pix to recap to where I'm at.

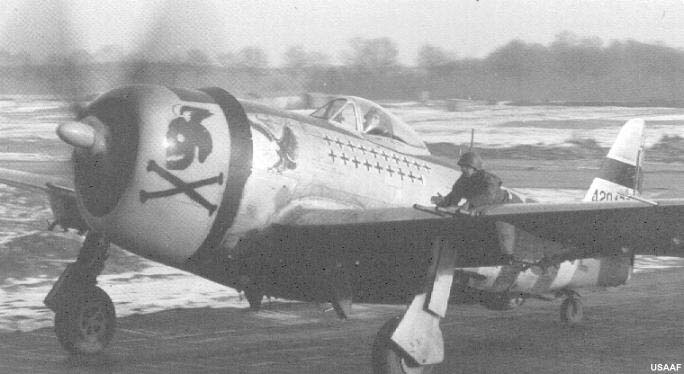
For this build I decided to recreateCol Glenn T. Eagleston's P-47D. This will be the first time that I use Alclad for the metal finish and will try to recreate most of the stripes by painting them instead of relying on the decals supplied.


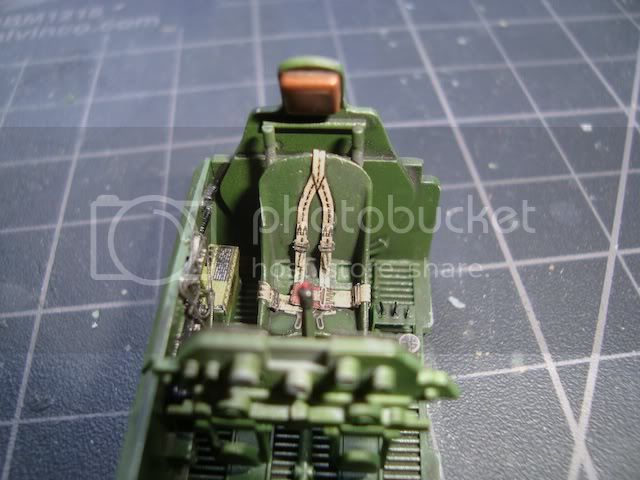
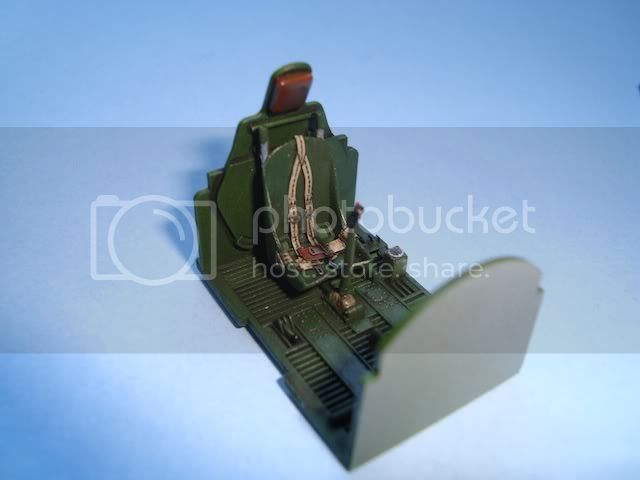
Here are pix of the cockpit with PE details, which I painted primarily with Tamiya Flat Green and later weathered with Promodellers' wash:





Here is the engine assembly and cowling:


The wing assembly and the wheel wells were painted with Tamiya's yellow green:


The fuselage and wings were then attached with little problems. One thing that I love of Tamiya kits is the ease which the kit comes together ..it almost builds itself:


More to continue ...

Hermann
hkopper
_VISITCOMMUNITY
Florida, United States
Joined: March 01, 2008
KitMaker: 529 posts
AeroScale: 340 posts
Posted: Thursday, December 17, 2009 - 07:48 AM UTC
The engine components were put together and later attached to the fuselage:


As can be seen, I started to fill in the gaps on the fuselage and did a bit of sanding to try to create a flawless surface. The reason is that I've read that the use of Alclad magnifies any flaw or seam found on the surface. The thunderbolt then received several coats of Alclad and for that I chose duraluminum. The aircraft's cockpit was masked using Tamiya tape and the wheel well and cowling were masked using blue tack.


More to follow,

Hermann
hkopper
_VISITCOMMUNITY
Florida, United States
Joined: March 01, 2008
KitMaker: 529 posts
AeroScale: 340 posts
Posted: Thursday, December 17, 2009 - 07:58 AM UTC
The next step was to paint the cowling. For that I used yellow along with a band of semi-gloss black.


This was followed by adding the black stripes to the tail (again using semi-gloss black):


That was followed by adding the OD stripe on the top of the fuselage. I substituted it with ModelMaster's RAF dark green because I liked the tone a bit more then Tamiya's OD. Also, you can notice the use of a lighter shade of Alclad on random panels of the top portion of the left and right wing. For this I masked off random panels and painted them using a lighter shade if aluminum:


I believe that I'm now up to speed to where I left the build. The next step will be to recreate the white and black allied stripes on belly of the fuselage. That will be followed by the assembly and painting of the main and rear landing gear. Stay tuned for more. Thanks for watching,

Hermann
AussieReg
Staff MemberAssociate Editor
AUTOMODELER
#007
_VISITCOMMUNITY
Victoria, Australia
Joined: June 09, 2009
KitMaker: 8,156 posts
AeroScale: 3,756 posts
Posted: Thursday, December 17, 2009 - 08:16 AM UTC
Hey Hermann, your Jug is looking really good so far, and your notes on what you have done are very helpful as well. Keep it up !!

Cheers, D
Tojo72
_VISITCOMMUNITY
North Carolina, United States
Joined: June 06, 2006
KitMaker: 4,691 posts
AeroScale: 238 posts
Posted: Thursday, December 17, 2009 - 08:17 AM UTC
Fantastic work on a great kit.Your cockpit work is really good.I wish mine were that nice,looking foward to the finale.
Tomcat31
#042
_VISITCOMMUNITY
England - North East, United Kingdom
Joined: November 18, 2006
KitMaker: 2,828 posts
AeroScale: 1,720 posts
Posted: Thursday, December 17, 2009 - 10:05 AM UTC

Quoted Text

I started this build about a month ago on P-47 site as part of the on going campaign. Since I'm not confident that I would finish the build on time

I've asked Nige for an extension for my entry on the campaign i'm sure he would do the same for you.
lampie
#029
_VISITCOMMUNITY
England - East Midlands, United Kingdom
Joined: December 23, 2005
KitMaker: 6,249 posts
AeroScale: 3,270 posts
Posted: Thursday, December 17, 2009 - 10:33 AM UTC

Quoted Text


Quoted Text

I started this build about a month ago on P-47 site as part of the on going campaign. Since I'm not confident that I would finish the build on time

I've asked Nige for an extension for my entry on the campaign i'm sure he would do the same for you.


Not a problem
Anybody else need an extension either PM me or post in the Campaign Thread
Nige
hkopper
_VISITCOMMUNITY
Florida, United States
Joined: March 01, 2008
KitMaker: 529 posts
AeroScale: 340 posts
Posted: Friday, December 18, 2009 - 07:32 AM UTC
Today I was able to paint the allied id markings to the thunderbolt. For this, I started out by first applying a vertical piece of Tamiya tape as a starting point. I then attached a horizontal piece that was also marked with the location of each stripe. The painting area was then closed with the final vertical piece of tape.


The area that was sectioned off received several coats of Tamiya white (glossy).


I then proceeded to paint each individual black stripe using Tamiya semi-gloss black. To do this, I taped off the section that would remain white and was guided by the markings that I left of the top horizontal piece of tape:


This was repeated for the second black stripe. I let the paint settle for a couple of hours. The moment of truth came about and I finally got the nerve to remove the tape to reveal the following:


sigh of relief).

That's it for today ...What remains is just adding the landing gear and all of the misc bits and pieces. That's will be followed by adding the decals and the weathering phase which will be quite light. Thanks for watching,

Hermann
NickZour
_VISITCOMMUNITY
Attica, Greece / Ελλάδα
Joined: May 01, 2008
KitMaker: 1,437 posts
AeroScale: 1,241 posts
Posted: Friday, December 18, 2009 - 10:17 AM UTC
Looks very nice

Keep going!


Cheers Nick
hkopper
_VISITCOMMUNITY
Florida, United States
Joined: March 01, 2008
KitMaker: 529 posts
AeroScale: 340 posts
Posted: Tuesday, December 29, 2009 - 01:34 AM UTC
Thank you Nick!!
Here is a quick and dirty update on my build: I've added about 85% of the decals to the thunderbolt (I have some more stencils to apply, mainly on the underside of the kit). The rocket tube has been painted and a coat of matt finish was applied. Once the decals are on, I'll apply a coat of Future to seal the decals and paint work. That will be followed by the use of Promodeller's wash for the panel lines. Below are several pix of my progress:


Thanks for watching,

Hermann
AussieReg
Staff MemberAssociate Editor
AUTOMODELER
#007
_VISITCOMMUNITY
Victoria, Australia
Joined: June 09, 2009
KitMaker: 8,156 posts
AeroScale: 3,756 posts
Posted: Tuesday, December 29, 2009 - 01:52 AM UTC
Hi Hermann, great work on this build, very clean and detailed. I can't wait to see it finished.

Cheers, D
thegirl
_VISITCOMMUNITY
Alberta, Canada
Joined: January 19, 2008
KitMaker: 6,743 posts
AeroScale: 6,151 posts
Posted: Tuesday, December 29, 2009 - 02:01 AM UTC
Looking awesome so far Hermann Your skills are getting better and better with each build !!!

Nice clean lines with the masking , which can be hard to do some times . Keep up the excellent work and I look forward to you wrapping this one up !
NickZour
_VISITCOMMUNITY
Attica, Greece / Ελλάδα
Joined: May 01, 2008
KitMaker: 1,437 posts
AeroScale: 1,241 posts
Posted: Tuesday, December 29, 2009 - 02:08 AM UTC

Quoted Text


Your skills are getting better.... !!!


http://www.youtube.com/watch?v=HaXKzE-y3eI


It's great 'till now, keep going


Cheers Nick
hkopper
_VISITCOMMUNITY
Florida, United States
Joined: March 01, 2008
KitMaker: 529 posts
AeroScale: 340 posts
Posted: Tuesday, December 29, 2009 - 08:01 AM UTC
Thanks for those kind words! Terri, you and Steffen can take a lot of credit in teaching me most of the tricks and techniques that I utilize today (you guys have created a monster)! Cheers,

Hermann
hkopper
_VISITCOMMUNITY
Florida, United States
Joined: March 01, 2008
KitMaker: 529 posts
AeroScale: 340 posts
Posted: Friday, January 01, 2010 - 04:14 PM UTC
I believe that I'll be wrapping up this build by Sunday. I've managed to apply the panel line wash to the entire aircraft. The final task will then be to attach the canopy, fuel tank, 500 lb bomb(s) and the rocket tubes. Once that is done, I will be able to call it a wrap and start my next build.

Below are pix of the progress:


Thanks for watching,

Hermann
Keeperofsouls2099
_VISITCOMMUNITY
Florida, United States
Joined: January 14, 2009
KitMaker: 2,798 posts
AeroScale: 2,443 posts
Posted: Friday, January 01, 2010 - 05:28 PM UTC
Very good looking plane you should be proud to have it in your collection....


Build On,
Justin
NickZour
_VISITCOMMUNITY
Attica, Greece / Ελλάδα
Joined: May 01, 2008
KitMaker: 1,437 posts
AeroScale: 1,241 posts
Posted: Friday, January 01, 2010 - 07:42 PM UTC
It looks great!!

But the wash in the landing gear interior needs fixing


Cheers Nick
hkopper
_VISITCOMMUNITY
Florida, United States
Joined: March 01, 2008
KitMaker: 529 posts
AeroScale: 340 posts
Posted: Saturday, January 02, 2010 - 12:36 AM UTC
Nick, is it too much? Do I need to wipe some of it off or apply somewhere else?
lampie
#029
_VISITCOMMUNITY
England - East Midlands, United Kingdom
Joined: December 23, 2005
KitMaker: 6,249 posts
AeroScale: 3,270 posts
Posted: Saturday, January 02, 2010 - 01:29 AM UTC
Almost there!
Wheel well wash looks fine to me.
This P-47 was operating in autumn/winter conditions during the advance across Europe and all sorts of muck would have got thrown up onto the underside.

Interestingly, none of Eaglestons WW2 kills were made while flying the P-47, they were all made while flying the P-51.
Nige
hkopper
_VISITCOMMUNITY
Florida, United States
Joined: March 01, 2008
KitMaker: 529 posts
AeroScale: 340 posts
Posted: Saturday, January 02, 2010 - 08:41 AM UTC
Well folks, I've finished the build ..better late then never. Below are a sample of the finished thunderbolt:


Thanks for watching,

Hermann
NickZour
_VISITCOMMUNITY
Attica, Greece / Ελλάδα
Joined: May 01, 2008
KitMaker: 1,437 posts
AeroScale: 1,241 posts
Posted: Saturday, January 02, 2010 - 10:21 PM UTC

Quoted Text

Nick, is it too much? Do I need to wipe some of it off or apply somewhere else?


It's "spoily"

Clean the most of it & reapply it


Cheers Nick
 _GOTOTOP