_GOTOBOTTOM
Modern (1975-today)
Discuss the modern aircraft age from 1975 thru today.
F-22J Arctic Aggressor, Academy 1/48
RedwingNev
_VISITCOMMUNITY
England - East Midlands, United Kingdom
Joined: February 07, 2004
KitMaker: 911 posts
AeroScale: 415 posts
Posted: Thursday, December 31, 2009 - 02:54 AM UTC
This


plus this


Plus this


This is my entry for the "Let It Snow" GB on the What If forums. Only 3 months long so I gotta concentrate on this for the time being.

Work has started. The initial impression when you first open the box is "whoa, this is gunna be good!" The 1-piece fuselage halves look excellent


Although there is a little flash around some panel lines, but no biggie. Otherwise looks excellent.


A couple of comparison shots of the kit and Wolfpack parts


All comments, questions, advice etc welcomed.
Tojo72
_VISITCOMMUNITY
North Carolina, United States
Joined: June 06, 2006
KitMaker: 4,691 posts
AeroScale: 238 posts
Posted: Thursday, December 31, 2009 - 06:20 AM UTC
Looking foward to the build,especially the fancy paintjob
RedwingNev
_VISITCOMMUNITY
England - East Midlands, United Kingdom
Joined: February 07, 2004
KitMaker: 911 posts
AeroScale: 415 posts
Posted: Friday, January 01, 2010 - 09:28 PM UTC
First decision of the build - do I include drop tanks or not? I'm kinda tempted cos they look so big and chunky....


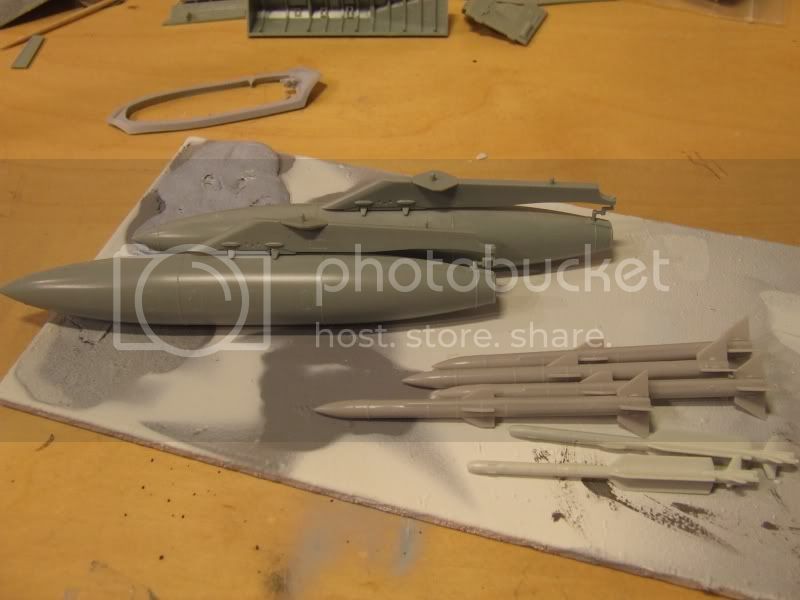
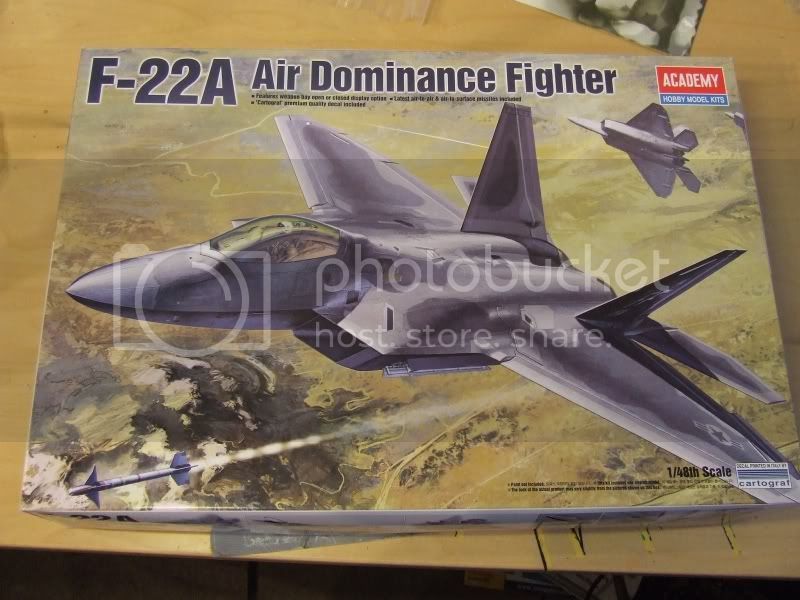
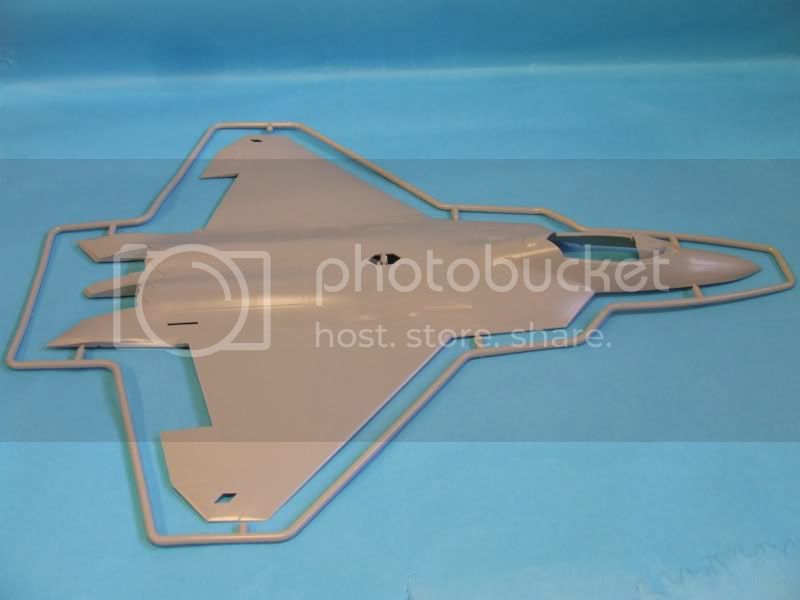
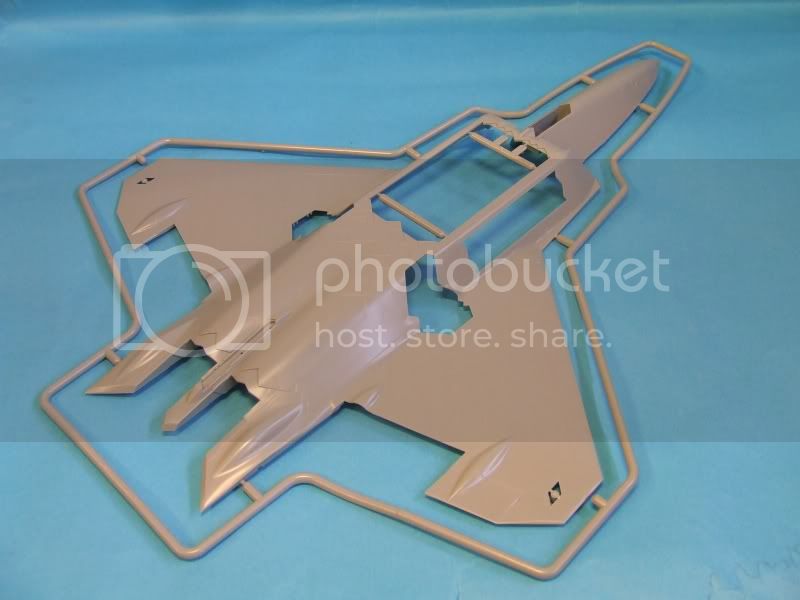
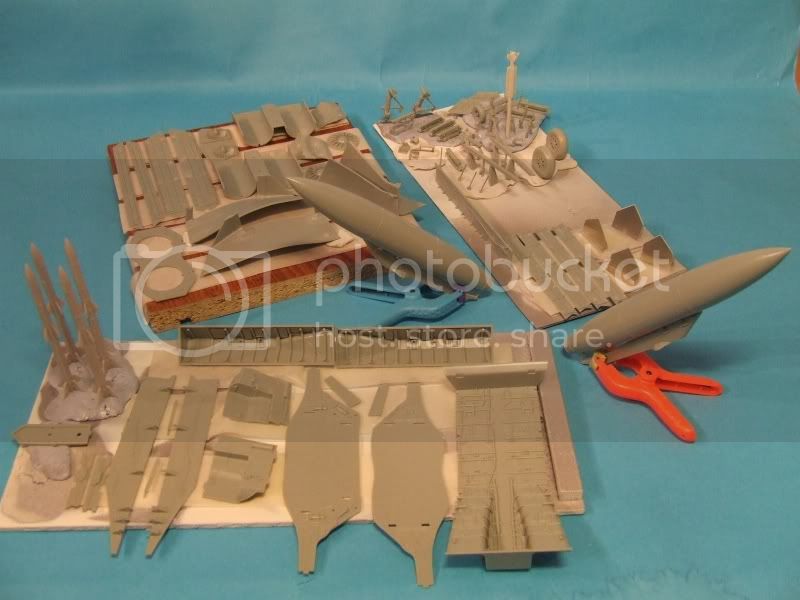
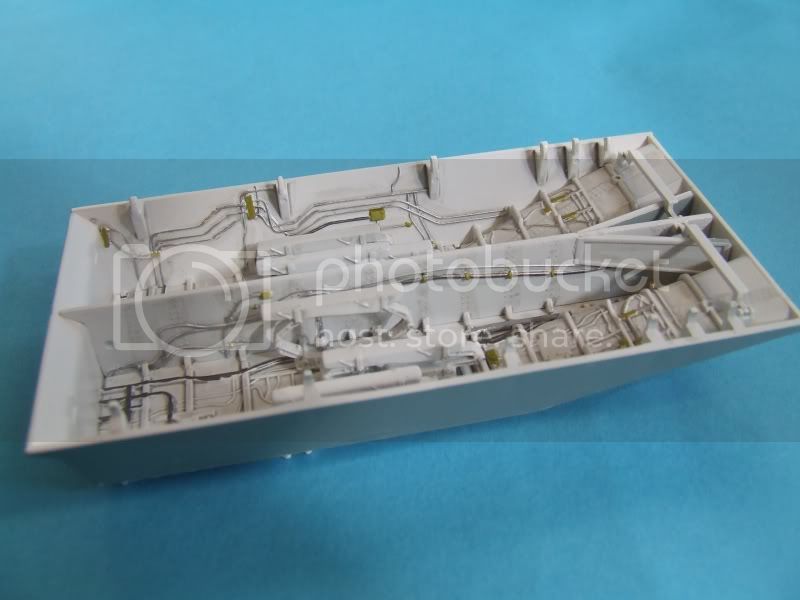
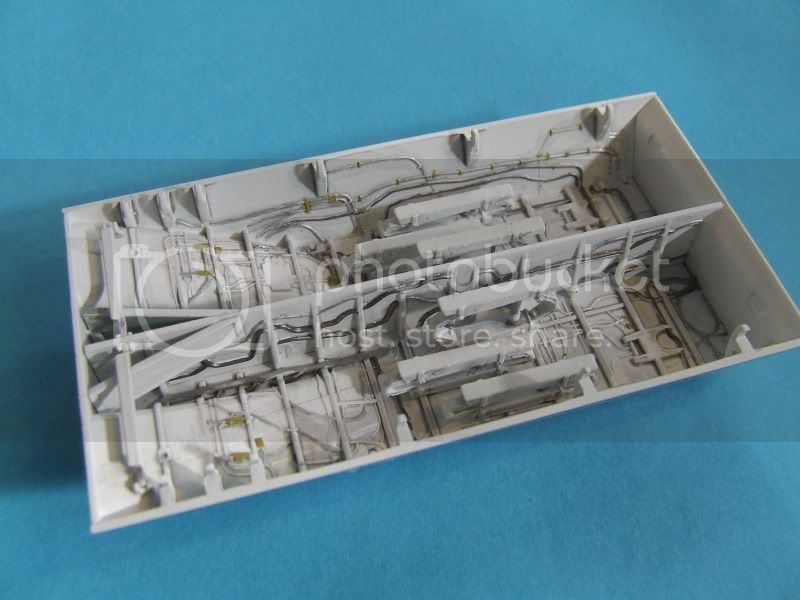
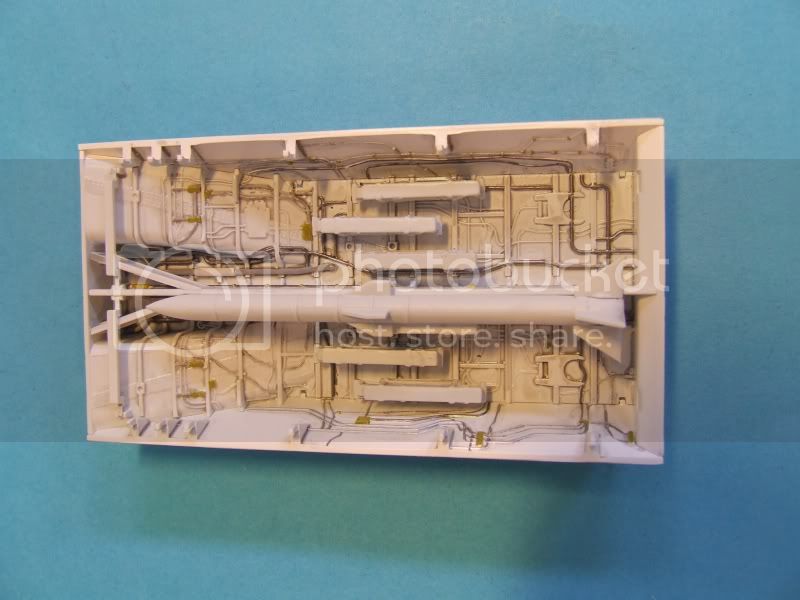
Because of all that lovely weapon bay detail, and because I may not build another of this model ever again I'm going to open them all up and give it a full weapons load 
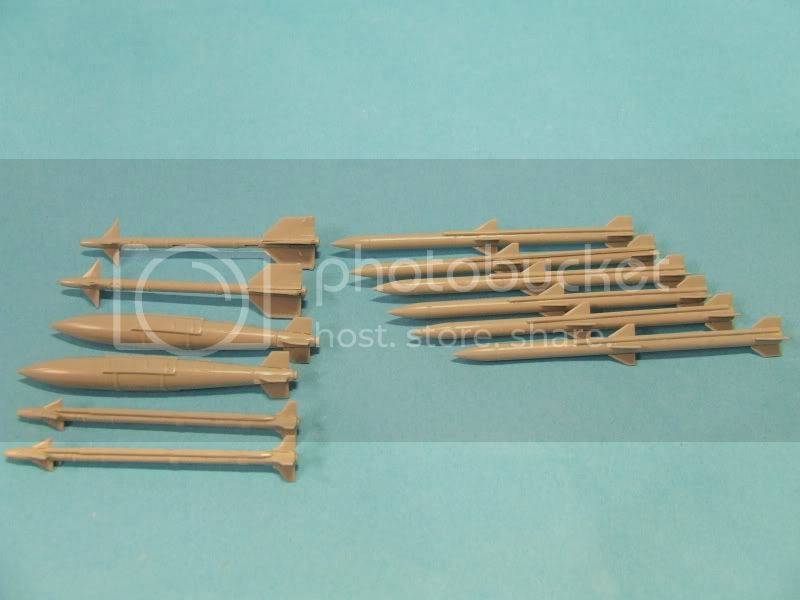
The 4 x AAM-4s are from the Hasegawa weapons sets, the AAM-5s on the other hand...

I'm planning on modifying the IRIS-Ts from the Revell 1/48 Typhoon. The plans below are slightly overscale....maybe 1/45.


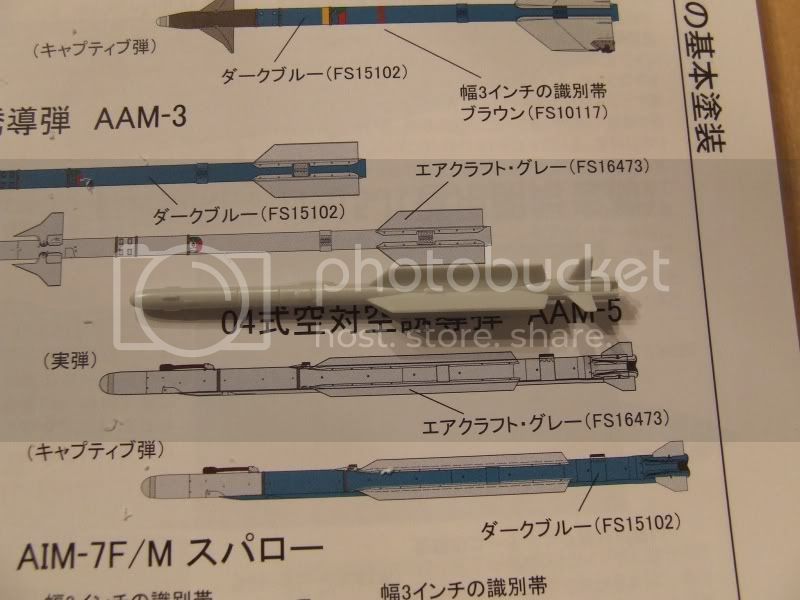
I'm not looking for absolute accuracy here, just good enough that you can't tell from a cursory glance. Its a 3 stage process as far as I can tell

1) Replace rear fins with correct shape and move them back
2) Reduce span of main fins
3) Remove nobbly bits on nose
4) Move main fins forward slightly. I may not do this due to the way the missile body fairs into the gap between the fins. That and I'm inherently lazy :whistle:

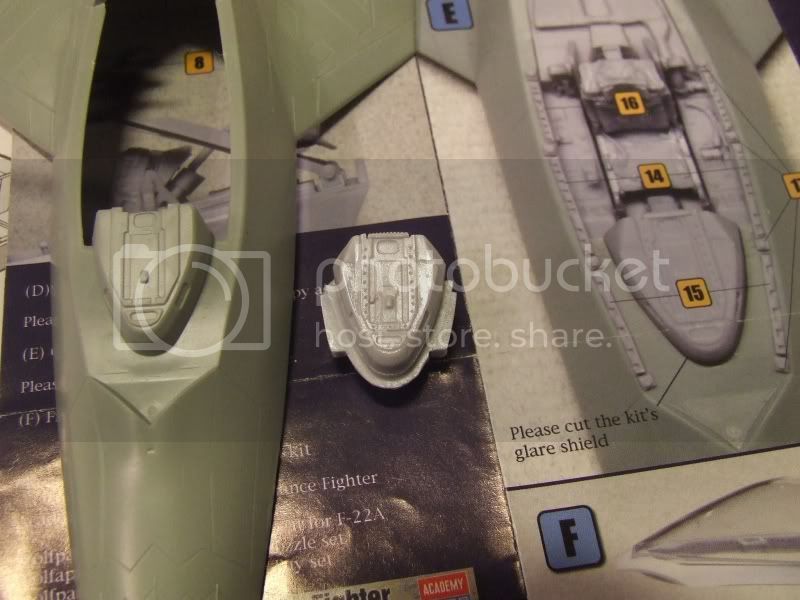
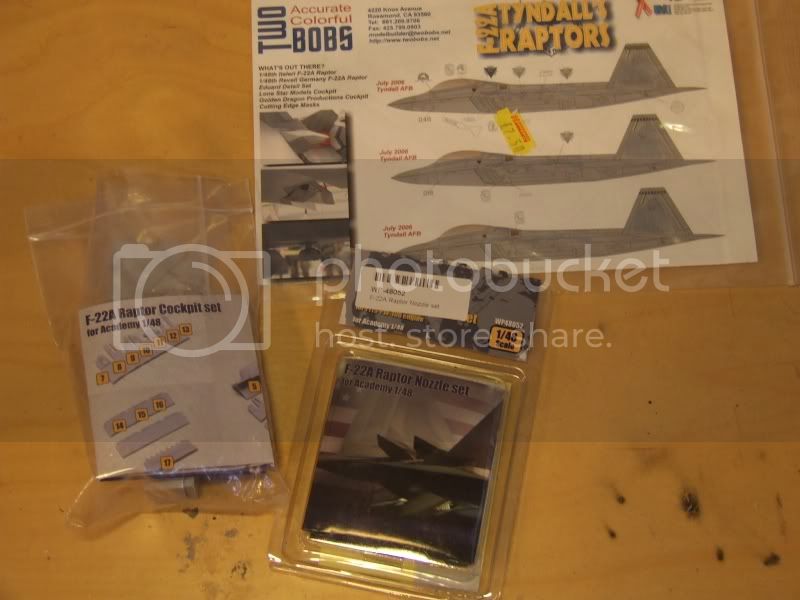
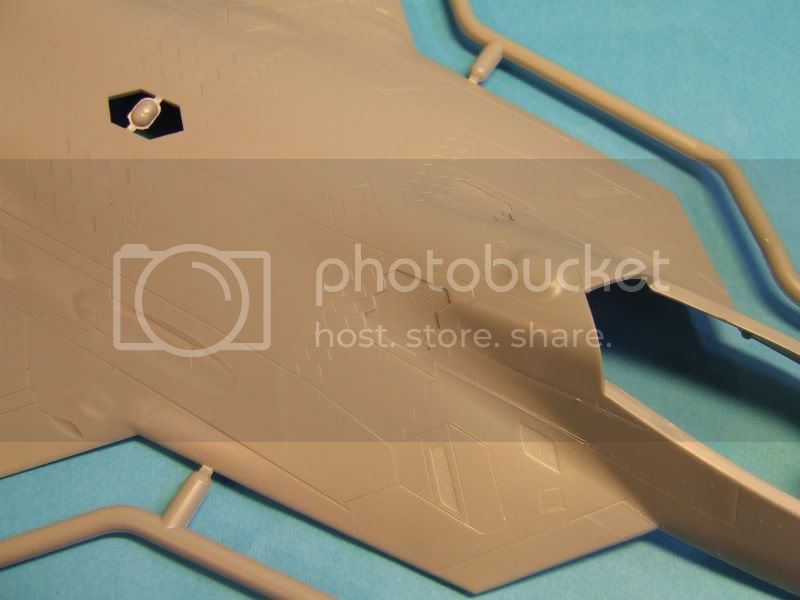
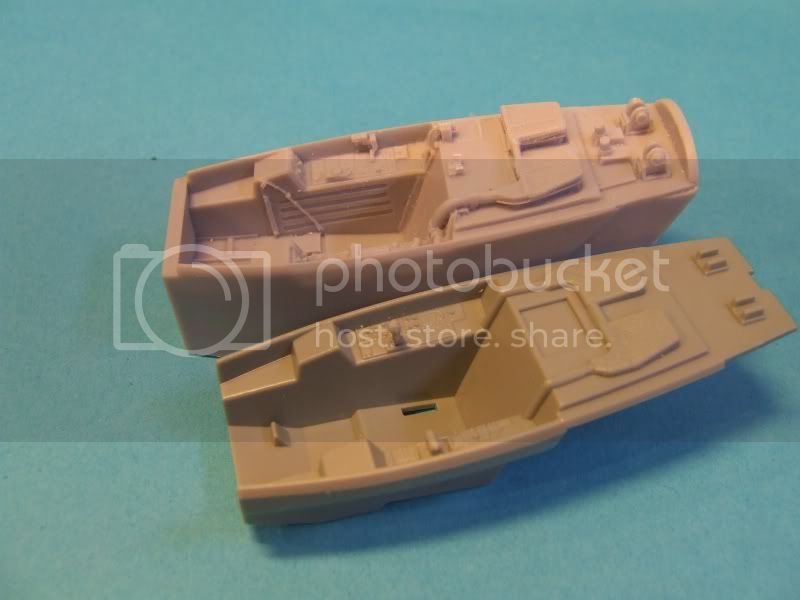
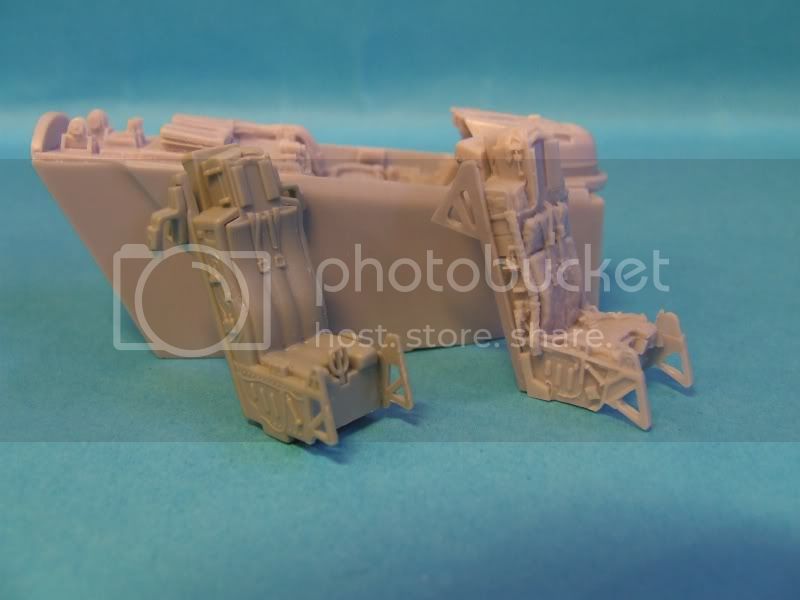
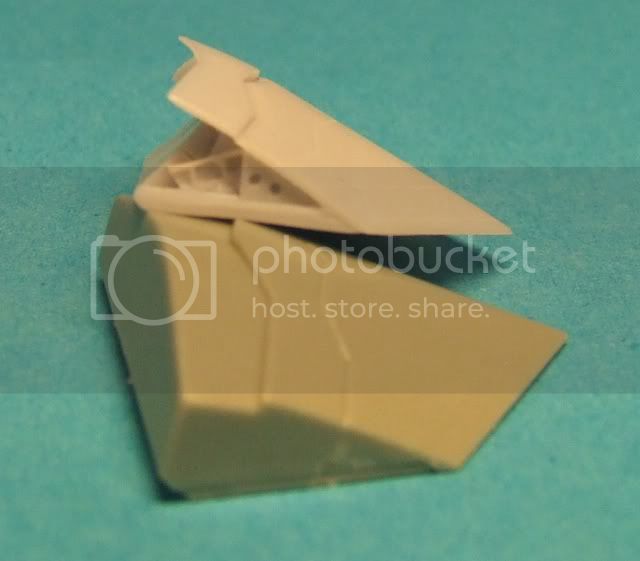
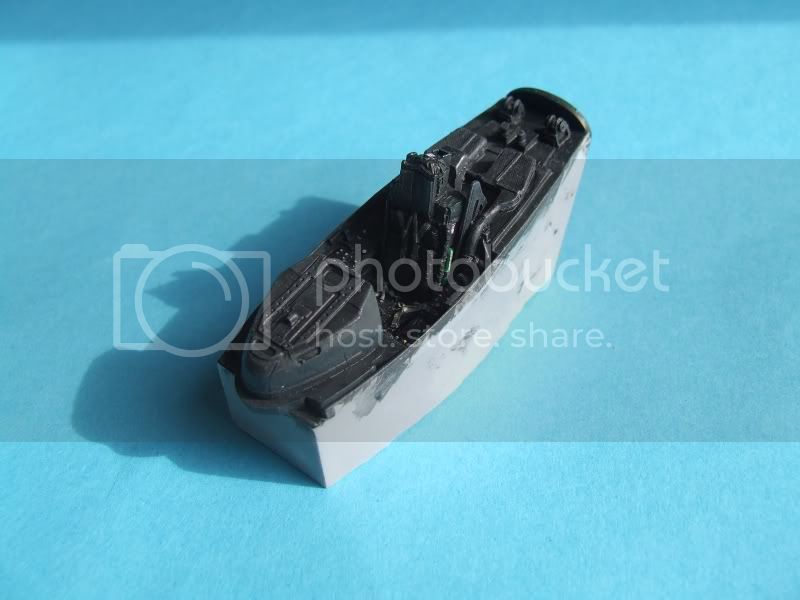
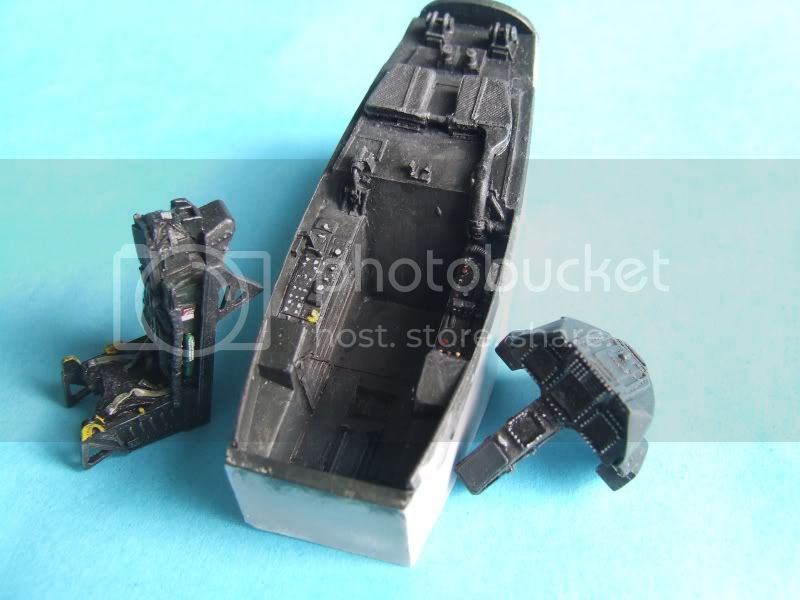
Surgery has also been performed on the cockpit coaming to allow the Wolfpack part to be inserted

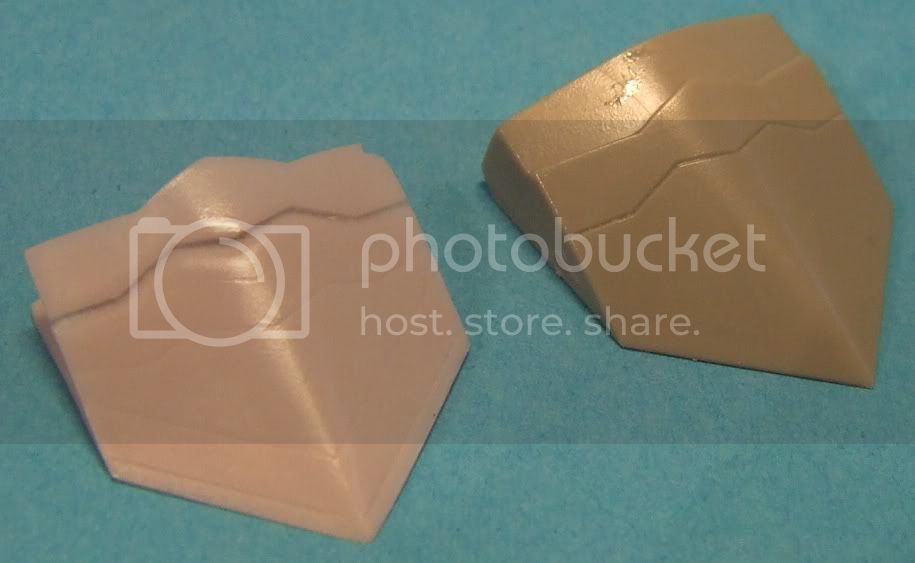
L-R: Kit part, resin part, WP instructions


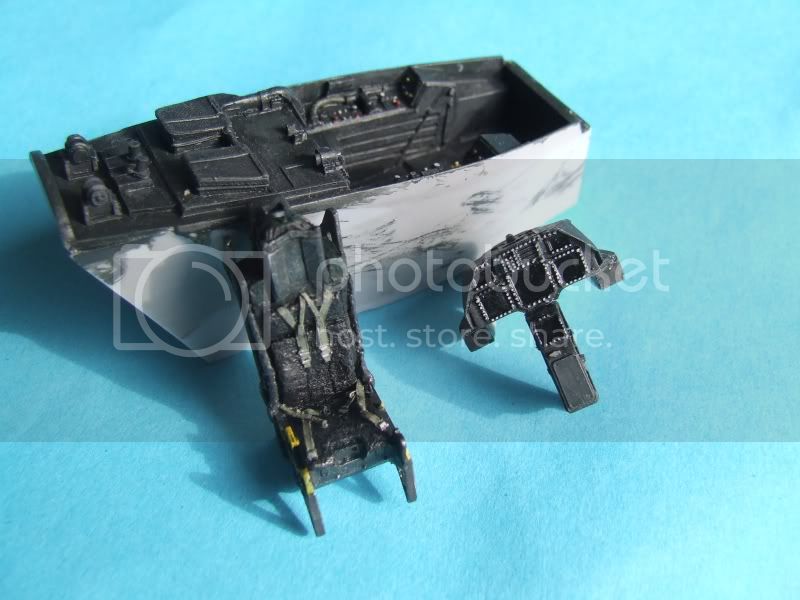
I decided to go the old "chain drill" route using the point of my knife


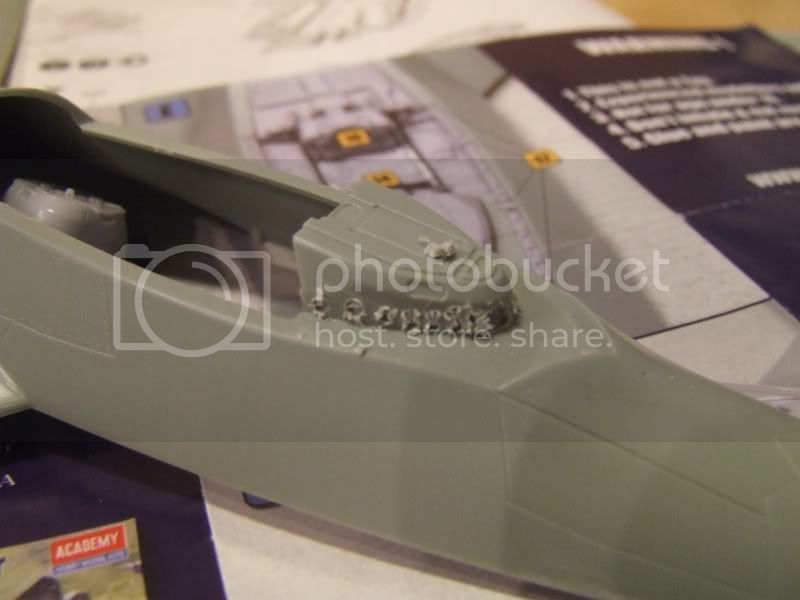
Connect the dots, et voila!


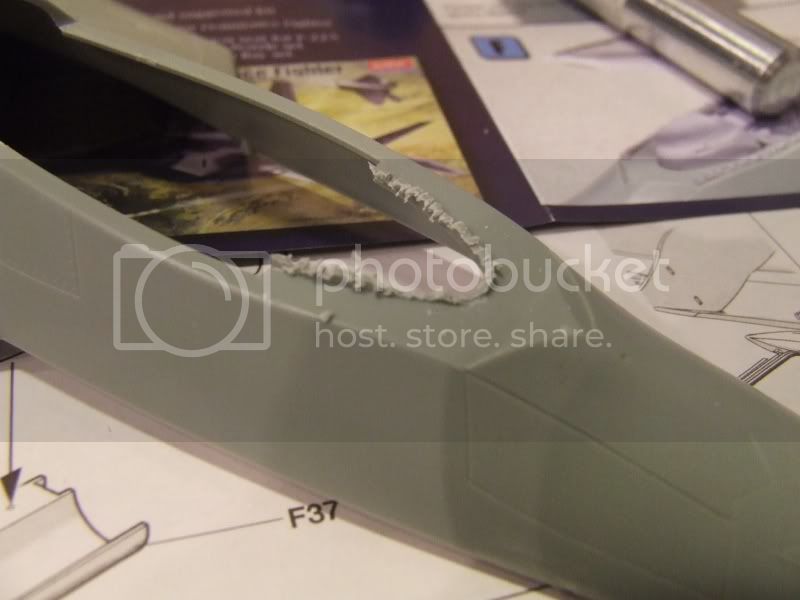
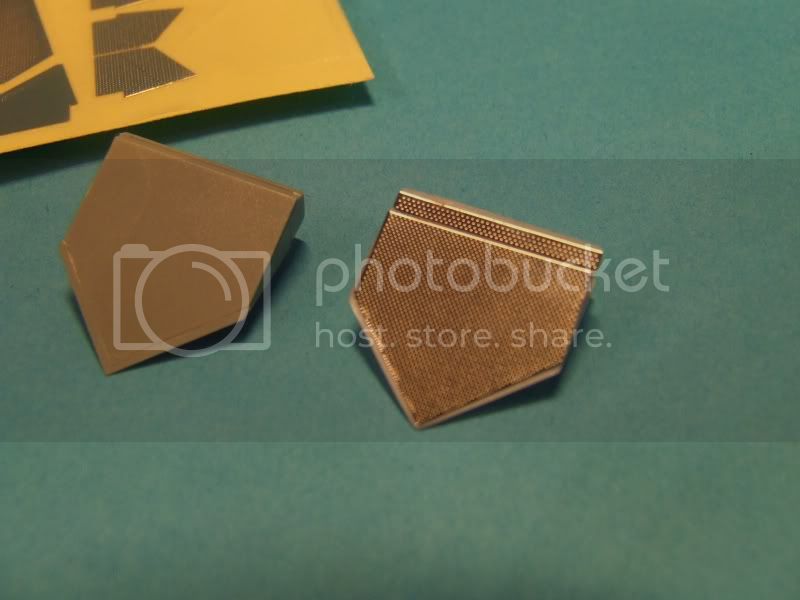
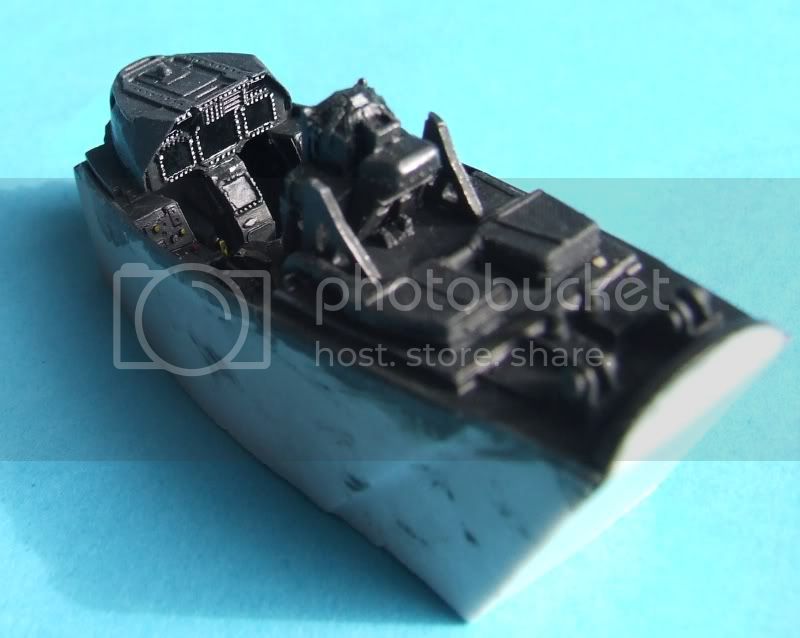
A bit of scraping and fettling later and the replacement part slots in.
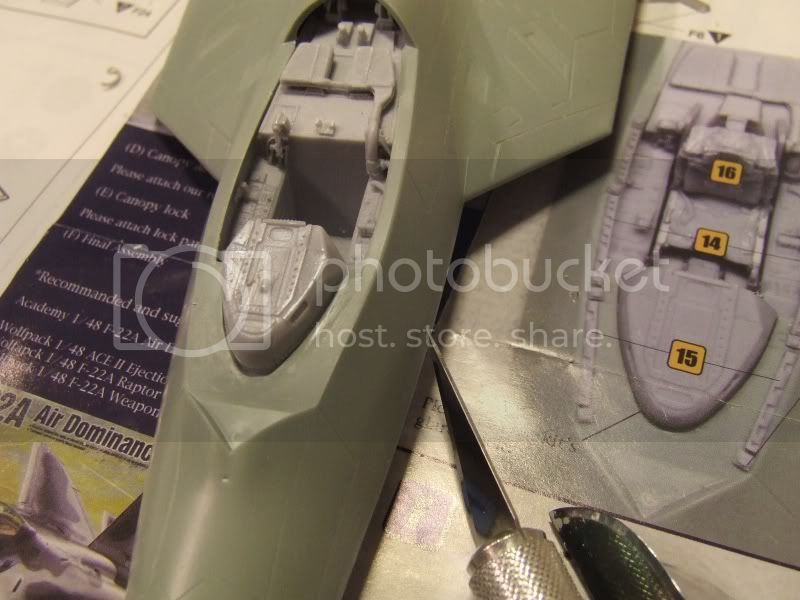

Simples!

As usual, all questions, comments, advice etc gratefully received.
james84
_VISITCOMMUNITY
Roma, Italy
Joined: January 28, 2006
KitMaker: 1,368 posts
AeroScale: 377 posts
Posted: Saturday, January 02, 2010 - 01:01 AM UTC
Cool one!
Are you really going to paint it like the Japanese aggressor shown in the fisrt post?
Mecenas
Joined: December 23, 2007
KitMaker: 1,596 posts
AeroScale: 1,275 posts
Posted: Saturday, January 02, 2010 - 01:20 AM UTC
I wonder if Steffen has already subscribed this thread...I did.
RedwingNev
_VISITCOMMUNITY
England - East Midlands, United Kingdom
Joined: February 07, 2004
KitMaker: 911 posts
AeroScale: 415 posts
Posted: Saturday, January 02, 2010 - 06:22 AM UTC

Quoted Text

Cool one!
Are you really going to paint it like the Japanese aggressor shown in the fisrt post?


Yes! I'm not quite sure how I'm going to go about it - I predict a lot of masking tape will be involved

I also don't know if I'm going to go with the Raptors metallic effect for the grey base camoflage or not....
RedwingNev
_VISITCOMMUNITY
England - East Midlands, United Kingdom
Joined: February 07, 2004
KitMaker: 911 posts
AeroScale: 415 posts
Posted: Saturday, January 16, 2010 - 05:51 AM UTC
I've been working almost non-stop on this for the last fortnight, 1-2 hours every night, basically preparing all the bits that will need spraying with white primer. As the photo below shows, that's a LOT of parts ;D


And that doesn't include the free weapons set that goes straight into the spares box (2 x AIM-9M, 2 x AIM-9X, 6 x AIM-120C, 2 x GBU-32 )


Speaking of weapons, my AAM-5 missile bash has been done. I've reduced the span of the main fins, cut off the rear ones and replaced them with the rear fins from a 1/72 Meteor courtesy of the Revell Typhoon, as well as cut off a few other nobbly bits. I didn't bother moving the main fins forward a couple of mm - it would be easier to just build the missile from scratch. If someone ever releases 1/48 AAM-5s (TwoMikes I'm looking in your direction), then I'll replace them.


I've also got to work on the Wolfpack nozzles - a couple of pics showing kit and WP in comparison (Wolfpack is lighter grey)


They also supply a self-adhesive set of etched parts which vastly improve the bare kit nozzles


The result of The great ARC Raptor nozzle debate seemed to be that the faces are scalloped, but its subtle enough to be virtually flat in scale form. So I will be attempting to recreate this effect with paint & staining.....


One quick question - what colour are the wingtip lights? The instructions say red & blue, where I thought it would be red & green? :unsure: I've not been able to find a definitive pic.

All comments, advice, criticism etc welcome.
Tojo72
_VISITCOMMUNITY
North Carolina, United States
Joined: June 06, 2006
KitMaker: 4,691 posts
AeroScale: 238 posts
Posted: Saturday, January 16, 2010 - 08:36 AM UTC
nice progress on all the sub-assemblies.now to bring it all together.
Grenadier37
_VISITCOMMUNITY
Texas, United States
Joined: June 02, 2008
KitMaker: 232 posts
AeroScale: 155 posts
Posted: Monday, February 15, 2010 - 09:59 AM UTC
Very cool! I'm looking forward to seeing the finished product.
ViperEnforcer
_VISITCOMMUNITY
Alabama, United States
Joined: December 05, 2007
KitMaker: 204 posts
AeroScale: 202 posts
Posted: Thursday, March 11, 2010 - 07:00 AM UTC

Quoted Text

I've been working almost non-stop on this for the last fortnight, 1-2 hours every night, basically preparing all the bits that will need spraying with white primer. As the photo below shows, that's a LOT of parts ;D

The result of The great ARC Raptor nozzle debate seemed to be that the faces are scalloped, but its subtle enough to be virtually flat in scale form. So I will be attempting to recreate this effect with paint & staining.....


One quick question - what colour are the wingtip lights? The instructions say red & blue, where I thought it would be red & green? :unsure: I've not been able to find a definitive pic.

All comments, advice, criticism etc welcome.


The divergent nozzles pedals are indeed "faceted", (not scalloped) and they should be represented in 48th scale. Maybe in 72nd they can be represented in shading, but it's not as subtle as one thinks.

The wingtip light lenses are clear, as are the LED clusters inside. There's a small blue/red element inside the LED cluster, but it would be as thick as a fiber optic strand if represented.

Mike V


james84
_VISITCOMMUNITY
Roma, Italy
Joined: January 28, 2006
KitMaker: 1,368 posts
AeroScale: 377 posts
Posted: Saturday, March 20, 2010 - 06:14 AM UTC
Any news?
RedwingNev
_VISITCOMMUNITY
England - East Midlands, United Kingdom
Joined: February 07, 2004
KitMaker: 911 posts
AeroScale: 415 posts
Posted: Thursday, March 25, 2010 - 02:49 AM UTC

Quoted Text


The divergent nozzles pedals are indeed "faceted", (not scalloped) and they should be represented in 48th scale. Maybe in 72nd they can be represented in shading, but it's not as subtle as one thinks.

The wingtip light lenses are clear, as are the LED clusters inside. There's a small blue/red element inside the LED cluster, but it would be as thick as a fiber optic strand if represented.

Mike V


Alas, its too late for the wingtip lights *shrugs* Any news on when your Raptor intake covers will be out? Really not looking forward to having to do a proper job on the intakes without them

[quote=james84]Any news? [/quote]

Thanks for asking Giacamo! Yes and no. Its actually been stalled for a month since I bought an Xbox360 but I do have some pics to share of work I did before then.

Cockpit is done. Quite hard to do these modern cockpits with their NVG friendly "how much more black can you get?" finish. And they are a bit boring too with their lack of knobs & dials, just big MFDs.


I used a base colour of Tamiya NATO black, with a black wash and Panzer Grey highlights. Quite subtle, and hard to pick up in pics


Also done the main wheels. One thing I do like is Academys inclusion of the data stencils. A nice touch I wish more manufacturers would do


Just noticed from the pics that the tyres need another going over


As usual, all comments, advice (encouragement!) etc welcomed.
ShawnM
_VISITCOMMUNITY
Missouri, United States
Joined: November 24, 2008
KitMaker: 564 posts
AeroScale: 510 posts
Posted: Thursday, March 25, 2010 - 03:10 AM UTC
gear looks good! Those stencils make a huge difference.
I like the paint work in your cockpit, the dry brush is right on!
james84
_VISITCOMMUNITY
Roma, Italy
Joined: January 28, 2006
KitMaker: 1,368 posts
AeroScale: 377 posts
Posted: Thursday, March 25, 2010 - 05:41 AM UTC
Well done!
I'm not sure, but I think the cockpit should have a grey base coat... anyway this looks nice, and being a "what if" project an artistic license is not a bad thing!
I've seen the box of this beast a couple of days ago... and it's HUGE! I thought it was smaller!
RedwingNev
_VISITCOMMUNITY
England - East Midlands, United Kingdom
Joined: February 07, 2004
KitMaker: 911 posts
AeroScale: 415 posts
Posted: Thursday, March 25, 2010 - 08:38 AM UTC
No, its black


Thanks for the kind word, and yep its a big ole plane
ViperEnforcer
_VISITCOMMUNITY
Alabama, United States
Joined: December 05, 2007
KitMaker: 204 posts
AeroScale: 202 posts
Posted: Saturday, March 27, 2010 - 09:09 AM UTC

Quoted Text


Quoted Text


The divergent nozzles pedals are indeed "faceted", (not scalloped) and they should be represented in 48th scale. Maybe in 72nd they can be represented in shading, but it's not as subtle as one thinks.

The wingtip light lenses are clear, as are the LED clusters inside. There's a small blue/red element inside the LED cluster, but it would be as thick as a fiber optic strand if represented.

Mike V


Alas, its too late for the wingtip lights *shrugs* Any news on when your Raptor intake covers will be out? Really not looking forward to having to do a proper job on the intakes without them

[quote=james84]Any news?


Yeah, I ran across this thread a bit late.

Our intake and exhaust plug set will be out around May. This is actually going to be a full set with AIM 9/9X covers, RBF Tags, Seat/HUD/Probe covers, ground chord, chocks, and the rest of the bedding exquipment.

I know it's too late, but it should be noted that the cockpit floor (except the boot troughs/tracks) and rudder pedal assembly are standard 36231 gray.

Keep pressing, looking good.

Mike V
RedwingNev
_VISITCOMMUNITY
England - East Midlands, United Kingdom
Joined: February 07, 2004
KitMaker: 911 posts
AeroScale: 415 posts
Posted: Sunday, March 28, 2010 - 12:09 AM UTC
Well, given the complex paint job I got planned, I can't see this being finished by May, so I'll definately go easy on the intakes knowing they will end up covered Be sure to give us a shout when the set is released.

I could repaint the floor, but I doubt much will be visible once I've got the seat in - and I'm pretty sure Japanese manufactured Raptors had a black floor anyway
RedwingNev
_VISITCOMMUNITY
England - East Midlands, United Kingdom
Joined: February 07, 2004
KitMaker: 911 posts
AeroScale: 415 posts
Posted: Saturday, April 17, 2010 - 12:05 AM UTC
Just a small update. I've finished the main weapons bay - this is all OOB. Painted using a combination of references and artistic license


I also discovered a problem with the rear fins on the AAM-4s fitting in the weapons bay. ISTR a similar problem with the AMRAAM which lead to its fins being cropped? Looks like I might have to develop a special AAM-4R

Tojo72
_VISITCOMMUNITY
North Carolina, United States
Joined: June 06, 2006
KitMaker: 4,691 posts
AeroScale: 238 posts
Posted: Saturday, April 17, 2010 - 01:09 AM UTC
weapons bay assembled and weathered very nicely.
 _GOTOTOP