_GOTOBOTTOM
World War II
Discuss WWII and the era directly before and after the war from 1935-1949.
Hosted by Rowan Baylis
Operation "Salvage"
Mecenas
Joined: December 23, 2007
KitMaker: 1,596 posts
AeroScale: 1,275 posts
Posted: Wednesday, January 06, 2010 - 08:47 PM UTC
Hi,
as the every professional modeller, which I'm trying to be, must have more than one model on the workbench at the moment I decided to dug out of the "waste-box" these two models. Both are 1:72 scale by Revell.


I started them in 2005 but due to the arrising problems I almost junk them. The biggest problem with these kits were the canopies. Revell's moulds, after few years of producing the kits, seemed to be completely worn out because the canopies even didn't have the proper shape not mentioning any frames or details. I send them a letter of complaint and got new ones: looking even worse... So I had no motivation to finish these kits. Then I found Pavla vac canopies...and so the story of this thread begins.

Here's what I have to deal with.

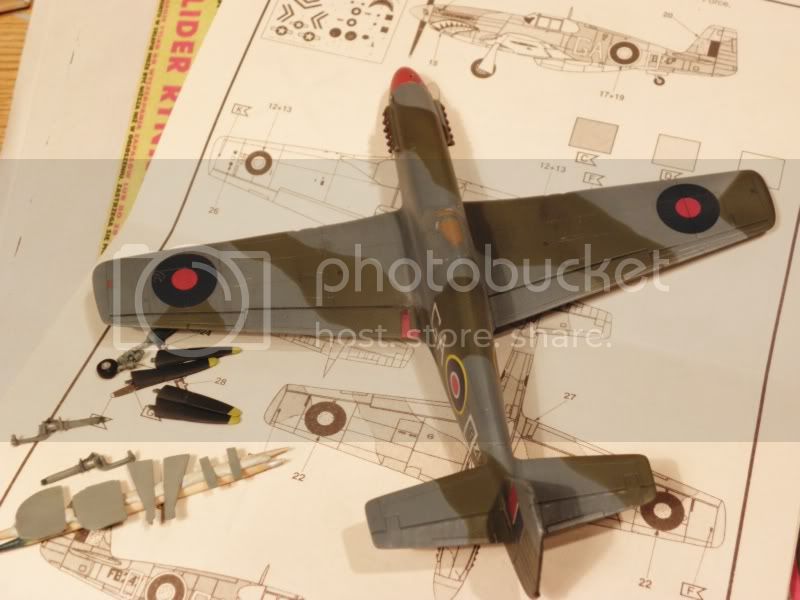
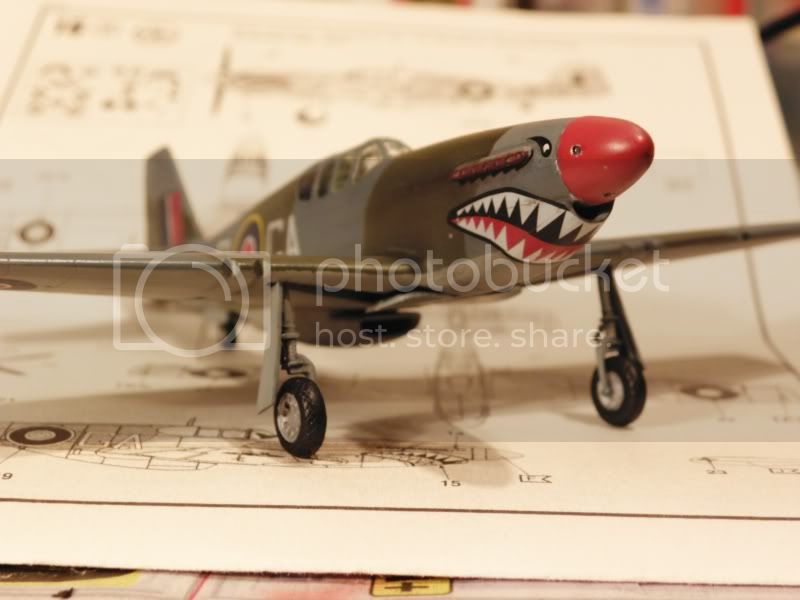
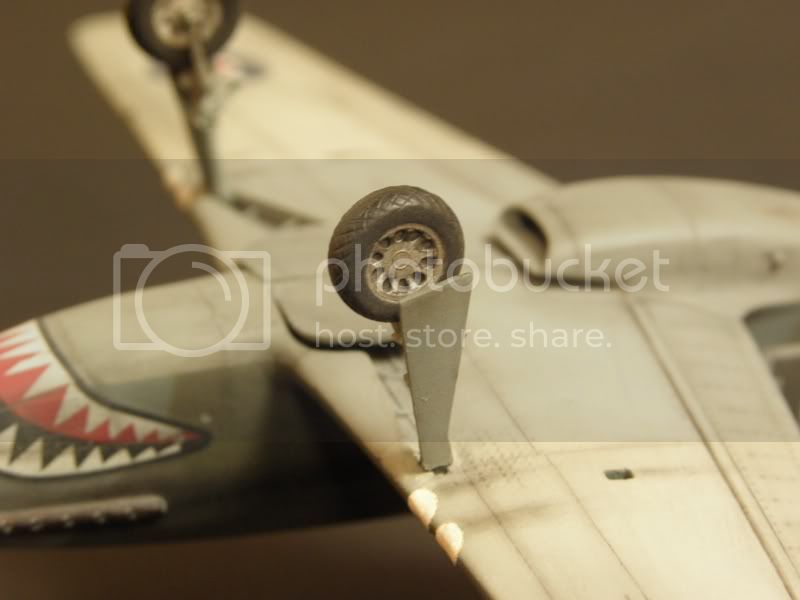
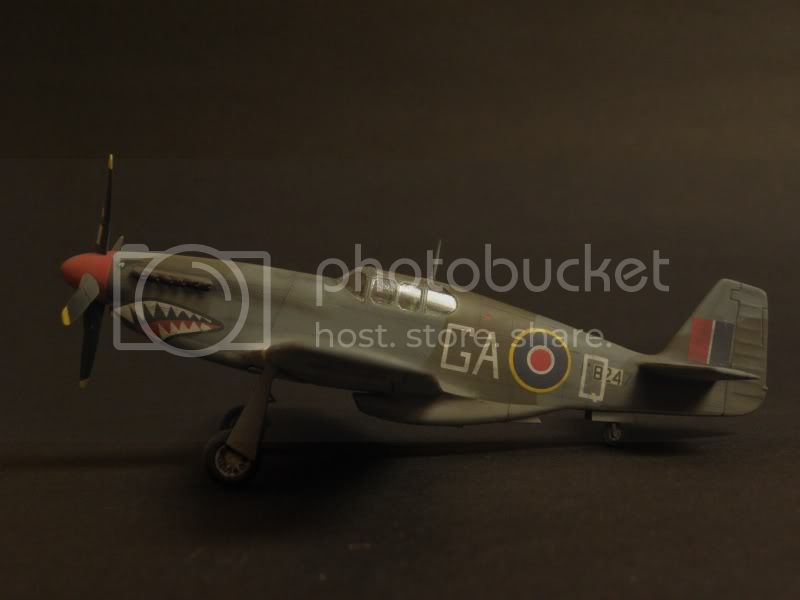
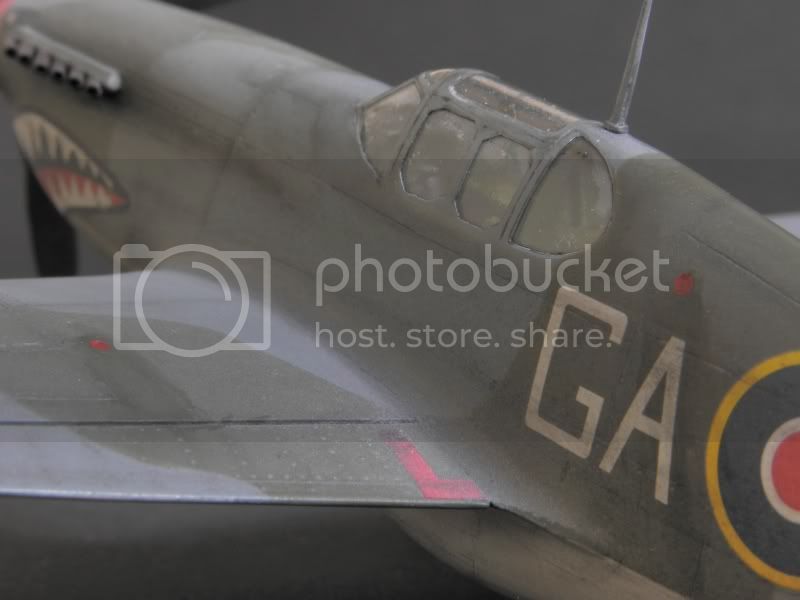
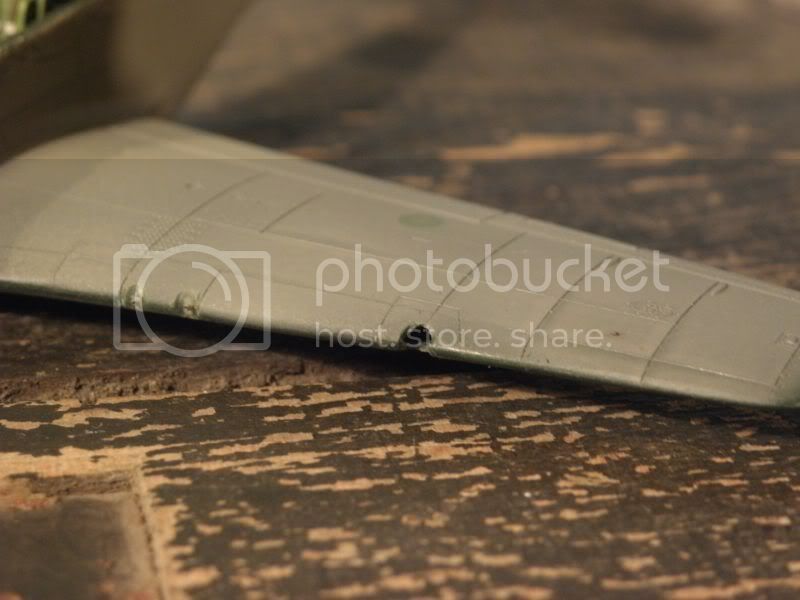
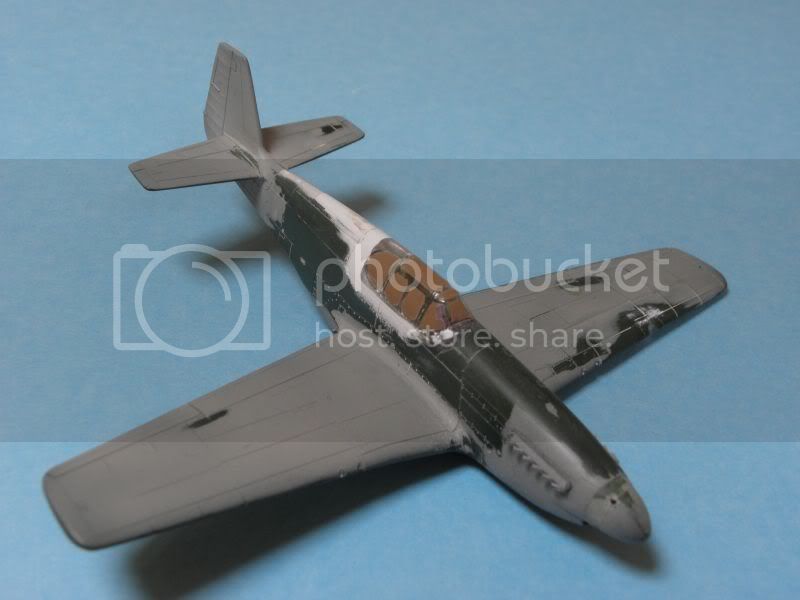
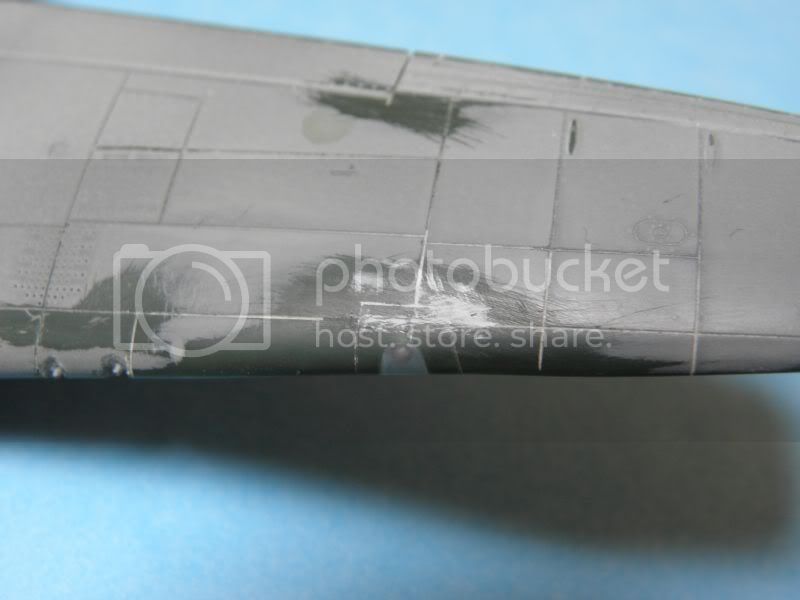
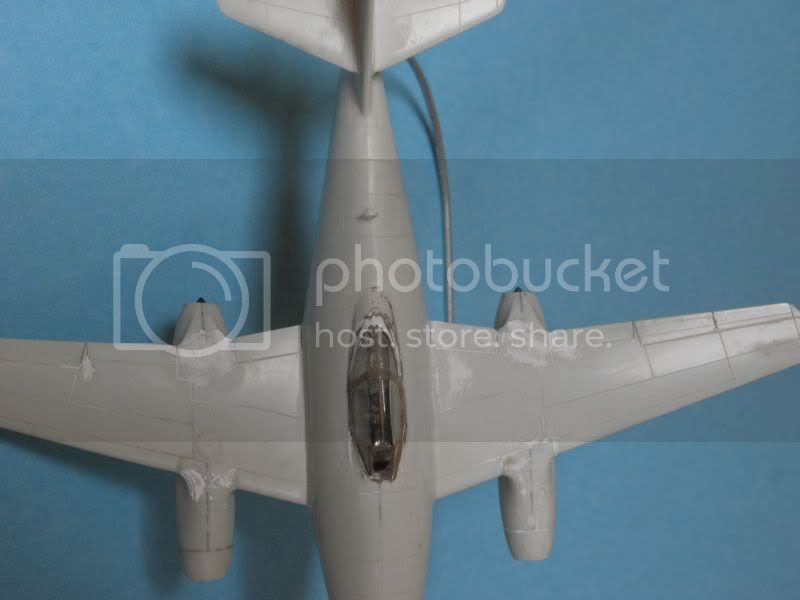
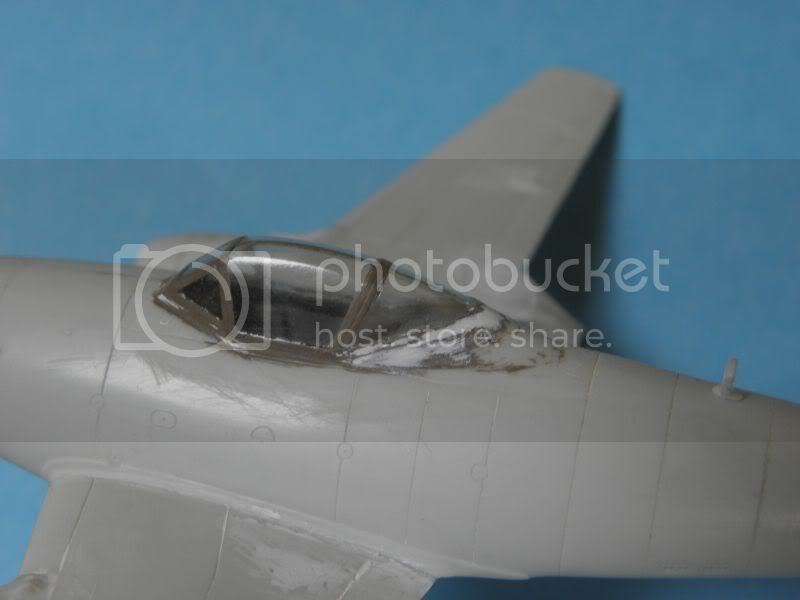
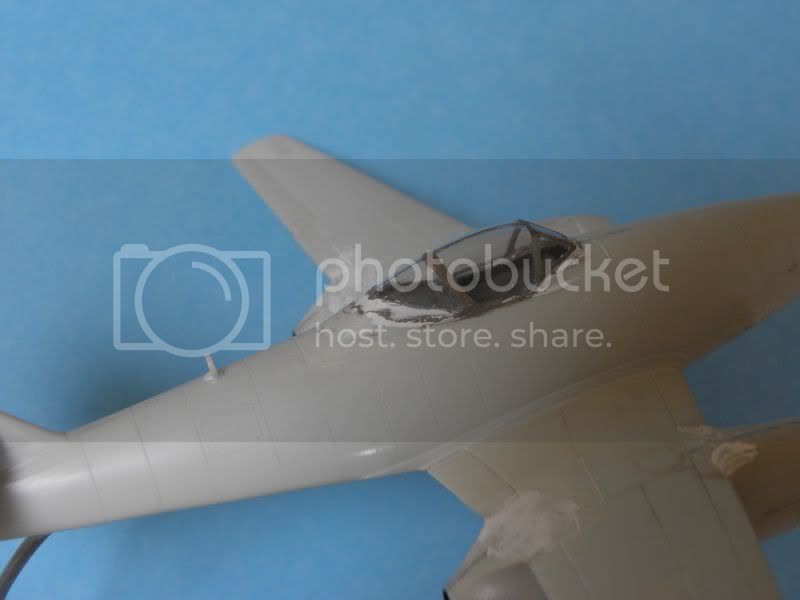
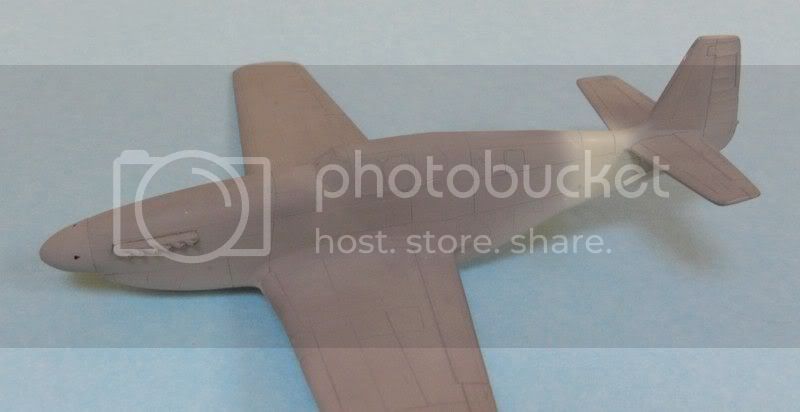
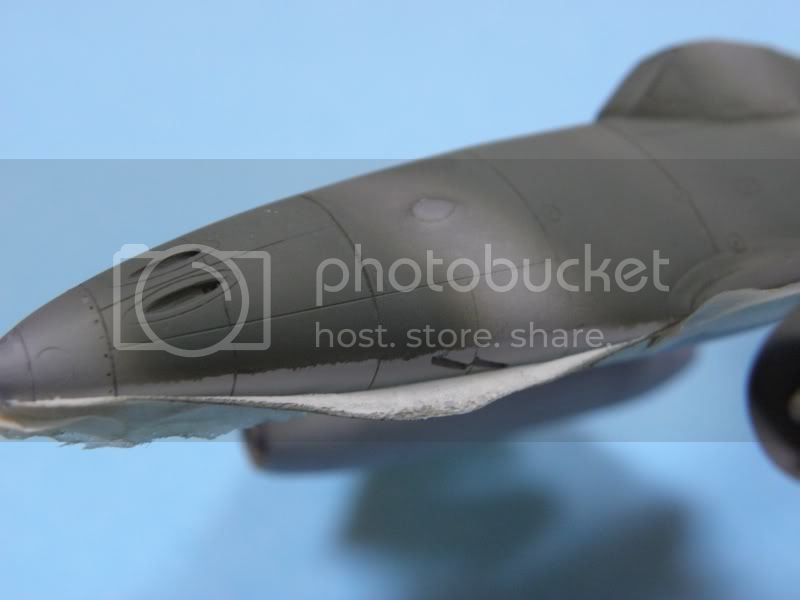
The Mustang will require much more work. I have used it for testing home made masks as you see. While building I have also tried to adopt some other canopies which I found in the "spares" but with no good result - that's why the cockpit area is so massacred.


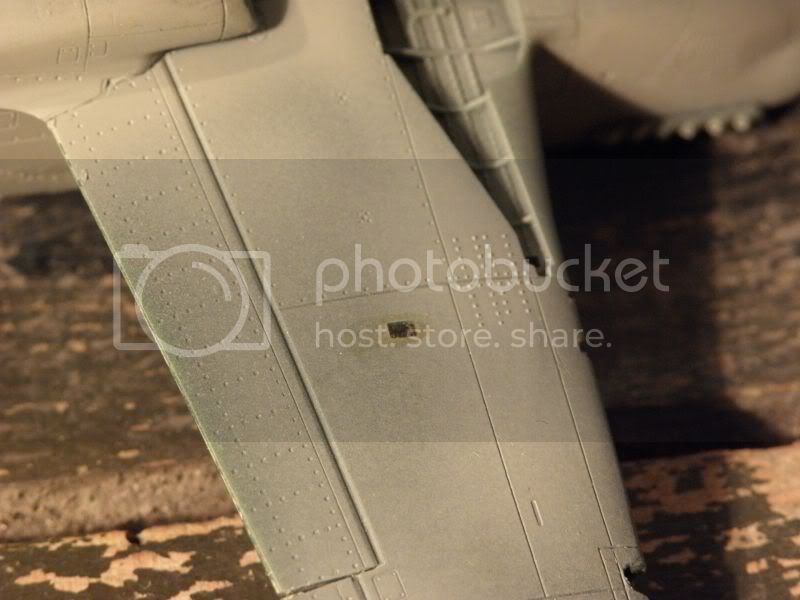
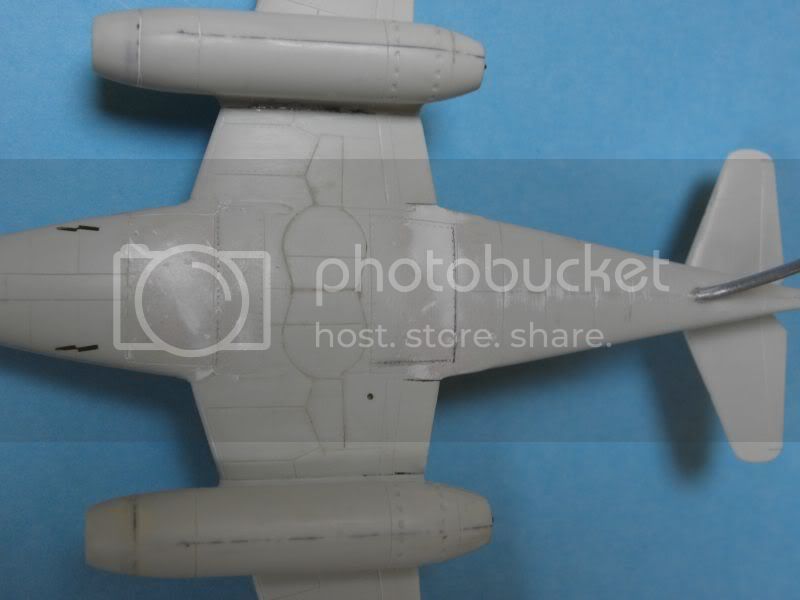
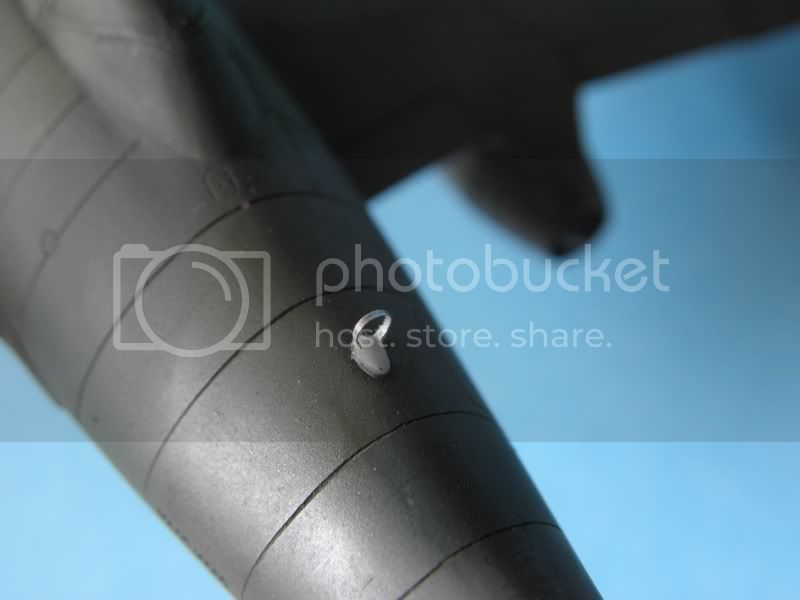
Revell decided to make only one empty shell case chute for two machine-guns...


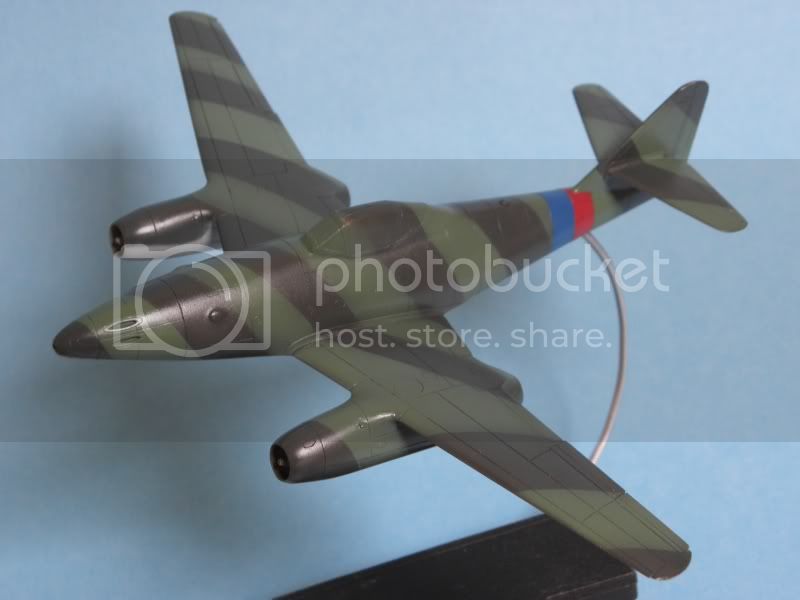
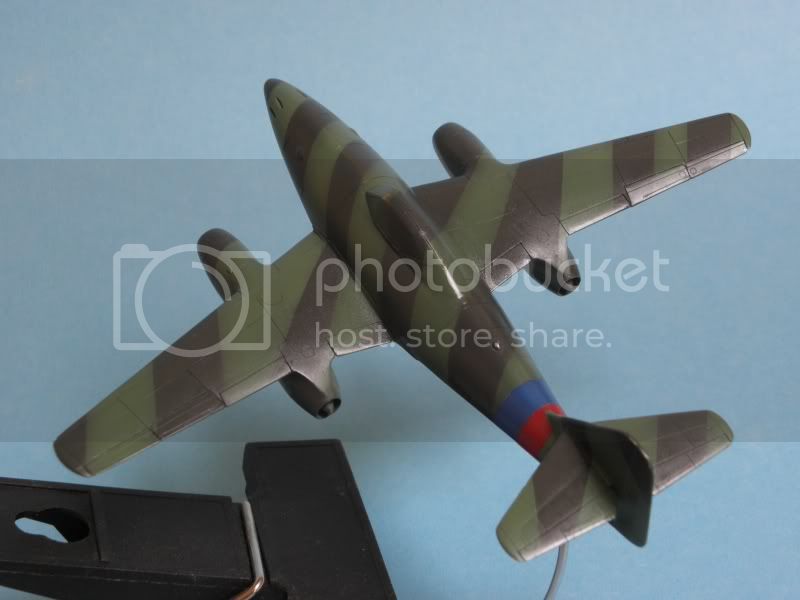
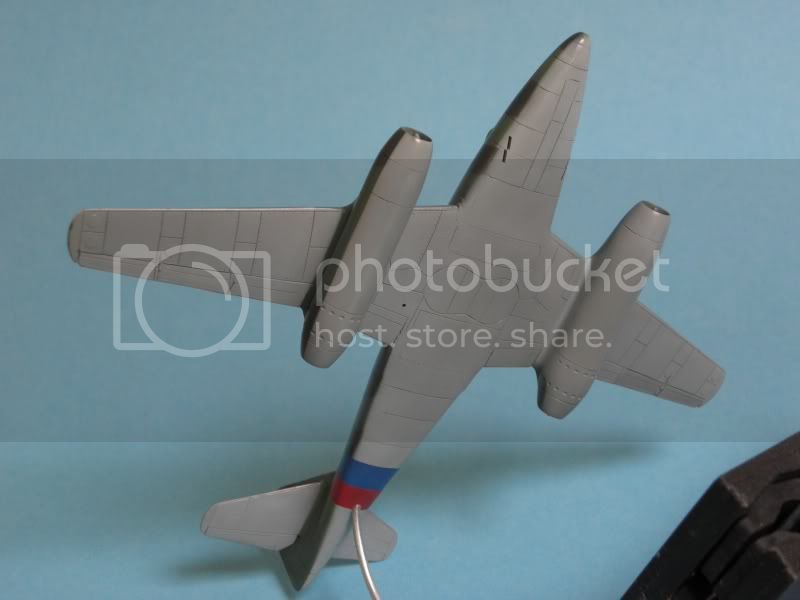
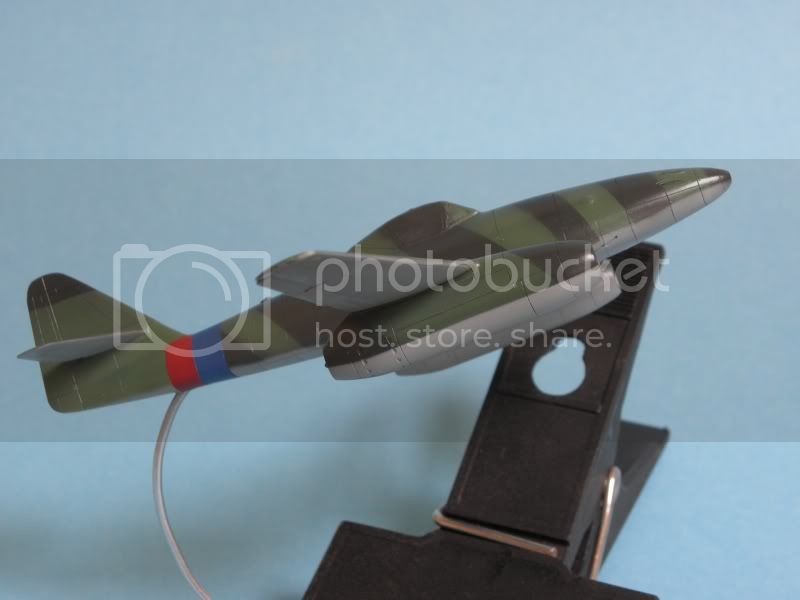
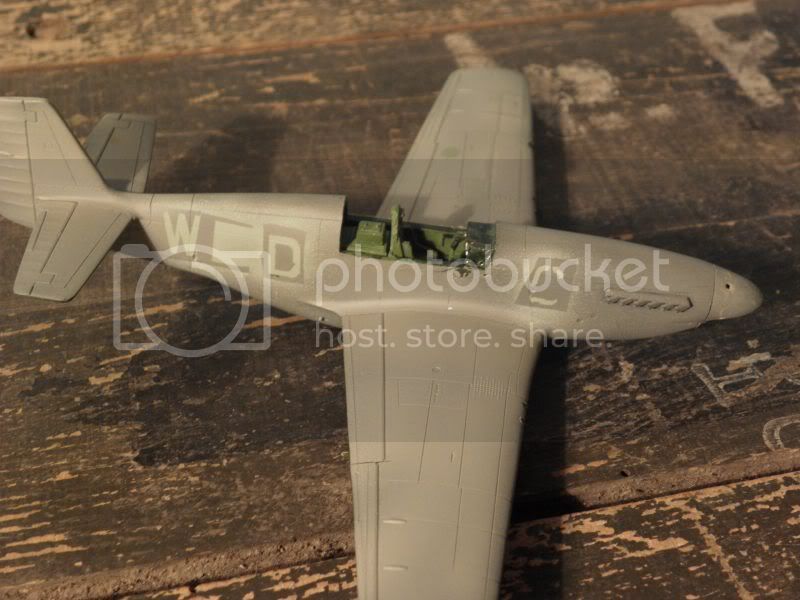
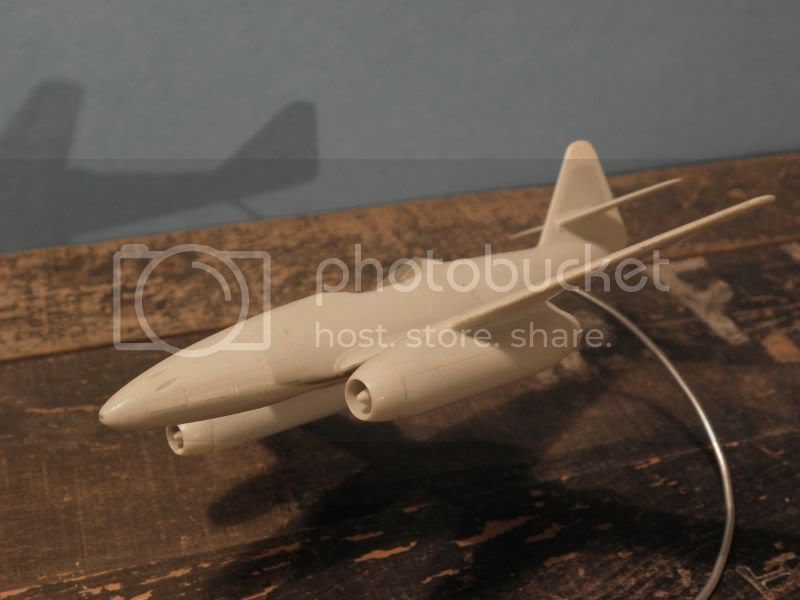
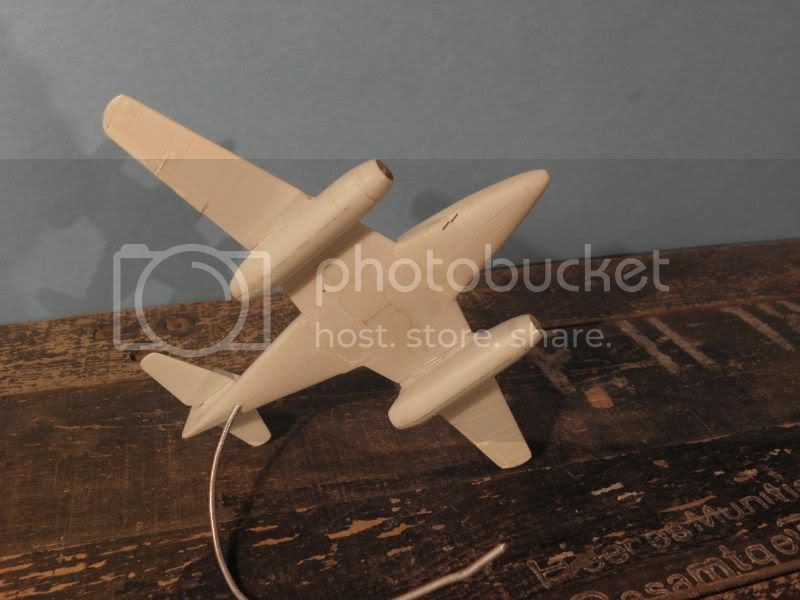
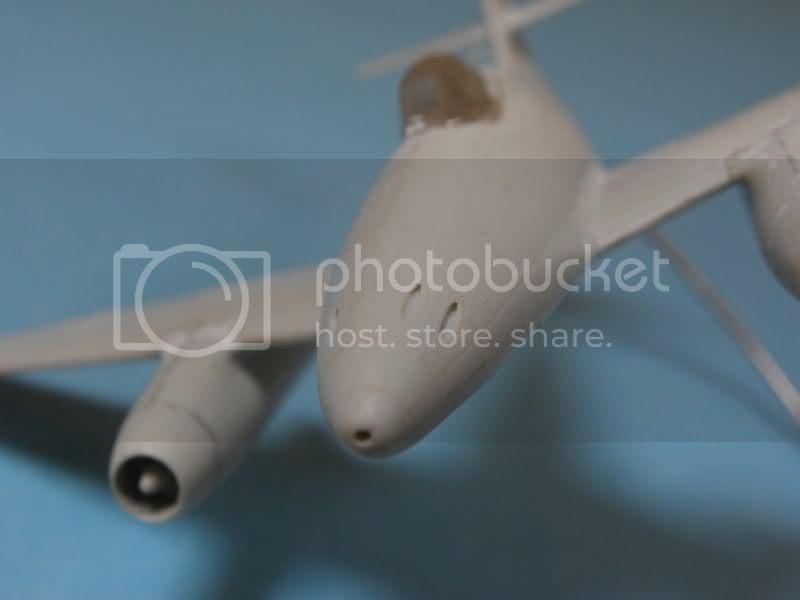
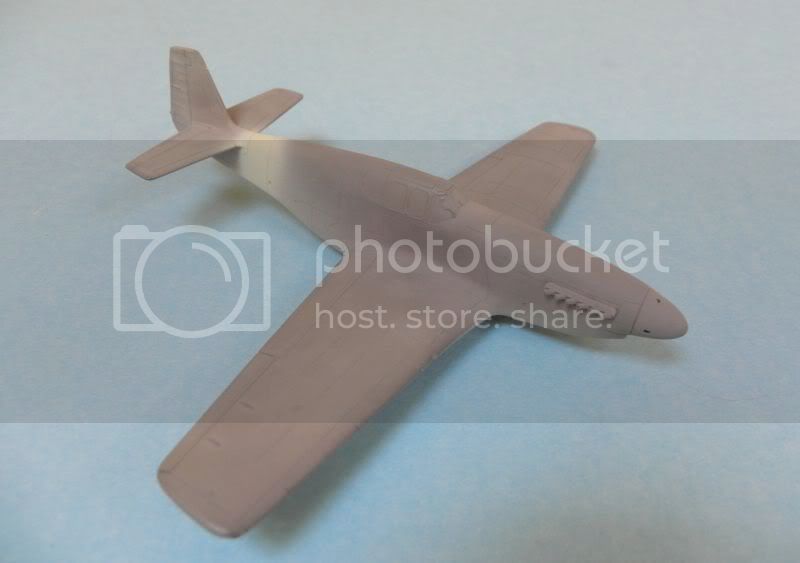
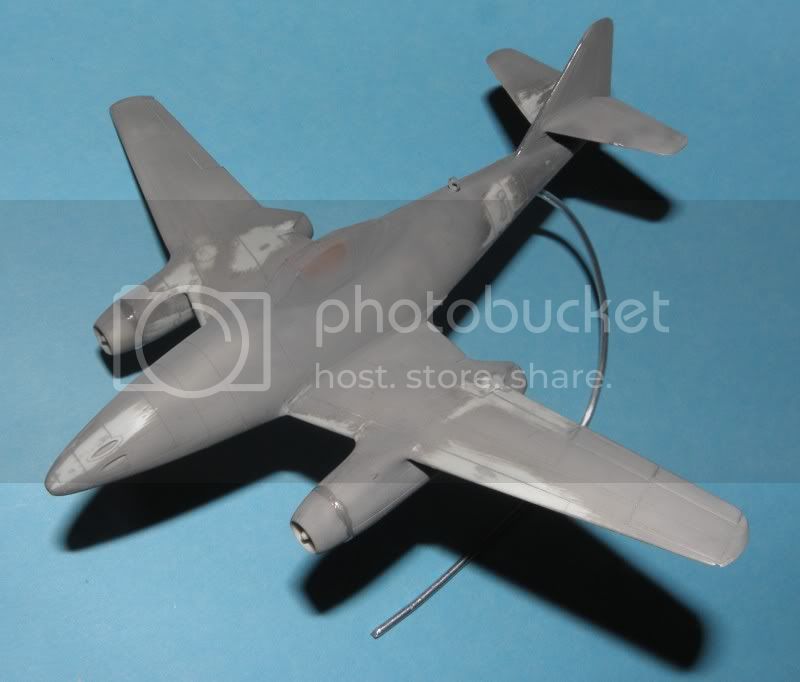
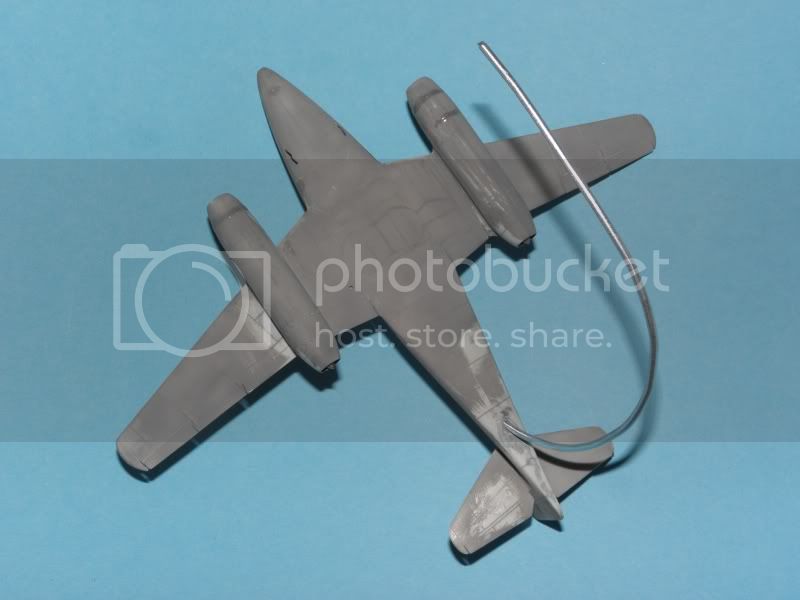
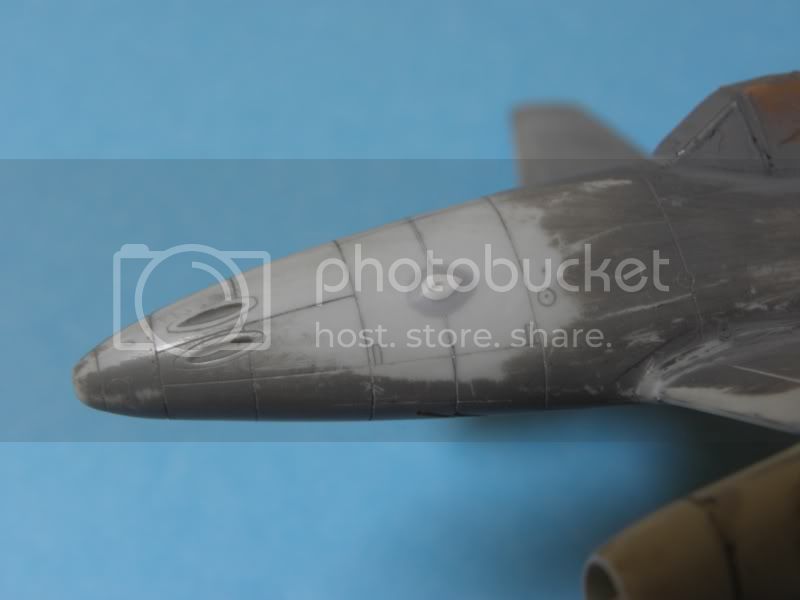
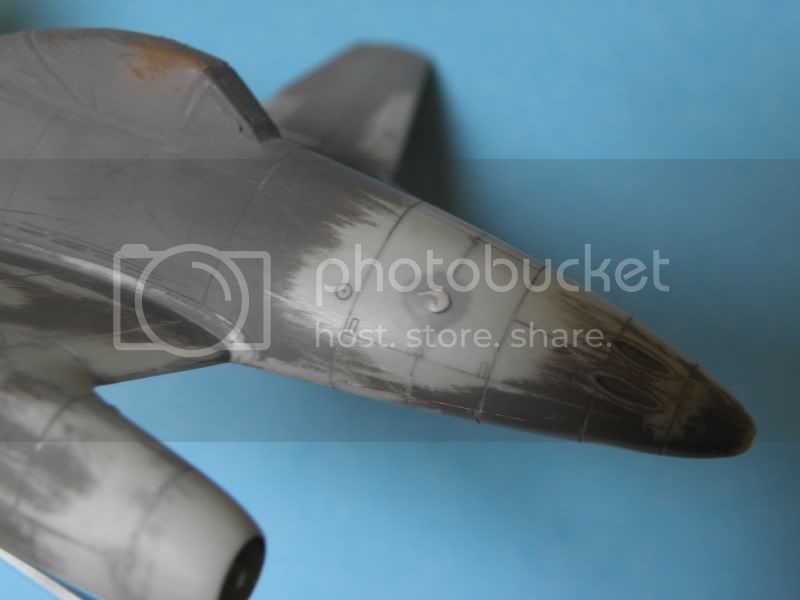
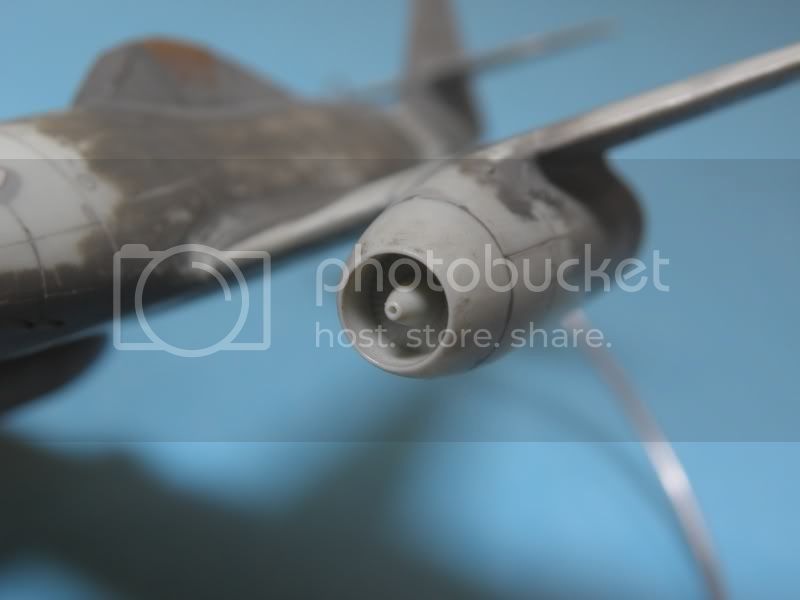
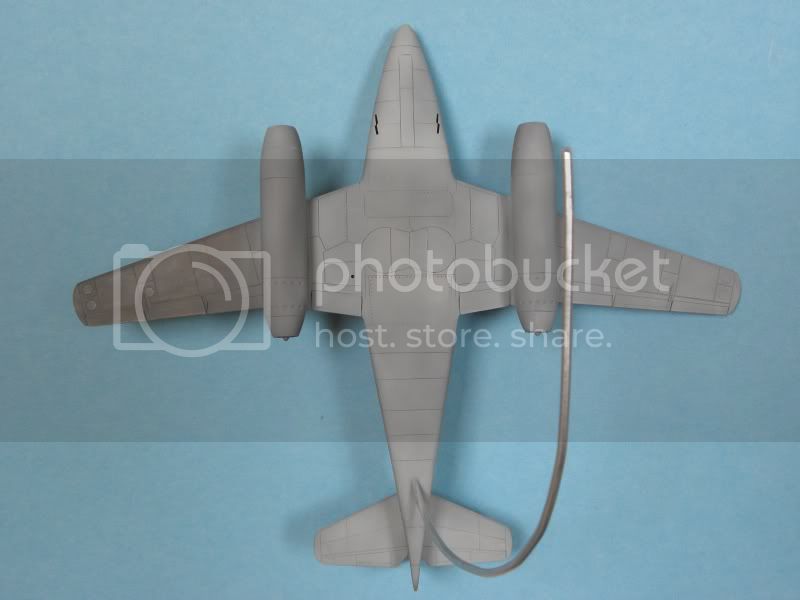
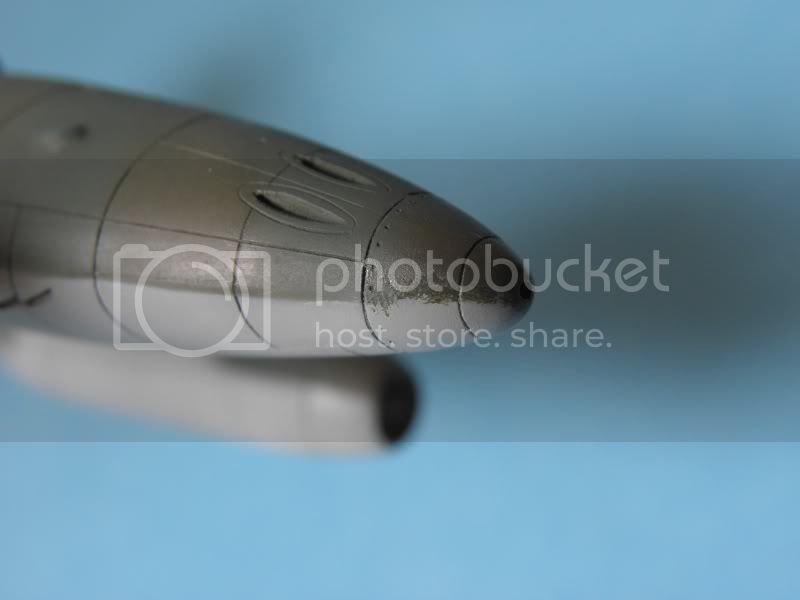
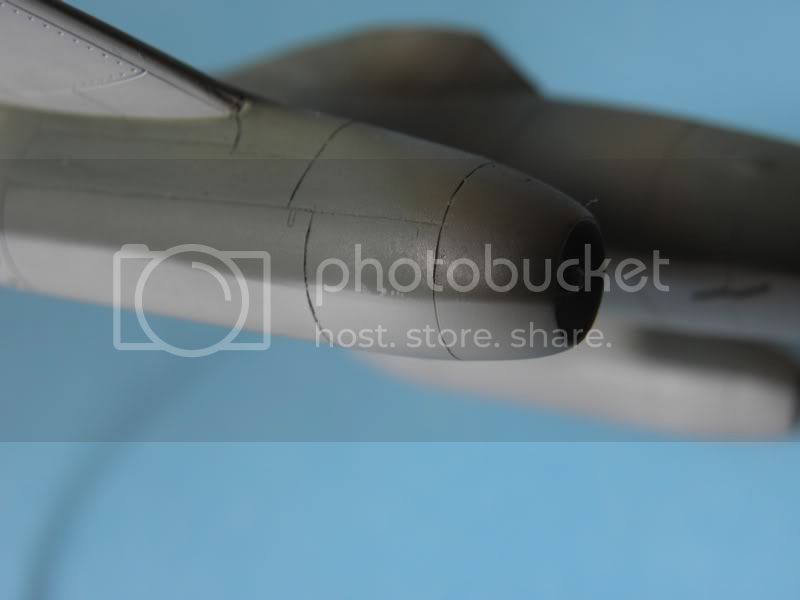
And this is Die Schwalbe. I didn't change anything in the shape of model or canopy althouth I will also have to use Pavla vac-formed. This model requires some filling and sanding as the accuracy of the parts deteriorated on the wing-fuselage joint.


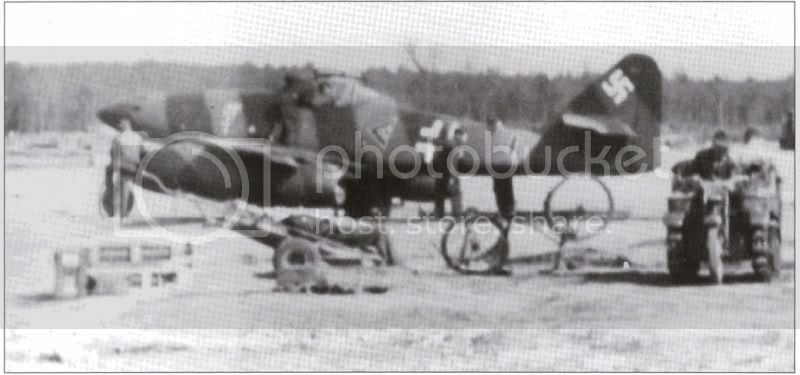
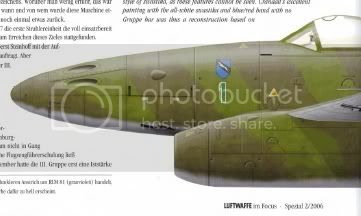
By the way: could you please help me identyfing colours of this plane as I'm not very good with the Luftwaffe...

pbhawkin
_VISITCOMMUNITY
New South Wales, Australia
Joined: November 23, 2009
KitMaker: 179 posts
AeroScale: 170 posts
Posted: Thursday, January 07, 2010 - 12:47 PM UTC
Michal,
I guess the colours for the 262 are RLM 76 light Blue and RLM 82 and 83 for the Green and Brown camo on top with the spots being the same.
Mecenas
Joined: December 23, 2007
KitMaker: 1,596 posts
AeroScale: 1,275 posts
Posted: Monday, January 11, 2010 - 03:43 AM UTC
Thank you Peter very much.
Mecenas
Joined: December 23, 2007
KitMaker: 1,596 posts
AeroScale: 1,275 posts
Posted: Saturday, April 10, 2010 - 06:56 AM UTC
Hi agian,
it looks that I started this thread and forgot about it. Shame on me, I know. But I haven't forgotten about these two models. Here is what I have done in the meantime.

First the Mustang. It took me hell out of time to fix the canopy. I have used the Pavla vacformed for this. Fisrt I wanted to do Mustang III but because I have damaged the fisrt canopy I had to use the second one from the set for the Mustang I.


This is the close up for the light in the leading edge. It's not perfect but I let it go, I just want to finish this kit someday.


Now the opposite side of the Force, the Schwalbe.

This model required some filling with puty to and also using a vac formed canopy. Most of the filling is done, now it's time for sanding, rescribing and polishing.


guitarlute101
_VISITCOMMUNITY
West Virginia, United States
Joined: December 18, 2006
KitMaker: 1,121 posts
AeroScale: 1,063 posts
Posted: Sunday, April 11, 2010 - 02:23 AM UTC
Michal,

"Operation Salvage" would make a great campaign. Finish any model you have started, got stuck on, and haven't completed yet, or that has been sitting on the workbench for way too long. It might give someone a reason to finish "that kit". What do you think?

Mark
Mecenas
Joined: December 23, 2007
KitMaker: 1,596 posts
AeroScale: 1,275 posts
Posted: Sunday, April 11, 2010 - 02:50 AM UTC
Hi Mark,
yap, I agree with you. There already was a similar campaign on Armorama "Get the job done" some time ago. It was so much succesfull that the second edition was scheduled for the last year ("Get the job done 2)" which I participated in. It really mobilized me to finish one of the models I have started few years ago and lost the motivation. Joinning the campaign was a real boost for me.
mykroft
_VISITCOMMUNITY
Ontario, Canada
Joined: November 14, 2009
KitMaker: 270 posts
AeroScale: 264 posts
Posted: Sunday, April 11, 2010 - 02:15 PM UTC
Note the single ejector chute on the wing is correct for B/C model P-51's, the D was the first with individual chutes for the .50 brownings.
Mecenas
Joined: December 23, 2007
KitMaker: 1,596 posts
AeroScale: 1,275 posts
Posted: Sunday, April 18, 2010 - 08:12 PM UTC

Quoted Text

Note the single ejector chute on the wing is correct for B/C model P-51's, the D was the first with individual chutes for the .50 brownings.


That's not the good news. Anyway thank you very much for pointing this out, I have already removed the putty from the shute.

Here is the progress of the last week.

Mustang was primed using Tamiya XF-54 acrylic just after spraying the canopy with the Interior Green. The lower surface was painted few hours later with Humbrol 64, the "Sky type S" band is the Pactra aryclic. That's all for the last week. I'm going to study some literature about the final painting scheme. It will have a lot of black&white stripes but some camouflage will also have to be aplied.


Mecenas
Joined: December 23, 2007
KitMaker: 1,596 posts
AeroScale: 1,275 posts
Posted: Monday, April 26, 2010 - 08:42 AM UTC
This week was "The time of the Schwalbe" on my workbench. First I have washed the model with thinner and alcohol for degreasing and removing the dust and dirt arisen in the few years of storing the model. Next step was masking the canopy. Thank God it has a very simple shape so it took me just 10 minutes. Then I could finaly prime the model with Tamiya acrylic XF-54. I used a new airbrush for this for a finger training so the paint layer was far from perfect. When the paint dried I filled all the small scratches with Surfacer 1000 and sanded it smooth. You can see the final efect below.


Oh yes, I almost forgot about the one more step: I filled with CA glue the biggest gaps and too deep panel lines on the engines nacelles. After sanding I'll engrave the new lines.
Merlin
Staff MemberSenior Editor
AEROSCALE
#017
_VISITCOMMUNITY
United Kingdom
Joined: June 11, 2003
KitMaker: 17,582 posts
AeroScale: 12,795 posts
Posted: Monday, April 26, 2010 - 09:00 AM UTC
Nice one Michal

It's great to see kits given a new lease of life, and the extra work you're doing is excellent.


Quoted Text

"Operation Salvage" would make a great campaign. Finish any model you have started, got stuck on, and haven't completed yet, or that has been sitting on the workbench for way too long. It might give someone a reason to finish "that kit". What do you think?.. Mark


It certainly would be good. A great Campaign-title for starters! Most of my potential candidates went into the bin when I left London, but I'm sure I could dig out a build or two already that need some TLC to get them home safely - a certain French sea-plane for instance...

All the best

Rowan
Mecenas
Joined: December 23, 2007
KitMaker: 1,596 posts
AeroScale: 1,275 posts
Posted: Monday, April 26, 2010 - 10:06 AM UTC
Thank you Rowan. This is a little break from the bigger challange - Spitfire. In this operation I don't have to solve so many problems, I just try to do the job, although it is also sometimes frustraiting.

The Campaign may be interesting but there are already so many other active that it surely needs a discussion of more than three in a separate thread. It already proved to be popular on Armorama.
Bigrip74
_VISITCOMMUNITY
Texas, United States
Joined: February 22, 2008
KitMaker: 5,026 posts
AeroScale: 2,811 posts
Posted: Monday, April 26, 2010 - 11:31 AM UTC
Hello Michal,

"DITTO" on the "SALVAGE" campaign, I also think that it would be a great idea and help many here to continue builds as you and Rowan stated were in the bin. I have a few that fit the description (1. started and in the box 2. trash bin)


Bob
Mecenas
Joined: December 23, 2007
KitMaker: 1,596 posts
AeroScale: 1,275 posts
Posted: Saturday, May 22, 2010 - 04:53 AM UTC
It was a small step for the man...I wish I could say that. The struggle goes on, again mainly with the Schwalbe. I was suggested to remove the wrong panel line on the guns cover and repicate a "tear drop". It took me some time for a never ending sanding but the result is not so bad I hope. It should be a bit smaller I think but I let it go, otherwise I will stuck again on this model. I also drilled a small holes it the cones of the air intake to the engines.


Mecenas
Joined: December 23, 2007
KitMaker: 1,596 posts
AeroScale: 1,275 posts
Posted: Sunday, May 23, 2010 - 07:39 AM UTC
Another quick update from my workbench and once agian I made some progress only with Schwalbe. This is how the model looked today morning:


And this is how it looks now.


Paints used were Pactra for RLM 76 thinned with water and the green is Agana RLM 81 thinned with alcohol.
Mecenas
Joined: December 23, 2007
KitMaker: 1,596 posts
AeroScale: 1,275 posts
Posted: Tuesday, June 22, 2010 - 08:27 PM UTC
Another part of my struggle. I decided to focus on the Schwalbe due to the less complicated painting scheme. Thanks to Rowan I already have all the required decals so I hope to finish it first.

Let's roll with the pictures.


New antenna, scratchbuilt.


These are two errors I have to repaint.


Tell me please what do you think about the colours. Paints used were: RLM76 from PACTRA, RLM81 from AGAMA and RLM83 from GUNZE, all acrylics. I'm a bit confused about the RLM81/83 contrast. Do you think it's ok?
Siderius
_VISITCOMMUNITY
Tennessee, United States
Joined: September 20, 2005
KitMaker: 1,747 posts
AeroScale: 1,673 posts
Posted: Wednesday, June 23, 2010 - 10:08 AM UTC
Hey there Michael. Yes I think the contrast is fine. The only thing I would say is maybe you needed to put a little more on when painting the colors. I think I'll include a photo of my 262. Take a look at it's colors. I used RLM 83 on my bird as well. Take care, Russell.


/>

P.S. I also used RLM 81 on the 262. It may be the manufacturer of paints, but there does seem to be more contrast on my kit for some reason. The only thing I can think of is the manufacturer is the key. I used Polly Scale on my 262.
md72
#439
_VISITCOMMUNITY
Washington, United States
Joined: November 05, 2005
KitMaker: 4,950 posts
AeroScale: 3,192 posts
Posted: Thursday, June 24, 2010 - 05:16 AM UTC
Looks like good progress on both kits.

I have a couple (OK 5 or 6) of kits that are too far along for a new campaign and too stalled looking for inspiration. Maybe a back from the dead campaign is a good idea.
Mecenas
Joined: December 23, 2007
KitMaker: 1,596 posts
AeroScale: 1,275 posts
Posted: Saturday, June 26, 2010 - 11:51 PM UTC
Thanks guys!

Russel, I'm affraid that my RLM83 is wrong. It should be like light green but Gunzo paint goes into bronw. RLM81 is brown but I don't use it this time.

A fellow from the other forum showed me his interpretation of the 82/83 coulors and I think he has much right. Here's his work.


There's nothing left to do than repaint 83 color.
Siderius
_VISITCOMMUNITY
Tennessee, United States
Joined: September 20, 2005
KitMaker: 1,747 posts
AeroScale: 1,673 posts
Posted: Sunday, June 27, 2010 - 08:26 AM UTC
Michal, I think the colors on that FW are correct. I hope I was some help. I'm sure you can recover and repaint the kit. Have you tried the Model Master Acryl line of colors, or the Polly Scale line of colors? I really like both and I find that they are true to color. Russell
Snorri23
_VISITCOMMUNITY
Ontario, Canada
Joined: March 25, 2010
KitMaker: 514 posts
AeroScale: 244 posts
Posted: Sunday, June 27, 2010 - 11:18 AM UTC
There is no defined rlm number for the 82/83 greens. Several manufacturers flip the numbers. So for me I would just go for the rlm 81 and the dark green. The colours used went through a metamorphosis RLM 74/75/76- 76/81/82- 76/82/83 and other combinations. Late war the top surface was painted in one colour usually the dark green and it was up to the front line to place on the camouflage colours. All in all paint it the way you think it should be. For who is to say that you are wrong.
Siderius
_VISITCOMMUNITY
Tennessee, United States
Joined: September 20, 2005
KitMaker: 1,747 posts
AeroScale: 1,673 posts
Posted: Sunday, June 27, 2010 - 11:21 AM UTC
There is truth to what Trevor says. Russell
Mecenas
Joined: December 23, 2007
KitMaker: 1,596 posts
AeroScale: 1,275 posts
Posted: Sunday, June 27, 2010 - 08:51 PM UTC
Thanks guys for the great feedback, I apreciate. Here are the pictures from the Luftwaffe in Focus about Sinner's Schwalbes.

This is the machine which I'm building


And this is the other/first known Sinners Schwalbe


And here's a part of the colour scheme from the same source.


As you see on the photos the contrast between two colors is ratcher intensive, so in my oppinion using 81 with 82 is not very good option because the second color is rather bright than dark. I'll try to mix some paints to achieve something similar to light green.

Mecenas
Joined: December 23, 2007
KitMaker: 1,596 posts
AeroScale: 1,275 posts
Posted: Sunday, August 29, 2010 - 01:28 AM UTC
This is definitely not the luckiest project for me. Last month I've been working with the Me-262 to get it done before the end of August, that was my goal. Well, I think I wanted it too much. The model is actually painted and secured with future, but I will be removing all the painting today afternoon. There are many steps between colours, especially on the red-blue stripes. What's more there is an effect of the "groats" everywhere. I can't accept it, so I'll start the painting again soon, ate least I hope to.


Mecenas
Joined: December 23, 2007
KitMaker: 1,596 posts
AeroScale: 1,275 posts
Posted: Sunday, June 19, 2011 - 01:30 AM UTC
It's been a very very long time since I last updated this thread. However I didn't abandon the project, nothing like this. What's more the project still continues and is 50% done. Few days ago I have finished in 99,9% the P-51B Mustang. It is painted as the FB247 from the 112 Sqn RAF in Italy. I have noticed, after making the pictures, that I forgot to finish the exhaus pipes and make the fuel spills on the wings and fuselage.

Here's the progress:


Repositioned landing gear.


And this is the final result for today:


Mecenas
Joined: December 23, 2007
KitMaker: 1,596 posts
AeroScale: 1,275 posts
Posted: Thursday, June 23, 2011 - 10:31 PM UTC
I have added some finishing touches to the "glass" - there were white remaiders of the polishing compound in the frame corners which I removed and applied a bit stronger black wash. The fuel stains were added to the wings and fuselage.

 _GOTOTOP