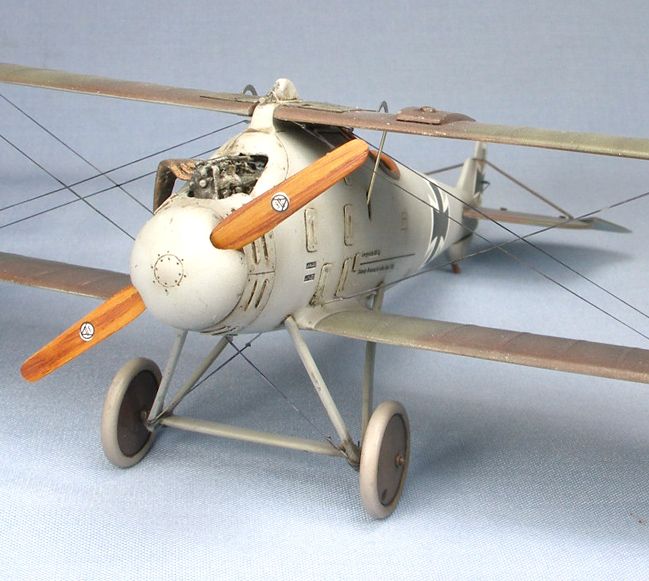
Many moons ago back in 2005, my first proper WWI build was the Hi-Tech Roland D.II “Haifisch” (“shark”) – see here:
http://www.theaerodrome.com/forum/models/18835-48-roland-d-ii-haifisch-shark-my-first-post-forum.html
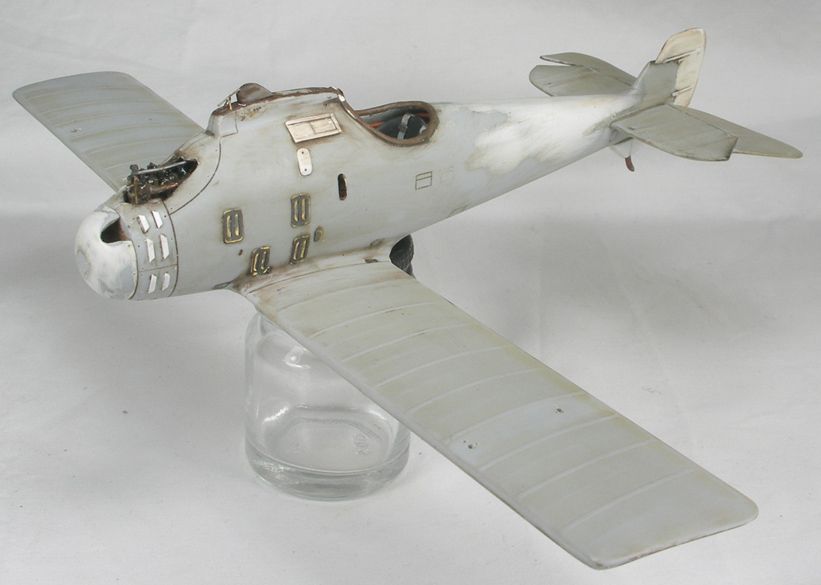
This is a rather obscure type that was derived from a fighter version of the more famous Roland C.II “Whalfisch” (“whale”) reconnaissance aircraft. There were a few modifications required to an otherwise ok kit (not a great kit, but a good basis). Well since 2005, I have had 4 moves of house (part of the joy of being in the military!), and alas, some moves ago, my little Roland took a beating or three (plus at one stage it had a book tip onto it, an accident on my girlfriend’s behalf), to the point where at the end of my most recent move last September, the little Roland looked rather sad:
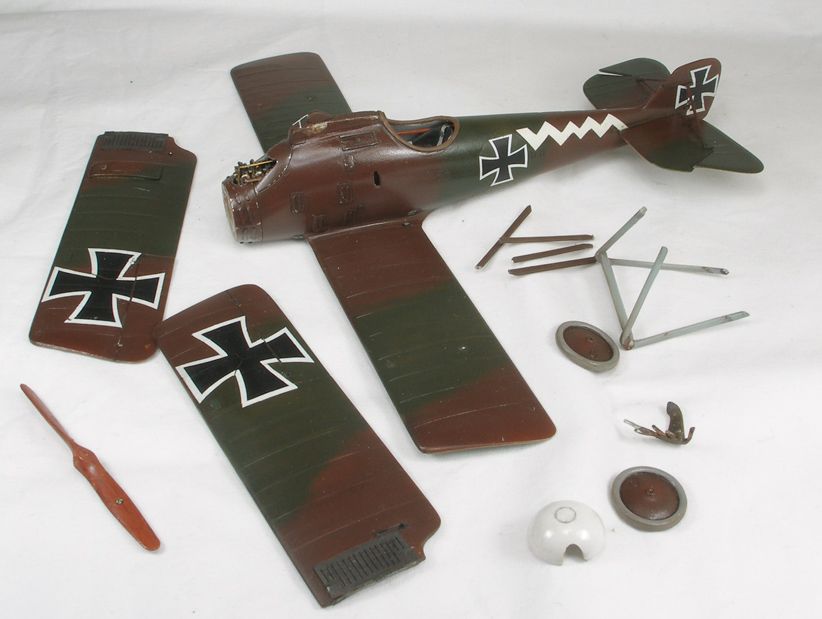
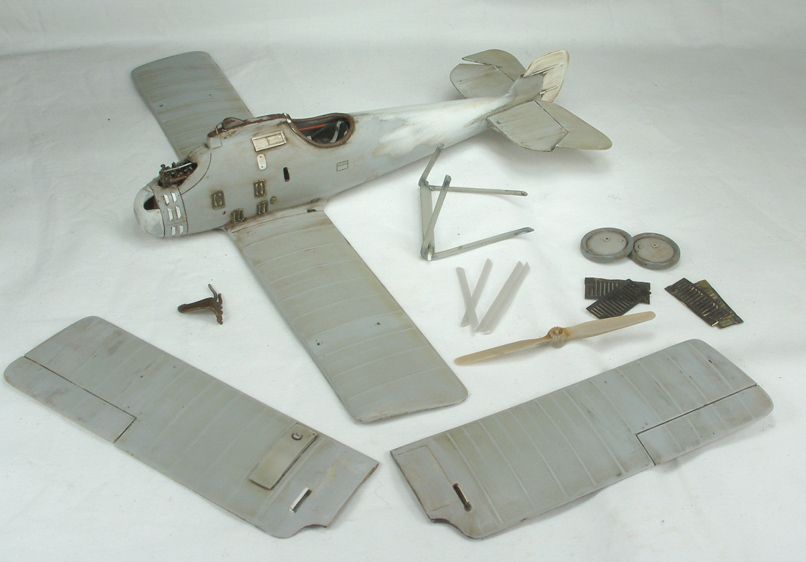
I have always liked the odd yet sleek lines of the Roland D.II, so I decided to put her out of her misery and do some repair work. Indeed I decided a bit of a facelift was needed as well, given that my skills have improved a little since my first biplane build. So I decided a re-paint and a clean up was in order. First step was to remove the old paint, which I did using methylated spirits, as the model was originally painted mainly using acrylics. The decals and areas painted with white enamels proved a little tough, but otherwise the paint came off easily.
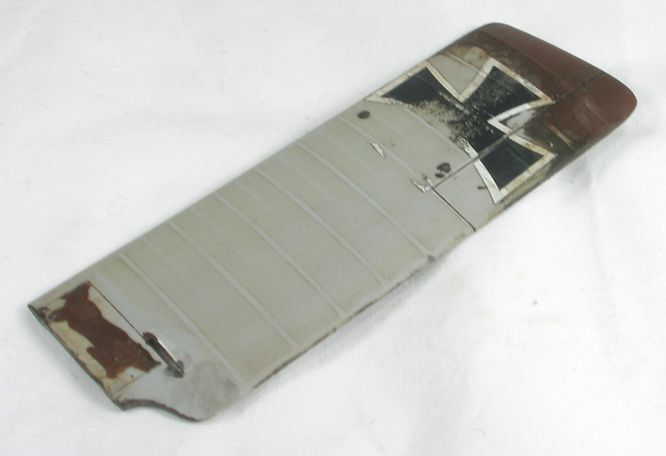
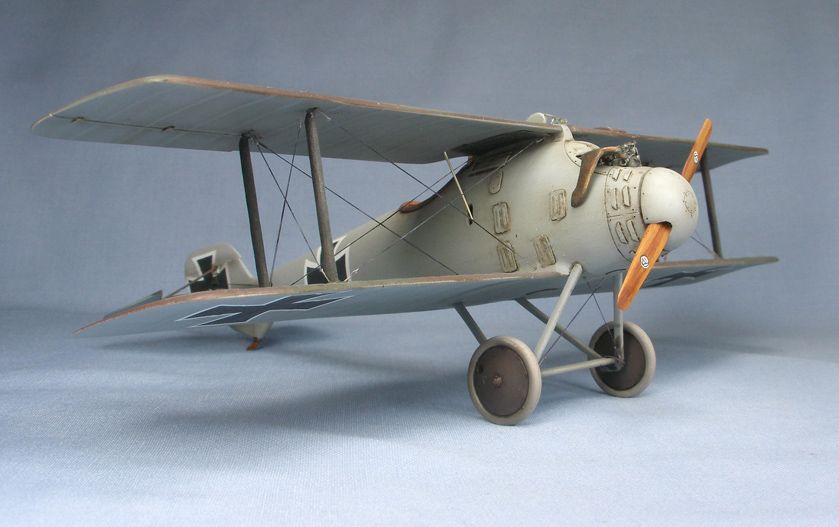
The wing attachments and other details were cleaned up, and in some cases, enhanced / replaced. The cooling louvres on the nose were replaced with sheet styrene. I also decided to replace the kit prop, and use new wheels, as the kits wheels are slightly too small (a spare set from a Pfalz D.III sufficed). Bungee chords were also added to the undercarriage by wrapping elastic around the axles.
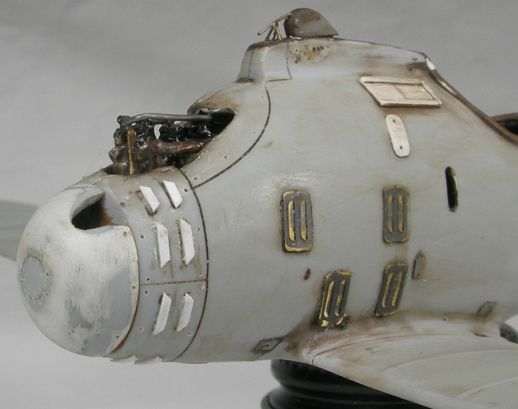
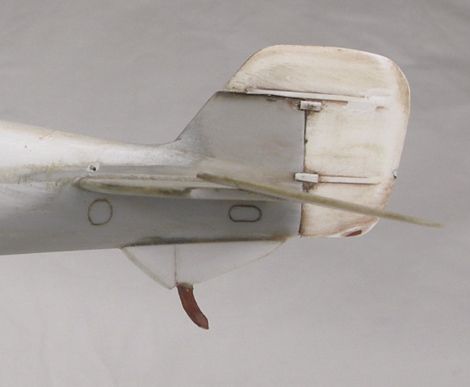
I had originally built the model as a Pfalz manufactured D.II, which did not have the tail skid fairing. I decided I wanted a Roland built aircraft this time, so I scratch built a new fairing from scrap plastic.
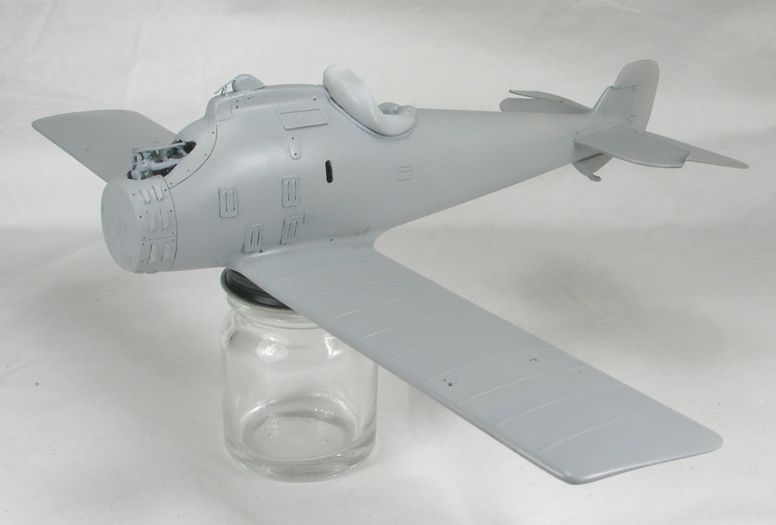
Then I primed in preparation for painting.
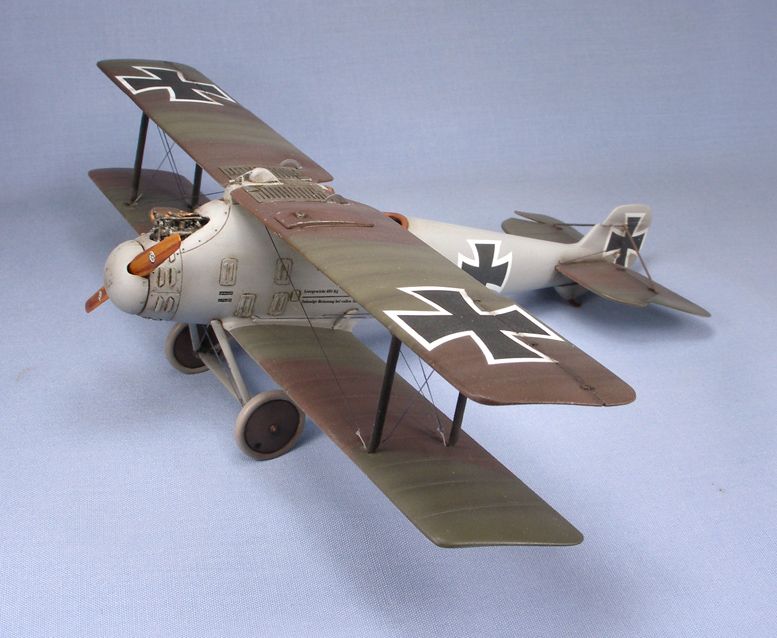
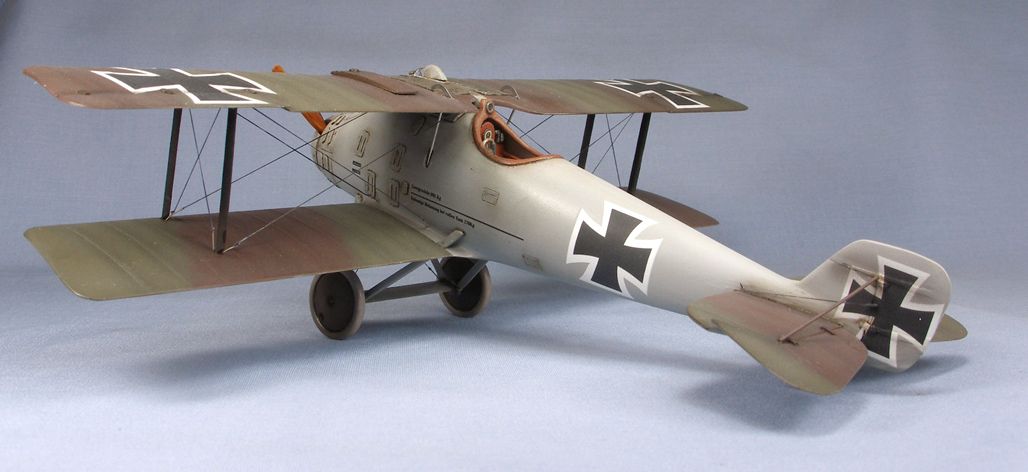
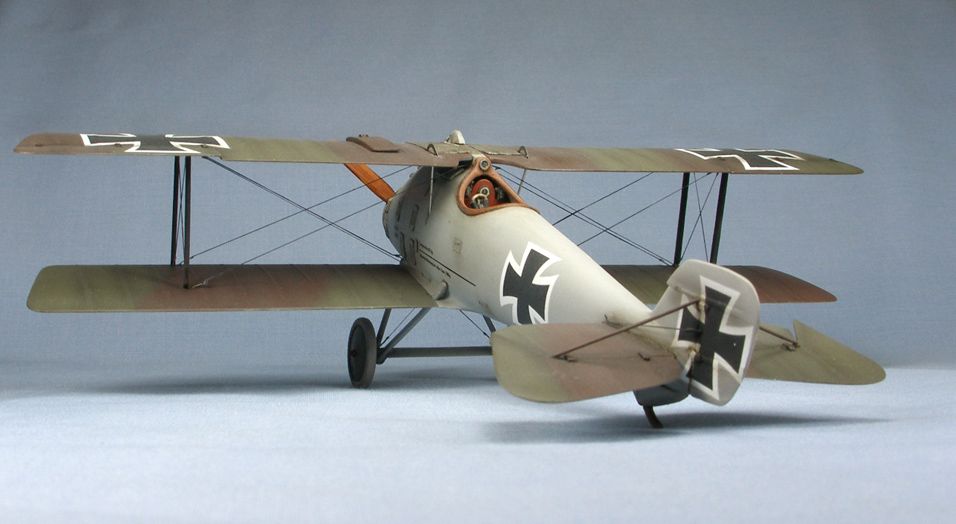
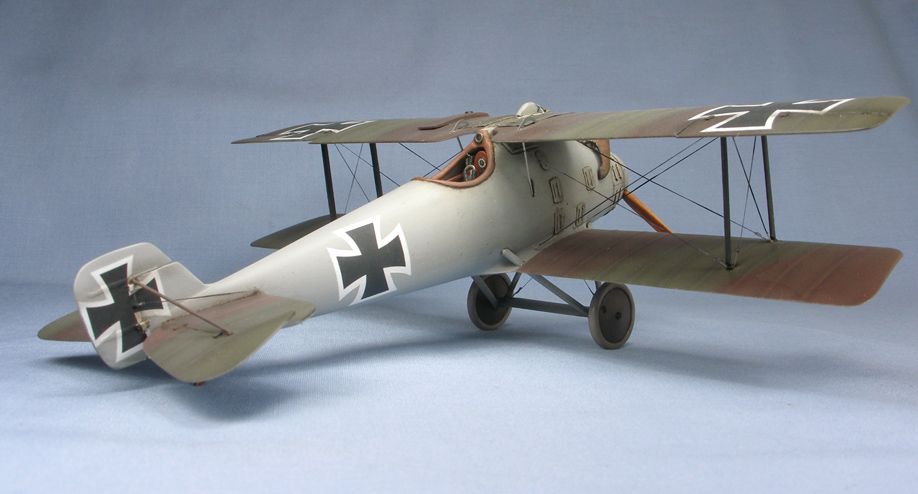
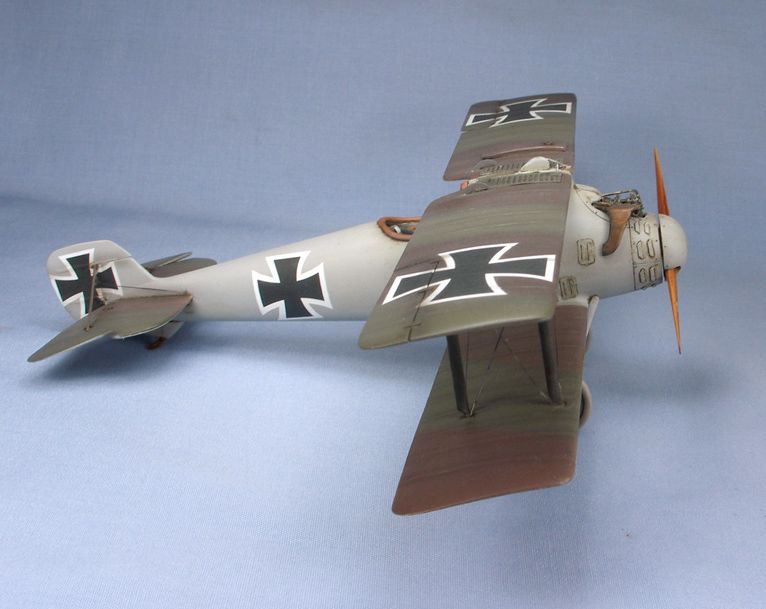
There are essentially two standard schemes for the Roland D.II. The first is the all over green and brown, with light blue undersides, in which my original build was done. This scheme had minor variations between Roland and Pfalz built machines. Though the Windsock datafile on the D.II doesn’t specifically describe the second scheme, it does include the odd picture of some D.IIs with green and brown wings, and overall light blue fuselages and wing undersides. This scheme seems to be restricted to some of the parent company built D.IIs. I thought this would make an interesting scheme, so on my merry way I went. The paints were all custom mixed acrylics, with all shading done after the base colours were down. Decals came from the spares box – I had to be careful which ones I chose as the Roland build machines had very characteristically “fat” fuselage and tail crosses. Roland D.IIs only served at the front for a very short time in early / mid 1917, so there were not many garish or colourful personal markings applied to these aircraft. As I could not find a picture of any personal markings associated with this type of scheme, I left the scheme essentially “stock”.
Anyways, I finished her today, so here are some pictures.
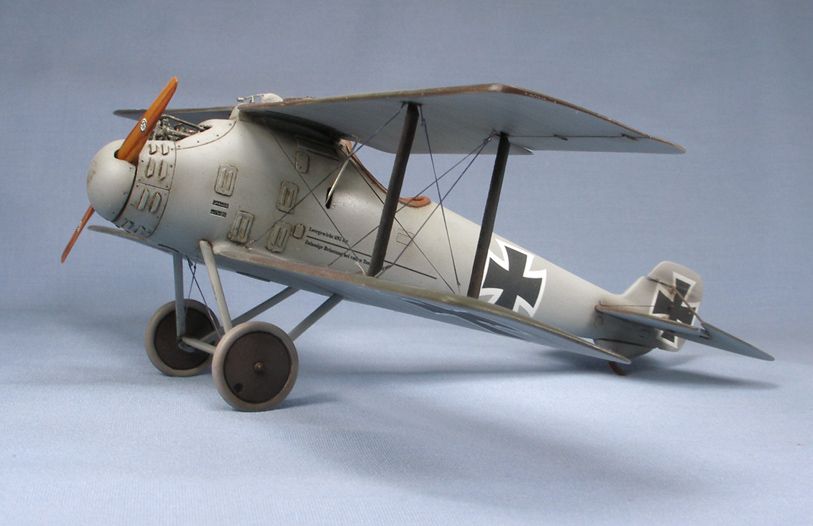
So there she is. It was nice to give this old girl a bit of a touch up! Still, some things I am not happy with, but I think I have done enough rebuilding to put this one back onto the shelf!
Comments and feedback always welcome!
BC
Early Aviation
Discuss World War I and the early years of aviation thru 1934.
Hosted by Jim Starkweather
Roland Redux
BradCancian
Queensland, Australia
Joined: August 30, 2006
KitMaker: 285 posts
AeroScale: 281 posts
Joined: August 30, 2006
KitMaker: 285 posts
AeroScale: 281 posts
Posted: Thursday, January 28, 2010 - 11:00 PM UTC
edoardo
Milano, Italy
Joined: November 30, 2007
KitMaker: 642 posts
AeroScale: 382 posts
Joined: November 30, 2007
KitMaker: 642 posts
AeroScale: 382 posts
Posted: Thursday, January 28, 2010 - 11:12 PM UTC
Well done Brad!
To me you did much more then a 'facelift': you did major surgery, and ended up very well!
To me the new plane is much better then the original: the painting, above all, is a great improvment.
Me, I'd throw all in the recicle bin, but you showed me that with patience and work even a wreck can be turned into a jewel! Very well done indeed!
ciao
Edo
edoardo
Milano, Italy
Joined: November 30, 2007
KitMaker: 642 posts
AeroScale: 382 posts
Joined: November 30, 2007
KitMaker: 642 posts
AeroScale: 382 posts
Posted: Thursday, January 28, 2010 - 11:16 PM UTC
P.s.
how such plane could possibly fly, I wonder???
The pilot doesn't have even the slitest possibility to look forward.... Also a good tactics would have been to fly directly head on to the plane: you would have been completely invisible to the pilot...
Or would one look above the top wing???
Strange plane indeed...
ludwig113
England - South East, United Kingdom
Joined: February 05, 2008
KitMaker: 1,381 posts
AeroScale: 1,110 posts
Joined: February 05, 2008
KitMaker: 1,381 posts
AeroScale: 1,110 posts
Posted: Thursday, January 28, 2010 - 11:21 PM UTC
very nice and good use of an old model.
paul
paul
thegirl
Alberta, Canada
Joined: January 19, 2008
KitMaker: 6,743 posts
AeroScale: 6,151 posts
Joined: January 19, 2008
KitMaker: 6,743 posts
AeroScale: 6,151 posts
Posted: Friday, January 29, 2010 - 01:12 AM UTC
Brad , excellent redo on this one giving it new life !
Mgunns
Arizona, United States
Joined: December 12, 2008
KitMaker: 1,423 posts
AeroScale: 1,319 posts
Joined: December 12, 2008
KitMaker: 1,423 posts
AeroScale: 1,319 posts
Posted: Friday, January 29, 2010 - 01:59 AM UTC
I have to agree with Edo, you did major surgery, and the patient looks much better for it. Outstanding job!
JackFlash
Colorado, United States
Joined: January 25, 2004
KitMaker: 11,669 posts
AeroScale: 11,011 posts
Joined: January 25, 2004
KitMaker: 11,669 posts
AeroScale: 11,011 posts
Posted: Friday, January 29, 2010 - 02:18 AM UTC
Nicely done Brad! Excellent save. Hi-Tech did do some nice kits. Its a shame they have gone away.
BradCancian
Queensland, Australia
Joined: August 30, 2006
KitMaker: 285 posts
AeroScale: 281 posts
Joined: August 30, 2006
KitMaker: 285 posts
AeroScale: 281 posts
Posted: Saturday, January 30, 2010 - 12:24 PM UTC
Thanks for the nice words folks It is nice to have this one back on the shelf, given it has a little bit of a special place in my modelling heart...
Edo - yes, the visibility from this aircraft was not great - that, and the handling characteristics were not so great due to the wing set up.... these were the main reasons that she was not a terribly successful fighter.
Thanks again!
BC
Edo - yes, the visibility from this aircraft was not great - that, and the handling characteristics were not so great due to the wing set up.... these were the main reasons that she was not a terribly successful fighter.
Thanks again!
BC
RAGIII
North Carolina, United States
Joined: June 19, 2007
KitMaker: 604 posts
AeroScale: 600 posts
Joined: June 19, 2007
KitMaker: 604 posts
AeroScale: 600 posts
Posted: Sunday, January 31, 2010 - 06:17 AM UTC
Brad,
Your Artistry,as always, is beautiful!
RAGIII
Your Artistry,as always, is beautiful!
RAGIII
JackFlash
Colorado, United States
Joined: January 25, 2004
KitMaker: 11,669 posts
AeroScale: 11,011 posts
Joined: January 25, 2004
KitMaker: 11,669 posts
AeroScale: 11,011 posts
Posted: Sunday, January 31, 2010 - 10:18 AM UTC
What method did you use to strip the old paint off?
BradCancian
Queensland, Australia
Joined: August 30, 2006
KitMaker: 285 posts
AeroScale: 281 posts
Joined: August 30, 2006
KitMaker: 285 posts
AeroScale: 281 posts
Posted: Sunday, January 31, 2010 - 02:54 PM UTC
Hi Stephen! As the original paint was mostly acrylics (except for the white areas), I used methylated spirits and cotton buds to remove the old acrylic paint. It worked a treat :-) Decals took a little more scrubbing but once some of the methylated spirits got under them they lifted easily enough.
Repainted
Östergötland, Sweden
Joined: April 04, 2006
KitMaker: 1,058 posts
AeroScale: 1,004 posts
Joined: April 04, 2006
KitMaker: 1,058 posts
AeroScale: 1,004 posts
Posted: Friday, February 05, 2010 - 05:08 AM UTC
Brad
This is just to good. U rule. Awesome
Larsa Q
This is just to good. U rule. Awesome
Larsa Q