Russel! Überklein I think is the correct German word !
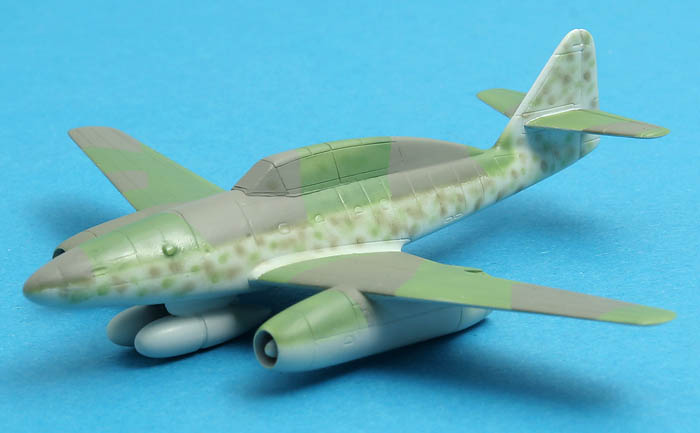
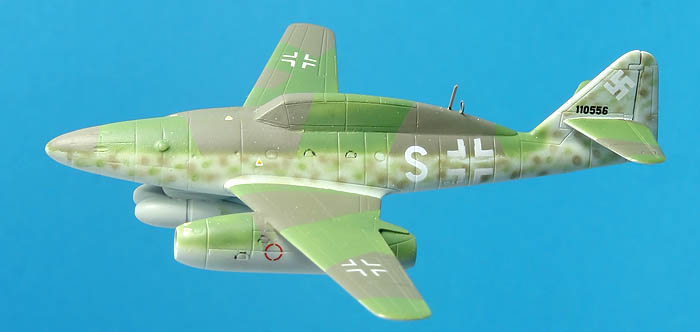
Some more mottling... This wasn't a very straightforward process. Even with my very-carefully-tested-and-thinned Gunze paint I was unable to get small enough and spatter-free spots. I finally resorted to mixing the paint with a bit of clear to get a slightly transparent paint and I could then move around the fuselage sides and get a rather stochastic mottling pattern. Not my idea though, I remember reading about it somewhere written by a modeller who did profiles in Photoshop and used this same method in both the software and on his models!
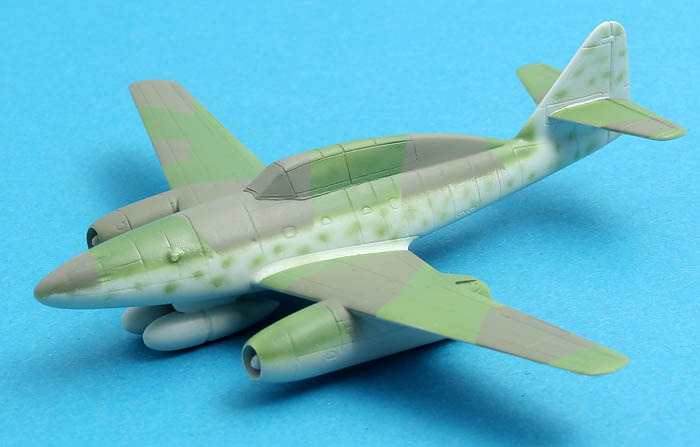
Green mottling...
...and brown added. Not bad I think! But it would have been so much easier in 1/72 !
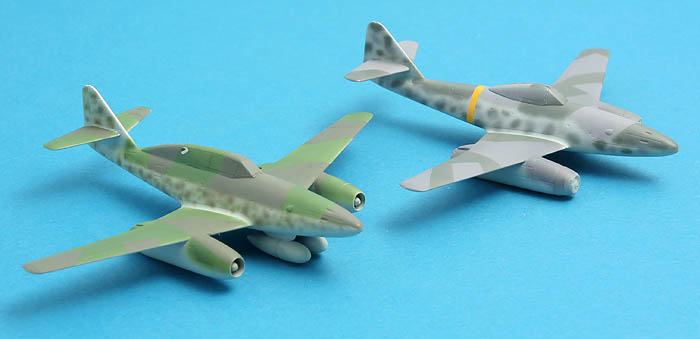
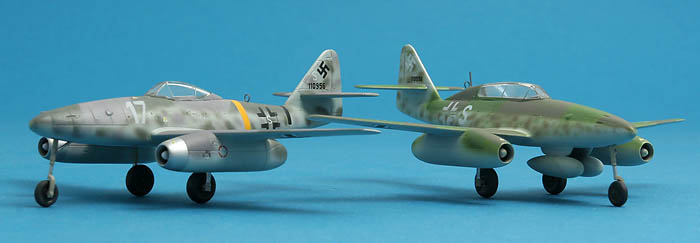
262s side by side. I couldn't resist removing the masking for the fuselage band. Quite snappy really! Also reminds me that I'll have to call Rickard and get the decals for the single seater, and he'll need half the sheet for his two seater...
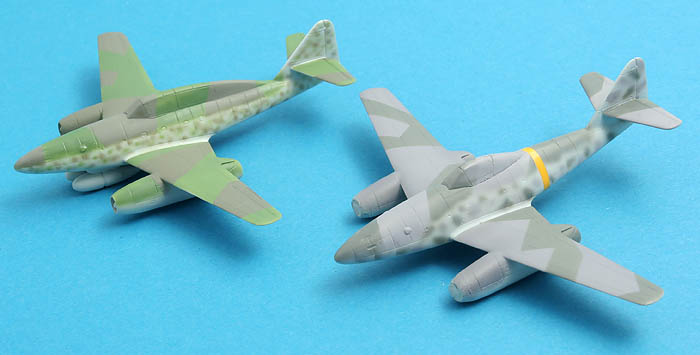
And from the other side... I really ought to do these in 1/72 again!
Bedtime!
Magnus
Hosted by Rowan Baylis
1/144 Eduard Me-262 x 2
magnusf
Stockholm, Sweden
Joined: May 02, 2006
KitMaker: 1,953 posts
AeroScale: 1,902 posts
Joined: May 02, 2006
KitMaker: 1,953 posts
AeroScale: 1,902 posts
Posted: Friday, May 07, 2010 - 09:54 AM UTC
robot_
United Kingdom
Joined: March 08, 2009
KitMaker: 719 posts
AeroScale: 691 posts
Joined: March 08, 2009
KitMaker: 719 posts
AeroScale: 691 posts
Posted: Friday, May 07, 2010 - 10:41 AM UTC
Magnus- very, very nice work on that tiny mottle! Superb!
magnusf
Stockholm, Sweden
Joined: May 02, 2006
KitMaker: 1,953 posts
AeroScale: 1,902 posts
Joined: May 02, 2006
KitMaker: 1,953 posts
AeroScale: 1,902 posts
Posted: Friday, May 07, 2010 - 10:15 PM UTC
Ben! Thanks!
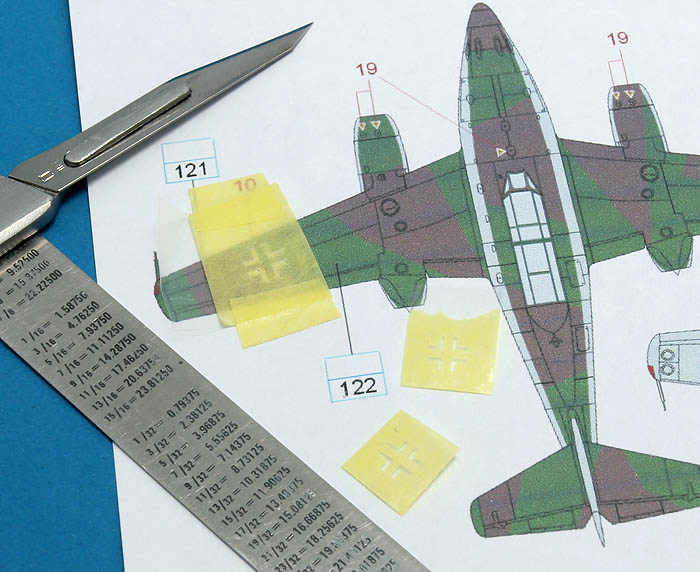
I stole a few minutes this morning to cut masks for the fuselage and wing crosses. All the same size, thank you Luftwaffe!
Tiny...
Magnus
I stole a few minutes this morning to cut masks for the fuselage and wing crosses. All the same size, thank you Luftwaffe!
Tiny...
Magnus
magnusf
Stockholm, Sweden
Joined: May 02, 2006
KitMaker: 1,953 posts
AeroScale: 1,902 posts
Joined: May 02, 2006
KitMaker: 1,953 posts
AeroScale: 1,902 posts
Posted: Saturday, May 08, 2010 - 09:40 AM UTC
I wrote an essay on the subject of modelling mistakes (or rather stupidities) the other day in an effort to console Ben for some bad over-spray on his Typhoon. The essence of this was that at least I do my mistakes mostly due to laziness. Referring to my previous post - guess what? The fuselage crosses aren't the same size as the wing crosses. I noticed that after painting them...
It is hard to see in this photo but there is a clear "double exposure" on the fuselages of both models where the larger cross has been superimposed over the previously painted smaller one. I'll have to trim them tomorrow when all the paint is cured thoroughly!
I did the number "17" with masks as well. A nice and square number, a lot better than "18" masking wise!
Magnus
magnusf
Stockholm, Sweden
Joined: May 02, 2006
KitMaker: 1,953 posts
AeroScale: 1,902 posts
Joined: May 02, 2006
KitMaker: 1,953 posts
AeroScale: 1,902 posts
Posted: Monday, May 10, 2010 - 09:44 AM UTC
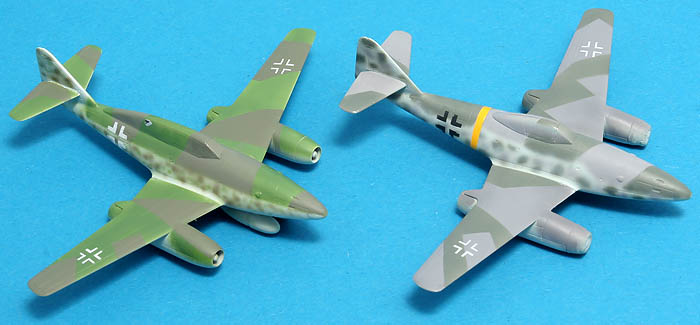
Just a quick decalling update.
Decals are as tiny as the models. Not too many of them, representing my least favourite part of modelling as they are!
Magnus
Decals are as tiny as the models. Not too many of them, representing my least favourite part of modelling as they are!
Magnus
robot_
United Kingdom
Joined: March 08, 2009
KitMaker: 719 posts
AeroScale: 691 posts
Joined: March 08, 2009
KitMaker: 719 posts
AeroScale: 691 posts
Posted: Monday, May 10, 2010 - 10:59 AM UTC
Looking great! The masked wing national markings came out wonderfully. The fuselage ones look perfect now too. It is really hard to tell how small this plane is, until re-visiting that photo with the 1/72 spitfire- amazing!
magnusf
Stockholm, Sweden
Joined: May 02, 2006
KitMaker: 1,953 posts
AeroScale: 1,902 posts
Joined: May 02, 2006
KitMaker: 1,953 posts
AeroScale: 1,902 posts
Posted: Tuesday, May 11, 2010 - 09:25 AM UTC
Decals for the two-seater were in the mailbox today.
A few touch-ups (I had to scrape away some glue from the canopy sill, can be seen in the photo) and a bit of detail painting left. And the landing gear, spindly stuff...
Magnus
A few touch-ups (I had to scrape away some glue from the canopy sill, can be seen in the photo) and a bit of detail painting left. And the landing gear, spindly stuff...
Magnus
magnusf
Stockholm, Sweden
Joined: May 02, 2006
KitMaker: 1,953 posts
AeroScale: 1,902 posts
Joined: May 02, 2006
KitMaker: 1,953 posts
AeroScale: 1,902 posts
Posted: Friday, May 14, 2010 - 01:41 AM UTC
Both models finally got a thin layer of semi-gloss Gunze clear. I try to keep them on the glossy side since they are so small!
Magnus
Magnus
Dirkpitt289
New Jersey, United States
Joined: May 24, 2008
KitMaker: 346 posts
AeroScale: 307 posts
Joined: May 24, 2008
KitMaker: 346 posts
AeroScale: 307 posts
Posted: Friday, May 14, 2010 - 03:31 AM UTC
Looking good. Almost there
magnusf
Stockholm, Sweden
Joined: May 02, 2006
KitMaker: 1,953 posts
AeroScale: 1,902 posts
Joined: May 02, 2006
KitMaker: 1,953 posts
AeroScale: 1,902 posts
Posted: Sunday, May 16, 2010 - 08:36 PM UTC
I've removed the canopy masking (with disappointing results) and added the landing gear (with disappointing results).
I'll have to do quite a lot of touch-up to the canopies, most of the framing came off with the masking. Regarding the landing gear: the lead I packed into the nose was (as usual) not even close to enough so I have filled both the nose gear wells and the forward part of the main gear wells with lead shot as well.
Gear covers, main gear oleos and detail painting left.
Magnus
robot_
United Kingdom
Joined: March 08, 2009
KitMaker: 719 posts
AeroScale: 691 posts
Joined: March 08, 2009
KitMaker: 719 posts
AeroScale: 691 posts
Posted: Sunday, May 16, 2010 - 08:50 PM UTC
Hi Magnus,
Sorry to hear of your disappointment in these final stages. I think they are looking really good despite the canopy problems- the small transfers really add to their realism.
magnusf
Stockholm, Sweden
Joined: May 02, 2006
KitMaker: 1,953 posts
AeroScale: 1,902 posts
Joined: May 02, 2006
KitMaker: 1,953 posts
AeroScale: 1,902 posts
Posted: Sunday, May 16, 2010 - 08:55 PM UTC
Quoted Text
Hi Magnus,
Sorry to hear of your disappointment in these final stages. I think they are looking really good despite the canopy problems- the small transfers really add to their realism.
Nothing that is unfixable! I just felt that in the name of honesty I had to admit my mistakes in public ! And people who makes mistakes are usually a lot more interesting than "Mr Perfect". I am a VERY interesting person !
Magnus
Dirkpitt289
New Jersey, United States
Joined: May 24, 2008
KitMaker: 346 posts
AeroScale: 307 posts
Joined: May 24, 2008
KitMaker: 346 posts
AeroScale: 307 posts
Posted: Monday, May 17, 2010 - 05:23 AM UTC
I feel for you. I have the same issue with my 1/72 night fighter (Not enough weight in the nose). UGH!
magnusf
Stockholm, Sweden
Joined: May 02, 2006
KitMaker: 1,953 posts
AeroScale: 1,902 posts
Joined: May 02, 2006
KitMaker: 1,953 posts
AeroScale: 1,902 posts
Posted: Wednesday, October 27, 2010 - 09:39 AM UTC
Friends!
I haven't built anything since May but now I am finally back. I hope you all have missed me sorely !
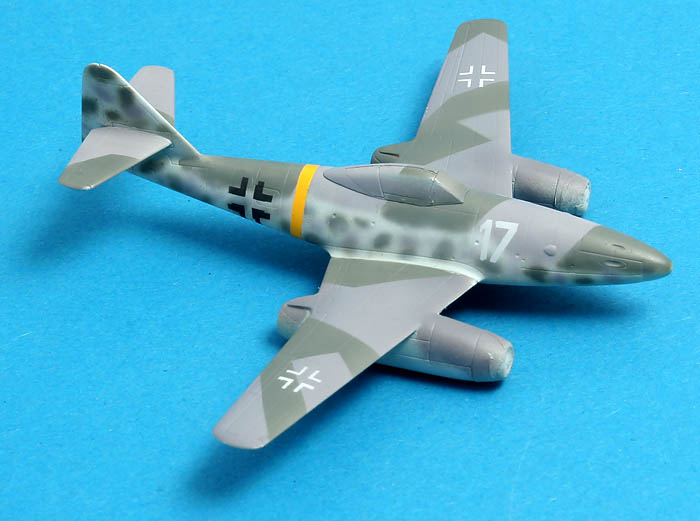
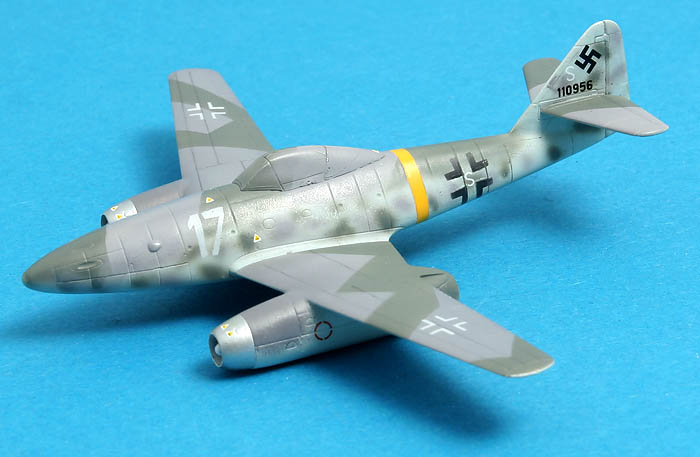
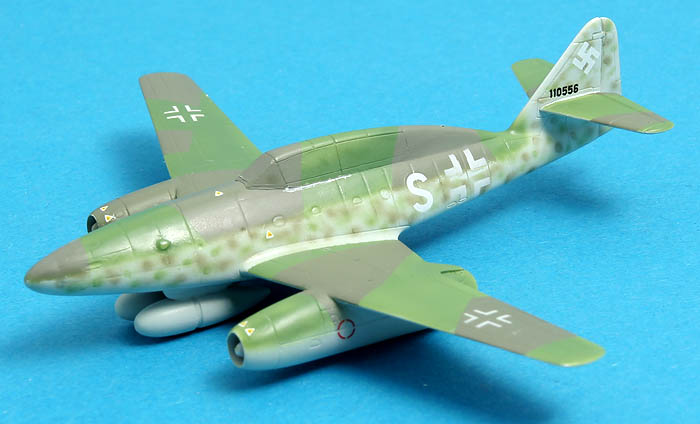
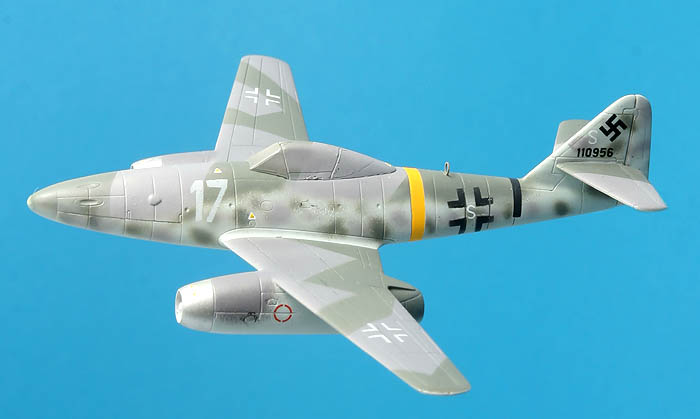
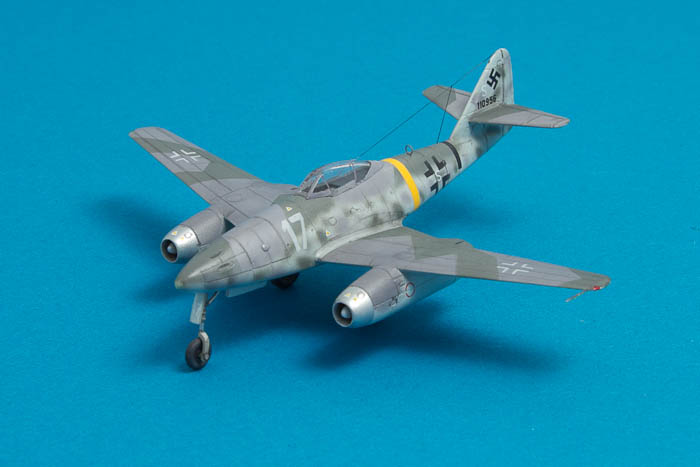
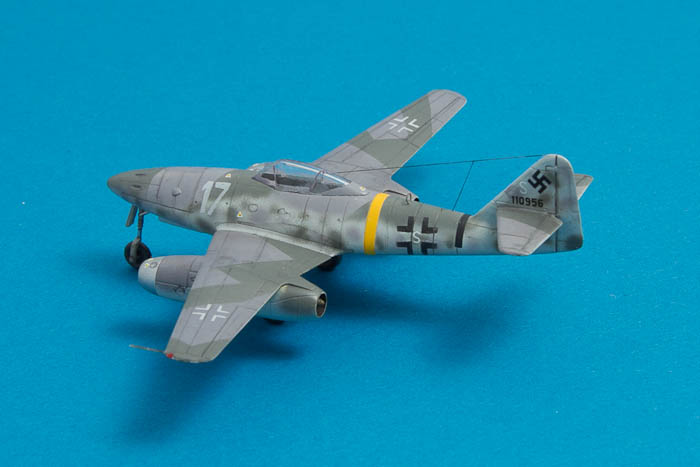
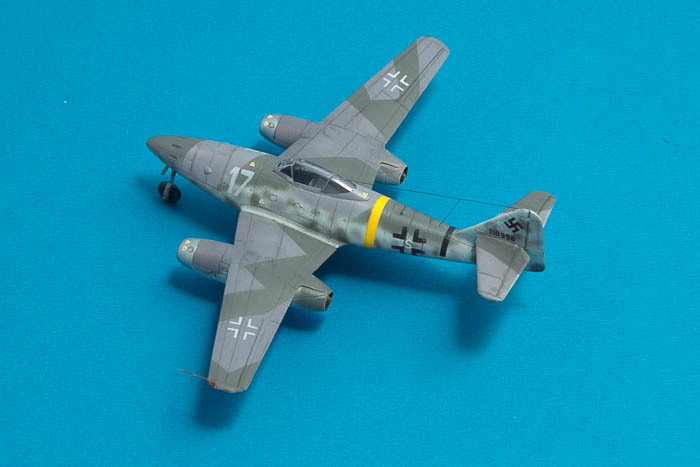
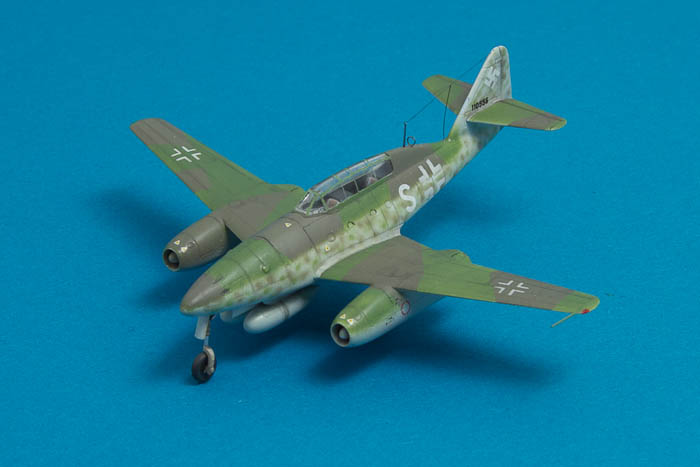
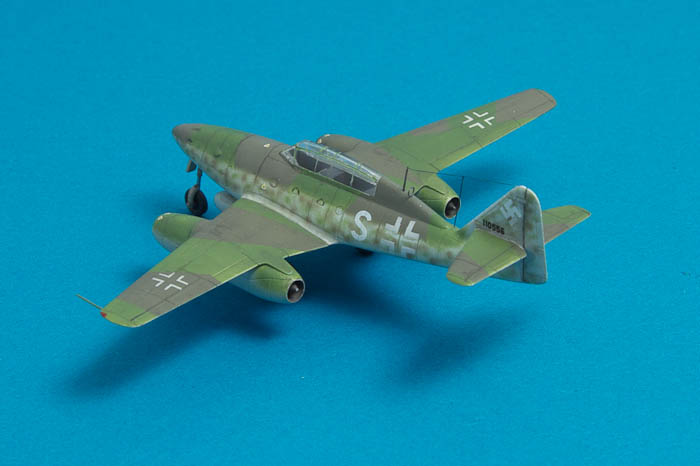
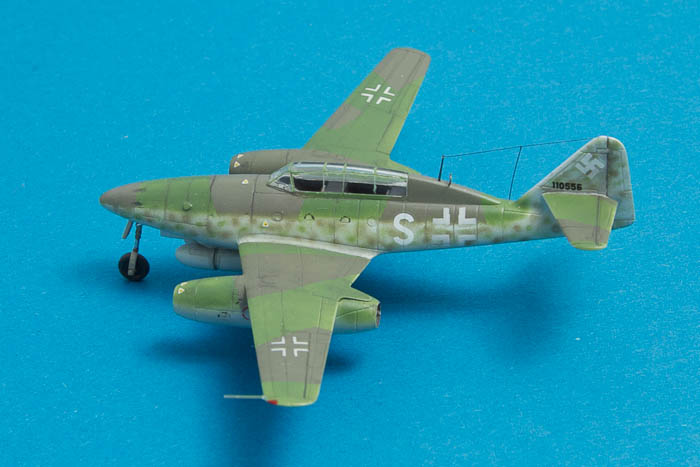
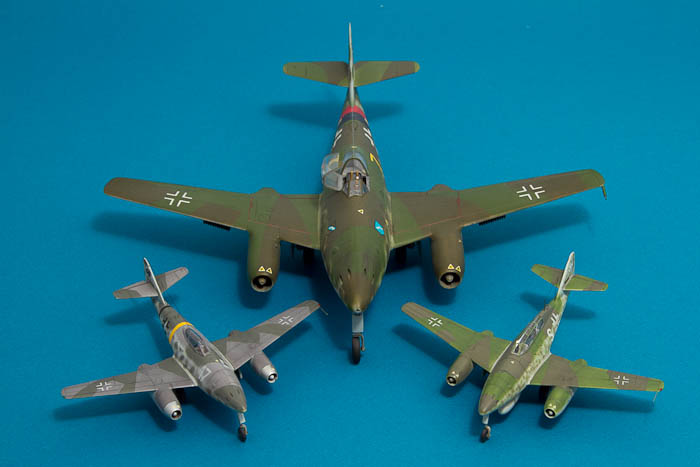
Anyway, I have spent the last few days finishing the 262s and this is what they look like!
I added some careful weathering, washing with Vallejo German Grey thinned with lots of water.
In real life, they are so small that it is really hard to see any details. The panel line washes might look a bit dominant in the photos but it really improves the look, giving a lot more life to the models!
Antenna wires are stretched sprue, thinner than hair but still looking a bit heavy in the photos.
The canopies are troublesome. They are quite thick (even considering the scale) and lack many of the frames.
I finally resorted to painting the frames using a brush and Vallejo acrylic paint. For the naked eye they look good enough.
For once I have been thankful for being heavily near-sighted. This means that I can work as close as my nose allows and still be able to focus on what I am doing.
Überkool and the gang! (Sorry, I couldn't resist...) Just for scale comparison, the huge thing in the background is a Hasegawa 262 in 72 scale...
Both have now been added to the collection.
Magnus
PolarBear
Västra Götaland, Sweden
Joined: February 23, 2005
KitMaker: 820 posts
AeroScale: 629 posts
Joined: February 23, 2005
KitMaker: 820 posts
AeroScale: 629 posts
Posted: Wednesday, October 27, 2010 - 10:41 AM UTC
For canopies that scale, I would have considered for a different method then mascing and spraying. Cutting very thin stripes of prepainted decal sheet, gently applying them and sealing by dipping the whole thing in future. Worked for me, at least.
Anyhows - great work on those gems! Good luck at C4!
Cheers // PolarBear
Anyhows - great work on those gems! Good luck at C4!
Cheers // PolarBear
chukw1
California, United States
Joined: November 28, 2007
KitMaker: 817 posts
AeroScale: 729 posts
Joined: November 28, 2007
KitMaker: 817 posts
AeroScale: 729 posts
Posted: Wednesday, October 27, 2010 - 01:46 PM UTC
Welcome back, Magnus! Hope you've been well- and the Schwalben are wunderbar!
Cheers!
chuk
Cheers!
chuk
magnusf
Stockholm, Sweden
Joined: May 02, 2006
KitMaker: 1,953 posts
AeroScale: 1,902 posts
Joined: May 02, 2006
KitMaker: 1,953 posts
AeroScale: 1,902 posts
Posted: Wednesday, October 27, 2010 - 05:50 PM UTC
Björn! I've never had any luck with decal stripes. On the other hand - I didn't have any luck with masking either in this case so it might be worth a second try!
Chuck! I'm glad you like them! One of them probably would fit inside the cockpit of your 410...
Magnus
Chuck! I'm glad you like them! One of them probably would fit inside the cockpit of your 410...
Magnus
robot_
United Kingdom
Joined: March 08, 2009
KitMaker: 719 posts
AeroScale: 691 posts
Joined: March 08, 2009
KitMaker: 719 posts
AeroScale: 691 posts
Posted: Wednesday, October 27, 2010 - 07:30 PM UTC
Magnus, the panel line wash definitely doesn't look over-done, even enlarged like this. I absolutely love the aerials and pitots- adds so much to their realism. Great job!
NickZour
Attica, Greece / Ελλάδα
Joined: May 01, 2008
KitMaker: 1,437 posts
AeroScale: 1,241 posts
Joined: May 01, 2008
KitMaker: 1,437 posts
AeroScale: 1,241 posts
Posted: Wednesday, October 27, 2010 - 08:52 PM UTC
These are really great
Cheers Nick
Cheers Nick
magnusf
Stockholm, Sweden
Joined: May 02, 2006
KitMaker: 1,953 posts
AeroScale: 1,902 posts
Joined: May 02, 2006
KitMaker: 1,953 posts
AeroScale: 1,902 posts
Posted: Thursday, October 28, 2010 - 10:52 PM UTC
Ben! Thanks for the comments. I have lost count on how many times I have broken off the pitots, they are just stretched sprue superglued to the leading edges. Next time I'm gonna use thin metal wires, glued into pre-drilled holes!
Nick! Thanks! Let's hope the judges like them as well this weekend, I'll keep you all posted!
Magnus
Nick! Thanks! Let's hope the judges like them as well this weekend, I'll keep you all posted!
Magnus
plasticwarfare
Halland, Sweden
Joined: October 11, 2010
KitMaker: 12 posts
AeroScale: 6 posts
Joined: October 11, 2010
KitMaker: 12 posts
AeroScale: 6 posts
Posted: Friday, October 29, 2010 - 01:24 AM UTC
Nice little gems, I´ll put the telephoto lens on the camera tomorrow so that I will be able to see them properly :-)
best regards
/E
best regards
/E
magnusf
Stockholm, Sweden
Joined: May 02, 2006
KitMaker: 1,953 posts
AeroScale: 1,902 posts
Joined: May 02, 2006
KitMaker: 1,953 posts
AeroScale: 1,902 posts
Posted: Saturday, November 13, 2010 - 08:56 AM UTC
I promised to tell you: I got a bronze for the grey one and nothing for the green... Probably because they are so small that the judges can't see their merits !
What is quite disturbing though is that they obviously are addictive!
Magnus
What is quite disturbing though is that they obviously are addictive!
Magnus