_GOTOBOTTOM
Early Aviation
Discuss World War I and the early years of aviation thru 1934.
WNW GB 2009 -10 SE-5a Mike
modelhound
_VISITCOMMUNITY
Washington, United States
Joined: February 17, 2009
KitMaker: 57 posts
AeroScale: 56 posts
Posted: Friday, April 16, 2010 - 05:21 PM UTC
Kind people,
Well, here it is some 2 years since I have worked on a model. And as I have promised (threatened) here is the begining of what I hope to be yet another online build of the WNW SE-5a. The first digital camera I bought turned out to be a bust. Great for ordinary pictures, but no close-ups. So I bought a new Canon A1100 IS. Great close-ups. I will learn how to improve my pictures, increase the depth of field most importantly, so bear with me as I learn while I post. Any way, here are some photos of the intake manifold, painted with various brands of acrylics.


Thanks for looking and all comments are welcome.

mIKE
Kornbeef
_VISITCOMMUNITY
England - South East, United Kingdom
Joined: November 06, 2005
KitMaker: 1,667 posts
AeroScale: 1,551 posts
Posted: Friday, April 16, 2010 - 08:53 PM UTC
well the 2 years away doesnt seem to have harmed...nice work....as for depth of feild...who needs the distractions?...

Keith
modelhound
_VISITCOMMUNITY
Washington, United States
Joined: February 17, 2009
KitMaker: 57 posts
AeroScale: 56 posts
Posted: Saturday, April 17, 2010 - 06:00 AM UTC
Here are some better photos, I'm slowly getting the hang of this camera stuff.


Thanks again for looking. Any comments welcome.

mIKE
CaptainA
_VISITCOMMUNITY
Indiana, United States
Joined: May 14, 2007
KitMaker: 3,117 posts
AeroScale: 2,270 posts
Posted: Saturday, April 17, 2010 - 06:35 AM UTC
Welcome to the Wingnut build. I am working on this one off and on also. I think you are going to like this kit.
modelhound
_VISITCOMMUNITY
Washington, United States
Joined: February 17, 2009
KitMaker: 57 posts
AeroScale: 56 posts
Posted: Sunday, April 18, 2010 - 05:58 PM UTC
Progress report:

The really big news is that Dennis, a fellow from our Bellingham model club, came to my house and carried my CO2 tank and all my airbrush stuff upstairs. For now, I can airbrush outside on the covered front porch.
Whoopee and Yahoo I say. I was getting really upset about having to try to brush paint everything. Try is the key word here.

Lots of work done but nothing that rates photos.

Glued the little pieces on the wing that fill the space under the aileron attachment location. By dryfitting I found that these little pieces were a tad to big. Some scraping of the surface that glues to the wing made everything look much better. I used Mr.Surfacer to fill the little open seam and used Non-acetone finger nail polish remover to tidy up the Mr.Surfacer. No sanding required so no loss of detail. Cleaned up the sprue attachment points on both wings and scraped off the very small mold marks. Polish with finger nail sanding stick which comes in 4 grades of grit.

I managed to lose the compass, so I made a new one out of sprue. It is so well buried in the instrument panel, no one except those who have built this kit will notice.

Because I now have my airbrush, I have stripped the paint from the seat assembly for the umpteenth and last time. I'll be repainting this yet again. Photos soon.

I have tried two ways of getting the fabric wrap effect on the cabane struts. Wrapping decal around doesn't seem to work. Even decal overcoated with future didn't behave for me. I would appreciate any ideas here.

OK enough is enough, I'll let you all get back to something more interesting.

mIKE
CaptainA
_VISITCOMMUNITY
Indiana, United States
Joined: May 14, 2007
KitMaker: 3,117 posts
AeroScale: 2,270 posts
Posted: Monday, April 19, 2010 - 01:09 AM UTC
Microsculpt makes some "Texture" decals. The make surfaces appear "clothlike". You can see them on the interior of my build. I had not given any thought to wrapping the cabanes, but it is worthy of thought. I don't know if they would lead to the desired effect. Another thought is Tamiya Tape. It is thin and might work.
Mgunns
_VISITCOMMUNITY
Arizona, United States
Joined: December 12, 2008
KitMaker: 1,423 posts
AeroScale: 1,319 posts
Posted: Monday, April 19, 2010 - 01:56 AM UTC
Hi MIke:

Welcome to the build. It is a great kit. The modeler should pay close attention to the instructions in the opening phases. The fire wall assembly and location is a little vague. If you look ahead you can see how it goes in to the fuselage but the assembly sequence is off and a little unclear. If you study the instructions and dry fit you will figure it out, it goes well after that.
The other unclear area is the assembly of the cowling and the fitting of the cowling to the engine. As I wasn't going to display the engine, I test fitted the cowling on the engine prior to cementing the engine in the air frame. You have to be careful but you have to spread it out a good amount. It is critical that the engine sit correctly otherwise the cowling won't match up to the airframe.

I am looking forward to seeing your photo's and assembly. Are you planning on displaying the engine?

Best

Mark
thegirl
_VISITCOMMUNITY
Alberta, Canada
Joined: January 19, 2008
KitMaker: 6,743 posts
AeroScale: 6,151 posts
Posted: Monday, April 19, 2010 - 03:12 AM UTC
Hi Mike .

Sounds like you are making some good progress on the kit . The fit is very tight and the guy's are right about the fire wall . This has to be lined up just right , you will love the wing to fuselage join For doing the tapeing on the cab struts , Tamiya tape is perfect for this , has a nice texture to it and nice and thin .

Looking forward to your next set of up-date pic's , also great to hear you got your airbrush back
modelhound
_VISITCOMMUNITY
Washington, United States
Joined: February 17, 2009
KitMaker: 57 posts
AeroScale: 56 posts
Posted: Monday, April 19, 2010 - 06:15 PM UTC
Progress report.

Well today was a case of two steps foreward, two steps back.

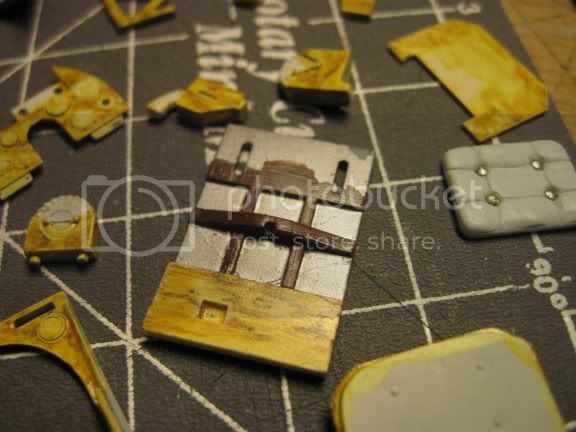
As was suggested by Terri on the AeroScale page, I spent most of my modeling time trying to use Tamiya tape to get the taped cabane struts to look right. Having tried several different techniques and finally stumbled on a method that seemed to work. I taped one end of a 6 inch long 1/8 inch wide piece of Tamiya tape sticky side up to my work table. Starting at the other end of the tape I could then wrap the tape on the strut keeping enough tension on the tape to solve the problem that the strut is not the same width over it's length. I could also by using this technique make sure the tape overlaped itself the same over the length of the strut. I painted two coats of Future to seal everything and then slapped on a quick coat of Gunze Olive Drab 1. The effect did not look too bad to the naked eye but when I took some quick photos it looked terrible. Terrible I tells ya!

Here is one of the photos to prove I will not post only pics of success.


After looking at the photos for some minuites, I threw the strut in Windex and stripped everything off.

The kind Mr. Richard Alexander of WNW fame had been looking at my build blog and sent me a nice email suggesting that anything wrapprd around the strut would be in his words "any 3D effect would be too pronounced". His suggestion is, and I quote again:
"I believe the best way to represent the fabric wrapped around some British aircraft struts is to do it with paint (any 3D effect would be too pronounced);
1 - paint struts with gloss or semi gloss PC10.
2 - do any weathering etc you plan to.
3 - carefully paint very fine lines of matt varnish to represent the frayed edges of the fabric strips.
Hope this helps."

After seeing the results of my efforts, I am inclined to believe him. Further test using paint and clear flat will be forthcoming.

Thats all for now. 'Over and Out', as it were.

mIKE :cool:
modelhound
_VISITCOMMUNITY
Washington, United States
Joined: February 17, 2009
KitMaker: 57 posts
AeroScale: 56 posts
Posted: Friday, April 23, 2010 - 07:05 PM UTC
Progress report:

No pictures of OT subjects this time. Mostly spending time dryfitting and tweeking the parts so they go together easily. The engineering is superb, but, the fit of the parts, as has been mentioned in the past, is a little too tight for my taste. I just eased the fit a little here and there.

Also, I am going to a mini contest tomorrow, Saturday, and I got out two of my off topic subjects to enter as a lark. I took some pictures and added them to the few pictures of other ot subjects in a new album on photobucket. For those who care, you can look at pictures of a few of my models here:

http://s2.photobucket.com/albums/y6/picker/my%20models/

Any comments as always are welcome.

mIKE
__________________
thegirl
_VISITCOMMUNITY
Alberta, Canada
Joined: January 19, 2008
KitMaker: 6,743 posts
AeroScale: 6,151 posts
Posted: Saturday, April 24, 2010 - 02:29 AM UTC
Hi Mike , how goes the taping on the struts ? Rather neat idea on just using a dullcoat to make the lines for the edges of the fabric . Will have to try this myself .

Looking forward to your progress pic's
JackFlash
_VISITCOMMUNITY
Colorado, United States
Joined: January 25, 2004
KitMaker: 11,669 posts
AeroScale: 11,011 posts
Posted: Saturday, April 24, 2010 - 08:53 AM UTC

Quoted Text

". . .The kind Mr. Richard Alexander of WNW fame had been looking at my build blog and sent me a nice email suggesting that anything wrapprd around the strut would be in his words "any 3D effect would be too pronounced". His suggestion is, and I quote again:
"I believe the best way to represent the fabric wrapped around some British aircraft struts is to do it with paint (any 3D effect would be too pronounced);
1 - paint struts with gloss or semi gloss PC10.
2 - do any weathering etc you plan to.
3 - carefully paint very fine lines of matt varnish to represent the frayed edges of the fabric strips.
Hope this helps."

After seeing the results of my efforts, I am inclined to believe him. Further tests using paint and clear flat will be forthcoming.. . ."


He is a good fellow. And how great is it to have a modeling company exec. that responds trying to help us with their product? Mr. Richard Alexander of Wingnut Wings is hereby nominated as a Friend and Good Fellow on the Aeroscale Early Aviation title!
modelhound
_VISITCOMMUNITY
Washington, United States
Joined: February 17, 2009
KitMaker: 57 posts
AeroScale: 56 posts
Posted: Saturday, May 01, 2010 - 06:20 AM UTC
Progress report:

Two things. I've ordered from Sears a cheap little patio table to put next to my airbrush rig on the front porch. I have a large CO2 bottle for air and several badger airbrushes. I should be painting soon.

Second. I've been working on the tail of the SE-5a. When looking at pictures what jumps out at me is the horizontal rib which sticks out rather proud from the general plane of the tail. To that end I have devised a way to replicate this. Using a miter box, I cut a shallow line at the rib location. I slightly widened the cut with a graver. I then glued a short piece of .022" guitar string into the groove and then applied some Acryl Blue filler which I then sanded smooth to the correct profile. A couple of coats of Mr. Surfacer 2000 and a final sanding. Then a light brush painted coat of Tamiya gray paint. All I have to do now is the other side.

Here are some pictures for your amusement.


About the wrapped interplane struts. I doug up a clear picture that showed these struts and the strip of fabric that made up the wrap. 2 inches wide at the most. That would make the wrap on the model 1/16 of an inch which is very narrow. Not worth the trouble me thinks.

Over and out, for now.


mIKE :cool:
modelhound
_VISITCOMMUNITY
Washington, United States
Joined: February 17, 2009
KitMaker: 57 posts
AeroScale: 56 posts
Posted: Thursday, May 06, 2010 - 04:52 PM UTC
The rudder:

While playing around with the rudder and trying to figure what to do, I discovered quite by accident that the rudder is molded thicker where the ribs are. Actually, I passed the rudder in front of a light and saw the brighter areas between the ribs. Way cool WNW.

See attached picture:


I figure some decal strips for the rib tapes will do the trick nicely. I am also going to put decal rib tapes on the fin, which by the way is well on the way to being finished on the other side.

Over and out.

mIKE
modelhound
_VISITCOMMUNITY
Washington, United States
Joined: February 17, 2009
KitMaker: 57 posts
AeroScale: 56 posts
Posted: Thursday, May 06, 2010 - 04:53 PM UTC
Progress report:

I finished the tailplane I was working on, and it came out looking like garbage. the wire I used to make the projecting rib was way too big in dia. I used a .023. Also, because I finished the starboard side completely before starting the port side, I failed totally to make the rib in the same place on both sides. So, I decided to make a tail from scratch so as not to ruin the last remaining WNW supplied tailplane. First attempt I made a frame, intending to cover it with .005 plastic card ala the Woodman technique. This failed meserably also. See some pictures.


See next post for what I did next.

mIKE
modelhound
_VISITCOMMUNITY
Washington, United States
Joined: February 17, 2009
KitMaker: 57 posts
AeroScale: 56 posts
Posted: Thursday, May 06, 2010 - 04:54 PM UTC
Progress report continued:

For the next attempt I decided to carve a tailplane out of .080 plastic card stock. I went back to my first idea using the wire, .013 this time. Also I learned the lesson that I must do each step on both sides before going on to the next. Turned out plenty OK this time, it's a keeper.

See pictures:


I finally got my airbrush working and sprayed the tail CDL while I was doing the interior of the fuselage. I have decided to use the WNW recommended
colors for the most part. Using Tamiya paints as they are what I have and what is available locally I considerably lightened the light wood color called for as I don't think it looks like birch at all. I spent several years making fine all wood furnature for doctors wives. I used baltic birch for all the interior bits like drawrs and such. Most of the plywood used in WW-1 aeroplanes is made from baltic birch. Except the mahogany parts in the Camel and the like. I know from many years of first hand experience what baltic birch looks like and I am going to attempt this in the interior of this SE-5a. My plan is to spray the very light basic color and then draw in the wood grain with finely sharpened watercolor pencils made by Derwent.

That's all for now. Over and out.

mIKE
JackFlash
_VISITCOMMUNITY
Colorado, United States
Joined: January 25, 2004
KitMaker: 11,669 posts
AeroScale: 11,011 posts
Posted: Thursday, May 06, 2010 - 05:08 PM UTC
Hmmm. Someone might make up some resin copies and offer them for a shipping & handling fee to any who are building this bird... Now who was that fellow who did the book on resin pouring. . .aaahhh yes here it is.

Click here.

And Mike ! Don't forget to inlist in the GB so I can add this great piece to the lists.

inlist here.
modelhound
_VISITCOMMUNITY
Washington, United States
Joined: February 17, 2009
KitMaker: 57 posts
AeroScale: 56 posts
Posted: Monday, May 17, 2010 - 04:20 PM UTC
Finally another progress report:

I spent most of the time since my last report fighting off a nasty infection in my left hand. Nobody seems to be able to figure out just what caused this infection, but let me say, I didn't like it at all. My hand swelled up to the size of a grapefruit and turned cherry red. After a week of some powerful antibiotics things look to be on the mend. No pictures of my hand.

I did however to get in some modeling just before and just after the infection era. Mostly painting, masking, painting, masking, painting, mask . . .well you get the picture. I did get to try my out idea about duplicating the birch plywood. Turned out OK, not great. Still some work to do but I'm gonna let things stay as they are now.

A little bit of scratch building. I made the starter magneto and two switches that lay at the pilots right elbow. I modified the floorboards a little, I'm going to put the black spars in as half rounds. You'll see those later as I havn't made them yet. Ah yes, I also made a new seat board and carved out a seat cushion. Havn't decided whether to use the scratch parts or go with the kit item.

On to the pictures:


More in the next post

mIKE the ceptic
modelhound
_VISITCOMMUNITY
Washington, United States
Joined: February 17, 2009
KitMaker: 57 posts
AeroScale: 56 posts
Posted: Monday, May 17, 2010 - 04:23 PM UTC
More pictures:


That's all for now. Stay tuned for more thrills and spills as mIKE the modelhound attempts to do justice to the wonderful WNW SE-5a. Seems like so much more to do.

Over and out, for now,

mIKE on the mend
MrMox
_VISITCOMMUNITY
Aarhus, Denmark
Joined: July 18, 2003
KitMaker: 3,377 posts
AeroScale: 115 posts
Posted: Monday, May 17, 2010 - 09:19 PM UTC
I like the variaty you have achieved in your wooden texture - especially because it needs a little extra to be visible trough the small cockpit opening.

Nice work so far.

Cheers/Jan
Mgunns
_VISITCOMMUNITY
Arizona, United States
Joined: December 12, 2008
KitMaker: 1,423 posts
AeroScale: 1,319 posts
Posted: Tuesday, May 18, 2010 - 01:14 AM UTC
Hi Mike:

I like the wood grain. It is interesting and educational to see the different approaches that modelers have to their wood grain and the techniques employed.

Best
Mark
thegirl
_VISITCOMMUNITY
Alberta, Canada
Joined: January 19, 2008
KitMaker: 6,743 posts
AeroScale: 6,151 posts
Posted: Tuesday, May 18, 2010 - 02:28 AM UTC
Your project is coming along very well Mike . It is nice to see the different ways modellers do their wood graining , how did you do your's ?
CaptainA
_VISITCOMMUNITY
Indiana, United States
Joined: May 14, 2007
KitMaker: 3,117 posts
AeroScale: 2,270 posts
Posted: Tuesday, May 18, 2010 - 05:25 AM UTC
Looks good.
modelhound
_VISITCOMMUNITY
Washington, United States
Joined: February 17, 2009
KitMaker: 57 posts
AeroScale: 56 posts
Posted: Tuesday, May 18, 2010 - 07:54 PM UTC
Terri wrote:
>It is nice to see the different ways modellers do their >wood graining , how did you do your's ?

I write:

I was hoping someone would ask.

I painted the background color with a very pale tan. White with just a smidge of light brown.

Using Derwent brand watercolor pencils, first with Golden Brown #59 I drew in the grain pattern. Keeping the pencil sharp and moving the the direction of the grain of the wood. Then using a darker brown Copper Beech #61 I drew in some highlights, keeping this color rather sparse. Then using a yellow pencil Deep Cadmium #6 I colored in between the browns, leaving a just little bit of un-colored space.


Now comes the fun part. Loading a 1/8 wide soft hair flat brush with clear Future, brush it in the direction of the grain. The colors will melt into one another giving you a nice wood pattern. The more you use the brush the less defined the grain pattern. Let this dry thoroughly.


Using Future and some leather dye I bought from a shoe repair shop, Yellow and just a spot of Red, I made up my own 'varnish'. I then painted on a coat of this 'varnish' and there you have it.


I suggest you paint a sheet of plastic, or left over wing or whatever with the light tan a practice a bit until you get the hang of achieving the results you want.

Best of luck to anybody who tries this. The biggest advantage is no oil paints and their smell. Plus, the Future dries in minutes, not days.

mIKE the teacher
edoardo
_VISITCOMMUNITY
Milano, Italy
Joined: November 30, 2007
KitMaker: 642 posts
AeroScale: 382 posts
Posted: Tuesday, May 18, 2010 - 08:34 PM UTC
Hi Mike!
You did a quite good tutorial on the wood grain!
Your method gives an unique result!
Very well done!
ciao
Edo
 _GOTOTOP