_GOTOBOTTOM
Start Here (for Beginners)
This forum is for younger modelers or people just starting out in the hobby.
Cockpit Wash
mtnflyer
_VISITCOMMUNITY
Alberta, Canada
Joined: March 08, 2009
KitMaker: 394 posts
AeroScale: 360 posts
Posted: Sunday, June 27, 2010 - 07:06 PM UTC
Hi

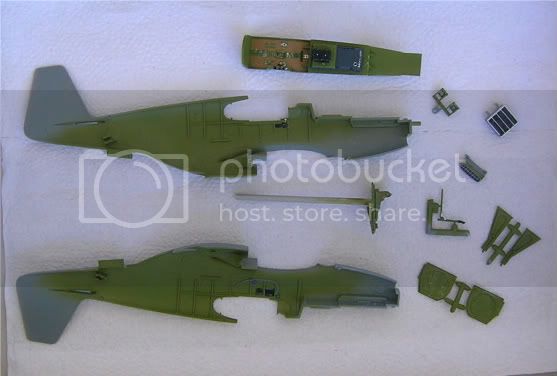
I've never washed, and need your help When you wish to wash a cockpit, do you clear-coat it first?

I've sprayed and brushed Tamiya acrylics and I can glue together now. Nice if it could be weathered a bit. Can I wash before applying Future?

Thanks. Guy
AussieReg
Staff MemberAssociate Editor
AUTOMODELER
#007
_VISITCOMMUNITY
Victoria, Australia
Joined: June 09, 2009
KitMaker: 8,156 posts
AeroScale: 3,756 posts
Posted: Sunday, June 27, 2010 - 07:46 PM UTC
G'day Guy. I think you would have a better finish if you applied the future then the wash. The glossier finish would make the wash spread better and "capillary" into all the little cracks and corners where grime tends to accumulate. It is also much easier to remove excess where you've gone too heavily. I use Tamiya acrylics, then "Future" (or our local equivalent), then Tamiya enamels or artists oils, heavily thinned either way.

Good luck with it.

Cheers, D
thegirl
_VISITCOMMUNITY
Alberta, Canada
Joined: January 19, 2008
KitMaker: 6,743 posts
AeroScale: 6,151 posts
Posted: Monday, June 28, 2010 - 02:10 AM UTC
Hi Guy !

When doing a wash , as to what Damian has said you want to seal the your paint job before applying a wash . If you use acrylic paint you want the wash to be in oil/enamel paint or vs versa with enamel to a acrylic wash . The clear coat will seal he paint for the thinner attacking the your work . Your wash will flow better using a flat clear coat such as testor's dull coat . Gives something for the wash to bite into . It's simple to do , but one can go over board with it . Start by applying it lightly and building it up form there to the effect you are looking for . Once the wash is dried , re-seal again with your choice of gloss or dullcoat to seal and protect the finish .
mtnflyer
_VISITCOMMUNITY
Alberta, Canada
Joined: March 08, 2009
KitMaker: 394 posts
AeroScale: 360 posts
Posted: Monday, June 28, 2010 - 06:42 AM UTC
Thankyou Folk's

Now I know just what to do:


I'll glue all these parts together, without joining the fuselage halves, clear-coat it with future, and then apply a very thinned enamel wash of brown?, or grey?. Hopefully, the mineral spirit thinner will not melt the plastic or finish.
This P-51 is for a campaign, and I'm in so few I can't waste them.

Thanks again. Guy
thegirl
_VISITCOMMUNITY
Alberta, Canada
Joined: January 19, 2008
KitMaker: 6,743 posts
AeroScale: 6,151 posts
Posted: Monday, June 28, 2010 - 11:04 AM UTC
Hi Guy .

You can use brown . I use a mix of brown and black . Colours are from the Testors Model Master range Raw sierra , brunt sierra and flat black . Some times once that is all dried and sealed i will give it another wash of grey in a few areas Once the wash is done and dried for added realizm do a dry brush of the base colour with white or even a buff shade and real seal .

Very nice paint work so far on your mustang . Also great to have you in the campaign .
md72
#439
_VISITCOMMUNITY
Washington, United States
Joined: November 05, 2005
KitMaker: 4,950 posts
AeroScale: 3,192 posts
Posted: Monday, June 28, 2010 - 11:20 AM UTC
Remember the clear coat, expecially when using a wash using the same solvent as your base coat

I've also used water based black ink, heavily diluted with a drop of dishwashing liquid, as a wash.

D's right the glossy finish of the Future/Klear/Pledge(?) will aso help the paint flow into the recesses.
mtnflyer
_VISITCOMMUNITY
Alberta, Canada
Joined: March 08, 2009
KitMaker: 394 posts
AeroScale: 360 posts
Posted: Monday, June 28, 2010 - 02:19 PM UTC
Thankyou for the lesson. Every inch was useful Guy
 _GOTOTOP