_GOTOBOTTOM
World War II
Discuss WWII and the era directly before and after the war from 1935-1949.
Hosted by Rowan Baylis
Grumman F4F-4 Wildcat
Delbert
#073
_VISITCOMMUNITY
Pennsylvania, United States
Joined: October 05, 2002
KitMaker: 2,659 posts
AeroScale: 209 posts
Posted: Thursday, July 01, 2010 - 08:12 AM UTC
Howdy.

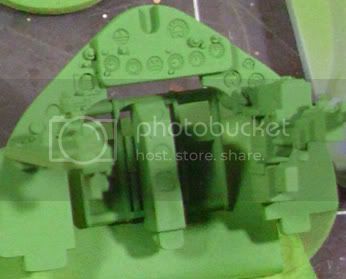
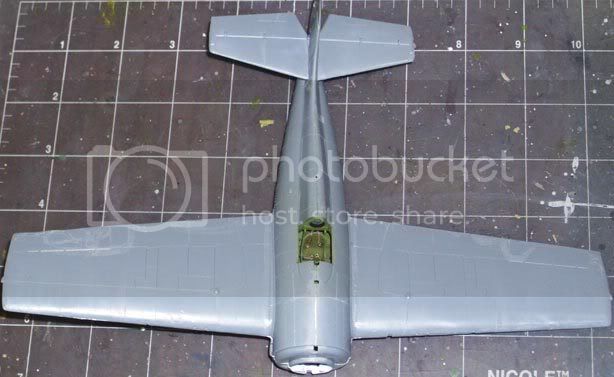
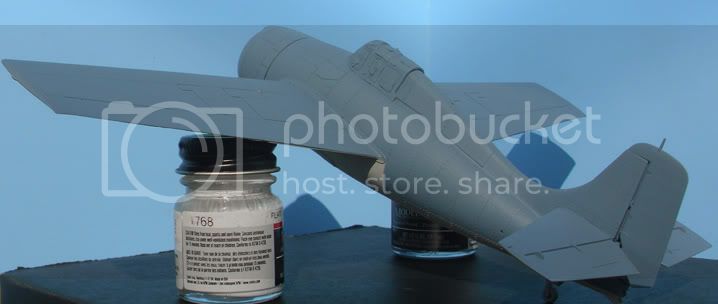
This is my first build blog so bear with me. As the topic says I'm building an F4F-4 Wildcat for the Campaign in the Pacific which ends Aug 15.

I'm building this one OOB. I'll be trying some things to improve my painting, and will be mostly painting with my new Renegade Velocity airbrush.

Delbert
#073
_VISITCOMMUNITY
Pennsylvania, United States
Joined: October 05, 2002
KitMaker: 2,659 posts
AeroScale: 209 posts
Posted: Thursday, July 01, 2010 - 10:08 AM UTC

Ok I"m off to a good start.. working on the cockpit. Everything seems to fit pretty good. there are a few sink holes inside the fusalage but I don't think they will be visible after assemble.

They are painted with Model Master enamel Green zinc Chromate. well thinned and airbrushed at about 6 psi I like how the Renegade Velocity lays the paint down and the trigger action is very smooth. I thought my badger 360(155) was good.. but the Velocity just seems to give a smoother paint flow. (at least for me.)

overview of painted parts.


The next pic is a close up of the instrument panel just to show how smoothly the paint went on... except for a bit there at the middle console where i put it on a bit too heavy to cover the rudder pedals.. my own fault..


Siderius
_VISITCOMMUNITY
Tennessee, United States
Joined: September 20, 2005
KitMaker: 1,747 posts
AeroScale: 1,673 posts
Posted: Thursday, July 01, 2010 - 10:18 AM UTC
Good job, good start. Looking forward to seeing your progress on this one. Russell
Delbert
#073
_VISITCOMMUNITY
Pennsylvania, United States
Joined: October 05, 2002
KitMaker: 2,659 posts
AeroScale: 209 posts
Posted: Friday, July 02, 2010 - 08:49 AM UTC

Ok got some more done. namely painting the cockpit details and gauges a flat black.. then drybrushed the gauges with white.

I do most of the painting by hand I'll most likely have the canopy closed and a careful hand detailing tends to look pretty good to me. when it dries well I'll work on some mild weathering. I'm also thinking of scratching some seatbelts as the kit doesn't come with any.


until later.
NickZour
_VISITCOMMUNITY
Attica, Greece / Ελλάδα
Joined: May 01, 2008
KitMaker: 1,437 posts
AeroScale: 1,241 posts
Posted: Friday, July 02, 2010 - 12:22 PM UTC
I think that the US interior green you have paint, it's too "Green" & Dark


Cheers Nick
Delbert
#073
_VISITCOMMUNITY
Pennsylvania, United States
Joined: October 05, 2002
KitMaker: 2,659 posts
AeroScale: 209 posts
Posted: Friday, July 02, 2010 - 11:37 PM UTC

Yep it looks a little too green right now, but that will change after I apply a darker filter over it and a dark wash.


Delbert
#073
_VISITCOMMUNITY
Pennsylvania, United States
Joined: October 05, 2002
KitMaker: 2,659 posts
AeroScale: 209 posts
Posted: Sunday, July 04, 2010 - 08:30 AM UTC
Ok Here are some pics after a filter wash of burnt umber oil paint.


the panel looks a little darker than it is because of shadows.

and here is a pic with my scratchbuilt seatbelts.. not
perfect, but I think not to bad.. I used brass wire and masking tape.


prob be all I get done for a while as we start vacation tomorrow.

Delbert
#073
_VISITCOMMUNITY
Pennsylvania, United States
Joined: October 05, 2002
KitMaker: 2,659 posts
AeroScale: 209 posts
Posted: Tuesday, July 13, 2010 - 03:54 PM UTC
Here is the next step..

got all the parts that are to be painted white and layed down some paint..


until laters.

Delbert
#073
_VISITCOMMUNITY
Pennsylvania, United States
Joined: October 05, 2002
KitMaker: 2,659 posts
AeroScale: 209 posts
Posted: Wednesday, September 15, 2010 - 02:56 AM UTC
Finally an Update.


the bad news is I didn't make the deadline on this one because all worked stopped in mid-July, one of my co-workers got hurt on the job and I worked a lot of overtime.

The good news, a new campaign just started OPERATION: Hangar Queen to finish something you've started, but didn't finish. And I think this fits in so I hope to finish it.

Here is a pic of where the work stopped for the blog, mainly its just main assembly work.


laters

Delbert
#073
_VISITCOMMUNITY
Pennsylvania, United States
Joined: October 05, 2002
KitMaker: 2,659 posts
AeroScale: 209 posts
Posted: Thursday, September 16, 2010 - 01:12 PM UTC

Ok work has resumed and here are a couple of in progress pics.


a closeup of the gun sight nothing special, but this is the best one I have ever done. I think I've figured this fiddly bit out.


a few parts i've painted and the canopy all masked up, as you can see I use the many many peices of small tape method.

Laters
Delbert
#073
_VISITCOMMUNITY
Pennsylvania, United States
Joined: October 05, 2002
KitMaker: 2,659 posts
AeroScale: 209 posts
Posted: Sunday, April 10, 2011 - 12:36 AM UTC
Howdy all

got some more paint on the project I'm trying to finish up now for the hanger queen build, Its been a while since I worked on this one.


Front view showing dividing line


top view showing my paint..


Close up view of the dividing line... I need to work on the curves a bit as its not all that sharp a line..

Paint went on very good though..

color is Model master pru blue
Siderius
_VISITCOMMUNITY
Tennessee, United States
Joined: September 20, 2005
KitMaker: 1,747 posts
AeroScale: 1,673 posts
Posted: Sunday, April 10, 2011 - 02:56 PM UTC
I like it! Good job, more pictures please when ready to post. Russell
Delbert
#073
_VISITCOMMUNITY
Pennsylvania, United States
Joined: October 05, 2002
KitMaker: 2,659 posts
AeroScale: 209 posts
Posted: Sunday, May 08, 2011 - 03:47 AM UTC
just an update..

the aircraft is in decaling stage

here is an in progress photo....

still putting decals on so its just decals on a future covered enamal using solveset (my fav)


later
Delbert
Siderius
_VISITCOMMUNITY
Tennessee, United States
Joined: September 20, 2005
KitMaker: 1,747 posts
AeroScale: 1,673 posts
Posted: Sunday, May 08, 2011 - 06:35 AM UTC
Good looking bird there! I use Solvaset only in extreme situations, I find it is a quite strong softening/setting agent. Good job. Russell
Delbert
#073
_VISITCOMMUNITY
Pennsylvania, United States
Joined: October 05, 2002
KitMaker: 2,659 posts
AeroScale: 209 posts
Posted: Sunday, May 08, 2011 - 10:10 AM UTC
thanks...

I use solveset for almost everything.. I like my decals to look painted on.. but it is strong stuff and you have to use it sparingly... I find using a very little for several applications to really snug the decals down..

I and on this bird I call all the panel lines and rivet detail a little extreme.

laters
JPTRR
Staff MemberManaging Editor
RAILROAD MODELING
#051
_VISITCOMMUNITY
Tennessee, United States
Joined: December 21, 2002
KitMaker: 7,772 posts
AeroScale: 3,175 posts
Posted: Sunday, May 08, 2011 - 12:17 PM UTC
[quotes]I and on this bird I call all the panel lines and rivet detail a little extreme.[/quote]

Hi Delbert,

Your Grumman is looking great! I look forward to seeing it when finished.

Don't sweat the rivet detail--the Wildcat was festooned with them. See this restored F4F-3: http://aeroscale.kitmaker.net//features/3858
Delbert
#073
_VISITCOMMUNITY
Pennsylvania, United States
Joined: October 05, 2002
KitMaker: 2,659 posts
AeroScale: 209 posts
Posted: Sunday, May 08, 2011 - 12:46 PM UTC
thanks..

and I didn't mean extreme as too many rivets, I meant extreme as in needing solveset to get the decals to snug down to em..


and I really can't wait to finish it myself.. its been a work in progress for a while now..

 _GOTOTOP