Mitsubishi A6M5a - 1/48 Tamiya
Germany
Joined: September 07, 2005
KitMaker: 5,609 posts
AeroScale: 5,231 posts
Posted: Monday, July 05, 2010 - 11:10 PM UTC
Hi all
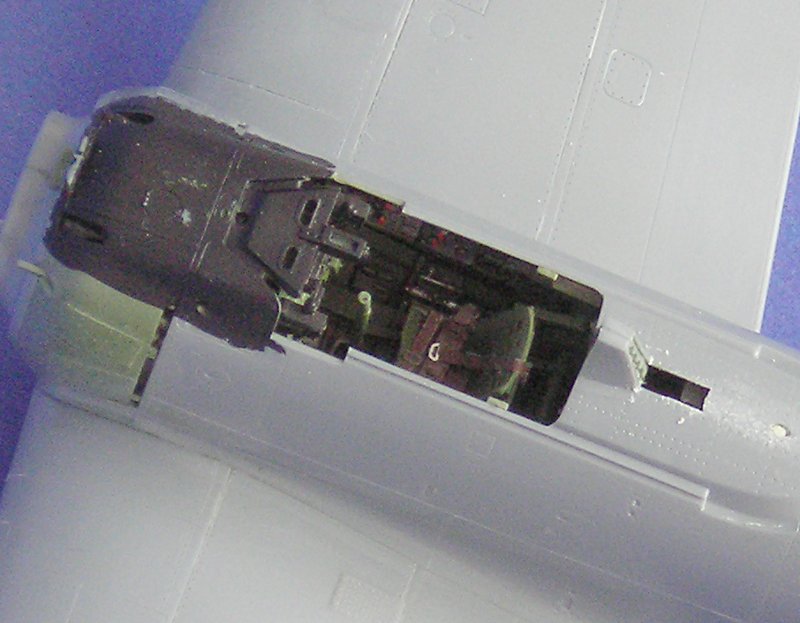
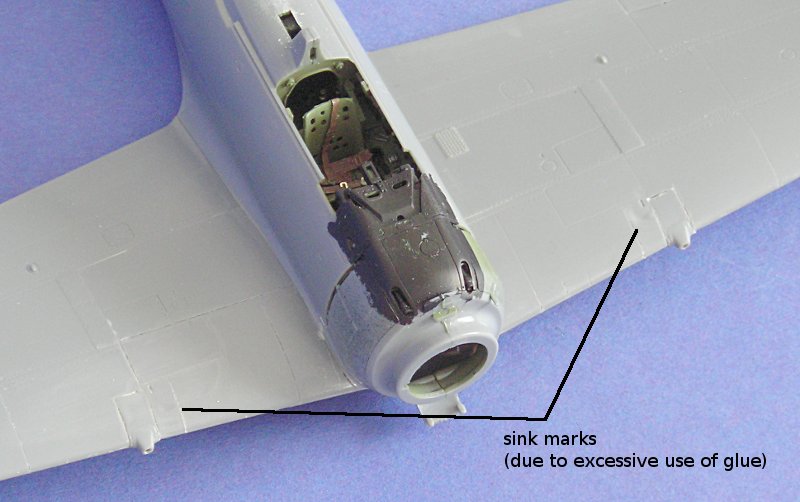
here is another project that I proceded with during my visit at home. Sadly I could not find the pix I took of the interior (at least I thought I did) so I only have these two at the moment. The build is/will be oob with the use of Tamiyas own detail set. Very pleasant project so far (even though it was on hold for a year or more). Again I would like to refer to Rowans and Jean-Luc's projects of the same subject
all the best
Steffen
DULCE ET DECORUM EST PRO HOBBY MORI
Germany
Joined: September 07, 2005
KitMaker: 5,609 posts
AeroScale: 5,231 posts
Posted: Friday, July 16, 2010 - 12:22 AM UTC
Hi Gang
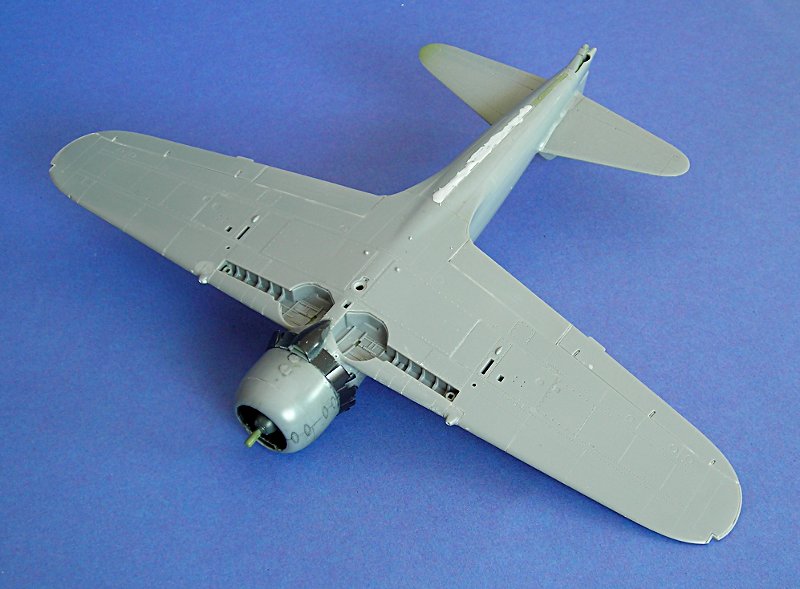
meanwhile I filled the dents with Tamiya Light Curing Putty (great stuff, while not suitable for all purposes).
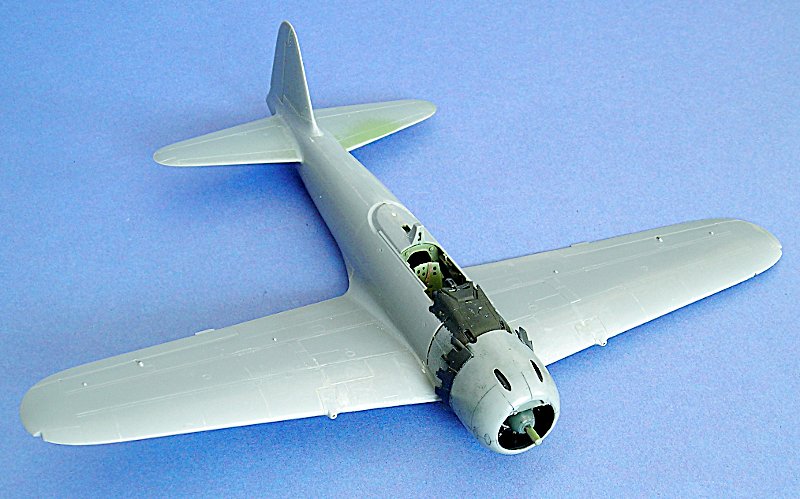
I also added some more small parts. The fulseage seam was still a bit visible after sanding, so I applied a bit of Mr.Surfacer 500. The Enginge/cowling assembly is still removable and I will probably paint this separately. Now that I have the paint I might progress abit faster, but I am not sure
all the best
Steffen
DULCE ET DECORUM EST PRO HOBBY MORI
Missouri, United States
Joined: November 24, 2008
KitMaker: 564 posts
AeroScale: 510 posts
Posted: Friday, July 16, 2010 - 02:11 AM UTC
looking good! I've got another zero in the stash as well.
Nothing quite like getting lost in plastic
On the bench:Revell 1/48 P-38 Lightning built as an F-5B
Next:??
Germany
Joined: September 07, 2005
KitMaker: 5,609 posts
AeroScale: 5,231 posts
Posted: Saturday, July 17, 2010 - 05:30 AM UTC
Hi Shawn
I have several, but just this is Tamiya. Had the same problem wiith the guns like Rowan and Jean-Luc. But else it is a great kit.
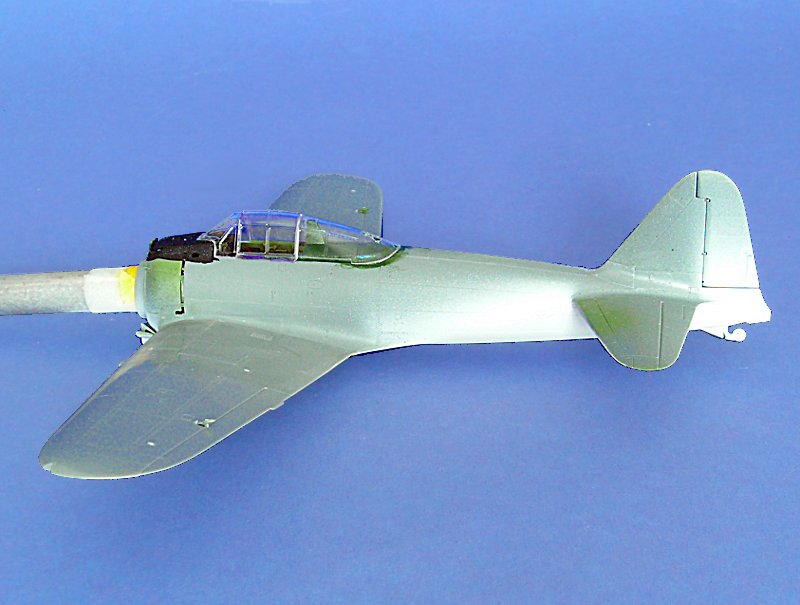
Small progress. I airbrushed the lower side with Lifecolor FS 36495. ..... Hmm, my source grabbed the wrong shade should be 36496 (I did not check before painting) I just wanted the proper colour for it according to
J-aircraft.com research.
Anyway I also attached the canopy ... and screwed up big time. I sometimes use plastic glue to fix canopys just for the nice capillary flow. Sadly the rear canopy "sucked" a bit to much of it ... after some drying time, sanding, polishing, Klear it still is a bit foggy in some places, but what the heck. I used Gators glue this time and Maskol for the middle part. Too bad the masks are not precut ...
all the best
Steffen
P.S. I just adjusted the paint mixing some A4 IJA light green into my light grey ... looks much better now
DULCE ET DECORUM EST PRO HOBBY MORI
Germany
Joined: September 07, 2005
KitMaker: 5,609 posts
AeroScale: 5,231 posts
Posted: Sunday, July 18, 2010 - 03:22 AM UTC
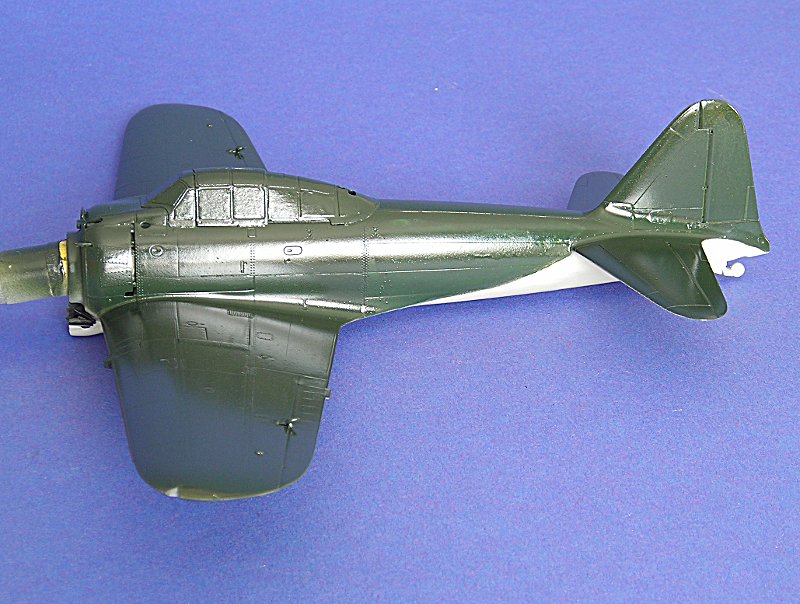
So I masked the canopy today and then sprayed the green. After that I gave it a layer of Klear. I think I met the Nakajima colours o.k. The tone will lighten a bit when I add the flat coat. All in all I want this model rather clean and well maintained -- no large chipping and stuff just some washes and flat coat.
all the best
Steffen
DULCE ET DECORUM EST PRO HOBBY MORI
Germany
Joined: September 07, 2005
KitMaker: 5,609 posts
AeroScale: 5,231 posts
Posted: Sunday, July 18, 2010 - 09:40 PM UTC
Started to apply decals today (you can see the Klear is not dry yet)

all the best
Steffen
DULCE ET DECORUM EST PRO HOBBY MORI
England - East Anglia, United Kingdom
Joined: November 09, 2006
KitMaker: 295 posts
AeroScale: 276 posts
Posted: Sunday, July 18, 2010 - 09:59 PM UTC
Hi Steffen, looks great with the decals on now.
Do you spray the Klear through the airbrush? I have been spraying mine and never seem to get a nice thick coat like what you have there.
Howard
Germany
Joined: September 07, 2005
KitMaker: 5,609 posts
AeroScale: 5,231 posts
Posted: Sunday, July 18, 2010 - 10:06 PM UTC
Hi Howard
Not sure what you mean. Before I apply the decals I airbrush the whole model with Klear. For the decal application I use Klear with a paint brush (instead of a decal softener).
all the best
Steffen
DULCE ET DECORUM EST PRO HOBBY MORI
United Kingdom
Joined: March 08, 2009
KitMaker: 719 posts
AeroScale: 691 posts
Posted: Sunday, July 18, 2010 - 10:07 PM UTC
Nice to see a new or well-maintained zero for a change! You're working through your part-completed models very effectively- I hope to do the same during the rest of this year.
Germany
Joined: September 07, 2005
KitMaker: 5,609 posts
AeroScale: 5,231 posts
Posted: Monday, July 19, 2010 - 02:21 AM UTC
Thanks Ben!
Well, I like a well weathered model but I have seen a few recently which look a bit too "crappy" for my personal taste.
Yes I try to get a few older projects finished with the newer ones ... sometimes it works, sometimes not

good luck with yours!!
all the best
Steffen
DULCE ET DECORUM EST PRO HOBBY MORI
England - East Anglia, United Kingdom
Joined: November 09, 2006
KitMaker: 295 posts
AeroScale: 276 posts
Posted: Tuesday, July 20, 2010 - 08:10 AM UTC
Hi Steffen
Actually your reply has answered my question perfectly. I normally thin my Klear with water and spray it but it never seems to build up very well.
Thank you and I look forward to the next installment.
Howard
Germany
Joined: September 07, 2005
KitMaker: 5,609 posts
AeroScale: 5,231 posts
Posted: Wednesday, July 21, 2010 - 06:51 AM UTC
As Big Cahuna Jim dumped the past 10 hours of posting I will just repost the picture I added during the day ....

and Rowan still did not post in this thread


cheers
Steffen
DULCE ET DECORUM EST PRO HOBBY MORI
Washington, United States
Joined: September 20, 2007
KitMaker: 861 posts
AeroScale: 111 posts
Posted: Wednesday, July 21, 2010 - 07:58 AM UTC
Looks great - I think you did a fine job with the colors.
We need to see some more Japanese WWII aircraft, IMHO. I have a Tamiya J2M3 Raiden that I should throw together one weekend soon.
-YL
Germany
Joined: September 07, 2005
KitMaker: 5,609 posts
AeroScale: 5,231 posts
Posted: Wednesday, July 21, 2010 - 08:37 AM UTC
Thanks Yoni!
Yes I tried to match the Nakajima colours for the Zero. I have the Tamiya Special Edition on order, that has Iwamoto included which is a Mitsubishi machine, so the comparison will be nice!
http://www.j-aircraft.com/research/amacryl.htmSadly I could not get the fully correct FS shades, but I matched with the help of IPMS Stockholms FS colour server, so I think I am pretty close ...
all the best
Steffen
P.S. Off topic: I just thought about your name, I am not sure which is your first name (or better which of the two I shall use to address you)? TIA
DULCE ET DECORUM EST PRO HOBBY MORI
Germany
Joined: September 07, 2005
KitMaker: 5,609 posts
AeroScale: 5,231 posts
Posted: Wednesday, July 21, 2010 - 11:20 PM UTC
Slow but steady ...
I started with the undercarriage ... the drop tank is just test fit as are the wheels

all the best
Steffen
DULCE ET DECORUM EST PRO HOBBY MORI
Slovenia
Joined: March 30, 2009
KitMaker: 106 posts
AeroScale: 105 posts
Posted: Thursday, July 22, 2010 - 02:21 AM UTC
Nice build so far, I am looking forward to see this Zero weathered.
Washington, United States
Joined: September 20, 2007
KitMaker: 861 posts
AeroScale: 111 posts
Posted: Thursday, July 22, 2010 - 07:09 AM UTC
Quoted Text
P.S. Off topic: I just thought about your name, I am not sure which is your first name (or better which of the two I shall use to address you)? TIA
I'll answer to anything, but Yoni is just fine. Besides, Mr. Lev sounds too much like my dad.
-YL
Germany
Joined: September 07, 2005
KitMaker: 5,609 posts
AeroScale: 5,231 posts
Posted: Thursday, July 22, 2010 - 07:14 AM UTC
Thanks Anze and Yoni!
@Anze: me too

@Yoni: I just was not sure which one was your first name, as there are several "cultures" that put the family name first...
next update tomorrow when I can take another picture ... was a pretty dark day here in sw Germany...
all the best
Steffen
DULCE ET DECORUM EST PRO HOBBY MORI
Germany
Joined: September 07, 2005
KitMaker: 5,609 posts
AeroScale: 5,231 posts
Posted: Thursday, July 22, 2010 - 09:10 PM UTC
HI again
despite the very dark - and humid - weather (but finally some lower temperatures) I took a photo of the progress. Some more u/c parts added, some small decals, tyres flattened, paint touch up...

all the best
Steffen
DULCE ET DECORUM EST PRO HOBBY MORI
Attica, Greece / Ελλάδα
Joined: May 01, 2008
KitMaker: 1,437 posts
AeroScale: 1,241 posts
Posted: Thursday, July 22, 2010 - 11:33 PM UTC
It's great until now

Keep going

Cheers Nick


Germany
Joined: September 07, 2005
KitMaker: 5,609 posts
AeroScale: 5,231 posts
Posted: Friday, July 23, 2010 - 05:24 AM UTC
Now after the first grey wash:
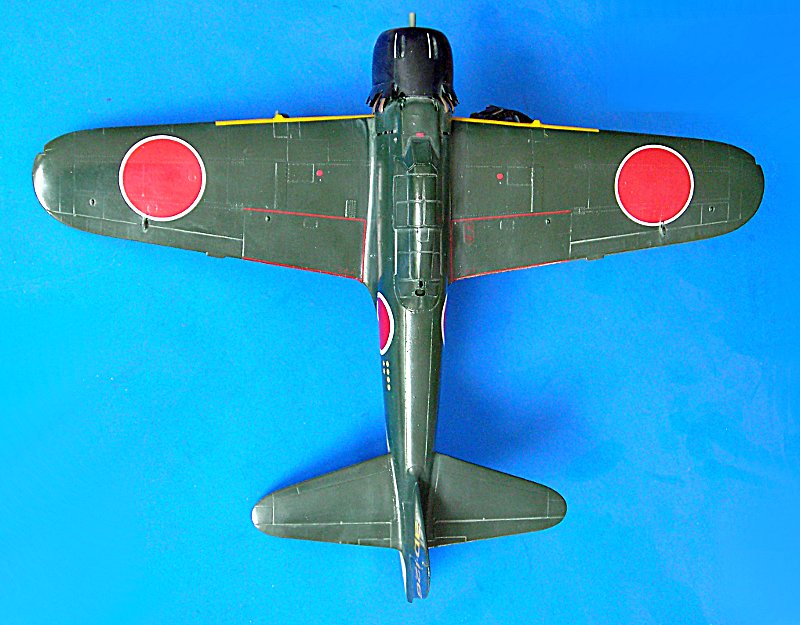
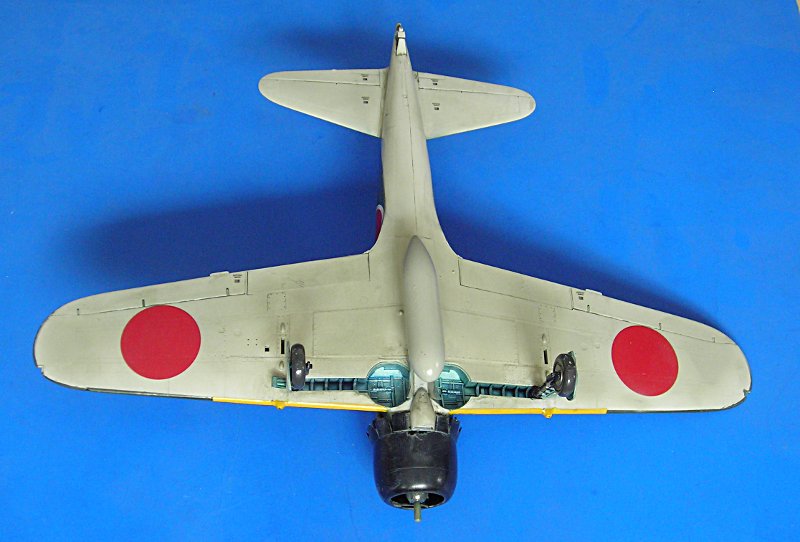
I will give the control surfaces a dark wash
all the best
Steffen
DULCE ET DECORUM EST PRO HOBBY MORI
Washington, United States
Joined: September 20, 2007
KitMaker: 861 posts
AeroScale: 111 posts
Posted: Sunday, July 25, 2010 - 06:41 PM UTC
Coming along nicely, Steffen. Can you tell me what paint you used to represent the aotake primer in the wheel wells?
-YL
Germany
Joined: September 07, 2005
KitMaker: 5,609 posts
AeroScale: 5,231 posts
Posted: Sunday, July 25, 2010 - 09:24 PM UTC
Hi Yoni
Sure: I used JPS 110-123 "USAF F-15 interior green" an then a wash mixed of Thraka green and Asurmen blue (both Citadel/GW washes) ... not much of a help I guess

I was busy with the kit despit theP-38 I started. But paint and decals need their drying times .... here is a picture of the actual state. I will need to do a bit around the canopy as the contrast of the wash is too harsh there IMO
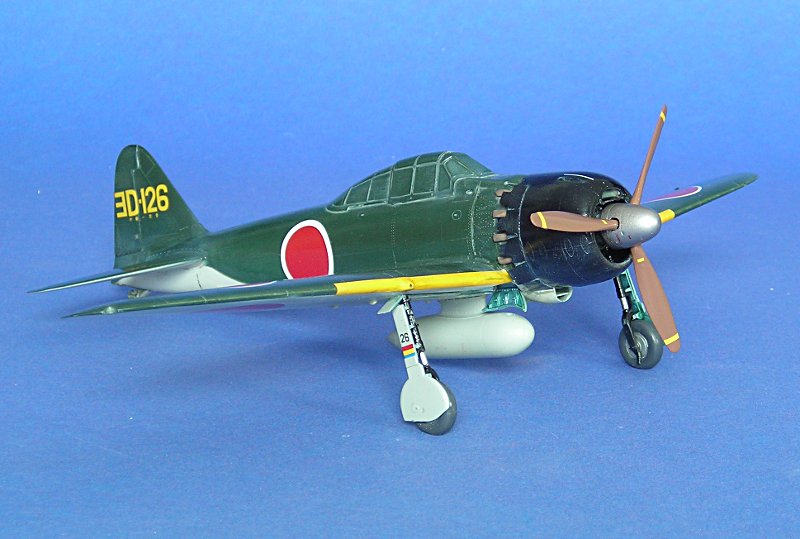
all the best
Steffen
DULCE ET DECORUM EST PRO HOBBY MORI
Wellington, New Zealand
Joined: March 15, 2005
KitMaker: 169 posts
AeroScale: 132 posts
Posted: Monday, July 26, 2010 - 01:11 AM UTC
Looking great there Steffen! These kits go together very nicely!
Germany
Joined: September 07, 2005
KitMaker: 5,609 posts
AeroScale: 5,231 posts
Posted: Monday, July 26, 2010 - 09:58 PM UTC
Thanks David and yes they go together pretty easy (forgot why I shelved it for two years)
Now after some touch ups on the weathering the flat coat is on and I like the look a lot.... still a bunch of small things to do .. taiil wheel, antenna, guns, clear parts ...
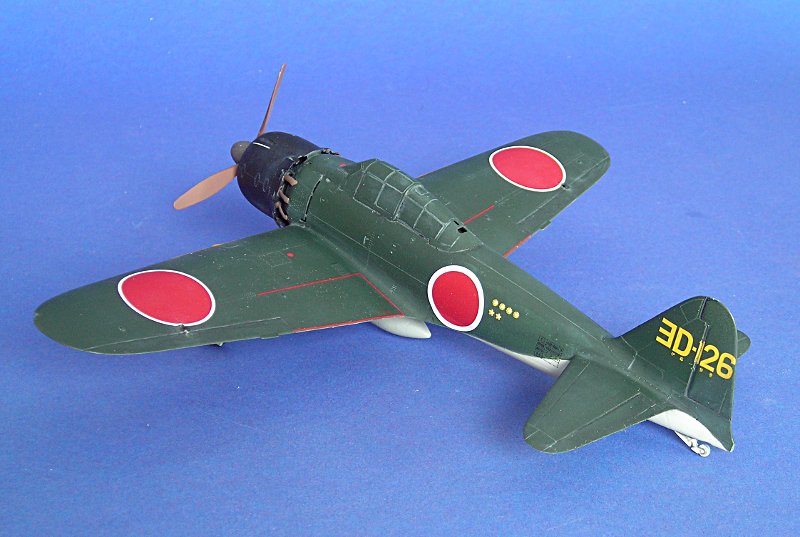
all the best
Steffen
DULCE ET DECORUM EST PRO HOBBY MORI


