
Hosted by Jim Starkweather
Hobby boss 1/48 A-10 Thunderbolt II

Keeperofsouls2099

Joined: January 14, 2009
KitMaker: 2,798 posts
AeroScale: 2,443 posts

Posted: Friday, July 30, 2010 - 03:49 PM UTC
I am starting a build log for the A-10 that I am building for the CAS campaign.I received my Aires cockpit yesterday and cleaned it up tonight.I will start painting tomorrow.More to come stay tuned 


VonCuda

Joined: November 28, 2005
KitMaker: 2,216 posts
AeroScale: 1,080 posts

Posted: Friday, July 30, 2010 - 04:30 PM UTC
Quoted Text
I am starting a build log for the A-10 that I am building for the CAS campaign.I received my Aires cockpit yesterday and cleaned it up tonight.I will start painting tomorrow.More to come stay tuned
Yeah........I know we're homies and all but you're starting to make me sick.


Dude, eventually your wife will find those credit card bills and then it will really hit the fan.

I'll watch this anyway.

Hermon


mother

Joined: January 29, 2004
KitMaker: 3,836 posts
AeroScale: 1,036 posts

Posted: Friday, July 30, 2010 - 04:37 PM UTC
Your going to love this kit Justin, it's one of the best in 1/48th I ever built. Here is my full build log just in case you need a tip or two. Looking forward to your start.
Hobby Boss A-10 Thunderbolt full build
Happy Modeling,
Joe
Hobby Boss A-10 Thunderbolt full build
Happy Modeling,
Joe

VonCuda

Joined: November 28, 2005
KitMaker: 2,216 posts
AeroScale: 1,080 posts

Posted: Friday, July 30, 2010 - 04:46 PM UTC
Killer build blog Joe! I'll be doing the Tamiya version for the CAS campaign in a few weeks but I'll be using your review as a painting guide. Beautiful bird man.
Hermon
Hermon


Keeperofsouls2099

Joined: January 14, 2009
KitMaker: 2,798 posts
AeroScale: 2,443 posts

Posted: Saturday, July 31, 2010 - 04:14 PM UTC
Thanks Joe that will help a lot all though I can't see the finished pics for some reason.but wow very good job my friend.update tomorrow.

Keeperofsouls2099

Joined: January 14, 2009
KitMaker: 2,798 posts
AeroScale: 2,443 posts

Posted: Tuesday, August 03, 2010 - 09:56 AM UTC
just an update I have the aires cockpit complete and installed in the fusalage I ill try to post pics tonight Ive just been really busy 


Keeperofsouls2099

Joined: January 14, 2009
KitMaker: 2,798 posts
AeroScale: 2,443 posts

Posted: Tuesday, August 03, 2010 - 03:32 PM UTC
Alright its time for me to put up or shut up so here is progress so far.....
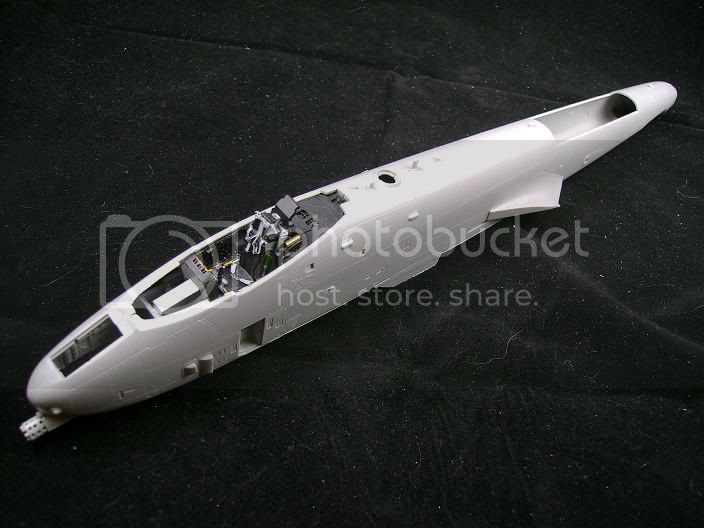
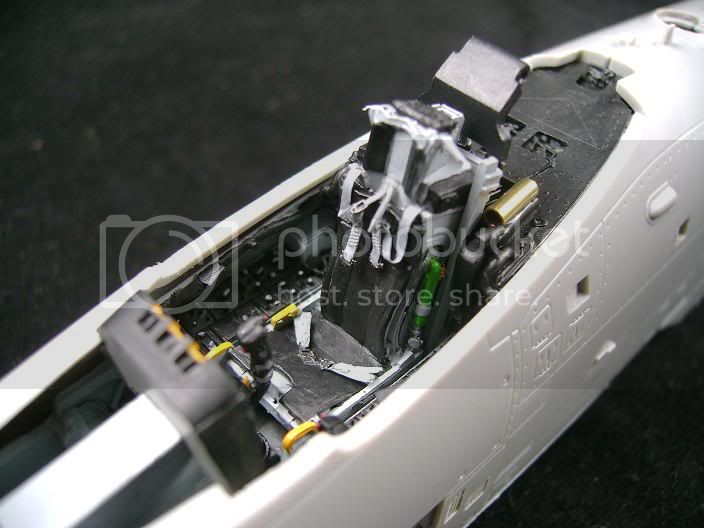
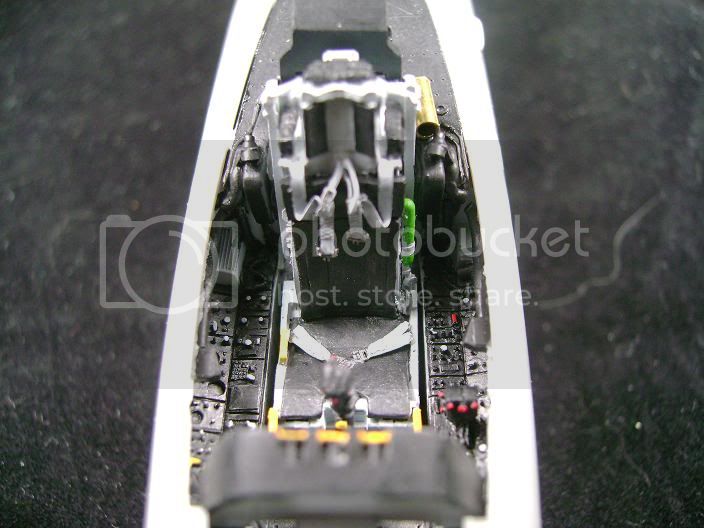
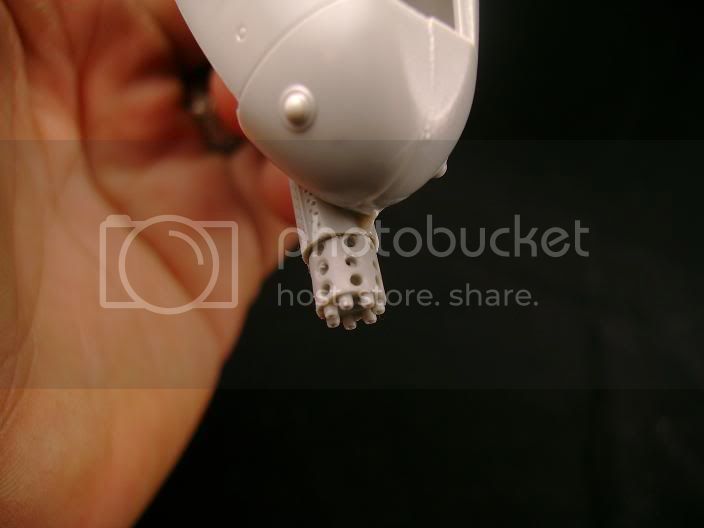
more soon really liking this one its actually going together quite well.


more soon really liking this one its actually going together quite well.


mother

Joined: January 29, 2004
KitMaker: 3,836 posts
AeroScale: 1,036 posts

Posted: Tuesday, August 03, 2010 - 04:22 PM UTC
Wow Justin the cockpit looks great, nice painting. It's nice seeing a cockpit that doesn't look like a bag of Skittles fell into. I thought about buying one but gave up. How does it fit in, any problems.
Happy Modeling,
Joe
Happy Modeling,
Joe

Keeperofsouls2099

Joined: January 14, 2009
KitMaker: 2,798 posts
AeroScale: 2,443 posts

Posted: Tuesday, August 03, 2010 - 04:27 PM UTC
Fits good the inside tabs on the fusalage halfs have to be removed but thats about it.And yes I understand the skittle remark .I try to stay as true to the real thing as possible

VonCuda

Joined: November 28, 2005
KitMaker: 2,216 posts
AeroScale: 1,080 posts

Posted: Wednesday, August 04, 2010 - 07:36 AM UTC
I'm trying to follow this build Justin but it's taking way too long for you to complete this one. It's been what......4 days now? Come on man! 

Nice work so far , as usual. Cockpit looks great, and I think Joe is refering to me when he mentions the whole skittles thing. Hey, a little red, yellow, and green doesn't hurt to hide my mistakes.

Hermon


Nice work so far , as usual. Cockpit looks great, and I think Joe is refering to me when he mentions the whole skittles thing. Hey, a little red, yellow, and green doesn't hurt to hide my mistakes.


Hermon

ShawnM

Joined: November 24, 2008
KitMaker: 564 posts
AeroScale: 510 posts

Posted: Thursday, August 05, 2010 - 01:48 AM UTC
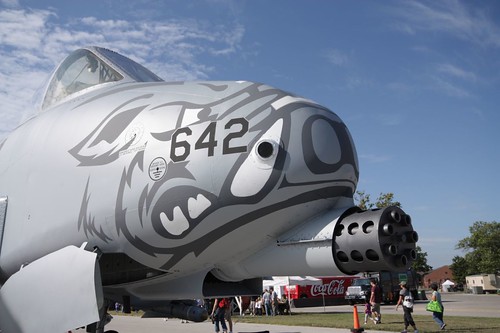
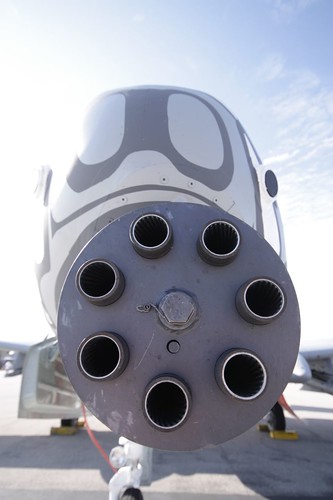
These may help:


Keeperofsouls2099

Joined: January 14, 2009
KitMaker: 2,798 posts
AeroScale: 2,443 posts

Posted: Thursday, August 05, 2010 - 05:22 AM UTC
Thanks for the pics shawn but I have a file full of them.more are always helpful though 


Keeperofsouls2099

Joined: January 14, 2009
KitMaker: 2,798 posts
AeroScale: 2,443 posts

Posted: Thursday, August 05, 2010 - 03:13 PM UTC
Received decals today from http://afterburnerdecals.com/ and must say how impressed I am there are marking options here for 34 A-10's from 1989-2009 along with data for all weapons of the A-10.Also it comes with 6 sheets of painting guides and info on positions of various antennas and other tech info such as slime lights etc.....All printed on cartograph.I now have enough decals for all the A-10's i will ever build.As a plus it shipped and was here in 4 days!
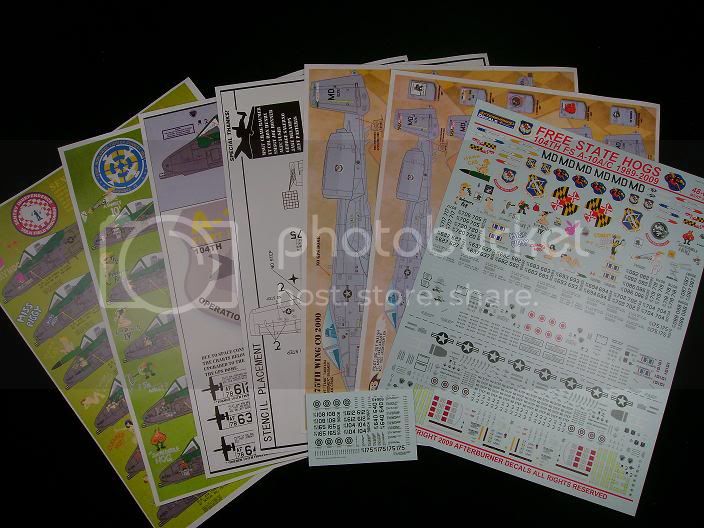

And for an update one nasty seam line running down the bottom that im dealing with so i will be on that for awhile


And for an update one nasty seam line running down the bottom that im dealing with so i will be on that for awhile
Posted: Friday, August 06, 2010 - 07:47 AM UTC
Very nice build so far, Justin. The cockpit is looking great. Important on the A-10 as so much is visible on the finished build.
I have the Italeri kit in my stash and look forward to follow your build for inspiration on details and camouflage.
Nothing says Close Air Support more than an A-10 or a Stuka.
I have the Italeri kit in my stash and look forward to follow your build for inspiration on details and camouflage.
Nothing says Close Air Support more than an A-10 or a Stuka.


Keeperofsouls2099

Joined: January 14, 2009
KitMaker: 2,798 posts
AeroScale: 2,443 posts

Posted: Friday, August 06, 2010 - 04:56 PM UTC
THanks Jesper trying new paints from valijo don't know if I spelled that correctly but you get the idea.we will see how they work 


Keeperofsouls2099

Joined: January 14, 2009
KitMaker: 2,798 posts
AeroScale: 2,443 posts

Posted: Sunday, August 08, 2010 - 01:35 PM UTC
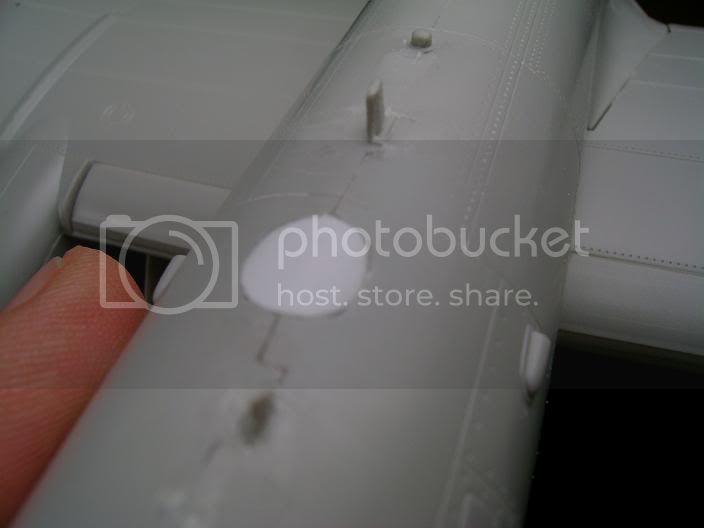
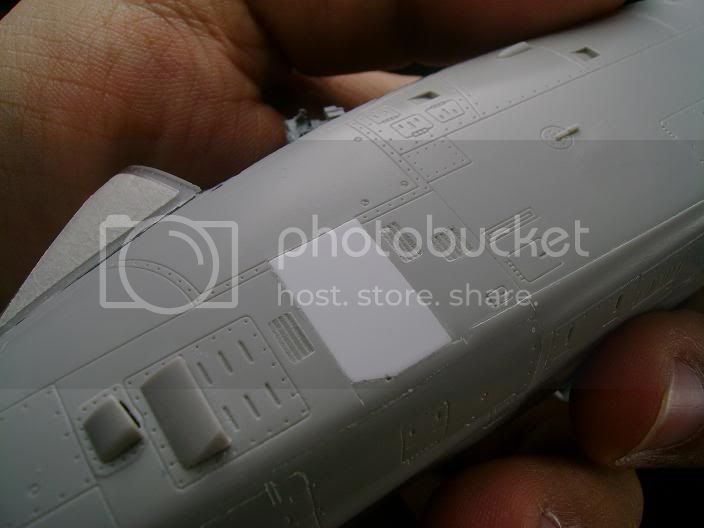
Update news at 11:00  sorry couldn't resist.Basically all that I am doing right now is assembly and correcting a few things.On the version I am doing the A-10A it didnt have the GPS dome so I removed it and filled with super glue and styrene.....
Secondly for some reason the only option you have with this kits ladder door is open.since I want mine closed I cut a new door out of styrene and glued it in place...
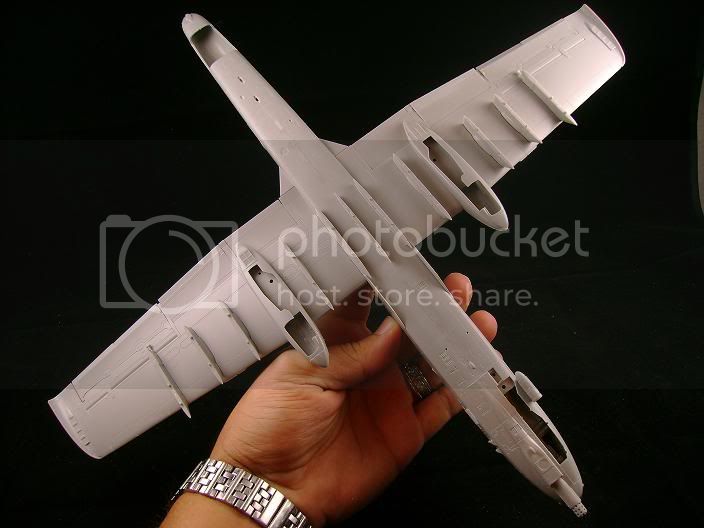
ant here is where the progress continues....
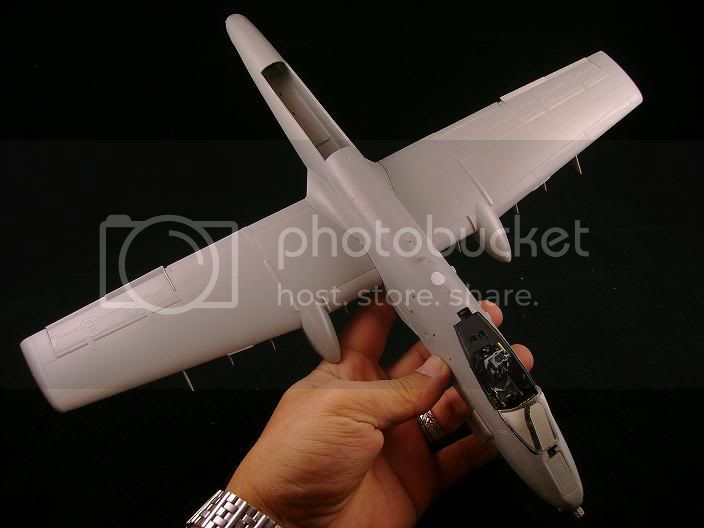
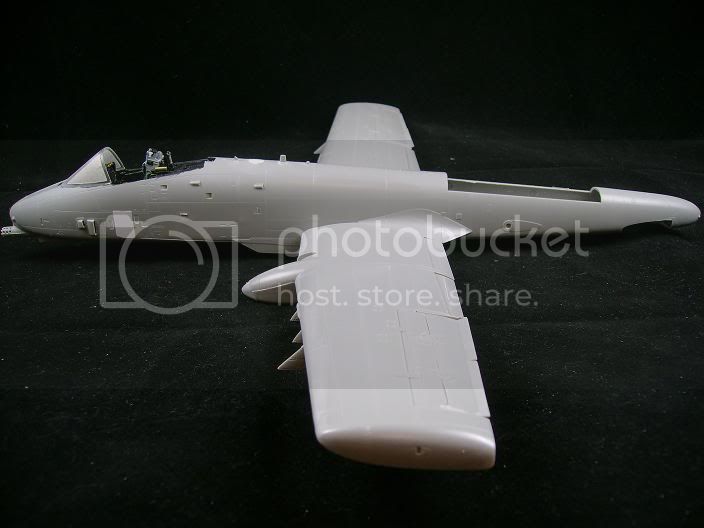
Hope your enjoying as always questions welcome
 sorry couldn't resist.Basically all that I am doing right now is assembly and correcting a few things.On the version I am doing the A-10A it didnt have the GPS dome so I removed it and filled with super glue and styrene.....
Secondly for some reason the only option you have with this kits ladder door is open.since I want mine closed I cut a new door out of styrene and glued it in place...

ant here is where the progress continues....


Hope your enjoying as always questions welcome

bdanie6

Joined: November 09, 2008
KitMaker: 615 posts
AeroScale: 459 posts

Posted: Sunday, August 08, 2010 - 03:52 PM UTC
I always enjoy watching your build Justin.  When I was living in NH the Conneticutt ANG flew A-10's. Their training missions on weekends took them up the Conn. River Valley. So I got to see 2 ship flights going low and slow right over my house. A lot
The Afterburner sheets look fantastic, but with so many choices, which one did you choose?
As always, fantastic job so far...

 When I was living in NH the Conneticutt ANG flew A-10's. Their training missions on weekends took them up the Conn. River Valley. So I got to see 2 ship flights going low and slow right over my house. A lot
The Afterburner sheets look fantastic, but with so many choices, which one did you choose?

As always, fantastic job so far...


Keeperofsouls2099

Joined: January 14, 2009
KitMaker: 2,798 posts
AeroScale: 2,443 posts

Posted: Sunday, August 08, 2010 - 04:31 PM UTC
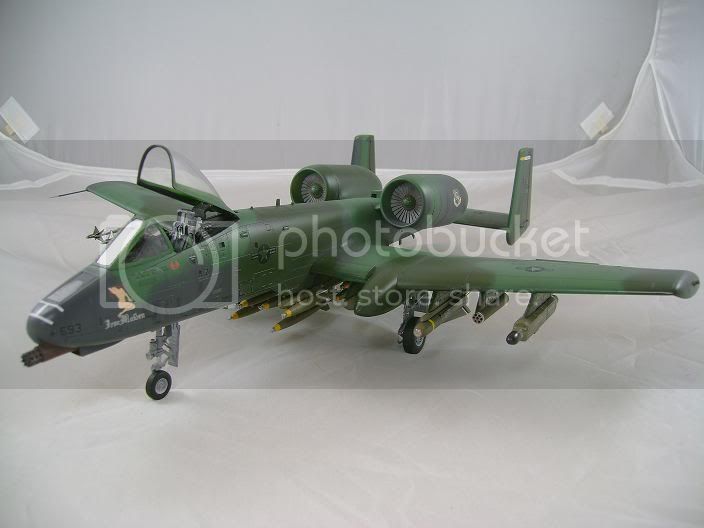
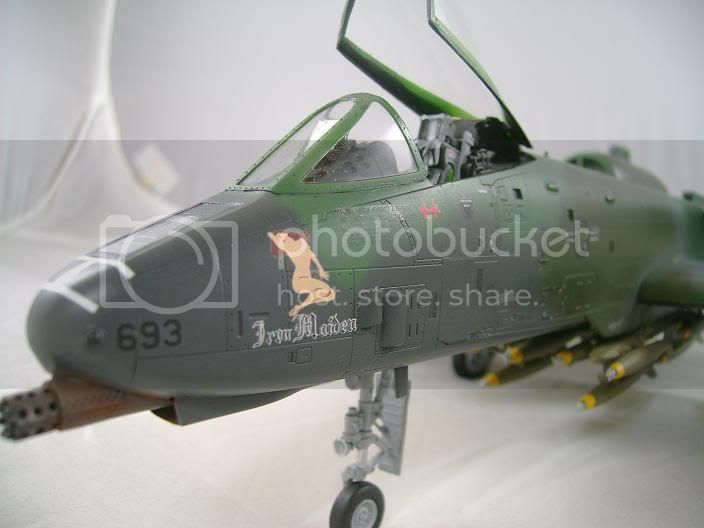
Thanks for the kudos.simple I went with iron maiden I'm a sucker for nose art.it will also be my first cam scheme ever.I'm not big on cam but my display cases are starting to look a bit gray so I figured I take a shot also give me a chance to put new paint to the test. 


VonCuda

Joined: November 28, 2005
KitMaker: 2,216 posts
AeroScale: 1,080 posts

Posted: Wednesday, August 11, 2010 - 08:22 AM UTC
Quoted Text
Thanks for the kudos.simple I went with iron maiden I'm a sucker for nose art.it will also be my first cam scheme ever.
Not to mention the fact that Iron Maiden totally rocks!

Super work so far. I'm itching to get started on my Hog for the CAS build.
Hermon


Keeperofsouls2099

Joined: January 14, 2009
KitMaker: 2,798 posts
AeroScale: 2,443 posts

Posted: Wednesday, August 11, 2010 - 10:32 AM UTC
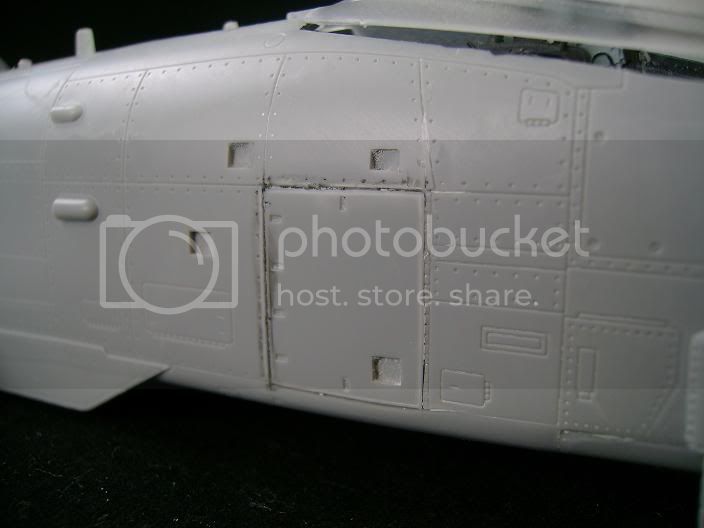
Here is the last couple of days work...1st I realized I hadn't put any weight in the nose  so I cut out one of the access panels in the side and slipped a few .45's in behind the cockpit
  what a pain!
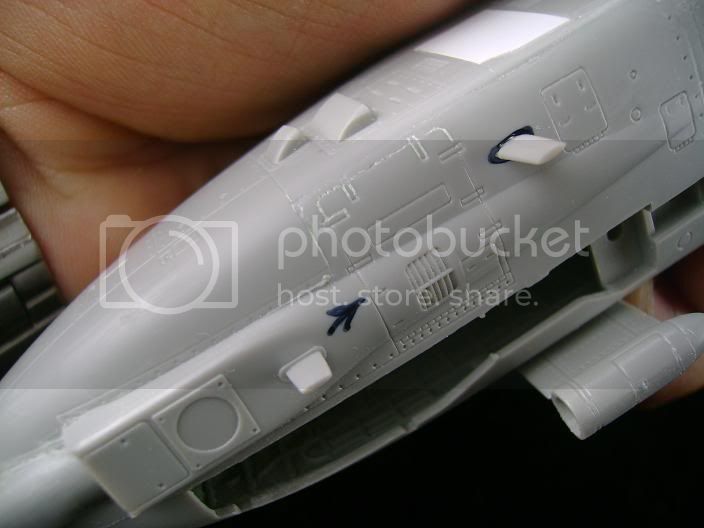
I then moved on to the antenna on the bottom of the gun vent that is in the wrong position.I've looked at all types of a-10's and 1000's of pic's and I cant find one with it ever being located here.So I moved it to its proper location.
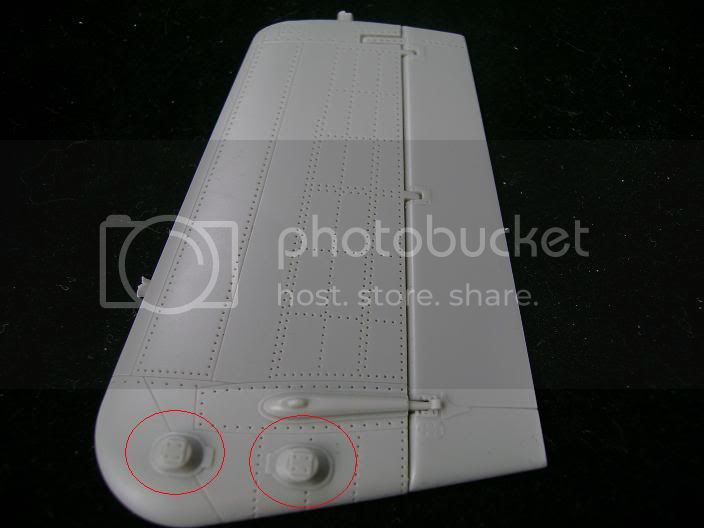
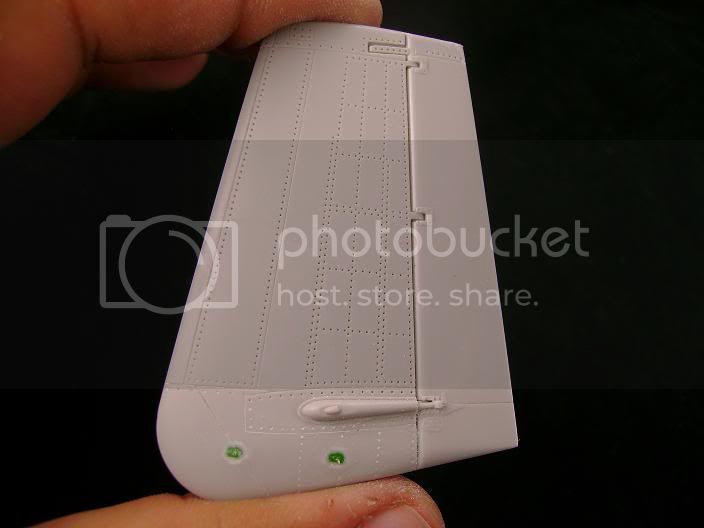
Since a am building an earlier A-10(Before Laste update)I had to remove and fill in the Radar Bumps on the outsides of the vertical stabilizers.
Which brings me to this point....
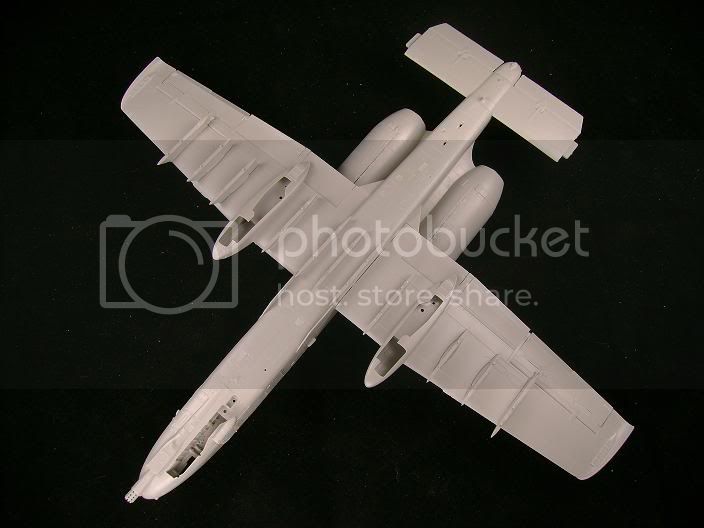
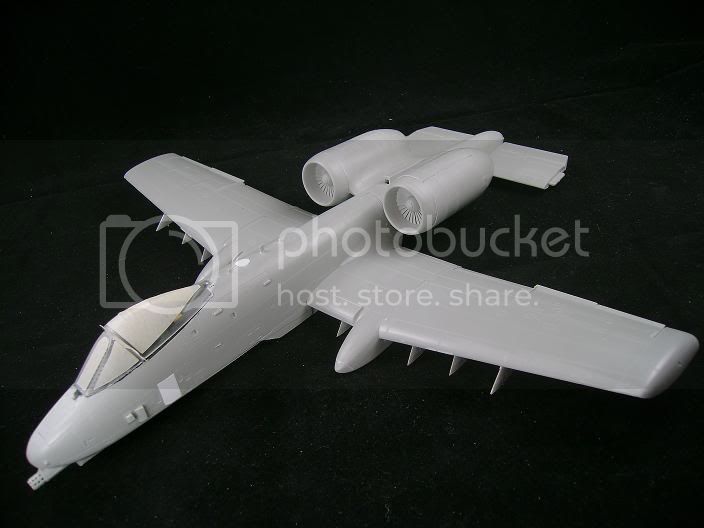
These arrived today.....
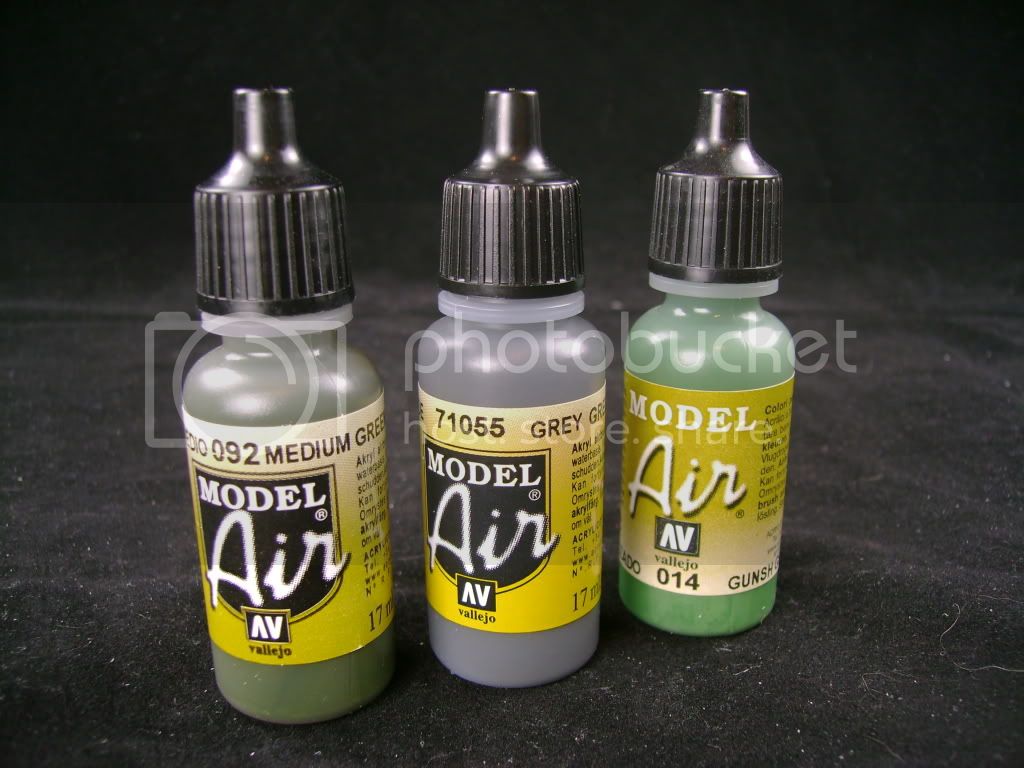
So now I can head down the path to completion
 so I cut out one of the access panels in the side and slipped a few .45's in behind the cockpit
  what a pain!
I then moved on to the antenna on the bottom of the gun vent that is in the wrong position.I've looked at all types of a-10's and 1000's of pic's and I cant find one with it ever being located here.So I moved it to its proper location.

Since a am building an earlier A-10(Before Laste update)I had to remove and fill in the Radar Bumps on the outsides of the vertical stabilizers.


Which brings me to this point....


These arrived today.....

So now I can head down the path to completion


Keeperofsouls2099

Joined: January 14, 2009
KitMaker: 2,798 posts
AeroScale: 2,443 posts

Posted: Friday, August 13, 2010 - 03:41 PM UTC
Got the camo scheme done first with some pre-shading
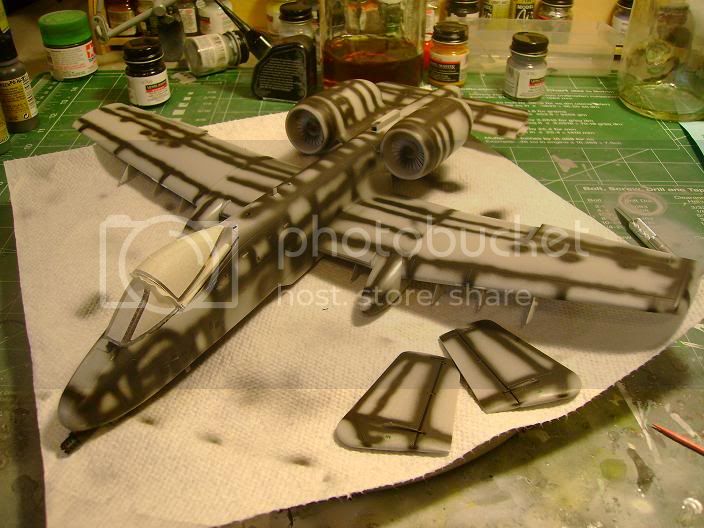
Then since 60%of the scheme was FS34102 using Vallejo 092 medium green.I sprayed 90% of the plane...
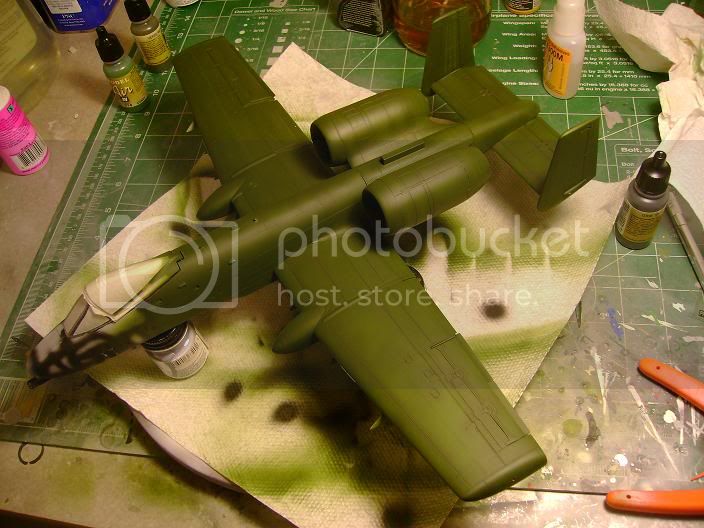
Next step I sprayed FS36081 Vallejo 71055 Grey Green....
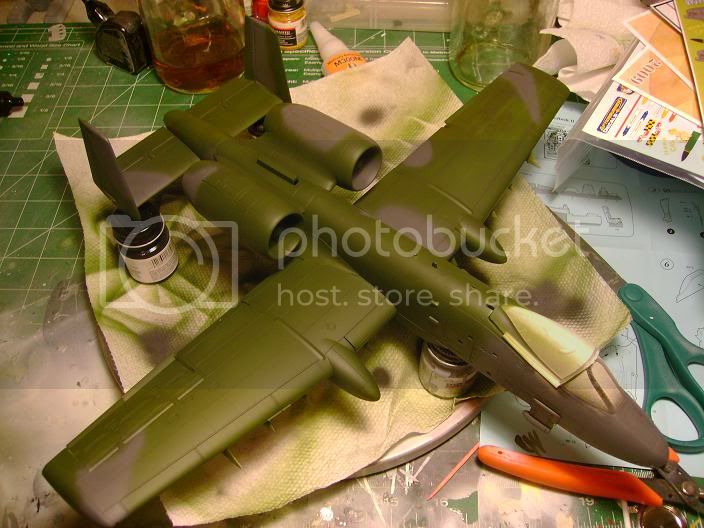
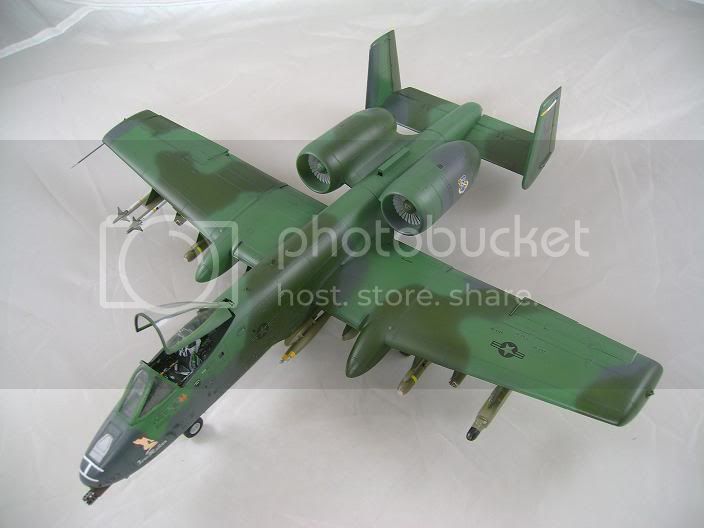
Then finally I sprayed FS34092 Vallejo 014 Gunsh Green and covered in future to let dry for the night.....
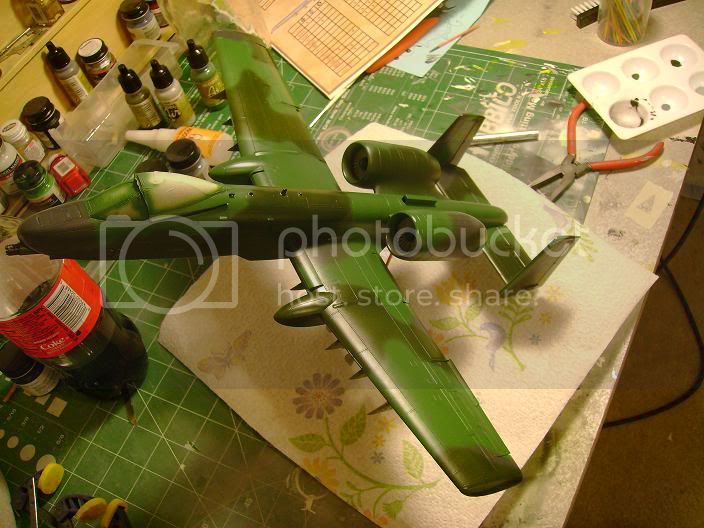
This Gunsh green looks a bit bright so I'm hoping that weathering and a flat coat will tone it down.More soon Hope your enjoying

Then since 60%of the scheme was FS34102 using Vallejo 092 medium green.I sprayed 90% of the plane...

Next step I sprayed FS36081 Vallejo 71055 Grey Green....

Then finally I sprayed FS34092 Vallejo 014 Gunsh Green and covered in future to let dry for the night.....

This Gunsh green looks a bit bright so I'm hoping that weathering and a flat coat will tone it down.More soon Hope your enjoying

hkopper

Joined: March 01, 2008
KitMaker: 529 posts
AeroScale: 340 posts

Posted: Friday, August 13, 2010 - 04:31 PM UTC
Outstanding blog Justin. I'm loving your attention to detail and the paint work is spot on. I'm eagerly waiting for the next uptake!
Hermann.
Hermann.

Keeperofsouls2099

Joined: January 14, 2009
KitMaker: 2,798 posts
AeroScale: 2,443 posts

Posted: Sunday, August 15, 2010 - 02:50 PM UTC
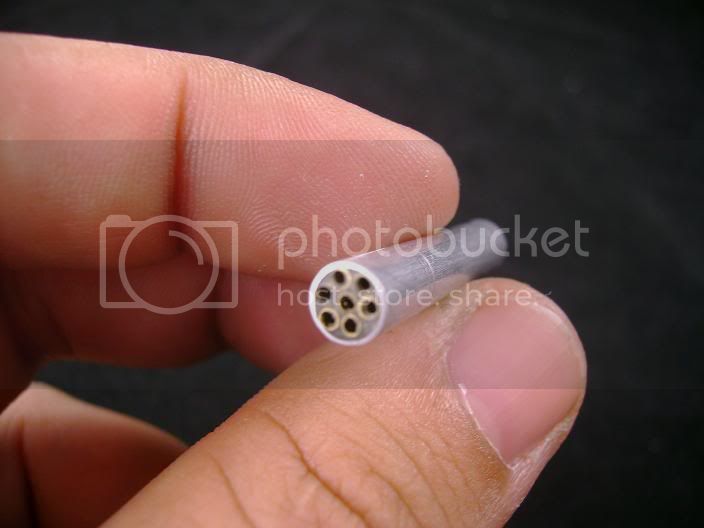
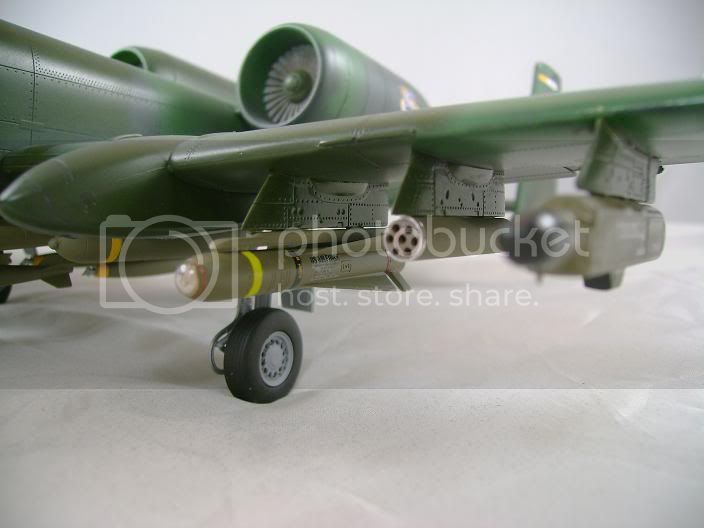
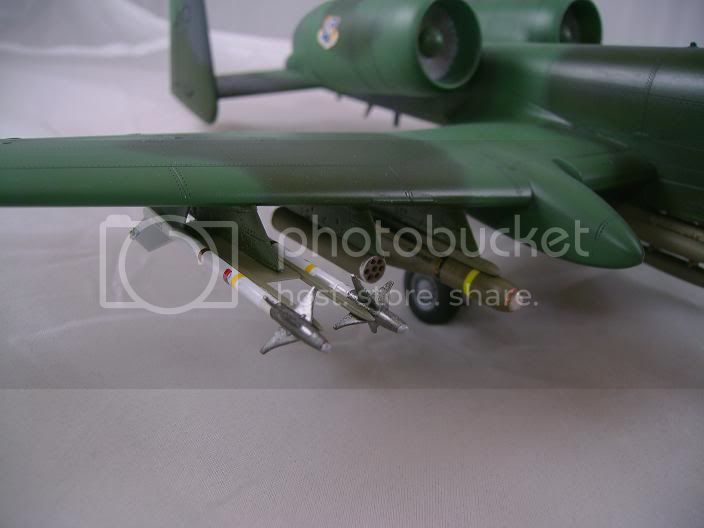
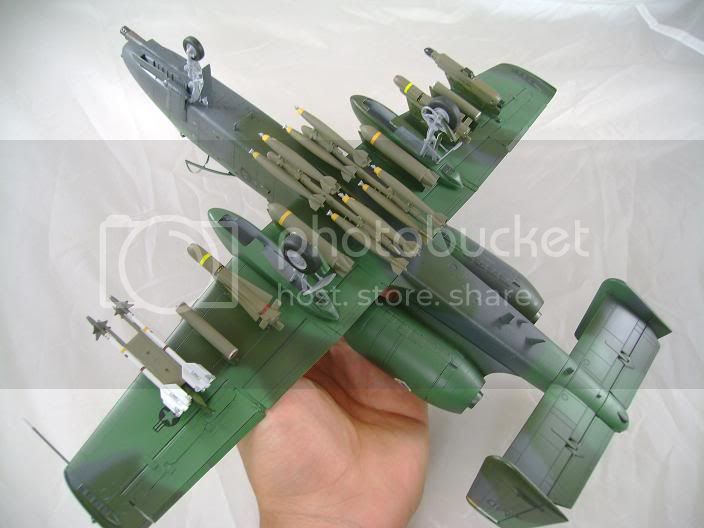
All of the decals on the plane it self are done...so i started turning my attention toward my weapons load.Since the kit does not come with the LAU-131 rocket pod and I wanted one.I searched everywhere and to my surprise no body makes one AF.So I made one.....Using some aluminum and brass tubing I had laying around.
Spending my time assembling all the bombs and missles now update soon

Spending my time assembling all the bombs and missles now update soon


mother

Joined: January 29, 2004
KitMaker: 3,836 posts
AeroScale: 1,036 posts

Posted: Sunday, August 15, 2010 - 05:17 PM UTC
She's really taking shape and looking good, and the painting is nicely done with soft edges. I like your idea for the pod.
For me thats the worst part of building aircraft models.
Happy Modeling
Joe
Quoted Text
Spending my time assembling all the bombs and missles
For me thats the worst part of building aircraft models.
Happy Modeling
Joe

Keeperofsouls2099

Joined: January 14, 2009
KitMaker: 2,798 posts
AeroScale: 2,443 posts

Posted: Thursday, August 19, 2010 - 03:58 PM UTC
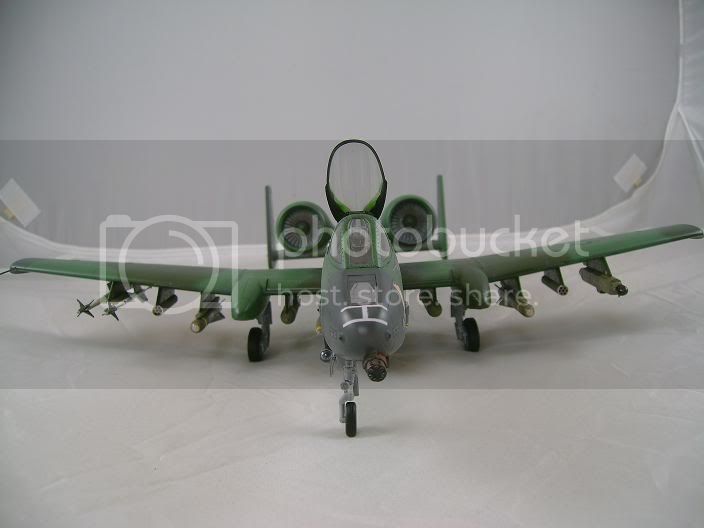
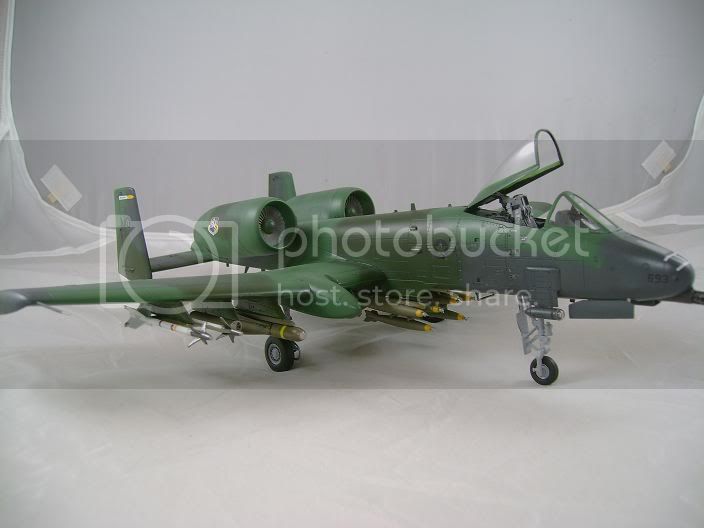
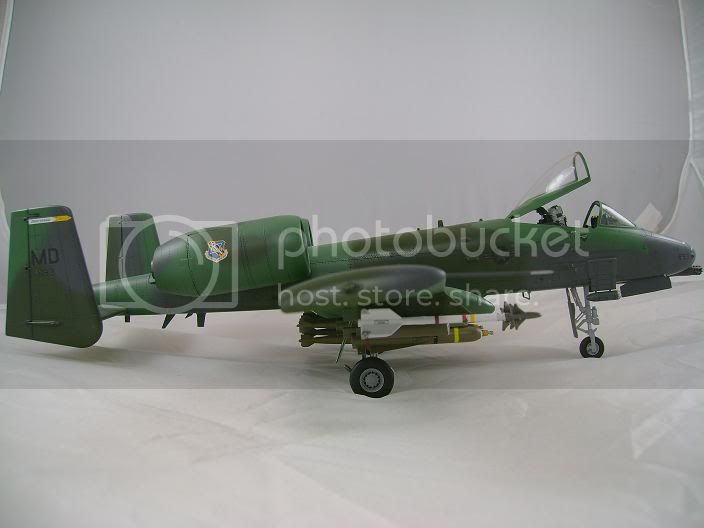
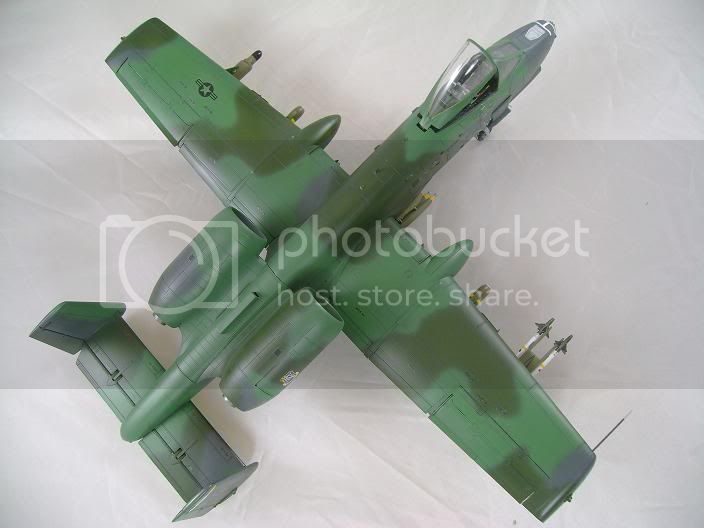
First off I would just like to say that after burner decals are well researched and you are given lots of options.That being said I must of got a bad batch because no matter what I did I could not get most of them to stop silvering.
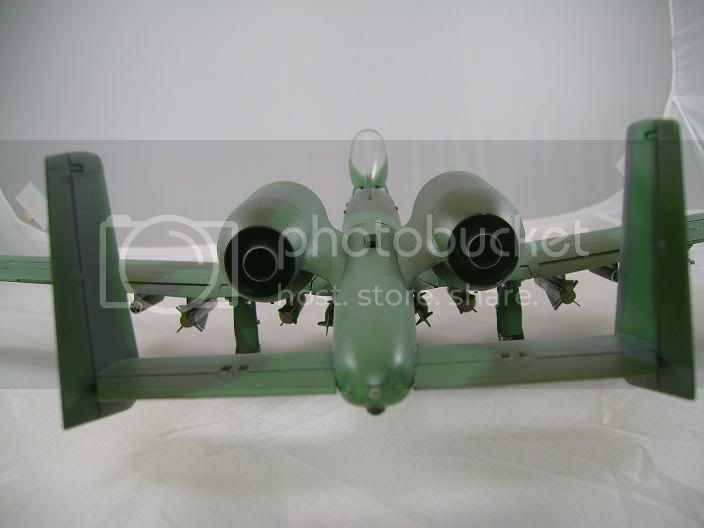
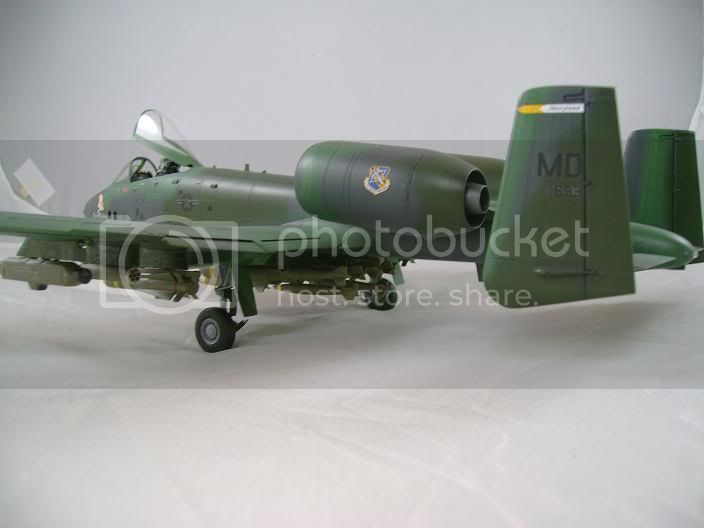
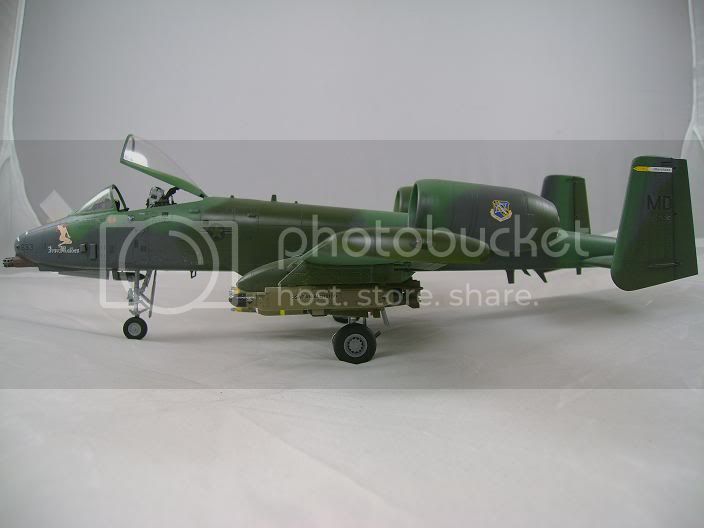
But here it is finished hope you like
Now Im off to the EOD
But here it is finished hope you like


Now Im off to the EOD

 |


