Hello friends, I must to say my great thanks to Terri and this forum, only in 2 days I learned from here, not only one of all the weathering techniques, but the courage to do it too
As many times (I guess) the search of new materials works great, and this is wath happened to me.
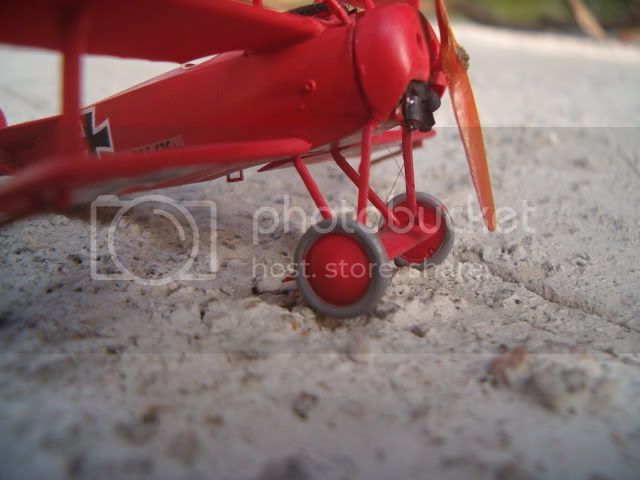
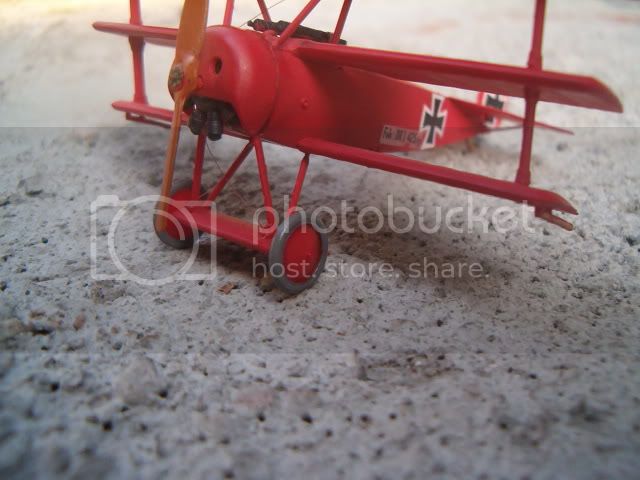
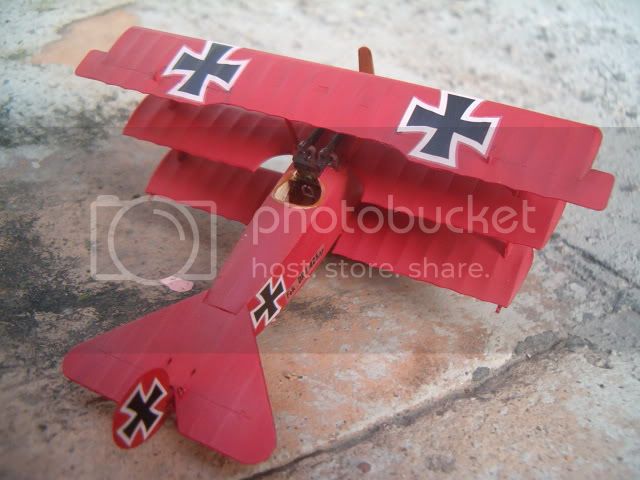
The result is the next pics, I simply thought, if the pastel chalk mixed with water works fine, maybe an water base marker could do...and yes, it works.
The first Terri advice, the model was painted with oil base paint, so the weatering material is water base.
The scarry was present when I started to paint the plane with the dark brown marker...aaahhhh!!!!!!! buy with some cotton cleaned the exes, and some water drop, cleaned more. Until the wanted finish apear...I found the happy feel never did it before, to weather a plane, and it is cool.
The line betwen the rim and weel, the line after the cowling, the aileron lines and ribs.
Thans again.
Cheers.
Al
Before
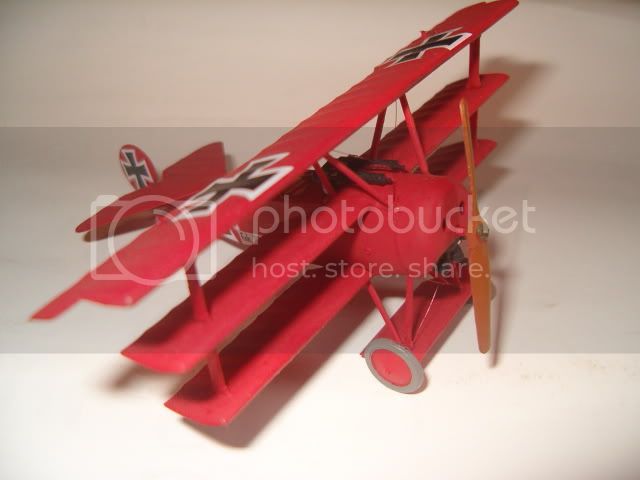
After
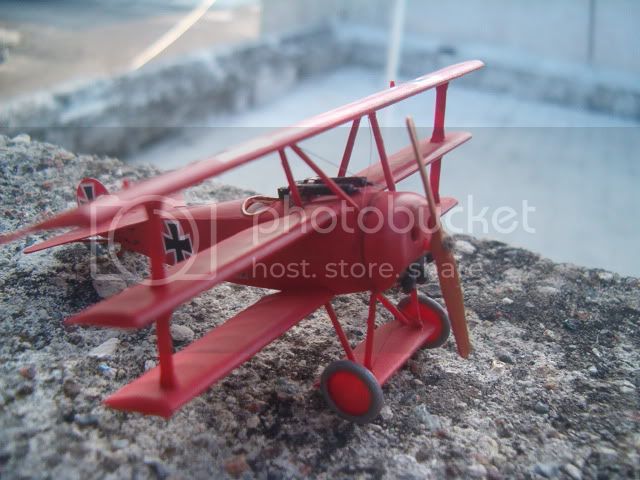
Early Aviation
Discuss World War I and the early years of aviation thru 1934.
Hosted by Jim Starkweather
My first weathering
Rotebaron
Jalisco, Mexico
Joined: August 10, 2010
KitMaker: 182 posts
AeroScale: 179 posts
Joined: August 10, 2010
KitMaker: 182 posts
AeroScale: 179 posts
Posted: Tuesday, August 10, 2010 - 01:45 PM UTC
thegirl
Alberta, Canada
Joined: January 19, 2008
KitMaker: 6,743 posts
AeroScale: 6,151 posts
Joined: January 19, 2008
KitMaker: 6,743 posts
AeroScale: 6,151 posts
Posted: Wednesday, August 11, 2010 - 03:08 AM UTC
Not to bad at all , you did a nice job for your first go at it ! This is what the site is all about ...sharing with others ....
You might find it easier next time if you do the weathering in stages as you build along . For exsample ....once the main colour scheme is on and before you start the final assembly of the kit , It will be easier to weather the parts giving you now room to work on the parts .
The key here is to practice and practice . I'm still learning new methods myself on different ways of doing things .
Thanks for sharing with us !
Rotebaron
Jalisco, Mexico
Joined: August 10, 2010
KitMaker: 182 posts
AeroScale: 179 posts
Joined: August 10, 2010
KitMaker: 182 posts
AeroScale: 179 posts
Posted: Wednesday, August 11, 2010 - 03:24 AM UTC
Thanks Terri, I noticed the weathering stages in another thread, ans as you said, are more room to work.
The last night I continued with the weathering, in middle and low wing and in fuselage, slowly takes more "dust" and looks diferent.
Cheers.
Al
The last night I continued with the weathering, in middle and low wing and in fuselage, slowly takes more "dust" and looks diferent.
Cheers.
Al
Mgunns
Arizona, United States
Joined: December 12, 2008
KitMaker: 1,423 posts
AeroScale: 1,319 posts
Joined: December 12, 2008
KitMaker: 1,423 posts
AeroScale: 1,319 posts
Posted: Thursday, August 12, 2010 - 03:01 AM UTC
Hi Alfredo:
Weathering can be a bit scary at first, like Terri wrote, practice. A little at a time, and in steps. Keep up the good work and the effort, each build is a learning experience that we use to build the next one and so on.
What kit is that?
Best
Mark
Weathering can be a bit scary at first, like Terri wrote, practice. A little at a time, and in steps. Keep up the good work and the effort, each build is a learning experience that we use to build the next one and so on.
What kit is that?
Best
Mark
Rotebaron
Jalisco, Mexico
Joined: August 10, 2010
KitMaker: 182 posts
AeroScale: 179 posts
Joined: August 10, 2010
KitMaker: 182 posts
AeroScale: 179 posts
Posted: Thursday, August 12, 2010 - 03:58 AM UTC
Quoted Text
Hi Alfredo:
Weathering can be a bit scary at first, like Terri wrote, practice. A little at a time, and in steps. Keep up the good work and the effort, each build is a learning experience that we use to build the next one and so on.
What kit is that?
Best
Mark
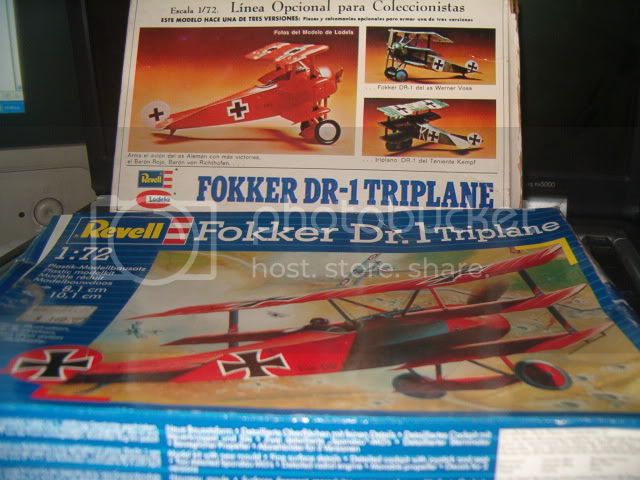
Hi Mark, as you said, definetely each new model is better than the one before, the kit is from Revell, 2003 edition, 1/72 scale,I do not know if it is from Revell Germany, I guess it is.
I wrote an small review in an mexican forum, with the diferences betwen 1983 and 2003 molds, and the deferences are a lot. The 1983 model was fabricated by Lodela, under licence from Revell, and was edited as 3 version to choose one, the red Baron, Voss or Kemps scheme.
Even yesterday I put some more weatering, the clear mat is next.
Cheers
Al
Rotebaron
Jalisco, Mexico
Joined: August 10, 2010
KitMaker: 182 posts
AeroScale: 179 posts
Joined: August 10, 2010
KitMaker: 182 posts
AeroScale: 179 posts
Posted: Thursday, August 12, 2010 - 04:32 AM UTC
The new and the oldie
CaptainA
Indiana, United States
Joined: May 14, 2007
KitMaker: 3,117 posts
AeroScale: 2,270 posts
Joined: May 14, 2007
KitMaker: 3,117 posts
AeroScale: 2,270 posts
Posted: Thursday, August 12, 2010 - 10:53 AM UTC
It is good to see you tried something new. Trying something new is a big step forward, even if it does not work. It is better when it work though. I think you did good.
Rotebaron
Jalisco, Mexico
Joined: August 10, 2010
KitMaker: 182 posts
AeroScale: 179 posts
Joined: August 10, 2010
KitMaker: 182 posts
AeroScale: 179 posts
Posted: Thursday, August 12, 2010 - 02:48 PM UTC
Thanks for the words Carl, now I goint to use the putty an D Vll needs some in turtle deck, even I painted it, the fuselage line is not straight where the stick/hole asambly in fuselage both halfs, so to putty and sand.
Cheers.
Al
Cheers.
Al