_GOTOBOTTOM
World War II: France
French aircraft of WWII
Hosted by Rowan Baylis
Classic Airframes MS.406
vanize
_VISITCOMMUNITY
Texas, United States
Joined: January 30, 2006
KitMaker: 1,954 posts
AeroScale: 1,163 posts
Posted: Wednesday, August 11, 2010 - 12:29 PM UTC
Starting a build log for the 1/48 scale Classic Airframes MS.406 I am building for the "Summer 1940" campaign.

The build, as usual, started with the cockpit. While the resin for this area is nicely done, the instructions don't really give you the greatest idea about positioning, which turns out to be fairly critical for this kit.

I had to remove the sidewall resin pieces after super-gluing them on to move them down about 0.3 cm. luckily they popped off without shattering (I have no idea how i managed that...)

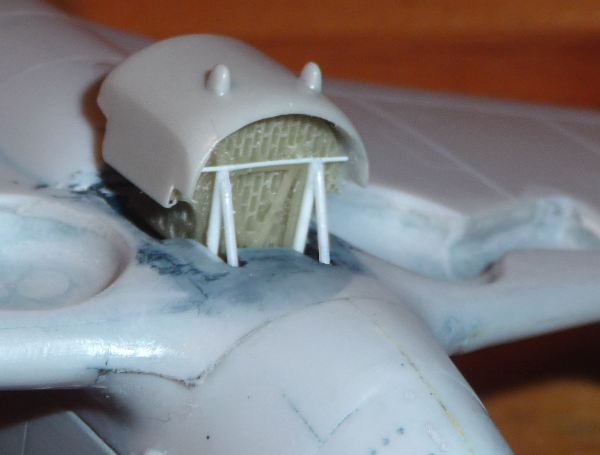
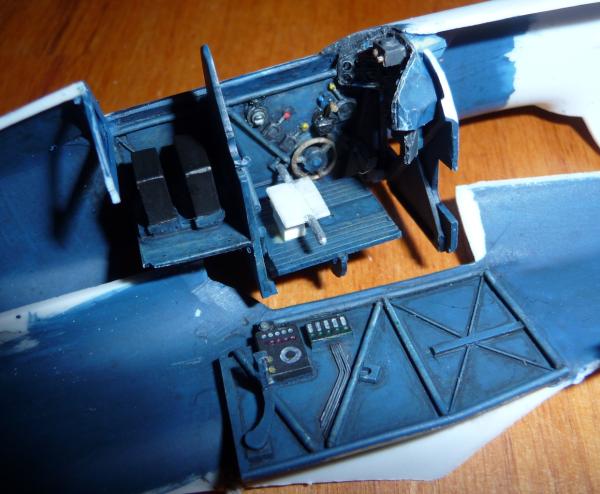
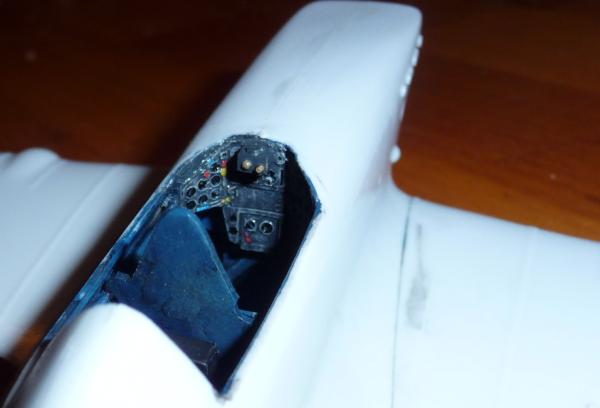
eventually I got the parts in what I think is the proper places. I used Polly S "Israeli camo blue" for the interior color, tinted with a liberal dark brown and black wash and dry brushed with a gray-blue. I think the comes about as close to the odd interior blue the French used in the time period as I can manage. CA would have you paint the cockpit medium gray. I doubt this is correct, but i could be wrong.

I added a bit of detail for the throttle, but everything else is pretty much kit-stock. I still need to add the glass for the gun sight, and I will insert the seat later - I got anxious to put the fuselage halves together.


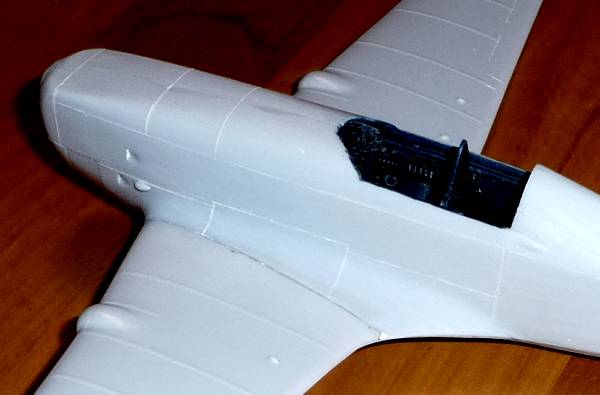
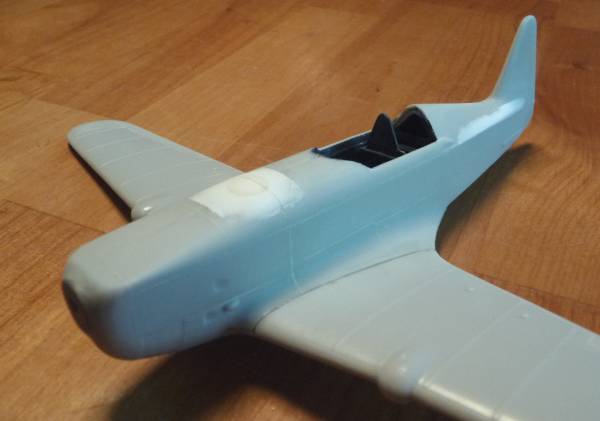
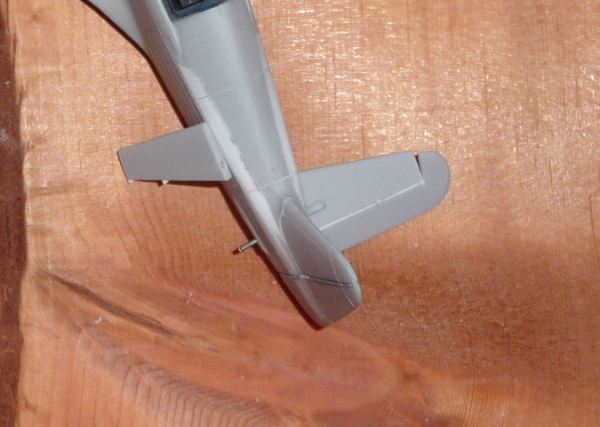
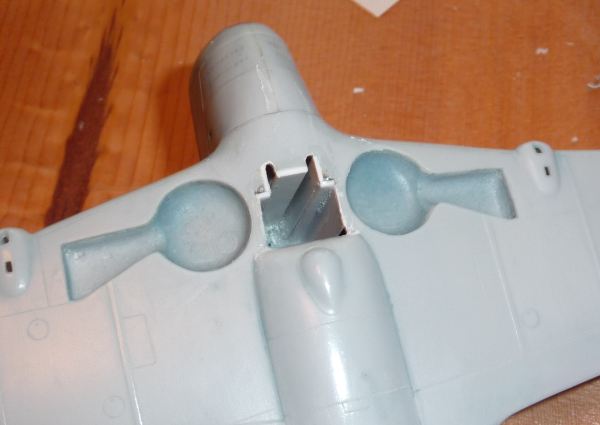
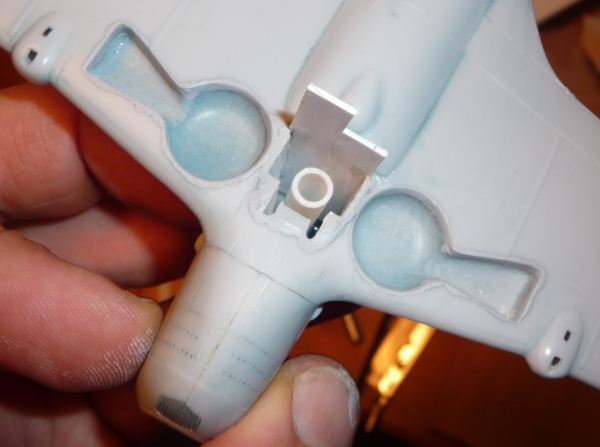
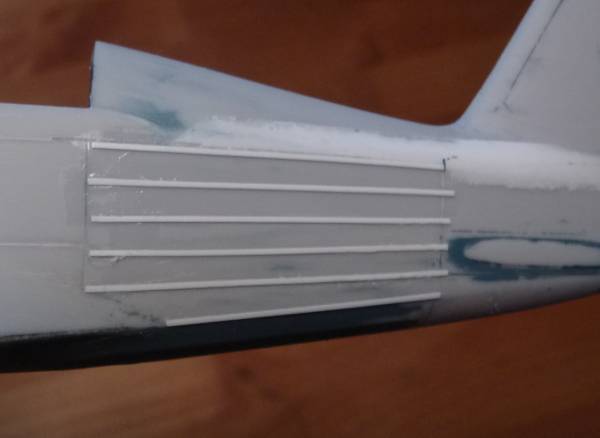
The inserts for the landing gear bays stand proud enough that you have to file/dremel away some of the thickness of the upper wing to get the wing halves to mate (worse on the starboard side for some reason). The fuselage halves were both warped, making it a challenge to get a straight body. But the body and wings went together well enough otherwise. I spent a fair bit of time filing the trailing edges of the wings both before and after assembly to get a suitably sharp trailing edge.

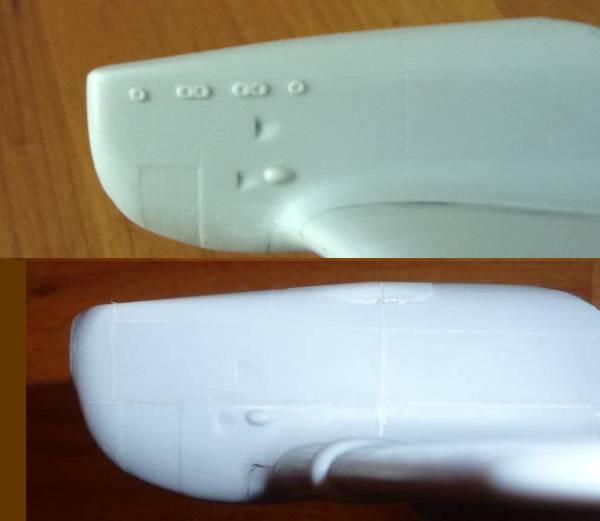
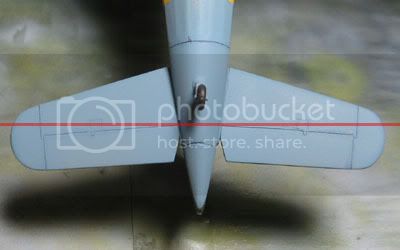
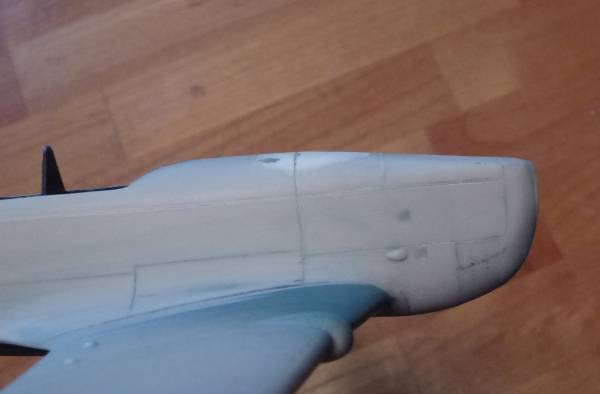
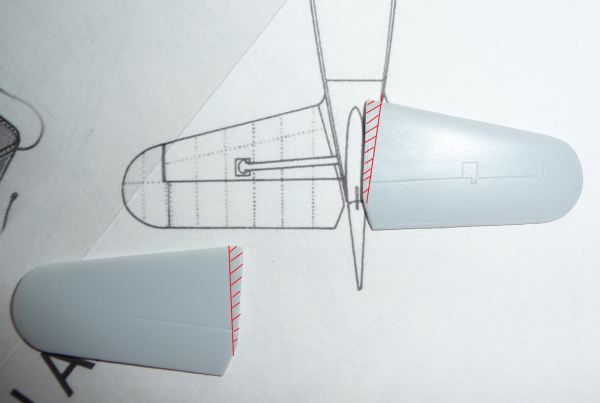
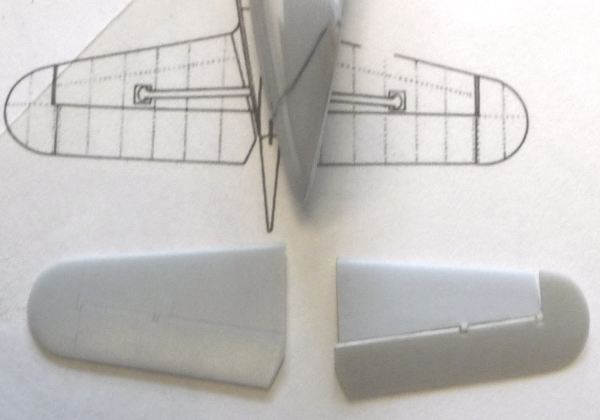
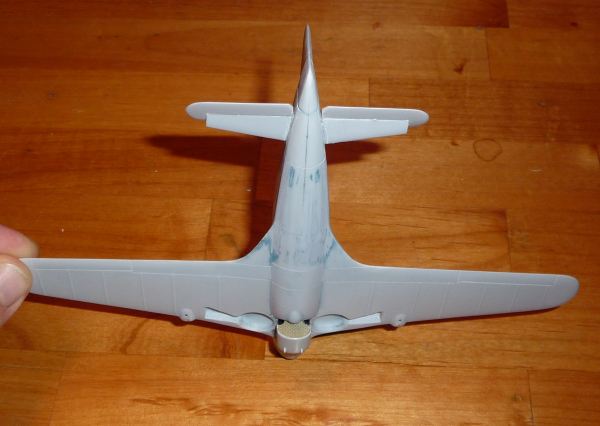
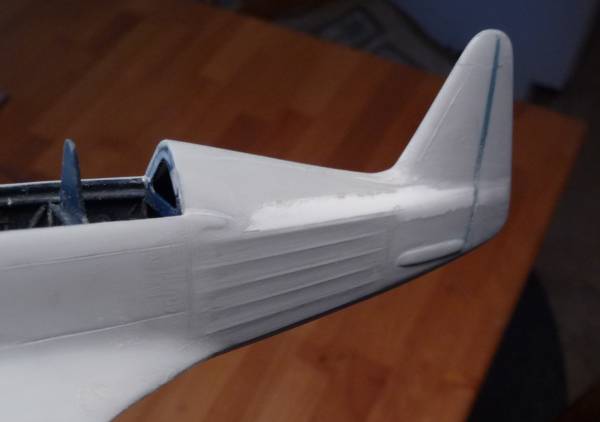
The nose shape is just not correct. compair:


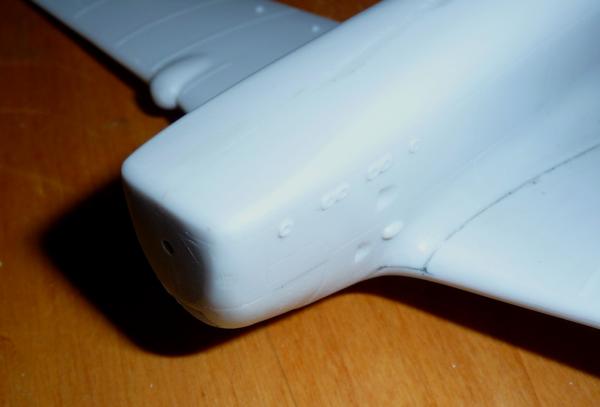
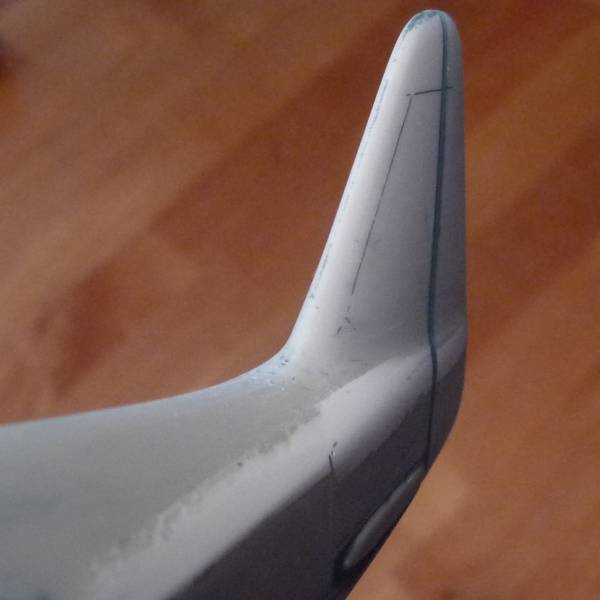
After some reshaping, I added a disk to the front (from a hurricane spinner hub, ground smaller in diameter by chucking it in my dremel and holing it against a file) and faired that in with epoxy putty:


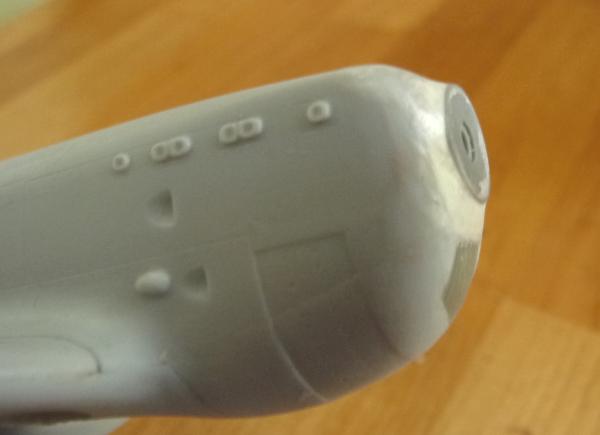
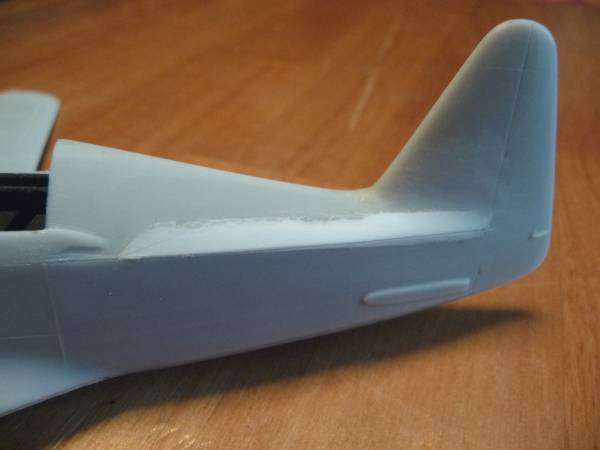
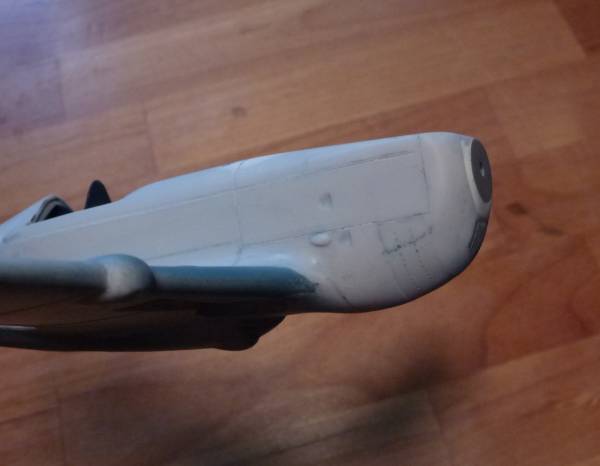
The nose shape still needs some more attention, and it is never going to be spot on to the real thing, but my efforts are making it look like a fair representation - I hope...

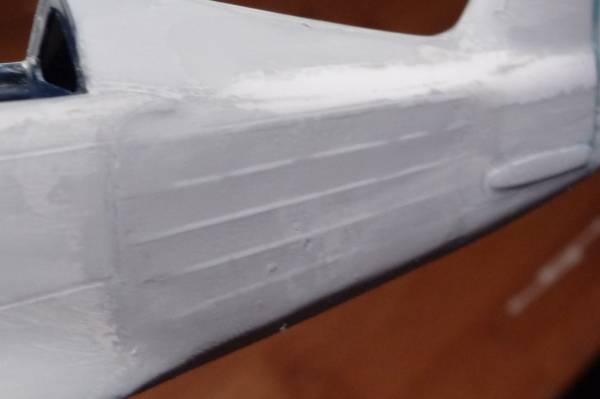
you can see in the last picture that the plastic has some fairly deep scratches in it in places. The kit came into my possession that way and either happened at the factory or while in the sealed plastic bags. The plastic is very soft, but this is the worse instance i have ever seen of this.
vanize
_VISITCOMMUNITY
Texas, United States
Joined: January 30, 2006
KitMaker: 1,954 posts
AeroScale: 1,163 posts
Posted: Friday, August 13, 2010 - 04:54 AM UTC
MY next pair of issues with this kit are:

1. the longitudinal panel lines. These are quite predominant on the MS.406 and the top one is straight to length of the for-fuselage from the rear of the cockpit to the nose. The kit has this line with a crook at the firewall, which gives the kit a sort of nose-down appearance which bugged me.

The lower panel line on the kit is straight all the way across, but one of the wing fairing panels actually breaks this line mid-way on the real thing. The Kit also lands this panel line too high in the nose area. It should terminate at the rear edge of the depressed grill area.

I filled in the panel lines with CA and sanded smooth.

2. The next issue is the exhaust outlets. These should run parallel to the panel lines mentioned above. In the kit, they run roughly parallel to the crooked panel line, emphasizing the nose-down appearance. Also, on the port side, the rear exhaust port is not in line with the others.

So, while sanding the panel line filler smooth, I took off the molded-on exhaust port as well. Still not sure what I am going to do about replacing them, but I'll sort something out.

All that said, here is the picture that says all the above much more succinctly:


compare to:


panel lines and exhausts sanded down and wing fairing panel line detour marked out:


Correct panel lines scribed in:


Emeritus
_VISITCOMMUNITY
Uusimaa, Finland
Joined: March 30, 2004
KitMaker: 2,845 posts
AeroScale: 1,564 posts
Posted: Friday, August 13, 2010 - 06:14 AM UTC
Nice work so far!
Good job going on those corrections. That cockpit took some TLC to get fitting nicely between the fuselage halves, no?

While doing those corrections, take a look at the stabilisers too. Having finished the MPM Mörkö-Morane, I was told the kit has the stabiliser spar line inaccurately angled back, while it should be straight as it's a single-spar structure. And as the Mörkö kit is (to my knowledge) basically the CA kit with a modified fuselage, I presume the stabiliser issue is there too.

Do you have any particular paint scheme and markings selected yet?

NickZour
_VISITCOMMUNITY
Attica, Greece / Ελλάδα
Joined: May 01, 2008
KitMaker: 1,437 posts
AeroScale: 1,241 posts
Posted: Friday, August 13, 2010 - 10:41 AM UTC
That's a really interesting build topic

The funny think is that I was reading about this aircraft yesterday night before go to bed

Mörkö=Ghost (I just read it )

Keep going


Cheers Nick
vanize
_VISITCOMMUNITY
Texas, United States
Joined: January 30, 2006
KitMaker: 1,954 posts
AeroScale: 1,163 posts
Posted: Wednesday, August 18, 2010 - 03:02 AM UTC

Quoted Text


While doing those corrections, take a look at the stabilisers too. Having finished the MPM Mörkö-Morane, I was told the kit has the stabiliser spar line inaccurately angled back, while it should be straight as it's a single-spar structure. And as the Mörkö kit is (to my knowledge) basically the CA kit with a modified fuselage, I presume the stabiliser issue is there too.

Do you have any particular paint scheme and markings selected yet?


Eetu,

Thanks for the heads up on the stabilizer. I'm still trying to figure out what the issue on that might be though...

Indeed the cockpit was a bear to fit into the cockpit. I wound up reducing the width of the resin cross pieces by a couple mm to help with this.

I am starting to think I will do the markings of one of the birds flown by polish pilots in France in the summer of 1940 - 3 tone camo on the upper surfaces with polish markings on the fuselage and french on the wings and tail.
vanize
_VISITCOMMUNITY
Texas, United States
Joined: January 30, 2006
KitMaker: 1,954 posts
AeroScale: 1,163 posts
Posted: Wednesday, August 18, 2010 - 03:20 AM UTC
So the shape of the nose was still bothering me, and after looking looking at photos like the ones below, I realized that the panel in front of the cockpit is flat and the angle to the nose only starts from the cowling cover forward. Almost all the 3-view drawing get this wrong!:


after sanding the are in front of the cockpit as flat as possible without going thru the plastic (we'll see how the windscreen fits after that soon enough!), I laminated a couple pieces of sheet styrene to the area I had to build up to match the make that panel horizontal and add the extra slope on the back part of the cowling. after some initial shaping, I smoothed everything in with CA glue, finalized the shape, and added the panel lines back in.

The following photo shows the result (along with the nose reshape), comparing it to the initial shape of the kit's forward fuselage:


I feel this really starts to give the project a feel much more like a MS 406 than it had before, and I am more or less happy enough with the shape of the nose now to move on... to the rear fuselage!

In an earlier post, I mentioned that the line running down the fuselage from nose to tail is prominent and obviously straight. My previous correction only fixed that for the front 2/3rds of the model, and I tried to leave the back part of this panel line alone.

But after looking at more photos that also made me think the rear fuselage needed a little more vertical depth and less on the rounded top area nearest the tail.

In the end I just couldn't leave it. So I glued on some plastic stock, shaped it to include enough additional vertical height near the tail to get that panel line straight, smoothed it out with more CA and added the panel line in:


I will now have to restore the fabric detail on the side of the fuselage.

I'm hoping that is the last of the major body mods I will be doing with this kit.

Here is a wider view of how she looks now:


As mentioned in the last post, here is what I think I may go for in terms of markings:


The nearest plane actually solves the problem I made for myself having sanded off the exhausts because the classic airframes kit includes that exhaust type in resin.


Emeritus
_VISITCOMMUNITY
Uusimaa, Finland
Joined: March 30, 2004
KitMaker: 2,845 posts
AeroScale: 1,564 posts
Posted: Wednesday, August 18, 2010 - 03:36 AM UTC

Quoted Text


Thanks for the heads up on the stabilizer. I'm still trying to figure out what the issue on that might be though...


Sorry, I probably could have been a bit clearer. Here:

The elevator hinge lines are angled while they should be perpendicular to the fuselage centerline.
jaypee
_VISITCOMMUNITY
Scotland, United Kingdom
Joined: February 07, 2008
KitMaker: 1,699 posts
AeroScale: 1,384 posts
Posted: Wednesday, August 18, 2010 - 03:36 AM UTC
What a difference that sculpting the nose makes! watching with interest.
vanize
_VISITCOMMUNITY
Texas, United States
Joined: January 30, 2006
KitMaker: 1,954 posts
AeroScale: 1,163 posts
Posted: Wednesday, August 18, 2010 - 03:51 AM UTC

Quoted Text


Quoted Text


Thanks for the heads up on the stabilizer. I'm still trying to figure out what the issue on that might be though...


Sorry, I probably could have been a bit clearer. Here:

The elevator hinge lines are angled while they should be perpendicular to the fuselage centerline.


ah! ok, clear now. I thought that might have been what you meant. thanks, I'll look out for that. =)
vanize
_VISITCOMMUNITY
Texas, United States
Joined: January 30, 2006
KitMaker: 1,954 posts
AeroScale: 1,163 posts
Posted: Friday, August 20, 2010 - 10:06 AM UTC
I just stumbled across a great reference book for the MS 406 in the used book area of my LHS. I see now that my nose correction is somewhat exaggerated and the reality is about 1/2 way between my fix and the kit's representation.

I need to digest this for a bit and also decide how much of the rest of the kit I am going to edit given the new wealth of info (and wonder why i do this to myself!)

to that end I am going to switch over to my builds for the "seaplanes" and "twin booms" campaigns for a bit.
vanize
_VISITCOMMUNITY
Texas, United States
Joined: January 30, 2006
KitMaker: 1,954 posts
AeroScale: 1,163 posts
Posted: Sunday, September 05, 2010 - 12:49 PM UTC
Managed to get this build back on the front burner for a day.

After studing my new reference, I decided that the lower tail needed some beefing up, as even the rudder has a slight bulge where the main fuselage meets it.

To replicate this, more plastic strip was added, CA glue used as a filler, and everything was shaped and blended in:


I also re-reshaped the nose, mainly making the cheeks narrower and reducing the length of my addition by about 40%


vanize
_VISITCOMMUNITY
Texas, United States
Joined: January 30, 2006
KitMaker: 1,954 posts
AeroScale: 1,163 posts
Posted: Monday, September 13, 2010 - 05:57 AM UTC
I managed to get some work in on the MS.406 this weekend. This project continues to be a modification snowball.

As Emeritus mentioned (thanks again for the heads up!), the horizontal stabilizers attach to the fuselage at the wrong angle, as shown when the kit parts are offered up to the 1/48 scale line drawing conveniently supplied in my recent used book MS.406 reference. The shaded areas need to be removed for the elevators to be perpendicular to the flight path as they are on the real thing:


Since most pictures of the MS.406 show the elevators drooping (and the rest of the flight control surfaces in the neutral position, thankfully), I decided to use a fine saw to cut them off and reposition them (with some extra detail work for the hinges). Right one almost done (some slight reshaping of the inner edge of the elevator still needed), left one as per the kit.


I inserted a metal pin through the rear of the fuselage and drilled out receiving holes to give the horizontal tailplane attachment points some strength:


The radiator on the on this bird was odd. It was mechanically extended or retracted depending on cooling needs instead of the usual method of using louvers to control the airflow over the radiator. I decided to model this unique feature open, but the Classic airframes kit supplied no opening or bay for the radiator to retract into. Even my reference had no clear picture of the bay opening, so I had to infer and guess a little:


Here is it my attempt at it (mostly done) with a plastic tube added to give the resin radiator supplied with the kit something to attach to:


The kit radiator gave a token hint of the framework associated with it, but I decided to beef it up to look more like the real thing. It isn't exact, but it gives the general idea. I used the the plastic part of the hobbycraft version of the MS406 for the radiator housing instead of the CA one as it is molded cleaner and had more plastic available for removal to enable the subtle shape modifications it needed (note flattened sides):


And finally the kit is starting to take the general outline of its final shape:


Lots to do still, but the last major modification is the propeller hub, which I still don't have a good idea on how to execute...
Emeritus
_VISITCOMMUNITY
Uusimaa, Finland
Joined: March 30, 2004
KitMaker: 2,845 posts
AeroScale: 1,564 posts
Posted: Monday, September 13, 2010 - 07:33 AM UTC
Great work on all those modifications! I especially like that lowered radiator.
chukw1
_VISITCOMMUNITY
California, United States
Joined: November 28, 2007
KitMaker: 817 posts
AeroScale: 729 posts
Posted: Monday, September 13, 2010 - 09:20 AM UTC
Wow, Vance- that's some truly fine work! You're polishing this old kit quite nicely, and I love the idea of some good Polish markings and camo.

Cheers!
chuk
vanize
_VISITCOMMUNITY
Texas, United States
Joined: January 30, 2006
KitMaker: 1,954 posts
AeroScale: 1,163 posts
Posted: Tuesday, September 14, 2010 - 06:44 AM UTC

Quoted Text

Wow, Vance- that's some truly fine work! You're polishing this old kit quite nicely, and I love the idea of some good Polish markings and camo.

Cheers!
chuk


Thanks Chuck!

Wow, it is an honor to have you comment on my post. your work (both the modeling and the drawing) is amazing!

Point in fact, it is your helldiver and the Me 410 that inspired me into getting so busy with this build


vanize
_VISITCOMMUNITY
Texas, United States
Joined: January 30, 2006
KitMaker: 1,954 posts
AeroScale: 1,163 posts
Posted: Tuesday, September 14, 2010 - 06:46 AM UTC

Quoted Text

Great work on all those modifications! I especially like that lowered radiator.


Thanks!

I came close to modeling the radiator closed because I am kind of getting weary of making modifications to this build, but I am glad i did now that I have (more or less) finished it.

vanize
_VISITCOMMUNITY
Texas, United States
Joined: January 30, 2006
KitMaker: 1,954 posts
AeroScale: 1,163 posts
Posted: Tuesday, September 14, 2010 - 06:55 AM UTC
So I totally forgot to post my in-progress pictures of restoring the fabric detail I lost while making the shape changes to the rear fuselage.

These should have come before my last picture post, but whatever, they are here now...


To restore the fabric surface detail on the rear fuselage, I started by laying down some strips of 0.01" x 0.02" plastic strip in some approximation of the ribbing layout:


Then I trimmed and sanded the edges flush with the metal panels:


Three of layers of Mr. Surfacer 500 liberally glopped on:


After that dried, I smoothed it out with 91% rubbing alcohol using my finger:


Another layer of mr surfacer and some careful sanding with 400 wet or dry in the direction of the ribs yielded this:


I'm pretty happy with the result. Though a little more work is required to get it perfect, I feel it is already better than the kit rendition of the fabric surface. =)
 _GOTOTOP