_GOTOBOTTOM
World War II
Discuss WWII and the era directly before and after the war from 1935-1949.
Hosted by Rowan Baylis
Eduard 1:32 Bf 109E-7 Build Kornbeef
Kornbeef
_VISITCOMMUNITY
England - South East, United Kingdom
Joined: November 06, 2005
KitMaker: 1,667 posts
AeroScale: 1,551 posts
Posted: Saturday, August 28, 2010 - 05:38 AM UTC
Hi all, some may not know me, I lurk normally in the early aviation forum.

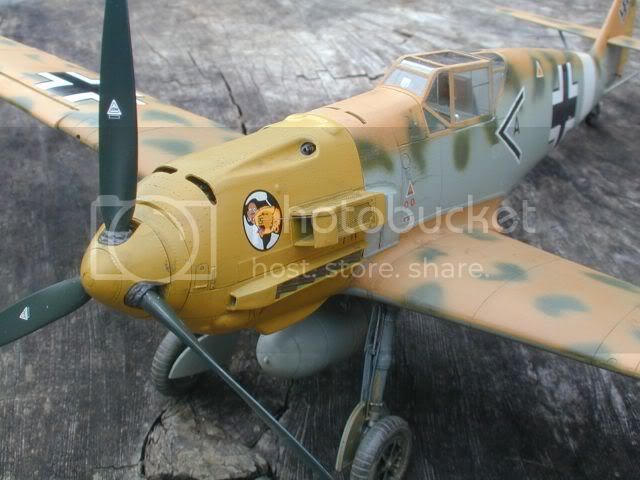
I picked this kit up by impulse a few days back, after giving up on the Trumpeter E-3 when I found the cockpit all wrong.

I know Eduards 109s have had a fair share of critiscism but thought after reading about this it sounded a good build. Assesing things I found a few things that suprised me, besides the vast difference between Trumpie and Eduards offerings, some good and some bad on both sides.

Anyway I dived in, now anyone knows my builds from the EA forum knows I seldom take the easy route.

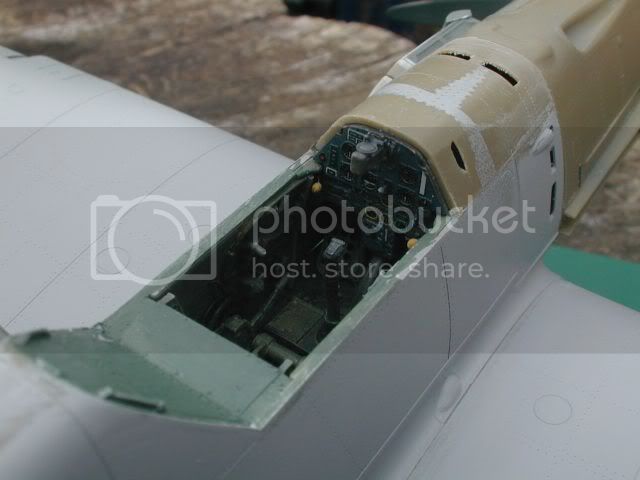
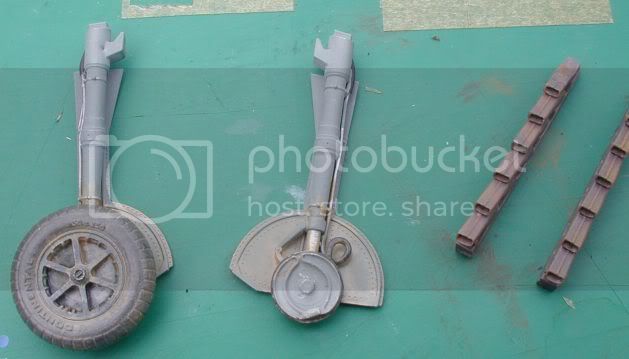
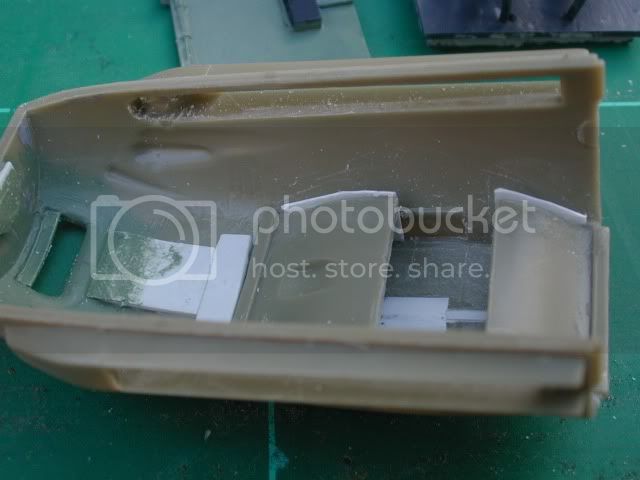
A trip to hannants website saw me armed with a set of quickboost exhausts, a set of resin wheels, An Aires cockpit update set.. An Eduard detail set..naughty as I believe personally this should be part of the kit, half of whats in it could be better represented in plastic with a little work.
And afterwards scribing template.


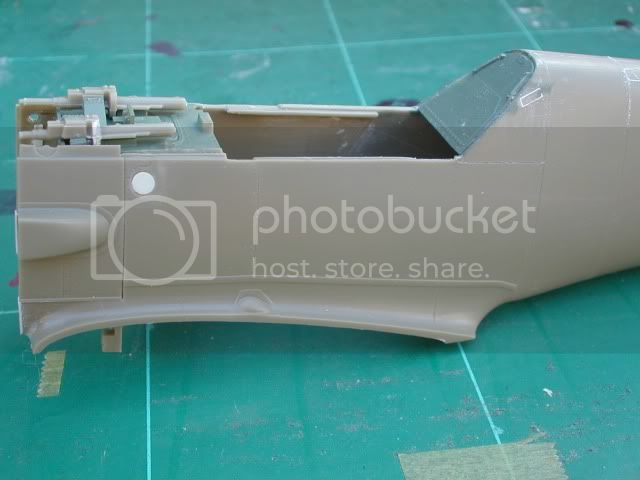
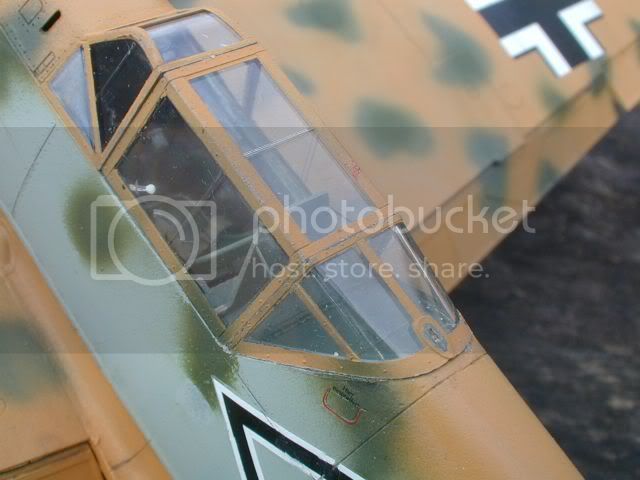
okay... hand hold mispositioned, her its filled but waiting to be rescribed. Now on this I have 2 sets of plans, one shows hand holds both sides as per the kit, the other and pics show only the left. I filled the right one. Oil filler on the eduard was miniscule, and is quite prominant I think.


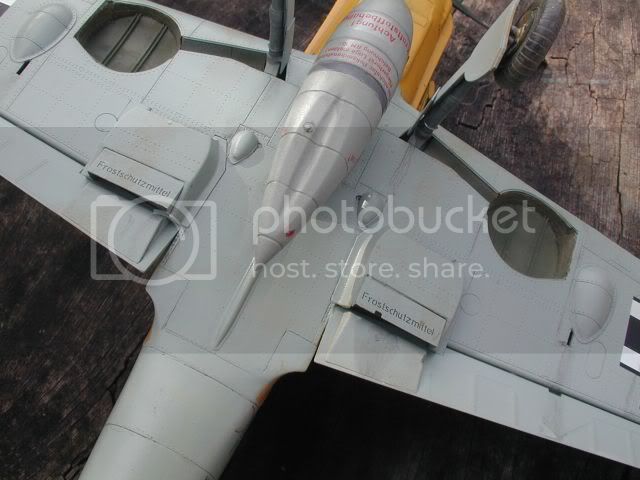
Fuel filler is in the right place I think but wrong shape, however the fuselage section line is too far back, moving the cap and making it the right shape seemed an easier option.


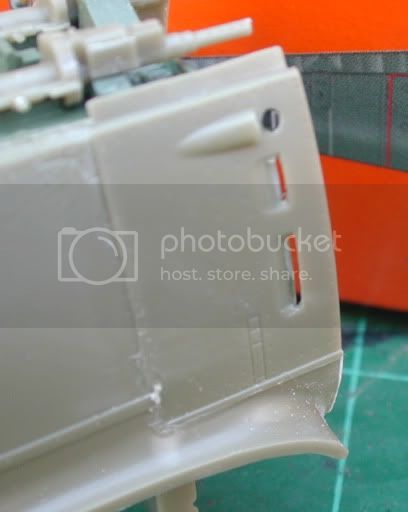
I just love opening up vents..sorry!


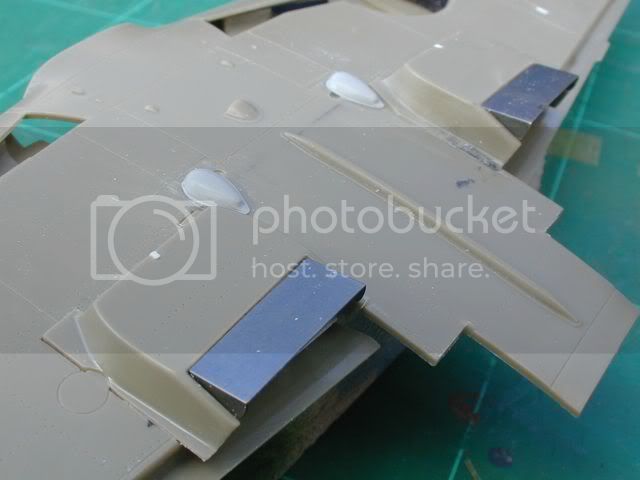
Ejection ports misplaced? and I think the blisters are out of position too, but I'm taking them as is, for now at least.


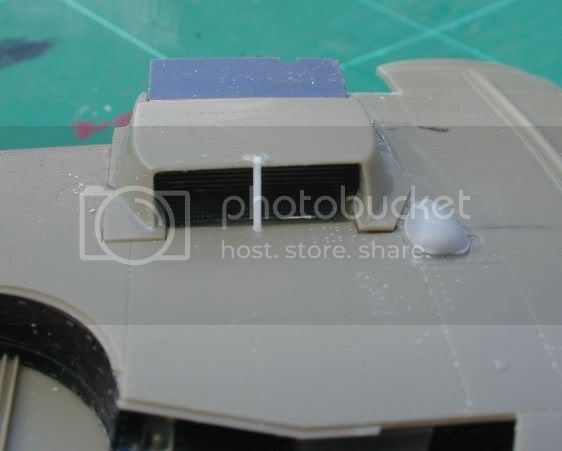
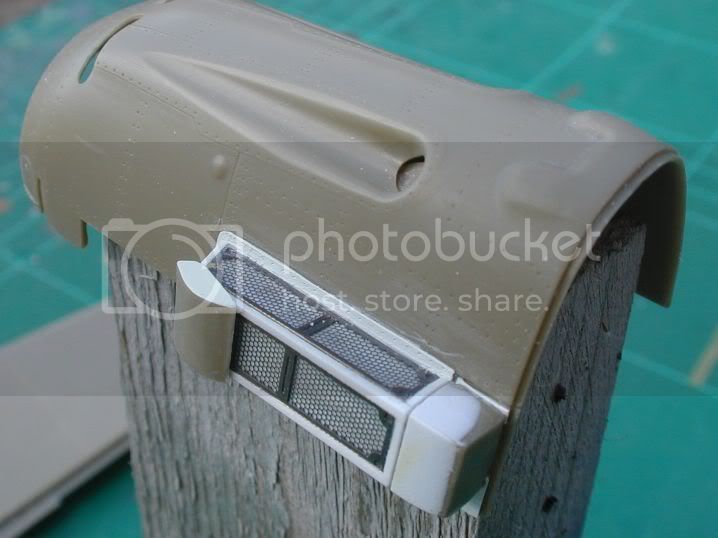
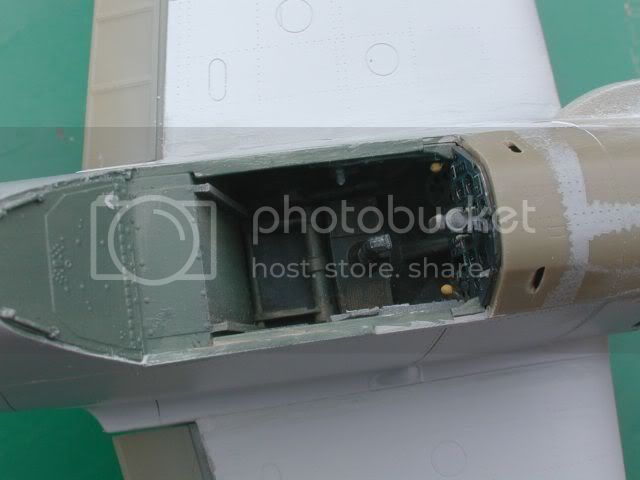
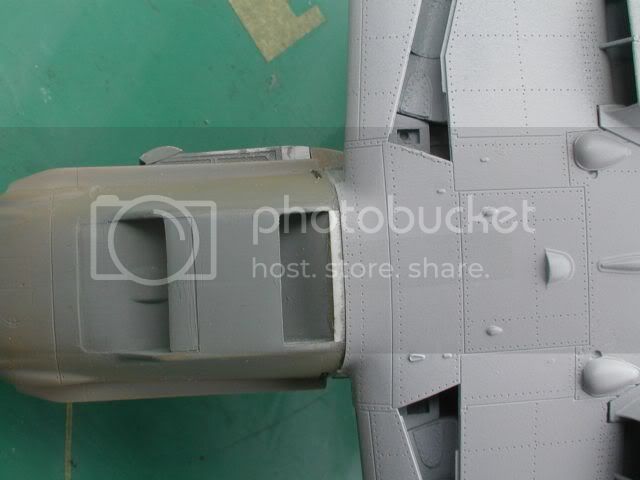
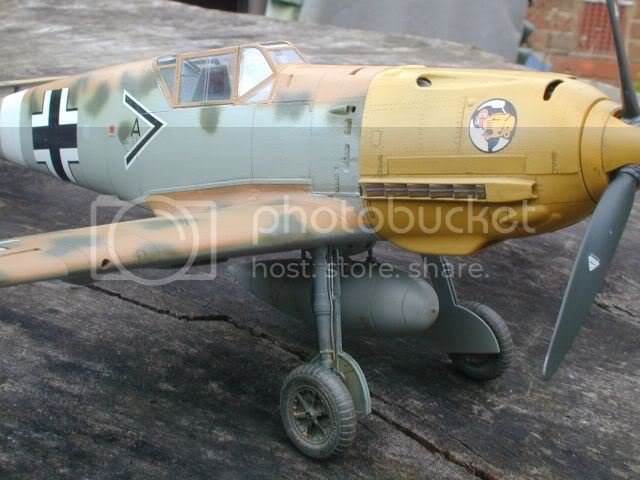
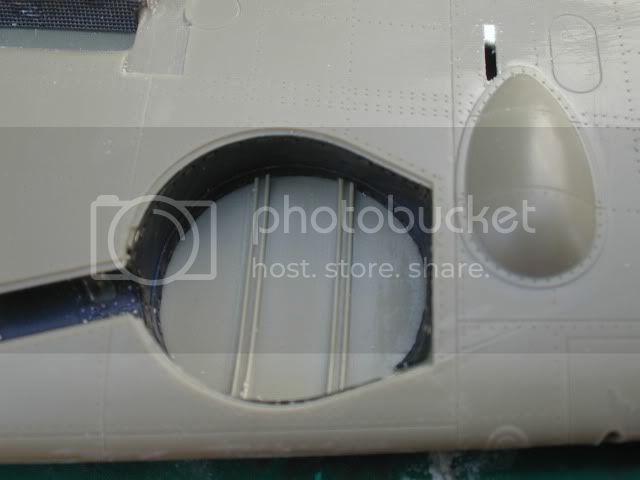
I cut the underside of the nose off to work on it, this is a very poor area on the kit I thought. Trumpeter handled it better in a way but got the shape wrong. Eduard handled it well but could have put more thought into it
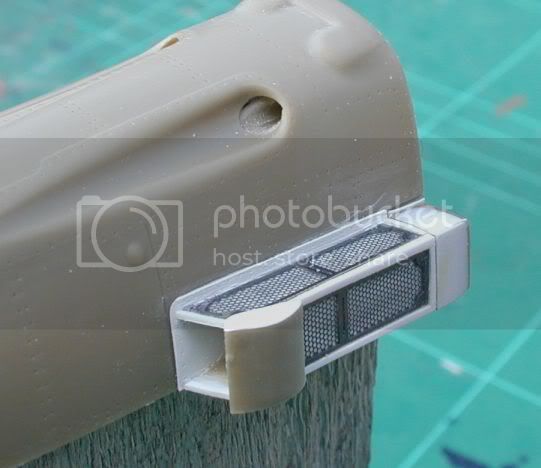
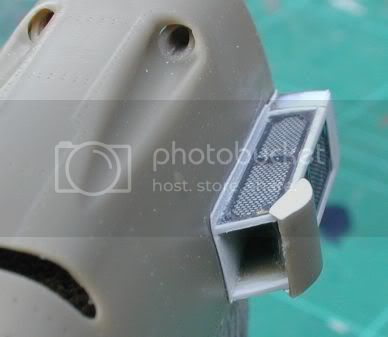
So I stregnthened the area generally, made up the cheek fillets in the rad intake and exit, wanted to paith the component parts seperately so chopped it as you see. I cut in the panel lines in front and under the intake, trying to reproduce the lapped over effect. Now in pics of the trop I cant see any with the extra vane in the intake so left that out., I have to make the flap for the rear still though. I happily carved out all the fastener locations to fit the eduard etched ones, only to find there isnt enough on the fret...NOT HAPPY Mr Eduard!

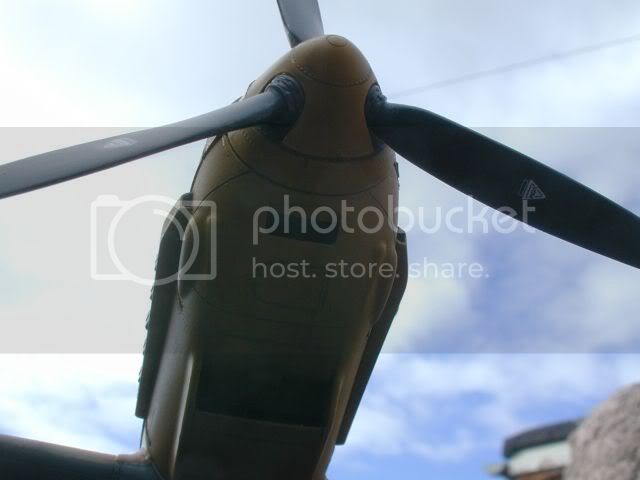
Though I havent shown it, I wasnt happy with the what seemed too pronounced bumps on the upper cowl and have sanded and shaved them down, I need to find better ref for the tropical filter, I dont think what Eduard show is particularly correct.


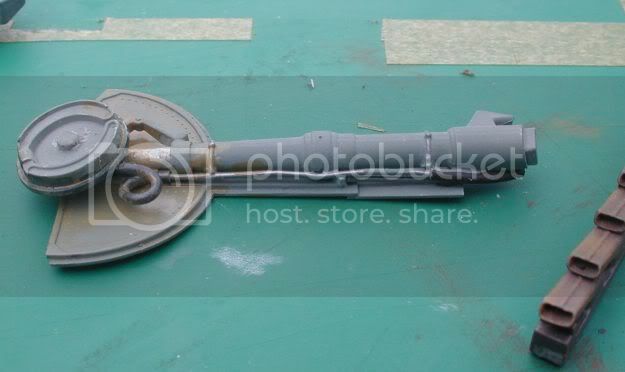
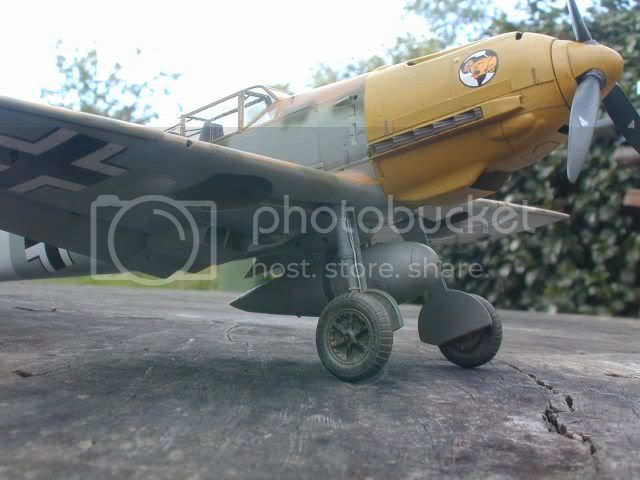
The offering by Eduard of this I think is very poor, I stole the trumpeter parts and detailed them they look much finer and a truer representation, however the droptank has a flat section with an indent, not sure if that is was or could be correct?


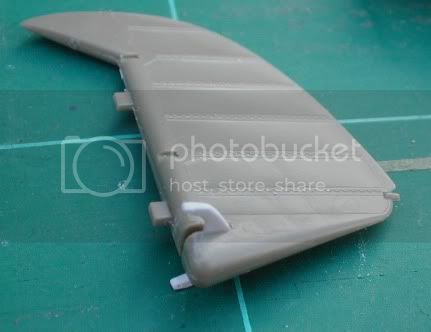
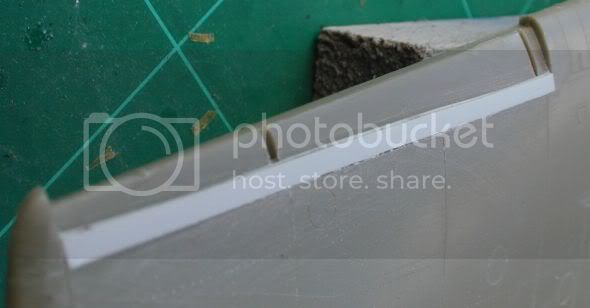
Finally... the rudder, I do like the eduard control surfaces, especiaplly compared to the Trumpeter ones which are FAT edged.
But the control horns were molded as a quarter circle, the etch ones are far to flat and flimsy so I scratched them oooh clever me

Now it might seem like I have a downer on this kit but its not so, just I expected after all is said and done for things to be where they should be, I love Eduards WWI offerings of late and after all the hype I maybe expected too much, Anyway its still enjoyabe to buil

Fitting sections of engine etc wher it shows through the various openings in the cowls is possible with trimming.

cheers, any comments taken good, bad scathing or advice are all welcome

Keith
stonar
_VISITCOMMUNITY
England - West Midlands, United Kingdom
Joined: August 15, 2008
KitMaker: 337 posts
AeroScale: 309 posts
Posted: Saturday, August 28, 2010 - 06:25 AM UTC
Very nice work. If you are worried about your drop tank take a look at these.


You seem like the kind of chap who will want to get it right!

Cheers
Steve
Kornbeef
_VISITCOMMUNITY
England - South East, United Kingdom
Joined: November 06, 2005
KitMaker: 1,667 posts
AeroScale: 1,551 posts
Posted: Saturday, August 28, 2010 - 06:35 AM UTC
Thanks Steve

Yes thats the one.. now I can smile about that bit

thanks, nice pics for picking details off (spots the drainplug? immediately)
Kornbeef
_VISITCOMMUNITY
England - South East, United Kingdom
Joined: November 06, 2005
KitMaker: 1,667 posts
AeroScale: 1,551 posts
Posted: Tuesday, August 31, 2010 - 05:56 AM UTC
I've made a lil progress, done a few mods, scratched a bit, both the plastic, and my head

Not overly impressed with Eduards Trop filter as it stood, after poring through books and the web I decided to mod/scratch my own rendition, at least it looks like the photo's but I think ther was more than one type, jst this fits the profile I'm fancying (Black though nothings finalyet. One thin I did find on my surfing trip was the slats are aparrently too wide, a reasonably easy fix, It said.


Funny how a pic makes something stand out..GAP!


reprofiled the openings for the rad, I have to round off and thin the support yet.fut out the flaps, filled the gap between rad flap and flap flap..thined the bottom somewhat to get them to sit a little closer to scale against the underside of the wing.
The two fairings I took from the trumpie kit, modded them a little, The Eduard ones seemed a very odd shape. I've yet to add the fasteners and hinges and detail the various openings and orifices .


enlarged, opened up the vents in front of the windsheild, I've yet to add a thin strip to blank the rear face off but its getting there.

Now... Trop filter


I spent a few hours last night puzzling, a fresh brain this morning and nimble fingers..LOL right..joke! later I came up with this. underneath its the Eduard part but a lot of Cyano and sheet and square stock later I had this to show for my effort. I have to say at the moment I'm very pleased with the look. Oh! and after all the effort why not show the blessed thing open? The new flap is made out a section of engine block I sliced out to fit it so it shows through the vents above and under the nose. Yes I know the cable isnt on yet

thats all for now folks, my albies are getting jelous

K
IronMark
_VISITCOMMUNITY
Texas, United States
Joined: December 27, 2009
KitMaker: 71 posts
AeroScale: 69 posts
Posted: Tuesday, August 31, 2010 - 01:53 PM UTC
Hi Keith,

Beautiful work! I have this kit in the stash and plan on watching your build very closely.

Brilliant solution for the trop filter, by the way!

Cheers,
Mark
Kornbeef
_VISITCOMMUNITY
England - South East, United Kingdom
Joined: November 06, 2005
KitMaker: 1,667 posts
AeroScale: 1,551 posts
Posted: Wednesday, September 01, 2010 - 12:58 PM UTC
Thanks Mark for the comment on the filter, Eduard seemed to suffer easyitis on this, which is a pit...its the main feature of a Trop after all...lol

Theres lots of little things I havent bothered posting. filling extra access panels in shortening the fairing over the cannon to match the thinner slat lines etc. Now I have to work on the pit, I kind of love/hate that part but must do it before I can fit the wings (which on a dry fit look like a bit of work is needed to get a good fit to the rear, possibly cos the lower wing had a real bad warp to it OOB.

Didnt get much time on her today, mainly filling on the wings around the slats

Cheers K
tornado64
_VISITCOMMUNITY
England - North West, United Kingdom
Joined: August 15, 2009
KitMaker: 203 posts
AeroScale: 57 posts
Posted: Thursday, September 02, 2010 - 10:12 AM UTC

Quoted Text

Very nice work. If you are worried about your drop tank take a look at these.


You seem like the kind of chap who will want to get it right!

Cheers
Steve


hhhmmmm !! i'm a bit unsure as to acuracy the actual drop tank mountings on the real tank are the opposite way around to the models

unless of course the model photo is reversed

but superb work
Kornbeef
_VISITCOMMUNITY
England - South East, United Kingdom
Joined: November 06, 2005
KitMaker: 1,667 posts
AeroScale: 1,551 posts
Posted: Thursday, September 02, 2010 - 12:45 PM UTC

Quoted Text


Quoted Text

Very nice work. If you are worried about your drop tank take a look at these.


You seem like the kind of chap who will want to get it right!

Cheers
Steve


hhhmmmm !! i'm a bit unsure as to acuracy the actual drop tank mountings on the real tank are the opposite way around to the models

unless of course the model photo is reversed

but superb work


Rechecked reference diagram and 2 pics I have show the fixings as I showed them but I did notice on the above photos just now that the mountings are crisscrossed one f-r and one l-r on opposite sides front and back.

even more confusion...well noted though Paul but compared to Eduards version Trumpeters is a dream.

K
stonar
_VISITCOMMUNITY
England - West Midlands, United Kingdom
Joined: August 15, 2008
KitMaker: 337 posts
AeroScale: 309 posts
Posted: Friday, September 03, 2010 - 12:52 AM UTC
This is really a labour of love! That is some beautiful work you are doing there. As far as drop tanks go I hope Eduard have included all the markings (Keine Bombe etc). They always make me smile.
I suppose it makes sense if you are dropping the tanks into friendly territory to make an effort to get them back. I wonder what 10 Reich Marks would get you.
Cheers
Steve
Kornbeef
_VISITCOMMUNITY
England - South East, United Kingdom
Joined: November 06, 2005
KitMaker: 1,667 posts
AeroScale: 1,551 posts
Posted: Wednesday, September 08, 2010 - 04:16 AM UTC
Okay progressing steadily. still a few bits to tidy but hope to be painting in a few days.

Joined the Bf 109 campaign late, i have 11 days to finish her...gulp.

anyway pics..yay!


yes shes got the wings on, I wasnt impressed by the resulting gap between the rear centr wing section and the fuselage, whether it was because mine was warped badly and possibly shrank I dunno but reinforcing strips behind, strips anf Cyano (Ive used more cyano on this build than any other) fixed the gap with some persuasive sanding.


cockpit is Aires, I got a reasonable level of detail but havent gone too ott as I'm building the cockpit closed. Seat to fit, I'm on with the aires seatbelts now amongst other things.


the lower nose is back on, the fit needed some tweaking as did the cowl covering the gun breaches which is one complete part not 3 as Eduard made it. I've shown the engine and upper cowl fitted, they stil arent fixed, just for the shot.


Finally two shots of my detailing of the undercarriage, Much head scratching was done here comparing them to pics and plans the lengths loked odd,the oleo's were too open, I knew something was amiss, but realised the length was fine, the problem was that the outer stopped to short making the exposed section look too long. Well measuring them against plans and trumpies parts (which have other issues) I solved it with a ring of plasticard and used the trumpie struts which are closer to real than the eduards.

the horrid dirtying is a result of building to long to late.

Keith,
Kornbeef
_VISITCOMMUNITY
England - South East, United Kingdom
Joined: November 06, 2005
KitMaker: 1,667 posts
AeroScale: 1,551 posts
Posted: Thursday, September 16, 2010 - 04:44 AM UTC
Hi again, times been tight, life got hectic just after I signed up got the 109 campaign, as it would.

Had a few ups and downs, mostly my fault as always, but my airbrush has been playing silly beggars too, so forgive the splotchiness please.....coughs...camo sprayed in the field...excuse excuses

I have to say I was very impressed with the canopy, clear thin and crisp, even if I'm not so sure about the double glazed upper panel...not being a 109 afficionado.

So I'm at a point close to finishing, a few parts to add, cannons, aerial and rig it. Some weathering and wear and a final mattcoat to tie her all together. I have 3 days.


cheers

Keith
On with the pics.
NickZour
_VISITCOMMUNITY
Attica, Greece / Ελλάδα
Joined: May 01, 2008
KitMaker: 1,437 posts
AeroScale: 1,241 posts
Posted: Thursday, September 16, 2010 - 08:41 AM UTC
I love the "109" (In my opinion superior to the Spitfire) and I think that you made a very good job Mr. Keith

I think that you had to leave the canopy open


Cheers Nick
warreni
_VISITCOMMUNITY
South Australia, Australia
Joined: August 14, 2007
KitMaker: 5,926 posts
AeroScale: 2,201 posts
Posted: Thursday, September 16, 2010 - 10:01 AM UTC
I have a question. You stopped building the Trumpeter Bf-109 because the cockpit was no good, yet you didn't put aside this Eduard kit because its cockpit was no good.. Wouldn't the Aries cockpit enhancement have worked just as well with the Trumpeter kit? Just wondering was all.

Kornbeef
_VISITCOMMUNITY
England - South East, United Kingdom
Joined: November 06, 2005
KitMaker: 1,667 posts
AeroScale: 1,551 posts
Posted: Thursday, September 16, 2010 - 11:59 AM UTC
Warren

Oh it wasnt that the cockpit was no good, the cockpit in the Trumpeter was wrong Warren and the Aires cockpit was something of an impulse buy when on Hannants site picking up bits for my albatros.

I used the resin cockpit but used Eduards dash and some other bits of their etch too.

Nick,

the canopy is fixed tight shut, theres plenty other bits can be broke off without tempting fate.

Keith
 _GOTOTOP