_GOTOBOTTOM
World War II
Discuss WWII and the era directly before and after the war from 1935-1949.
Hosted by Rowan Baylis
Hawker Hurricane, Revell 1/32
CanDid
_VISITCOMMUNITY
Stockholm, Sweden
Joined: May 03, 2010
KitMaker: 123 posts
AeroScale: 98 posts
Posted: Saturday, September 11, 2010 - 03:56 AM UTC
Hallo!

Inspired by KitMaker member Dirkpitt289's build 1/72 Daimler-Benz Spitfire EN830 here on AeroScale I intend to build a Hawker Hurricane diorama.

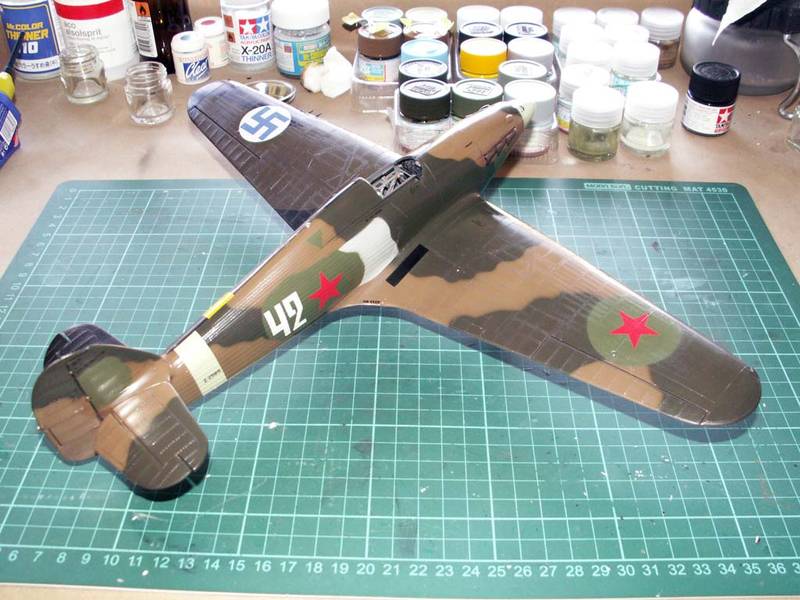
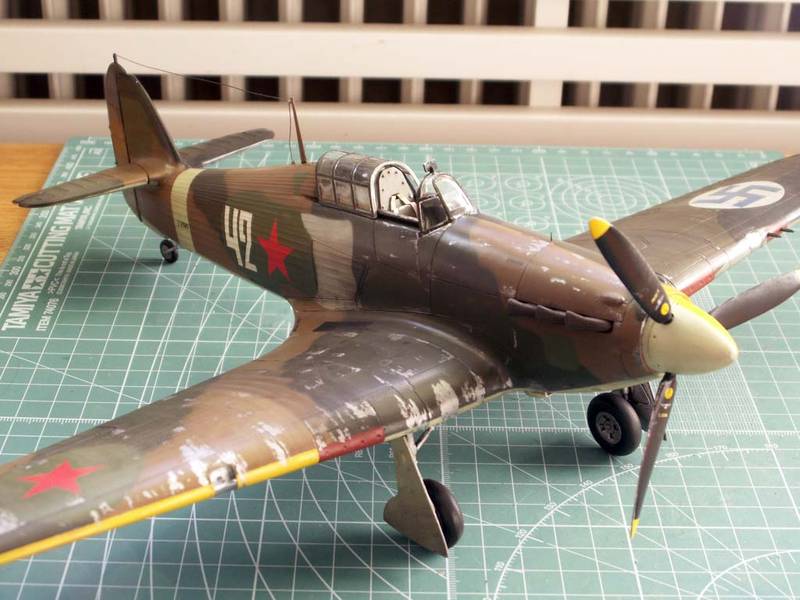
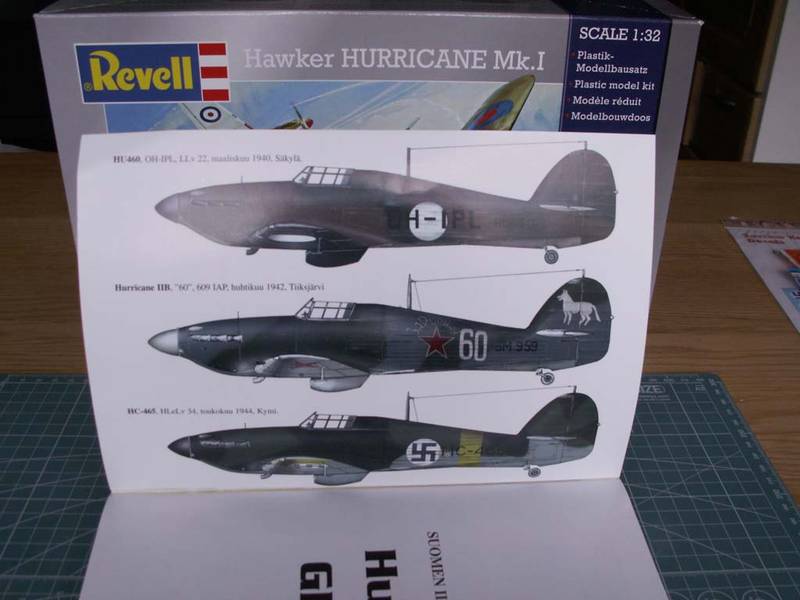
My idea is to convert Revell's 1/32 Hurricane Mk.I into a Mk.IIa/b and paint it in two different paint schemes, one on each side of the fuselage. Russian on the right side and Finnish on the left. Although there will be two different paint schemes on the plane, it will be one and same plane, Z2585.


Research

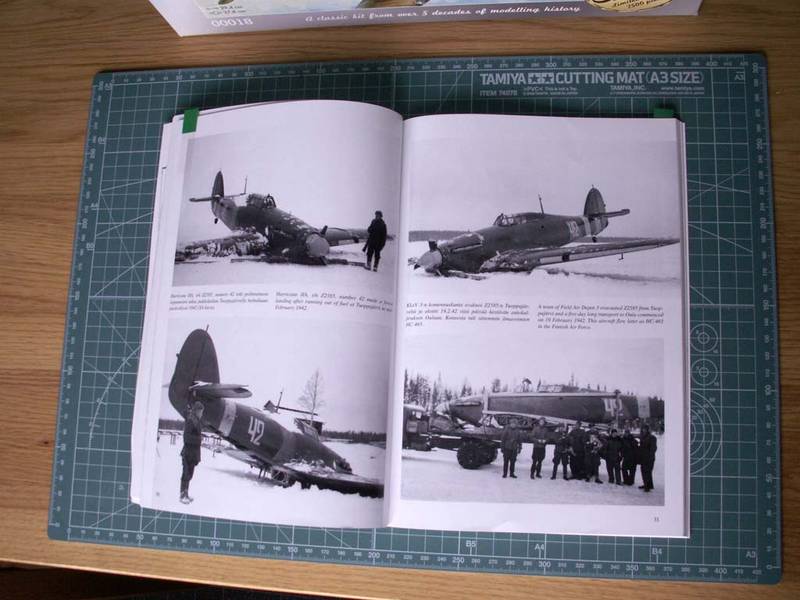
Z2585, a Hurricane Mk.IIa, was originally used by 316 sqn, RAF (Polish). According to the Finnish researcher Pentti Manninen it was transferred to the Russians as past of the lend lease in early 1942, becoming 'White 42'.

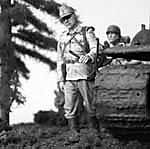
White 42 was forced to land behind enemy lines in February 1942 after running out of fuel. The Finnish Air Force captured the plane at the crash site at the lake Tuoppajärvi (Topozero), a lake located between the White Sea and the current Finnish border in Karelia.

The recovered war booty aircraft was refurbished and put into flying condition becoming HC-465 in the Finnish Air Force. HC-465 used the fuselage from the Mk.IIa Z2585, but it's wings was from another war booty Hurricane Mk.IIb.


Parts

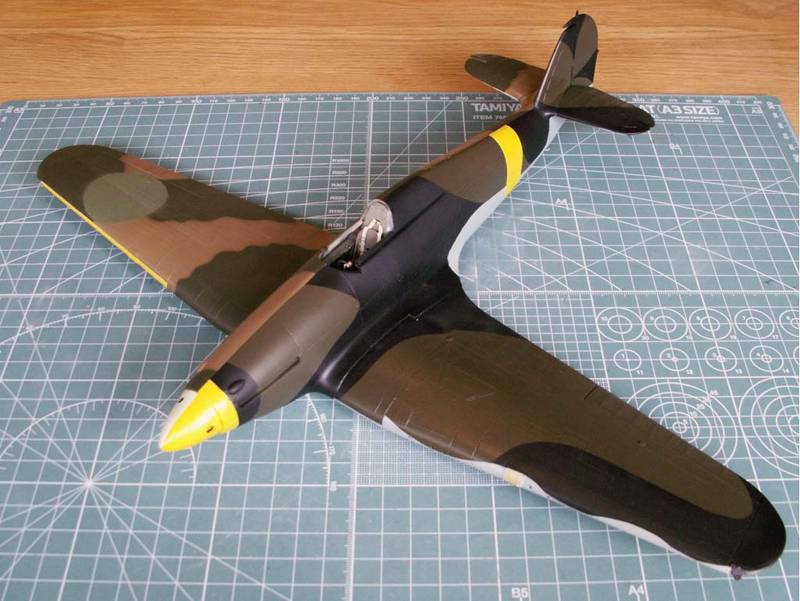
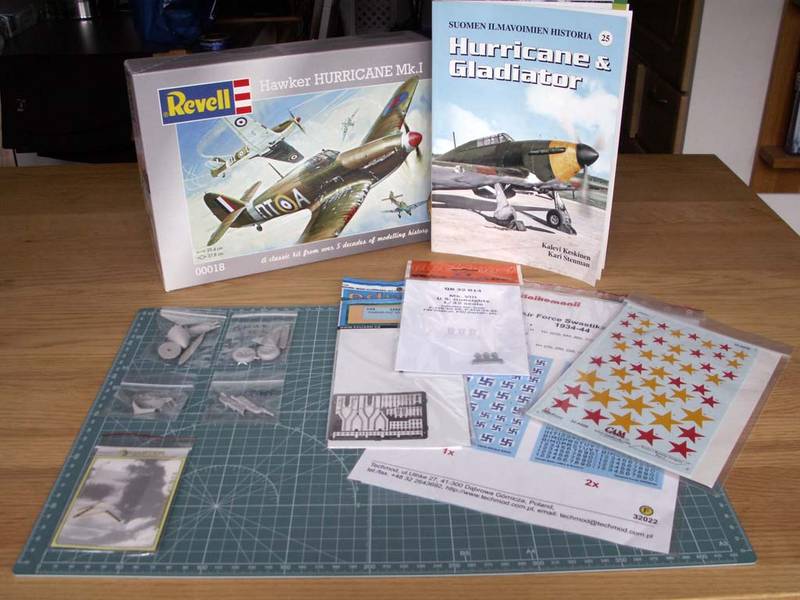
As mentioned in the Topic Title the kit I plan to use is Revell's 1/32 Mk.I. Some work needs to be put into the kit as it is an old kit (originally made in 1971) that has raised panel lines and loads of raised rivets. It also comes with Mk.IIc wings with the 20 mm canons.

Grey Matter Figures has made a very nice cockpit for this kit. Trying to keep it in a slimmer budget I have only bought their seat and control stick though. I intend to use the kit parts and perhaps scratch building some details instead. I also plan to use the kit decals for the instruments as they look pretty good. Maybe I'll drill out the holes and put a clear sheet in between to create some depth, we'll see. Seatbelts from Eduard will be added together with a Gunsight from Quickboost.

The fuselage will be left as it it comes in the kit though I will try to re-scribe the panel lines. While doing this I will try to keep the rivets, only sanding them down a bit For prop and spinner I will use Grey Matter Figures resin parts. Same for the exhausts.

On the wings I will remove the 20mm cannons and try to re-scribe the panel lines, once again without destroying the rivets. For the HC-465 side of the plane I will add two .303s from Air Master Series. Landing gear hatches and wheels will be GMF parts.

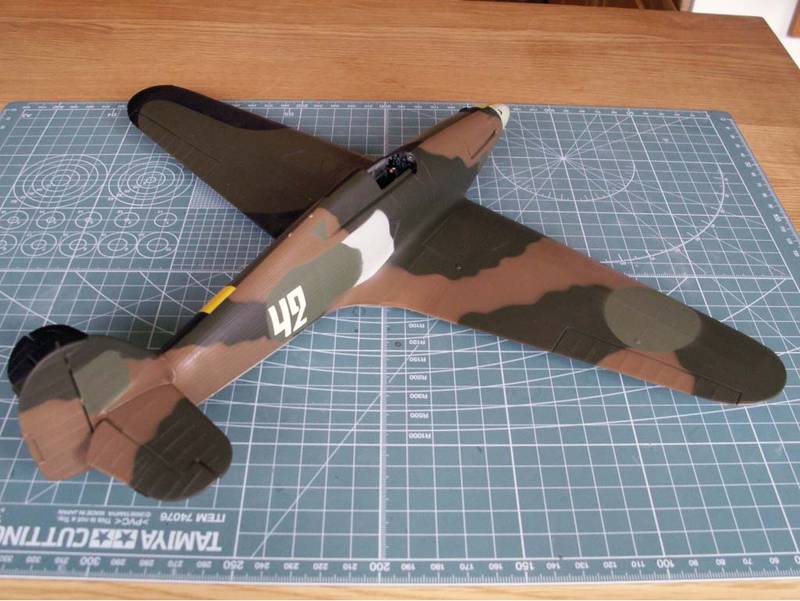
When it comes to decals the plan is to use Techmod FAF decals for the swastikas and serial. On the Russian side of the plane I will use the kit decals except for the over painted areas. CAM Decals Russian stars will added. The 42 number I will try to Air Brush onto the plane.


Diorama

I will place the plane into a winter diorama. At the moment the plan is to split the diorama halves by a barb wire fence and placing at least one figure into it. It will not be a crash site diorama as for the pictures of 'White 42'. The plane will be on it's wheels.

The main part of the research done for this project so far is done by using Kari Stenman and Kalevi Keskinens excellent book series Suomen Ilmavoimien Historia. I can really recommend them to modellers interested in Finnish Air Force history.

Please give me some comments, hints and tips along the way, I'll need it!
CanDid
_VISITCOMMUNITY
Stockholm, Sweden
Joined: May 03, 2010
KitMaker: 123 posts
AeroScale: 98 posts
Posted: Saturday, September 25, 2010 - 07:40 AM UTC
Progress so far - cockpit made.

I mainly used the original parts hollowing out the sides and the floor. The back armour is scratch built . Seat and control stick is resin parts and seatbelt is photo etch. I used the decals included in the kit for the instruments. A few more details such as gun sight are still to be added.

Everything painted and weathered using acrylics from Vallejo and Mr. Colour.

As you (just) can see I have also started the scribing job on the panel lines.

Bye for now

NickZour
_VISITCOMMUNITY
Attica, Greece / Ελλάδα
Joined: May 01, 2008
KitMaker: 1,437 posts
AeroScale: 1,241 posts
Posted: Saturday, September 25, 2010 - 10:36 AM UTC
That's a very nice cockpit

I also like the aircraft & the country ( Finnish were real heroes ) you have choosed Mr. Fredrik


Cheers Nick
CanDid
_VISITCOMMUNITY
Stockholm, Sweden
Joined: May 03, 2010
KitMaker: 123 posts
AeroScale: 98 posts
Posted: Thursday, October 07, 2010 - 11:35 PM UTC
Up to this point I have sanded down and re-scribed the panel lines. I kept the rivets ans bolts on the wings and fuselage scribed new lines for the hatches of the two extra .303s on the Finnish wing.

The Mk.IIC guns have been removed and holes drilled instead making place for the four .303s on the Russian side and the six .303s on the Finnish side No other major changes to the original kit has been made.

The kit needed a little sanding and some sheet plastic to fit the wings to the fuselage properly.

The paintwork has been a mixture of pain and pleasure. I have had huge problems with chipping during the whole build. I have tried to sand, clean and also use blended thinner to make it work, but nothing seems to work on this one.

I wonder if the primer I used is to old


Anyway, some paintwork is still left under the wings, and the Sky coloured band on the Russian side of the fuselage is still to be added.


Please comment!
ShawnM
_VISITCOMMUNITY
Missouri, United States
Joined: November 24, 2008
KitMaker: 564 posts
AeroScale: 510 posts
Posted: Friday, October 08, 2010 - 03:06 AM UTC
that looks awesome!
Is this an OOP kit or is it still made?
NickZour
_VISITCOMMUNITY
Attica, Greece / Ελλάδα
Joined: May 01, 2008
KitMaker: 1,437 posts
AeroScale: 1,241 posts
Posted: Friday, October 08, 2010 - 09:10 AM UTC
The camo painting is great


Cheers Nick
CanDid
_VISITCOMMUNITY
Stockholm, Sweden
Joined: May 03, 2010
KitMaker: 123 posts
AeroScale: 98 posts
Posted: Sunday, October 10, 2010 - 10:59 PM UTC

Quoted Text

that looks awesome!
Is this an OOP kit or is it still made?


The kit is still available, It is a reissued one, still with the year 1971 visible in the mould. http://www.revell.com/germany/aircraft/80-0018.html I bought it a few months ago.
CanDid
_VISITCOMMUNITY
Stockholm, Sweden
Joined: May 03, 2010
KitMaker: 123 posts
AeroScale: 98 posts
Posted: Friday, October 15, 2010 - 11:52 PM UTC
The paint job is finished and I have given the whole aircraft a few coats of gloss clear. Decals have been added using a mix of kit and after market decals.


There is no decal sheet available for those two machines so I have mixed my own trying to stay as close to the pictures as possible.


I sprayed the with a new coat of gloss clear and added a MIG-wash.


The machine is now ready for final detailing and a layer of flat clear. The paint is still to 'new'. Additional weathering is needed to replicate the wear and tear.

Bye for now
CanDid
_VISITCOMMUNITY
Stockholm, Sweden
Joined: May 03, 2010
KitMaker: 123 posts
AeroScale: 98 posts
Posted: Sunday, October 17, 2010 - 02:33 AM UTC
Hallo again!

The Hurri-bird is finally finished. As I wrote in the beginning of the thread I have not put that much attention into the build itself. With a minimum of build effort I have tried to stay close to the reality, as in the pictures I have found of this plane


The thing for me with this build was to try to improve my skills in using my air brush and improve my painting and masking techniques. I still consider myself as a beginner, learning as I go.


I have now finished the plane itself and will head on to the diorama. It will be a simple winter diorama with one or maybe two figures. The plan is to divide the diorama into two halves, just as I have done with the plane.


The diorama will be built on a MDF-board and built up using plaster cloths to create a winter scenery. The plan at the moment is to split the Finnish and Russian halves using a barbed wire fence.

So far this has been a really funny build. Hope you like it!

Bye for now
CanDid
_VISITCOMMUNITY
Stockholm, Sweden
Joined: May 03, 2010
KitMaker: 123 posts
AeroScale: 98 posts
Posted: Friday, January 28, 2011 - 11:29 PM UTC
Finally finished!

The 'Hurri' has is now places in a winter diorama, split in halves just as the plane itself.

The idea was to make a colder, whiter area with the plane parked close to a hangar on the Finnish side whilst the Russian side is supposed to be parked on the edge of a grass field with a slightly lower temperature just after a snow fall.


Here is a few pics of the Finnish side


And a couple form the Russian side


On the Russian side an old man is walking his dog on the edge of the air field.


Thanks for watching!
Bungal
_VISITCOMMUNITY
England - South East, United Kingdom
Joined: February 19, 2007
KitMaker: 84 posts
AeroScale: 69 posts
Posted: Saturday, January 29, 2011 - 03:58 AM UTC
All I can say is
WOW
Fantastic looking Hurricane from both sides.

Brian
 _GOTOTOP