North Carolina, United States
Joined: November 28, 2005
KitMaker: 2,216 posts
AeroScale: 1,080 posts
Posted: Thursday, December 30, 2010 - 01:53 PM UTC
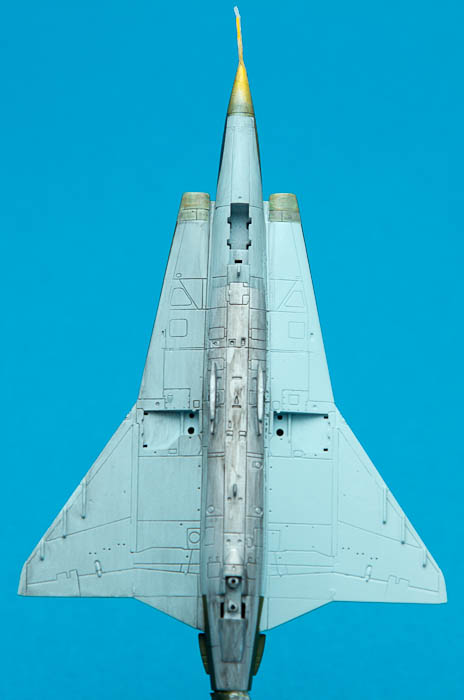
I'm wondering what the light blue would look like in 1/48 scale. Should I stick to the standard grey for accuracy?
Hermon

"Those who would give up Essential Liberty
to purchase a little Temporary Safety,
deserve neither Liberty nor Safety."
Benjamin Franklin
Florida, United States
Joined: January 14, 2009
KitMaker: 2,798 posts
AeroScale: 2,443 posts
Posted: Thursday, December 30, 2010 - 03:59 PM UTC
once again Ive been inspired and will be ordering a Italeri 1/48 JAS 39 A GRIPEN.

Thanks Magnus

"From time to time, the tree of liberty must be watered with the blood of
tyrants and patriots."
- Thomas Jefferson
IPMS#47611
Stockholm, Sweden
Joined: May 02, 2006
KitMaker: 1,953 posts
AeroScale: 1,902 posts
Posted: Friday, December 31, 2010 - 12:27 AM UTC
Quoted Text
I'm wondering what the light blue would look like in 1/48 scale. Should I stick to the standard grey for accuracy?
Hermon
Grey with a tint of blue would do the trick! One possible match might be Tamiya XF-66!
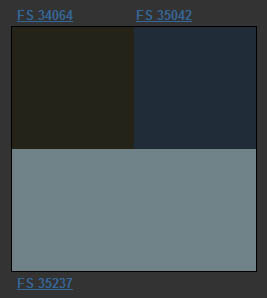
The reason why I try to stay on the light side (apart from the aircraft needing a bit of help with the light since they are so small) is that my weathering methods always push the overall impression towards the dark side (that sounded ominous, didn't it?

).
Quoted Text
once again Ive been inspired and will be ordering a Italeri 1/48 JAS 39 A GRIPEN. Thanks Magnus
I have one or two in 1/72 scale but have never gotten around to build one...

Magnus
Press banner to the right to follow my trail to the new forums!
North Carolina, United States
Joined: November 28, 2005
KitMaker: 2,216 posts
AeroScale: 1,080 posts
Posted: Friday, December 31, 2010 - 01:06 PM UTC
XF-66? Thanks for that Magnus. Having never been near a real Draken I'm keeping notes on everything you suggest so that I might be able to do my kit justice.

Hermon
"Those who would give up Essential Liberty
to purchase a little Temporary Safety,
deserve neither Liberty nor Safety."
Benjamin Franklin
Stockholm, Sweden
Joined: May 02, 2006
KitMaker: 1,953 posts
AeroScale: 1,902 posts
Posted: Friday, December 31, 2010 - 09:52 PM UTC
Hermon! Just to prove that I have seen one of my two Draken-subjects fly:
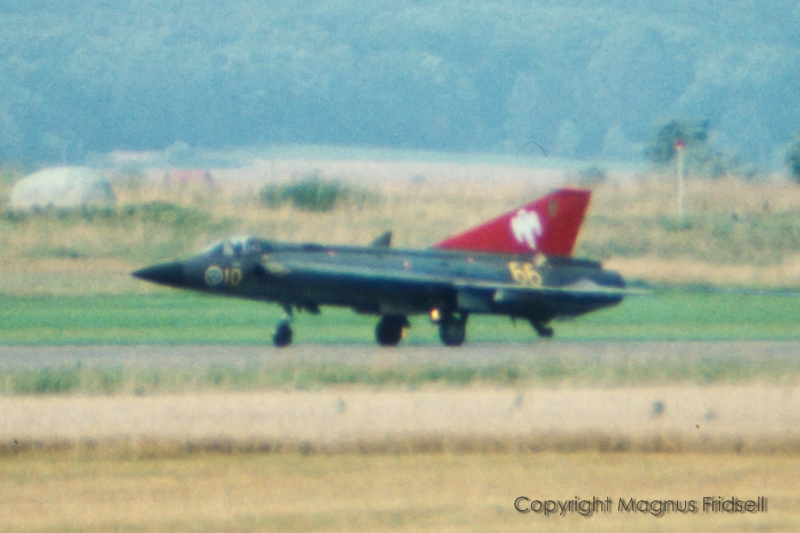
This is from Halmstad airshow in August 1989, copied from an old slide. The telezoom I used then wasn't the best and my knowledge of photography was also quite limited... I was 17 at the time
For some reason I didn't take any more photos of the Draken (I had seen them many times and I knew they were to be around for ages to come...) so this beast was a lot more interesting:
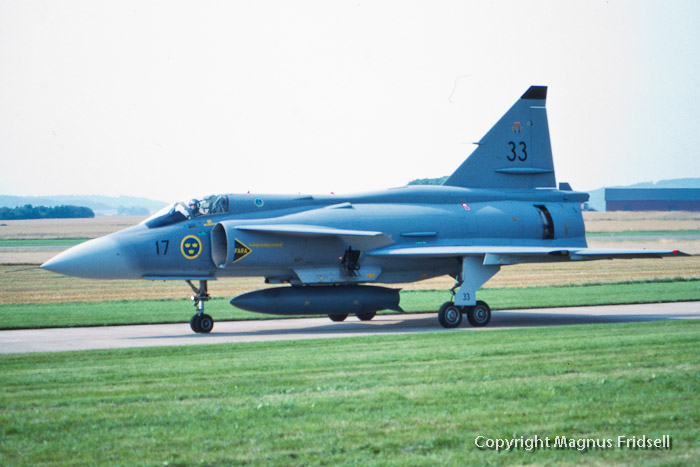
The Draken taxied by on the same taxiway but I didn't take a photo... And now both types are gone from the inventory!
Magnus
Press banner to the right to follow my trail to the new forums!
Stockholm, Sweden
Joined: May 02, 2006
KitMaker: 1,953 posts
AeroScale: 1,902 posts
Posted: Sunday, January 02, 2011 - 07:59 PM UTC
I am one of those early risers so when the rest of the family happily snoozes upstairs, I sit downstairs in "the sty" drinking coffee and doing model magic in the mornings
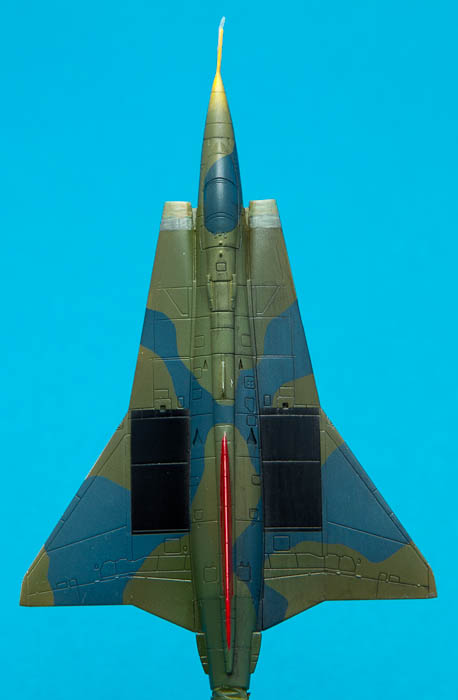
! So now they are green, and the family is still asleep!
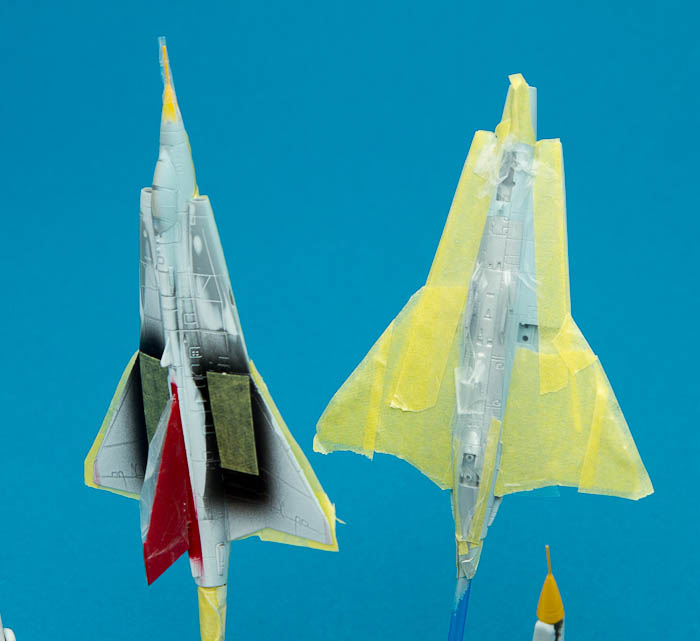
Masking on small models is always fiddly, this is a combination of tape and Parafilm.
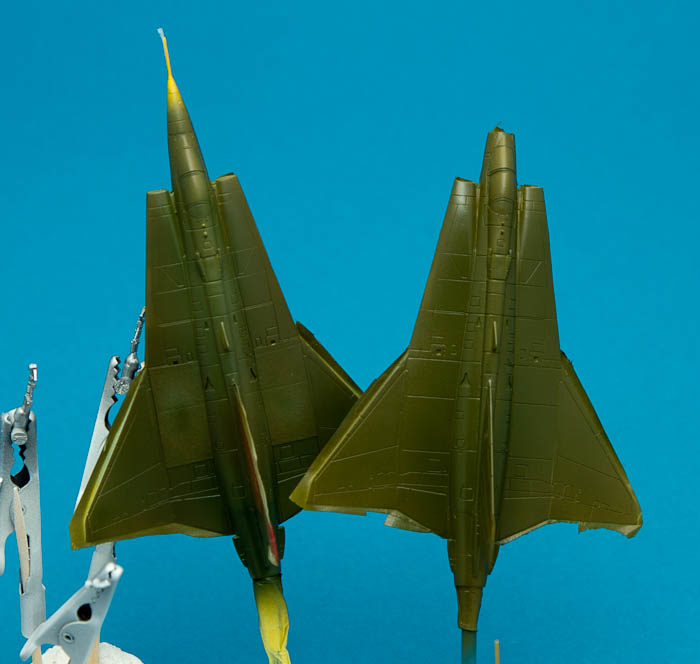
I've tried to make them look a bit different by mixing white and green in the base mix . In reality I think "66" was a bit more weathered than "62" even if that one also had seen its fair share of sun and rain!
With a bit of luck there will be time for painting the blue tonight. A bit more masking before that though
...
Magnus
Press banner to the right to follow my trail to the new forums!
Stockholm, Sweden
Joined: May 02, 2006
KitMaker: 1,953 posts
AeroScale: 1,902 posts
Posted: Tuesday, January 04, 2011 - 09:25 AM UTC

This masking is killing me (as usual). And they are so small that it is beyond my powers to paint them freehand
OK then, everything prepared for an airbrush-session tomorrow at least!
Magnus
Press banner to the right to follow my trail to the new forums!
Stockholm, Sweden
Joined: May 02, 2006
KitMaker: 1,953 posts
AeroScale: 1,902 posts
Posted: Tuesday, January 04, 2011 - 07:34 PM UTC
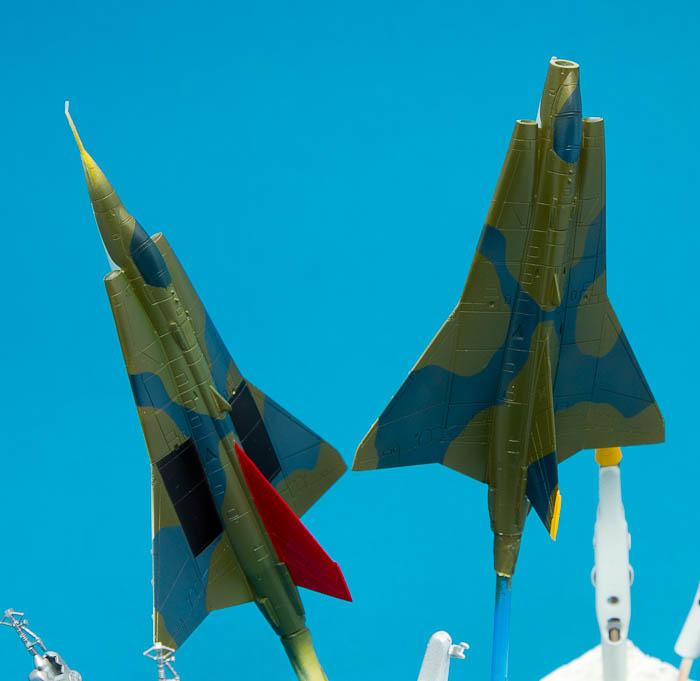
Camouflage finished. I am not entirely happy with the look but that can be adjusted with a wash and some weathering.
Magnus
Press banner to the right to follow my trail to the new forums!
North Carolina, United States
Joined: November 28, 2005
KitMaker: 2,216 posts
AeroScale: 1,080 posts
Posted: Wednesday, January 05, 2011 - 12:16 AM UTC
I'd be happy with those any day. Really nice work on the camo in such a tiny scale Mangus. A nice subtle wash should really make them come to life.
Hermon
"Those who would give up Essential Liberty
to purchase a little Temporary Safety,
deserve neither Liberty nor Safety."
Benjamin Franklin
New Jersey, United States
Joined: May 24, 2008
KitMaker: 346 posts
AeroScale: 307 posts
Posted: Wednesday, January 05, 2011 - 02:03 PM UTC
Very cool. Great paint work
AussieReg
 Associate Editor
#007
Victoria, Australia
Joined: June 09, 2009
KitMaker: 8,156 posts
AeroScale: 3,756 posts
Posted: Wednesday, January 05, 2011 - 02:15 PM UTC
I'm with Hermon and Dirk, they look great Magnus, especially for flea-scale builds !
Quoted Text
I am not entirely happy with the look but that can be adjusted with a wash and some weathering.
Deja-vu, I say that to myself every morning when I look in the mirror
ON the bench
Revell 1/24 '53 Corvette (building as '54)
Revell 1/24 BMW 507 Coupe and Cabrio
Italeri 1/48 Me262 B-1a/U1 Nightfighter
Monogram 1/24 '57 Chevy Nomad
Dragon 1/350 USS Frank Knox DD-742
Stockholm, Sweden
Joined: May 02, 2006
KitMaker: 1,953 posts
AeroScale: 1,902 posts
Posted: Friday, January 07, 2011 - 09:23 AM UTC
Sorry about your face Damian, I am in the same situation
!
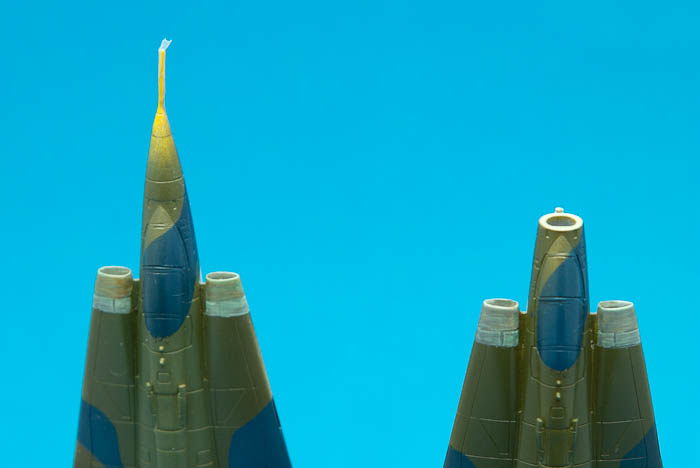
Another thing I am not entirely happy with, the intakes... I've painted and repainted trying to achieve some kind of slightly transparent look and I am not even close... I don't even like the colours even if they vary wildly from aircraft to aircraft. On the grey ones they were overpainted, probably due to some militant modellers threatening the airforce... This is a bit like painting woodgrain, another one of those things that I seldom succeed with... Well, I'll leave it for now and see if there will be some divine inspiration later...
A wash has been applied to one side of the aircraft. As you can see the blue is drastically toned down!
The same process on the upper surfaces.
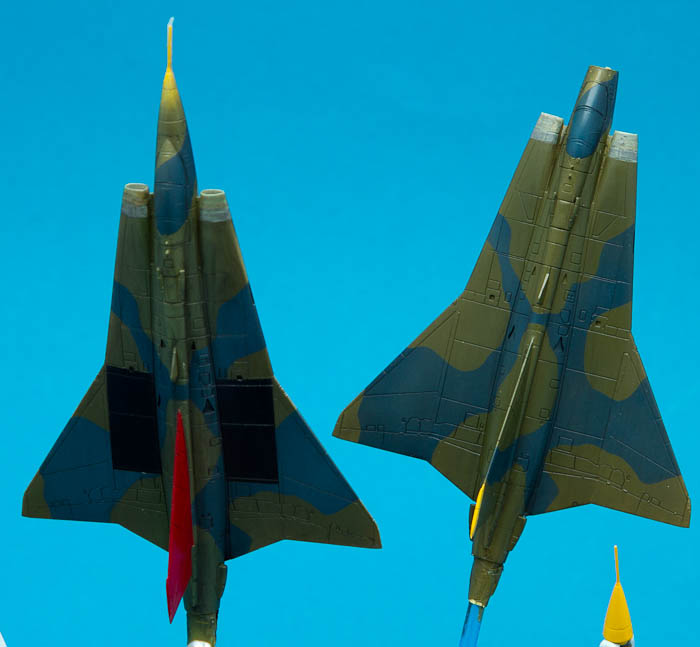
Two well-washed Draken!
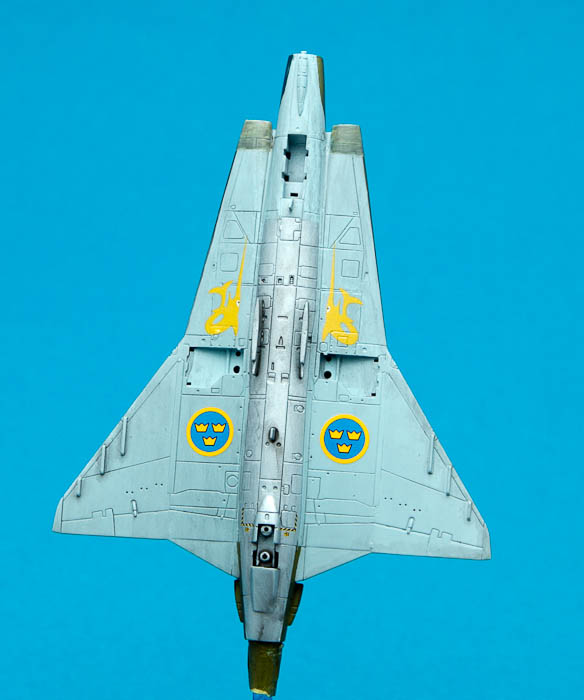
I've started decalling. I will seal off the decals with a clear coat and then go on with more weathering and detail painting! National insignia come from a Flying Colours generic insignia sheet (available from Hannants among others). It is for 1/72 scale but there are markings that fit perfectly anyway. I will have to live with the differing colours of the swordfish and the insignia...
Hermon and Dirk Pitt! Thanks for comments!
Magnus
Press banner to the right to follow my trail to the new forums!
Stockholm, Sweden
Joined: May 02, 2006
KitMaker: 1,953 posts
AeroScale: 1,902 posts
Posted: Friday, January 14, 2011 - 09:07 AM UTC
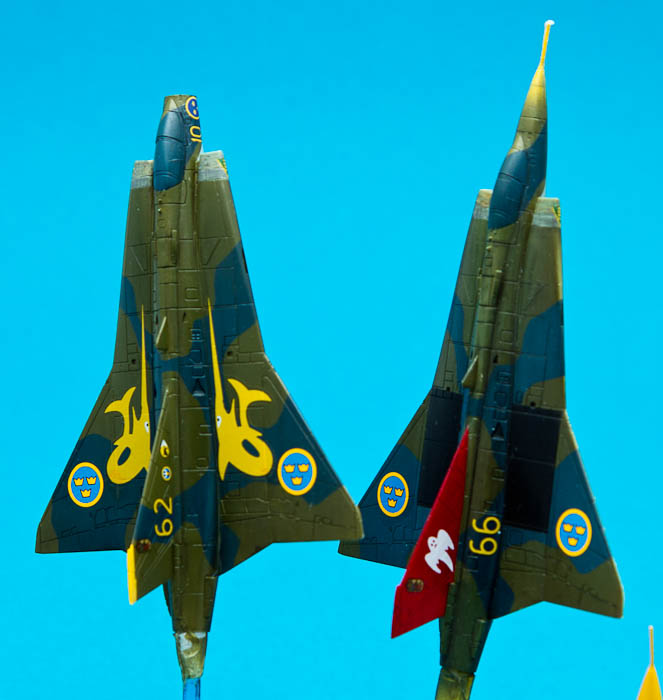
Almost finished with the decals.
Magnus
Press banner to the right to follow my trail to the new forums!
Gelderland, Netherlands
Joined: July 29, 2008
KitMaker: 799 posts
AeroScale: 3 posts
Posted: Friday, January 14, 2011 - 10:21 AM UTC
Hi Magnus,
Nice progress! It must be pretty tough to work in such a small scale. Great results though from your side! And a cool scheme you've put these aircraft in.
Greetings,
Max
North Carolina, United States
Joined: November 28, 2005
KitMaker: 2,216 posts
AeroScale: 1,080 posts
Posted: Friday, January 14, 2011 - 01:31 PM UTC
I think you're being a bit hard on yourself Magnus. They both look great and the wash has really made the scheme come together.
I'm seriously thinking of giving 1/144 scale a try.
Hermon
"Those who would give up Essential Liberty
to purchase a little Temporary Safety,
deserve neither Liberty nor Safety."
Benjamin Franklin
Texas, United States
Joined: June 29, 2010
KitMaker: 5,854 posts
AeroScale: 372 posts
Posted: Saturday, January 15, 2011 - 07:59 PM UTC
I almost can't believe these are 144, makes me think I should give a few modern fighters a try in this scale if they can come out looking this good
litespeed
News Reporter England - North West, United Kingdom
Joined: October 15, 2009
KitMaker: 1,976 posts
AeroScale: 1,789 posts
Posted: Monday, January 17, 2011 - 10:51 AM UTC
Nearly there Magnus, looking excellent.
All the best.
tim
Stockholm, Sweden
Joined: May 02, 2006
KitMaker: 1,953 posts
AeroScale: 1,902 posts
Posted: Friday, January 21, 2011 - 09:23 AM UTC
Thanks for kind words and encouragement!
I have been thinking of how to paint the pitot stripes for some time and came up with an idea yesterday. I cut a thin slice out of a plastic eraser, made holes through it with a needle and then cut it into pieces. Those pieces were then carefully thread onto the pitot tube and spaced equally along it. Easier than decals and safer than tape!
While on the subject of plastic erasers: get a box of them! They are cheap and come in very handy every now and then. My favourite use for them are as sanding blocks. Cut to shape and wrapped in sand paper they help reaching into awkward corners and being flexible they don't leave marks like toothpicks, scalpel handles or other former weapons of my choice! They can also be cut to wedges and distances for rigging things before glueing, you can mount things on them using pins or steel wire to make parts easier to handle... The fantasy is the limit!
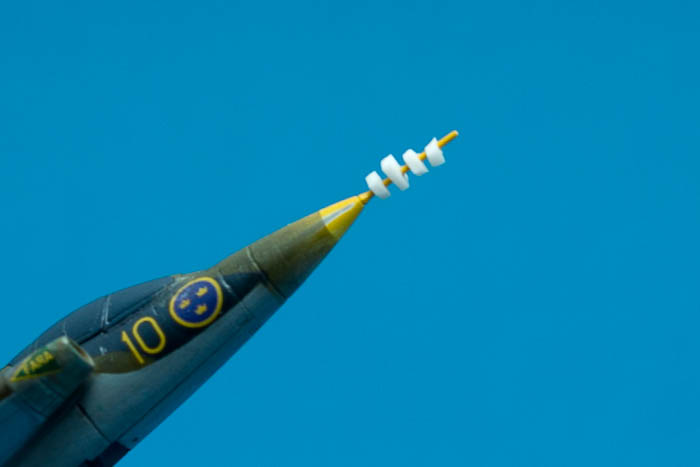
Eraser masks in place! Sorry for the slightly blurry picture, I didn't notice until...
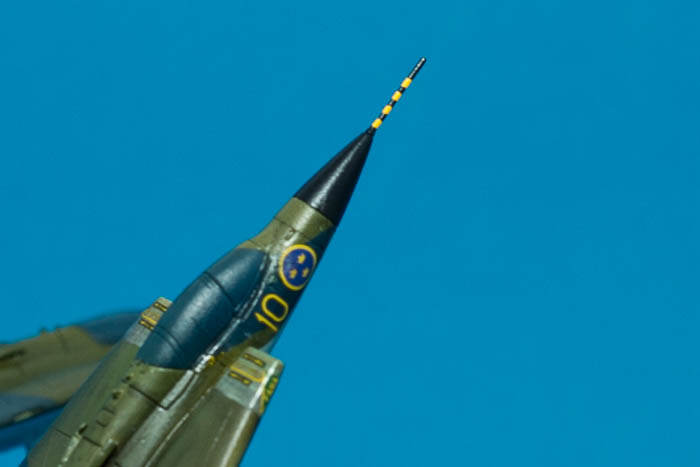
...painting was finished! At this magnification they are slightly uneven but with the naked eye there is no chance of seeing this, I promise!
Magnus
Press banner to the right to follow my trail to the new forums!
AussieReg
Associate Editor #007
Victoria, Australia
Joined: June 09, 2009
KitMaker: 8,156 posts
AeroScale: 3,756 posts
Posted: Friday, January 21, 2011 - 10:53 AM UTC
You gotta love improvisation !! Thanks for a great tip Magnus.
These builds are looking really nice now with that weathering and detailing in place, beautiful work.
Cheers, D
ON the bench
Revell 1/24 '53 Corvette (building as '54)
Revell 1/24 BMW 507 Coupe and Cabrio
Italeri 1/48 Me262 B-1a/U1 Nightfighter
Monogram 1/24 '57 Chevy Nomad
Dragon 1/350 USS Frank Knox DD-742
North Carolina, United States
Joined: November 28, 2005
KitMaker: 2,216 posts
AeroScale: 1,080 posts
Posted: Saturday, January 22, 2011 - 03:04 PM UTC
Indeed. Great tip Magnus and I'll be using that little trick in the future I'm sure. The twins are looking excellent in their final stages. I've been looking forward to seeing the finished products!
Hermon
"Those who would give up Essential Liberty
to purchase a little Temporary Safety,
deserve neither Liberty nor Safety."
Benjamin Franklin
England - South East, United Kingdom
Joined: September 15, 2004
KitMaker: 4,728 posts
AeroScale: 1,351 posts
Posted: Saturday, January 22, 2011 - 03:27 PM UTC
Great work thus far Magnus, I've been following your build quietly from the side lines but with it almost complete I had to comment.
Oh and great tip about the eraser.
On the bench...
Italeri A129 Mangusta
British Bulldog Spitfire theme build
Stockholm, Sweden
Joined: May 02, 2006
KitMaker: 1,953 posts
AeroScale: 1,902 posts
Posted: Friday, February 11, 2011 - 09:16 PM UTC
Thanks for you comments! I am sorry that my updates (and building sessions...) are a bit sporadic for the time being...
With a bit of luck they'll be finished during the weekend! Canopy masks came off this morning and I have been doing a bit of detail painting.
Magnus
Press banner to the right to follow my trail to the new forums!
Stockholm, Sweden
Joined: May 02, 2006
KitMaker: 1,953 posts
AeroScale: 1,902 posts
Posted: Wednesday, February 16, 2011 - 07:33 AM UTC
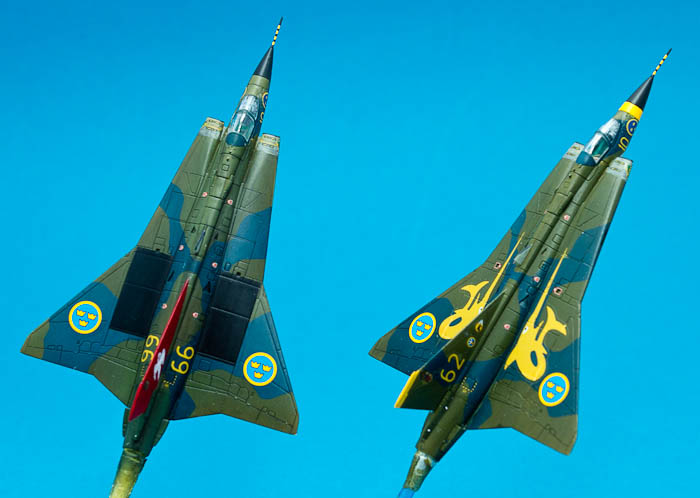
Finished!
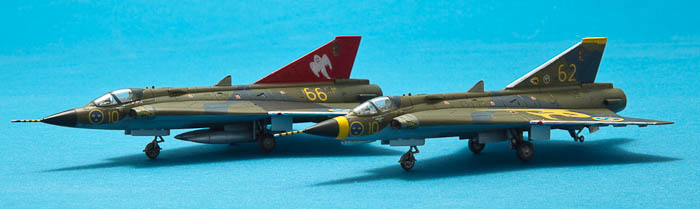
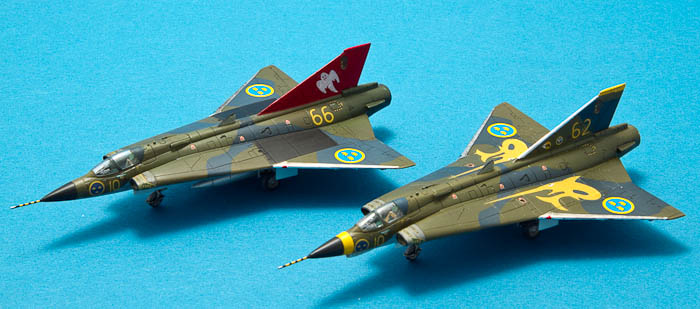
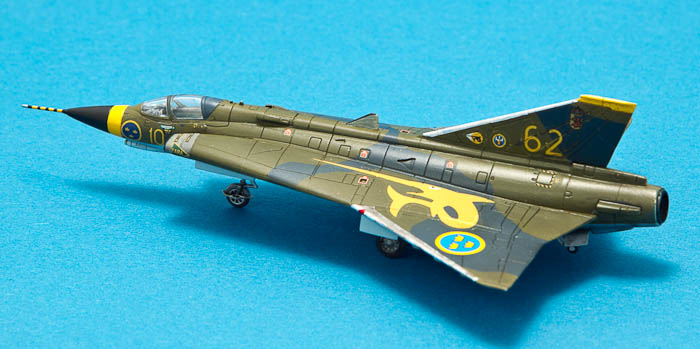
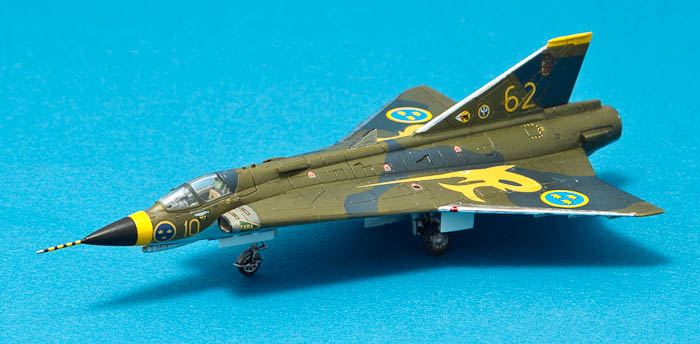
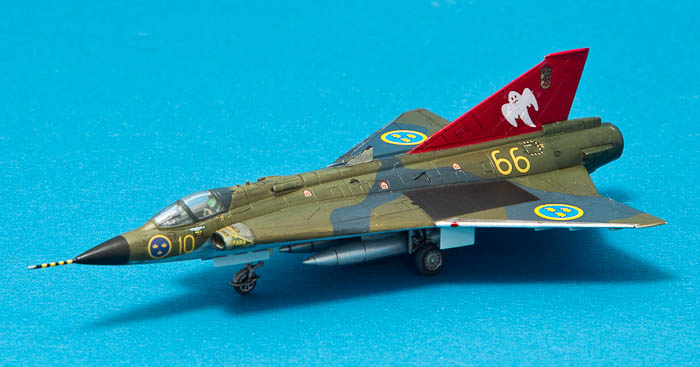
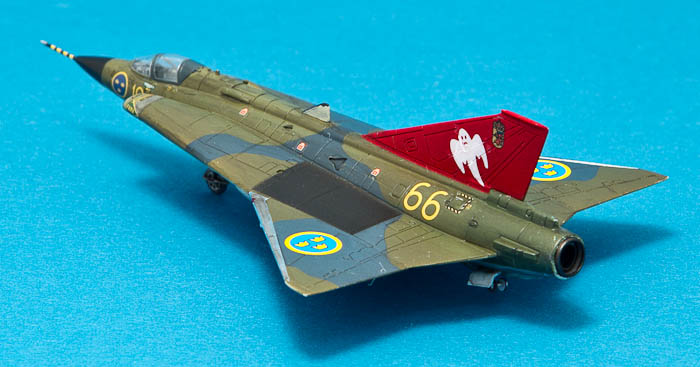
A few conclusions: the kits are magnificent. Well detailed and easy to assemble apart from the cannon wing inserts that require a bit of filler. The decals could have been better, some of the colours (yellow and blue) are raster printed. Screened decals would have looked a lot sharper even if the raster dot pattern really can't be seen from normal viewing distance. I have been told that there are aftermarket decals available, they don't seem to be too easy to get hold of but it would be definitely worth tracking them down.

Nice to add them to
the collection, now on to something
a lot more substantial!
Magnus
Press banner to the right to follow my trail to the new forums!
litespeed
News Reporter England - North West, United Kingdom
Joined: October 15, 2009
KitMaker: 1,976 posts
AeroScale: 1,789 posts
Posted: Wednesday, February 16, 2011 - 09:01 AM UTC
Excellent work Magnus. I have really enjoyed your build log, and what a fantastic result.
Well done.
All the best.
tim
New Jersey, United States
Joined: May 24, 2008
KitMaker: 346 posts
AeroScale: 307 posts
Posted: Wednesday, February 16, 2011 - 02:49 PM UTC
Another magnificent build. Simply stunning work.
Now what's next?