_GOTOBOTTOM
World War II
Discuss WWII and the era directly before and after the war from 1935-1949.
Hosted by Rowan Baylis
Zoukei-Mura Ta-152H-1
CPTKelley
_VISITCOMMUNITY
Pennsylvania, United States
Joined: January 15, 2005
KitMaker: 206 posts
AeroScale: 115 posts
Posted: Tuesday, November 16, 2010 - 04:15 PM UTC
For another perspective on this kit, I've done a quick in-box review. A build article will be forthcoming, shortly.

James
http://www.scalewarbirds.com


Roxter
_VISITCOMMUNITY
Rigas, Latvia
Joined: July 04, 2007
KitMaker: 268 posts
AeroScale: 245 posts
Posted: Thursday, November 18, 2010 - 01:24 AM UTC
James, the link is not working. Although I'm looking forward to read the review
CPTKelley
_VISITCOMMUNITY
Pennsylvania, United States
Joined: January 15, 2005
KitMaker: 206 posts
AeroScale: 115 posts
Posted: Sunday, November 21, 2010 - 04:19 AM UTC


Since ScaleWarbirds Studios is down, still (ISP says it's a DNS propagation; Domain registrar says nothing.) I'll post the first full update here.

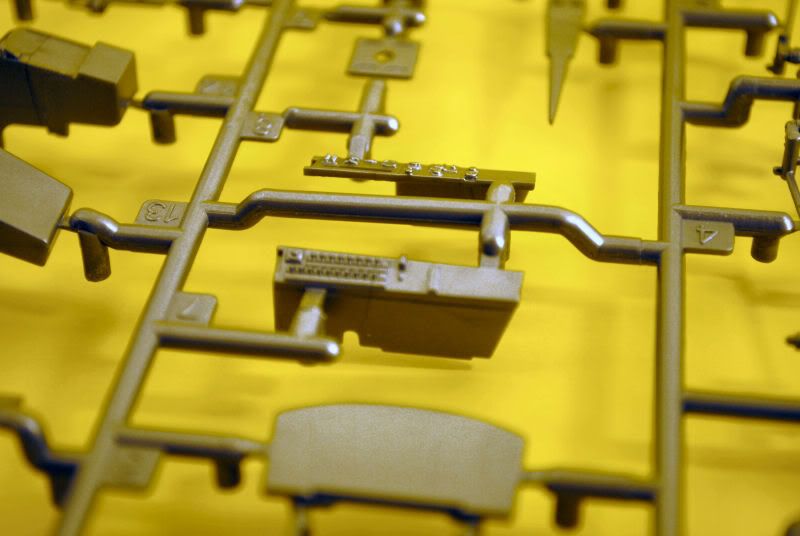
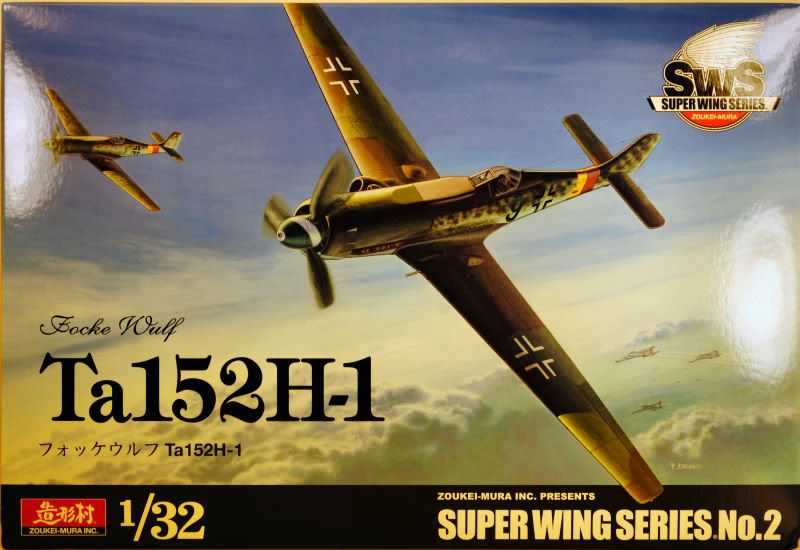
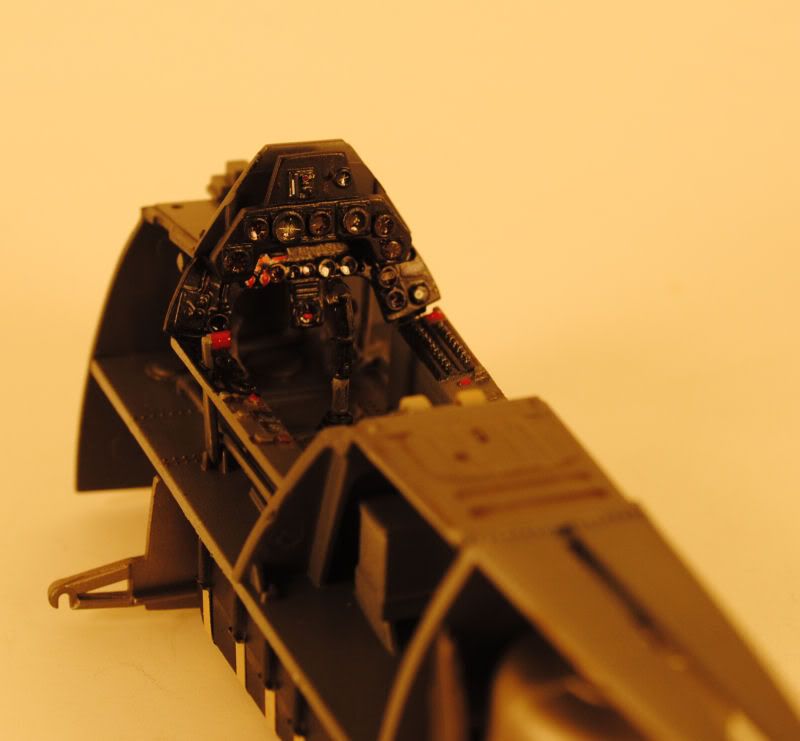
I spent the past 3 days building up the cockpit. The first thing that I'll say, is, I'm a little disappointed in the details. I think that they're a little soft. When I first saw the silver plastic, I was hopeful the details would "pop" under some paint. They did, but...I just feel that they are not as crisp as they could be. I had an Eduard FW-190D-9 cockpit set around somewhere, and I was going to use that for this project, but...of course, I can't find it. Now that the cockpit is finished, it'll turn up, any minute now. If you have the Eduard PE set I just mentioned, I think you'd be better off using it. Fortunately, as it's a Focke-Wulf...you won't see too much of the IP, once it's up under the coaming. For that reason as well, I decided to forgo detailing the different colored bezels.

The second thing that I'll say, and this is more of an issue, is the decals. They're not great. The instrument panel decals come in two options: one whole panel of instruments, one each for the upper and lower IP, and one each for the left and right hand tub panels. The other option is individual dials for each instrument. I initially went with the whole panel option, because I wanted to see how they performed. After numerous coats of Mr. Mark Softer and SolvaSet, they simply draped over the panels like thin vinyl. Not cool. Hot water, slice and dice, nothing helped. They're pretty much impervious to decal solutions. I soaked the whole thing in isopropyl, and scrubbed them off with a small brush. Then, I repainted the clear instrument panel, and used the individual decals. This was a better end result, but not great, AFAIC. I added some Future into each dial to represent the glass of each dial face. Additionally, and you can see in some of the pics, the graphics are heavily pixilated, like a dot-matrix printer. I'm concerned, because the airframe decals are of the same sheet. There isn't any dot-matrix patterns on the numbers or national markings...but I'm concerned how they will perform/go down. I'm already thinking about aftermarket decals.

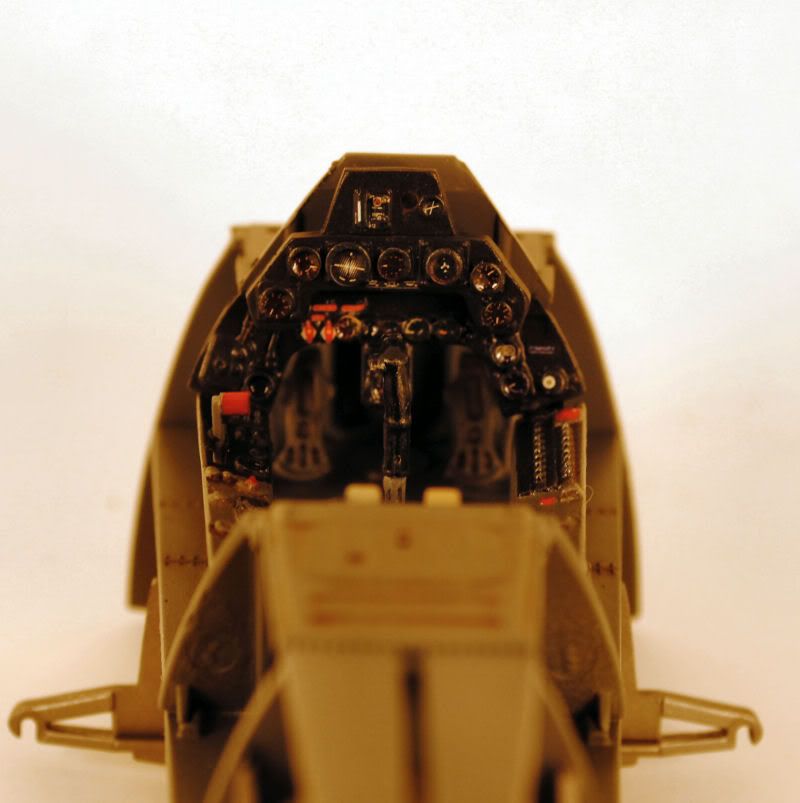
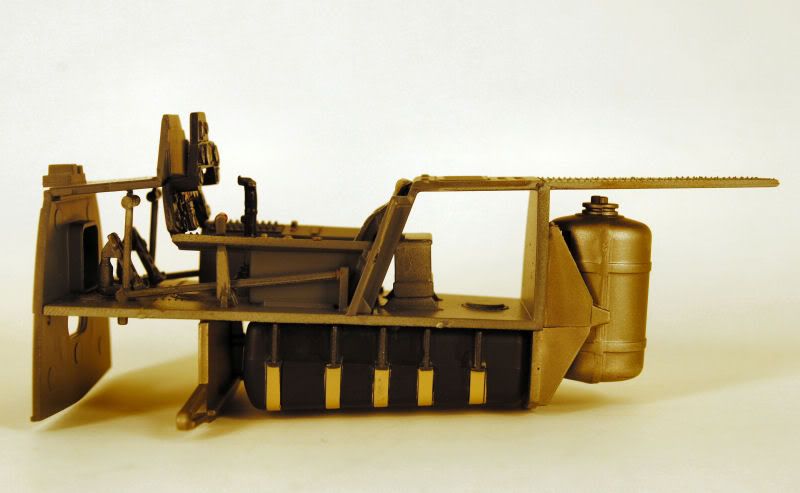
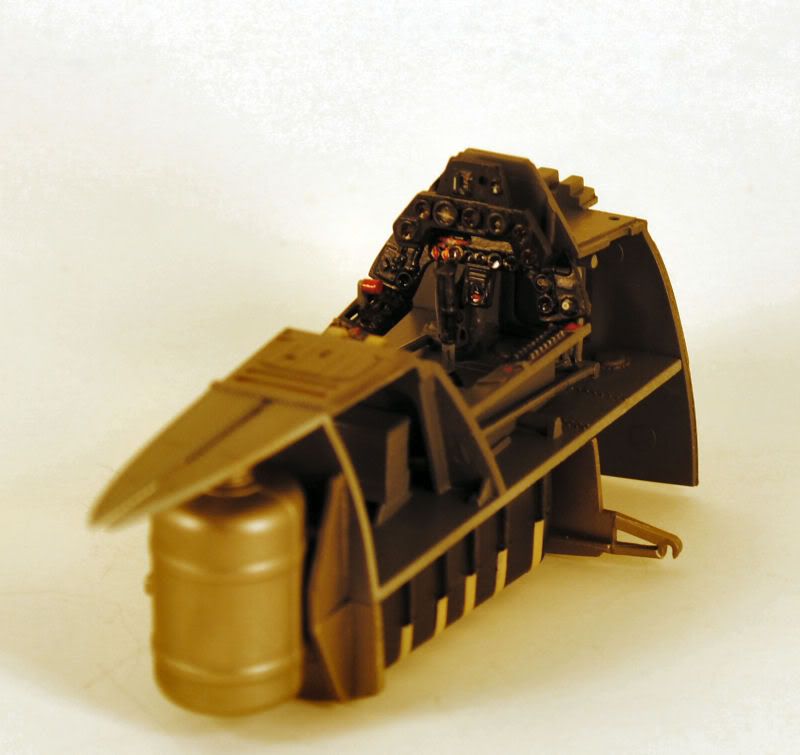
I do like the seats. I used the one with the belts molded onto it, and under paint, it's as nice as any resin replacement. I wish the shoulder straps went up onto the turtle-deck, but, with molding limitations, I understand why they don't. I think the seat looks pretty cool. All in all, the parts assembled very quickly, and easily. Most of the past 3 days was spent painting everything. I gave a Burnt Umber wash to most parts, followed by drybrushing with Gunmetal. I didn't fuss with the Nitrous Oxide tank, or the battery, or the fuel cells. You won't see them once in the fuselage.

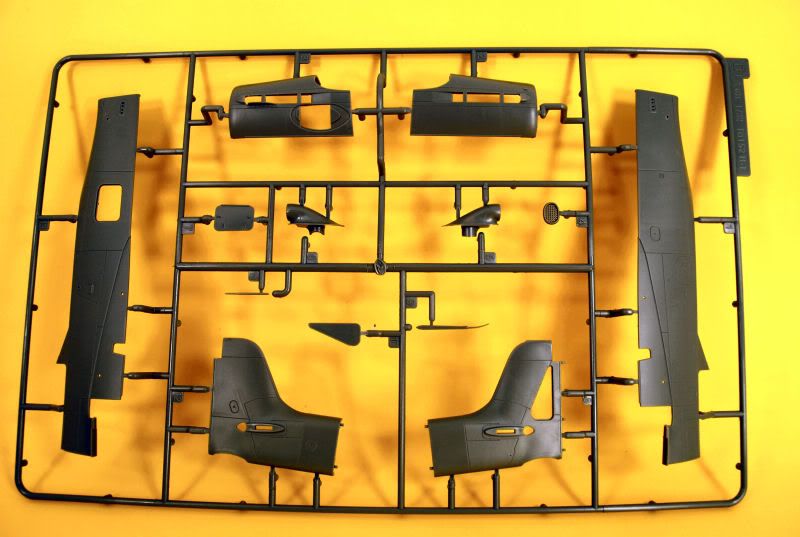
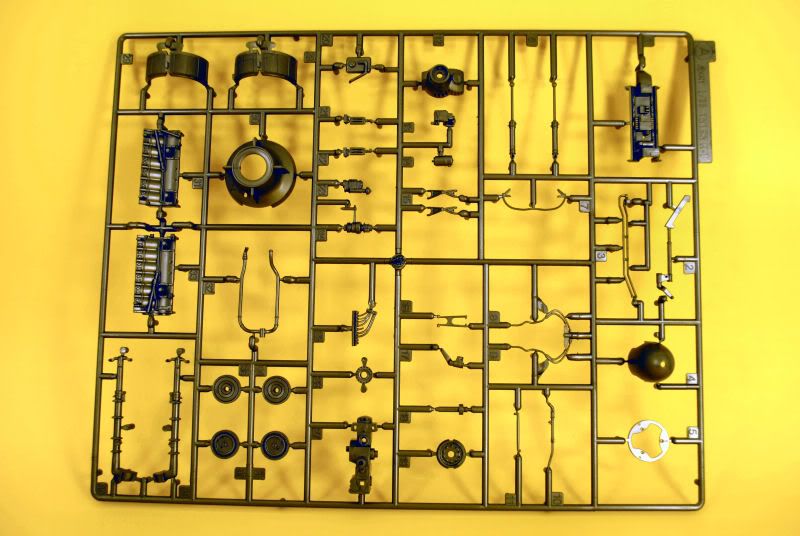
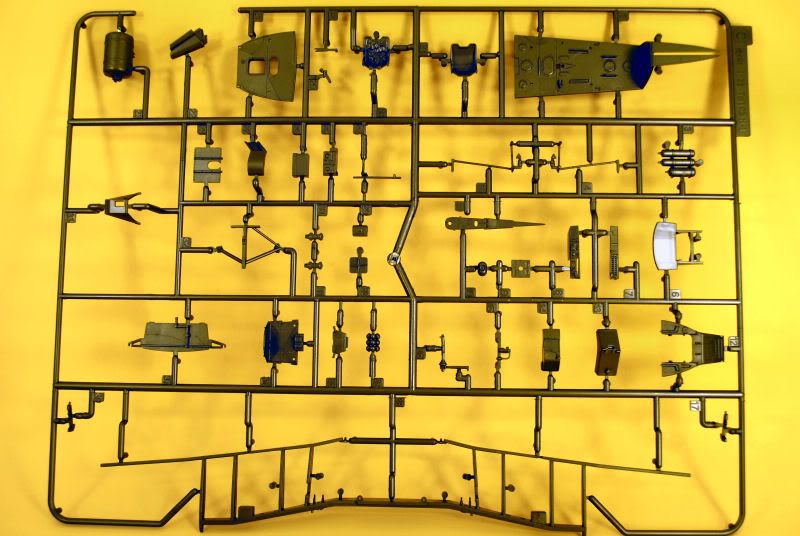
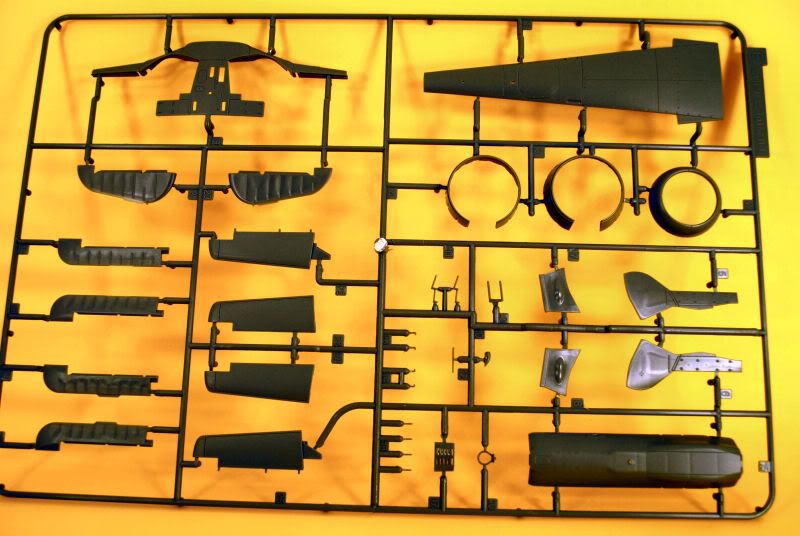
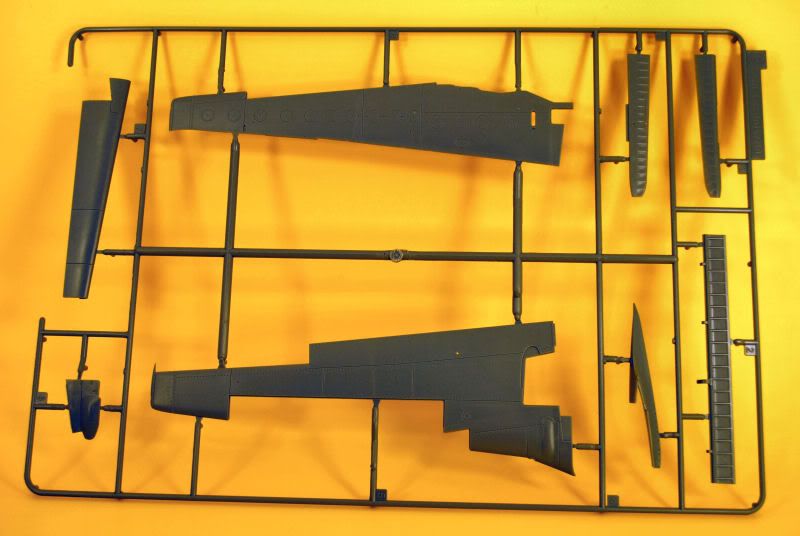
Here's the pictures, thus far. You can decide for yourselves.


CPTKelley
_VISITCOMMUNITY
Pennsylvania, United States
Joined: January 15, 2005
KitMaker: 206 posts
AeroScale: 115 posts
Posted: Thursday, November 25, 2010 - 12:57 PM UTC
I've completed the Ta-152's Junkers-Jumo 213.
www.scalewarbirds.com

Roxter
_VISITCOMMUNITY
Rigas, Latvia
Joined: July 04, 2007
KitMaker: 268 posts
AeroScale: 245 posts
Posted: Friday, November 26, 2010 - 01:30 AM UTC
Thanks James for update and honest review! Looking forward to see the whole build article.
NickZour
_VISITCOMMUNITY
Attica, Greece / Ελλάδα
Joined: May 01, 2008
KitMaker: 1,437 posts
AeroScale: 1,241 posts
Posted: Friday, November 26, 2010 - 05:52 AM UTC

Quoted Text

Thanks James for update and honest review! Looking forward to see the whole build article.


I have to agree

That's a really great kit ( I NEED IT 
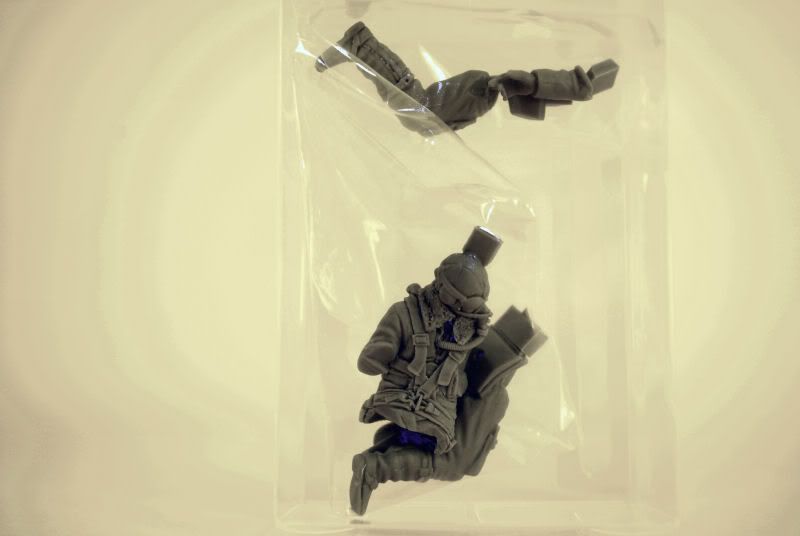
), the figure looks SUPERB, can we have a few close-ups please


Cheers Nick
dcandal
_VISITCOMMUNITY
Buenos Aires, Argentina
Joined: September 07, 2006
KitMaker: 918 posts
AeroScale: 688 posts
Posted: Saturday, November 27, 2010 - 03:01 AM UTC
An excellent work James
CPTKelley
_VISITCOMMUNITY
Pennsylvania, United States
Joined: January 15, 2005
KitMaker: 206 posts
AeroScale: 115 posts
Posted: Wednesday, December 01, 2010 - 04:37 PM UTC
Due to several distractions this past week, I haven't written this up yet on my site. But, I wanted to at least get some pics out there.

The fuselage is together, and the tail plug attached.

The inside of the cockpit walls are pockmarked with thick, deep ejector pin marks. They required a micro-chisel and lots of Mr. Surfacer. In my opinion, the over-engineering of the kit to produce an "anatomy lesson" has resulted in making the build much more difficult than it should be.

The fit of fuselage to tail plug was horrible at best. I recommend forgoing the instructions (which have you assemble the entire empannage and "plug" it onto the fuselage), and cementing the left and right tail halves to the left and right fuselage halves. The fit was SO poor, that the entire empannage was cocked off the center line by 20 - 25 degrees. I had to sand the butte ends flush, and still add a shim. Absolutely ridiculous. I still have to re-fill some of the resultant scars, and rescribe some lost detail. The further into this build I get....the more underwhelmed with it I am becoming. DEFINITELY not the latest and "greatest". At this stage, I consider this kit average, at best. At a very premium price.


Merlin
Staff MemberSenior Editor
AEROSCALE
#017
_VISITCOMMUNITY
United Kingdom
Joined: June 11, 2003
KitMaker: 17,582 posts
AeroScale: 12,795 posts
Posted: Wednesday, December 01, 2010 - 08:49 PM UTC
Hi James

Nice one! Thanks for the updates. Despite the few niggles, it does look a really exciting kit! I wonder what it'll cost if it ever reaches this side of The Pond?

All the best

Rowan
CPTKelley
_VISITCOMMUNITY
Pennsylvania, United States
Joined: January 15, 2005
KitMaker: 206 posts
AeroScale: 115 posts
Posted: Friday, December 03, 2010 - 03:08 PM UTC
Hi guys and gals.

I've updated my website with the wing assembly sequence. This kit, so far, is just not great. I expected so much more.


efrick
_VISITCOMMUNITY
Tennessee, United States
Joined: December 15, 2003
KitMaker: 20 posts
AeroScale: 12 posts
Posted: Friday, December 03, 2010 - 04:43 PM UTC
Hi James,

From what I see so far, you are correct: This just doesn't look like a great kit. But, I must say, considering what you are working with you are making it look pretty darn good. I was almost giddy over the prospect of this kit when I first read about it but it appears to be less than stellar.

I think I'll hold out for the DML 1/32nd DO-335.

Regards (and thanks for the progressive build!)

Ed
CPTKelley
_VISITCOMMUNITY
Pennsylvania, United States
Joined: January 15, 2005
KitMaker: 206 posts
AeroScale: 115 posts
Posted: Saturday, December 04, 2010 - 02:27 AM UTC
DML is making a 1/32 Arrow???? Sweet!!!!

I know this build review seems like I'm being overly negative...I'm not! (I've been accused of this on another forum). I'm test fitting, I'm being careful, I'm following the directions, I'm trying to make this thing work like the advertisements would have you believe it would. I had no misconceptions about it being a Tamiya kit. It's just not great. Will it look good when I'm done? Yeah, probably.

I'm just an average modeler showing the world how this kit really goes together....your mileage may vary.
 _GOTOTOP