_GOTOBOTTOM
World War II: Germany
Aircraft of Germany in WWII.
Hosted by Rowan Baylis
1/32 Me-163B
ScanmanDan
_VISITCOMMUNITY
Victoria, Australia
Joined: April 01, 2006
KitMaker: 9 posts
AeroScale: 9 posts
Posted: Saturday, February 05, 2011 - 08:30 PM UTC
I'm just having a bit of fun. Something simple to practice on and the Hasegawa Komet seemed to fit the bill nicely. The only aftermarket bits needed were a CMK resin cockpit and Eagle Strike decals.

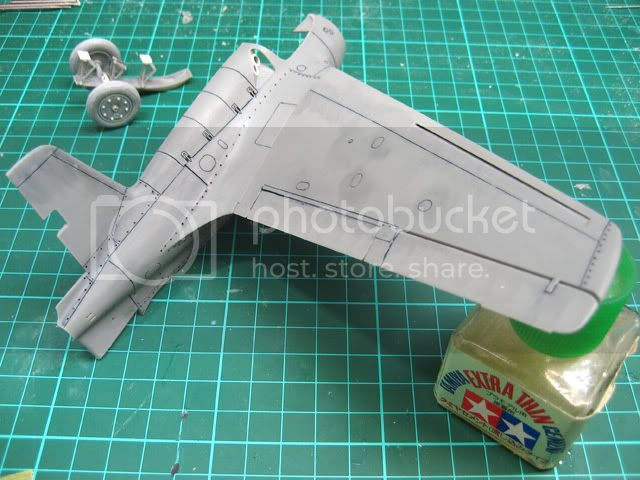
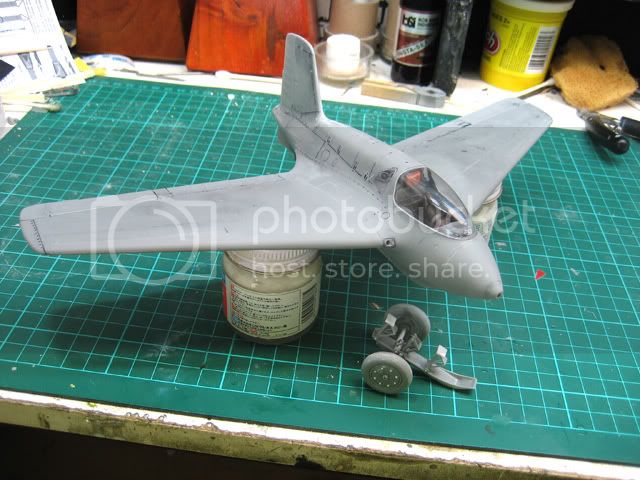
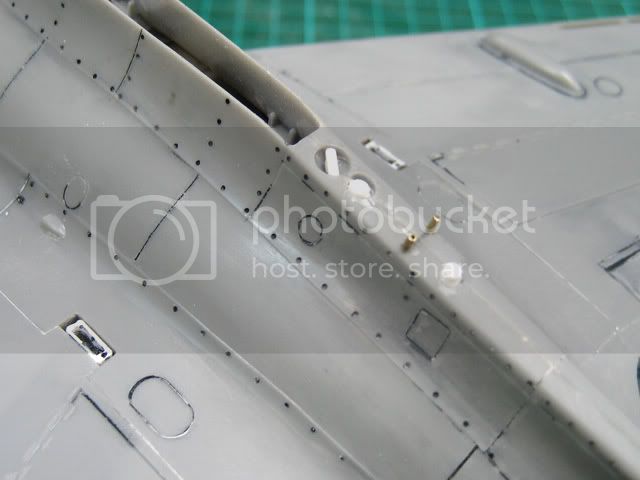
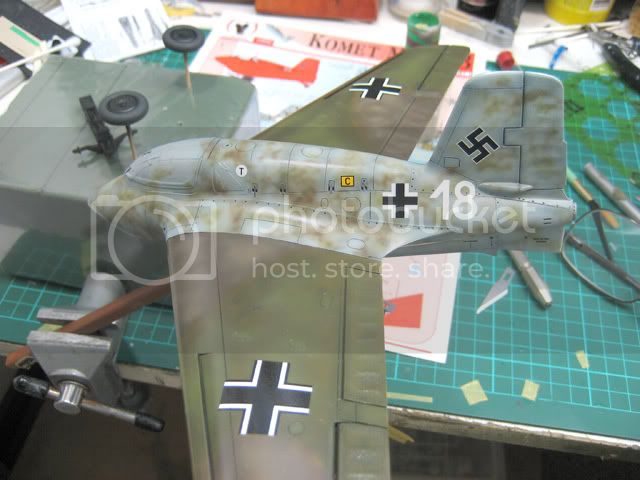
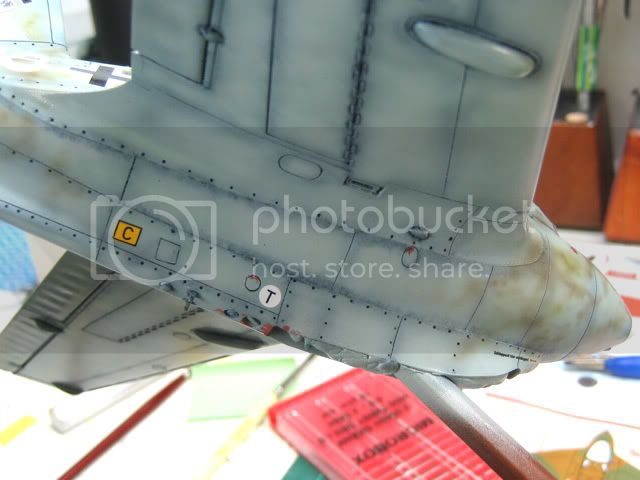
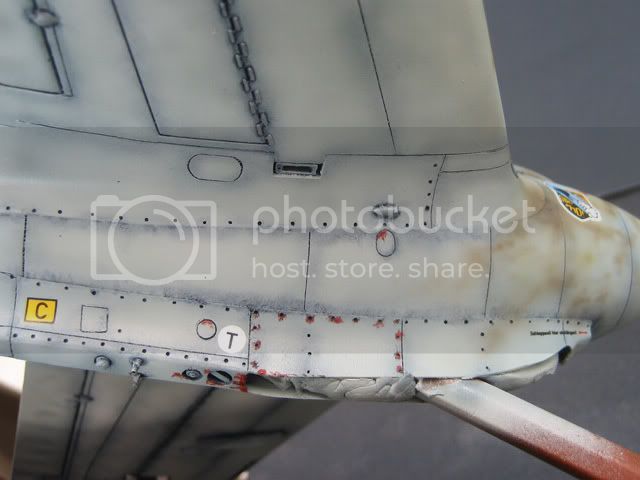
So far I've assembled the fuselage and wings and scribed in some details.


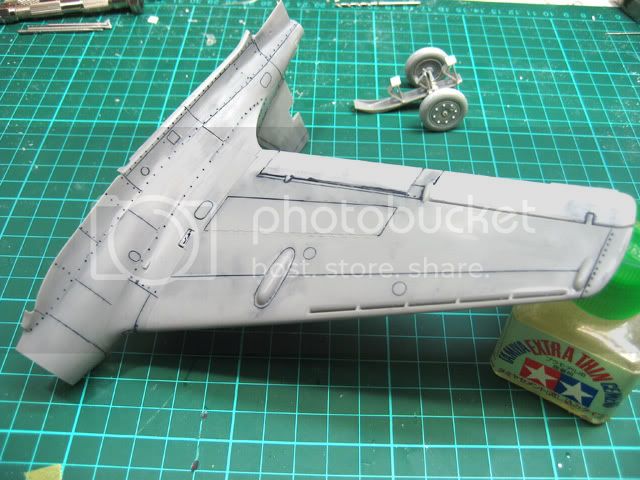
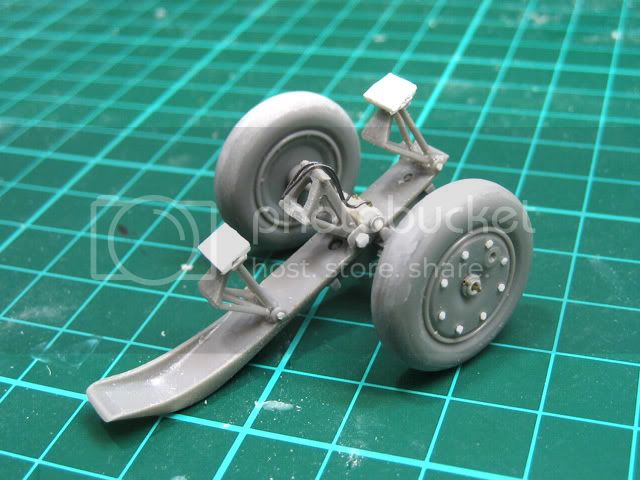
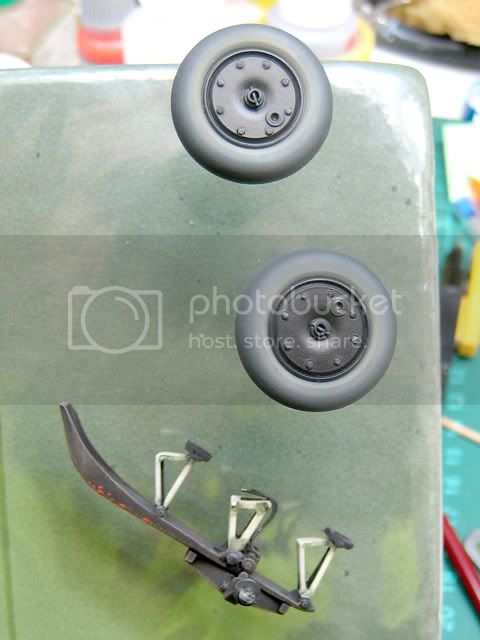
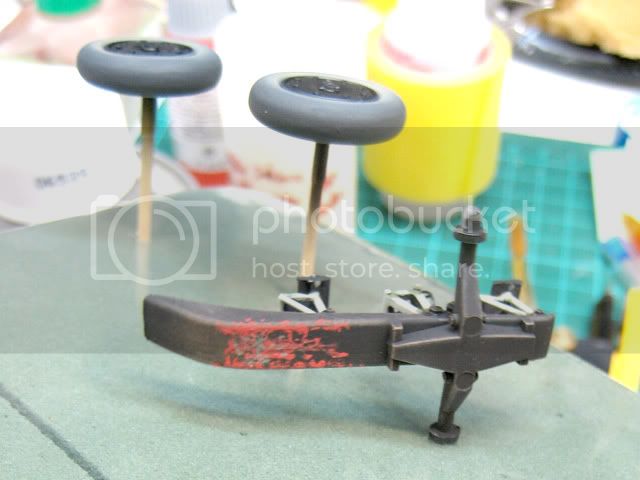
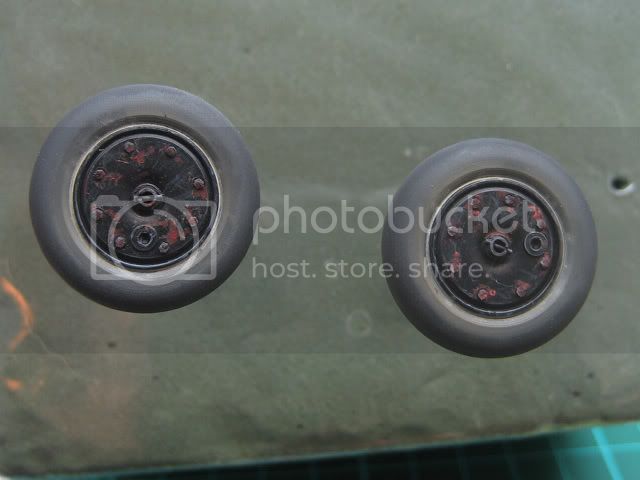
Assembled the dolly and wheels, added a few bits from styrene and modified the mountings so that it can be fitted after the fuselage is joined and painted.


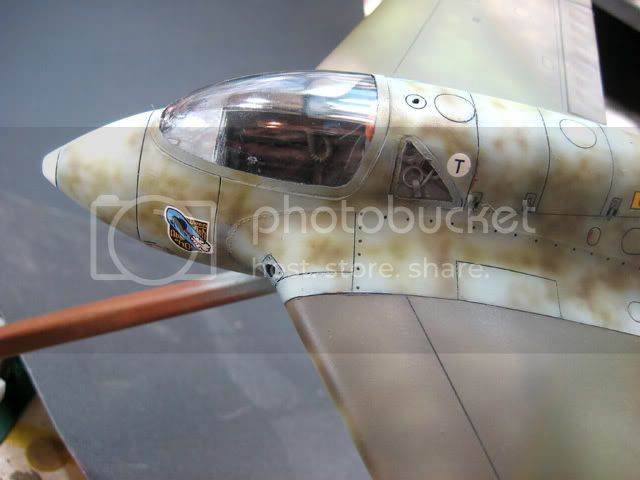
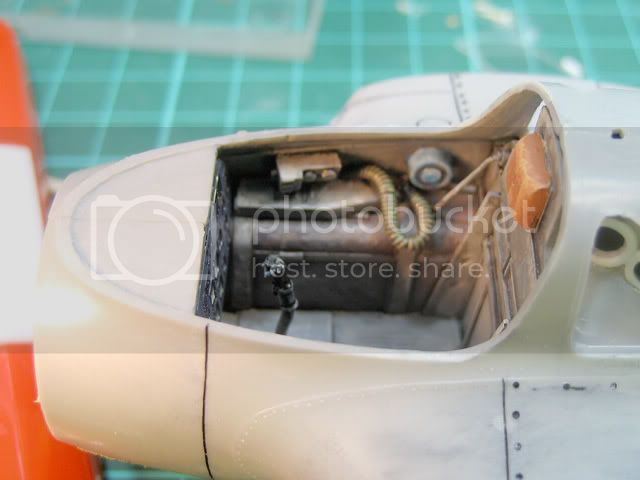
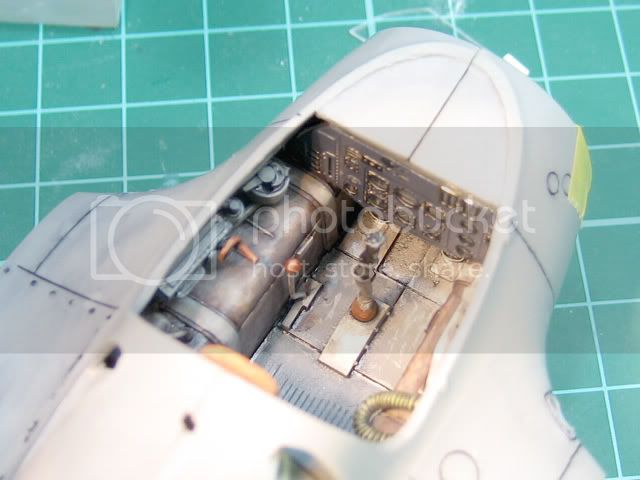
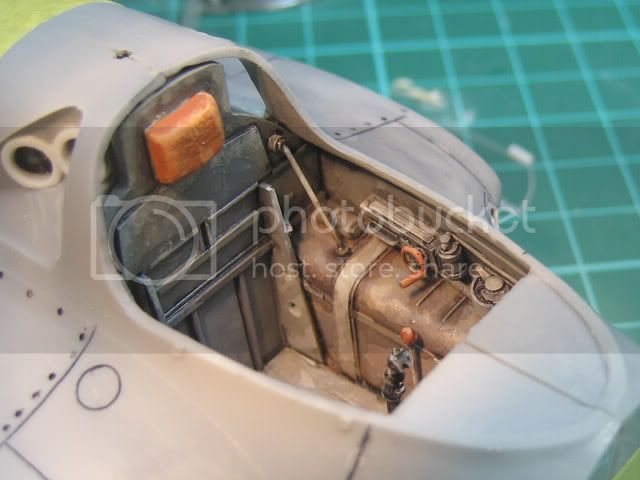
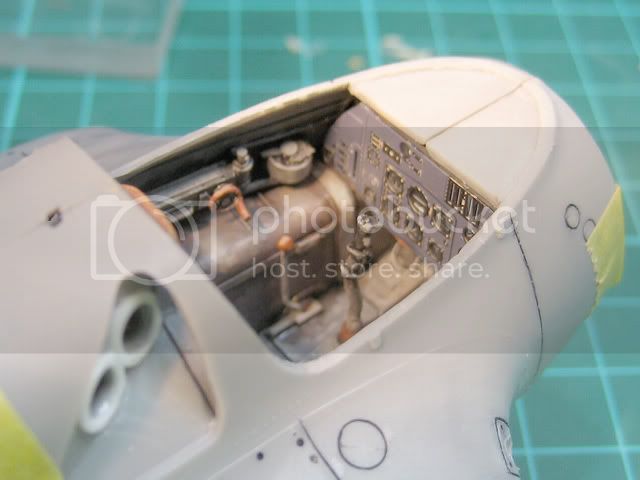
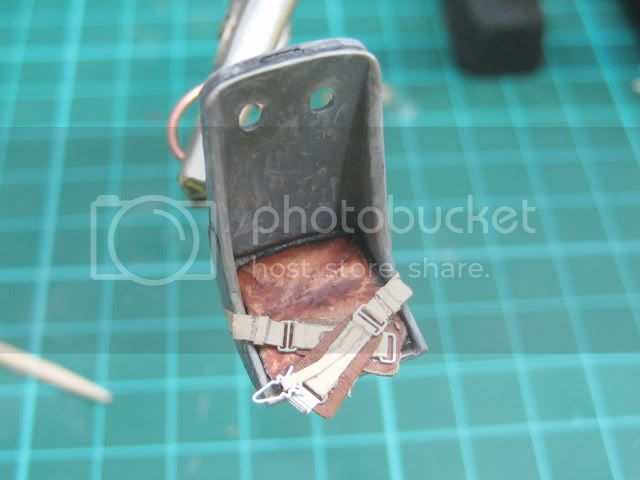
Begun work on assembling the beautiful CMK resin cockpit.

Hopefully have this kit in the paintshop by next weekend and finished in a couple of weeks. Which is warp speed for me.

Thanks for stopping in for a look.

Dan
NickZour
_VISITCOMMUNITY
Attica, Greece / Ελλάδα
Joined: May 01, 2008
KitMaker: 1,437 posts
AeroScale: 1,241 posts
Posted: Saturday, February 05, 2011 - 10:31 PM UTC
Wow! I can see some great detailing until now
One of my favorites in the game "Il-2 Sturmovik" because of it's great performance


Cheers Nick
AussieReg
Staff MemberAssociate Editor
AUTOMODELER
#007
_VISITCOMMUNITY
Victoria, Australia
Joined: June 09, 2009
KitMaker: 8,156 posts
AeroScale: 3,756 posts
Posted: Saturday, February 05, 2011 - 10:33 PM UTC
Hey Dan, welcome to Aeroscale. More Aussies (especially Vics) is always a good thing !!

Great work so far, please post some more progress pics and let us know how the kit goes together.

Cheers, D
ScanmanDan
_VISITCOMMUNITY
Victoria, Australia
Joined: April 01, 2006
KitMaker: 9 posts
AeroScale: 9 posts
Posted: Monday, February 07, 2011 - 10:47 PM UTC
A little more progress. Worked a bit to get the resin CMK cockpit to sit in the fuselage properly. Had to use a styrene spar and pin to hold it in position. I didn't use the sets photoetched side panels but made styrene replacements for them. I'm really impressed with the detail on the resin cockpit. I hope I can do it justice once the paint goes on.

Here is where it's at right now.


Nick & Daiman-- Thanks for the comments.
Siderius
_VISITCOMMUNITY
Tennessee, United States
Joined: September 20, 2005
KitMaker: 1,747 posts
AeroScale: 1,673 posts
Posted: Tuesday, February 08, 2011 - 01:20 PM UTC
Really looking forward to seeing this build. Although I am a 72 scale modeler, I next enjoy 32 scale. The Me 163 will look great I'm sure. Keep up the good work. Russell
ScanmanDan
_VISITCOMMUNITY
Victoria, Australia
Joined: April 01, 2006
KitMaker: 9 posts
AeroScale: 9 posts
Posted: Saturday, February 12, 2011 - 12:35 AM UTC
Progress;


Thanks for taking a look.

Dan
chukw1
_VISITCOMMUNITY
California, United States
Joined: November 28, 2007
KitMaker: 817 posts
AeroScale: 729 posts
Posted: Saturday, February 12, 2011 - 05:29 AM UTC
Looks wonderful, Dan- cheers! Getting resin to fit is always a feat, at least for me. I built that kit back in the 70's- and can't count the times I broke the skid supports.

Looking forward to seeing more-
chuk
ScanmanDan
_VISITCOMMUNITY
Victoria, Australia
Joined: April 01, 2006
KitMaker: 9 posts
AeroScale: 9 posts
Posted: Wednesday, February 23, 2011 - 12:22 AM UTC
Slow progress. Concentrating on getting the basic assembly nice and smooth and square. I'd like to enter this one in competition at Model Expo.


Added a few belly details, tow hook and fuel dump vent.


I have spent a bit of time getting a good smooth wing joint and tidying up the scribing. Just a little bit to go before I can prime this baby.

Chuck --A big thank you for your wonderful comments. I'm honored as I am a big fan of your craftsmanship and entertaining and informative posts.

Dan
ScanmanDan
_VISITCOMMUNITY
Victoria, Australia
Joined: April 01, 2006
KitMaker: 9 posts
AeroScale: 9 posts
Posted: Friday, February 25, 2011 - 06:24 PM UTC
After a day filled with the shakes-ies, drops-ies, knock over-ies and smug everything in sight-ies I have managed to get the blue on.


Now it's just a matter of leaving the model alone to cure a bit before I tackle the mottles. Easier said than done as I'm dying to get on with it.

I hope you like her with a bit of paint.


Dan
ScanmanDan
_VISITCOMMUNITY
Victoria, Australia
Joined: April 01, 2006
KitMaker: 9 posts
AeroScale: 9 posts
Posted: Friday, February 25, 2011 - 11:01 PM UTC
Mottles;


Tried to stay a bit subtle.

Dan
ScanmanDan
_VISITCOMMUNITY
Victoria, Australia
Joined: April 01, 2006
KitMaker: 9 posts
AeroScale: 9 posts
Posted: Monday, February 28, 2011 - 11:19 PM UTC

Must keep pushing on.

Decals;


Haven't made any stuff ups yet. Started to run some very thin Paynes Grey oil paint into the panel lines. But I found that I didn't need as much as I usually do because the water color that I used to check the scribing and rivets held up very well after painting.

Dan
ScanmanDan
_VISITCOMMUNITY
Victoria, Australia
Joined: April 01, 2006
KitMaker: 9 posts
AeroScale: 9 posts
Posted: Monday, March 07, 2011 - 01:07 AM UTC
Slow progress;

Started to paint up the landing trolly.


Lots and lots of pin washes with oil paints to panel lines and started the chipping/scratching.


Happy now that most of the decals are done and I can start to do the detail painting. That's the part I really like to do.
ScanmanDan
_VISITCOMMUNITY
Victoria, Australia
Joined: April 01, 2006
KitMaker: 9 posts
AeroScale: 9 posts
Posted: Sunday, March 13, 2011 - 02:43 PM UTC
Slow going but a little progress.

Wheels got finished;


Over cooked, and I was trying to be restrained :BANGHEAD2:

A little detail painting but I tried real hard to stop myself from doing my usual over board chip and bang it to death finish.

The mantra was KISS Keep it SUBTLE stupid.


Last of the decals went on and a nice thin even coat of Testers Dull Coat to give a semi flat finish.

]


Just a very few additions to make before I make the display base. Might even, gasp, get her done by next weekend.

Happy with the way the finish turned out but man am I itching to just add one more chip.....
Maybe the next one can be ready for the scrapers torch.
Siderius
_VISITCOMMUNITY
Tennessee, United States
Joined: September 20, 2005
KitMaker: 1,747 posts
AeroScale: 1,673 posts
Posted: Tuesday, March 15, 2011 - 03:52 PM UTC
Daniel, that's nice work there! I really like your kit. 1/32 is my second favorite scale, because I work mostly in 1/72. The camoflauge came out great. You should be proud of your Komet. Russell
chukw1
_VISITCOMMUNITY
California, United States
Joined: November 28, 2007
KitMaker: 817 posts
AeroScale: 729 posts
Posted: Wednesday, March 16, 2011 - 02:46 AM UTC
That's a real peach, Daniel! The mottling and finish look great.

Cheers!
chuk
 _GOTOTOP