MH-53E Sea Dragon Academy 1:48
England - West Midlands, United Kingdom
Joined: March 21, 2009
KitMaker: 379 posts
AeroScale: 75 posts
Posted: Wednesday, February 16, 2011 - 10:49 AM UTC
Hello everybody
This is my next project:
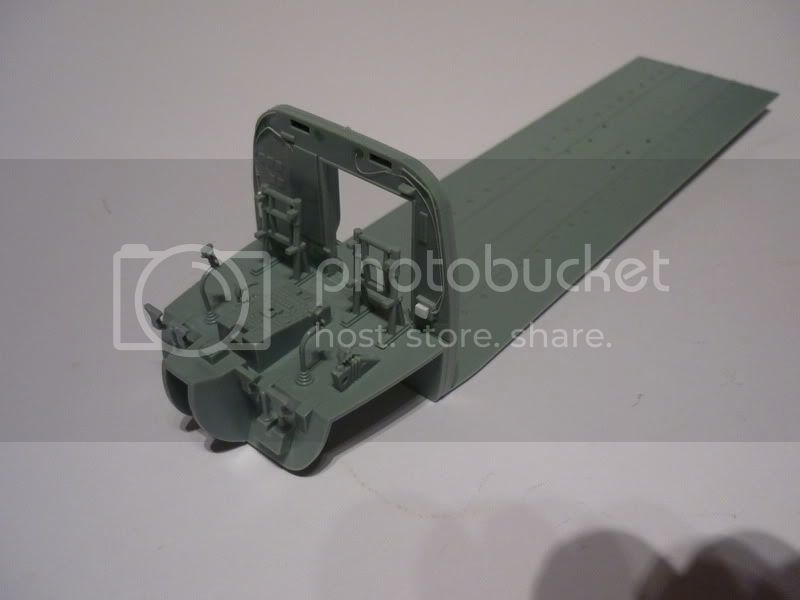
I build straight OOb as i am planning to concentrate on clean build process.
There might be some small additions, but nothing major.
[url=http://photobucket.com/Ratatouille-collection?albumview=slideshow][img]http://i.imgur.com/kFPfg.jpg[/img][/url]
Putrajaya, Malaysia
Joined: March 04, 2004
KitMaker: 2,511 posts
AeroScale: 121 posts
Posted: Wednesday, February 16, 2011 - 12:17 PM UTC
i have this kit lying somewhere in the stash... this is my first time watching a wip of this build... will watch this thread close... good luck mate!
The more i know, the less I understand!!!!
Florida, United States
Joined: May 16, 2002
KitMaker: 17,694 posts
AeroScale: 1,728 posts
Posted: Wednesday, February 16, 2011 - 03:01 PM UTC
Looking good so far. I'll be watching this one as well. I will be starting the 1/48 CH-53E soon myself.
Field Artillery --- The KING of BATTLE!!!
"People sleep peaceably in their beds at night only because rough men stand ready to do violence on their behalf." -- George Orwell
Showcase
Texas, United States
Joined: June 29, 2010
KitMaker: 5,854 posts
AeroScale: 372 posts
Posted: Wednesday, February 16, 2011 - 05:58 PM UTC
I love this family of heavy helicopters. I have the CH-53E in my stash as well, but won't be building it for a while. It will be great to see this one built Adam. Are you going to creat a base that represents part of the deck as you did on your last build?
England - West Midlands, United Kingdom
Joined: March 21, 2009
KitMaker: 379 posts
AeroScale: 75 posts
Posted: Wednesday, February 16, 2011 - 08:30 PM UTC
Quoted Text
I love this family of heavy helicopters. I have the CH-53E in my stash as well, but won't be building it for a while. It will be great to see this one built Adam. Are you going to creat a base that represents part of the deck as you did on your last build?
Yes, i am thinking about re-creating that picture, 2 edges will be end of aircraft deck, and 2 other like a cut-out with some pipes etc.
This time i will try to get smaller chains so they will be more "in scale" than previuos one.
[url=http://photobucket.com/Ratatouille-collection?albumview=slideshow][img]http://i.imgur.com/kFPfg.jpg[/img][/url]

#041
Kobenhavn, Denmark
Joined: July 20, 2006
KitMaker: 10,069 posts
AeroScale: 3,788 posts
Posted: Wednesday, February 16, 2011 - 11:32 PM UTC
Very nice project, Adam. I do not know the Academy kit, so it will be interesting to follow.
Looking forward to see more

Campaign'oholic - 252+ campaigns completed
European Union
Joined: September 28, 2004
KitMaker: 2,186 posts
AeroScale: 1,587 posts
Posted: Thursday, February 17, 2011 - 03:49 AM UTC
having one of those in my stack as well, i am looking forward to following this thread
The mission: Beat the stash.
Almost conquered: MIG-29, Blackhawk, Skyray, Skyraider, fouga
Main battle:Demon, Skyhawk, F-14, CH-53
Stash reserve:Blackhawk, CH-46, 47 en 53; SU-7, Eurofighter, mohawk, hellcat, F-16D, 6x Fouga Magister, Voodoo
Texas, United States
Joined: June 29, 2010
KitMaker: 5,854 posts
AeroScale: 372 posts
Posted: Thursday, February 17, 2011 - 08:55 AM UTC
Awesome Adam, glad to hear it and looking forward to another excellent display piece.
England - North West, United Kingdom
Joined: May 02, 2008
KitMaker: 156 posts
AeroScale: 51 posts
Posted: Thursday, February 17, 2011 - 09:18 AM UTC
watching this!

litespeed
 News Reporter
England - North West, United Kingdom
Joined: October 15, 2009
KitMaker: 1,976 posts
AeroScale: 1,789 posts
Posted: Friday, February 18, 2011 - 06:57 AM UTC
I will be watching this also. Great choice of subject Adam.
All the best.
tim
England - West Midlands, United Kingdom
Joined: March 21, 2009
KitMaker: 379 posts
AeroScale: 75 posts
Posted: Monday, February 21, 2011 - 09:27 AM UTC
Hello lads
I hope i want disappoint anybody with this project.
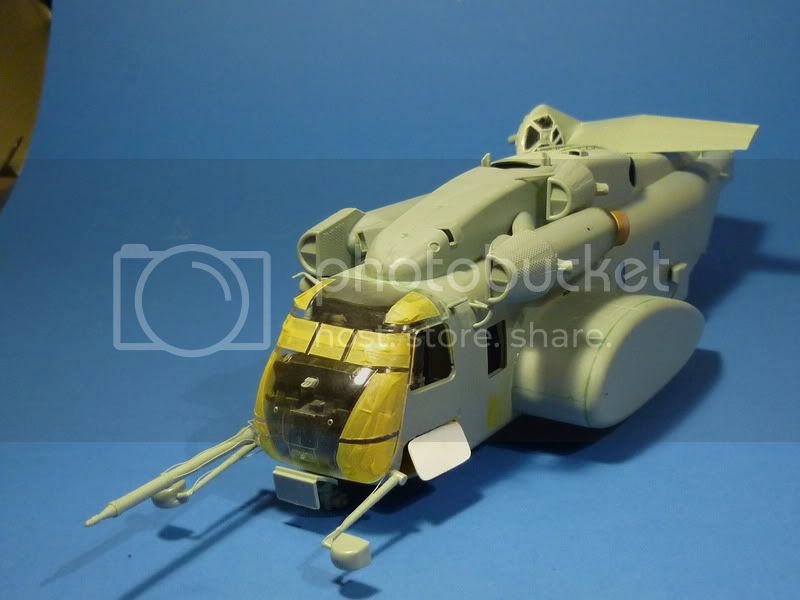
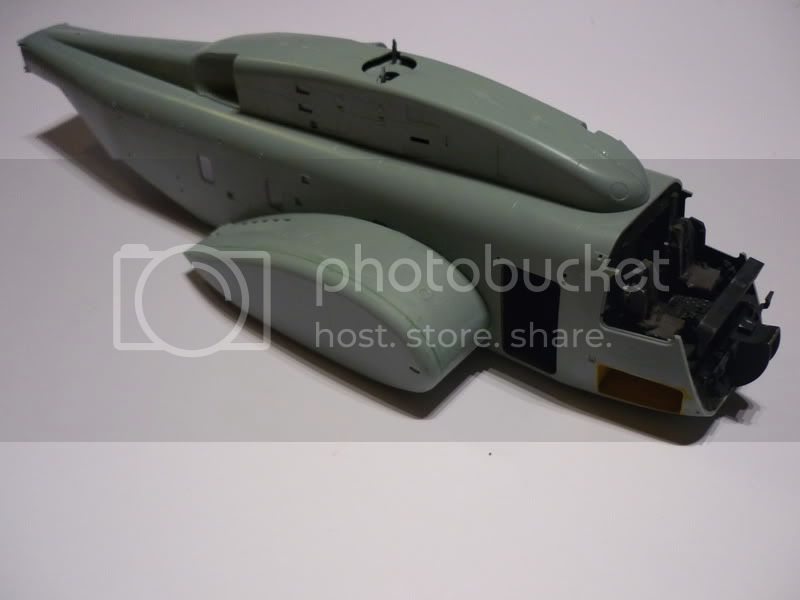
As i want to leave few things open this time, i started work on interior. I am not exactly happy with it, but it should be fine.
[url=http://photobucket.com/Ratatouille-collection?albumview=slideshow][img]http://i.imgur.com/kFPfg.jpg[/img][/url]
England - West Midlands, United Kingdom
Joined: March 21, 2009
KitMaker: 379 posts
AeroScale: 75 posts
Posted: Tuesday, March 08, 2011 - 09:35 AM UTC
Welcome and hello
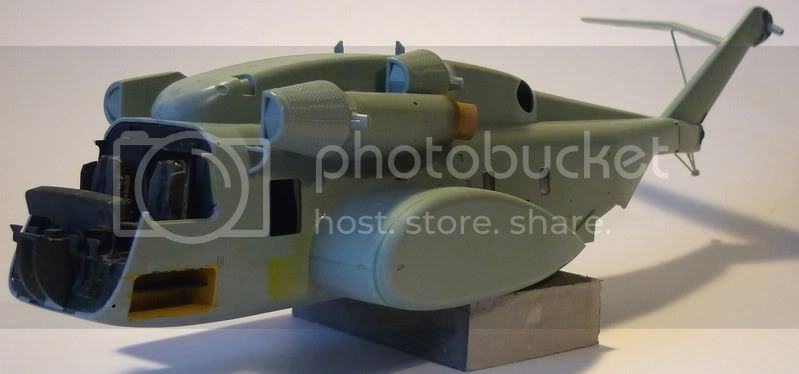
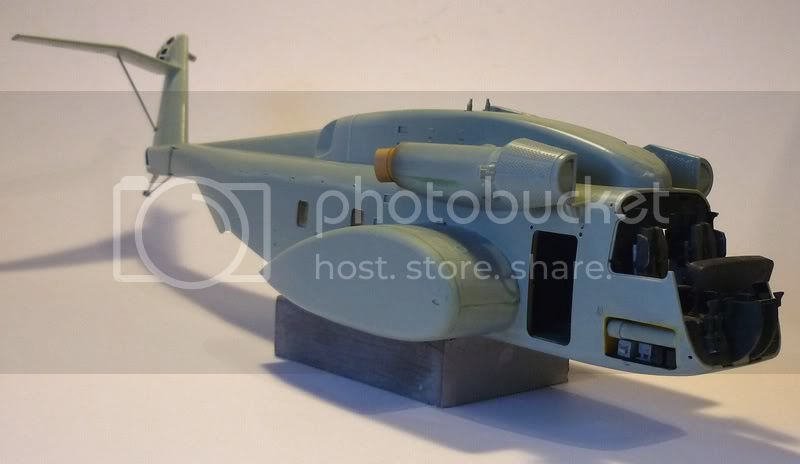
Smal progress, not much time lately.
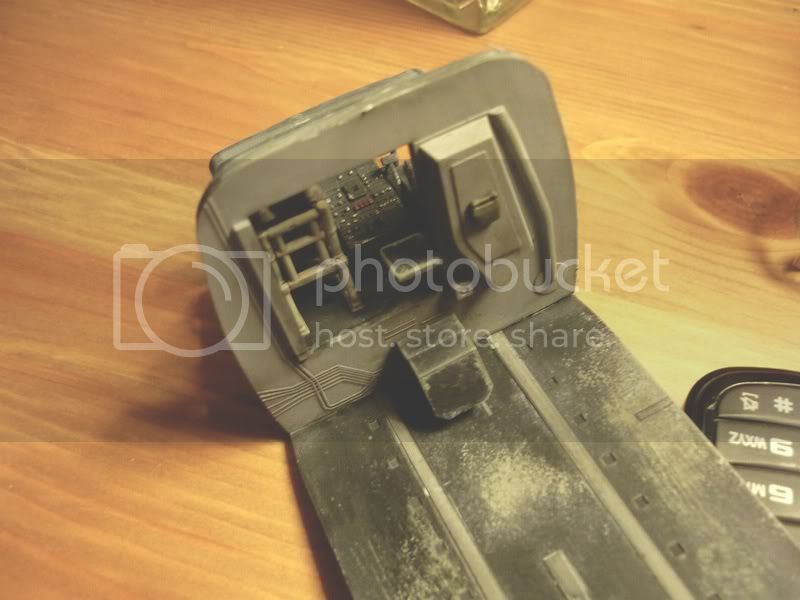
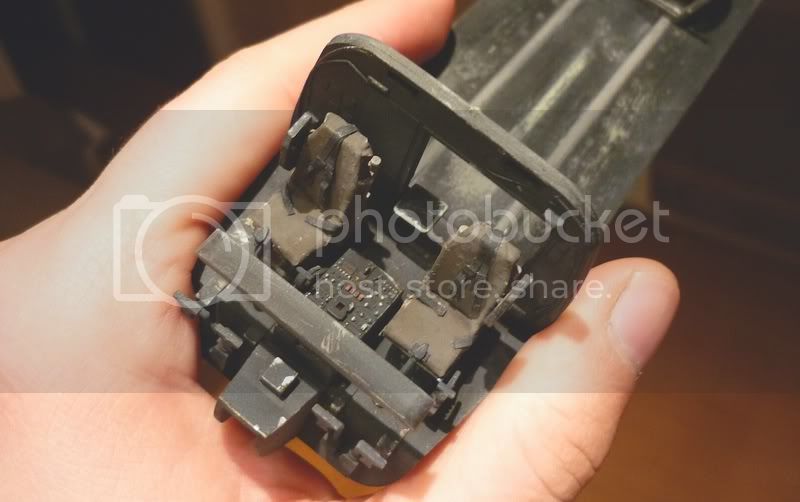
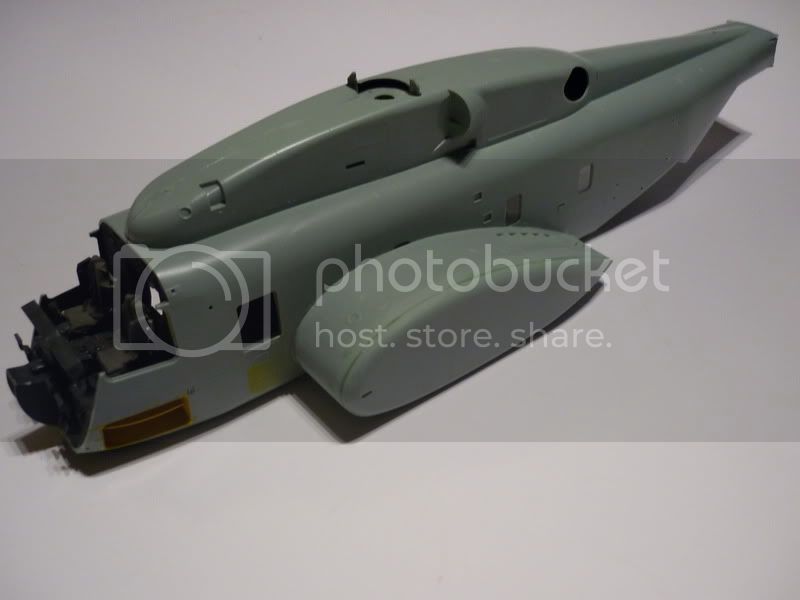
I decided to open few hatches for avionics, so a bit of cutting and scratchbuilding was necessary.
I must say that so far this build is quite easy, all the parts are fitting together and only a bit of putty and sanding is need it:
[url=http://photobucket.com/Ratatouille-collection?albumview=slideshow][img]http://i.imgur.com/kFPfg.jpg[/img][/url]
New York, United States
Joined: January 29, 2004
KitMaker: 3,836 posts
AeroScale: 1,036 posts
Posted: Tuesday, March 08, 2011 - 06:34 PM UTC
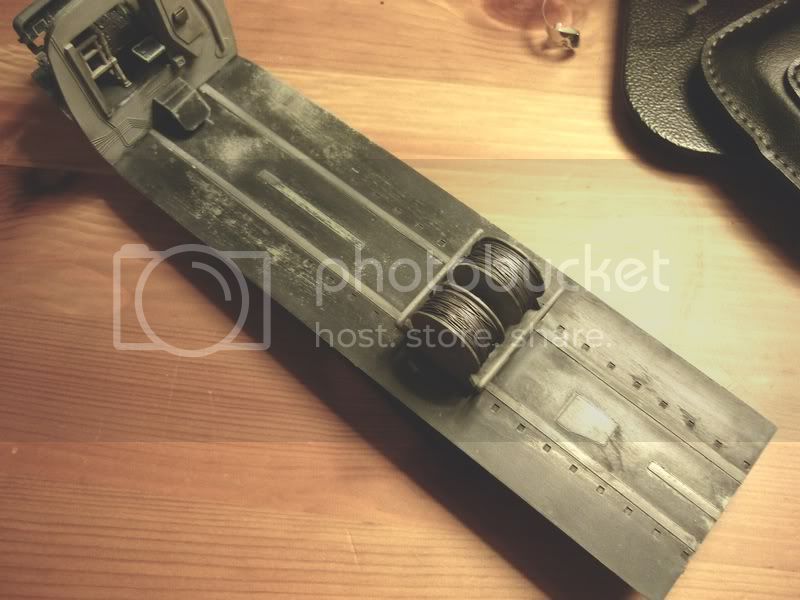
Three words Adam..."don't touch it". The interior look great, especially the affect on how you wore down the paint in the cargo area
very realistic. Looking forward to your next progress posting.
Happy Modeling,
Joe
It feels like bible camp
Only Im not crying pretending Im somewhere else.
Happy Modeling
Joe
Texas, United States
Joined: June 29, 2010
KitMaker: 5,854 posts
AeroScale: 372 posts
Posted: Saturday, March 12, 2011 - 07:11 PM UTC
Man she's looking good! I'm glad there haven't been any real fit issues on this one..
England - South East, United Kingdom
Joined: September 15, 2004
KitMaker: 4,728 posts
AeroScale: 1,351 posts
Posted: Sunday, March 13, 2011 - 11:03 AM UTC
Great going Adam, this is one of those kits that been on my to get list for some time now it may move to the top of the list.
I'll follow with interest.
On the bench...
Italeri A129 Mangusta
British Bulldog Spitfire theme build
England - West Midlands, United Kingdom
Joined: March 21, 2009
KitMaker: 379 posts
AeroScale: 75 posts
Posted: Sunday, March 13, 2011 - 11:09 AM UTC
Quoted Text
Great going Adam, this is one of those kits that been on my to get list for some time now it may move to the top of the list.
I'll follow with interest.
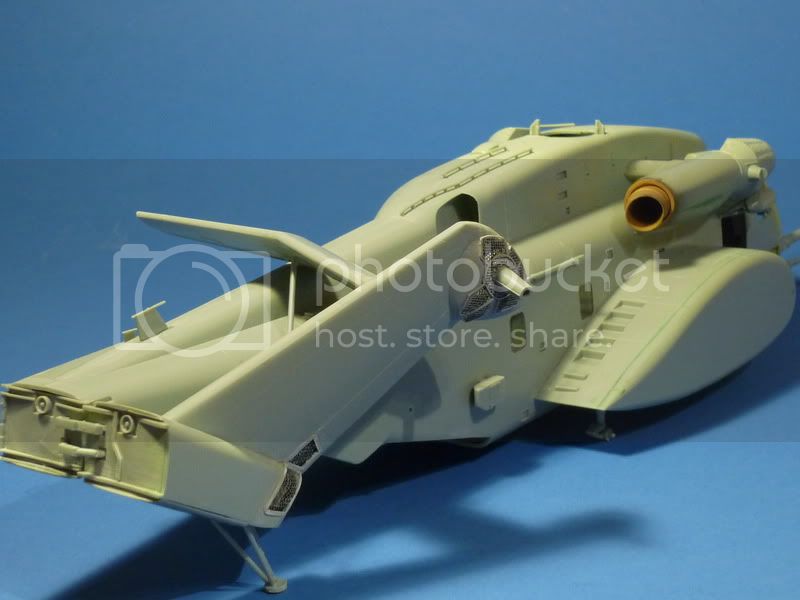
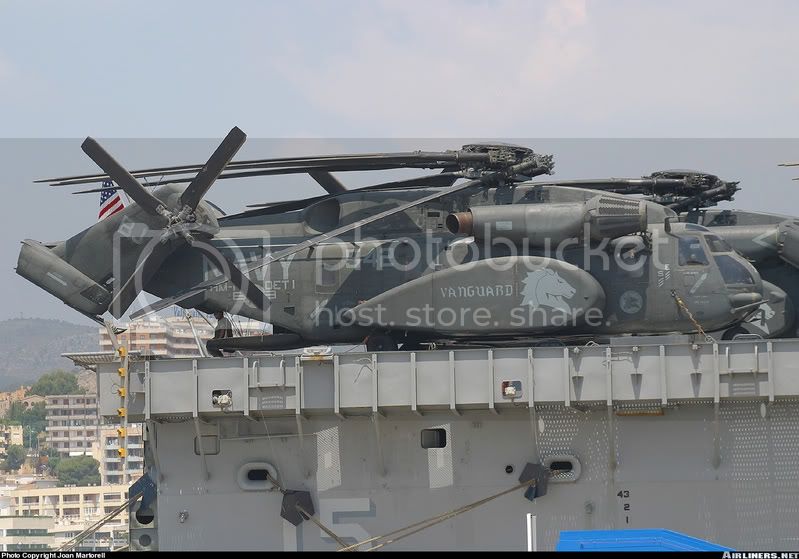
Thanks for interest lads, yes it is a very good kit, I love the box-art and i must say that is one the main reasons why i bought. Other reason over Super Stallion is those big sponson.
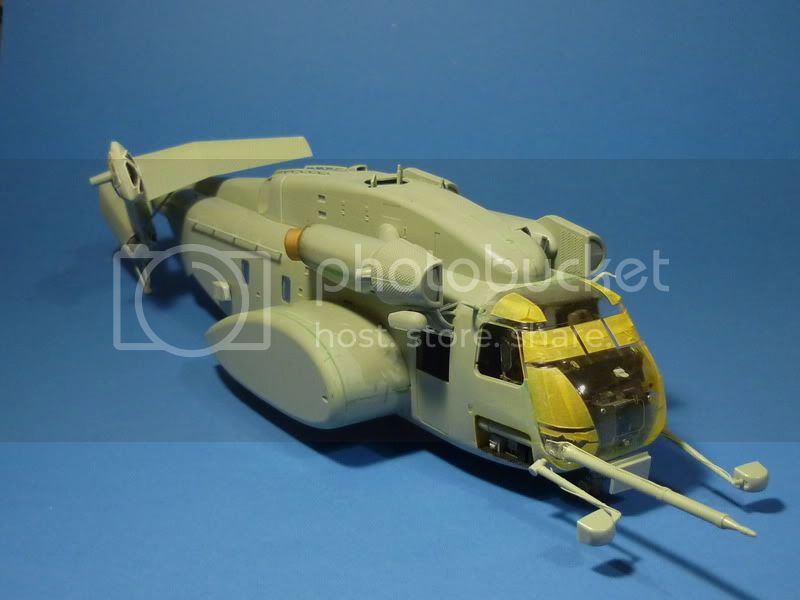
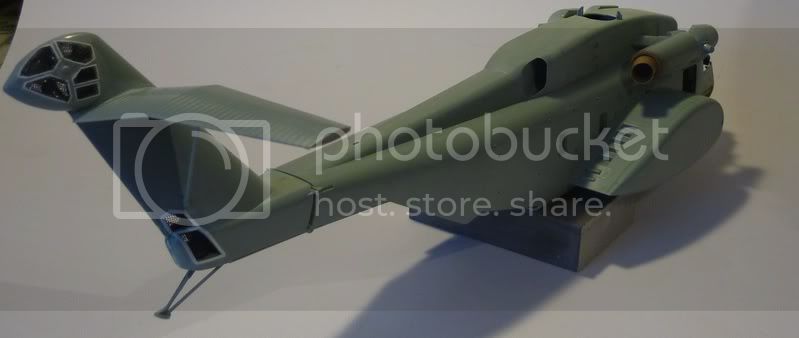
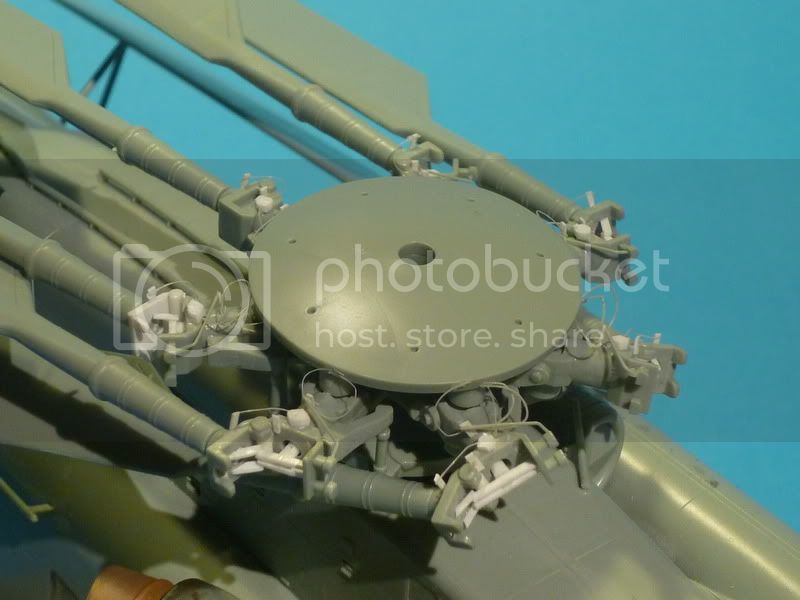
So far i am working on engines and tail. I decided to remove molding from ventylation holes and scratchbuild rear rotor transmision. A lot of cutting and drilling but it think it will be worth it, only think is that i am not quite sure yet how to replicate the mesh that is covering those holes.
Some pictures soon.
[url=http://photobucket.com/Ratatouille-collection?albumview=slideshow][img]http://i.imgur.com/kFPfg.jpg[/img][/url]
England - West Midlands, United Kingdom
Joined: March 21, 2009
KitMaker: 379 posts
AeroScale: 75 posts
Posted: Sunday, March 20, 2011 - 06:38 AM UTC
Hello and welcome again
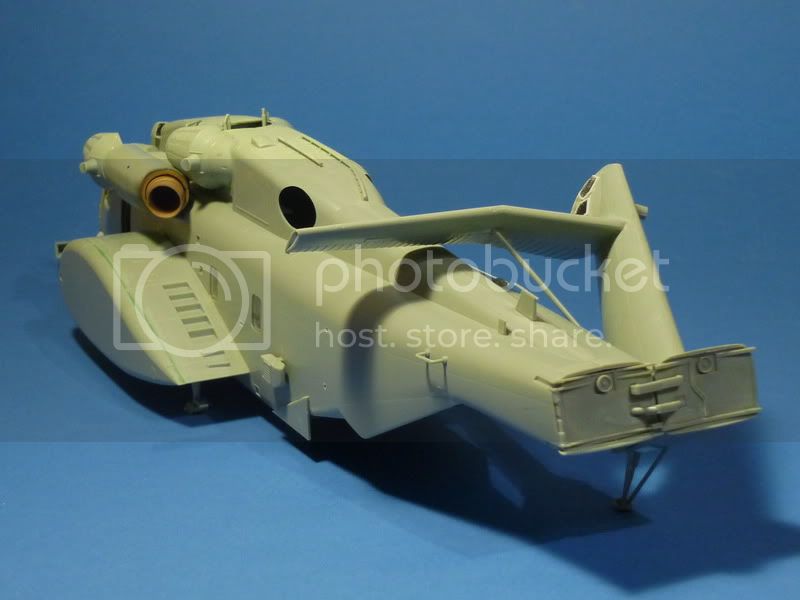
Progress is slow, i have tried to replace molded mesh from shaft cover on tail with something of my own and result is not worth the effort i put on it. I will recommend to buy PE parts for this section as it will give better result.
Anyway i have to repeat what i said earlier that quality of this model is very good, and for a more experienced modellers it can be a good base for a very detailed model. Not for me as my luck of patience will kill it.
[url=http://photobucket.com/Ratatouille-collection?albumview=slideshow][img]http://i.imgur.com/kFPfg.jpg[/img][/url]
England - North West, United Kingdom
Joined: May 02, 2008
KitMaker: 156 posts
AeroScale: 51 posts
Posted: Sunday, March 20, 2011 - 07:04 AM UTC
Point taken , but still looks good, nonetheless
England - West Midlands, United Kingdom
Joined: March 21, 2009
KitMaker: 379 posts
AeroScale: 75 posts
Posted: Monday, March 28, 2011 - 11:15 AM UTC
[url=http://photobucket.com/Ratatouille-collection?albumview=slideshow][img]http://i.imgur.com/kFPfg.jpg[/img][/url]
Texas, United States
Joined: June 29, 2010
KitMaker: 5,854 posts
AeroScale: 372 posts
Posted: Monday, March 28, 2011 - 03:49 PM UTC
Your mesh on the tail actually looks pretty good, but I will probably be going with the PE myself simply because it is easier and will probably look better than my home brewed efforts would. I'm also going to be building mine with the tail and rotors folded simply to save space as this kit is pretty darn big. They look the business either way

Wisconsin, United States
Joined: March 30, 2011
KitMaker: 199 posts
AeroScale: 150 posts
Posted: Thursday, March 31, 2011 - 10:46 AM UTC
Looking sharp! I actually have the same kit on my bench right now. I had to debate whether or not to have the tail rotor folded back or not, as the fit isnt that great when you have it in the flight position. Happy modeling, and looking forward to seeing your finished build.
On the Bench: 1/72 Italeri Tornado Pinup Campaign
On Deck: ?
England - West Midlands, United Kingdom
Joined: March 21, 2009
KitMaker: 379 posts
AeroScale: 75 posts
Posted: Thursday, April 28, 2011 - 11:47 AM UTC
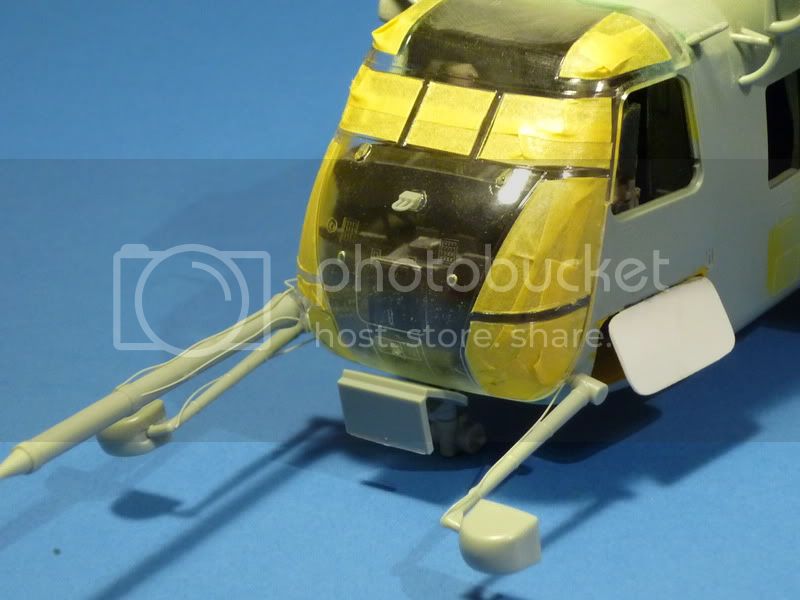
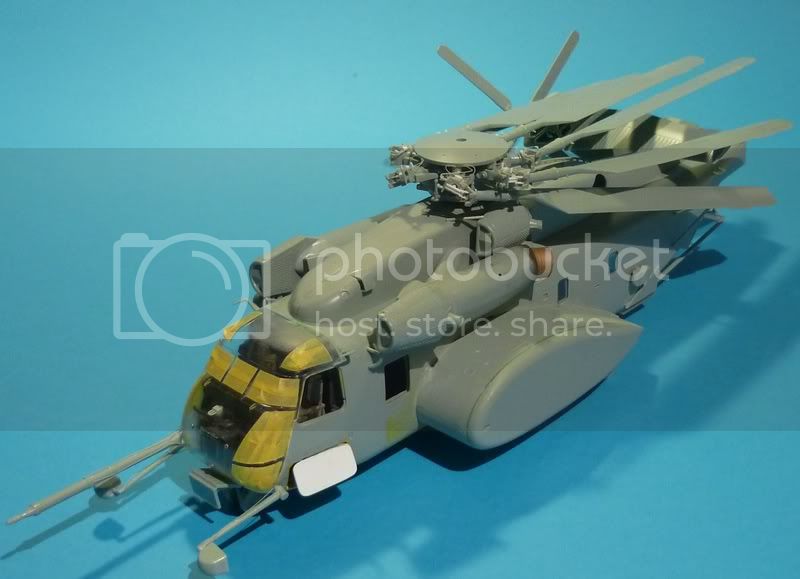
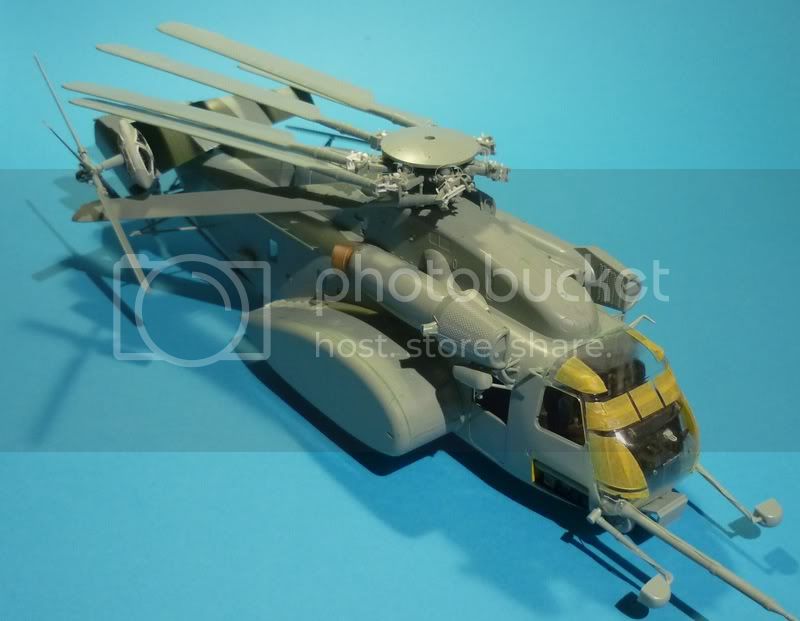
Hello
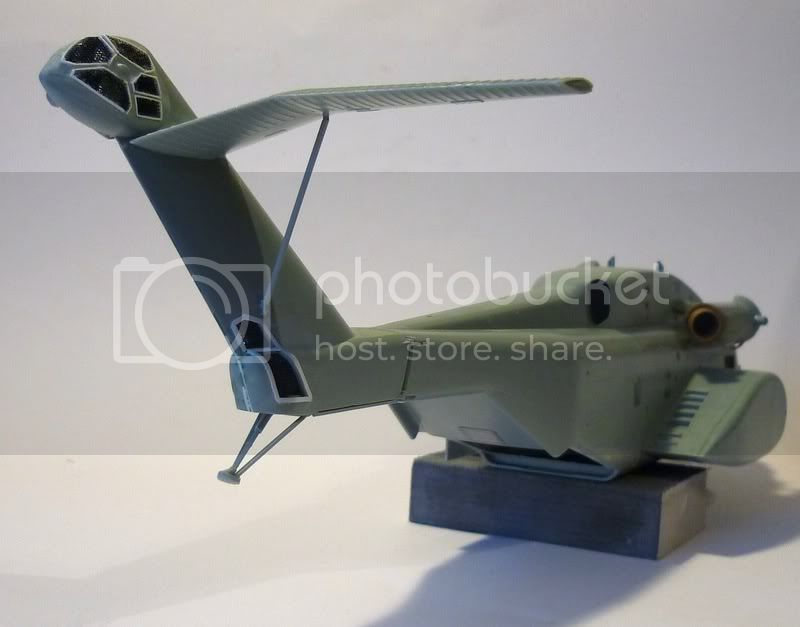
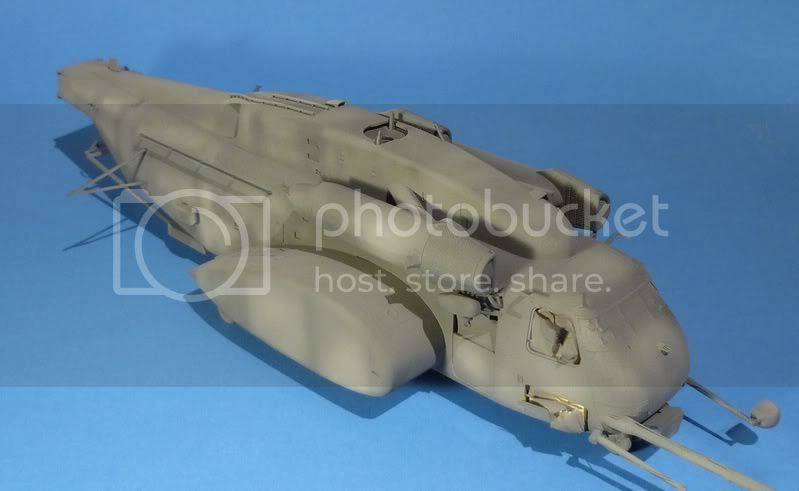
Small progress, however build is now 99% complete.
Next update will be with painting:
[url=http://photobucket.com/Ratatouille-collection?albumview=slideshow][img]http://i.imgur.com/kFPfg.jpg[/img][/url]
England - West Midlands, United Kingdom
Joined: March 21, 2009
KitMaker: 379 posts
AeroScale: 75 posts
Posted: Thursday, May 12, 2011 - 10:49 AM UTC
Hello everybody
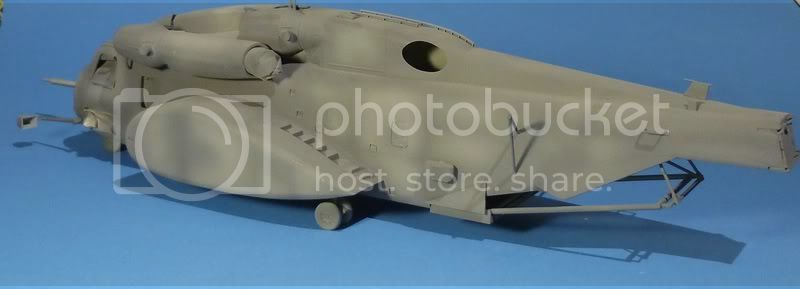
I finally got some time so i started painting. Base colour is XF-63 German Grey than highlights with XF-77 IJN grey and finally XF-54 Dark Sea grey.
I am planning to make a bit faded one, i know that general they are being kept in good condition, but somehow i like it that way.
Fading and highlights are bit irregular but later after varnish and wash etc everything should blend in nicely:

[url=http://photobucket.com/Ratatouille-collection?albumview=slideshow][img]http://i.imgur.com/kFPfg.jpg[/img][/url]
Texas, United States
Joined: June 29, 2010
KitMaker: 5,854 posts
AeroScale: 372 posts
Posted: Thursday, May 12, 2011 - 11:35 AM UTC
I really like the worn look too, it tends to really emphasize the badassery of these heavy birds. How are you doing with keeping the paint thin? I'm still struggling with it myself.
England - West Midlands, United Kingdom
Joined: March 21, 2009
KitMaker: 379 posts
AeroScale: 75 posts
Posted: Thursday, May 12, 2011 - 11:55 AM UTC
Quoted Text
I really like the worn look too, it tends to really emphasize the badassery of these heavy birds. How are you doing with keeping the paint thin? I'm still struggling with it myself.
I tried few things, but only one works for me, Tamiya paints thinned with tamiya thinner in 50:50 ratio (more or less) and good primer, as acrylics without primer have tendencies to "slide off" on plastic.
[url=http://photobucket.com/Ratatouille-collection?albumview=slideshow][img]http://i.imgur.com/kFPfg.jpg[/img][/url]