so here we go, A. D. 2007!
-----------------------------------------------------------
This is the actual kit I got hold of, dating back to1989 according to the copyright notice:

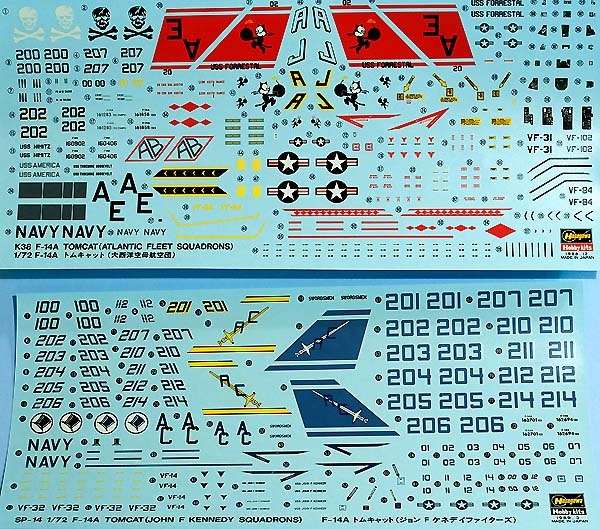
There were two HUGE decal sheets in the box. Rather generous but too bad I won´t use them anyway!
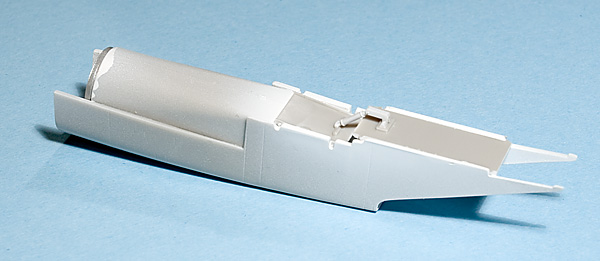
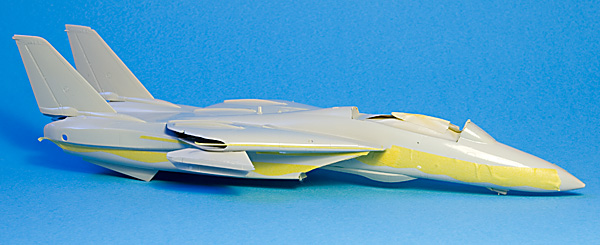
I have built the aft fuselage. I think I should have fitted the top part of the beaver tail to the top part of the fuselage instead of doing as mr. Hasegawa suggested. Now I ended up with a fuselage spine not being entirely flat and a rather awkward joint... It will be interesting to see what it looks like after painting!

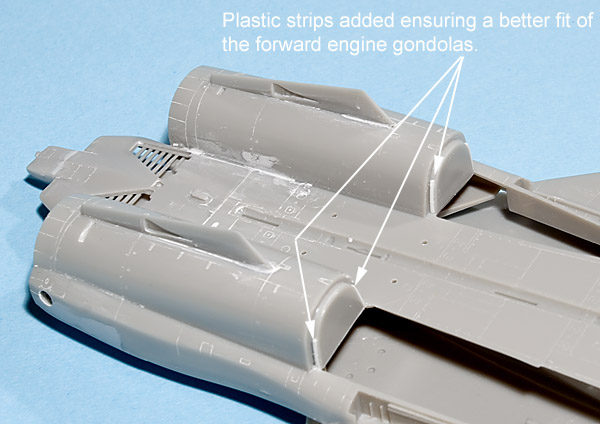
The lower part of the fuselage is complex but cleverly designed. The fit between fuselage and the forward part of the engine nacelles is a bit sloppy, a few small strips of plastic will help a lot.
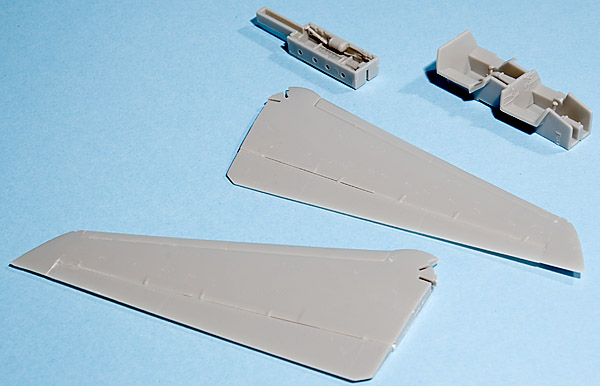
The only thing that has gone seriously wrong (yet) is the wings: I think the best way of assembling flaps and slats is to glue them to the upper half of the wing and getting the best possible fit there. The lower half of the wing can then be fitted afterwards. I glued top and bottom part of the wing together and fitted flaps and slats afterwards. Fit on one wing was OK, the other one didn´t fit at all. I have probably gotten some slight misalignment between the parts and then slats and flaps won´t fit.
I really enjoy this, I am more of a builder than a painter and this kind of rather complex project is a joy!
I hope to get som basic painting done this weekend and I'll try to post more frequently in the future.
-----------------------------------------------------------
Most of the white parts painted. There are lots of them...
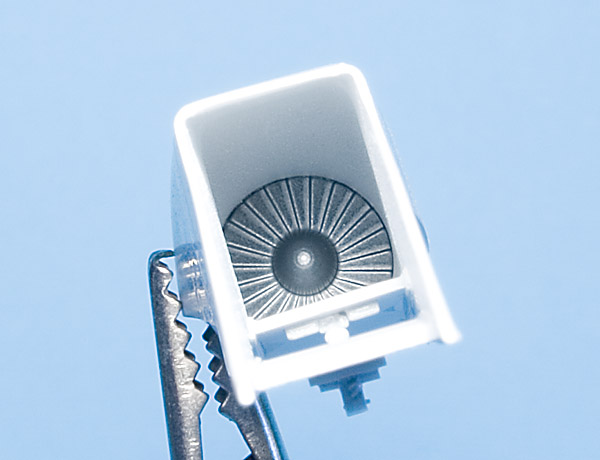
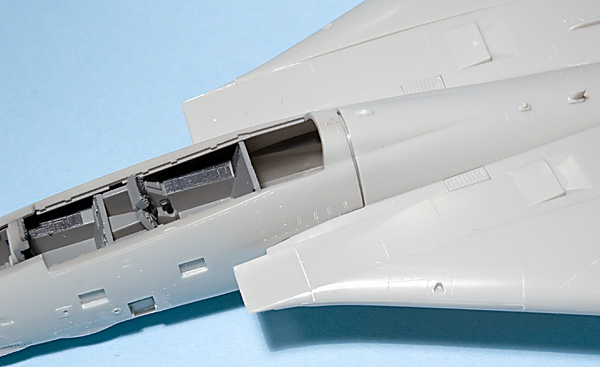
Intake ducts and ramps assembled.
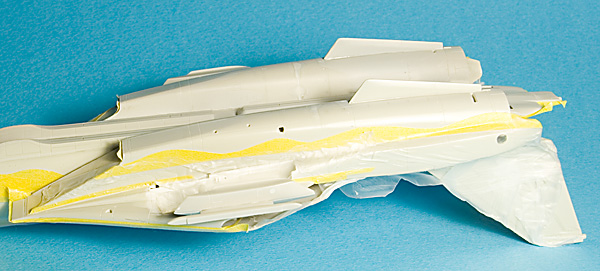
All parts removed from the trees and cleaned from parting lines and ejector marks. There is ejector marks everywhere, as soon as a part is large enough to allow for an ejector pin, there is one. Some are really tricky to get rid of, located among rivet lines on the insides of the landing gear covers for instance...
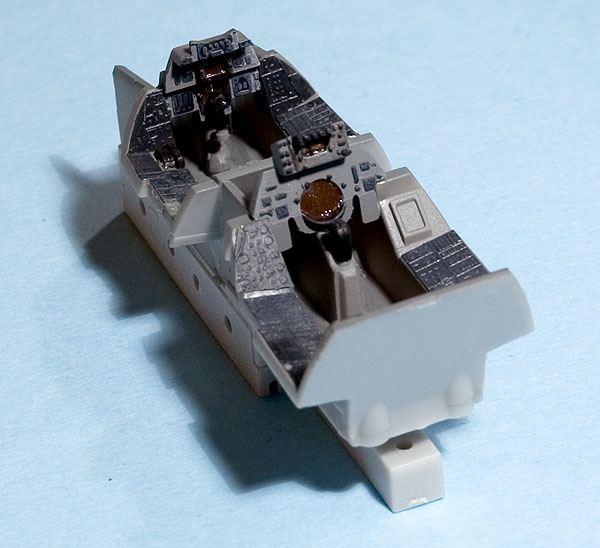
Cockpit painted and assembled. Nothing fancy, just the bits from the box with some drybrushing. I can't say that I am really fond of the Hasegawa etch parts. They lack the definition that Eduard and Part have and they are also very shallow making them hard to both dry brush and wash. I'm not too happy about the result either but at least it looks good in the pictures (a lot better than in reality where things just look black or grey...) I'll do my usual trick and spend some extra effort on the ejector seats and the coamings. I ALWAYS spend the work where the contest judge can be expected to see it :-)
Intake ducts:
Cockpit:

Next step will be assembling the forward fuselage and then mate that one to the rear end. In a few days it will look like a Tomcat I hope!
-----------------------------------------------------------
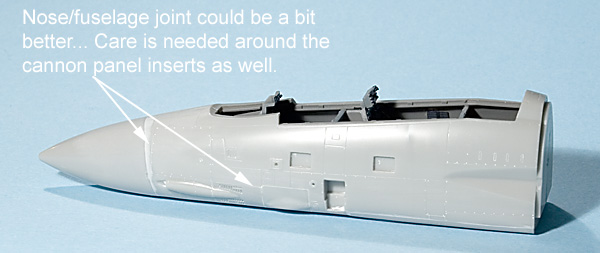
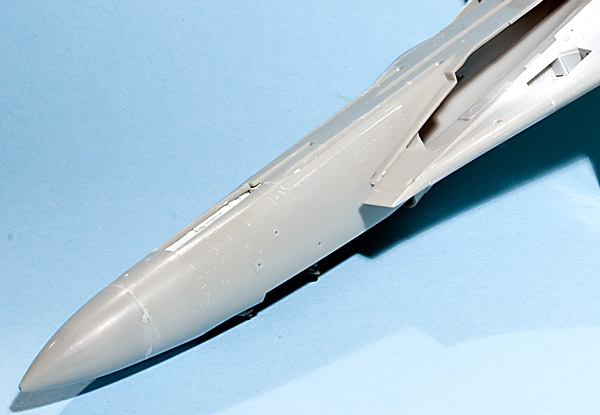
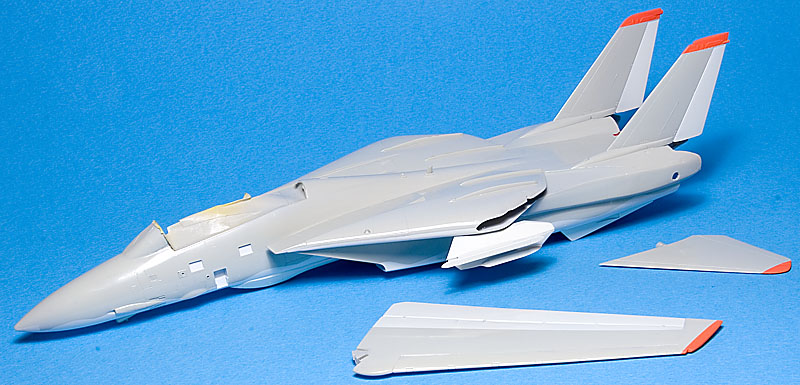
Front fuselage finished. Fit of nose part could be better, it is a bit wide. Hasegawas habit of cramming the most out of their tooling using inserts is a mixed blessing. Those inserts are often a tricky fit and they are hard to fill and sand also!

-----------------------------------------------------------
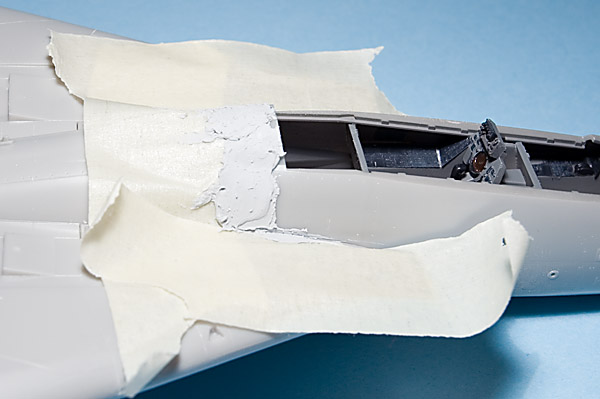
Work continues... I read here, recommended reading, about an odd thing with the Hasegawa 1/72 kits: When assembling the front and back fuselage the fit is excellent but will result in a nose that bends upwards. The belly of the aircraft should be dead straight but it won't be if you don't do anything about it resulting in ill fitting Phoenix pallets and an odd stance.
I simply glued the parts together and then bent the fuselage until the belly was straight, fixing it in that position until the glue had set.
Straightening the fuselage...
..will result in a rather substantial gap right behind the cockpit...
...that a bit of putty will make look even nastier...
...but some careful sanding will return the model to its former glory...
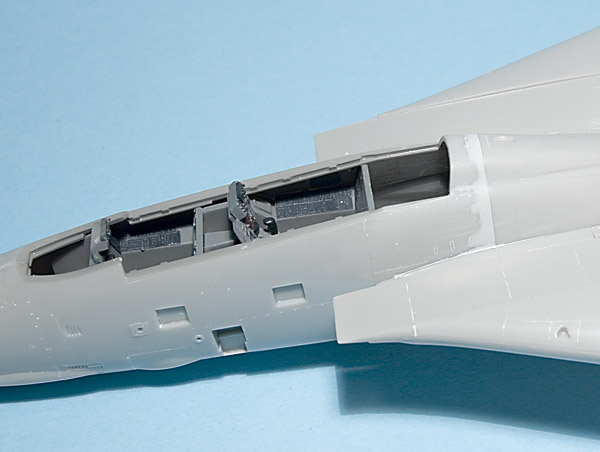
What worries me now is that I can feel a change of curvature and a slight depression between the parts with my fingers. I'll have to paint it to see how well I succeeded with the sanding and reshaping.
I stumbled upon another web site that I don't think has been linked to before in this thread. If you think that you have built lots of Tomcats, check this one out . There is a good chance that he has built more of them! The site, Andys models, contains lots of other useful stuff like photos of the different sprues found in various Hasegawa Tomcat boxings and some very nice profiles.
-----------------------------------------------------------
Painting is finally underway with the gull grey already applied. I decided to return to my first love (at least when talking modelling paints) Gunze acrylics and ordered a batch.
This has caused all kinds of trouble. I have had to relearn how to thin them (they are a lot more sensitive for the thinning ratio than Vallejo and Xtracrylix for instance) and they don't really cover that well. On the other hand, they dry mirror smooth. At least when they finally harden, they tend to be "soft" for several days.
An orgy in masking... Using Tamiya tape for the demarcations and Parafilm to cover the rest of the model. When masking is finished I seal off the tape edges with a further coat of gull grey, a painters trick I learned when I helped a friend repaint his living room.
-----------------------------------------------------------
One of the first foreign (foreign for me at least, remember that I am from Sweden!) modelling magazines I ever read was FSM. They always stated how many hours they had spent building a kit in their reviews and it was seldom more than 15 hours. I spent almost two hours masking and painting the rear air brake area... I must be a slow builder.

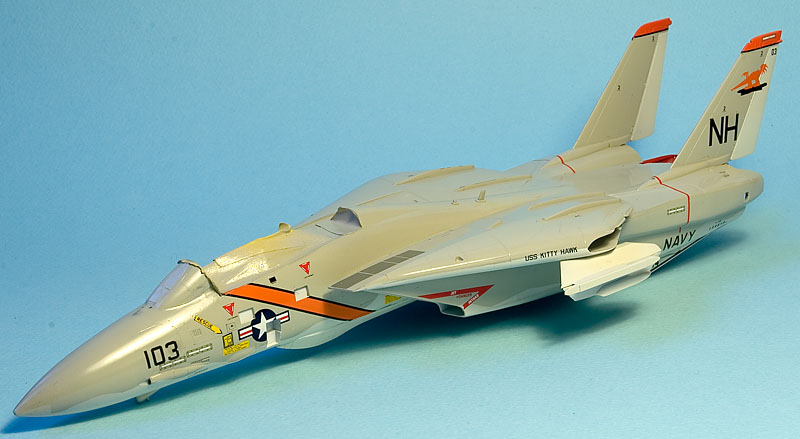
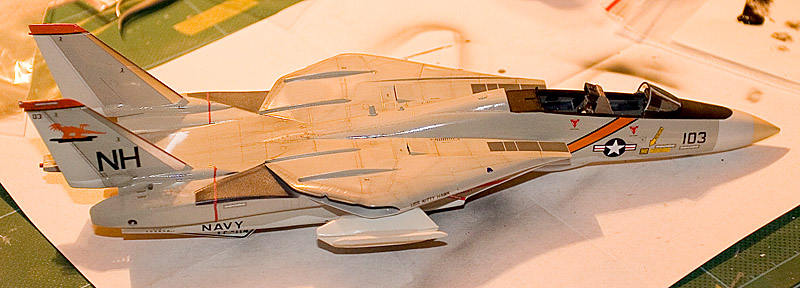
My Cat is starting to look rather snappy now I think, grey over white goes well together with the "Aardvark orange" on the wing, stabilizer and fin tips. All orange areas should have black borders, I will probably use black decal stripes.
Masking and painting masking and painting masking and painting. It feels as if it never ends...
-----------------------------------------------------------
Say hello to Zot!
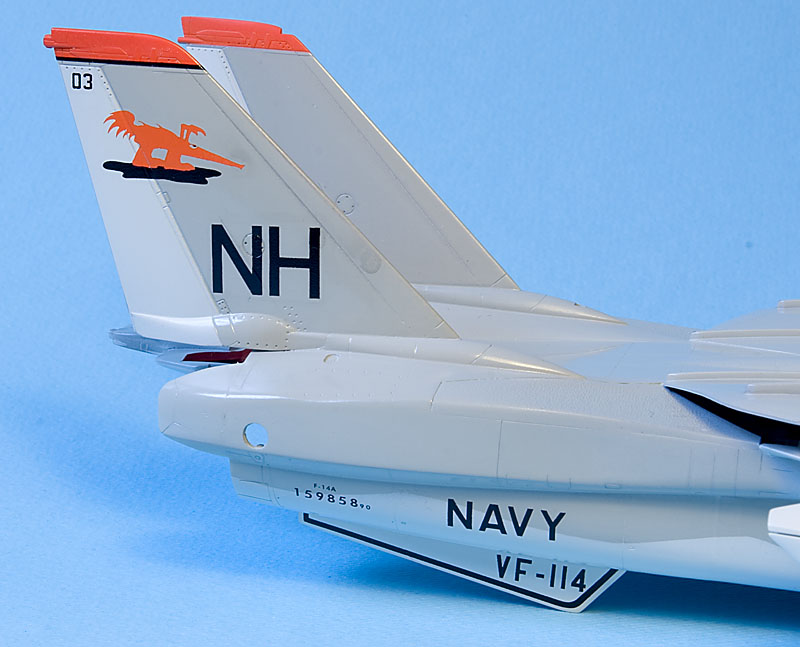
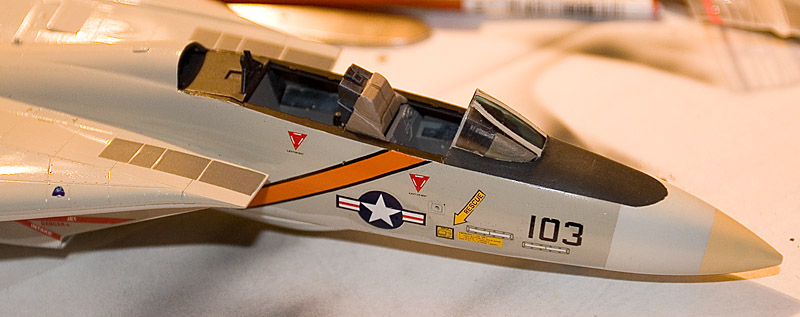
Finally time for some decals and the aircraft quickly turns a lot more attractive! This CAM sheet ranks among the best ones I have ever used. Thin, in register, opaque, responds to set and sol, what else is there to ask for? I will be busy with these for a few more nights, there is quite a lot of stencilling in addition to the other markings.
Those dark "puddles" is due to the Gunze paint not withstanding Micro Sol very well. Using Tamiya clear in between would help but I try to avoid too many coats of paints and varnishes. So now I have three choices:
1) Polishing the paintwork hoping that the "puddles" are on the surface.
2) Touching up using Gunze paint.
3) Weather them into the finish, hoping that it looks as if that was what I intended...
-----------------------------------------------------------
Painting and decaling is now finished. Gunze paints, CAM decals and Gunze clear gloss to seal it all in. As a final step, I polish the gloss coat using Micro Mesh abrasive cloths, this results in an almost mirror smooth finish that is also very glossy. I like the smoothness but not the sheen... I could go over it all again with a satin coat but this will immidiately turn the surface a bit more uneven. Any suggestions?
I have also begun the weathering, I choose to start with the wings since they are the most easily repainted part of the model if I mess up. I nearly did since the artist oils bite to the Gunze paint immediately, making them almost impossible to wipe off completely.
A wing with the weathering process underway.
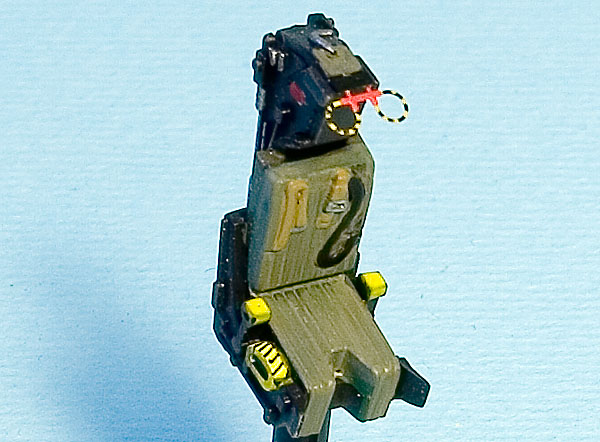
One of the ejection seats. Nothing extra, just out-of-the-box. The ejection handle is supplied as photo etch (no plastic as a back-up oddly enough, the same goes for all the panels in the cockpit) but a few coats of paint added some bulk to it.
Main fuselage. Lots of angles and difficult-to-reach areas when painting and polishing.
By the way, do you remember the grey "puddles" in the paintwork? They were actually bare plastic, the paint had been dissolved by Micro Sol... I masked the decals with strips of Tamiya tape and repainted, easier than I thought it should be!
-----------------------------------------------------------
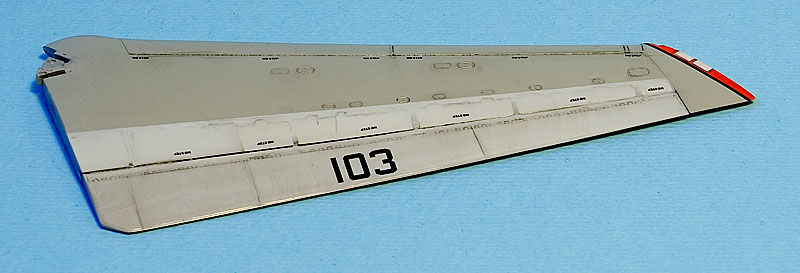
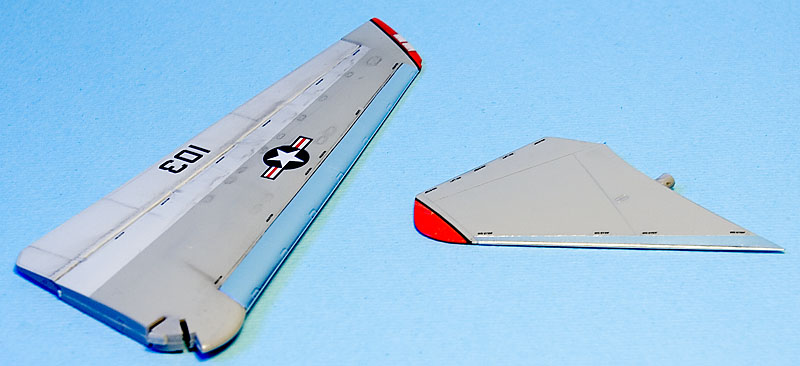
I have added the natural metal leading edges to the wings and stabilizers using bare metal "Matte Aluminium" foil. I will have to overpaint part of it on the wings since just part of the leading edge slat area was in natural metal.
The fins will also have natural metal leading edges, I am not sure that the exact serial I am building had it but at least SOME Tomcats had it at some time or another.
-----------------------------------------------------------
Working working working...
I have brought the whole modelling workshop with me on holiday this year. I have set up shop in my parents living room so that I can pretend to behave socially acceptable while still being able to finish that troublesome Tomcat in time. It will be close but I am almost sure that I will manage!
Tonight I am masking and painting the anti glare panel.

Back to the airbrush...
-----------------------------------------------------------
Masking removed, the edge of the anti glare panel looks a bit jagged but I will find some way or another to take care of that. All cockpit parts except the seats are in place as well, finally the Tomcat is taking shape!
Right now I am attaching all the position lights, I "glue" them using Gunze clear blue and red. It is fiddly...
-----------------------------------------------------------
Time to continue with the weathering on the Tomcat. I use water soluble oil paint to add some dirt and grime, rather more than I had planned from the beginning. I might have gotten a bit carried away in the process but I will be able to tone down the weathering overspraying it with gull grey if I need.
-----------------------------------------------------------
Finally!
I will take some more photos this weekend.
It looks a bit toothless without armament but hopefully I will be able to load a full set of missiles tomorrow night!
Now I REALLY need something easy to build...
-----------------------------------------------------------
One last post in this thread from me, just to "close the books"!
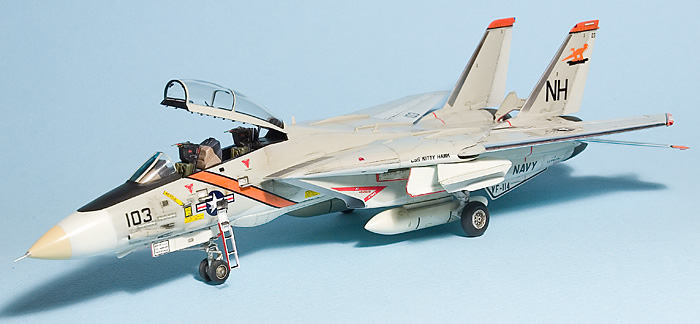
Since my last post, I have done some more tweaking. Most importantly a hook so that I can catch the wire finally but also a full missile load.
I know it could fly with six Phoenix but I prefer showing off the three different kinds of missiles it could carry: Phoenix, Sparrow and Sidewinder.


Magnus