_GOTOBOTTOM
Rotary Wing
Discuss helicopters and other rotary wing aircraft from any era.
HH-60G pre-Block 152 Academy 2201
auger0_0
_VISITCOMMUNITY
England - East Anglia, United Kingdom
Joined: January 12, 2011
KitMaker: 53 posts
AeroScale: 50 posts
Posted: Friday, March 18, 2011 - 01:13 AM UTC
After some encouragement from the members of this Forum I have started a blog on my HH60G build.


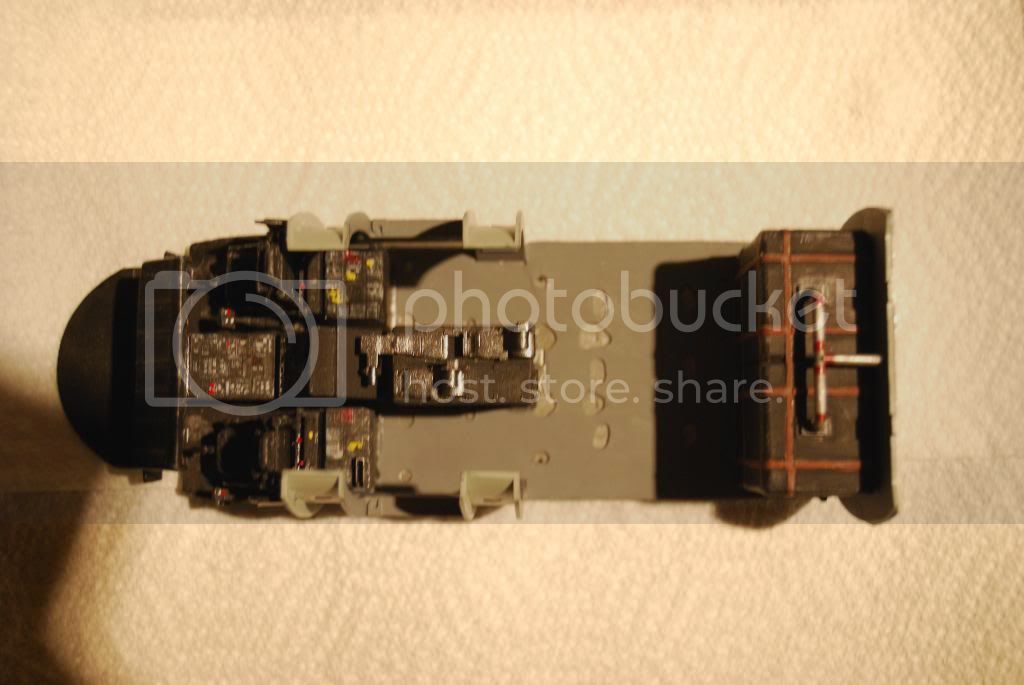
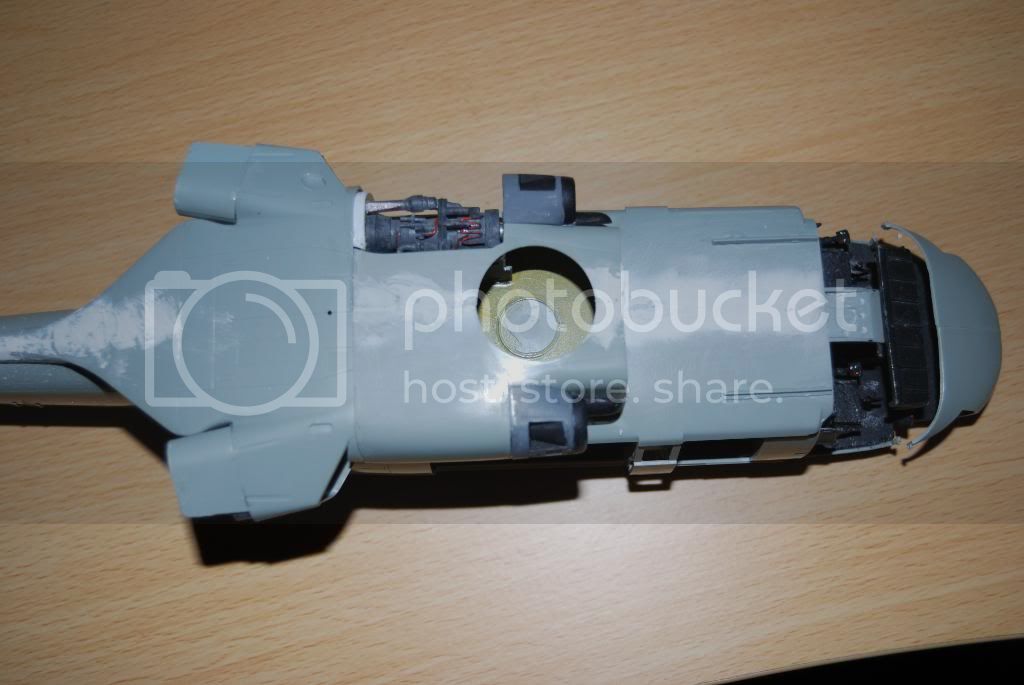
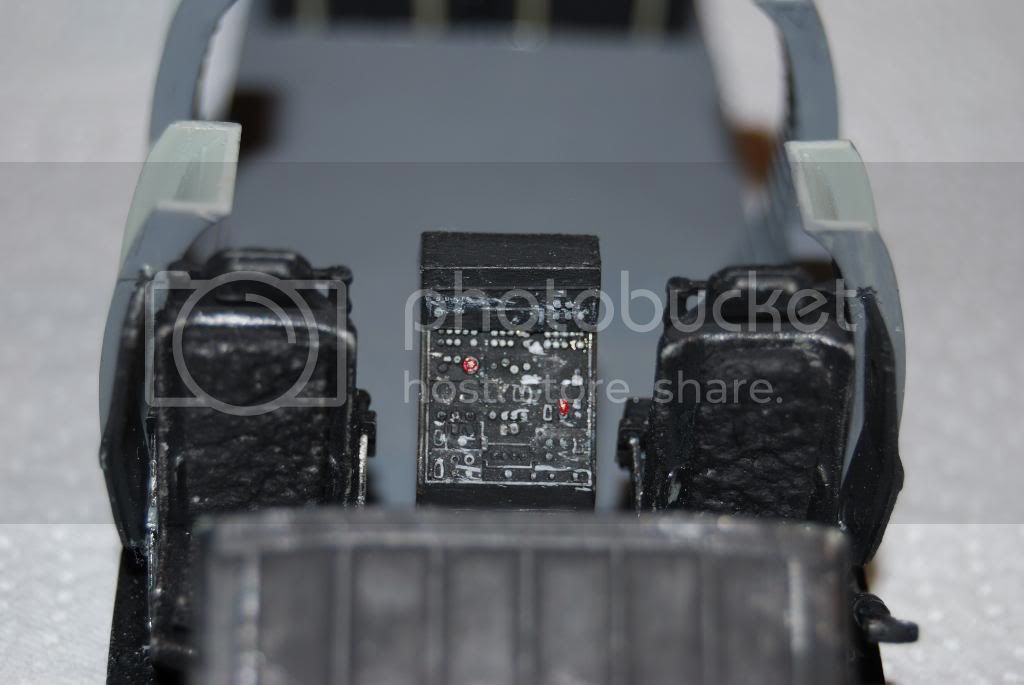
This a birdseye view of the cockpit I have made some changes since this was taken which i will add shortly.


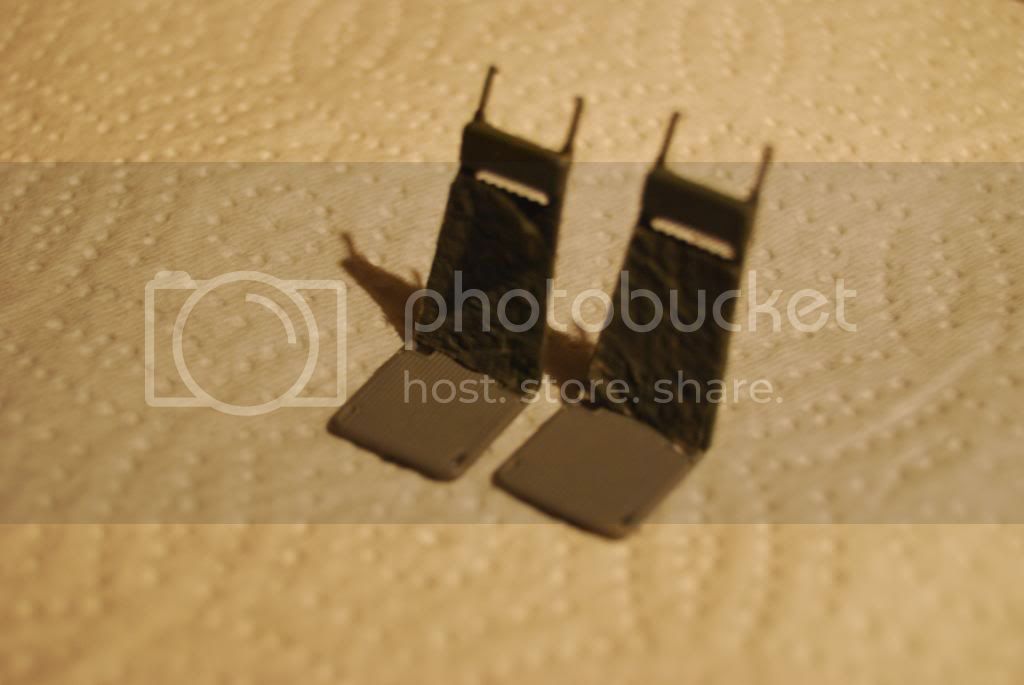
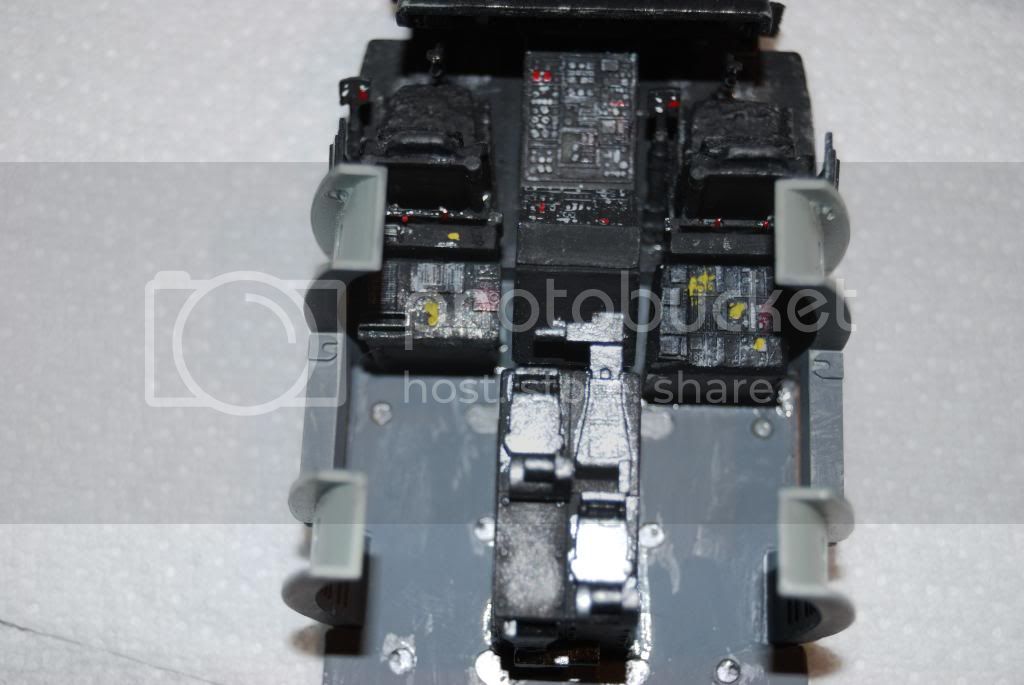
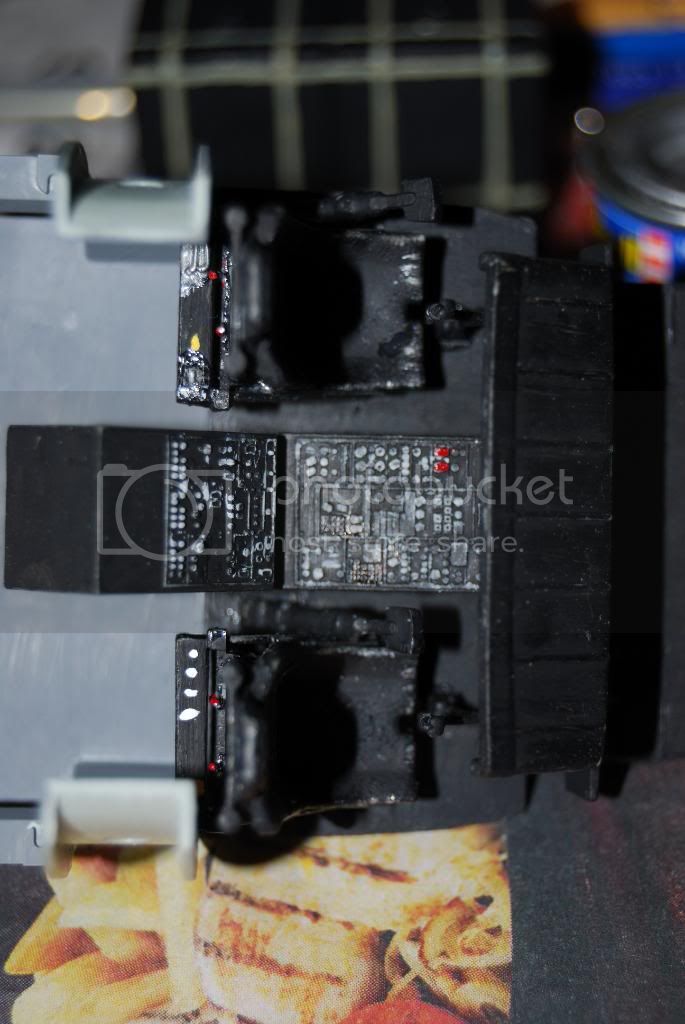
These are the two gunners seats. The back has been covered with kitchen roll treated with PVA to try and give more realistic canvas effect.


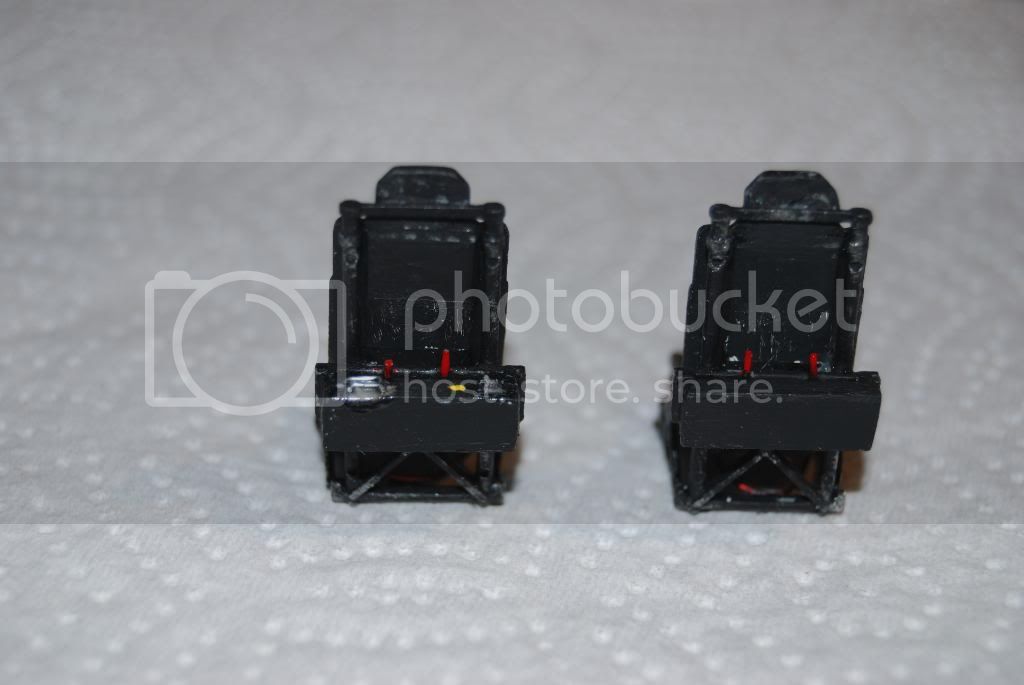
Pilots seats with some additional detail such as adjustment levers at the rear and cables under the seat.


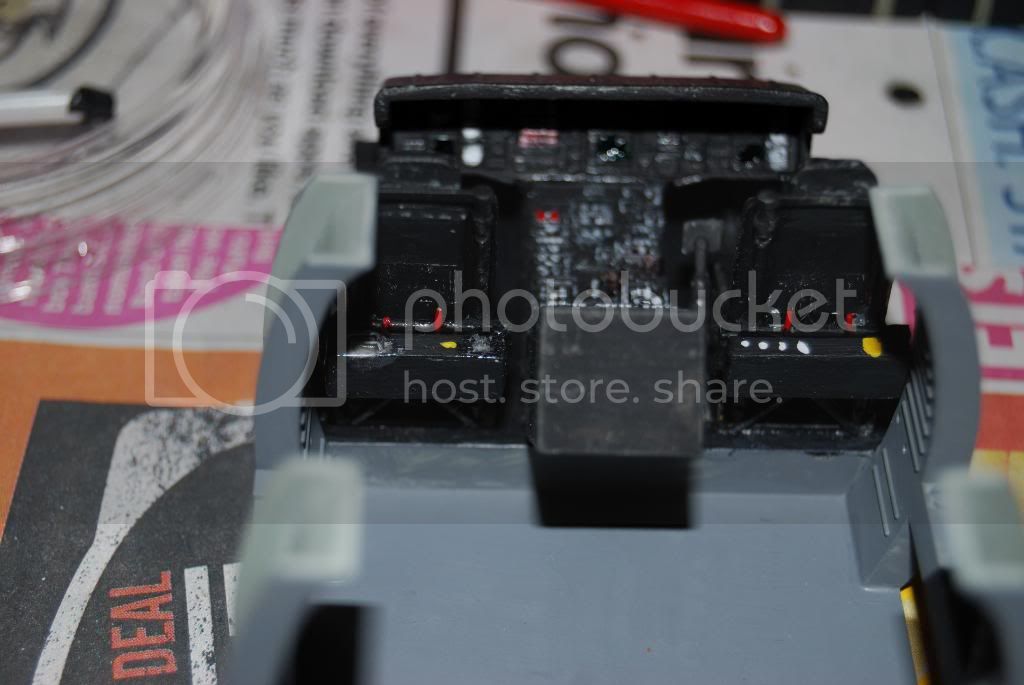
View of cockpit with seats in place, the ugly white and yellow have now been removed.


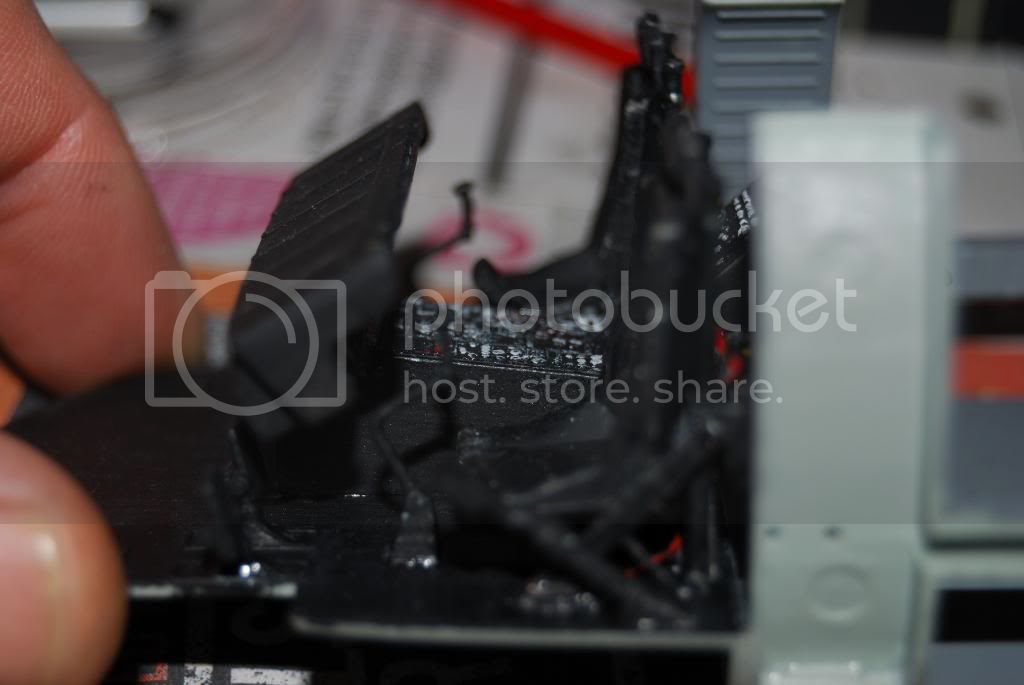
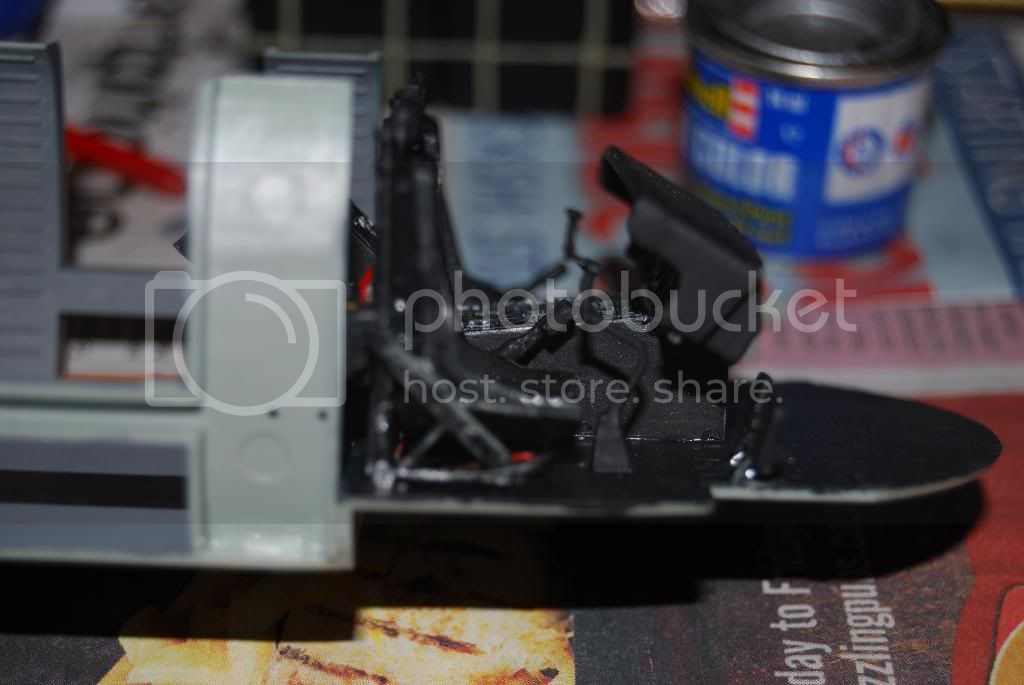
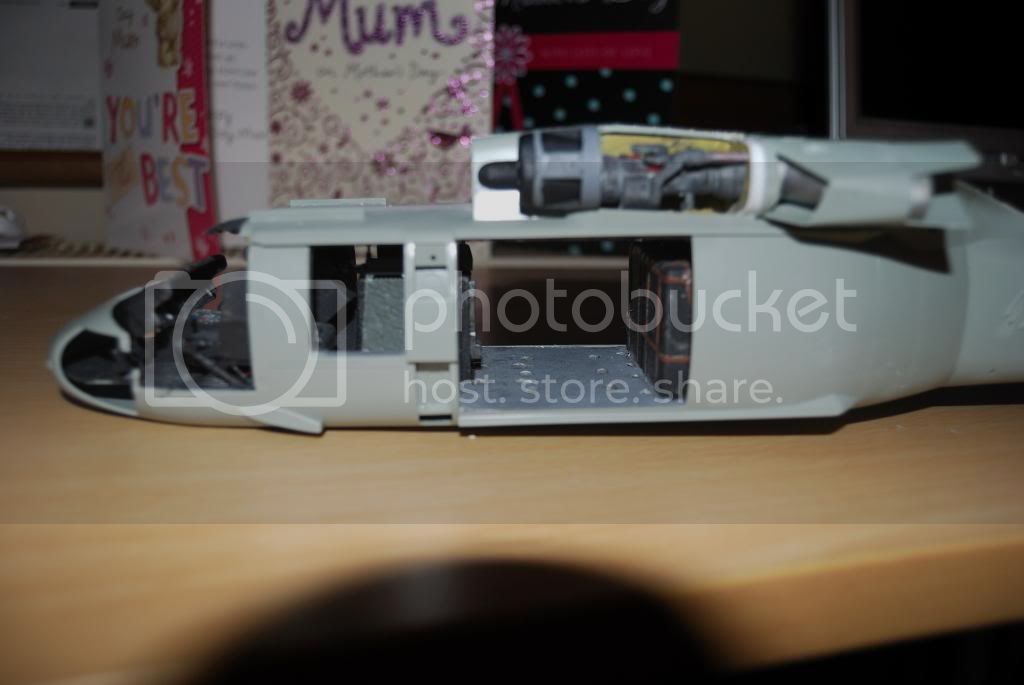
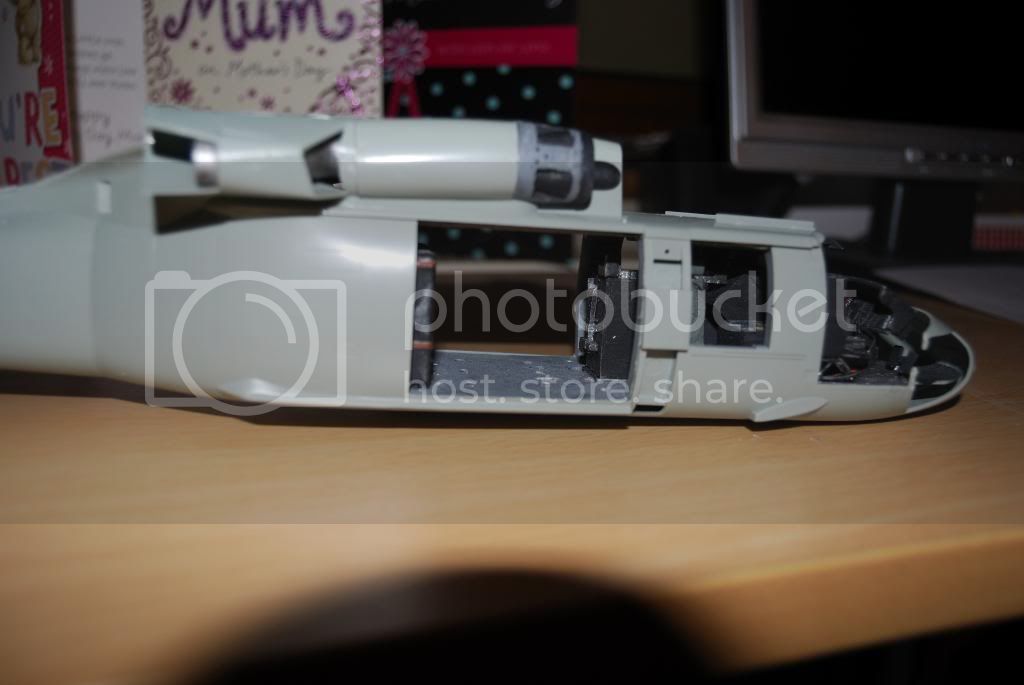
Two views from the side.

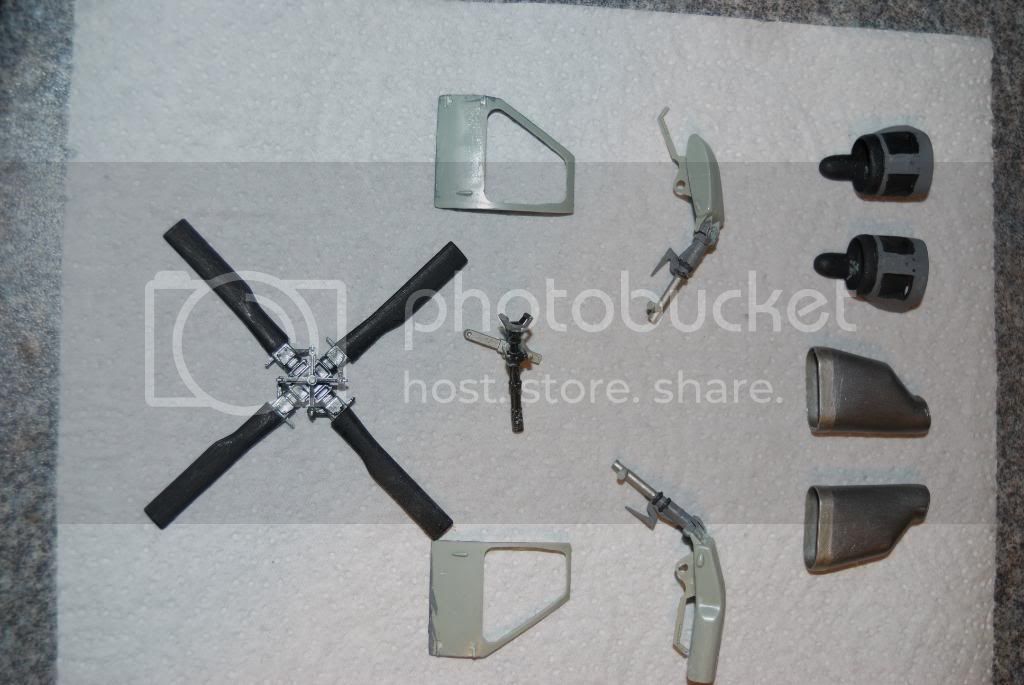
I have since started work on the Miniguns and M60's although I may well not include the M60's as most photo's I have seen of operational Aircraft dont have them on the door mount, just Miniguns by the Gunners station.

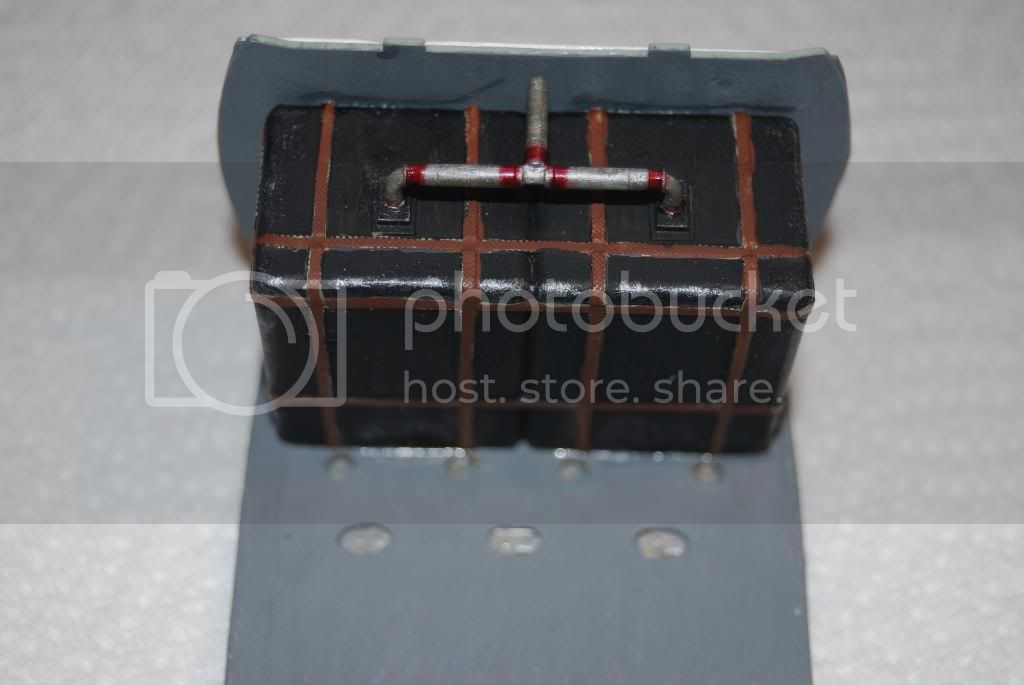
I have the reserve tank in place although I may well add some retraining straps if I can make them.

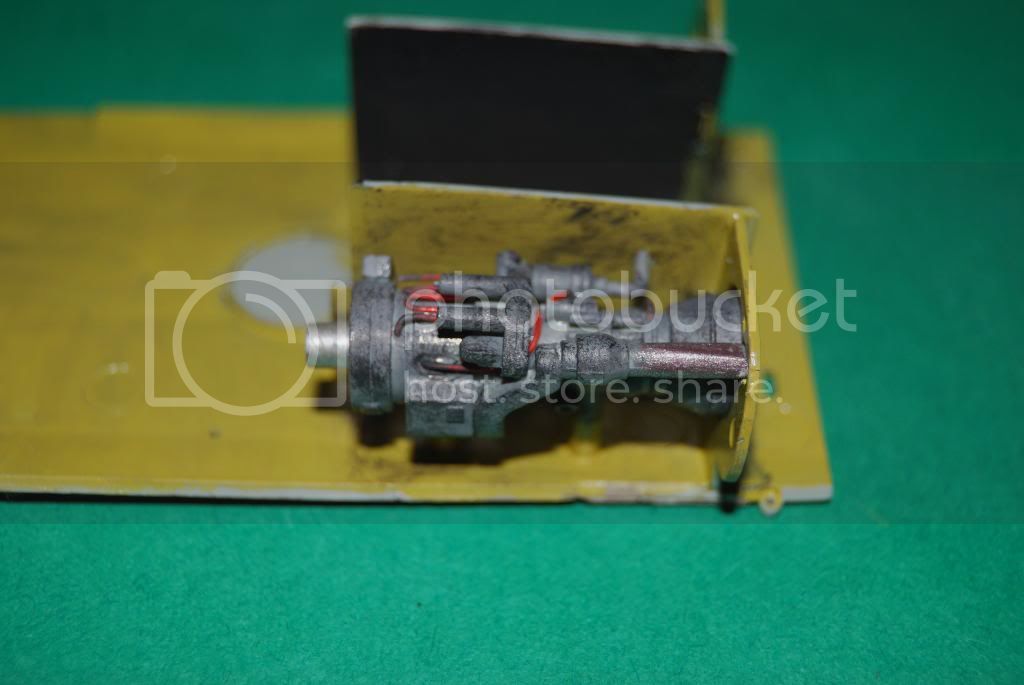
Also started work on the HIRSS which was slow going, built the engine which will be exposed and added some details to this and weathered it.

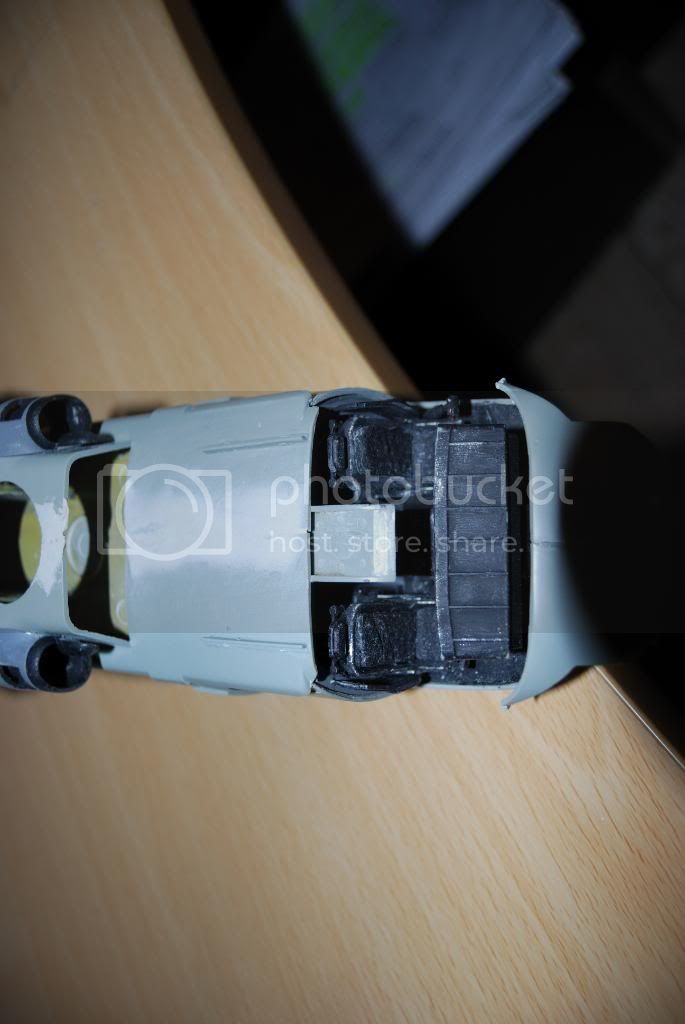
Opened the doors as I want to show then open.

Please feel free to give me feedback on this build.

Issues found so far

Ejector pin holes

Some parts are difficult to line up, HIRSS assembly each side come in 3 parts for main outlet packed this out with bluetack to ensure correct placement of the components then when dried removed it..

Anyway more to follow shortly, hope you enjoy.

HeavyArty
_VISITCOMMUNITY
Florida, United States
Joined: May 16, 2002
KitMaker: 17,694 posts
AeroScale: 1,728 posts
Posted: Friday, March 18, 2011 - 02:56 AM UTC
It sounds good, but none of your picture links work either. Looking forward to seeing it once you get the pics sorted out.
auger0_0
_VISITCOMMUNITY
England - East Anglia, United Kingdom
Joined: January 12, 2011
KitMaker: 53 posts
AeroScale: 50 posts
Posted: Friday, March 18, 2011 - 03:36 AM UTC
Gino, apologies missed that http:// was added twice they should work now :-)
HeavyArty
_VISITCOMMUNITY
Florida, United States
Joined: May 16, 2002
KitMaker: 17,694 posts
AeroScale: 1,728 posts
Posted: Friday, March 18, 2011 - 09:14 AM UTC
I fixed your images so they work now. All you had to do was put img in the brackets as opposed to url.

The model is looking good so far. Good job on the IP and other cockpit details.

The only weapons mounted should be the GAU 19 miniguns in the gunners' windows. The .50 cals in the doors were only a test item and it was found that with them and their ammo the aircraft was almost at max weight and there was no room inside for the PJs to work and for any downed pilots. The .50 cal doorguns were not accepted by the USAF.
auger0_0
_VISITCOMMUNITY
England - East Anglia, United Kingdom
Joined: January 12, 2011
KitMaker: 53 posts
AeroScale: 50 posts
Posted: Friday, March 18, 2011 - 09:35 PM UTC
Gino many thanks for fixing the pictures and thanks for the comments I will hopefully post more pics this weekend

Regards Simon
auger0_0
_VISITCOMMUNITY
England - East Anglia, United Kingdom
Joined: January 12, 2011
KitMaker: 53 posts
AeroScale: 50 posts
Posted: Sunday, March 20, 2011 - 05:36 AM UTC
As promised here are few more pictures of work done this weekend


Rear instrument panel with added fuse box and seat pads and backs


Auxilliary fuel tank with additional pipework ( more to do )


Turbine

More to photo's to come


Simon


Collection of parts

HeavyArty
_VISITCOMMUNITY
Florida, United States
Joined: May 16, 2002
KitMaker: 17,694 posts
AeroScale: 1,728 posts
Posted: Sunday, March 20, 2011 - 09:44 AM UTC
Looking good. You might want to clean the straps on the aux tanks up a bit. Also, the lower portion of the main gear struts should be the same color as the rest of the fuselage. They do not retract and shoud not be chrome.

You can see them struts here:


I also found a couple pics of an MH-60G in overall AFSOC Gray w/out plume detectors. It does have the nose-mounted radar and under the nose FLIR turret though.


Keep up the good work.
auger0_0
_VISITCOMMUNITY
England - East Anglia, United Kingdom
Joined: January 12, 2011
KitMaker: 53 posts
AeroScale: 50 posts
Posted: Sunday, March 20, 2011 - 10:44 AM UTC
Gino hi

Thanks for the comments and the pictures they will be a great help, I spent a lots of time today looking for early model picture with no luck. Again appreciate all the help and encouragement.


Regards simon
drabslab
_VISITCOMMUNITY
European Union
Joined: September 28, 2004
KitMaker: 2,186 posts
AeroScale: 1,587 posts
Posted: Sunday, March 20, 2011 - 10:57 PM UTC
please keep it coming, i am watching this with interest
auger0_0
_VISITCOMMUNITY
England - East Anglia, United Kingdom
Joined: January 12, 2011
KitMaker: 53 posts
AeroScale: 50 posts
Posted: Monday, March 21, 2011 - 06:59 AM UTC
Drabslab I hope it's of help


Simon
auger0_0
_VISITCOMMUNITY
England - East Anglia, United Kingdom
Joined: January 12, 2011
KitMaker: 53 posts
AeroScale: 50 posts
Posted: Monday, March 28, 2011 - 12:59 AM UTC
Hello,

Well I have been quite for the last 2 weeks work has interupted my modelling.

Progress has been slow in what I have done, I have part sheeted the ceiling prior to fixing the seats and painted just need to fill in some areas (Photo's to follow when I am happy with it). I put in the the armoured floor with cutouts not as good as some but this is being done a budget so I have done my best, I have put in fine wire tie down loops near the aux tank ready to take the strapping (Photto's once assembled). Built one gunners instruments box for the back needs to be cleaned up and painted one more to go. I will hopefully have some time this week to work on it and take some photo's.

Simon

auger0_0
_VISITCOMMUNITY
England - East Anglia, United Kingdom
Joined: January 12, 2011
KitMaker: 53 posts
AeroScale: 50 posts
Posted: Tuesday, April 05, 2011 - 12:57 AM UTC
Photo's coming I promise, took some the other day just need to upload them. Well the last week has been frustrating I have reached the close up point after finihsing the internals didnt go as far I had wanted for detail but my scratching skills need more work.

During close up I hit a big issue the fuselage would not close correctly to fit close up to the internal walls it left a large gap. I had to resort to taking the lectric saw to the dog house floor to get closure, I also had to cut away part of the air intake at the top this worked fine and closeup was compete. As a knock affect I have now had to split the doghouse and loose 1mm so it is th correct size. I dont think this is a problem in later versions of this kit mine was from 2001. I am currently working on tidying up the dog house floor before doing the same to the doghouse before fitting in place. I put toghter part of the HIRESS last night and temporarily fixed it in place, I have decided to leave the Engine cover part up as not happy with the internals, also noted a fit issue with the firewall to HIRESS and have had fill a 2mm gap with sheet plastic.

I am convinced some if not all these issues are my fault but you live and learn :

Learning is a series of mistakesor lessons from which we gain experience, shame politician and commanders don't Learn

auger0_0
_VISITCOMMUNITY
England - East Anglia, United Kingdom
Joined: January 12, 2011
KitMaker: 53 posts
AeroScale: 50 posts
Posted: Tuesday, April 05, 2011 - 09:10 PM UTC
Okay photo's as promised

Paln view of internals


Cockpit and gunners section


Auxilliary fuel tank


Front this was after surgery but before I start tidying it up


Plan view post surgery and prior to clean up


Port view


Starboard view


As I said earlier my scratching skills were not up to what i wanted to do, I think later on I may well build another of this type but from a later kit and use the Dragon and Eduard EP. I dont think I can really complain as this one only cost me £20 and has not had to many issues.I am working on the cleanup currently ready for all the sub components to be put in place. As I dont have an air brush currently I am going to go for an all over X-54 from a can or something close, panel detail I am going to highlight prior to spraying with a fine sharpie pen, most of build is a re-learning exercise for me.

Enjoy Simon
HeavyArty
_VISITCOMMUNITY
Florida, United States
Joined: May 16, 2002
KitMaker: 17,694 posts
AeroScale: 1,728 posts
Posted: Wednesday, April 06, 2011 - 12:08 AM UTC
Looking pretty good so far. The build challenges you are facing have nothing to do with when the kit was manufactured. All the UH/MH-60 kits have them. Its just the kit. A newer one will be about the same. You just have to work through it.

A caution about the sharpie, don't use it. The paint will run the sharpie and you will have a mess. In my opinion, pre-shading is a useless practice because it isn't realistic at all. Have you ever seen an aircraft (or any other vehicle for that matter) with the panels outlined so they stand out. I think it is an overused artsy-fartsy technique and should be avoided. By using weathering techniques like washes, drybrushes, and dusting you can get a much more realistic finish.

Keep up the good work.
auger0_0
_VISITCOMMUNITY
England - East Anglia, United Kingdom
Joined: January 12, 2011
KitMaker: 53 posts
AeroScale: 50 posts
Posted: Wednesday, April 06, 2011 - 12:28 AM UTC
Gino

Thank you for your comments and encouragement Sir, I am relieved that the issues I have come across are not due to my building skills or lack there of. As for the Sharpie I was looking for a means of giving definition to detail but I hear what you say having worked on Pre 1960 Aircraft I must admit alot of the panels end up dented, creased, painted over and generally just worn so perhaps taking into account and your comments I may go for that look although it seems from the walkarounds I have looked at paint wear seems to be the main detail to model and of course wear on rotors, walk and tread areas.

Washes and weatherng is something I have not had a great deal of experience with but will try out if I am happy I will transfer, this is the first model I have used dry brushing techniques on in any large amount.

Again many thanks

Simon
auger0_0
_VISITCOMMUNITY
England - East Anglia, United Kingdom
Joined: January 12, 2011
KitMaker: 53 posts
AeroScale: 50 posts
Posted: Friday, April 08, 2011 - 05:52 AM UTC
Question regarding external aerial

Are they a wire aerial or are they a tube with the aerial inside

Any help much appreciated

Simon
HeavyArty
_VISITCOMMUNITY
Florida, United States
Joined: May 16, 2002
KitMaker: 17,694 posts
AeroScale: 1,728 posts
Posted: Friday, April 08, 2011 - 10:53 AM UTC
Which ones are you talking about? A better description is needed, I'm not sure which ones you mean.
auger0_0
_VISITCOMMUNITY
England - East Anglia, United Kingdom
Joined: January 12, 2011
KitMaker: 53 posts
AeroScale: 50 posts
Posted: Monday, April 11, 2011 - 02:27 AM UTC
Gino

I am talking about the the one on the Port side just past the rear doors which runs along half way up the fusealage from front to back and looks like a rail in the kit

regards Simon
HeavyArty
_VISITCOMMUNITY
Florida, United States
Joined: May 16, 2002
KitMaker: 17,694 posts
AeroScale: 1,728 posts
Posted: Monday, April 11, 2011 - 05:03 AM UTC
It is an antenna running inside a tube. It looks like a solid rod on the actual heo as well. The kit part is correct.


auger0_0
_VISITCOMMUNITY
England - East Anglia, United Kingdom
Joined: January 12, 2011
KitMaker: 53 posts
AeroScale: 50 posts
Posted: Tuesday, April 12, 2011 - 12:19 AM UTC
Gino many thanks

Regards Simon
auger0_0
_VISITCOMMUNITY
England - East Anglia, United Kingdom
Joined: January 12, 2011
KitMaker: 53 posts
AeroScale: 50 posts
Posted: Sunday, May 01, 2011 - 08:59 AM UTC
Apologies for the lack of updates, Good weather here in the uk means gardening and work on outside projects. I should pickup this thread again in the next few weeks.

Regards Simn
 _GOTOTOP