Shot of few of the bits from the kit
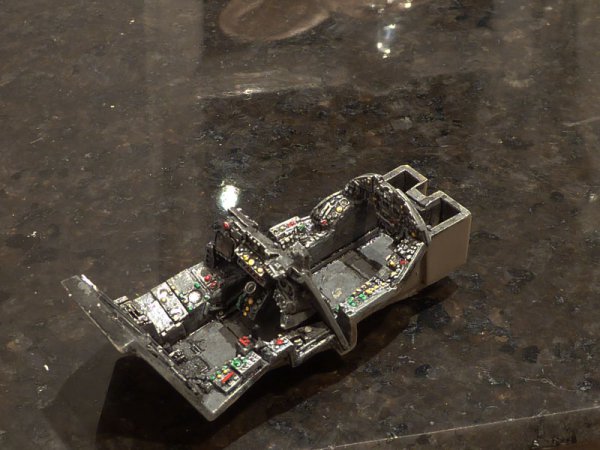
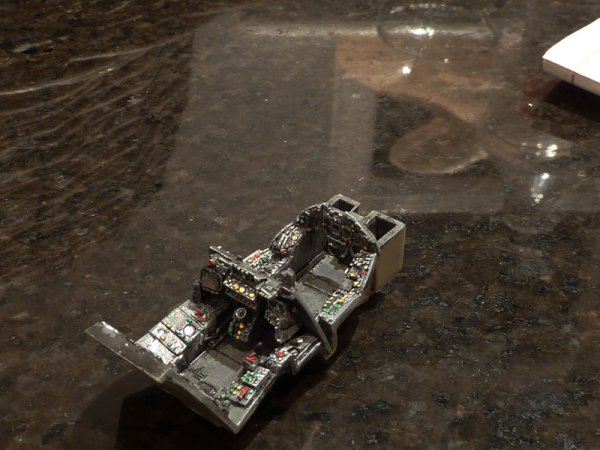
And the NeOmega resin cockpit
And the photo etched details
Made some masks out of paper
Temporarily assembled the body to do the cammo, this will need to come apart again to fit the cockpit
paint arrived, so gave the plane a coat of the raf grey
then applied the maskol usuing a brush by hand
let dry then applied the raf green
let that dry then started to peel off the maskol, this was incredibly satisfying
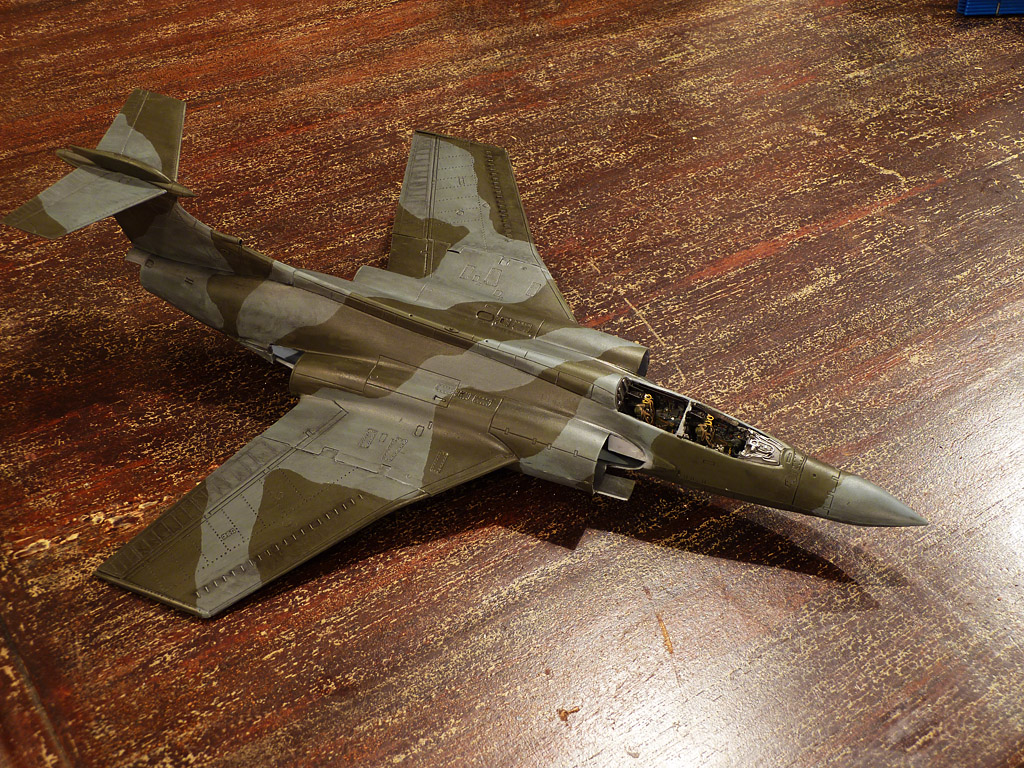
maskol off
Modern (1975-today)
Discuss the modern aircraft age from 1975 thru today.
Hosted by Jim Starkweather
1:48 Airfix Buccaneer Progress thread
SteveJWilliams
United Kingdom
Joined: January 24, 2011
KitMaker: 43 posts
AeroScale: 43 posts
Joined: January 24, 2011
KitMaker: 43 posts
AeroScale: 43 posts
Posted: Tuesday, March 22, 2011 - 09:50 AM UTC
drabslab
European Union
Joined: September 28, 2004
KitMaker: 2,186 posts
AeroScale: 1,587 posts
Joined: September 28, 2004
KitMaker: 2,186 posts
AeroScale: 1,587 posts
Posted: Tuesday, March 22, 2011 - 10:18 AM UTC
using maskol to mask!
it's a long time since i've seen someone do that. I used it a lot many years ago when i was doing 1/72.
do you often use maskol?
and do you like it or is itjust a fast solution?
it's a long time since i've seen someone do that. I used it a lot many years ago when i was doing 1/72.
do you often use maskol?
and do you like it or is itjust a fast solution?
SteveJWilliams
United Kingdom
Joined: January 24, 2011
KitMaker: 43 posts
AeroScale: 43 posts
Joined: January 24, 2011
KitMaker: 43 posts
AeroScale: 43 posts
Posted: Tuesday, March 22, 2011 - 11:07 AM UTC
iv tried most methods, this is one of my favourites still, as long as you take your time with it you can get a good effect, my issue with using a mask and spraying is you get a feathered edge which can look ok, but in my opinion isnt realistic
SteveJWilliams
United Kingdom
Joined: January 24, 2011
KitMaker: 43 posts
AeroScale: 43 posts
Joined: January 24, 2011
KitMaker: 43 posts
AeroScale: 43 posts
Posted: Wednesday, March 23, 2011 - 08:04 AM UTC
Weathered, got to pull it all apart again now and do the cockpit
will be reassembled tighter with less gaps when permanent
SteveJWilliams
United Kingdom
Joined: January 24, 2011
KitMaker: 43 posts
AeroScale: 43 posts
Joined: January 24, 2011
KitMaker: 43 posts
AeroScale: 43 posts
Posted: Thursday, March 24, 2011 - 10:04 AM UTC
got some of the neomega cockpit done tonight
might have this finished tomorrow
SteveJWilliams
United Kingdom
Joined: January 24, 2011
KitMaker: 43 posts
AeroScale: 43 posts
Joined: January 24, 2011
KitMaker: 43 posts
AeroScale: 43 posts
Posted: Friday, March 25, 2011 - 09:07 AM UTC
ok more stuff, the details of this cockpit are really good when used with photo etched details
in the cockpit bath tub
cockpit bathtub in the plane, you can see the walls of the cockpit in this pic, this is also a replacement of the standard parts, modification of the insides of the shell were required to fit these
plane partly reassembled again
in the cockpit bath tub
cockpit bathtub in the plane, you can see the walls of the cockpit in this pic, this is also a replacement of the standard parts, modification of the insides of the shell were required to fit these
plane partly reassembled again
Bungal
England - South East, United Kingdom
Joined: February 19, 2007
KitMaker: 84 posts
AeroScale: 69 posts
Joined: February 19, 2007
KitMaker: 84 posts
AeroScale: 69 posts
Posted: Friday, March 25, 2011 - 09:22 AM UTC
WOW
Posted: Friday, March 25, 2011 - 06:26 PM UTC
Interesting technique that you have there when I wouldn't even contemplate painting and weathering the Bucc until I had it all together and closed up. Mind you when I did my kit the fit was terrible as you can see from the full full build log of my attempt Here
Keeperofsouls2099
Florida, United States
Joined: January 14, 2009
KitMaker: 2,798 posts
AeroScale: 2,443 posts
Joined: January 14, 2009
KitMaker: 2,798 posts
AeroScale: 2,443 posts
Posted: Saturday, March 26, 2011 - 03:13 PM UTC
Good work Sir I love the seats awesome
SteveJWilliams
United Kingdom
Joined: January 24, 2011
KitMaker: 43 posts
AeroScale: 43 posts
Joined: January 24, 2011
KitMaker: 43 posts
AeroScale: 43 posts
Posted: Sunday, March 27, 2011 - 09:05 AM UTC
thanks for the comments
more updates, parts fitted, meant to paint the wing edges silver, but i painted and wasnt happy, so i tried tin foil instead and after weathring looks great
Also got the airbrake done and weathered
Overall so far
more updates, parts fitted, meant to paint the wing edges silver, but i painted and wasnt happy, so i tried tin foil instead and after weathring looks great
Also got the airbrake done and weathered
Overall so far
SteveJWilliams
United Kingdom
Joined: January 24, 2011
KitMaker: 43 posts
AeroScale: 43 posts
Joined: January 24, 2011
KitMaker: 43 posts
AeroScale: 43 posts
Posted: Monday, March 28, 2011 - 09:12 AM UTC
plane has feet, although iv only stuck one gear door on
Dirkpitt289
New Jersey, United States
Joined: May 24, 2008
KitMaker: 346 posts
AeroScale: 307 posts
Joined: May 24, 2008
KitMaker: 346 posts
AeroScale: 307 posts
Posted: Monday, March 28, 2011 - 03:53 PM UTC
Great looking build. The Buccaneer is a cool looking plane!
Gundam-Mecha
England - South East, United Kingdom
Joined: August 05, 2009
KitMaker: 1,019 posts
AeroScale: 66 posts
Joined: August 05, 2009
KitMaker: 1,019 posts
AeroScale: 66 posts
Posted: Monday, March 28, 2011 - 10:00 PM UTC
Great work Steve, the camo came out great. I've not used Maskol before but I've been considering it for my Hind to cover some hard to mask spots.
How quickly do you peel it off after painting?
SteveJWilliams
United Kingdom
Joined: January 24, 2011
KitMaker: 43 posts
AeroScale: 43 posts
Joined: January 24, 2011
KitMaker: 43 posts
AeroScale: 43 posts
Posted: Tuesday, March 29, 2011 - 12:20 AM UTC
about 90 mins however you can leave the maskol on for 3 days so it doesnt really matter.
iv improved the silver wing edges now so hopefully will have some pics of that later
Lucky13
Scotland, United Kingdom
Joined: June 01, 2006
KitMaker: 1,707 posts
AeroScale: 1,119 posts
Joined: June 01, 2006
KitMaker: 1,707 posts
AeroScale: 1,119 posts
Posted: Tuesday, March 29, 2011 - 03:48 AM UTC
Great work mate! Got one of each of the Airfix Buccaneers sitting and waiting for some attention...
SteveJWilliams
United Kingdom
Joined: January 24, 2011
KitMaker: 43 posts
AeroScale: 43 posts
Joined: January 24, 2011
KitMaker: 43 posts
AeroScale: 43 posts
Posted: Tuesday, March 29, 2011 - 10:44 AM UTC
finished the canopy for the cockpit
also improved the wing edge silver bits