

Hi Folks
Just ordered the long waiting Gloster Gladiator from Silver Wings. I was in contact with Wojtek when realised the Sea Gladiator asking if He would do a Mk1/II, and the respons was that if I waited he hade it comming.So this was early this year and now the wait is over.At last I can start the build of a Gladiator in 32-scale.
When the amilman drops the box with all resin on my doorstep I´ll be back with pics from the build.
How many off you have done the same thing? Wating for a Gloster Gladiator in big scale?
//Larsa
World War II
Discuss WWII and the era directly before and after the war from 1935-1949.
Discuss WWII and the era directly before and after the war from 1935-1949.
Hosted by Rowan Baylis
1/32 Gloster Gladiator

Repainted

Joined: April 04, 2006
KitMaker: 1,058 posts
AeroScale: 1,004 posts
Posted: Friday, March 25, 2011 - 07:39 AM UTC

Merlin

#017


Joined: June 11, 2003
KitMaker: 17,582 posts
AeroScale: 12,795 posts

Posted: Friday, March 25, 2011 - 09:56 PM UTC
Nice one Lars!
I really look forward to seeing your build. The Silverwings Gladiator (and the Hart!) is a kit I'd love to have myself.
All the best
Rowan
I really look forward to seeing your build. The Silverwings Gladiator (and the Hart!) is a kit I'd love to have myself.
All the best
Rowan

CanDid
Joined: May 03, 2010
KitMaker: 123 posts
AeroScale: 98 posts

Posted: Thursday, March 31, 2011 - 11:40 PM UTC
Hi,
I've been glancing at this kit for WHILE, just waiting for someone to make a post. Just being curious, do you plan a Swedish Air Force F19 build?
Cheers
/Fred
I've been glancing at this kit for WHILE, just waiting for someone to make a post. Just being curious, do you plan a Swedish Air Force F19 build?
Cheers
/Fred
Repainted
Joined: April 04, 2006
KitMaker: 1,058 posts
AeroScale: 1,004 posts
Posted: Friday, April 01, 2011 - 06:11 PM UTC
Quoted Text
Hi,
I've been glancing at this kit for WHILE, just waiting for someone to make a post. Just being curious, do you plan a Swedish Air Force F19 build?
Cheers
/Fred
Hi
That´s just what i planning

This one you can find at the Sedish Airforce museum.
//Larsa
Repainted
Joined: April 04, 2006
KitMaker: 1,058 posts
AeroScale: 1,004 posts
Posted: Saturday, April 16, 2011 - 08:42 AM UTC
The word from Wojtek is that the Gladiator is on it´s way over to me.  Hopefully next week I got me a Gladiator
http://s1207.photobucket.com/albums/bb467/Museet/J8%20Gloster%20gladiator%20Mk%20II/
//Larsa
Hopefully next week I got me a Gladiatorhttp://s1207.photobucket.com/albums/bb467/Museet/J8%20Gloster%20gladiator%20Mk%20II/
//Larsa

JPTRR
#051

Joined: December 21, 2002
KitMaker: 7,772 posts
AeroScale: 3,175 posts
Posted: Saturday, April 16, 2011 - 09:25 AM UTC
Awesome! I wish this model had been avaialable for the past campaign Fighters Under the Midnight Sun 

ludwig113

Joined: February 05, 2008
KitMaker: 1,381 posts
AeroScale: 1,110 posts

Posted: Saturday, April 16, 2011 - 07:47 PM UTC
the gladiator is one of my fav. aircraft, unfortunately is a bit too pricey for me,maybe one day...
Repainted
Joined: April 04, 2006
KitMaker: 1,058 posts
AeroScale: 1,004 posts
Posted: Tuesday, April 19, 2011 - 07:42 AM UTC
WOW, Got my Gladiator today and just Oboy. This is nice, This is nice. Pics comming this way asp.
//Larsa
//Larsa
Repainted
Joined: April 04, 2006
KitMaker: 1,058 posts
AeroScale: 1,004 posts
Posted: Tuesday, April 26, 2011 - 04:25 AM UTC
At last I got some time to take some pics off the Gladiator. Here they are.

Here´s what you get, alot off bags and the fuselage taped together.Etch included
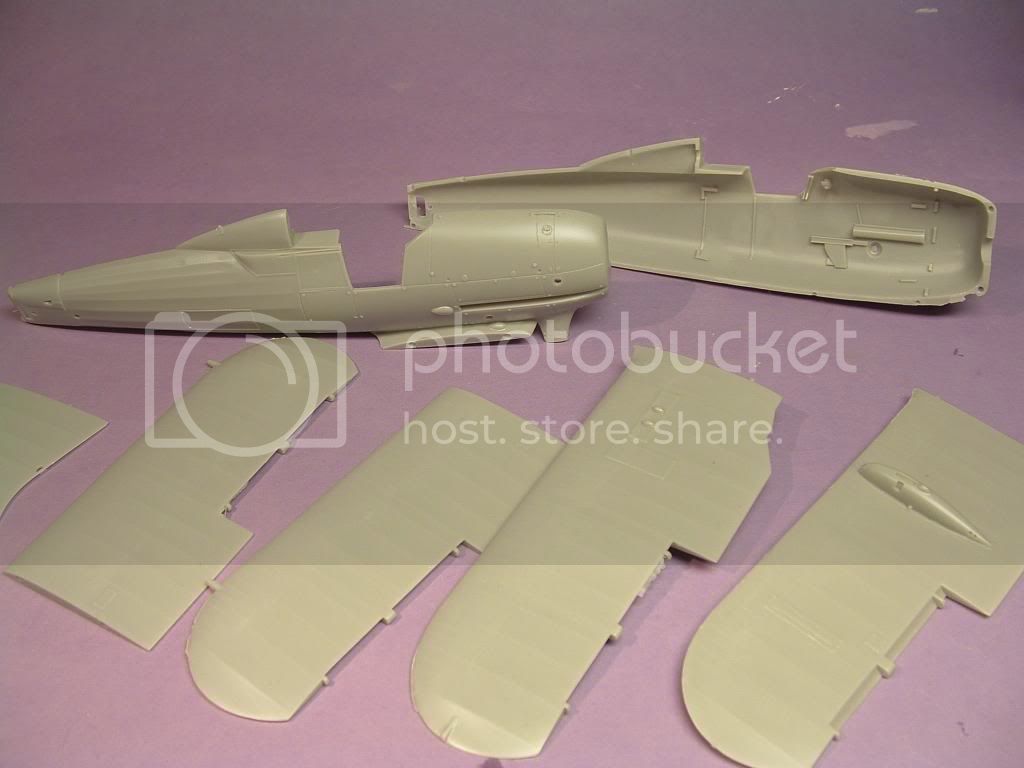
The fuselage and wings made sit and dreams with a coup off coffee this weekend.The detals of the ribs in the wing and fuselage is just a gem.

The instructions is just okey.
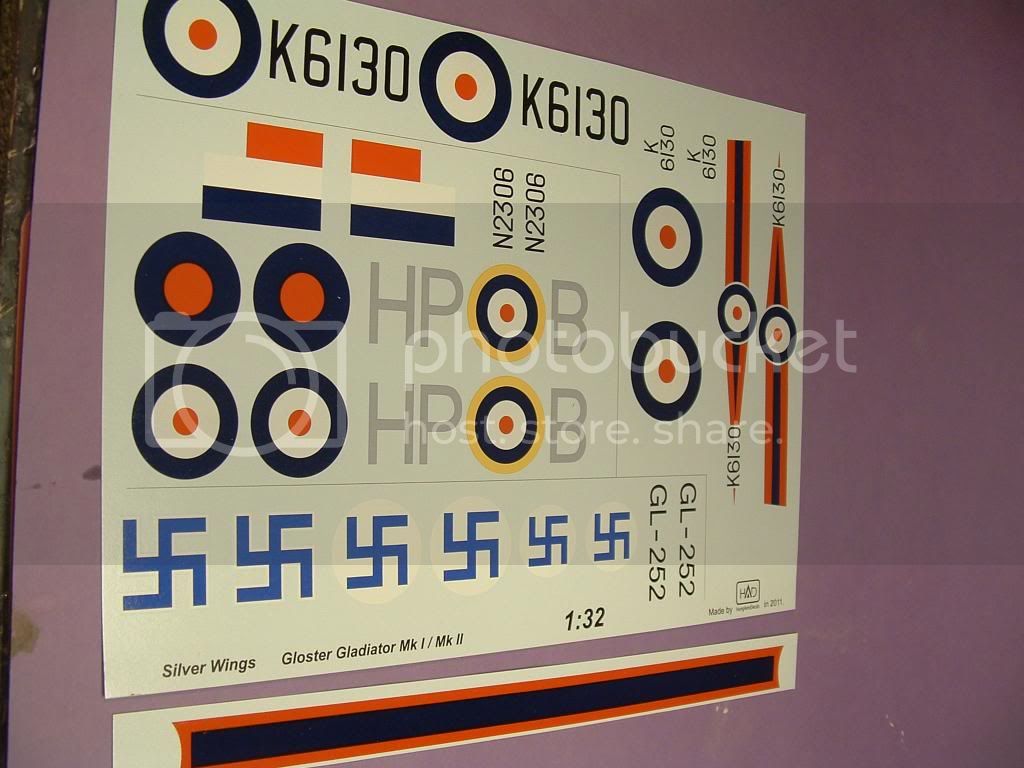
The decals looking good and I can not tell you if they correct or not. For me I will not use them,so I will not be able to tell you how the stick to the model.


More pics comming as soon I start this build up folks
//Larsa
Here´s what you get, alot off bags and the fuselage taped together.Etch included
The fuselage and wings made sit and dreams with a coup off coffee this weekend.The detals of the ribs in the wing and fuselage is just a gem.
The instructions is just okey.
The decals looking good and I can not tell you if they correct or not. For me I will not use them,so I will not be able to tell you how the stick to the model.
More pics comming as soon I start this build up folks
//Larsa

Kornbeef
Joined: November 06, 2005
KitMaker: 1,667 posts
AeroScale: 1,551 posts

Posted: Tuesday, April 26, 2011 - 09:37 AM UTC
Now that looks very nice Lars, I can't wait to see you work your magic on her.
Repainted
Joined: April 04, 2006
KitMaker: 1,058 posts
AeroScale: 1,004 posts
Posted: Thursday, April 28, 2011 - 02:07 AM UTC
Quoted Text
Now that looks very nice Lars, I can't wait to see you work your magic on her.
Thanks
I allways wanted Roden to make the Gladiator in this scale, but Wojtek (Silver Wing)was the first to respond.For the moment I´ll have the Staggerwing on the table and will start up this build asp after the stagger.
busy,busy
//Larsa
Merlin
#017
Joined: June 11, 2003
KitMaker: 17,582 posts
AeroScale: 12,795 posts
Posted: Thursday, April 28, 2011 - 04:53 AM UTC
Hi Lars
It looks a stunner - I'm officially very jealous! Can you write us an In-Box Review?
All the best
Rowan
It looks a stunner - I'm officially very jealous!
Can you write us an In-Box Review? All the best
Rowan
Repainted
Joined: April 04, 2006
KitMaker: 1,058 posts
AeroScale: 1,004 posts
Posted: Thursday, May 05, 2011 - 08:51 AM UTC
Quoted Text
Hi Lars
It looks a stunner - I'm officially very jealous!
All the best
Rowan
Hi Folks/Rowan the jealous
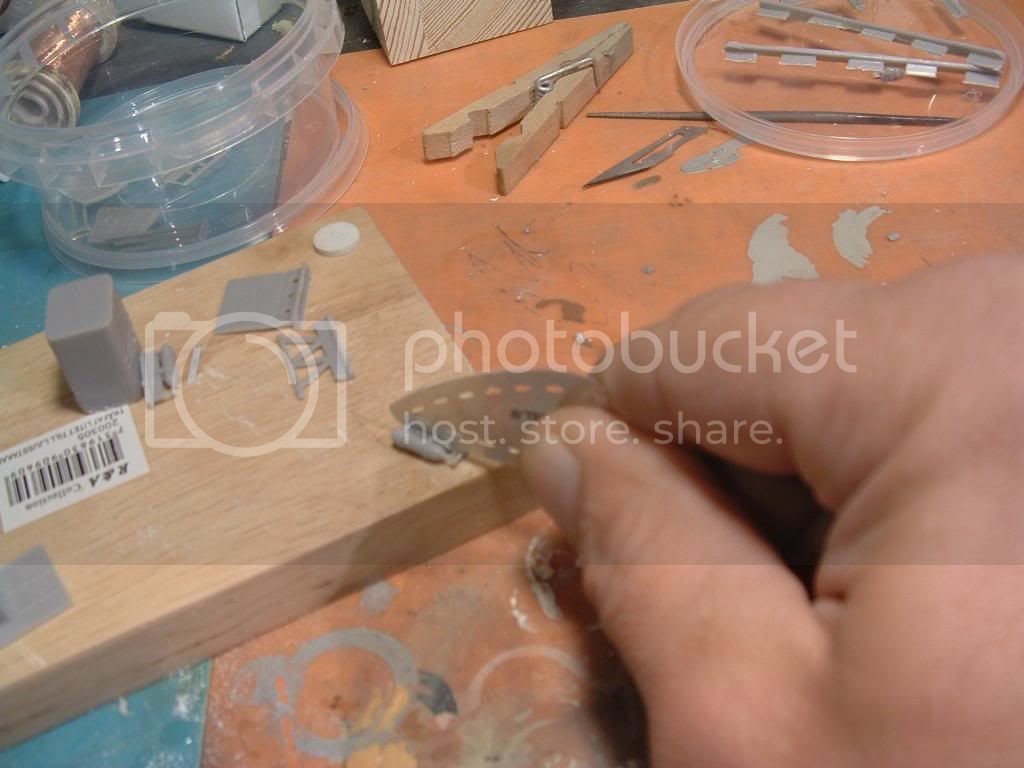
It´s time for the first build pics. The instructions wants to start with the engine but I was more interested in to start up the interior works. Cutting the block from the casting process took me some time, had to be very careful not to break anything I didn´t want. The frames are fragile and easy breaking. I used an old Trimaster blade for the job.
There´s one error in the instructions about the length off the plastic rods you have to cut. Marked in red here on the instructions says 24mm but testing to close the fuselage halves it do not work, so 22mm is more correct. I guess 23mm will be okay after test fitting again and again. So I will replace the mentioned rod for a 23 mm length rod.

The frames was slightly warped so with some TLC I was able to glue them together and squared up.

The inside of the fuselage you can see the nicely done guide blocks for the frame to rest on. Once again cudos Silver wings.
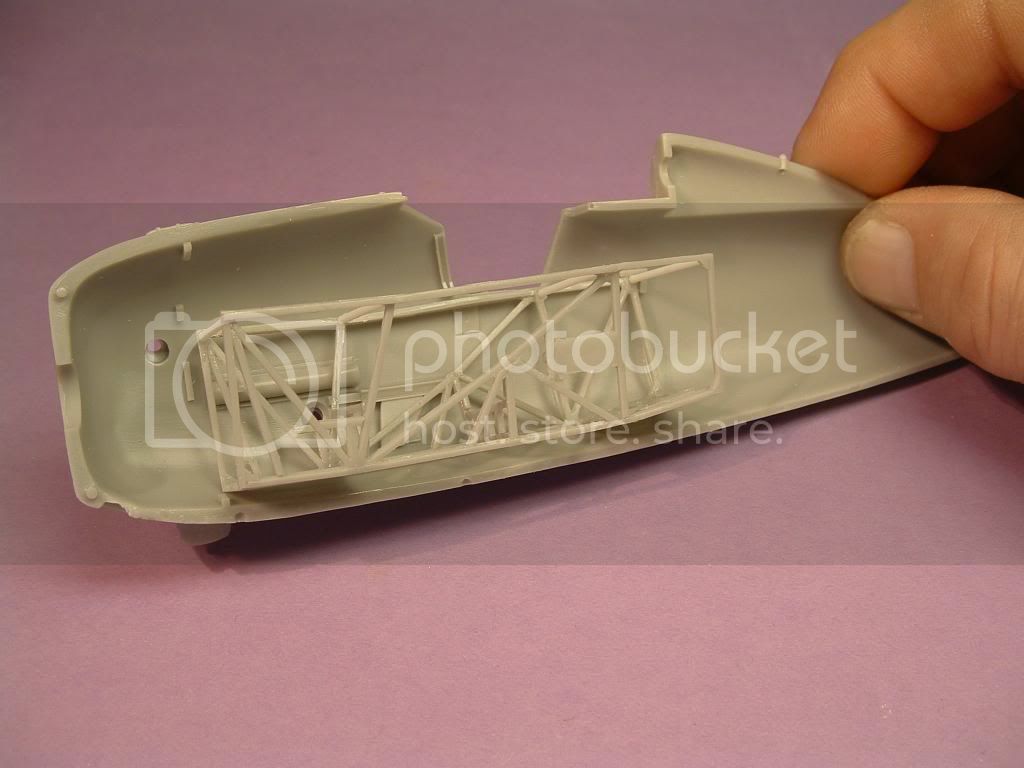
The last test off the fuselage halves for this night and update.

As you can see I can go up one mm to 23, just having a small gap of the frame.
regards
//Larsa
Repainted
Joined: April 04, 2006
KitMaker: 1,058 posts
AeroScale: 1,004 posts
Posted: Monday, May 16, 2011 - 06:13 PM UTC
Hi folks
I fixed the gap up, adding a 23 mm length rod instead off the shorter 22 mm.
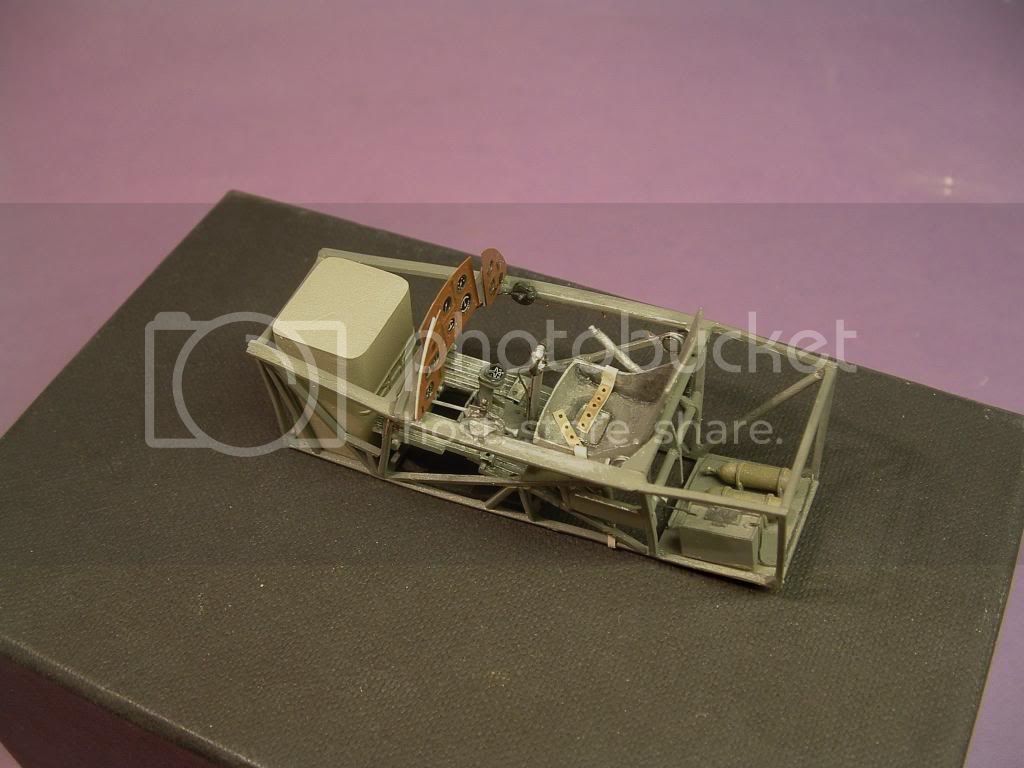
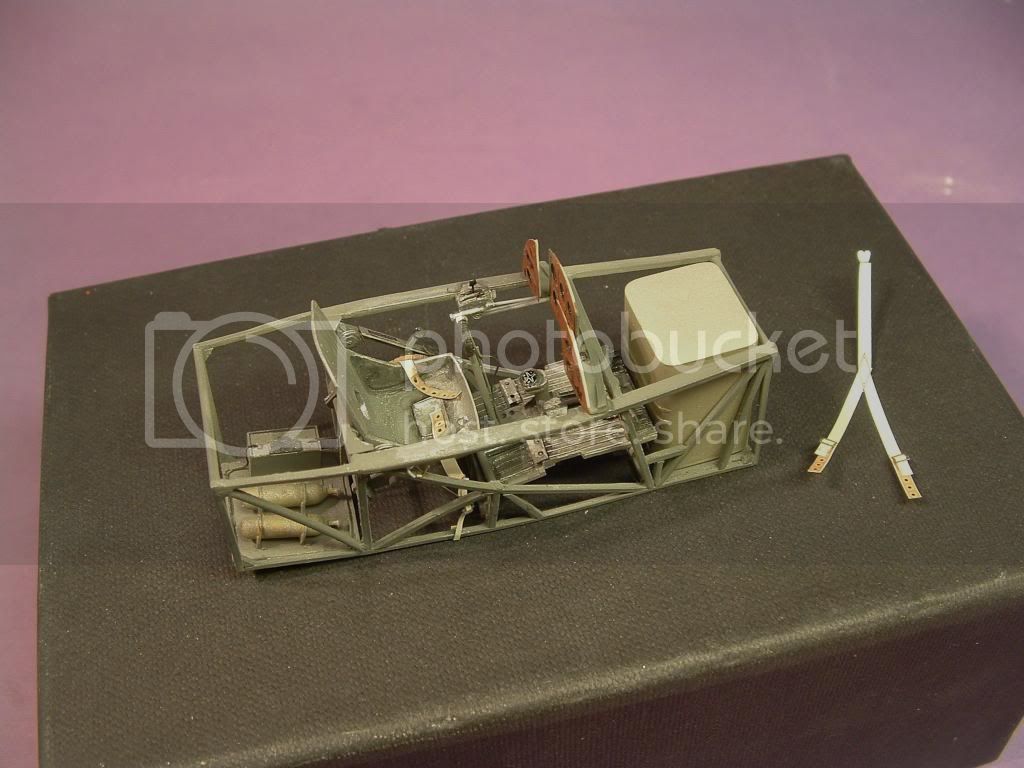
Now mostly of the details silver wing provided is in the interior. The seat, floor and controlstick are not glued in place yet, they will after painting is done. I added some extra details from sheet brass 0.3mm thick and some copper wires. I used pictures from the museum Gladiator as guide and reference.


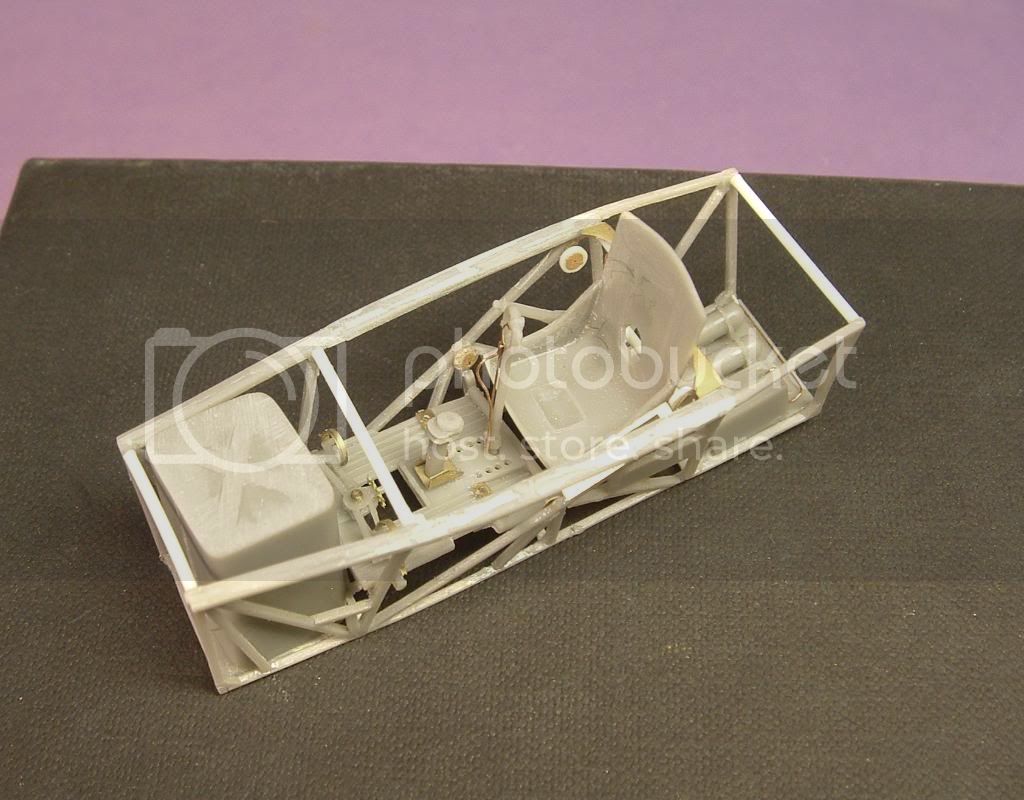
I will not use the etched seat belt from Silver Wing´s. An early style of Sutton belts from HGW will be used instead. They have just that little bit more interest and details. I do not like bending brass belts into the cockpit, even if Silver Wing`s belt is soft and very easy to bend I find it difficult to get the belt realistic when glued in.HGW ´s have a paper belts and this is the first time for me with this brand. The etch included is Eduards top work.

//Larsa
I fixed the gap up, adding a 23 mm length rod instead off the shorter 22 mm.
Now mostly of the details silver wing provided is in the interior. The seat, floor and controlstick are not glued in place yet, they will after painting is done. I added some extra details from sheet brass 0.3mm thick and some copper wires. I used pictures from the museum Gladiator as guide and reference.
I will not use the etched seat belt from Silver Wing´s. An early style of Sutton belts from HGW will be used instead. They have just that little bit more interest and details. I do not like bending brass belts into the cockpit, even if Silver Wing`s belt is soft and very easy to bend I find it difficult to get the belt realistic when glued in.HGW ´s have a paper belts and this is the first time for me with this brand. The etch included is Eduards top work.
//Larsa
Repainted
Joined: April 04, 2006
KitMaker: 1,058 posts
AeroScale: 1,004 posts
Posted: Wednesday, May 18, 2011 - 01:12 AM UTC
Hi
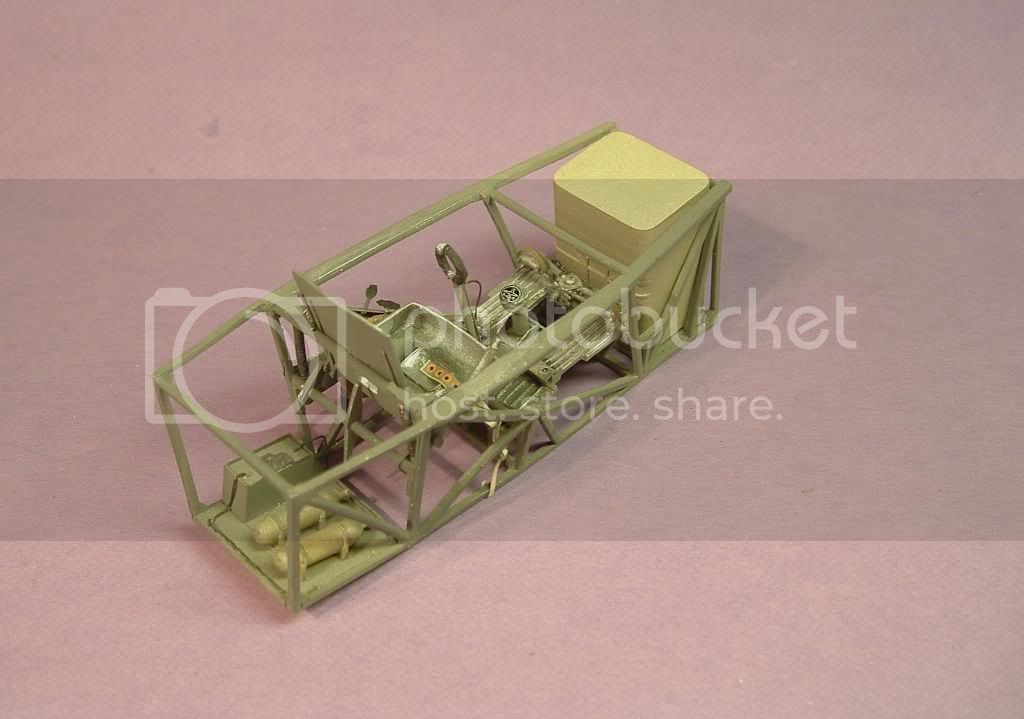
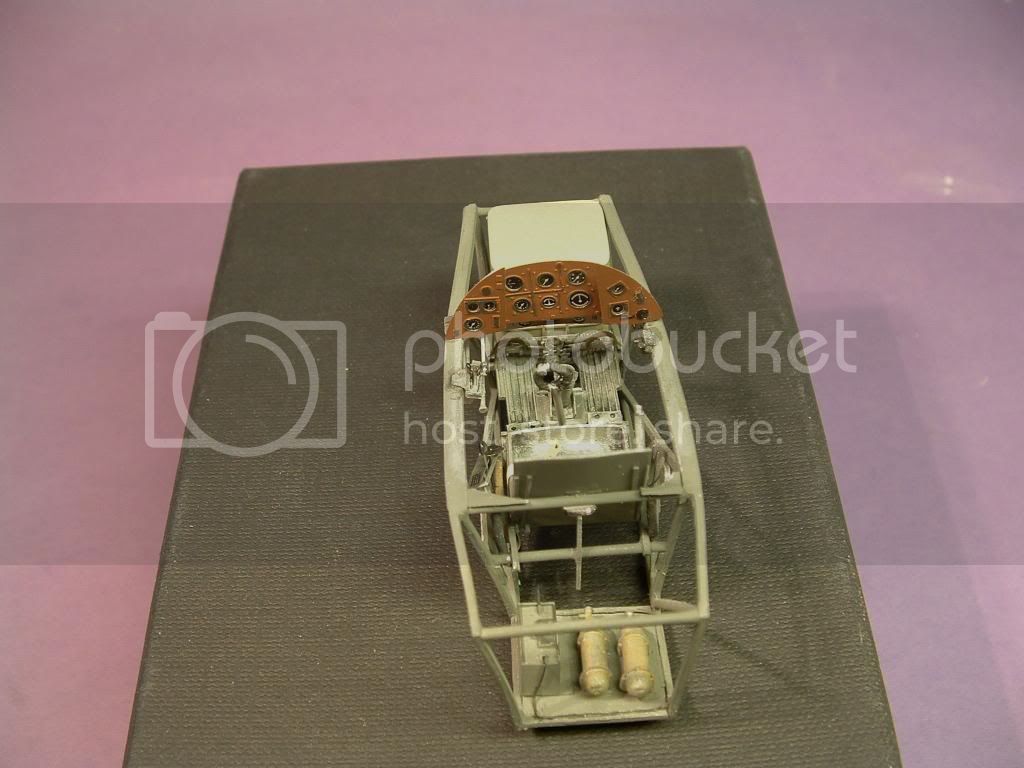
Yesterday I got some paint on to the frame, starting with aluminum (27002) from Humbrol as base colour. Then grey 92 was used as final colour. When the paint was still wet I used a toothpick to scratch up the grey to let the silver shine thru. A decal sheet from Mike Grant´s decals had to let a compass decals lend me a compass for the Gladiator.
A thin wash mixed from black33 and sand 63 was used to give the interior some 5 o´clock shadows. So from here I´ll working on the belts from HGW. Outstanding materials.

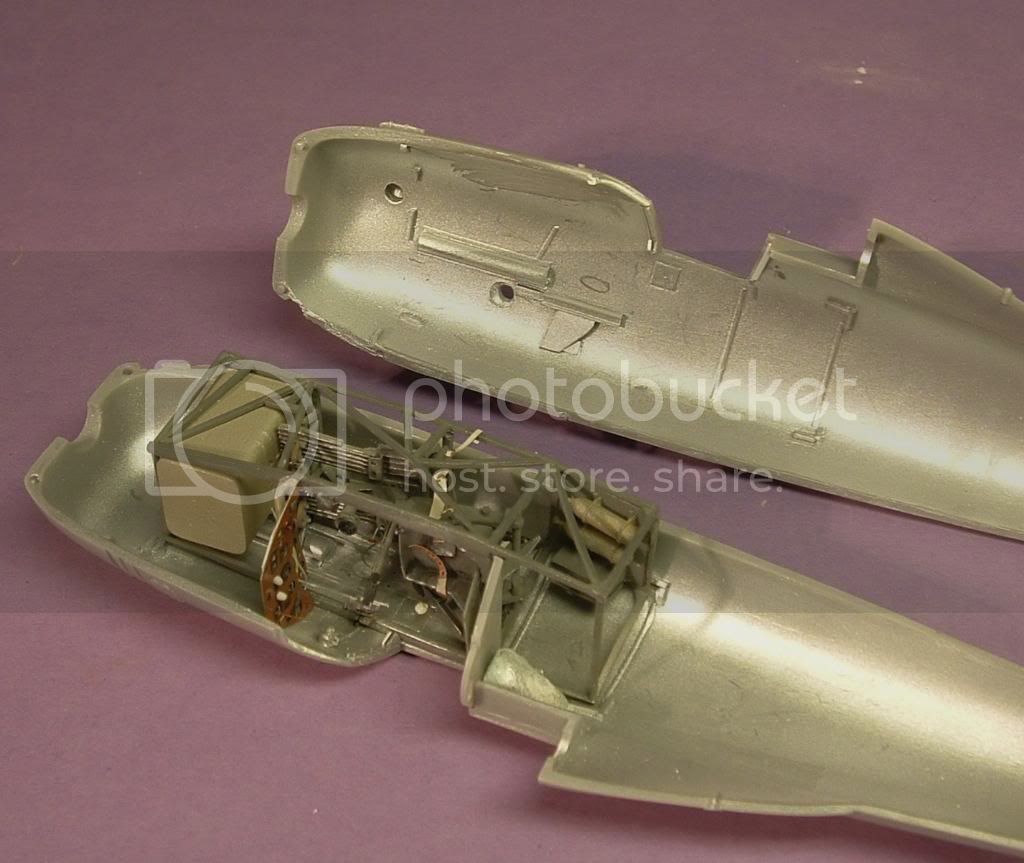
So next thing is to take some attention to the innersides of the fuselages, there´s some details to get fixed before I let the airbrush work again.
The fueltank is painted with the same alu 27002 and some sand 63 to get yellowish colours. The panels are still wet so pics off them coming next time I´ll update. Hopefully I can have the insides finished then to.
//Larsa
Yesterday I got some paint on to the frame, starting with aluminum (27002) from Humbrol as base colour. Then grey 92 was used as final colour. When the paint was still wet I used a toothpick to scratch up the grey to let the silver shine thru. A decal sheet from Mike Grant´s decals had to let a compass decals lend me a compass for the Gladiator.
A thin wash mixed from black33 and sand 63 was used to give the interior some 5 o´clock shadows. So from here I´ll working on the belts from HGW. Outstanding materials.
So next thing is to take some attention to the innersides of the fuselages, there´s some details to get fixed before I let the airbrush work again.
The fueltank is painted with the same alu 27002 and some sand 63 to get yellowish colours. The panels are still wet so pics off them coming next time I´ll update. Hopefully I can have the insides finished then to.
//Larsa
Repainted
Joined: April 04, 2006
KitMaker: 1,058 posts
AeroScale: 1,004 posts
Posted: Wednesday, May 18, 2011 - 10:45 PM UTC
Hi again
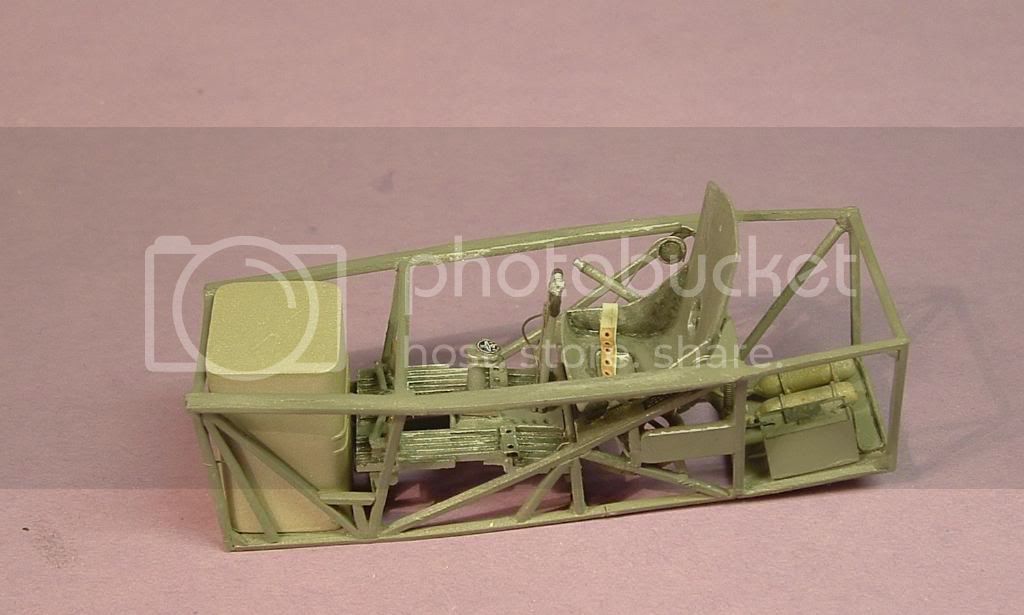
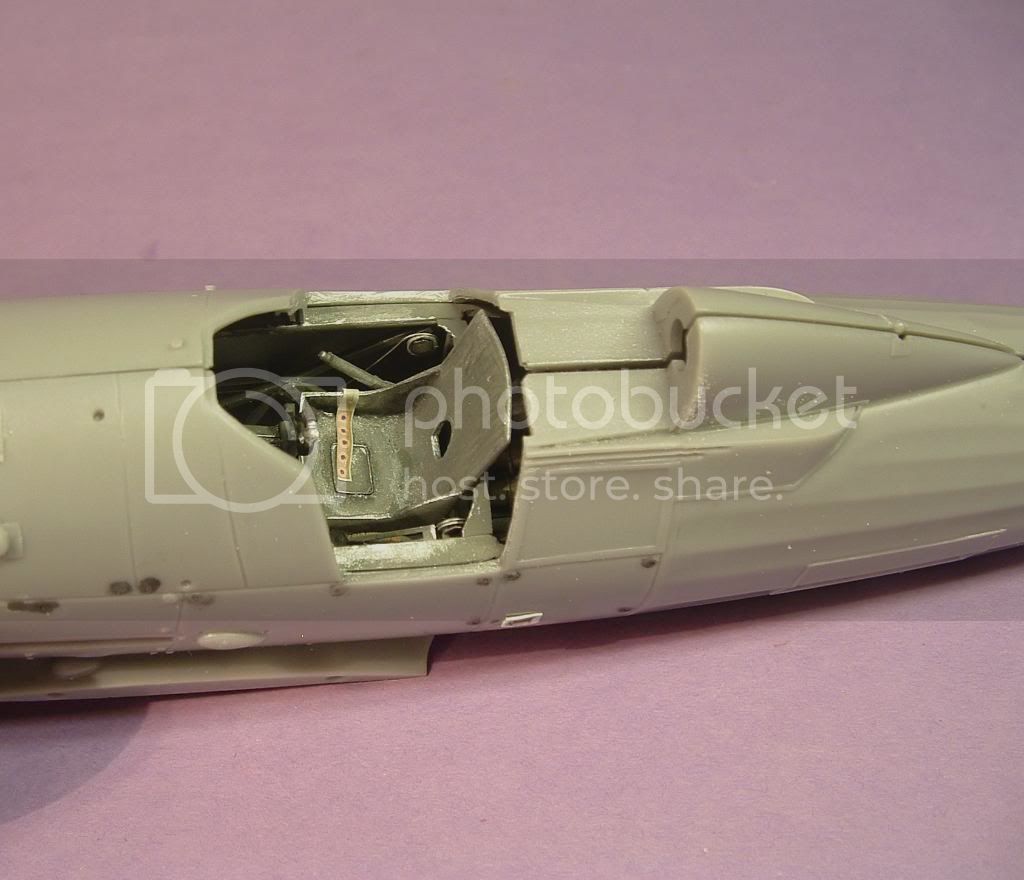
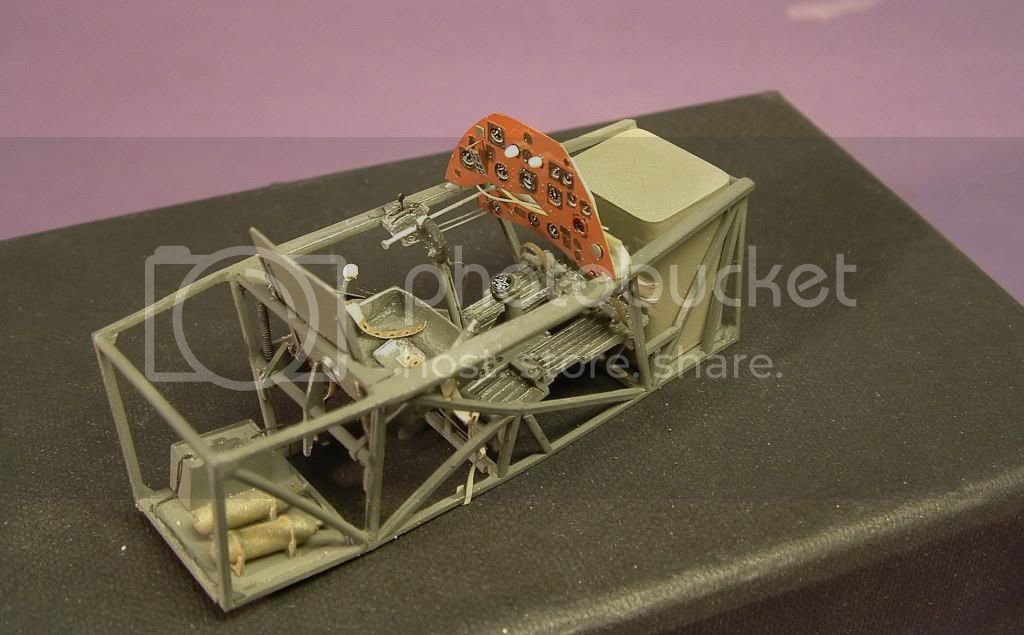
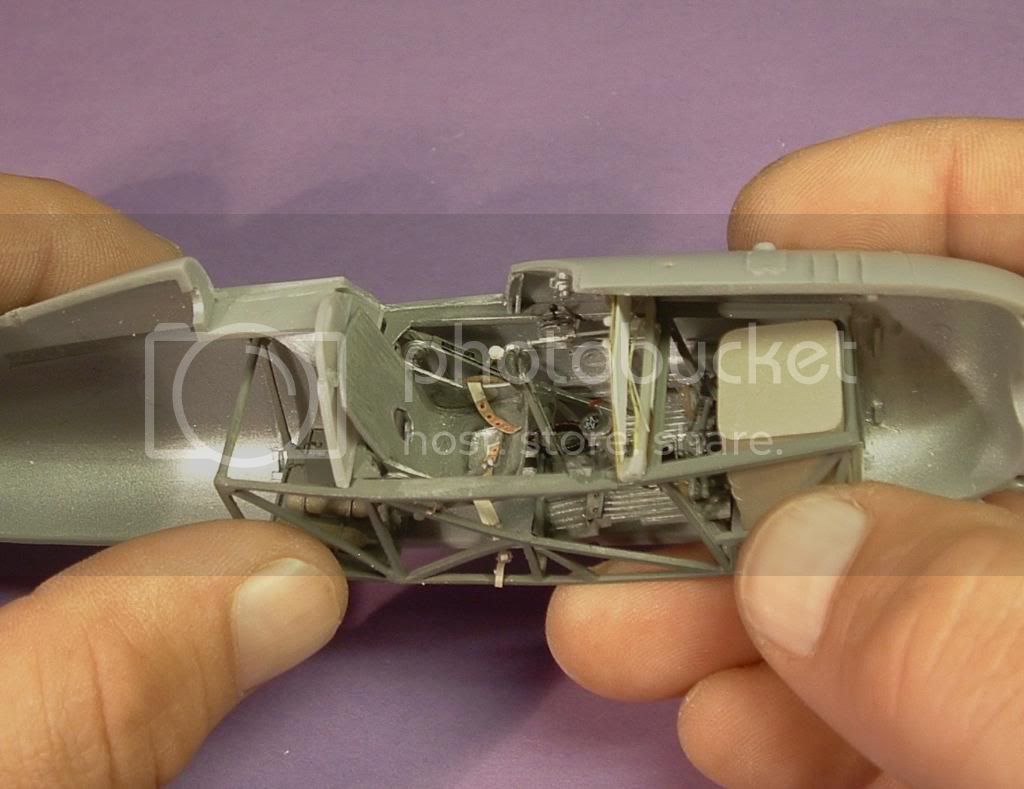
Now are the instrument panel, telegraph key and throttle in place. An oxygen hose will be added later from the tubes under the seat and out in a loop on the floor. Some wires are still to be added before I can say, Ok it´s done. I detailed up the throttle with some spare etch and hot stretched sprue
There was some checking before I glued the panels for the instrument in place. It was a tight fit but no problems. The clear film with the instruments was painted white using Tamyia´s white primer, an easy and quick way to do it. The panel itself was painted Humbrol 62 leather with a touch of 107 WW1 purple, just to give it a more reddish tone.

Feel free to comment if you like
//Larsa
Now are the instrument panel, telegraph key and throttle in place. An oxygen hose will be added later from the tubes under the seat and out in a loop on the floor. Some wires are still to be added before I can say, Ok it´s done. I detailed up the throttle with some spare etch and hot stretched sprue
There was some checking before I glued the panels for the instrument in place. It was a tight fit but no problems. The clear film with the instruments was painted white using Tamyia´s white primer, an easy and quick way to do it. The panel itself was painted Humbrol 62 leather with a touch of 107 WW1 purple, just to give it a more reddish tone.
Feel free to comment if you like
//Larsa
Repainted
Joined: April 04, 2006
KitMaker: 1,058 posts
AeroScale: 1,004 posts
Posted: Tuesday, May 24, 2011 - 08:54 PM UTC
Hi
Time for a short update. I had to change the instrument panel, some confusion about which panel was used.So with the references I had on the MkI panel the new was set up. I used Silver Wings panel just added some instrumentrings from Eduard and some placards from Waldron´s. The small etched dot and squares was taken from an old etch from S&S carparts in 24-scale.Still some bits to be painted and then we can call the interior done.
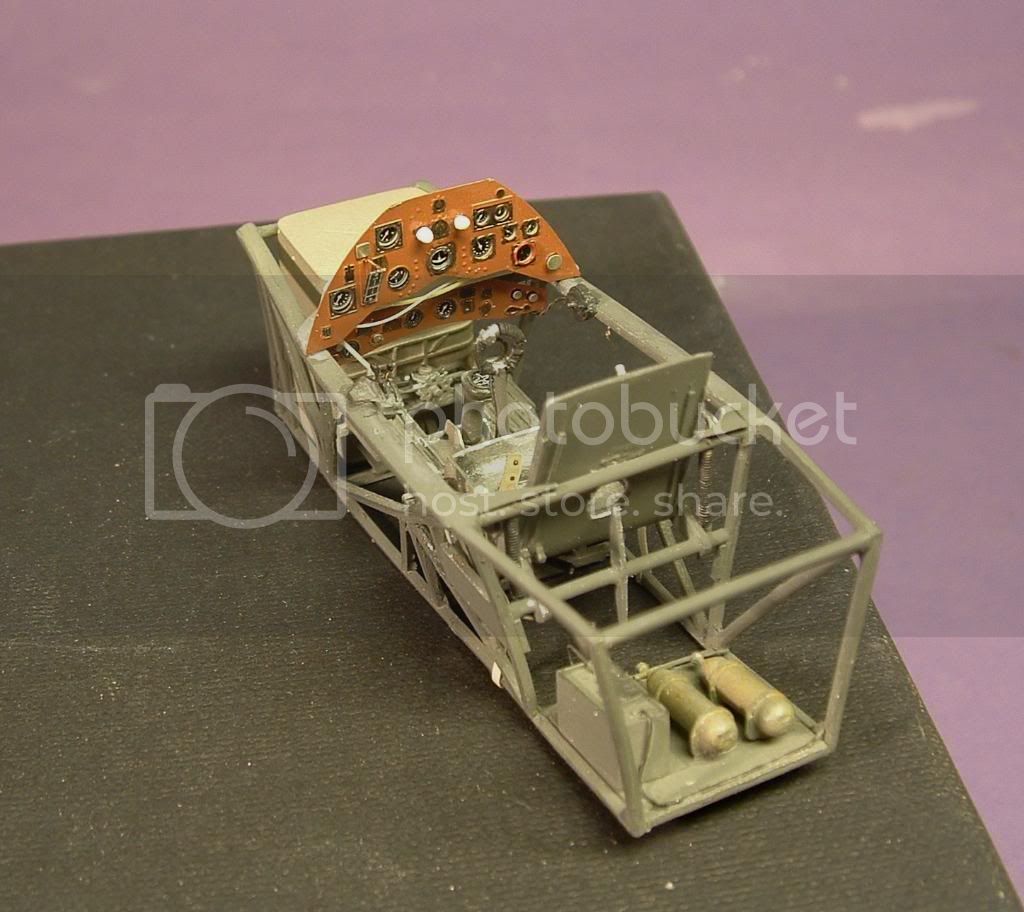
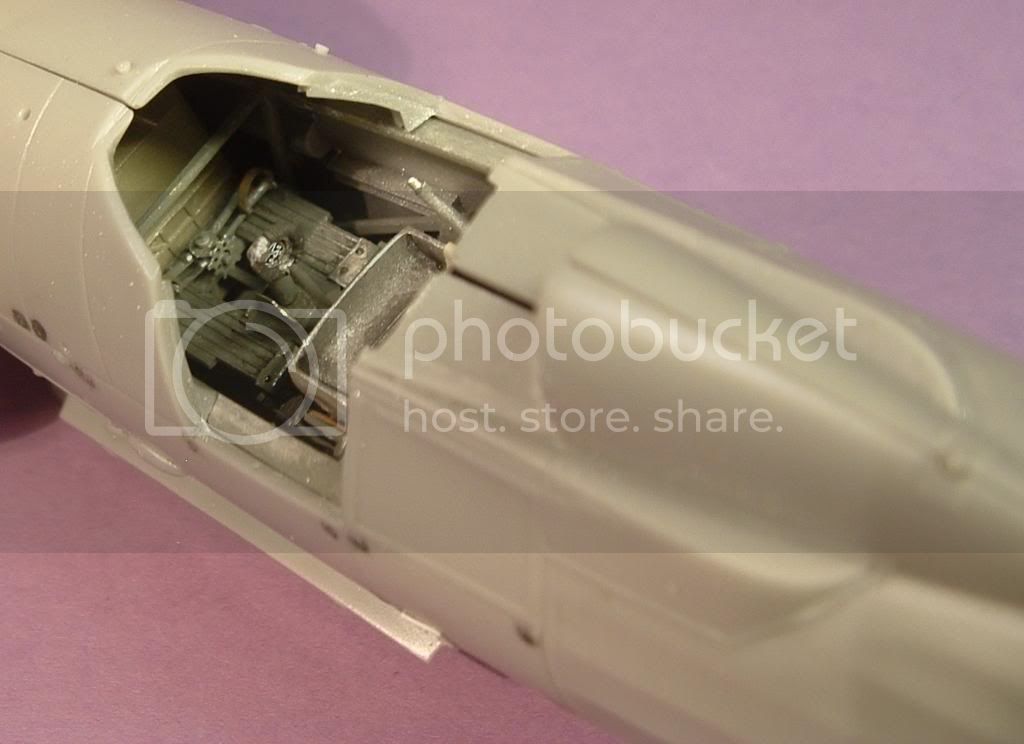
So from here my attention is turned to the inside of the fuselage. I will replace the guns. Using the guns from Monograms B-17 G in 48 scale, they just look better for a Browning/Colt M22 they used in Sweden at the time.
//Larsa
Time for a short update. I had to change the instrument panel, some confusion about which panel was used.So with the references I had on the MkI panel the new was set up. I used Silver Wings panel just added some instrumentrings from Eduard and some placards from Waldron´s. The small etched dot and squares was taken from an old etch from S&S carparts in 24-scale.Still some bits to be painted and then we can call the interior done.
So from here my attention is turned to the inside of the fuselage. I will replace the guns. Using the guns from Monograms B-17 G in 48 scale, they just look better for a Browning/Colt M22 they used in Sweden at the time.
//Larsa |

WEB HOSTING BY


Copyright ©2021 AeroScale and Kitmaker Network, a subsidiary of Silver Star Enterprises
All Rights Reserved. Please read our Conditions of Use and Privacy Policy.
All Rights Reserved. Please read our Conditions of Use and Privacy Policy.