1/48 Focke Wulf Fw 190 F-8
Portugal
Joined: June 15, 2005
KitMaker: 172 posts
AeroScale: 168 posts
Posted: Saturday, April 30, 2011 - 01:04 AM UTC
Hello!
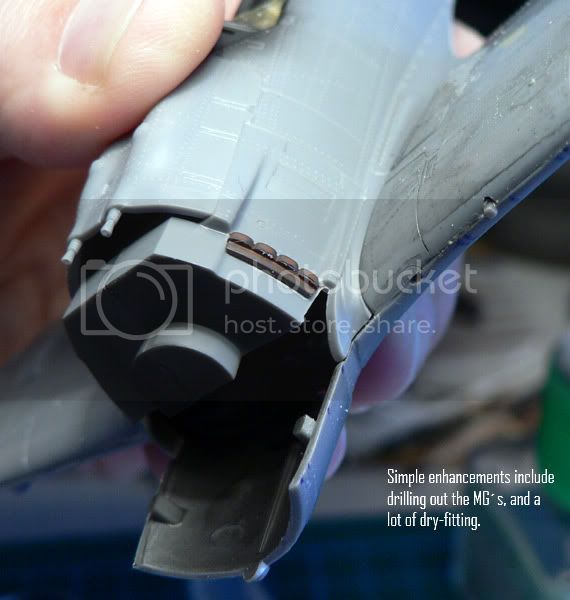
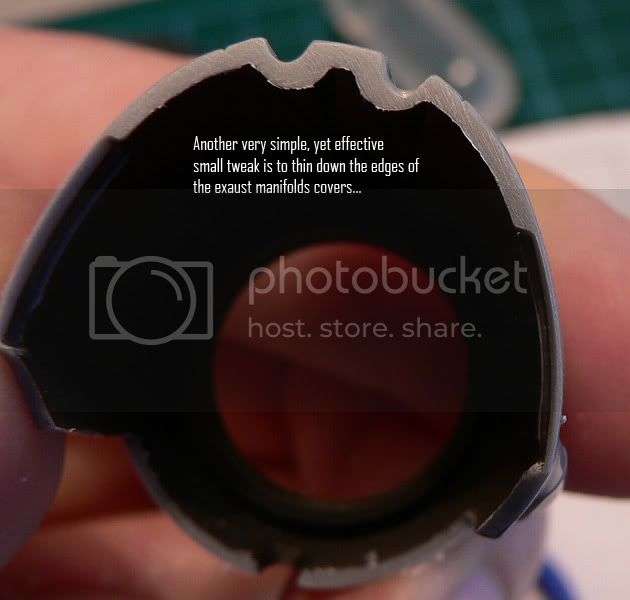
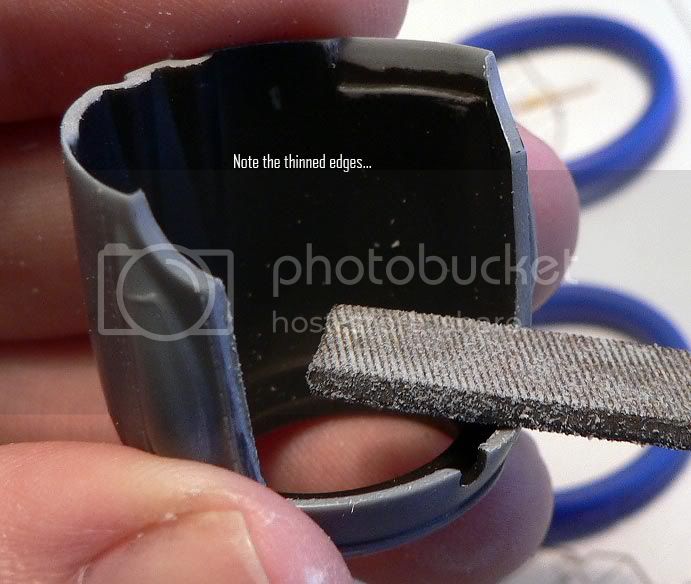
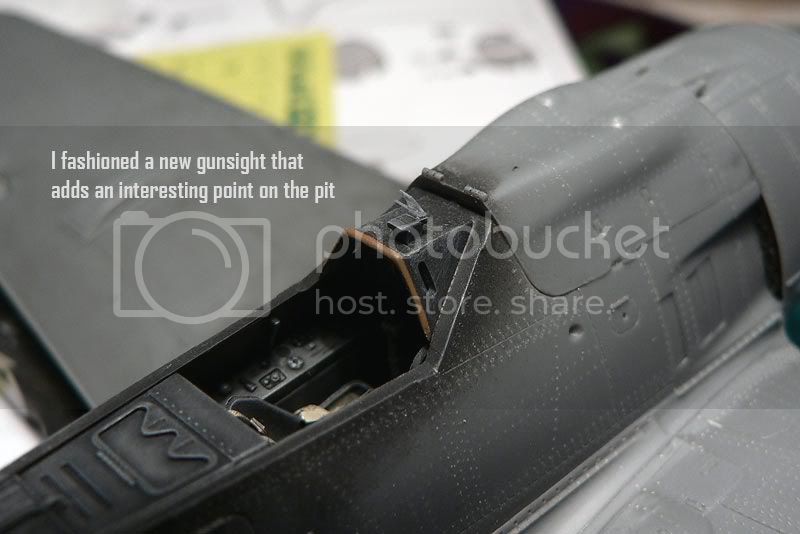
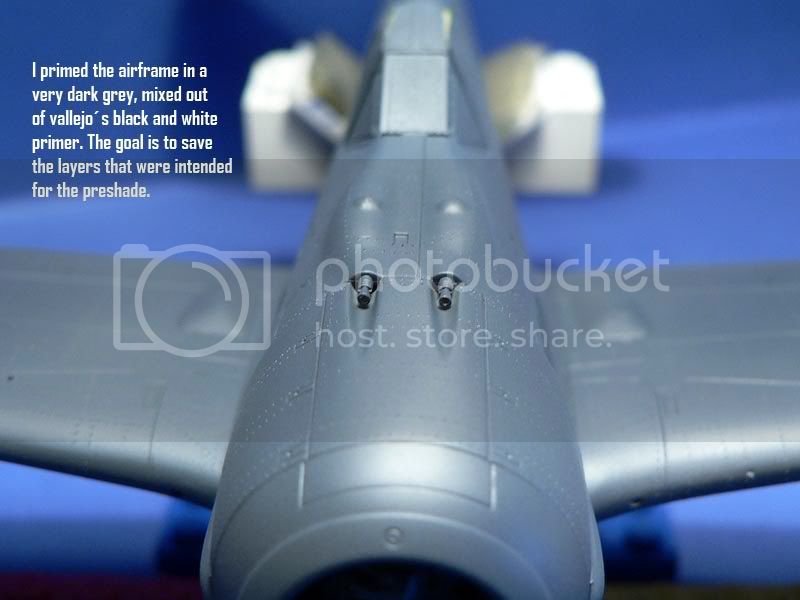
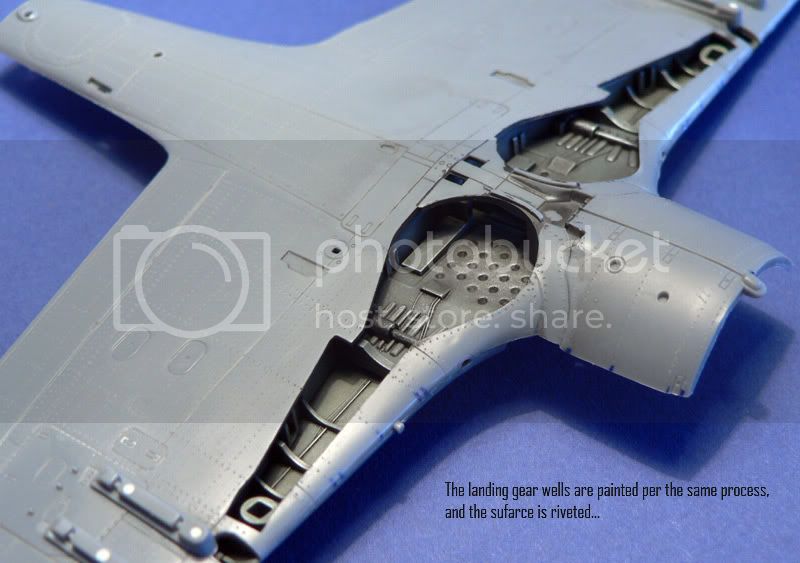
I´m starting this saga wich will include riveting and a small base...
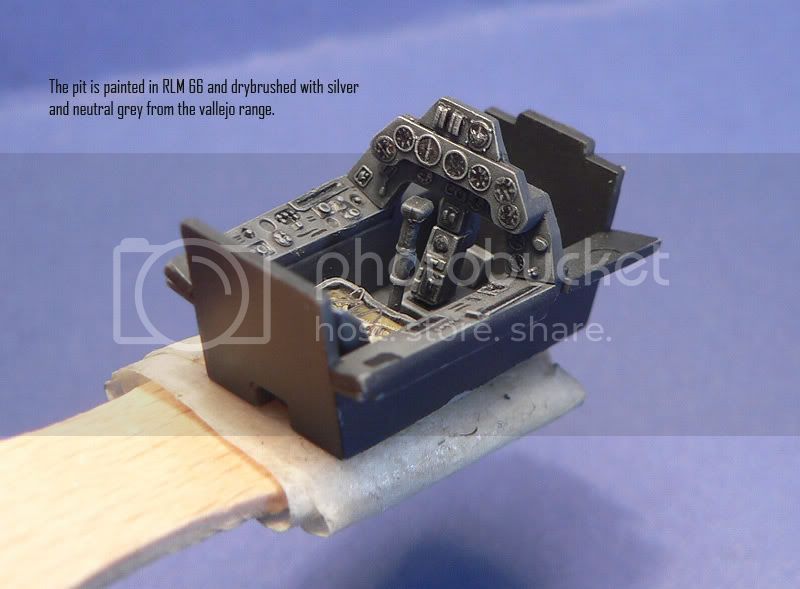
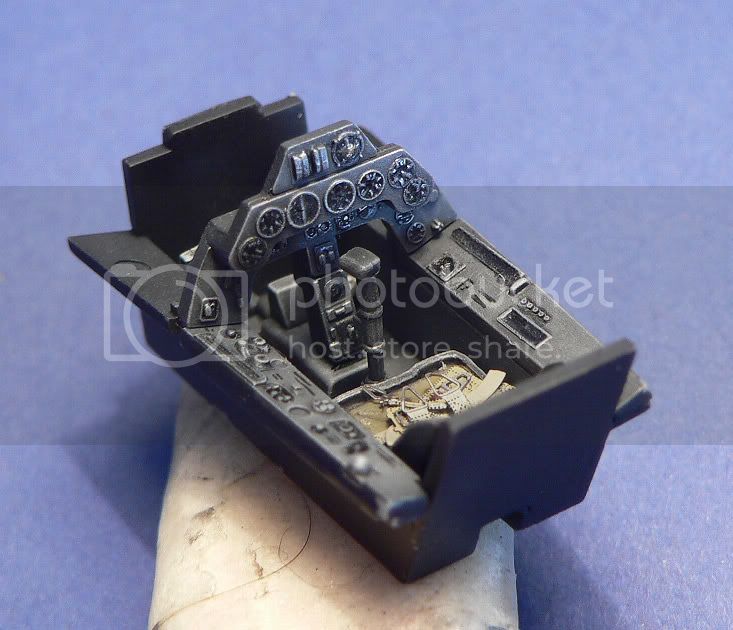
until now... the cockpit is done...!
My best regards!
Primorskiy, Russia
Joined: February 24, 2009
KitMaker: 238 posts
AeroScale: 15 posts
Posted: Saturday, April 30, 2011 - 11:11 AM UTC
Hi, josepedro !
Your cockpit looks great ! Who lets this set?
Hals und Beinbruch !
I was born with a stiff , Stiff Upper Lip !!!
Portugal
Joined: June 15, 2005
KitMaker: 172 posts
AeroScale: 168 posts
Posted: Monday, May 02, 2011 - 10:56 PM UTC
Hello!
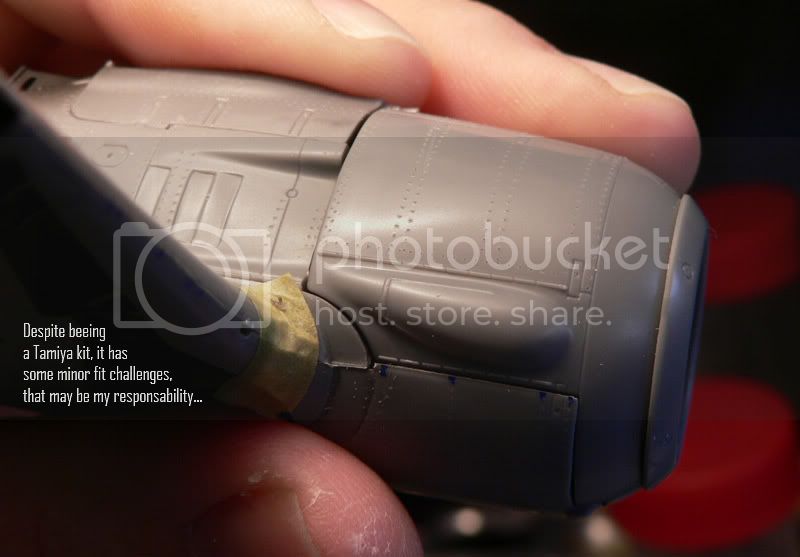
It´s the Tamiya Kit, with only the eduard PE belts added.
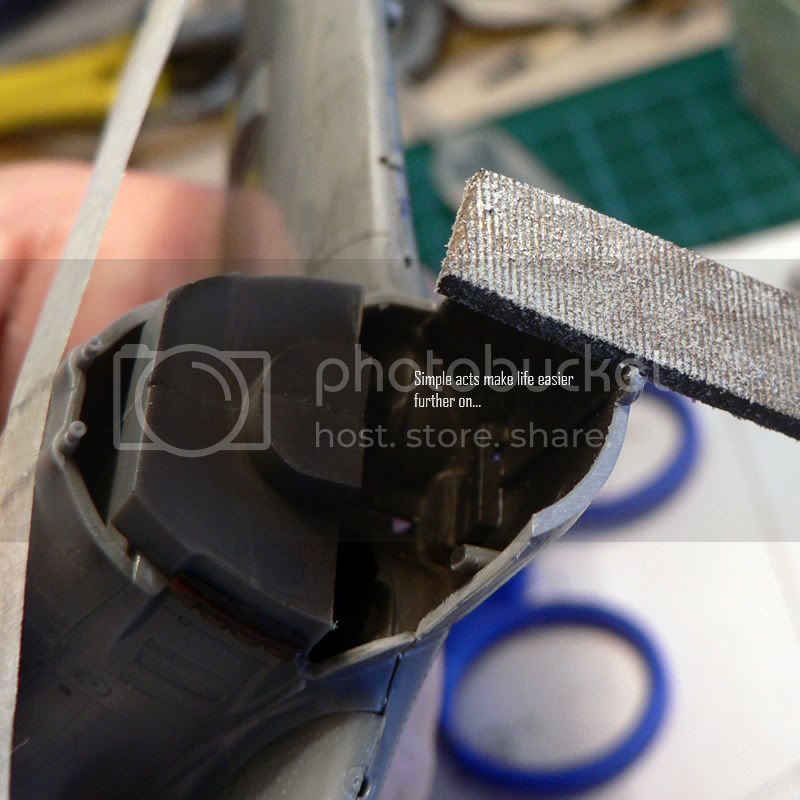
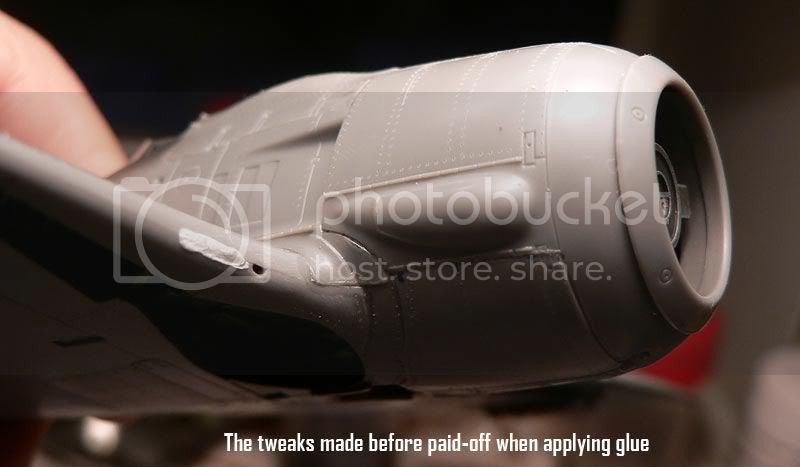
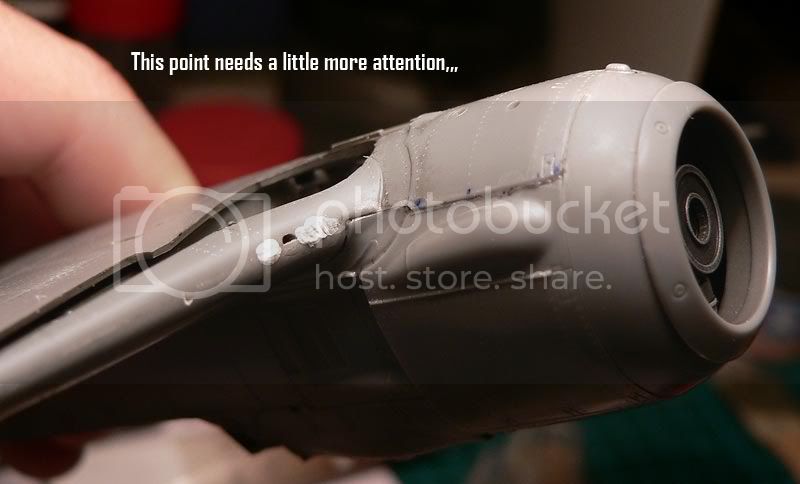
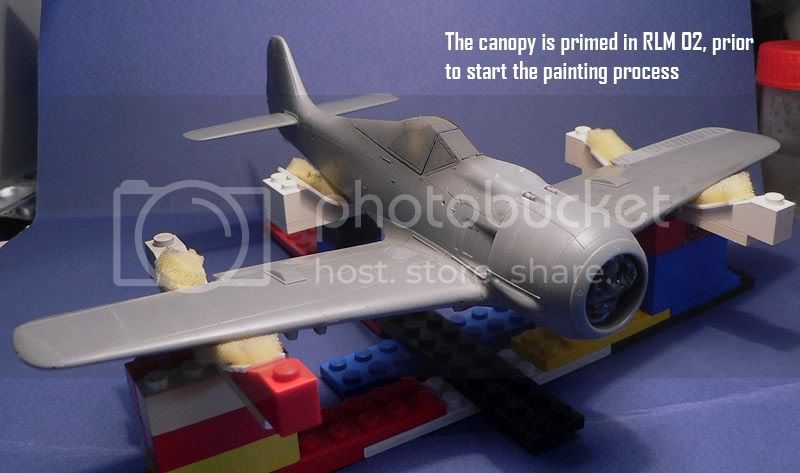
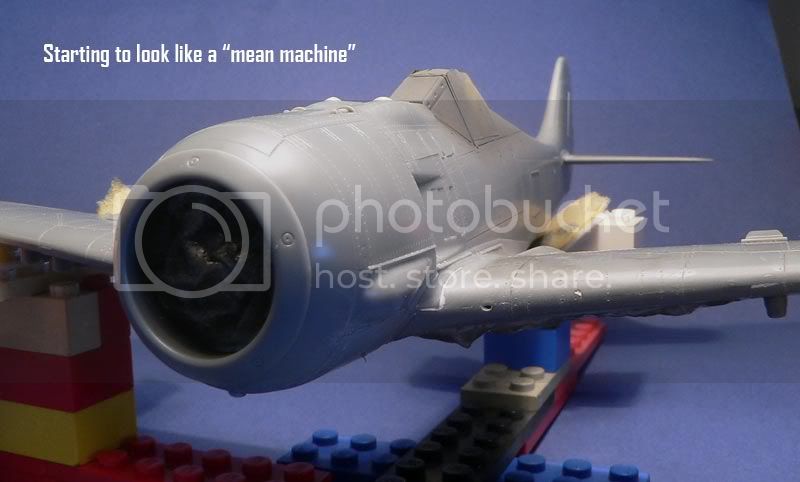
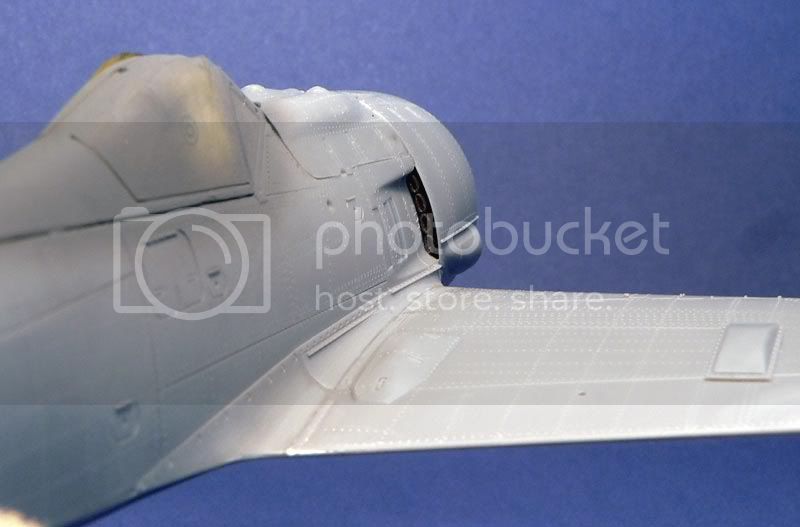
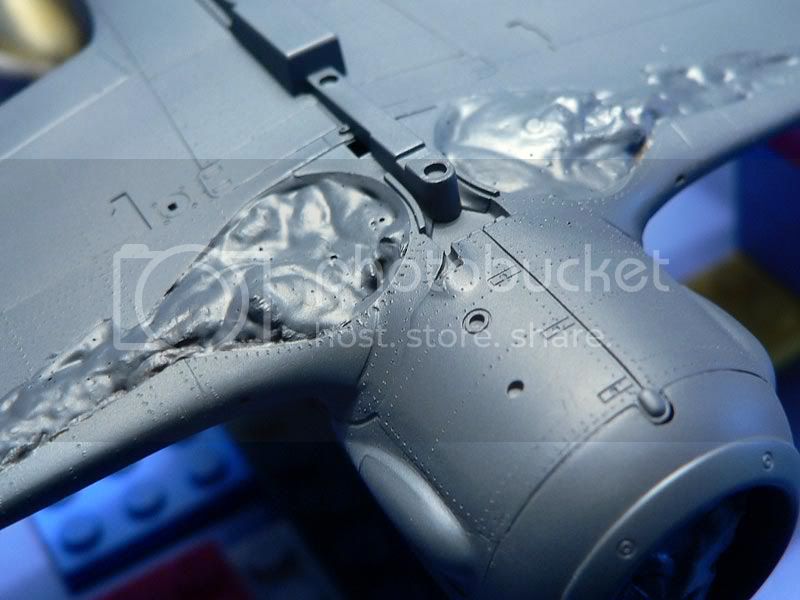
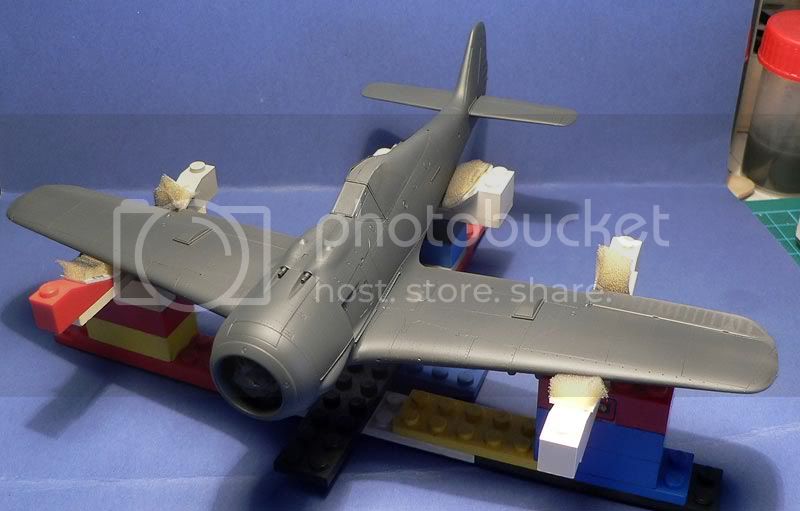
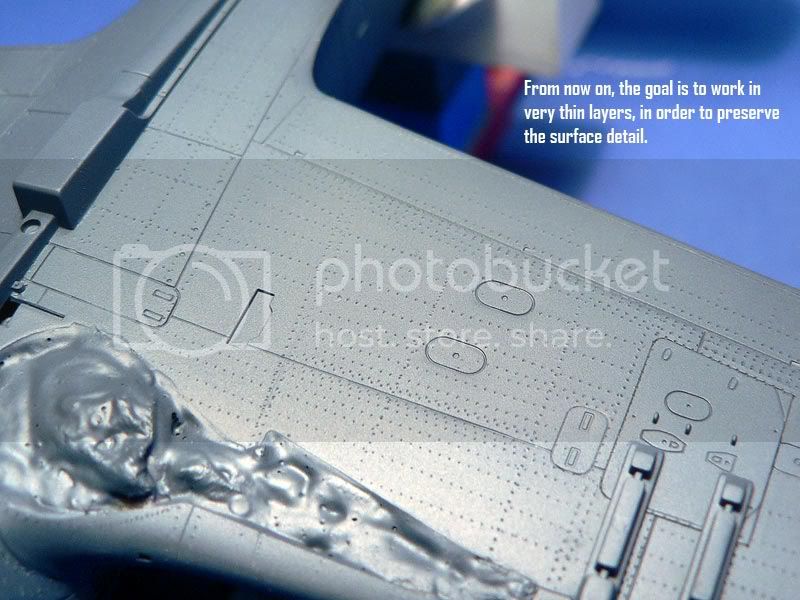
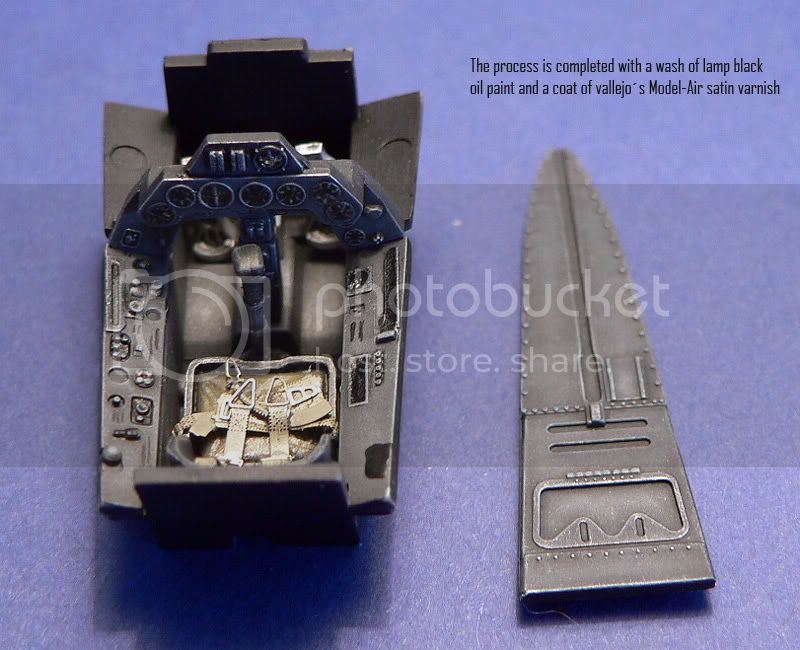
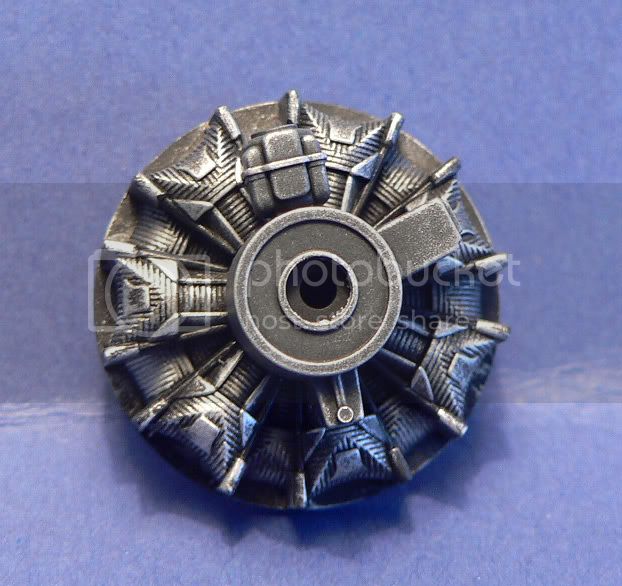
Here are some pics showing some more steps...


My best regards!
England - North West, United Kingdom
Joined: March 21, 2011
KitMaker: 27 posts
AeroScale: 19 posts
Posted: Tuesday, May 03, 2011 - 02:05 AM UTC
Great start. I'll be watching this one.
Lisboa, Portugal
Joined: August 27, 2010
KitMaker: 679 posts
AeroScale: 669 posts
Posted: Tuesday, May 03, 2011 - 06:50 AM UTC
Olá JP,
It must be pure madness to punch all those rivets...great job on the cockpit. Very fond of your technique in shading & weathering
Cheers
Pedro
Portugal
Joined: June 15, 2005
KitMaker: 172 posts
AeroScale: 168 posts
Posted: Wednesday, May 04, 2011 - 12:47 AM UTC
Rigas, Latvia
Joined: July 04, 2007
KitMaker: 268 posts
AeroScale: 245 posts
Posted: Wednesday, May 04, 2011 - 11:08 PM UTC
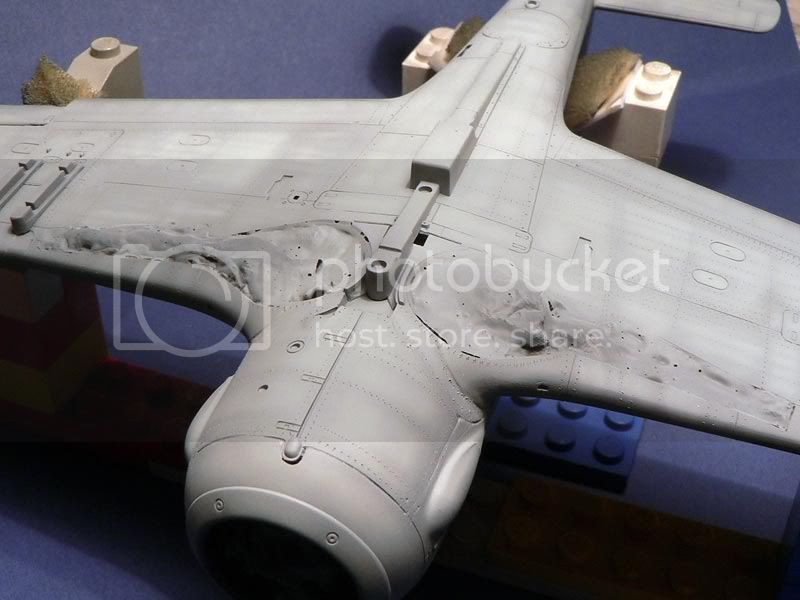
one of the most "pain-in-the-a*s" places of the kit is also wing and fuselage joint seem.

Portugal
Joined: June 15, 2005
KitMaker: 172 posts
AeroScale: 168 posts
Posted: Saturday, May 07, 2011 - 05:22 AM UTC
Rigas, Latvia
Joined: July 04, 2007
KitMaker: 268 posts
AeroScale: 245 posts
Posted: Sunday, May 08, 2011 - 09:03 PM UTC
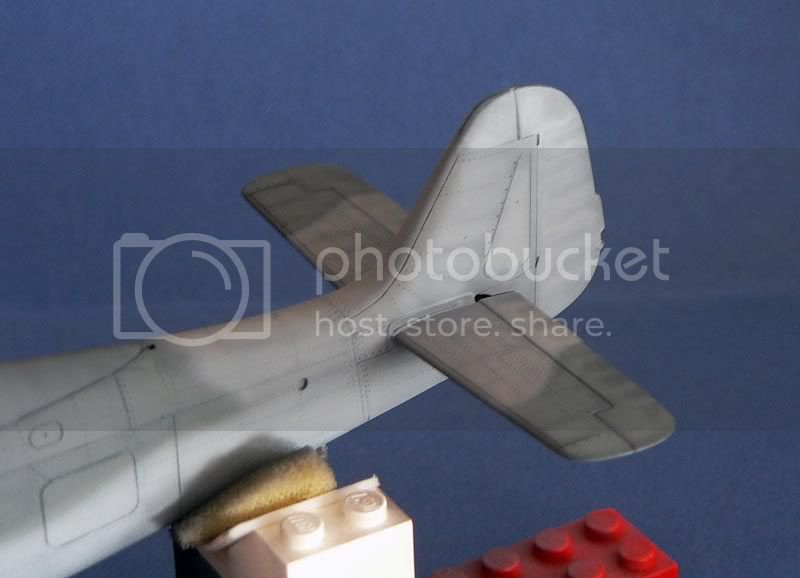
Ahhh... Those plastic parts start to get those butcher bird shapes. Love the riveting and the later style canopy.
I'm definitely looking forward to see more!

Portugal
Joined: June 15, 2005
KitMaker: 172 posts
AeroScale: 168 posts
Posted: Wednesday, May 11, 2011 - 12:40 AM UTC
Brest, Belarus
Joined: July 20, 2009
KitMaker: 105 posts
AeroScale: 76 posts
Posted: Wednesday, May 11, 2011 - 09:02 AM UTC
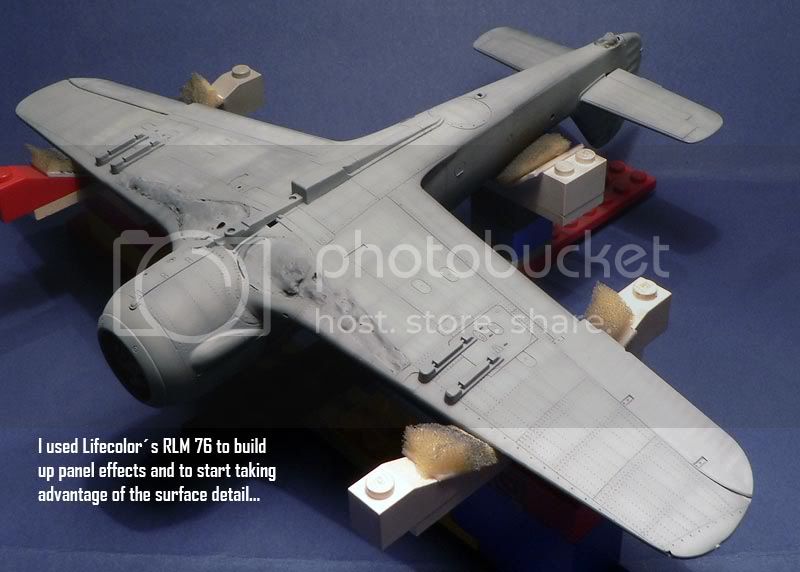
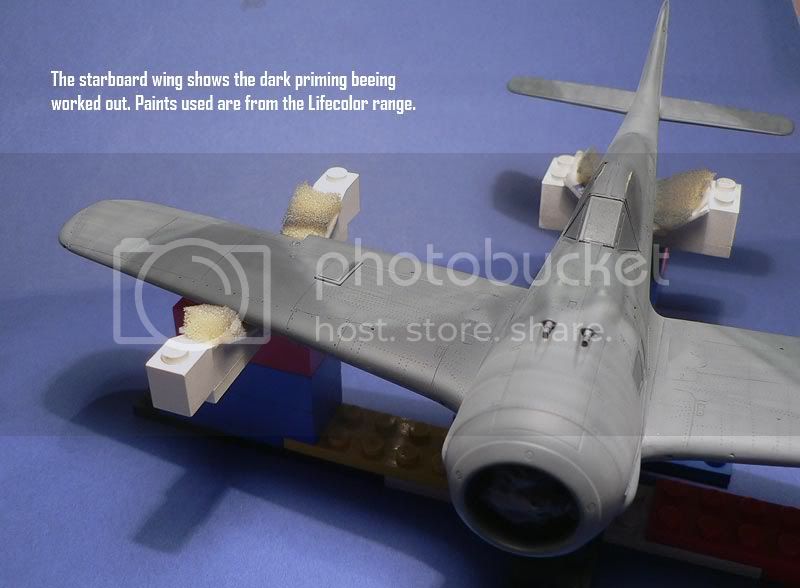
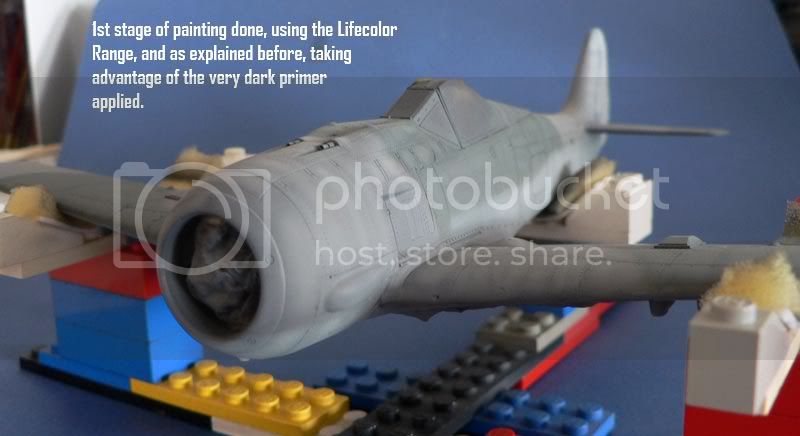
Why the low surface isn`f blue but grey?!

Portugal
Joined: June 15, 2005
KitMaker: 172 posts
AeroScale: 168 posts
Posted: Thursday, May 12, 2011 - 12:34 PM UTC
Rigas, Latvia
Joined: July 04, 2007
KitMaker: 268 posts
AeroScale: 245 posts
Posted: Thursday, May 12, 2011 - 07:28 PM UTC
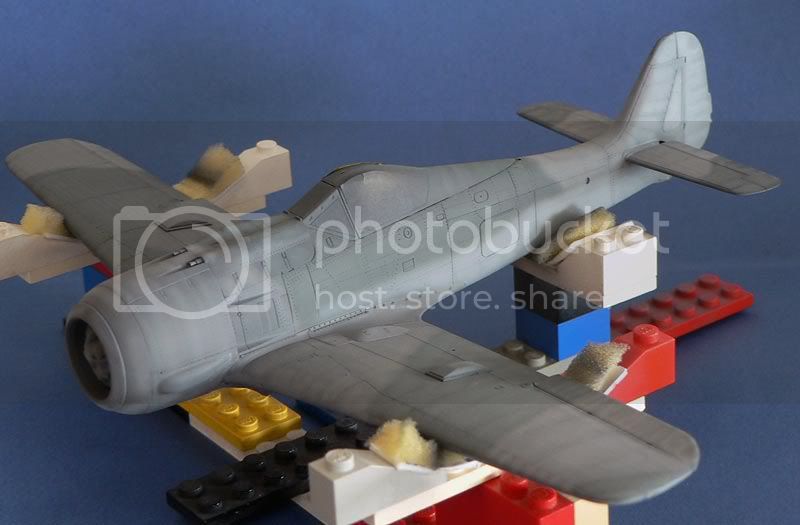
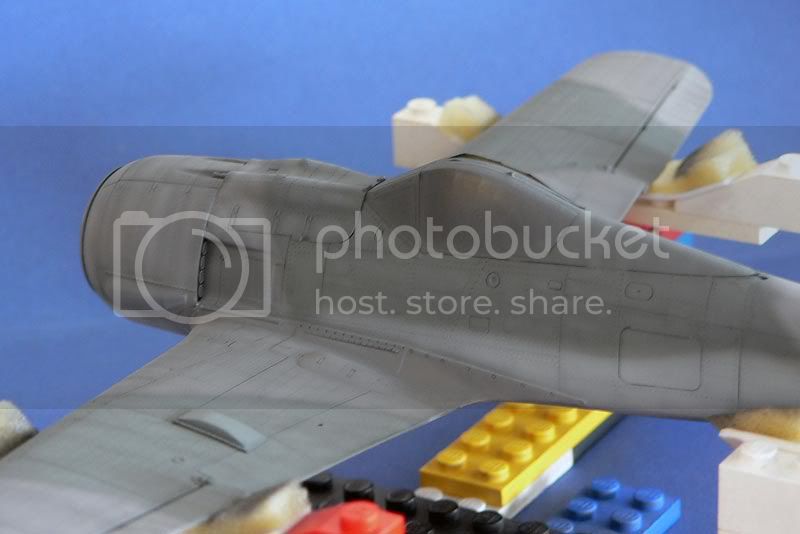
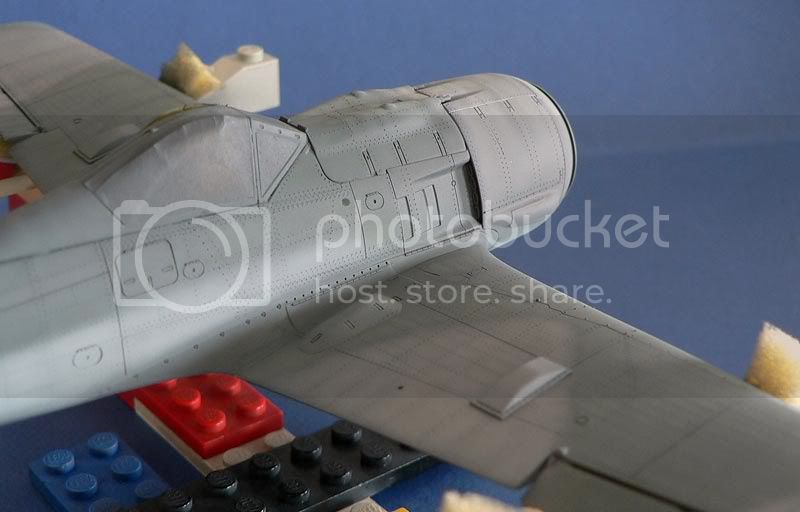
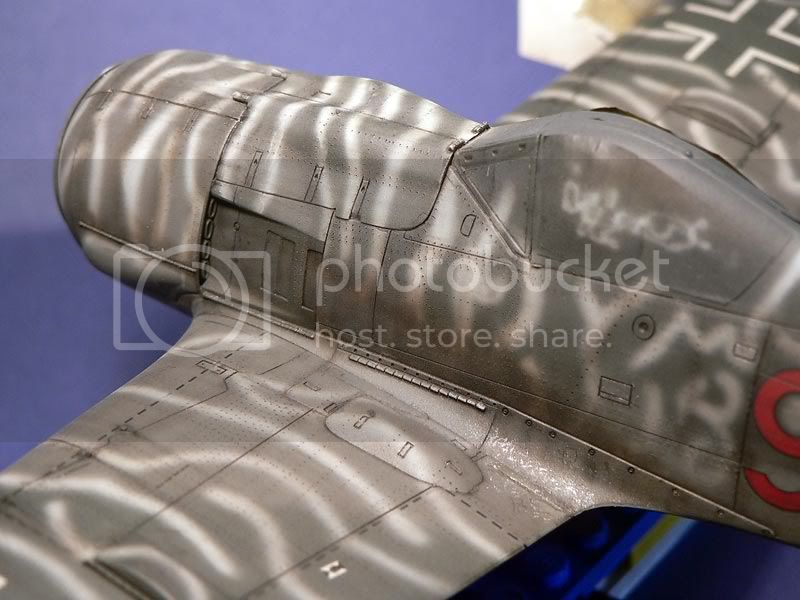
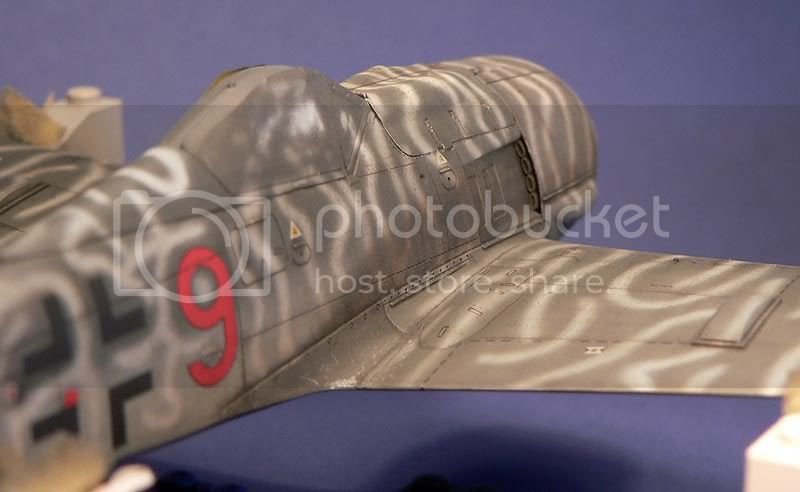
it doesn't look grey to me - ordinary RLM76 with pre and post-shading revealing darker areas of panel lines. I really like that subtle look of different panel and colour weathering. Which airbrush are you using, Jose?
Portugal
Joined: June 15, 2005
KitMaker: 172 posts
AeroScale: 168 posts
Posted: Thursday, May 12, 2011 - 09:44 PM UTC
Thanks for the feedback!
I´m using an HS Infinity, with the 0.15 nozzle.
José
Stockholm, Sweden
Joined: May 02, 2006
KitMaker: 1,953 posts
AeroScale: 1,902 posts
Posted: Friday, May 13, 2011 - 09:48 AM UTC
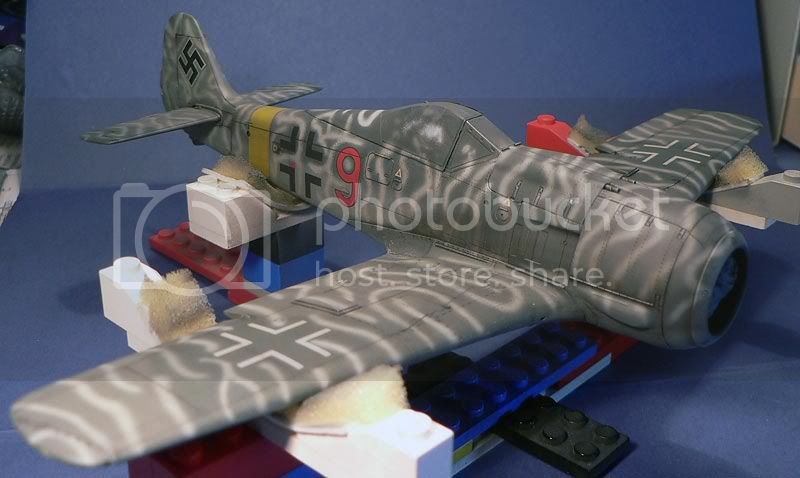
José! The build is good but the paintwork is magnificent! I like it a lot!
What do you use for thinning the paints? I have never really become a friend of the LifeColor paints, I much prefer Gunze for airbrush painting.

Magnus
Press banner to the right to follow my trail to the new forums!
Portugal
Joined: June 15, 2005
KitMaker: 172 posts
AeroScale: 168 posts
Posted: Saturday, May 14, 2011 - 11:15 PM UTC
Hej Magnus!
I´ve been using Lifecolor´s own thinner, with a hint of a amonia based solution ...
for example Windex or in Portugal, Ajax Cristal. I supose that a glass cleaning solution with amonia does the trick.
I too have some paints from the Gunze range, but after i got it right with the lifecolor, they´re gorgeous to work with.
José Pedro
Stockholm, Sweden
Joined: May 02, 2006
KitMaker: 1,953 posts
AeroScale: 1,902 posts
Posted: Sunday, May 15, 2011 - 08:47 AM UTC
I'll try it then! Thanks for your advice!
Magnus
Press banner to the right to follow my trail to the new forums!
Portugal
Joined: June 15, 2005
KitMaker: 172 posts
AeroScale: 168 posts
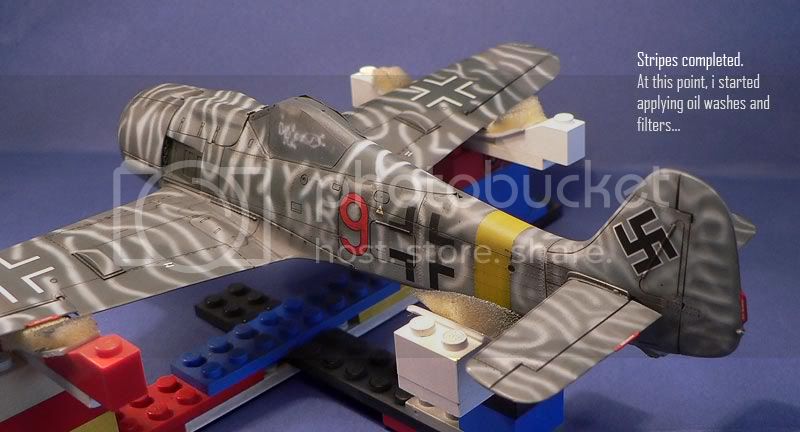
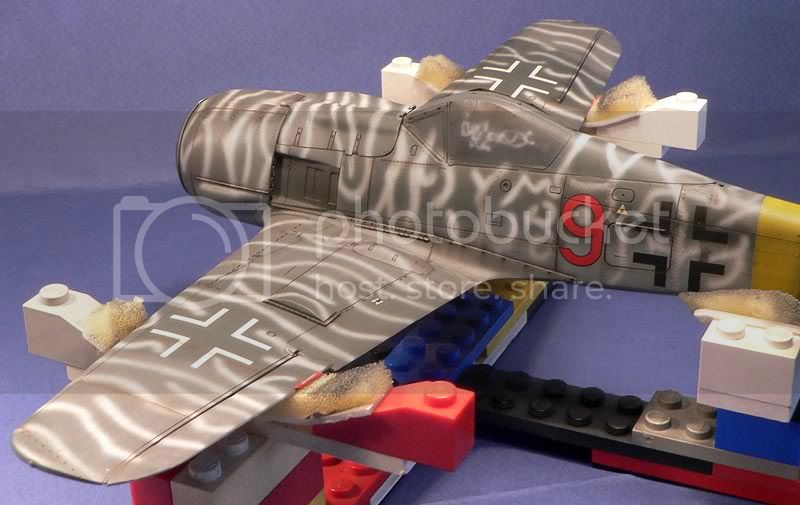
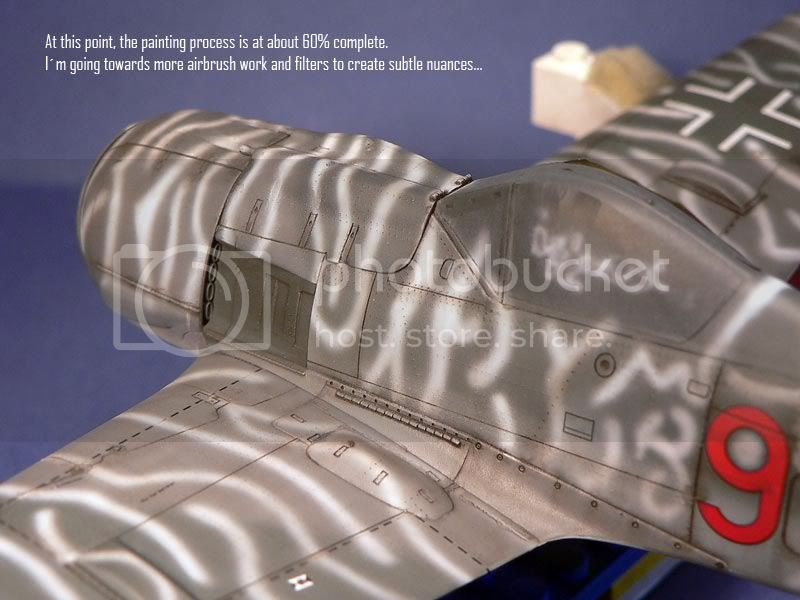
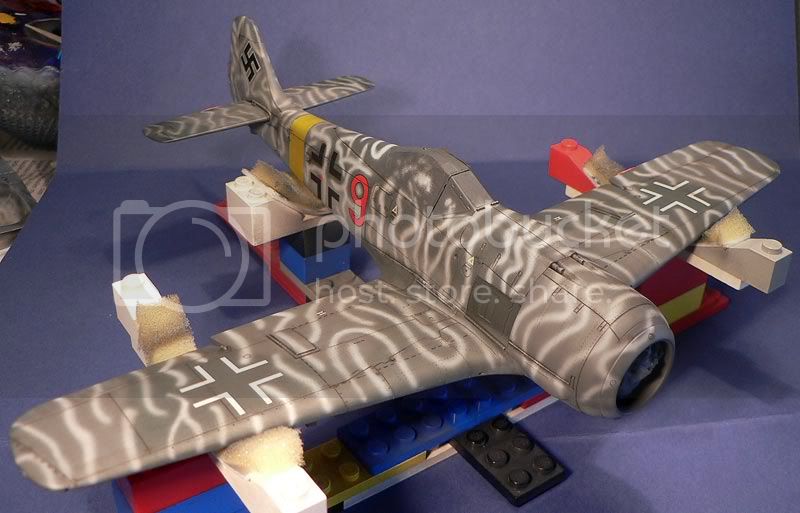
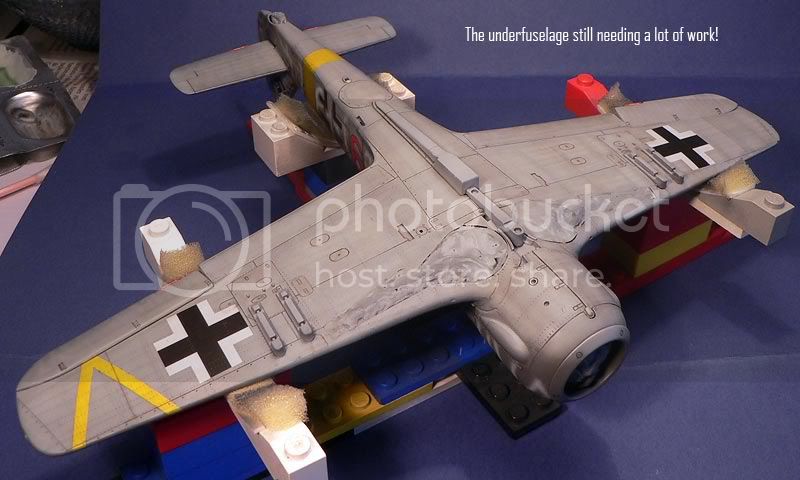
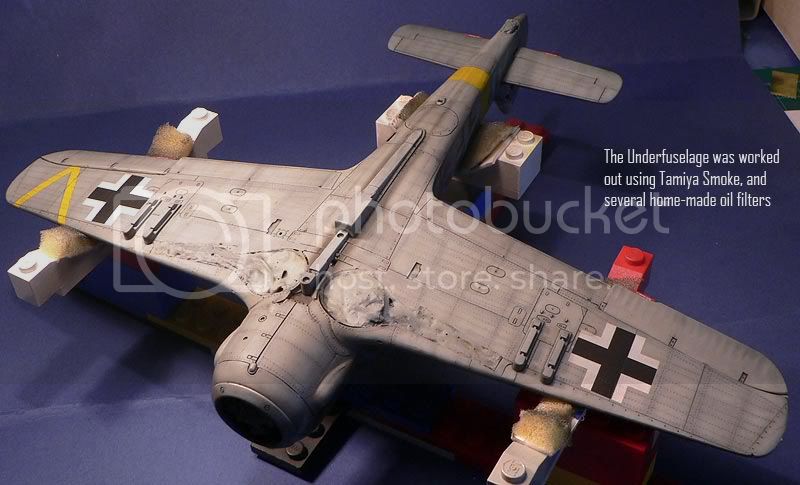
Posted: Thursday, June 02, 2011 - 12:48 PM UTC
Hello!
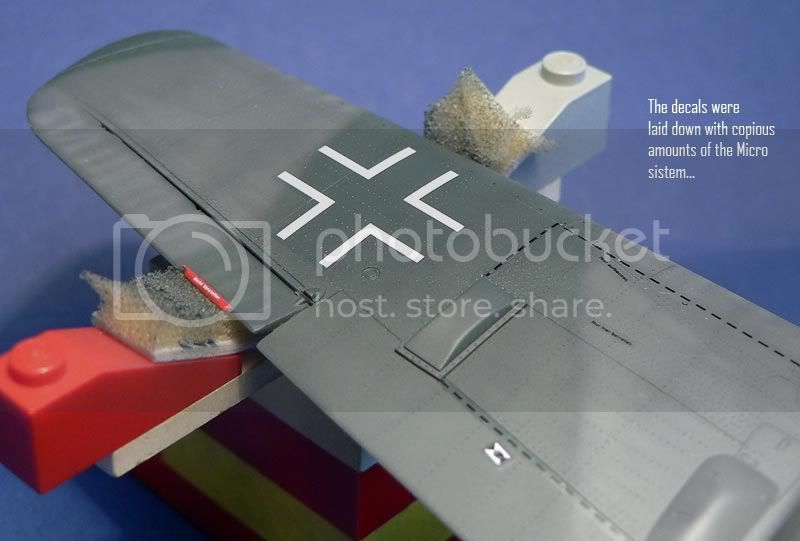
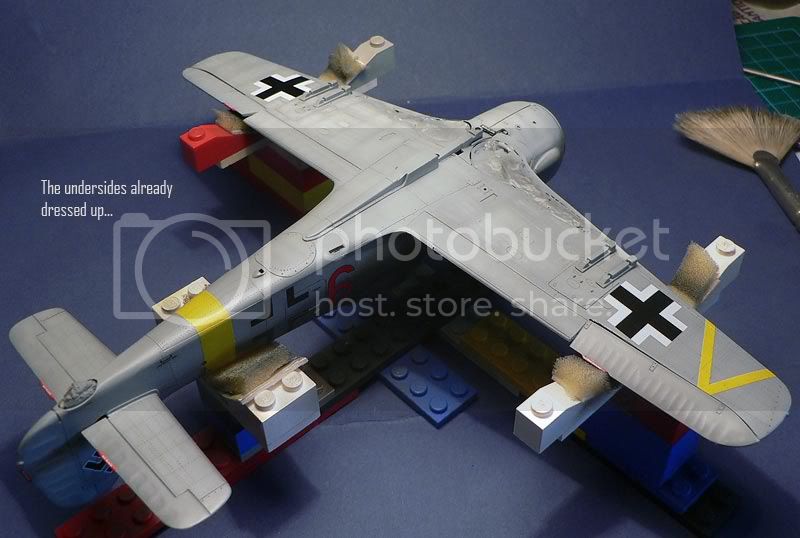
Here goes some more progress...

My best regards!!!

#041
Kobenhavn, Denmark
Joined: July 20, 2006
KitMaker: 10,069 posts
AeroScale: 3,788 posts
Posted: Thursday, June 02, 2011 - 02:46 PM UTC
Looks great, Jose. The painting is really nice looking.
Looking forward to see more.

Campaign'oholic - 252+ campaigns completed
Portugal
Joined: June 15, 2005
KitMaker: 172 posts
AeroScale: 168 posts
Posted: Sunday, June 05, 2011 - 12:24 AM UTC
Rigas, Latvia
Joined: July 04, 2007
KitMaker: 268 posts
AeroScale: 245 posts
Posted: Friday, June 10, 2011 - 03:22 AM UTC
looks really good. and that subtle riveting. hope to see this Butcher Bird on its legs

Portugal
Joined: June 15, 2005
KitMaker: 172 posts
AeroScale: 168 posts
Posted: Monday, June 13, 2011 - 06:21 AM UTC
Rigas, Latvia
Joined: July 04, 2007
KitMaker: 268 posts
AeroScale: 245 posts
Posted: Monday, June 13, 2011 - 08:10 PM UTC
Jose, awesome pics as always! Could you please specify what exactly you've done with Tamiya Smoke? How did you simulate wing root scratches? thanx!
Portugal
Joined: June 15, 2005
KitMaker: 172 posts
AeroScale: 168 posts
Posted: Monday, June 13, 2011 - 11:46 PM UTC
Quoted Text
Jose, awesome pics as always! Could you please specify what exactly you've done with Tamiya Smoke? How did you simulate wing root scratches? thanx!
I shaded the panel lines, acreated some shadows.
The wing roots were made with a silver pencil as well as a regular HB pencil.
Thanks for commenting!