

Hi every one!!
My I introduce my self, Im Adrian Urrejola from Guatemala in Central America, 50 years old, and I like to introduce my next project too. (This project will be my third, the others one were in 1/72)
My next project will be a corsair F4u-4 in 1/32 Trumpeter. I like to build in scratch too and I have already do, the front and back landing gears.
In a couple of days I will show us, the landing gears, just for finished the last picture to post it.
Im very glad to share with all of us and I really happiest for to know your advising and any comment about it.
Thanks very much and let me a few days to prepare the material to show us.
Thanks very much!!
Adrian Urrejola
World War II
Discuss WWII and the era directly before and after the war from 1935-1949.
Discuss WWII and the era directly before and after the war from 1935-1949.
Hosted by Rowan Baylis
Corsair F4u-4 1/32 Trumpeter

adrianu

Joined: December 26, 2010
KitMaker: 41 posts
AeroScale: 41 posts
Posted: Tuesday, May 24, 2011 - 05:04 PM UTC
Removed by original poster on 05/26/11 - 02:40:36 (GMT).
adrianu
Joined: December 26, 2010
KitMaker: 41 posts
AeroScale: 41 posts
Posted: Wednesday, May 25, 2011 - 05:22 PM UTC
HI every one!!
Ive been working for this project since January of this year.
I took the decision to scratch build all the front and back land gear. And I will scratch the entire machine and the cockpit too. I like to work with brass, iron and any kind of metals.
This project will be finished until November or December of this year because ( I hope) because need a lot a patient and to find reference, instructions, pictures of all kind the airplane, and the investigation take a time.
If, some of you want to contributive with referents of any kind, a really been very thankful. Thanks of all your help cant you give me in the future.
Please, Im here for to hear you about your any comments.
Each of the parts of this land gear has many pieces and a lot o work. Thats the reason so, in this first stage, I will only to show us a complete work.
But if you have any kind of questions , please ask me and I will be very glad to show more details of the complete process.
Ive already completed the front and back landing gear. And in a couple of months I want to complete the cockpit part.
For now I will give you two posts. The first post is the back land gear and the second I will give us in a couple of days, representing the front land gear.
Thanks again, and I hope that every person can enjoy the work!!
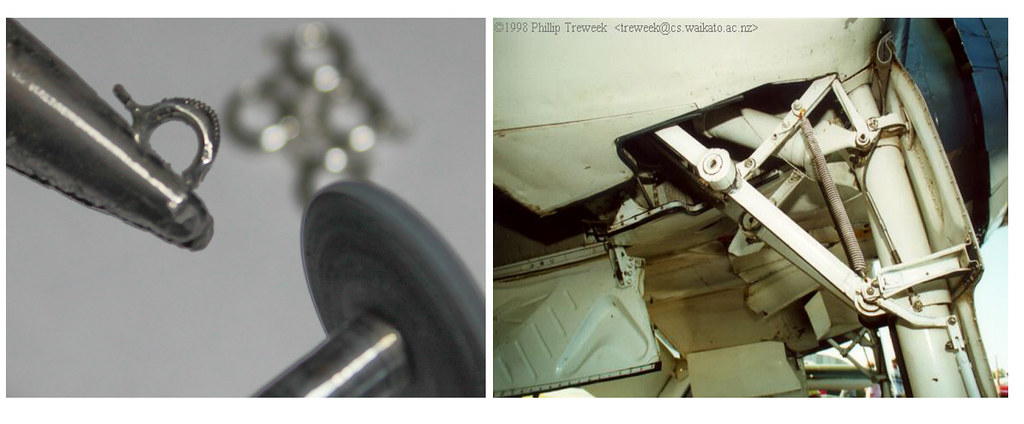
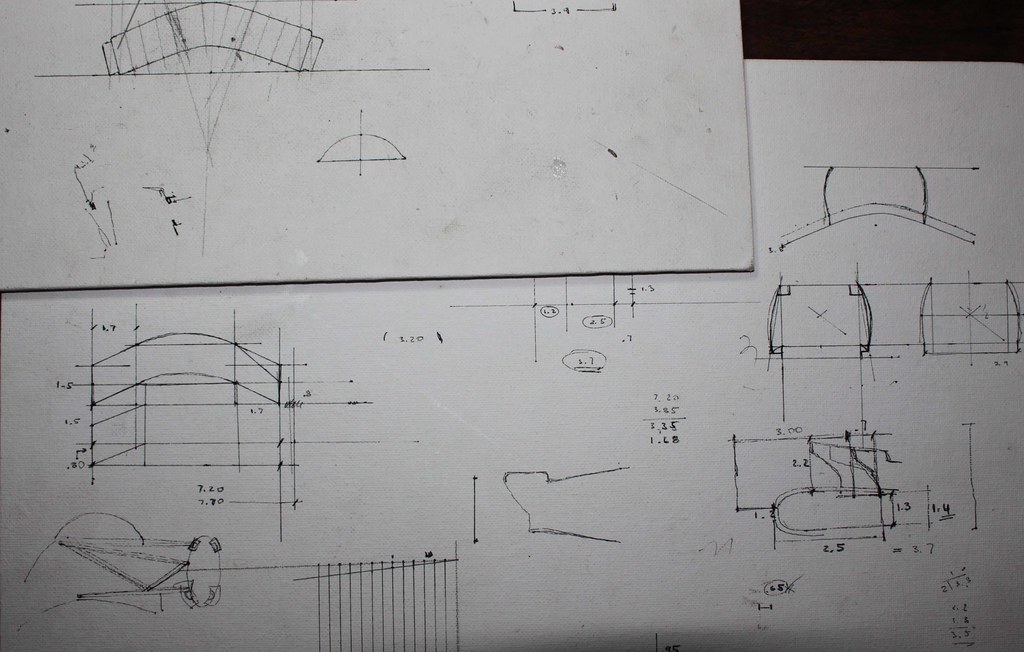
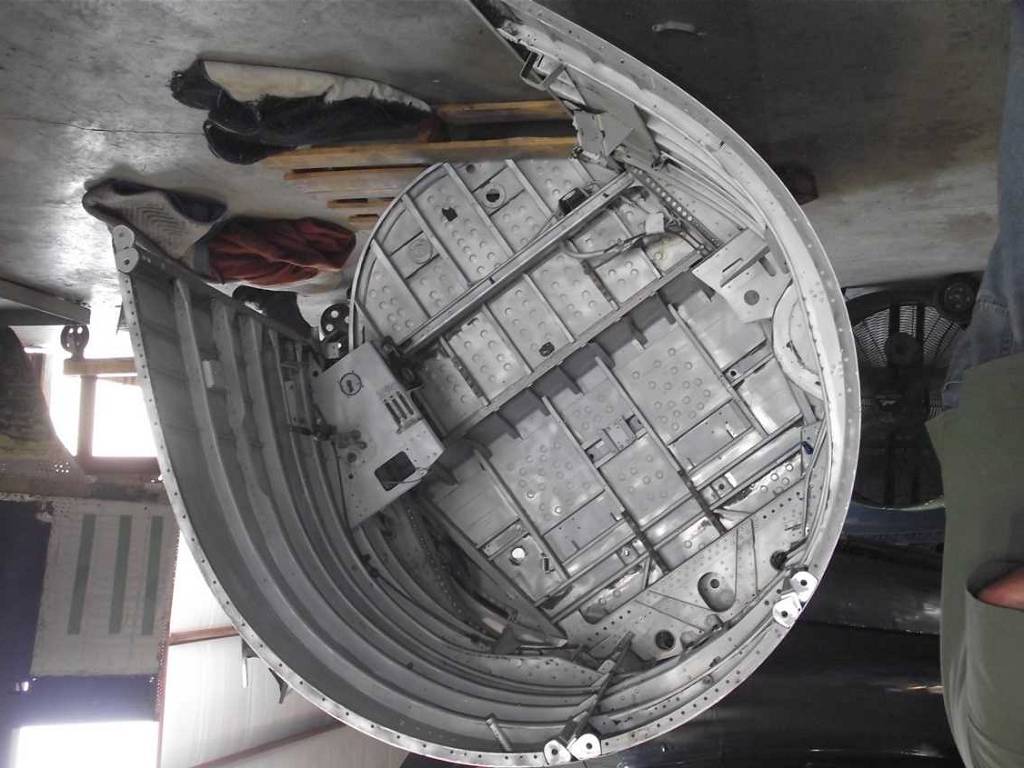
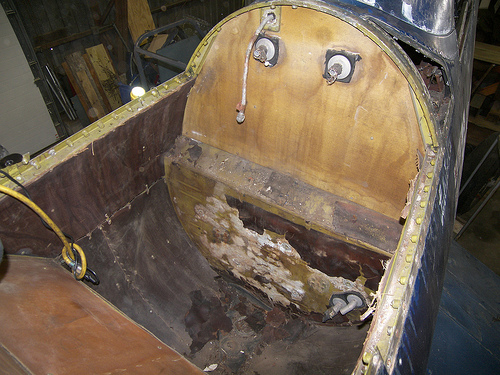
Examples of some of the referents I use it:

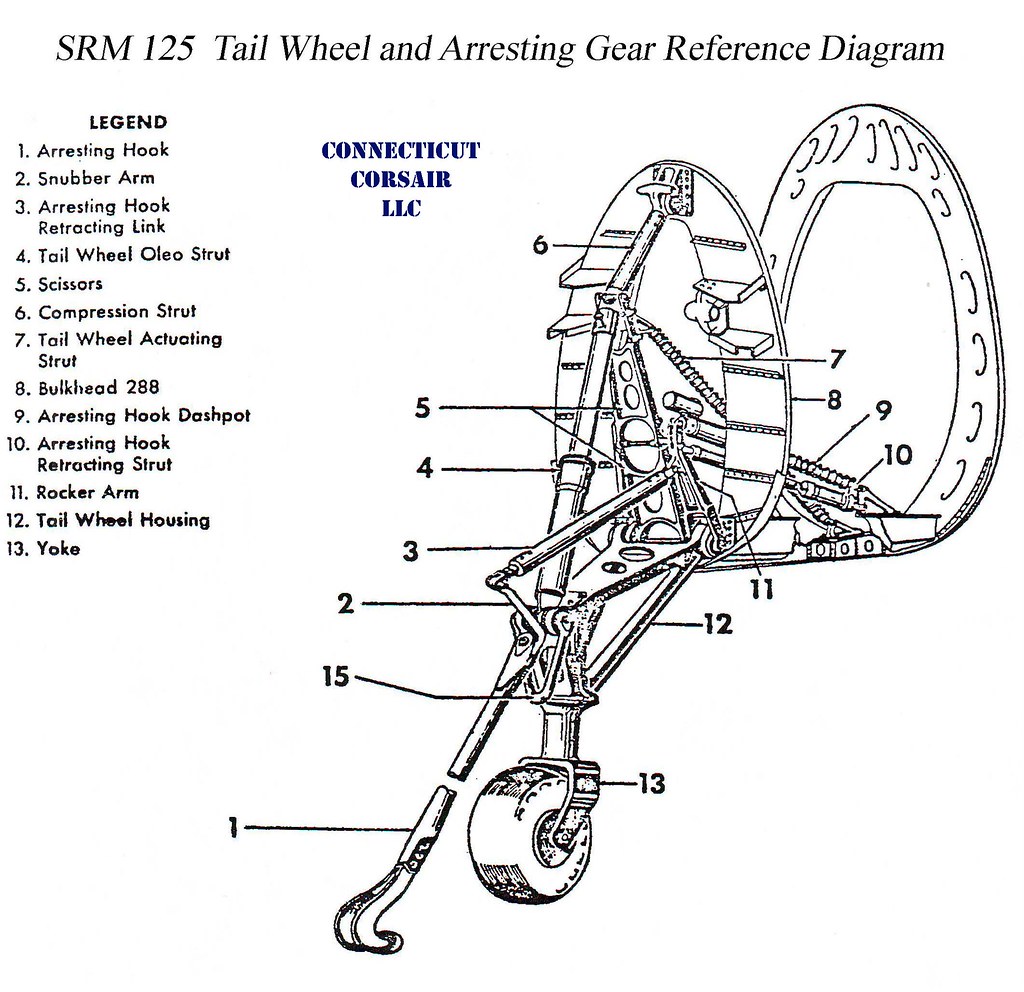
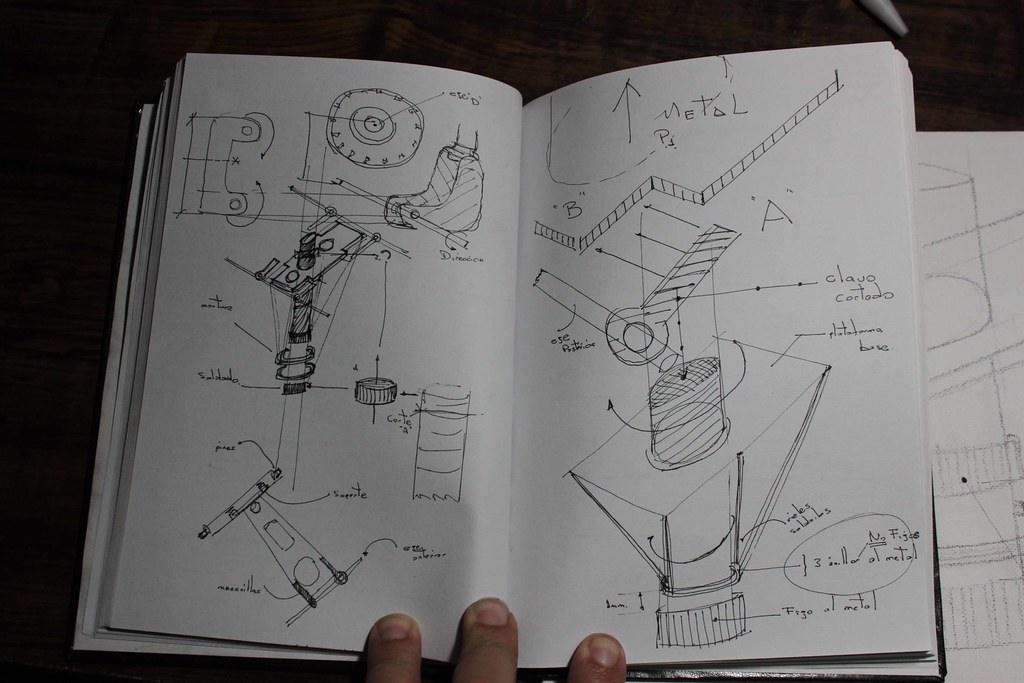
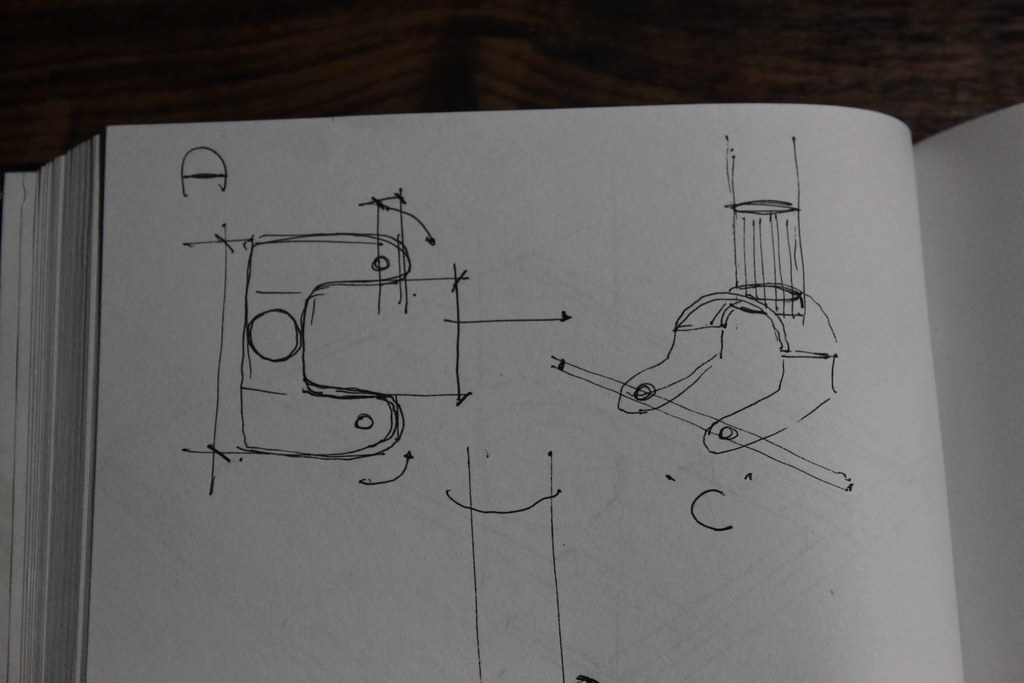
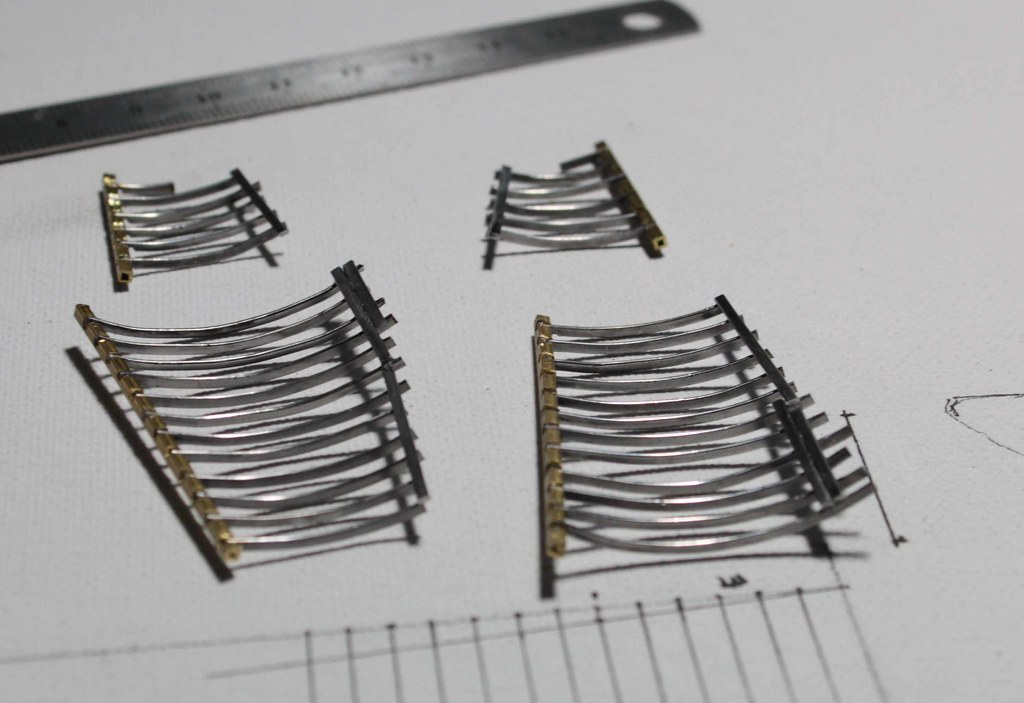
Some of my draws
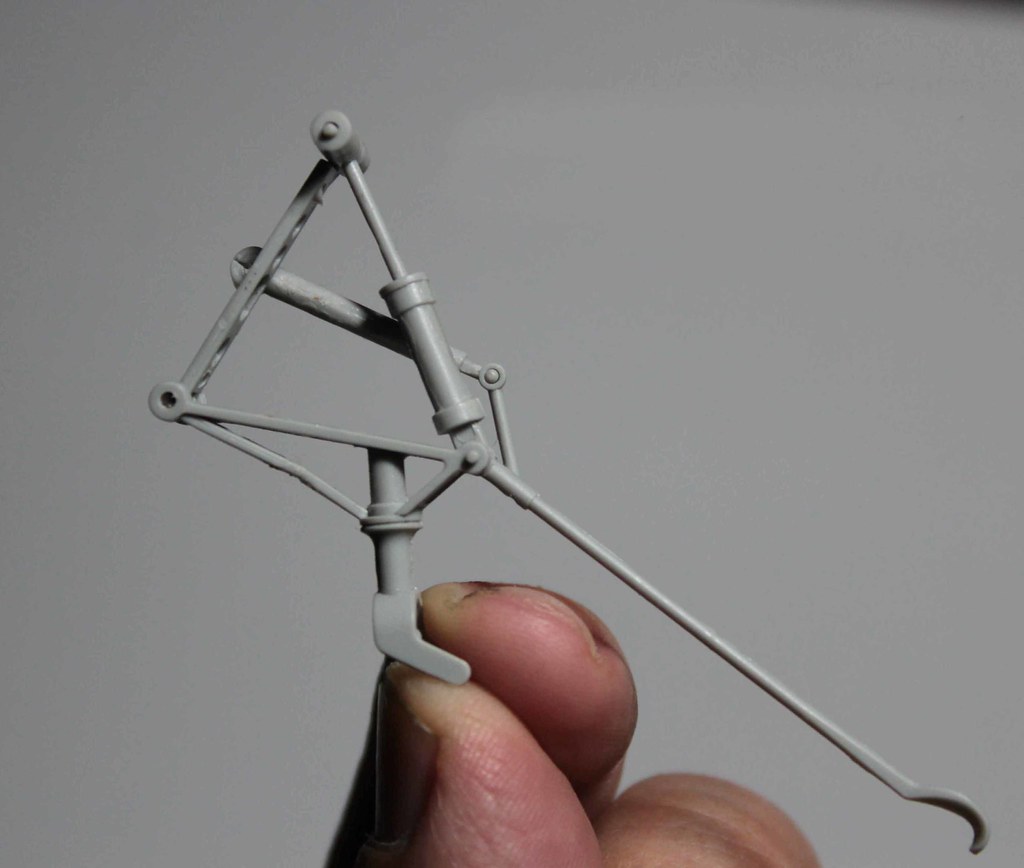
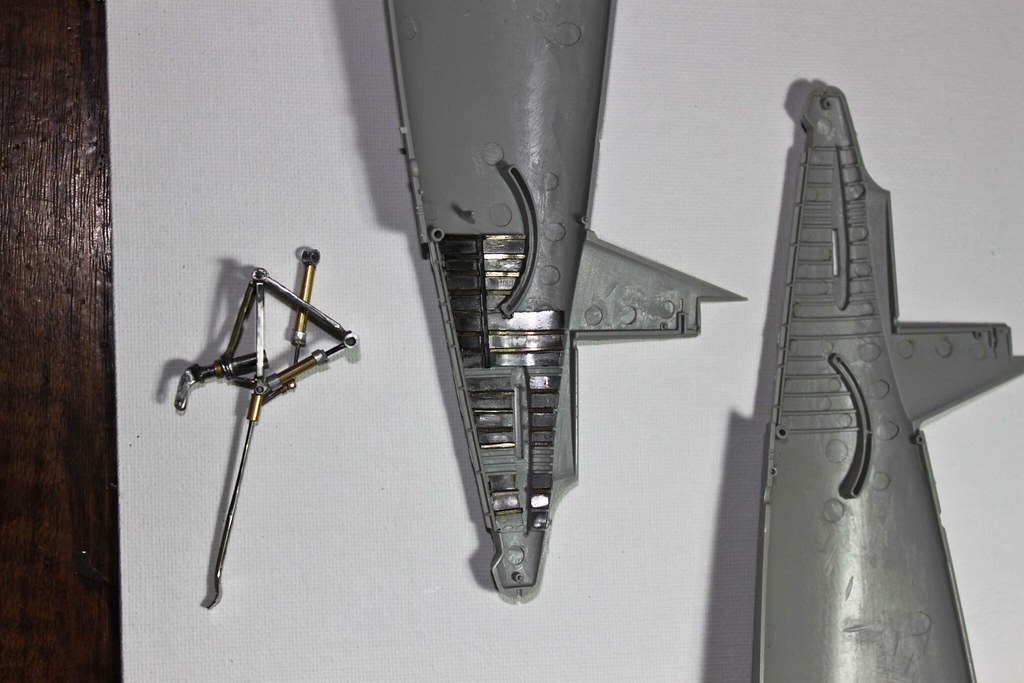
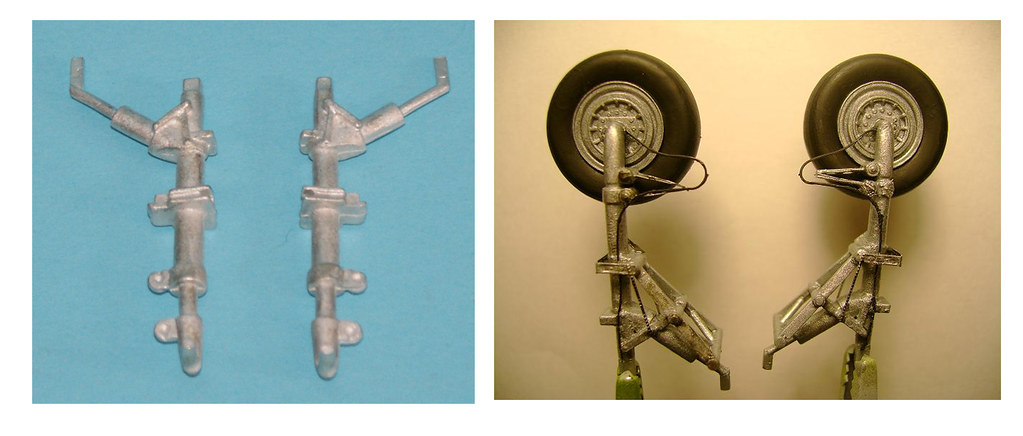
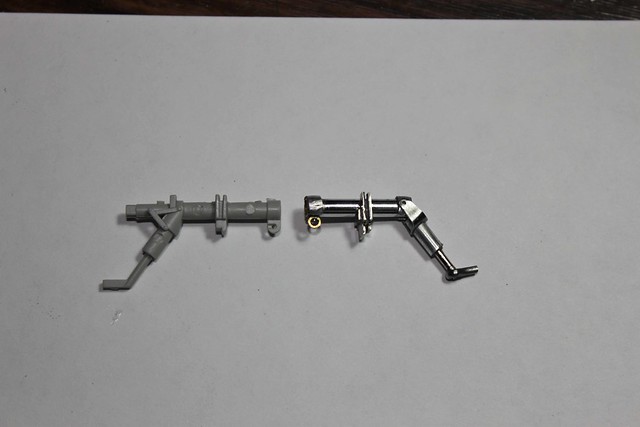
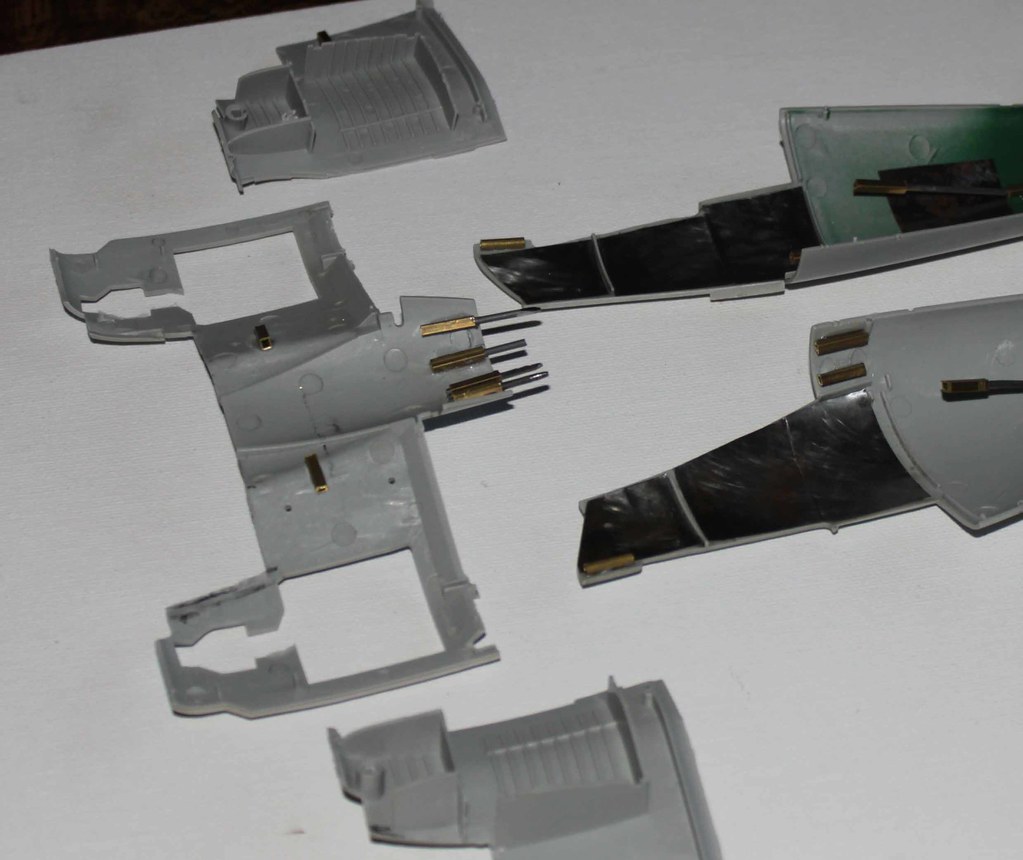
How looks the plastic part:
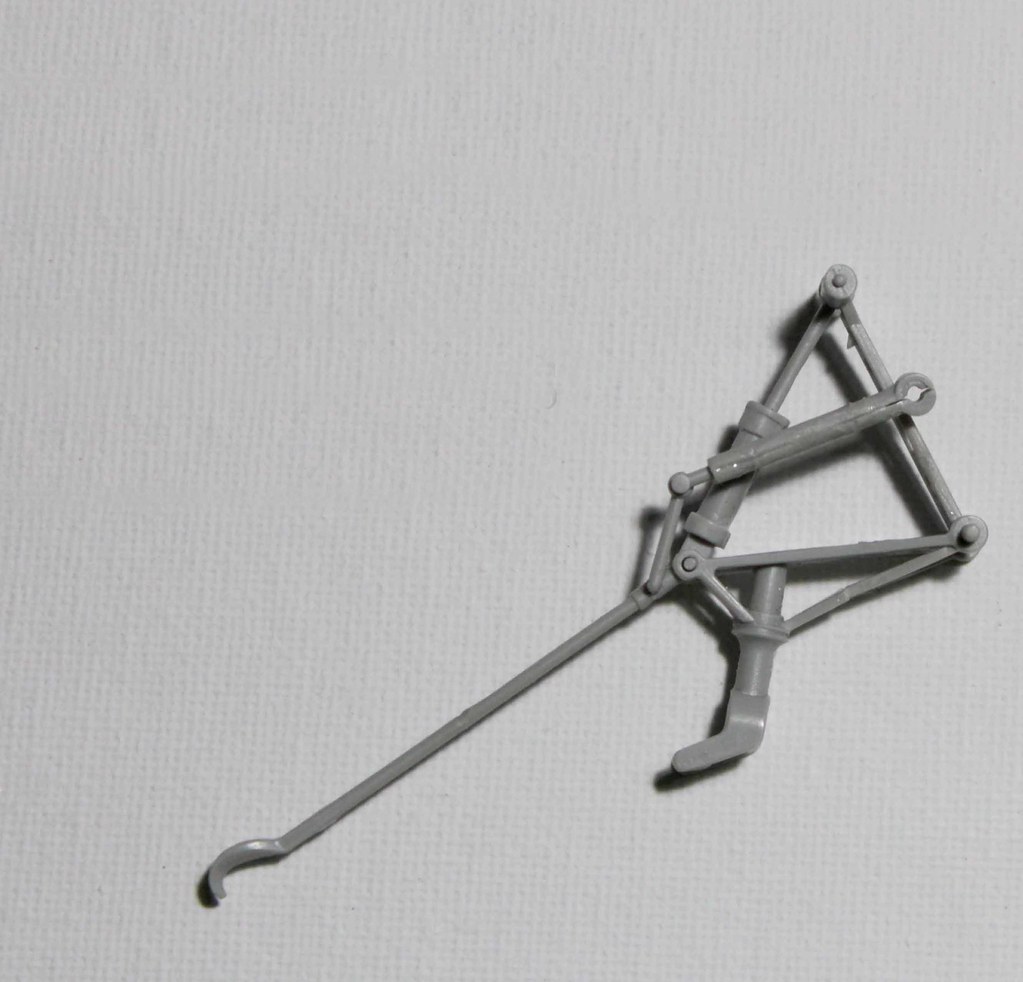

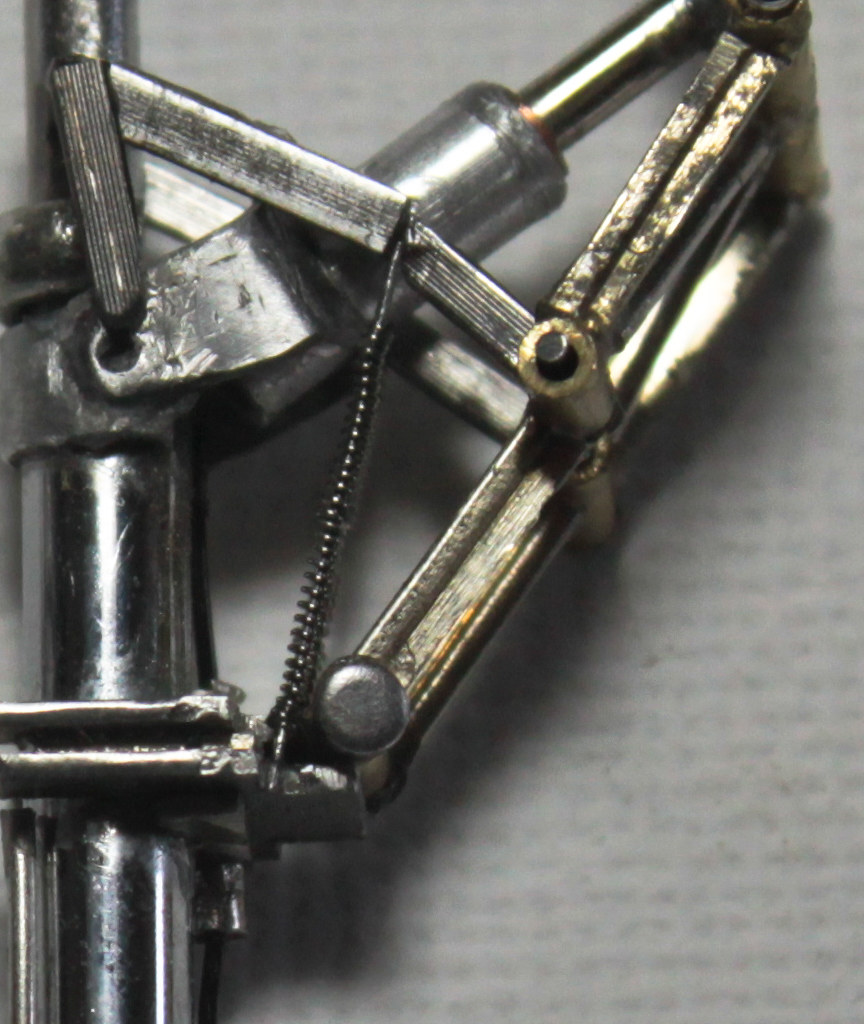
I just want to show us a few part of ones of the complete process (But if you have any questions, welcome!!)

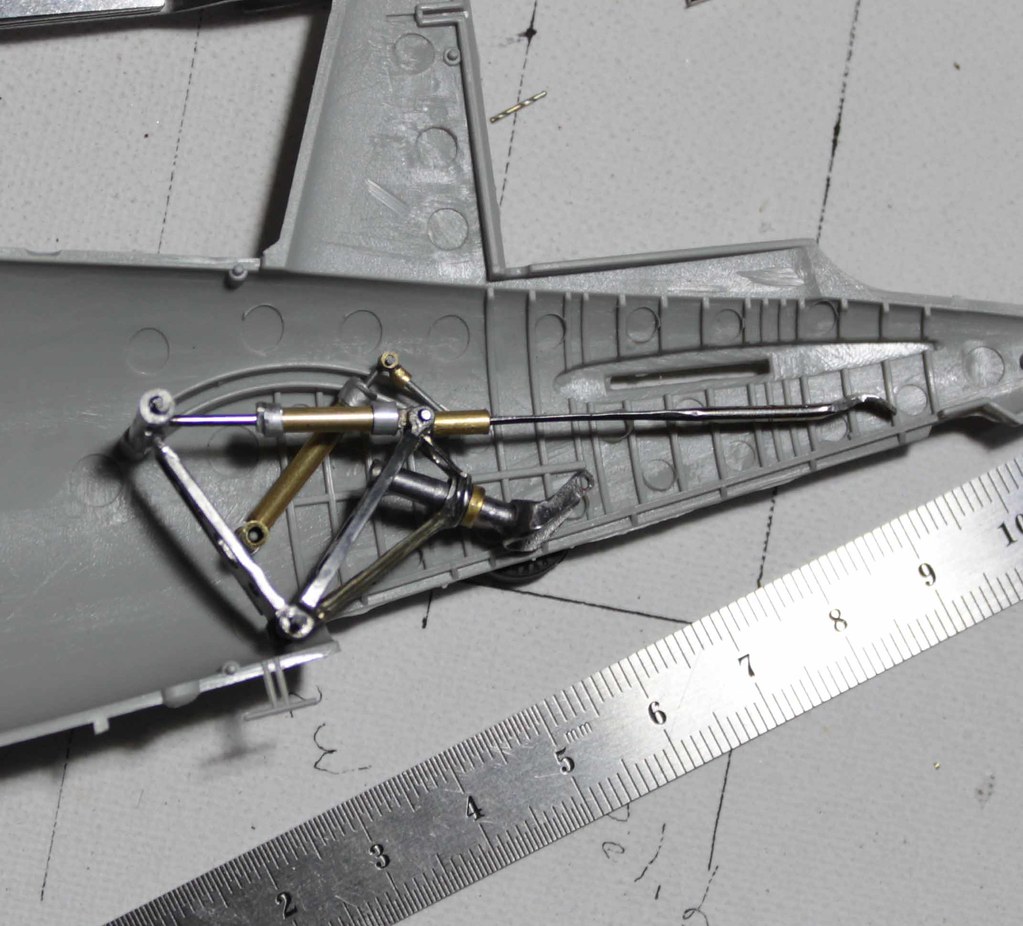
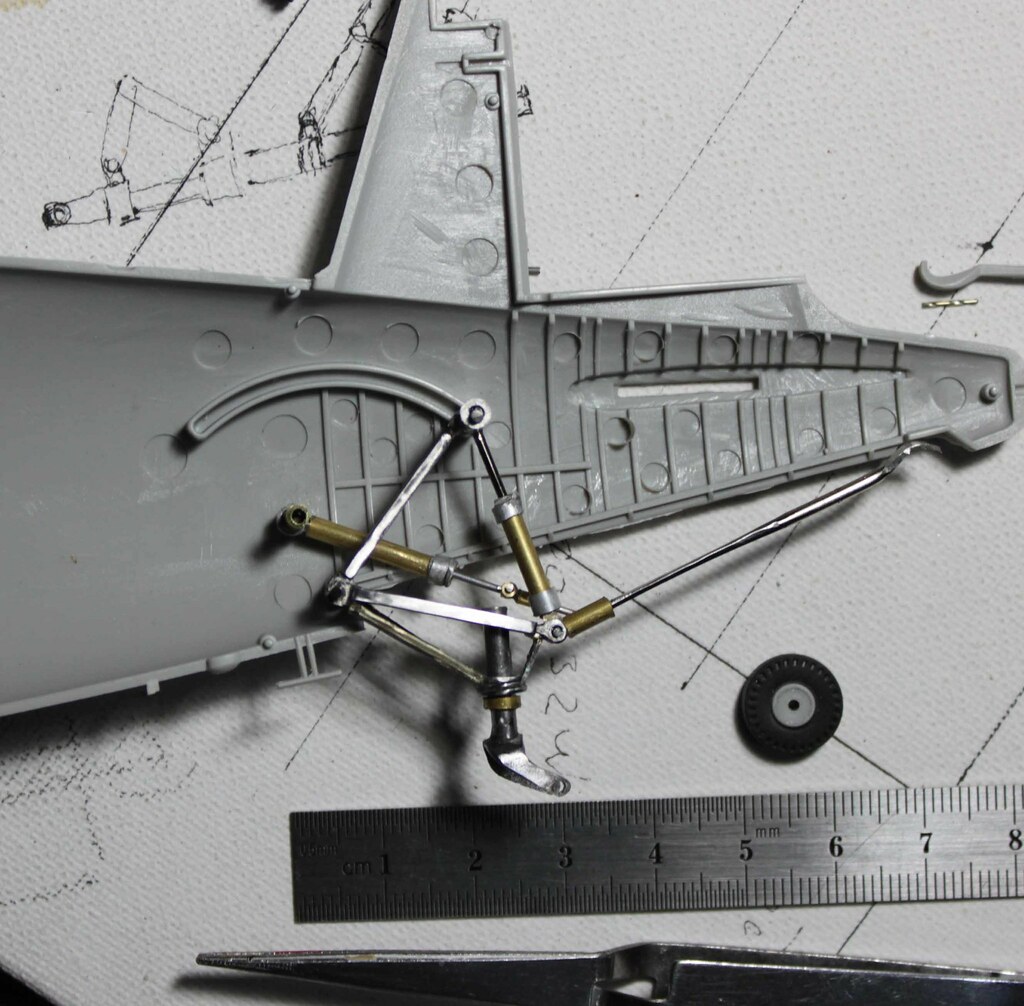
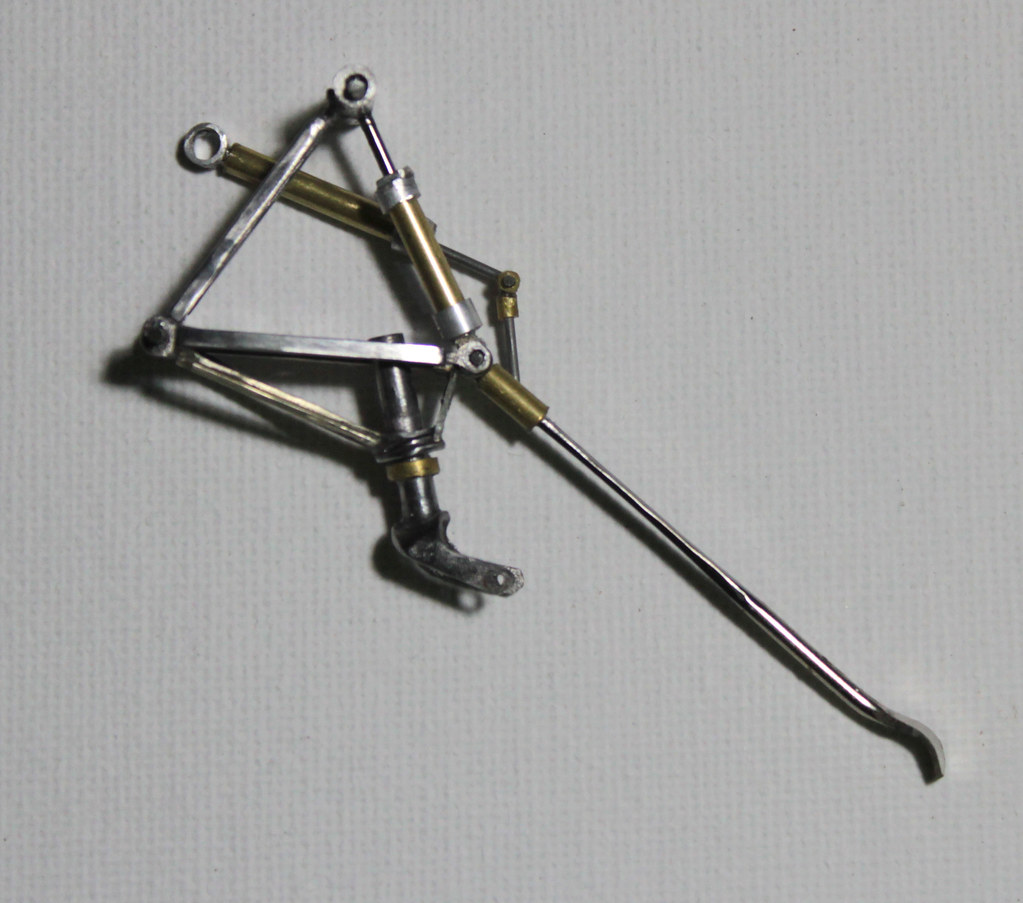
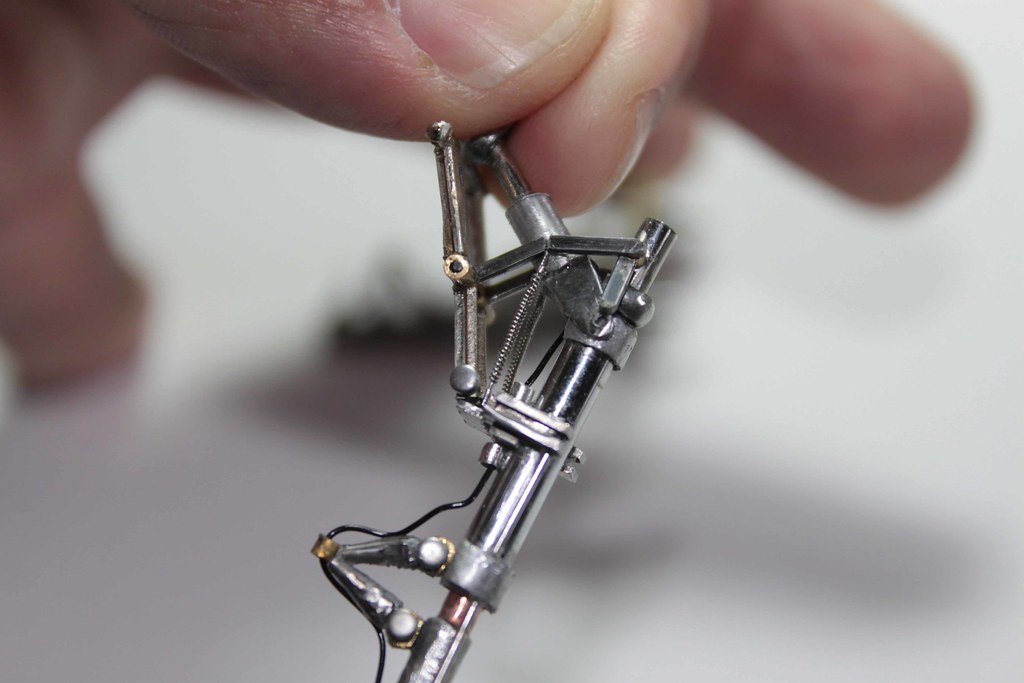
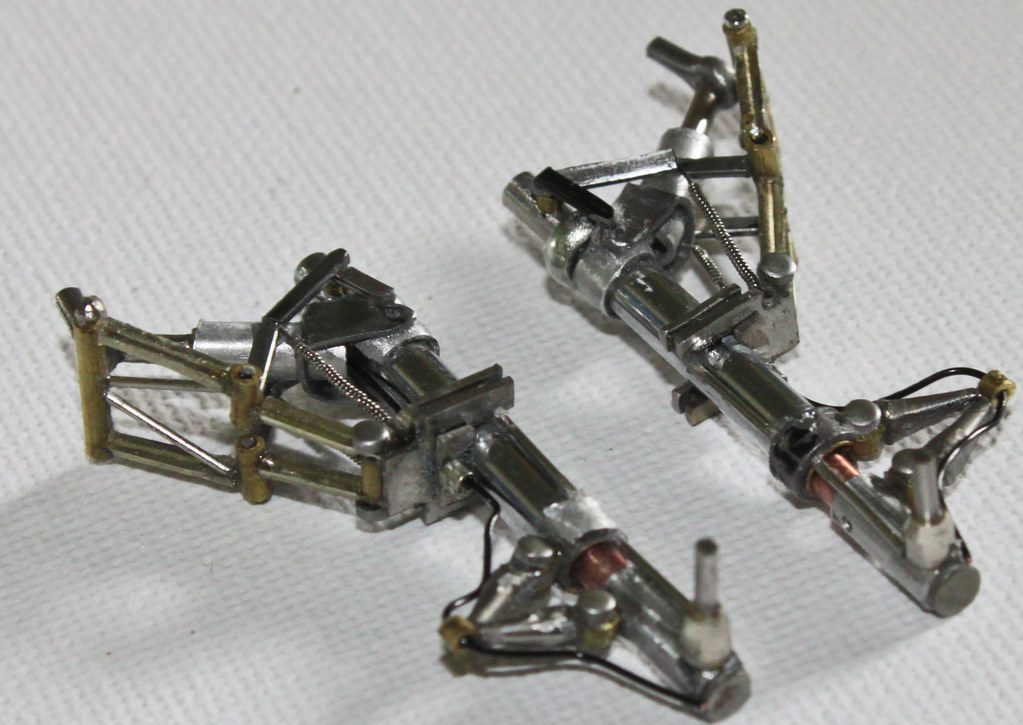
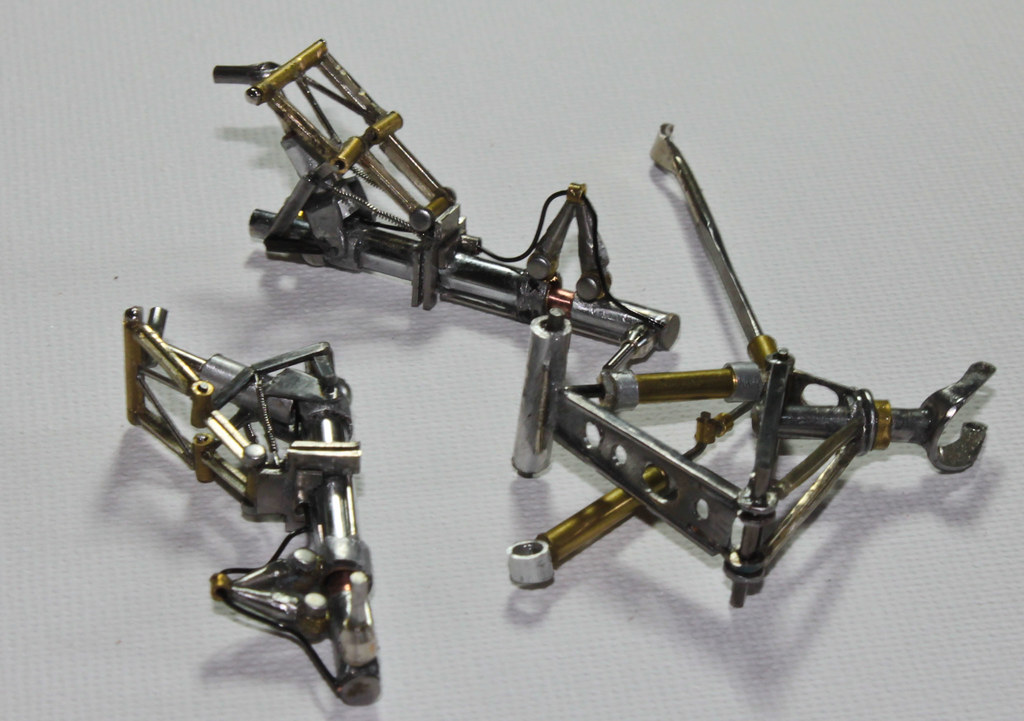
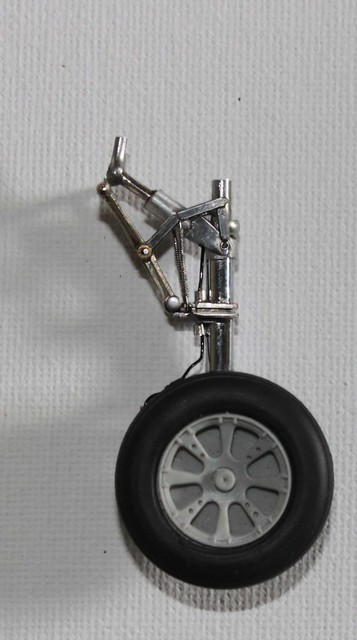
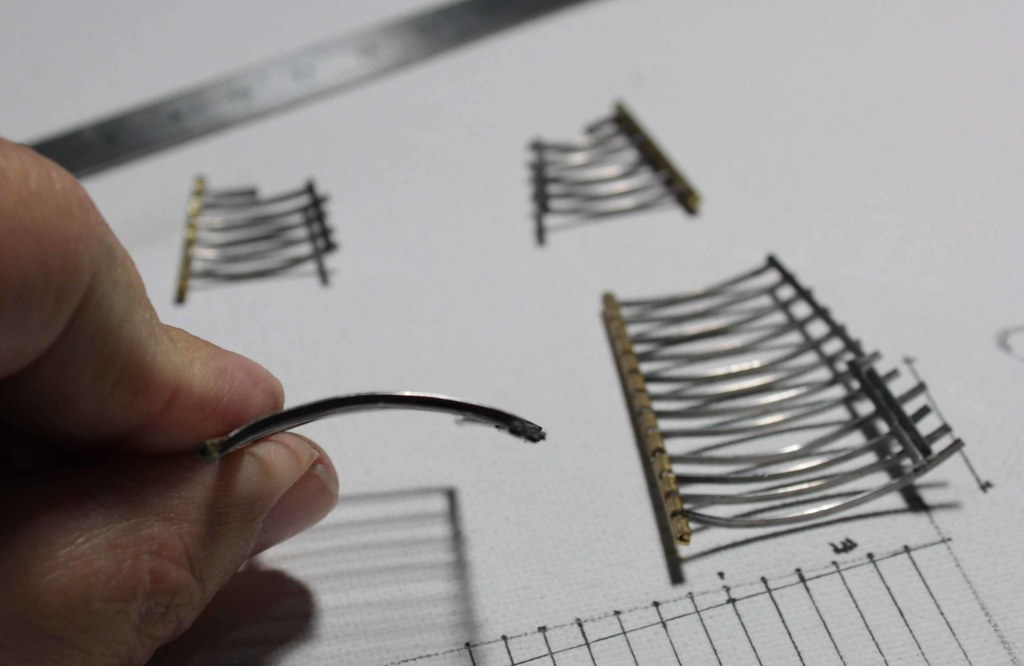
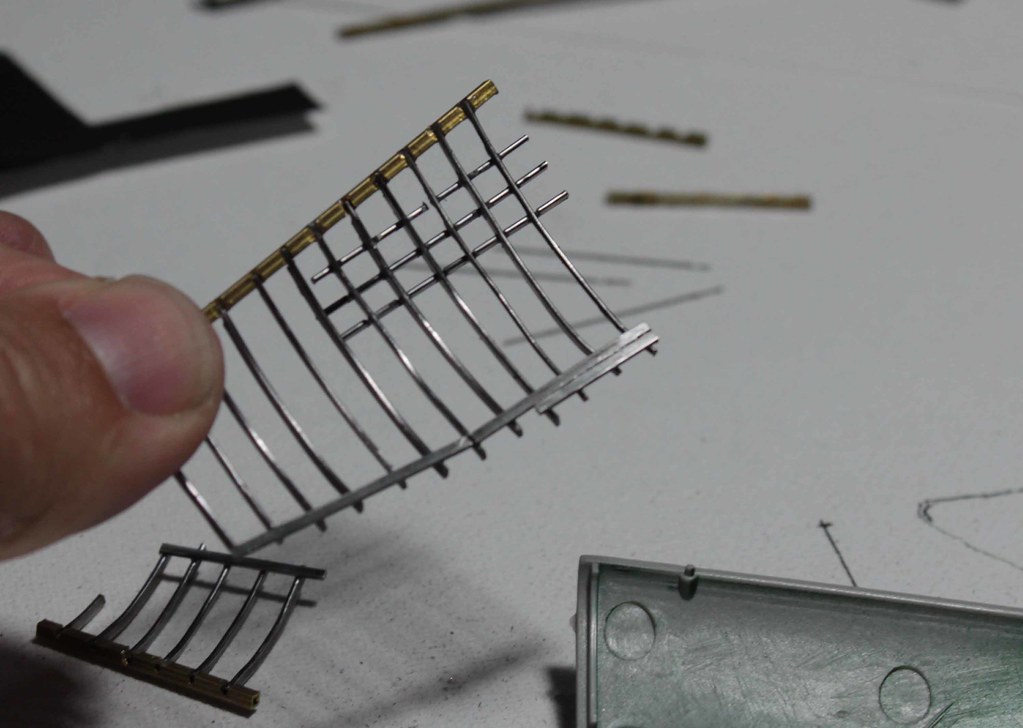
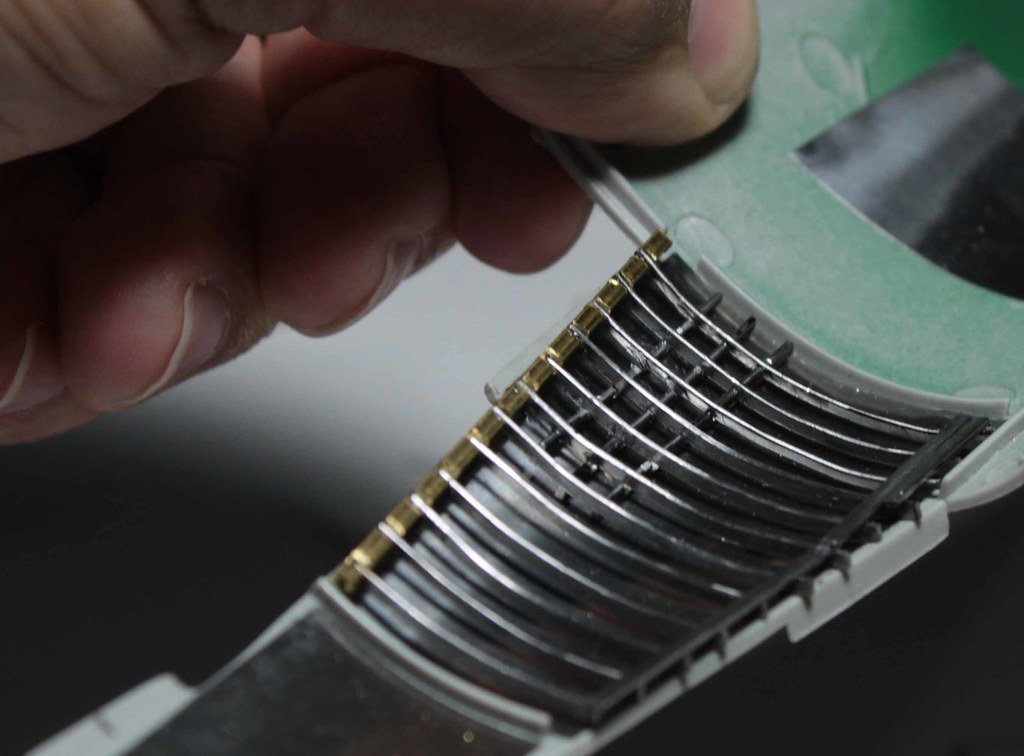
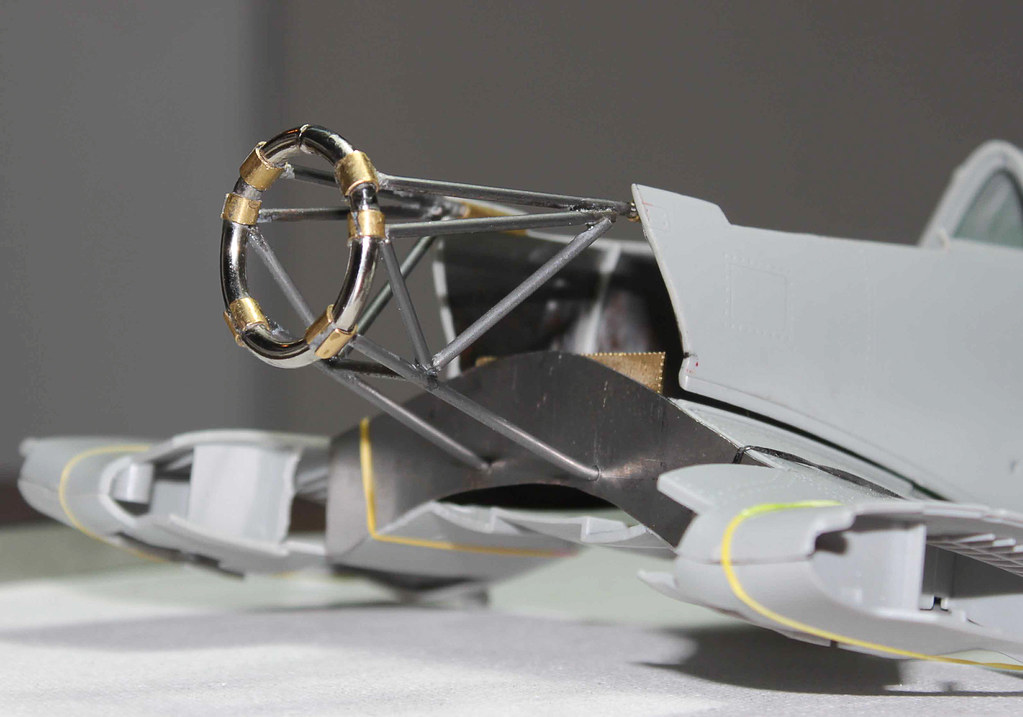
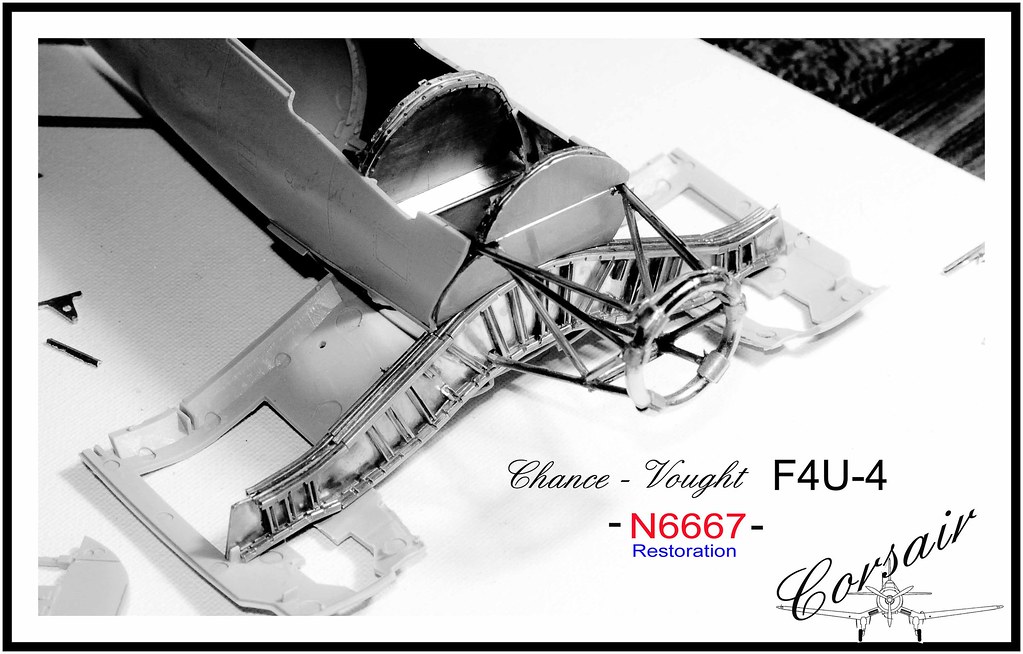
Now, how looks the finished scratch of the land gear.
This scratch piece has all the original moving of the plastic part.
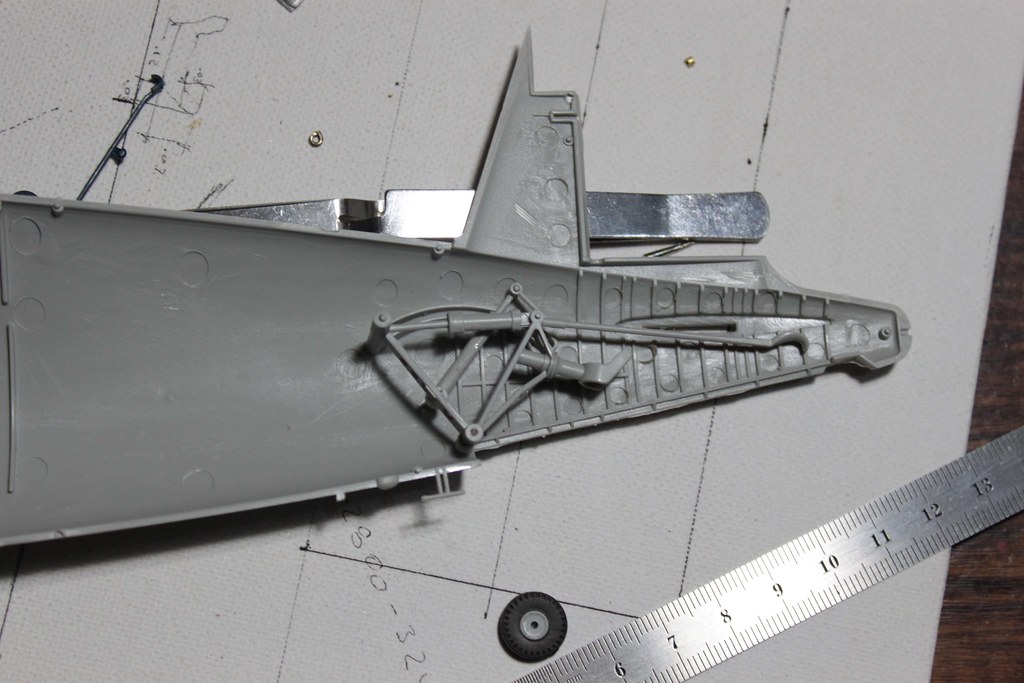
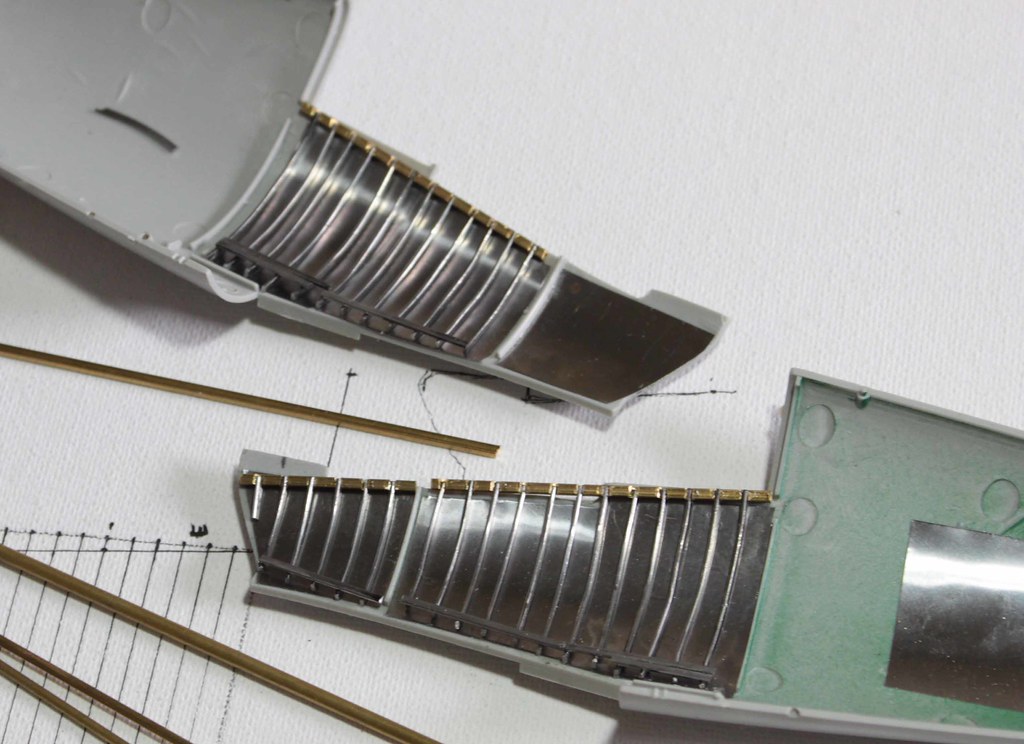
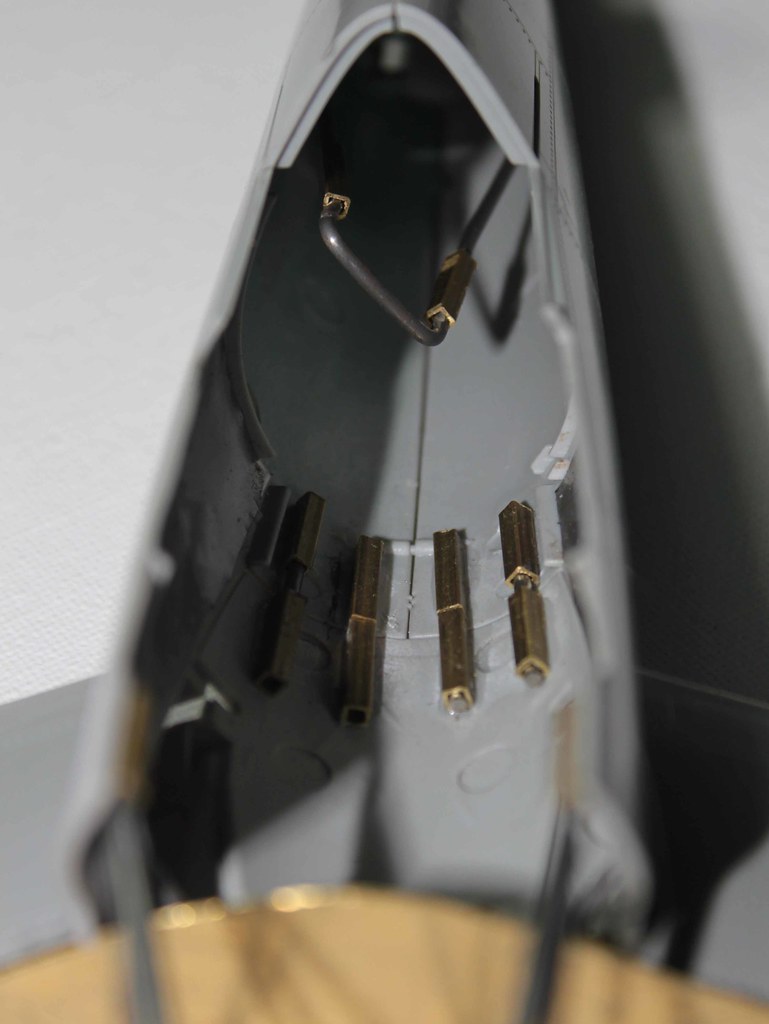
How looks the back gear inside of the tail: (two positions)
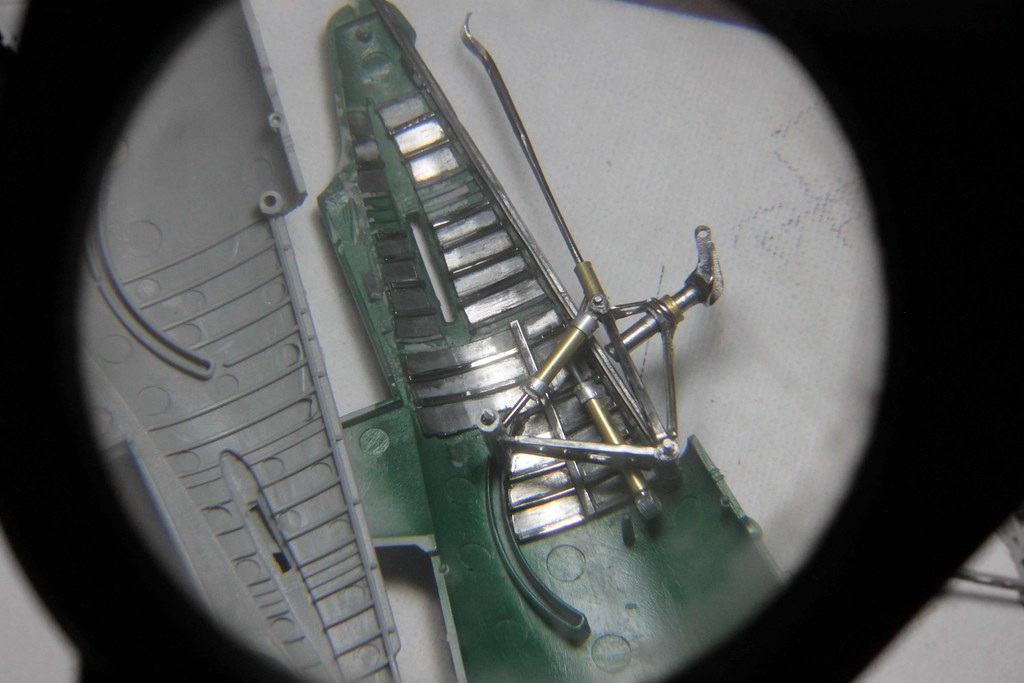
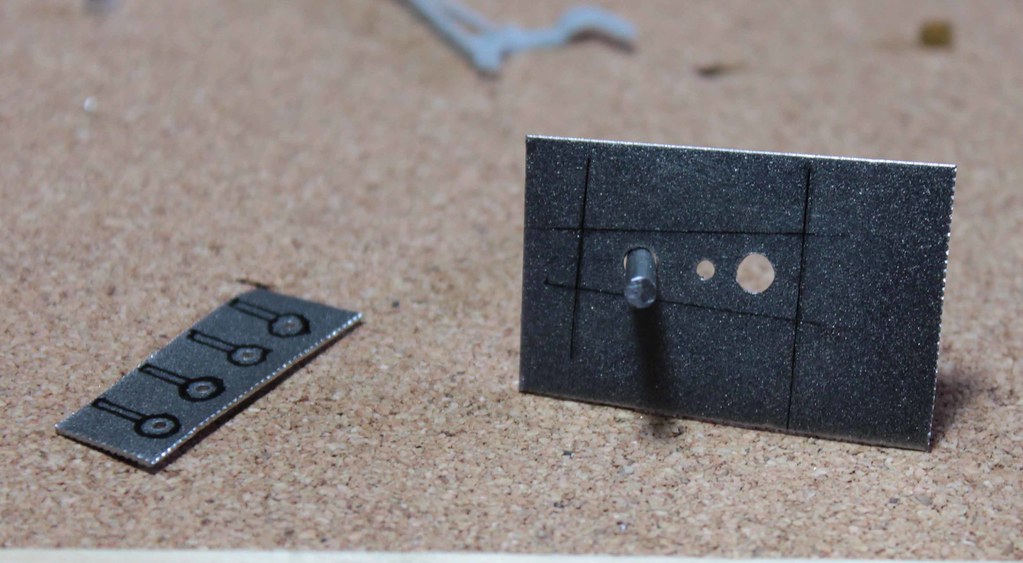
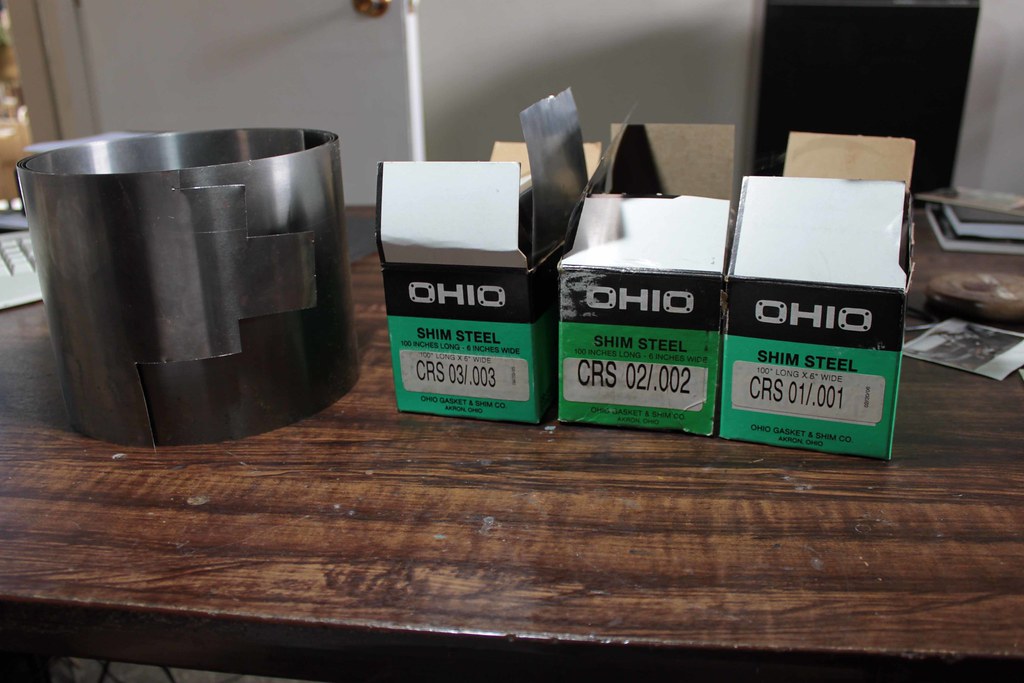
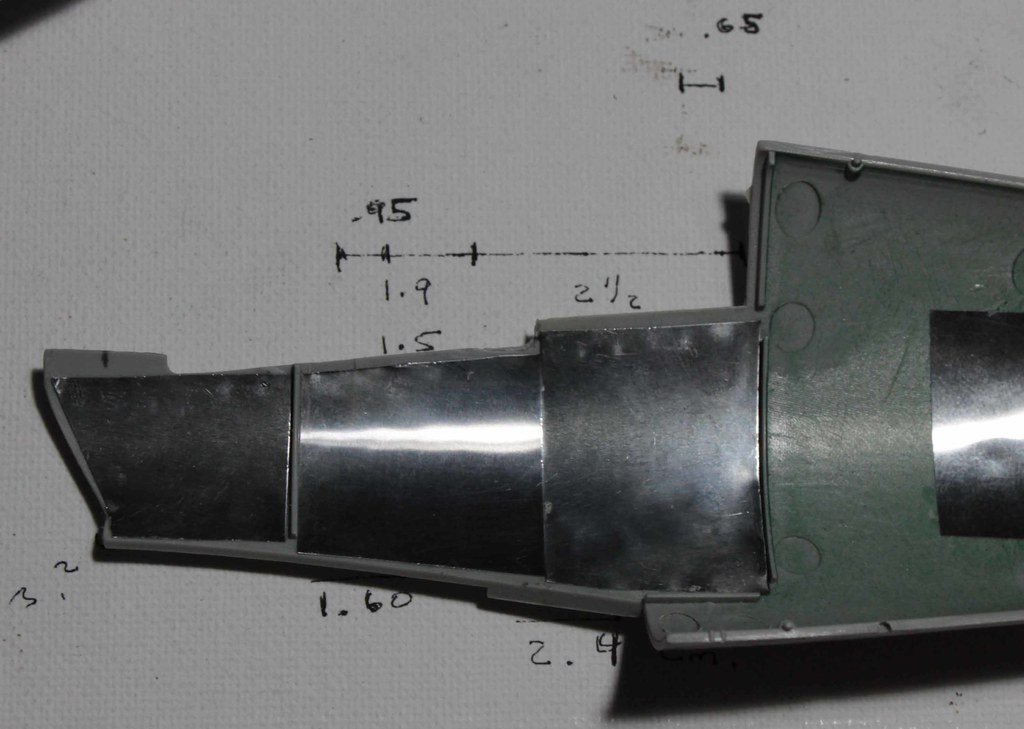
And for to solve the metal part of the tail, I cut some metal parts and put it the entire surface, covers the entire visible surface.
Thanks so much for your attention and in a couple of days I will show your how the front gear looks all in scratch.
Regards!!!
adrianu
Joined: December 26, 2010
KitMaker: 41 posts
AeroScale: 41 posts
Posted: Wednesday, May 25, 2011 - 06:06 PM UTC
Here are other pictures:
MrMox

Joined: July 18, 2003
KitMaker: 3,377 posts
AeroScale: 115 posts

Posted: Wednesday, May 25, 2011 - 07:28 PM UTC
Very nice work, the angle on the hook though, is not sufficient for arresting the wire.
Cheers/Jan
Cheers/Jan


Emeritus

Joined: March 30, 2004
KitMaker: 2,845 posts
AeroScale: 1,564 posts

Posted: Wednesday, May 25, 2011 - 08:39 PM UTC
Superb work so far!  I'll be keeping a close eye on this build. With that kind of craftmanship all over the kit, it'll be fabulous.
I agree on the arresting hook, it should have more bend to it.
That's a really clever way to deal with those pesky pin ejector marks. I'll have to remember that in case I run into similar stuff in the future. Is it foil or some thin metal sheet you used?

I'll be keeping a close eye on this build. With that kind of craftmanship all over the kit, it'll be fabulous.I agree on the arresting hook, it should have more bend to it.
That's a really clever way to deal with those pesky pin ejector marks. I'll have to remember that in case I run into similar stuff in the future. Is it foil or some thin metal sheet you used?
chukw1

Joined: November 28, 2007
KitMaker: 817 posts
AeroScale: 729 posts
Posted: Thursday, May 26, 2011 - 03:37 AM UTC
Wow! I mean WOW!!

mtnflyer

Joined: March 08, 2009
KitMaker: 394 posts
AeroScale: 360 posts
Posted: Thursday, May 26, 2011 - 08:48 AM UTC
Your work is pure eye-candy; a joy to look at and learn from. I'll be following closely as well.
adrianu
Joined: December 26, 2010
KitMaker: 41 posts
AeroScale: 41 posts
Posted: Thursday, May 26, 2011 - 04:37 PM UTC
Hi!!
------------------------------------
Very nice work, the angle on the hook though, is not sufficient for arresting the wire.
Jan Klarbæk
I agree on the arresting hook, it should have more bend to it.
Eetu Tahvonen
Thanks you for all your pretty Words, I really feel very comfortable, thanks!!!
About de angle of the hook, I feel that suggestion is RIGHT!!
Definite: If any part of the airplane is external and very visual to observe, I think will be need to put all the attention for to do it right.
After I studied the part, I decided to make a change.
This change has 2 parts:
One is hard and Dangerous parts and the other is easier
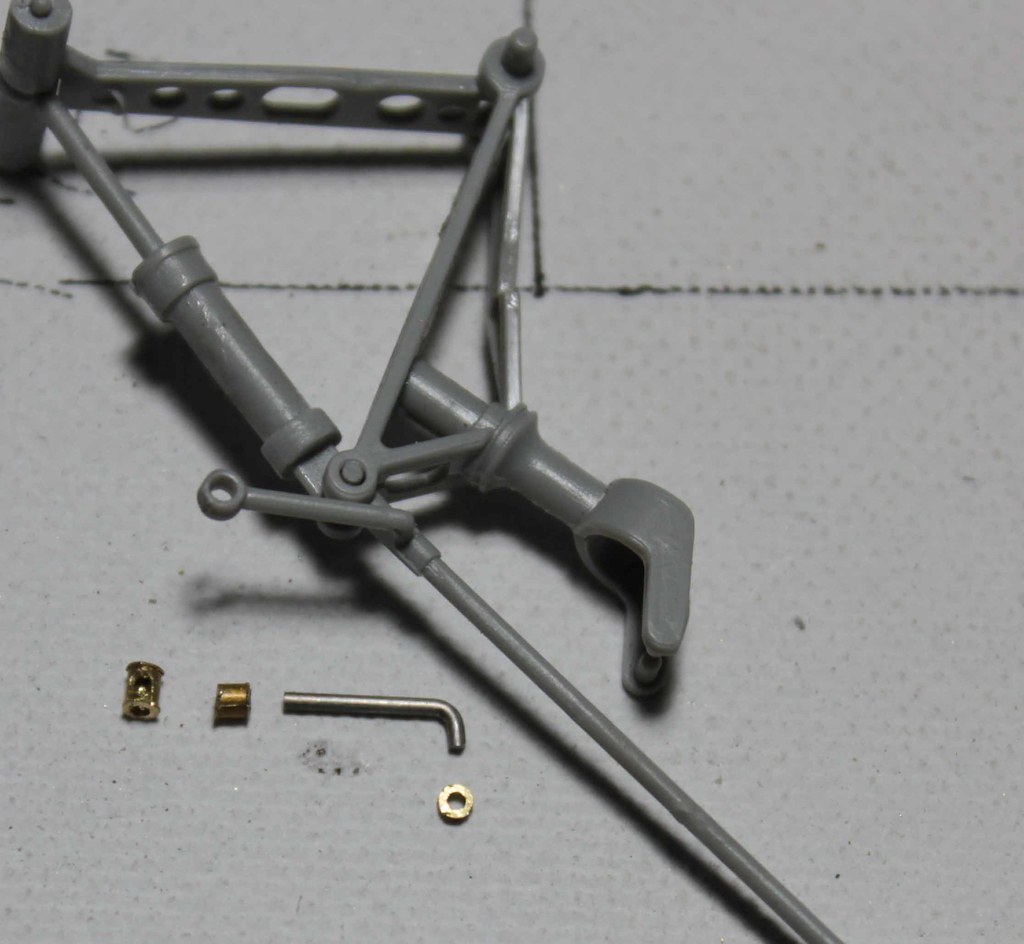
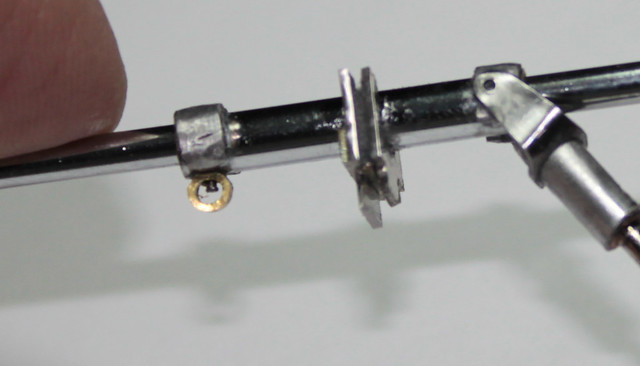
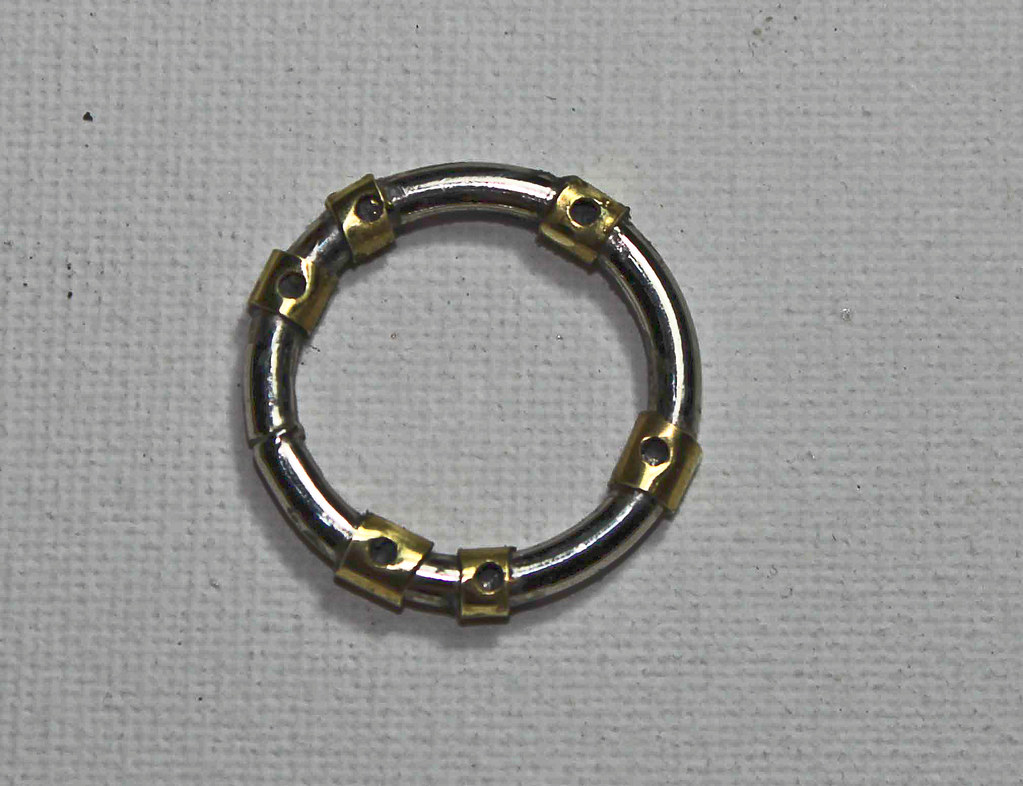
The first part needs to cut the bad piece without alter the all land gear
I already cut it.
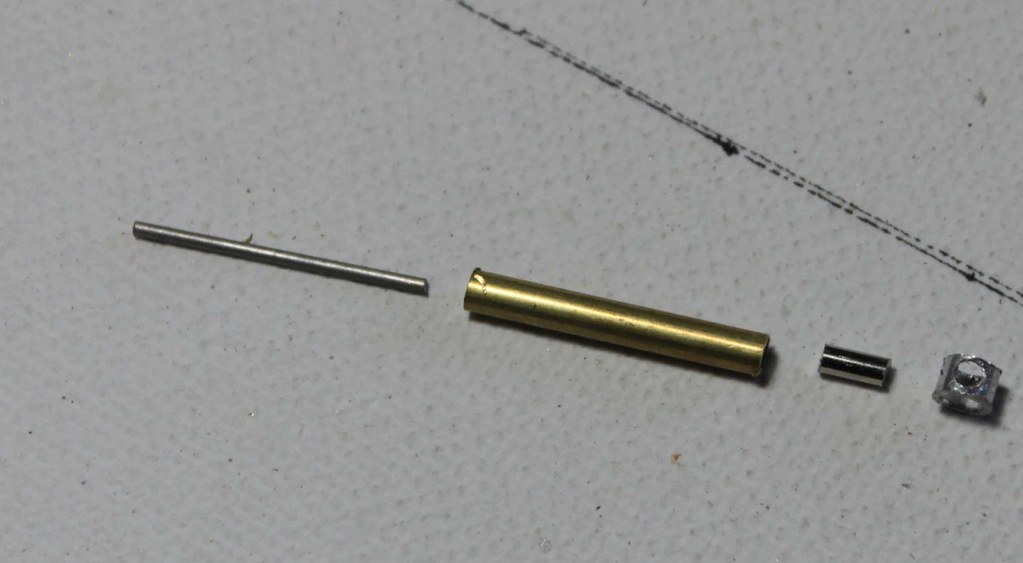
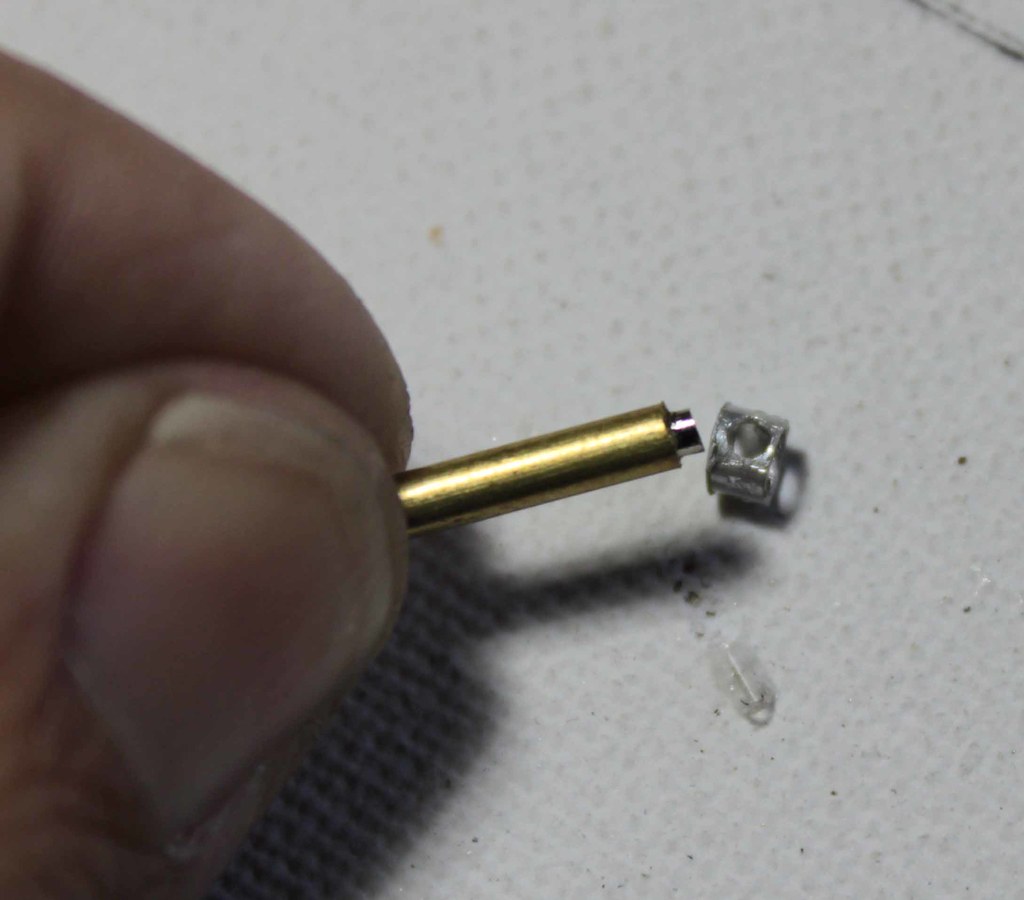
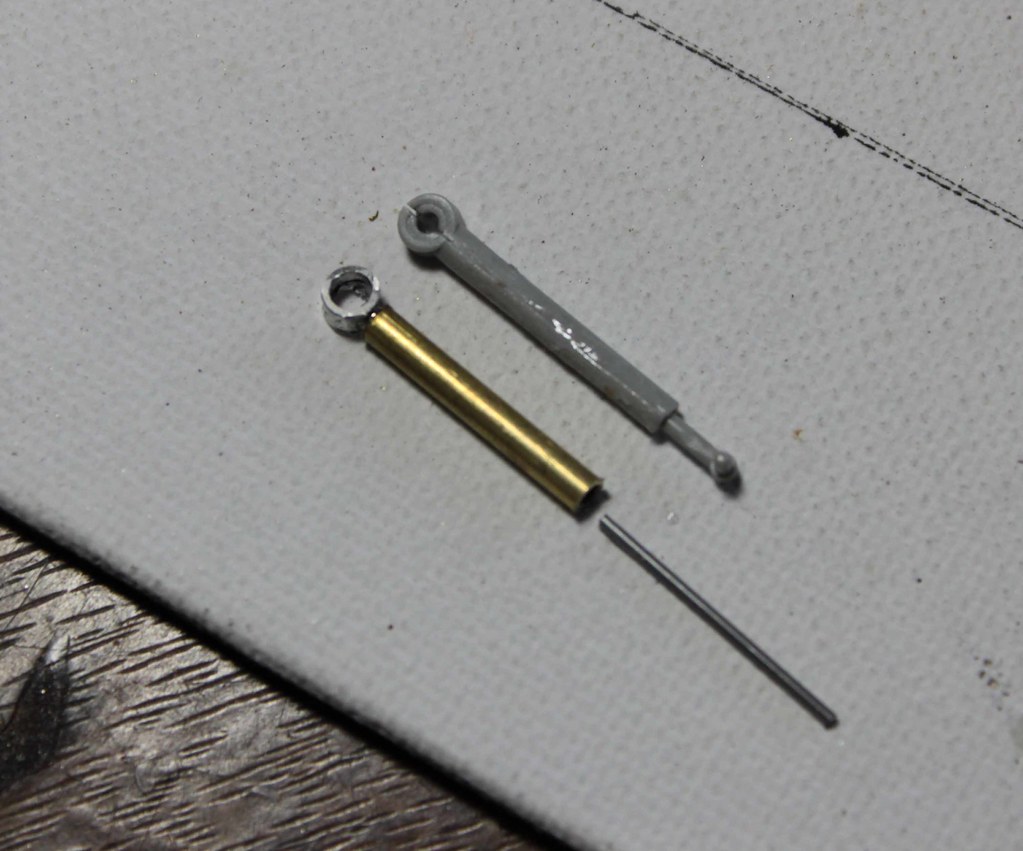
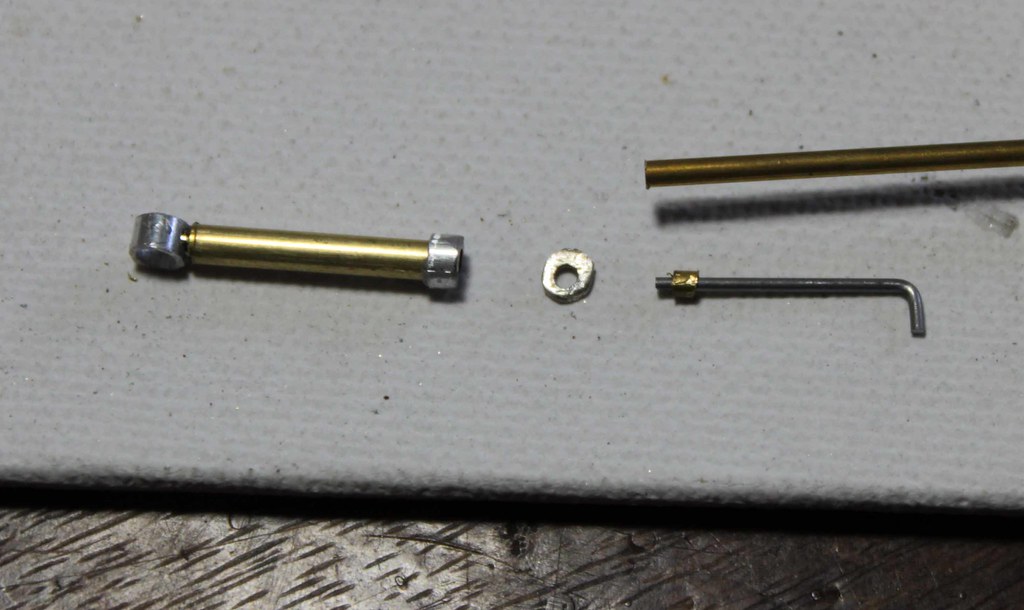
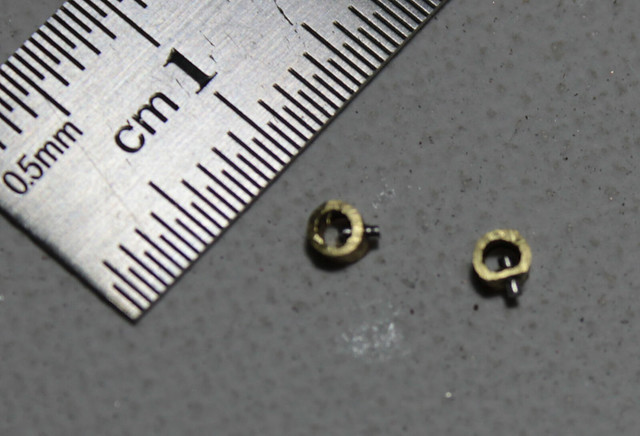
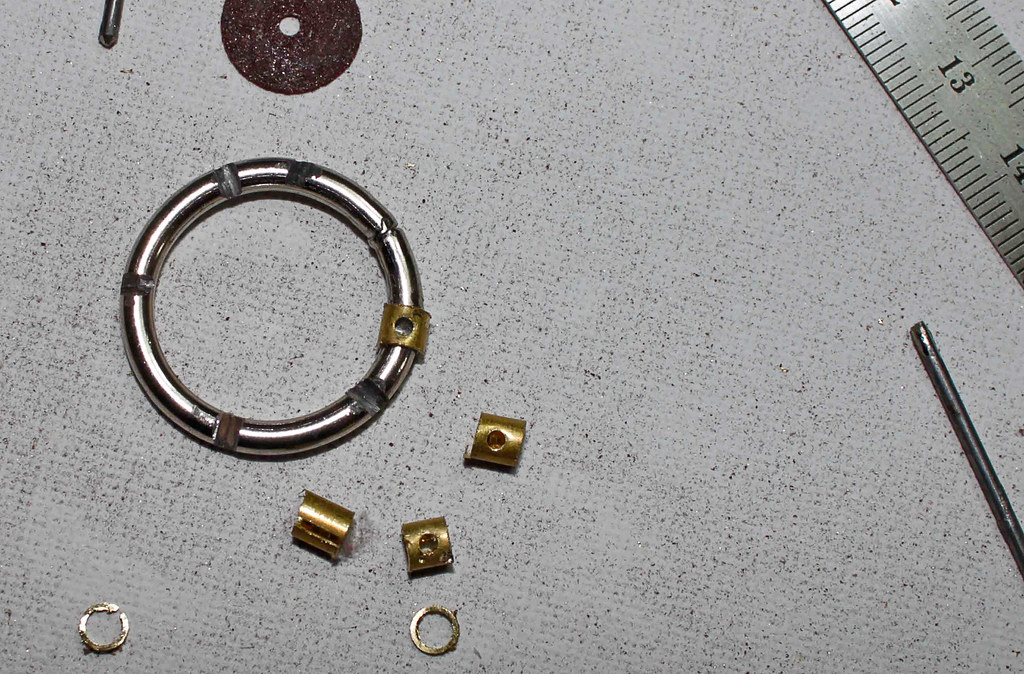
For to join with the new one, I built a new piece with 1 metal pin and 2 little brass tube
(You can observed it in the next image)

The easier part is to build a new hook because this step is not dangerous for the entire land gear and you can spend more time for to do it. And I will make it in about the next 3 weeks
Thanks!!!!!!
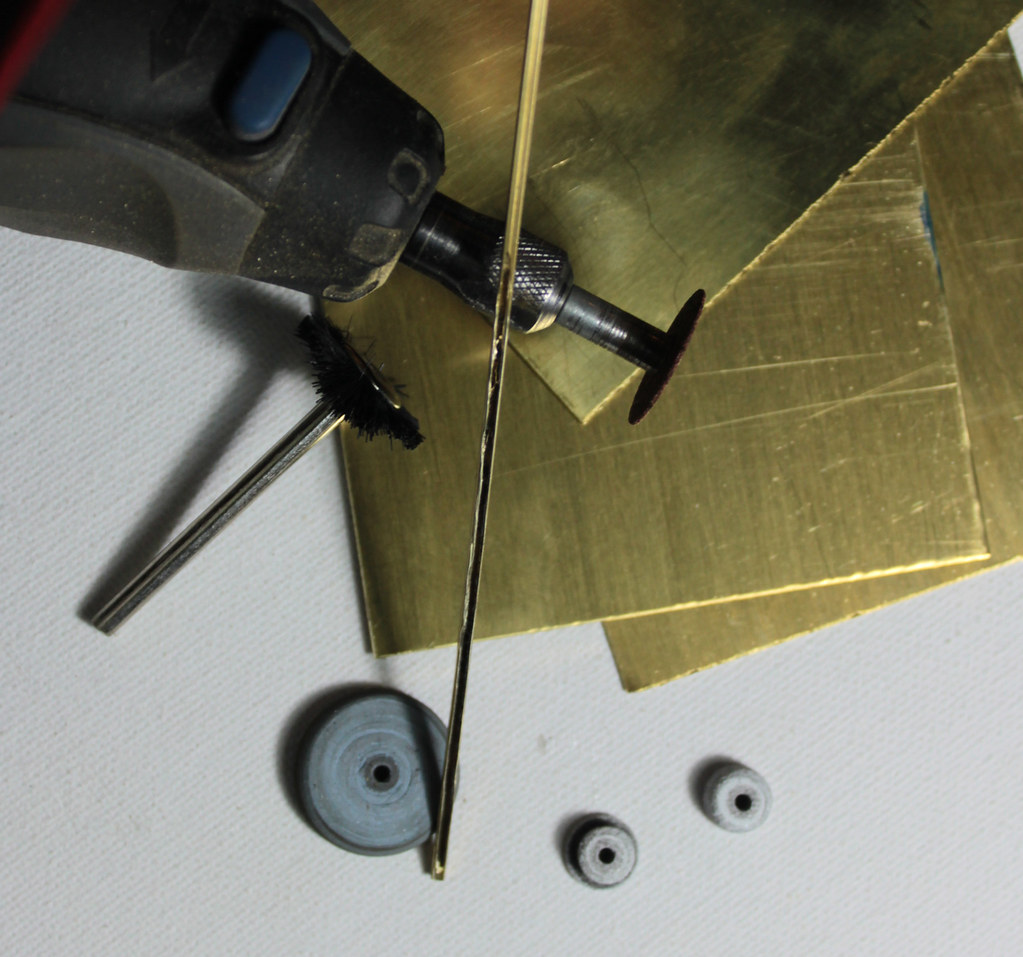
Hi!! Eetu Tahvonen
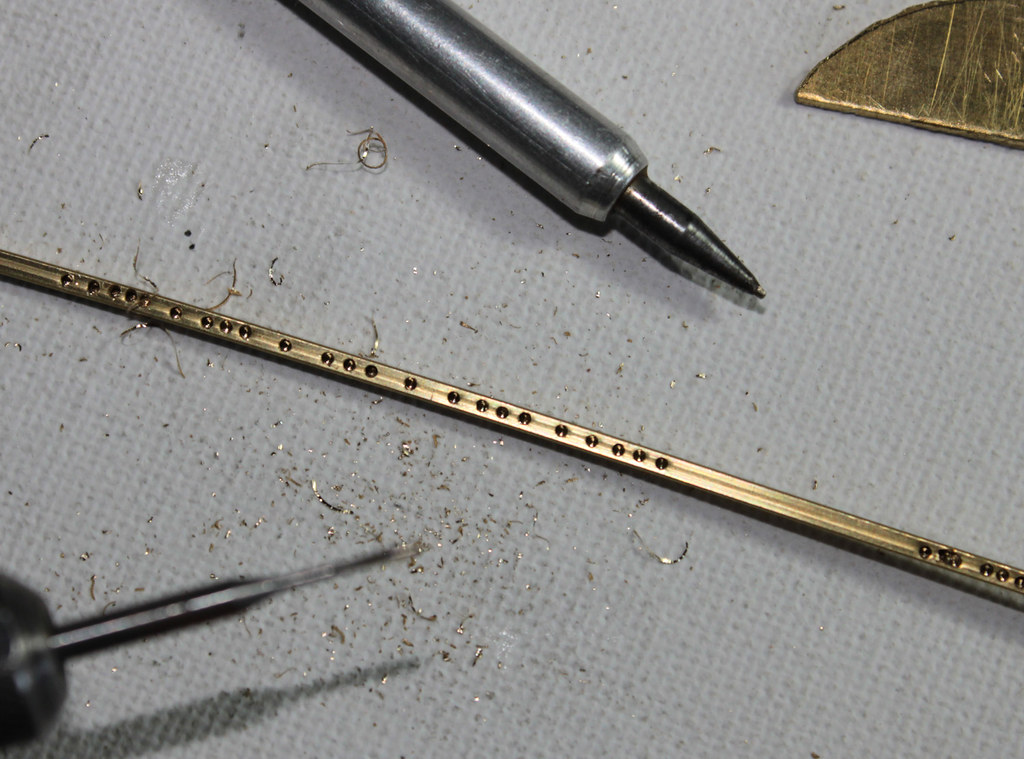
I use a different thin metal for to do it
In the next picture I will show you the different measure metal I use it
Good Luck!!
adrianu
Joined: December 26, 2010
KitMaker: 41 posts
AeroScale: 41 posts
Posted: Thursday, May 26, 2011 - 04:43 PM UTC
Hi Chuck Wojtkiewicz!!!
Hi Guy
Thanks for your words!!
Regards!!!
Hi Guy
Thanks for your words!!
Regards!!!
adrianu
Joined: December 26, 2010
KitMaker: 41 posts
AeroScale: 41 posts
Posted: Friday, May 27, 2011 - 09:54 AM UTC
Hi!!
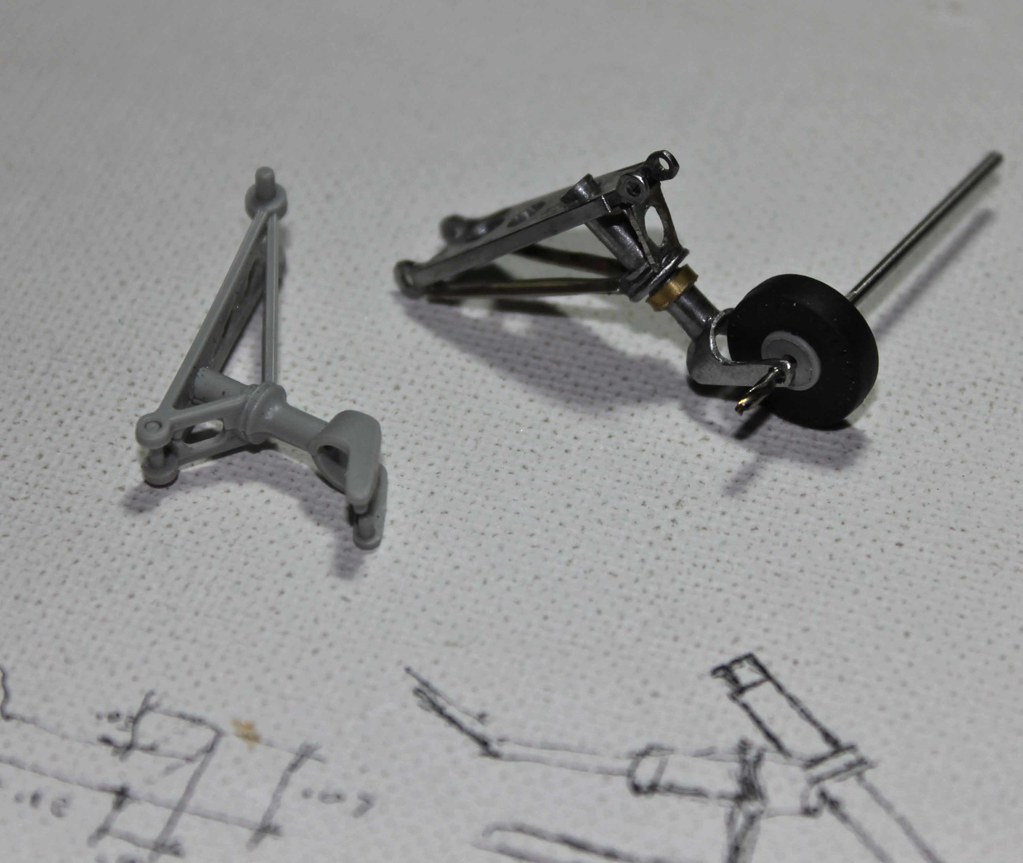
First I want to show us a couple of pictures of the plastic and metal front gear
Please, if you have any question, please ask it, for me will be a pleasure to answer it
The plastic front gear from trumpeter has 7 pieces for each gear ( total = 14 )
My scratch build has 74 pieces for each gear ( total = 148 )
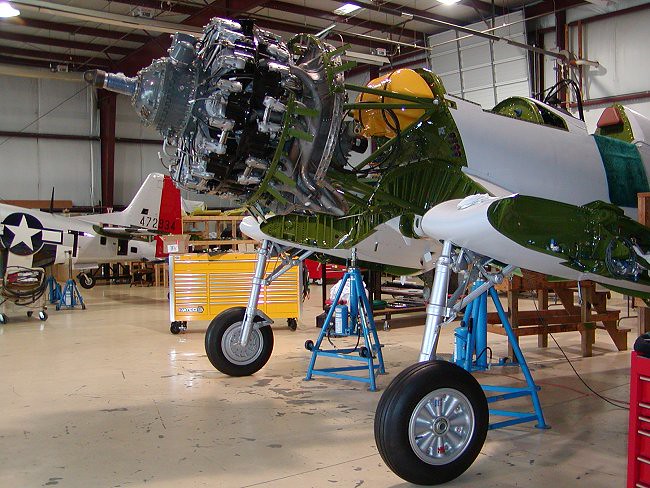
Then I want to show us a couple of pictures where I took some ideas for my landing gear
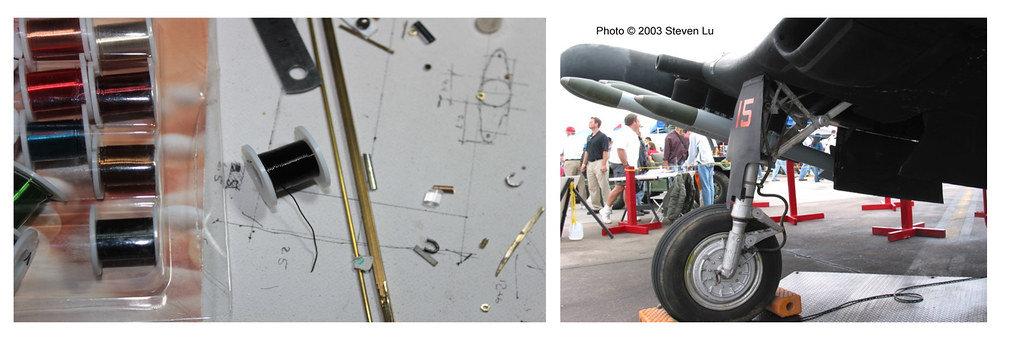
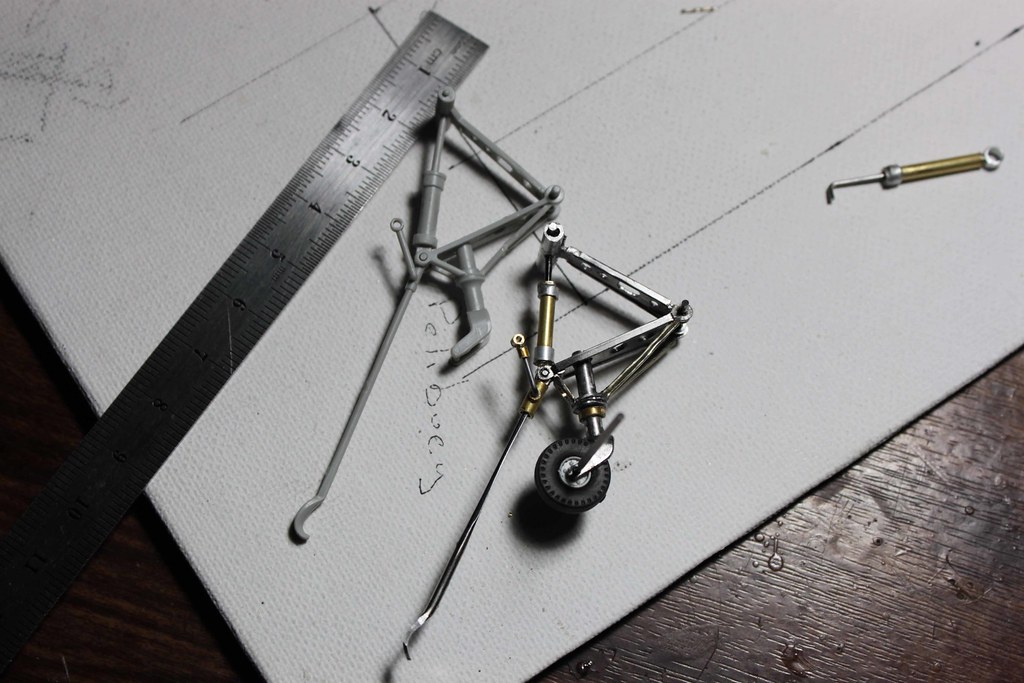
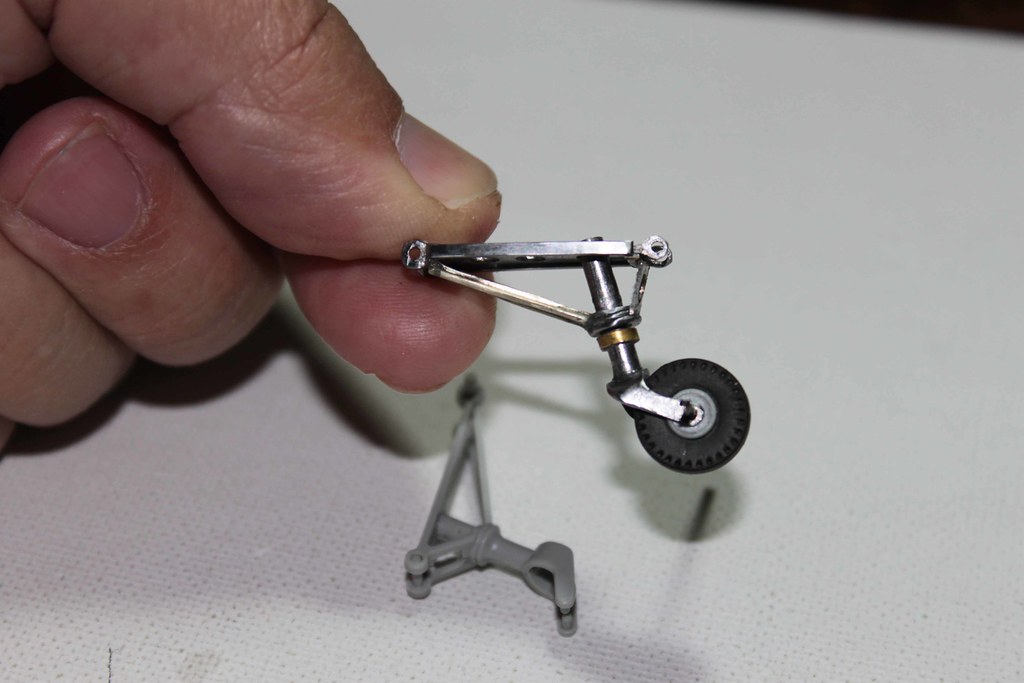
And the result is:
Here others view of the front landing gear


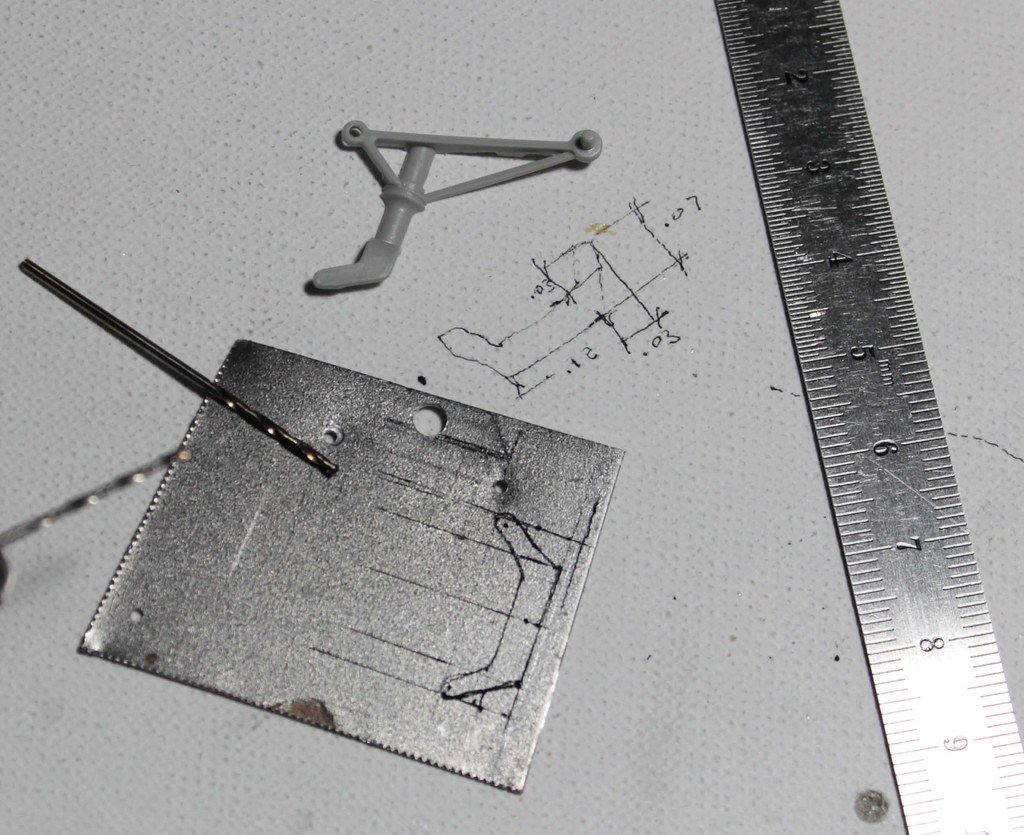
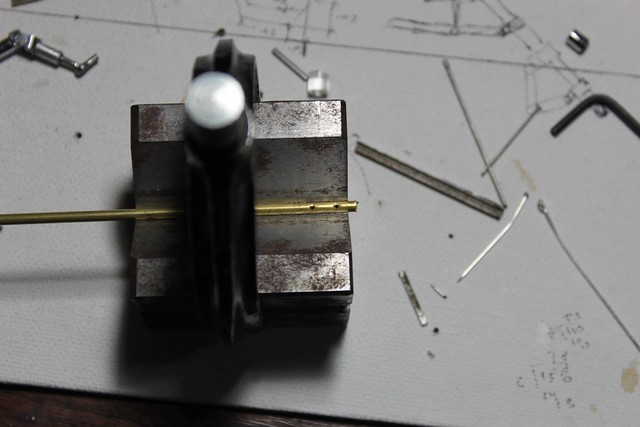
I want to show us some parts of the method of building. Good Luck!!!

The tires in the final stage I will make it in scratch too
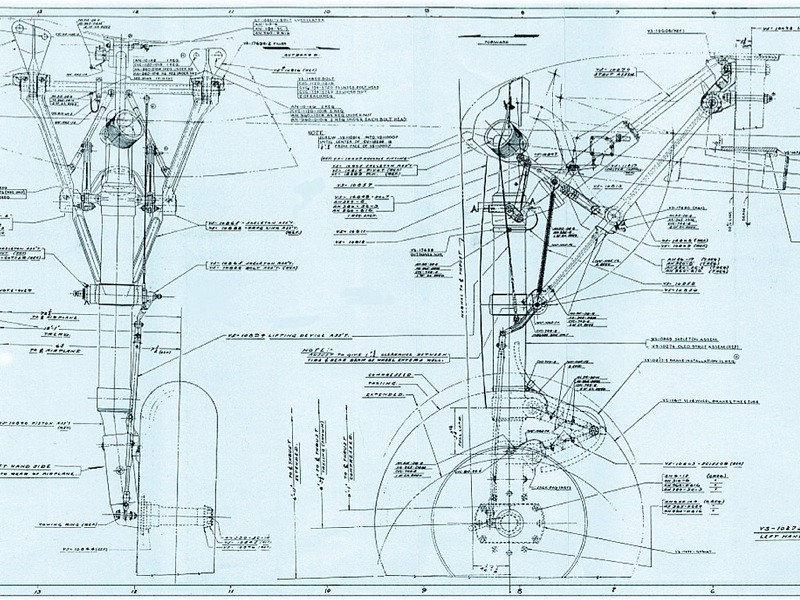
This is one of the plan I use it for reference
Regards!!
First I want to show us a couple of pictures of the plastic and metal front gear
Please, if you have any question, please ask it, for me will be a pleasure to answer it
The plastic front gear from trumpeter has 7 pieces for each gear ( total = 14 )
My scratch build has 74 pieces for each gear ( total = 148 )
Then I want to show us a couple of pictures where I took some ideas for my landing gear
And the result is:
Here others view of the front landing gear
I want to show us some parts of the method of building. Good Luck!!!
The tires in the final stage I will make it in scratch too
This is one of the plan I use it for reference
Regards!!

USCHIvdROSTEN

Joined: December 11, 2010
KitMaker: 64 posts
AeroScale: 57 posts
Posted: Friday, May 27, 2011 - 09:08 PM UTC
Wow! I really envy your scratchbuilding skills! It looks absolutely phantastic! Paint the model as you build it and we´ll have an absolute show stopper! :-))))
Great work! I´ll follow this one closely. Hats off!
Great work! I´ll follow this one closely. Hats off!
adrianu
Joined: December 26, 2010
KitMaker: 41 posts
AeroScale: 41 posts
Posted: Sunday, May 29, 2011 - 05:05 PM UTC
Hi Alex!!
Thanks you for your words. That will be fabulous to share this model with us!!. Thanks!!
Ok Alex,
The plan is: ( in each stage I will show us my work, good!)
1) I will build de cockpit (all scratch) (1 ½ month more or less ) ( some parts need to be paint while I build it )
2) I will paint all the landing gear
3) I will paint the cockpit
4) I will close the fuselage.
And thanks!!! Again
Adrian Urrejola
adrianu
Joined: December 26, 2010
KitMaker: 41 posts
AeroScale: 41 posts
Posted: Friday, February 17, 2012 - 05:22 PM UTC
HI!!
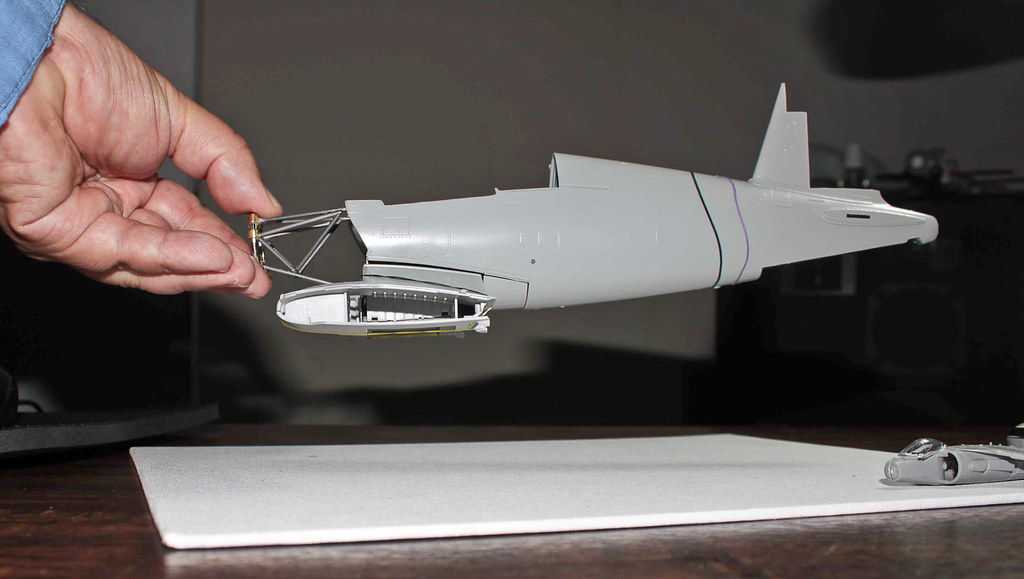
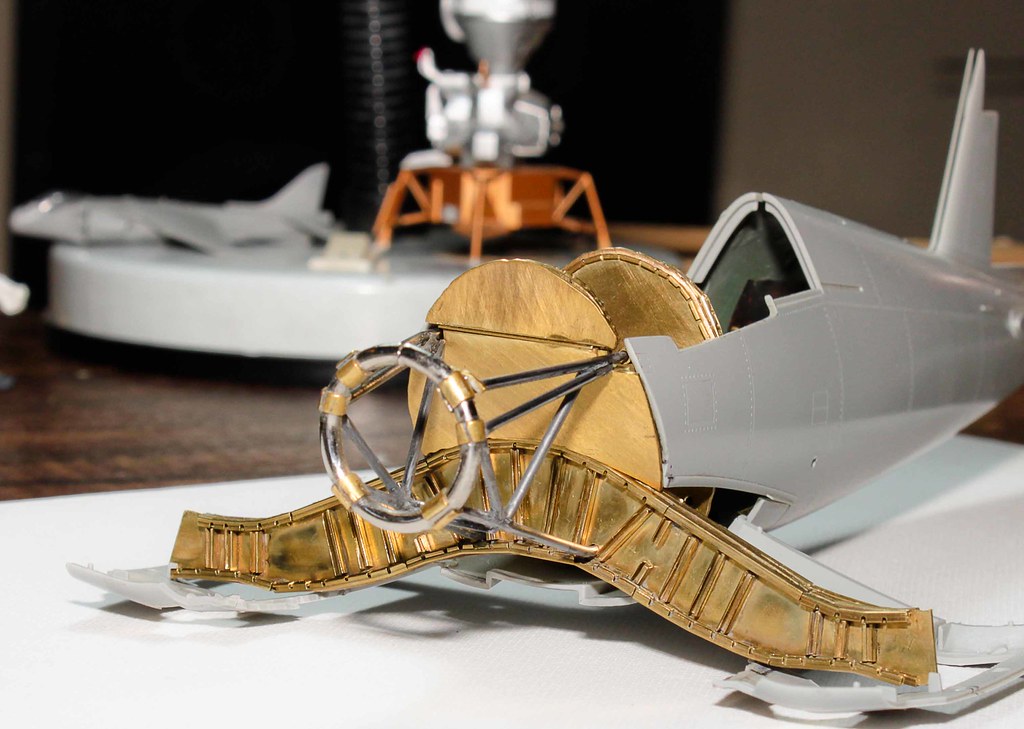
First I will give you my vision of the final stage of the corsair reconstruction
Then I will cut the fuselage. And in this step will not point to return.
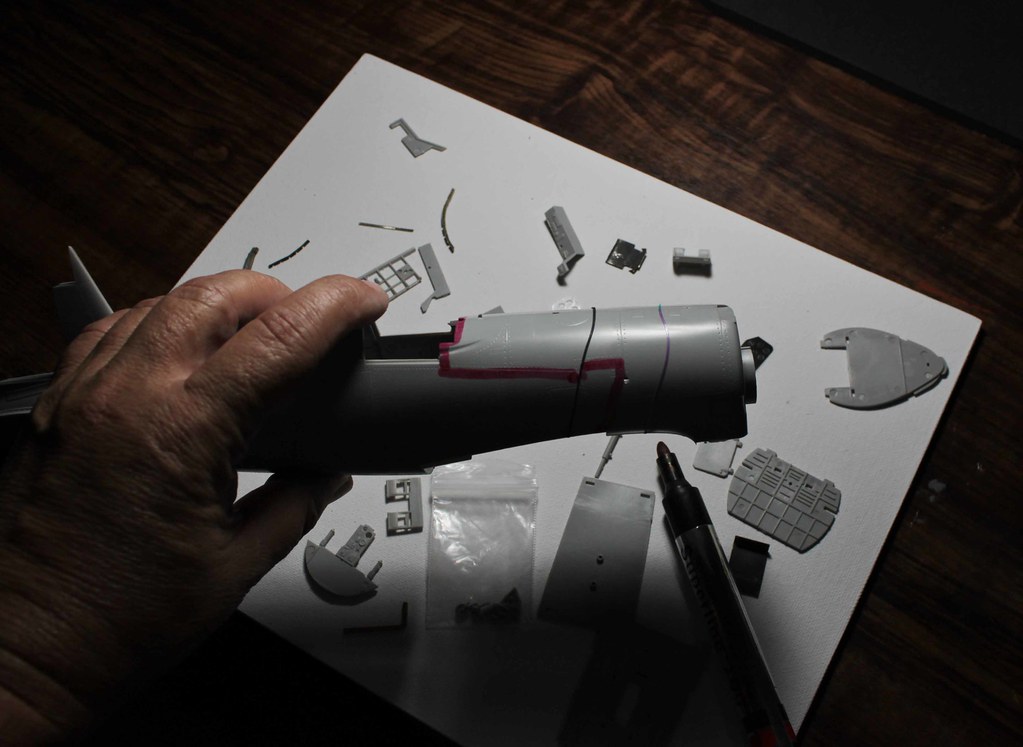
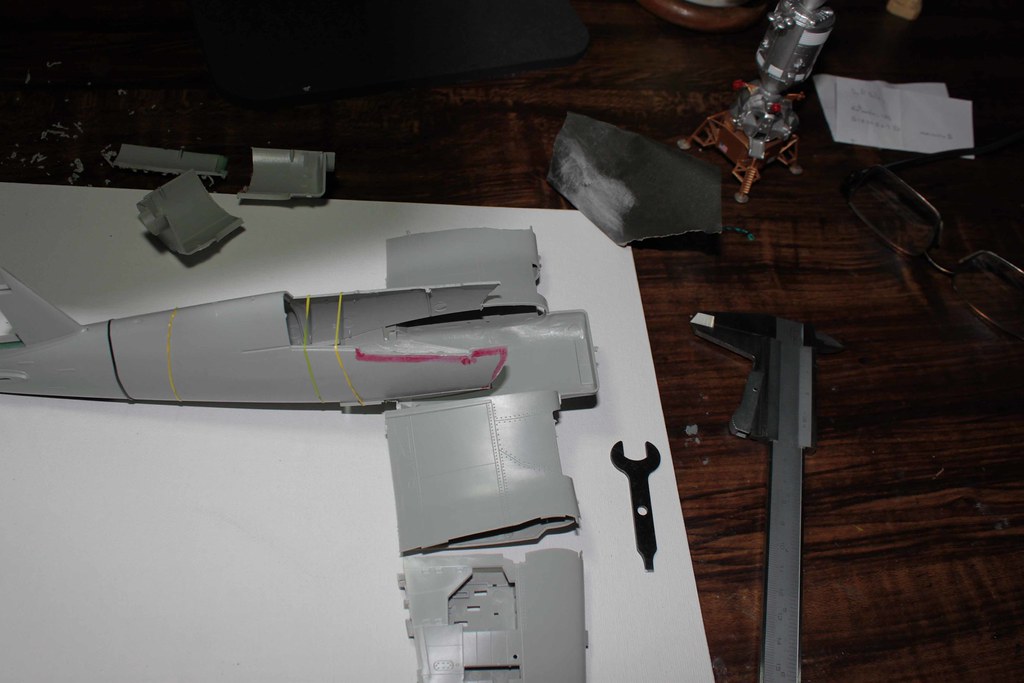
First I will give you my vision of the final stage of the corsair reconstruction
Then I will cut the fuselage. And in this step will not point to return.
adrianu
Joined: December 26, 2010
KitMaker: 41 posts
AeroScale: 41 posts
Posted: Friday, February 17, 2012 - 05:35 PM UTC
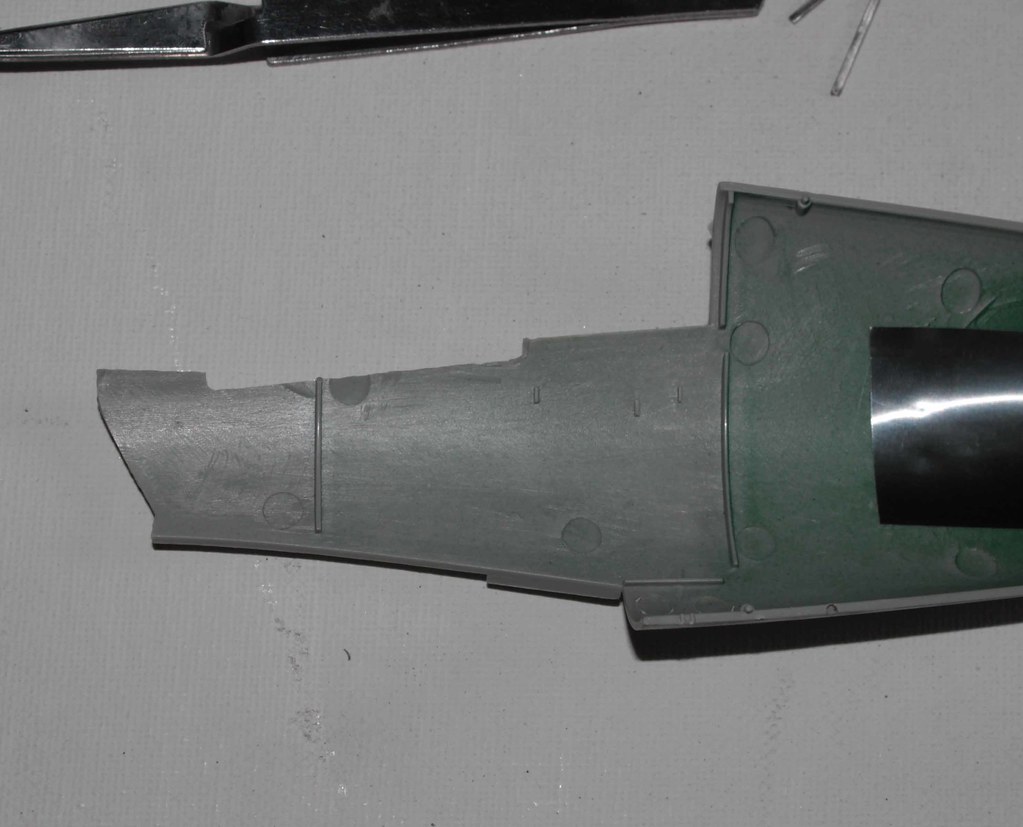
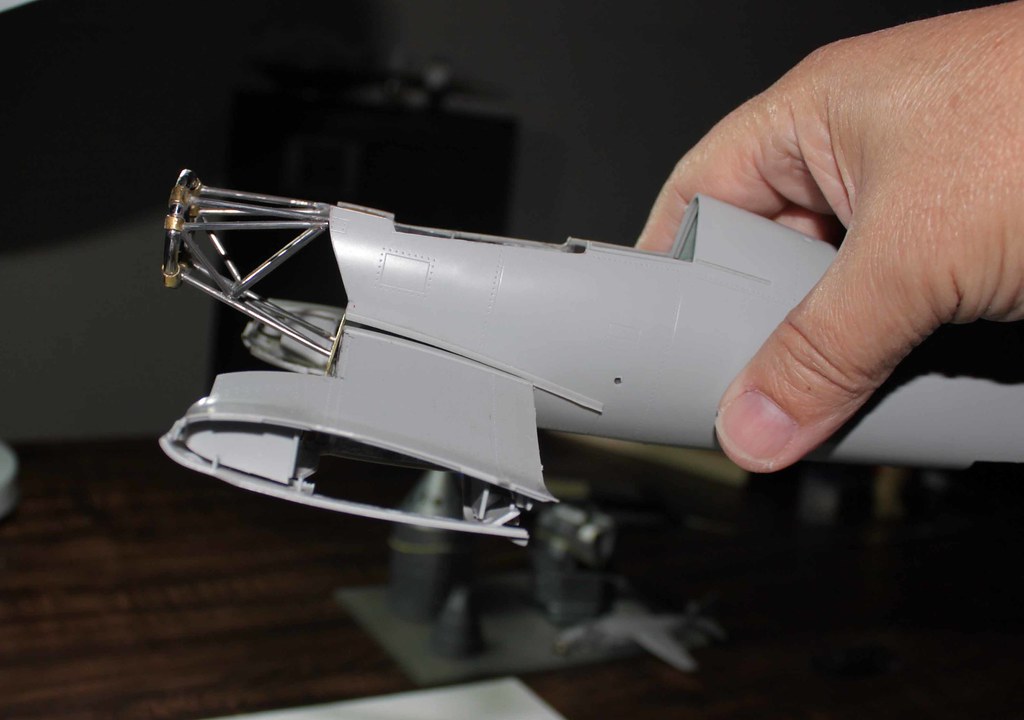
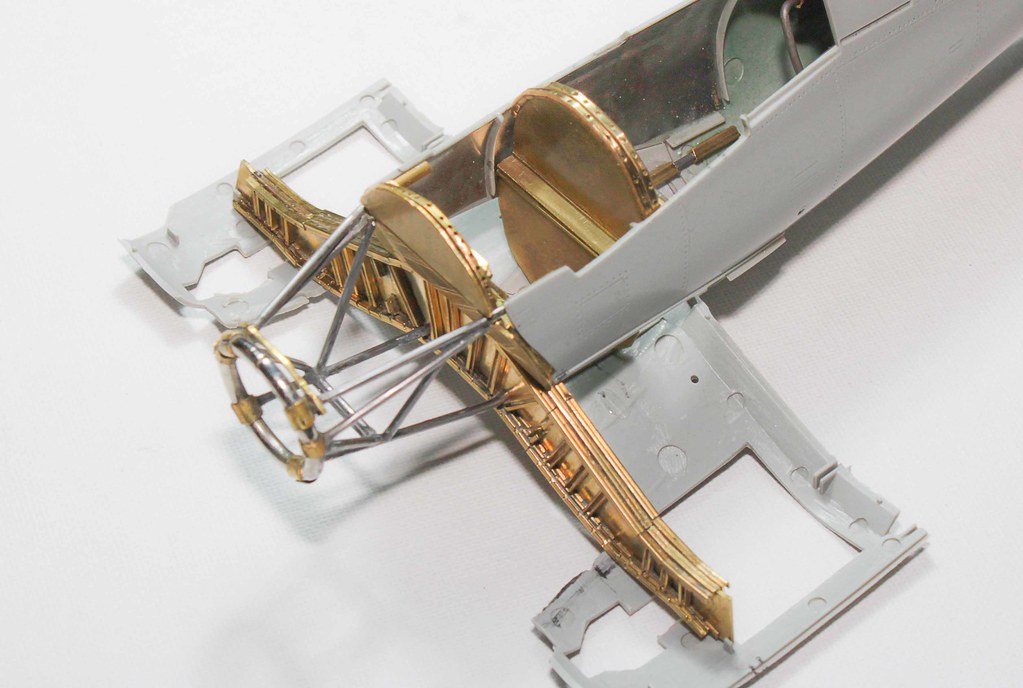
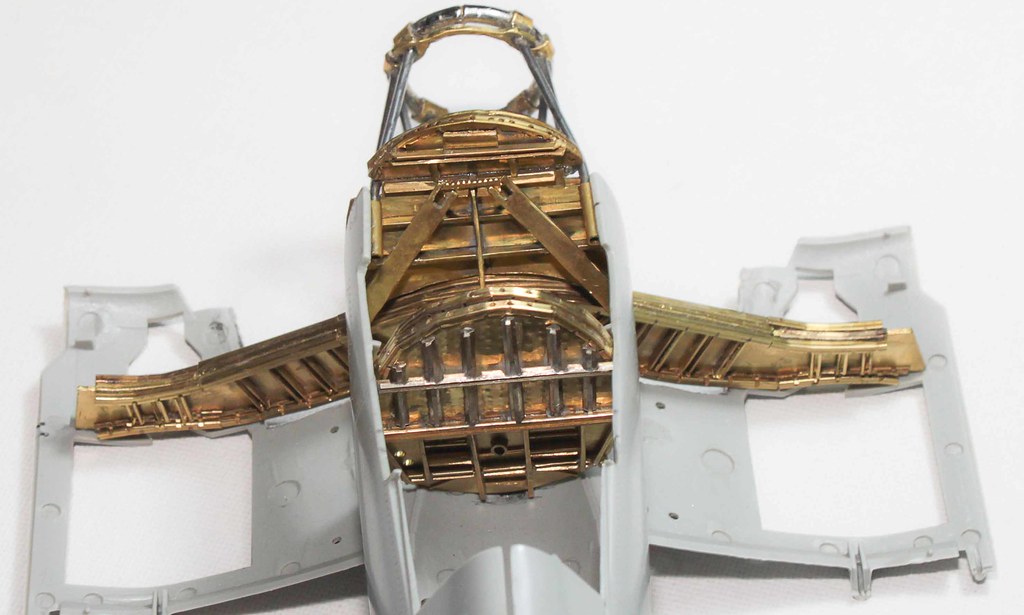
Then I will build the interior of the fuselage:

adrianu
Joined: December 26, 2010
KitMaker: 41 posts
AeroScale: 41 posts
Posted: Friday, February 17, 2012 - 05:44 PM UTC
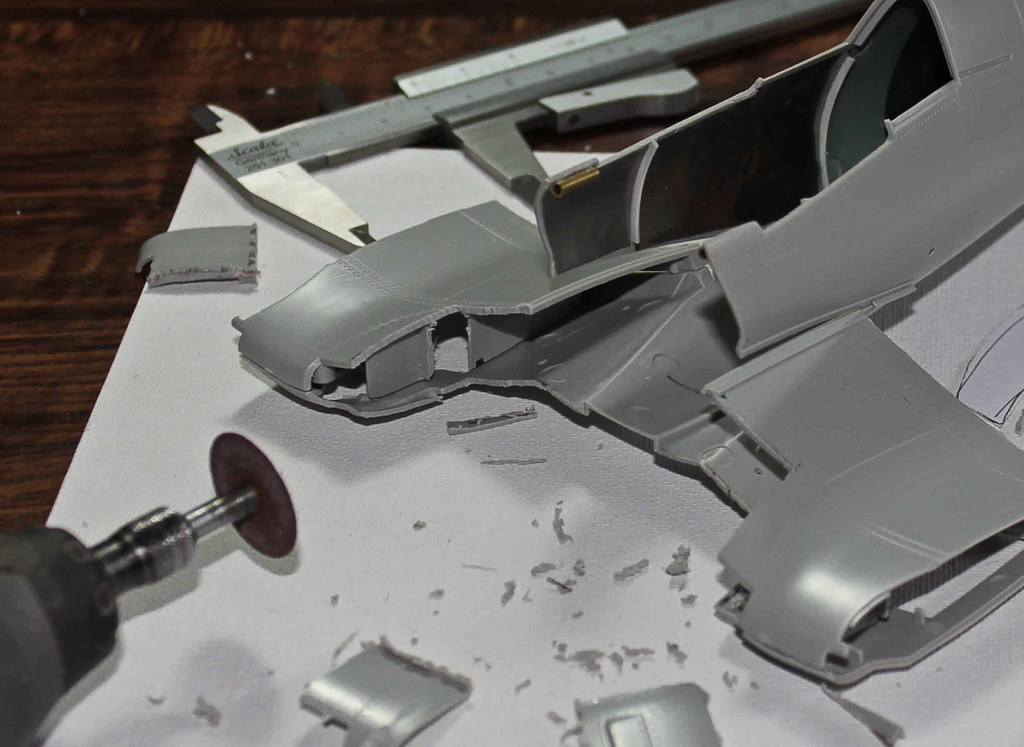
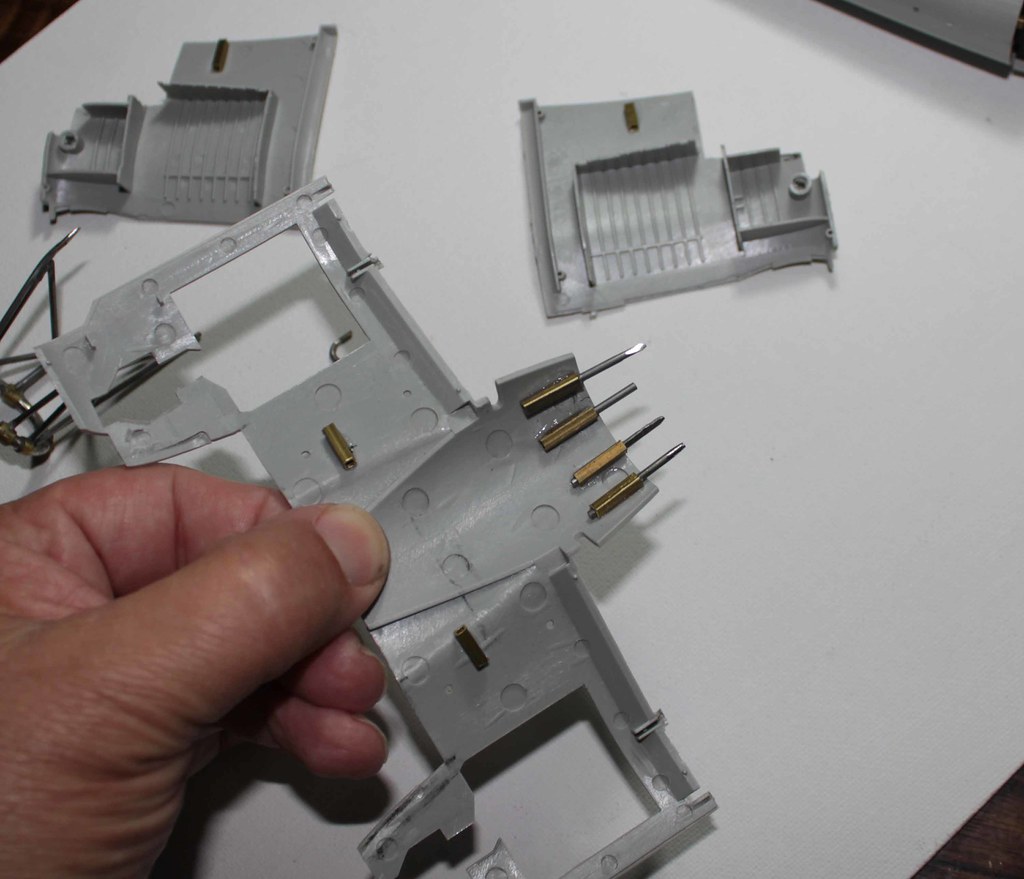
Then I will put some pins for to join and to support the weigh of the brass and metal structure
It is important: All the pieces are joining with NO glue at this point, just putting together to reflect one piece.

adrianu
Joined: December 26, 2010
KitMaker: 41 posts
AeroScale: 41 posts
Posted: Friday, February 17, 2012 - 05:54 PM UTC
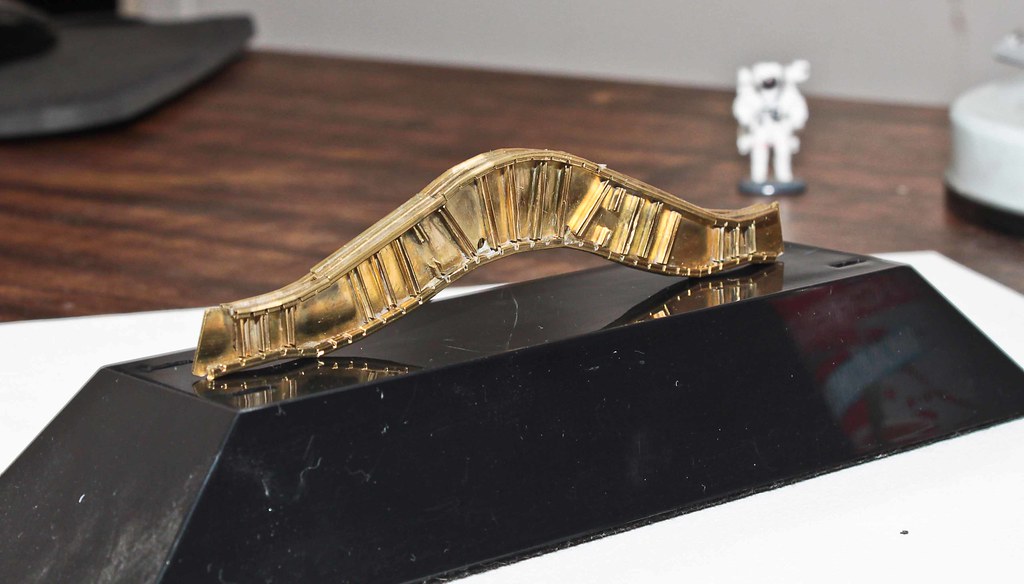
Then I will to build one of the principal pieces of the engine section:


adrianu
Joined: December 26, 2010
KitMaker: 41 posts
AeroScale: 41 posts
Posted: Tuesday, February 21, 2012 - 01:01 PM UTC
A few steps:
Any comment will be welcoming
 [/url]

Important: The pieces has not finished at all, need more details


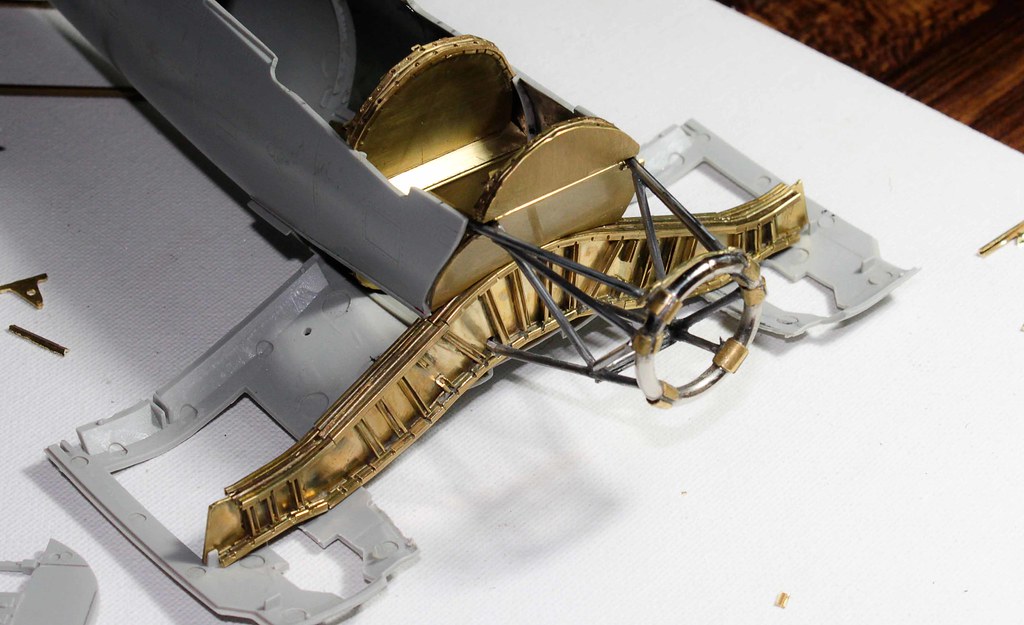

Thanks!!
Any comment will be welcoming
[/url]Important: The pieces has not finished at all, need more details
Thanks!!
raypalmer
Joined: March 29, 2010
KitMaker: 1,151 posts
AeroScale: 985 posts

Posted: Wednesday, February 22, 2012 - 02:50 PM UTC


warreni

Joined: August 14, 2007
KitMaker: 5,926 posts
AeroScale: 2,201 posts

Posted: Wednesday, February 22, 2012 - 09:19 PM UTC
Adrian, you are building a museum quality model there. I will be watching with great interest.
chukw1
Joined: November 28, 2007
KitMaker: 817 posts
AeroScale: 729 posts
Posted: Thursday, February 23, 2012 - 03:58 AM UTC
Quoted Text
I'm with Richard! Beautiful work, Adrian- cheers!
chuk

Spiderfrommars

Joined: July 13, 2010
KitMaker: 3,845 posts
AeroScale: 25 posts
Posted: Thursday, February 23, 2012 - 07:11 AM UTC
...that's REALLY IMPRESSIVE!!
Thanks for sharing !!
Thanks for sharing !!
adrianu
Joined: December 26, 2010
KitMaker: 41 posts
AeroScale: 41 posts
Posted: Thursday, February 23, 2012 - 12:15 PM UTC
Thanks all of us. I'm really feeling part of this forum. My next post will be in one month.
Regards
Adrian Urrejola
Regards
Adrian Urrejola
McIvan

Joined: November 18, 2009
KitMaker: 64 posts
AeroScale: 34 posts
Posted: Thursday, February 23, 2012 - 12:58 PM UTC
I am rather in awe. Look forward to seeing more...great work!
raypalmer
Joined: March 29, 2010
KitMaker: 1,151 posts
AeroScale: 985 posts
Posted: Thursday, February 23, 2012 - 03:13 PM UTC

 |

WEB HOSTING BY


Copyright ©2021 AeroScale and Kitmaker Network, a subsidiary of Silver Star Enterprises
All Rights Reserved. Please read our Conditions of Use and Privacy Policy.
All Rights Reserved. Please read our Conditions of Use and Privacy Policy.