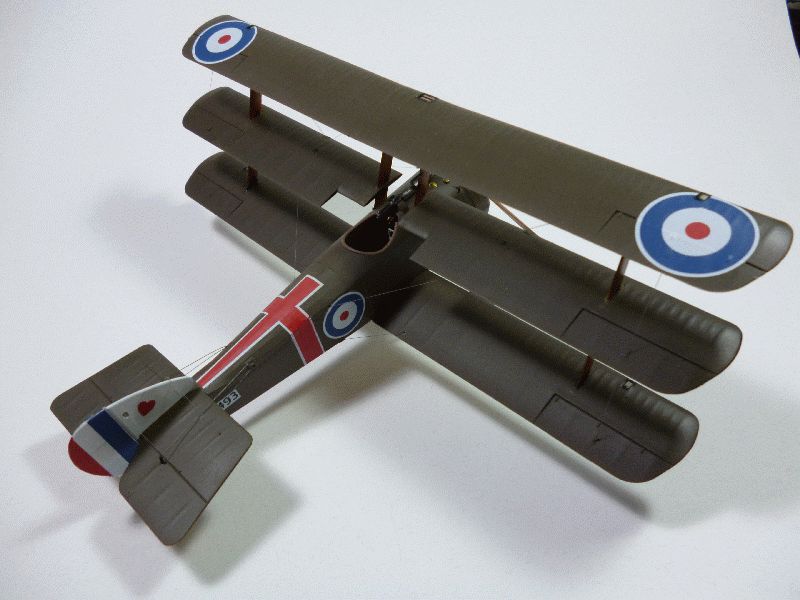
I can hear the groans now.. "Please not another build for KotS!"
I am sorry but I had nothing to do with the Pfalz for a few hours so I started this Roden Triphound. I was considering an Academy Sopwith Camel, but the surface detailing was way over the top and so I will be selling it on Ebay if anyone wants a good easy first WW1 biplane to build.
Anyway, on with the build!
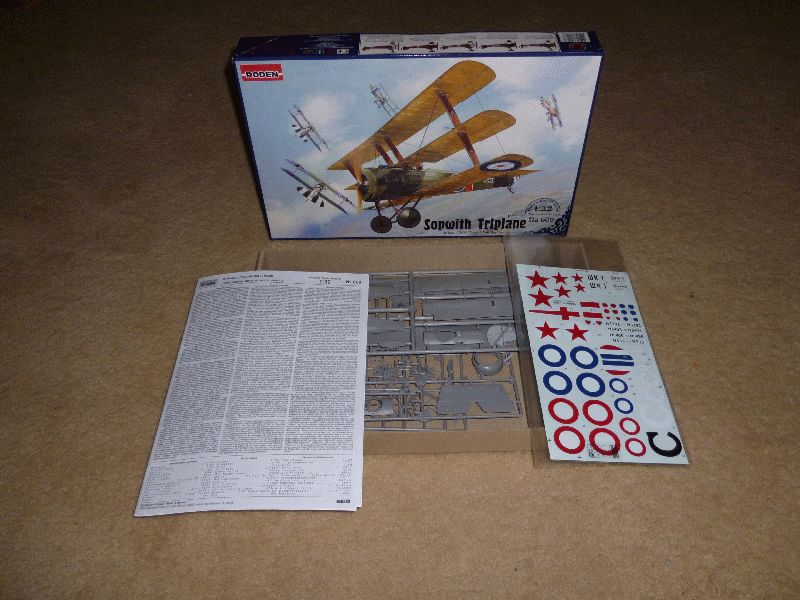
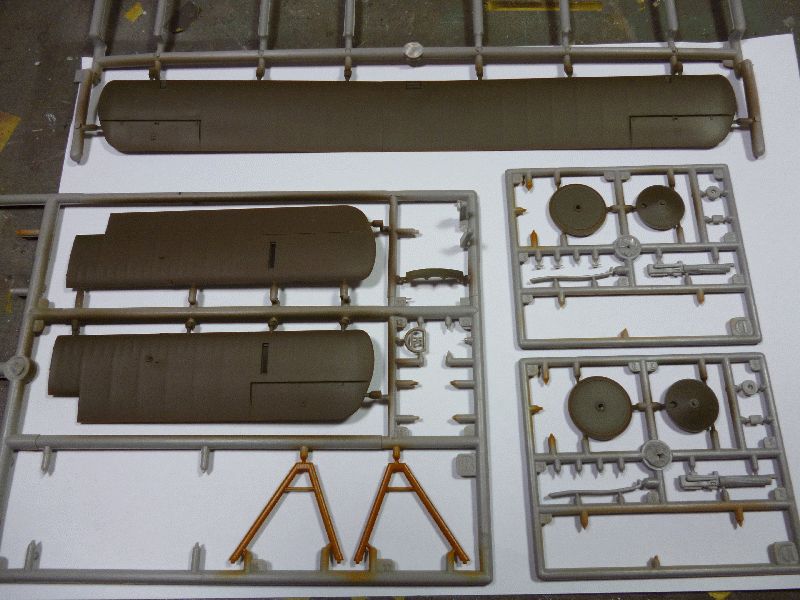
So there I was merrily drilling holes in various pieces in various places to accept the rigging when I tried to drill the holes through the centre wings at an angle. I failed miserably as I didn't get the angle right. So after filling the holes I drilled again and failed again!! Sigh. Filled said holes and when I looked a little closer at one of the wings I discovered this..
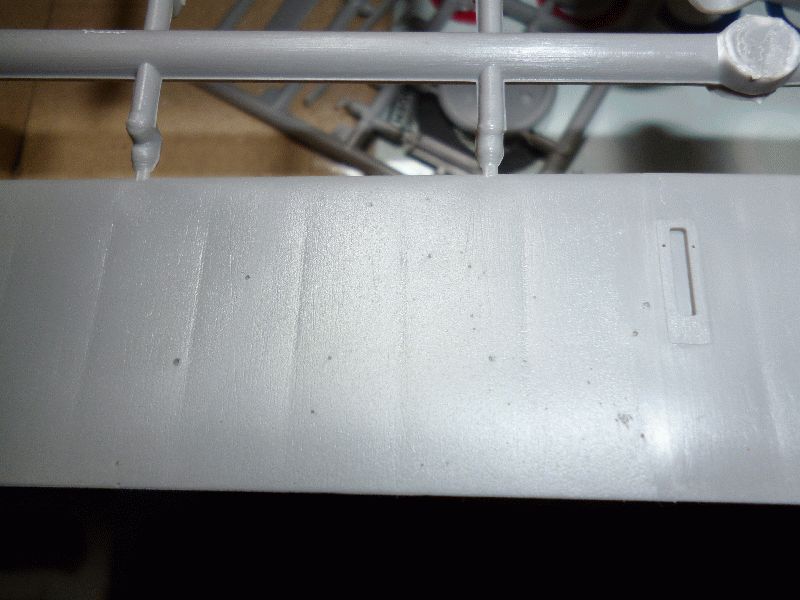
Yep, lots of little holes on the lower surface of one of the wings. I am not trying to Roden bash here but this is the second kit I have had hassles with in the last few months, and this in one of their latest kits. Looks like their quality control still needs some work.
But anyway, I got the engine together and painted and then remembered to gave all the sprues a good tub after noticing that the linen colour paint I brushed on the cockpit sides was going all blobby and not adhering everywhere. No problem, just put more paint on. That worked this time but maybe not next time so I decided I better give em a tub.
I have found a really good walk-around of a replica which is what I am going to go off as Roden have some suspect colour call outs, especially in the cockpit. They call for wood colour on the inside of the cockpit walls, but I know they should be natural linen.
We shall see how the rest of this one goes.
Til tomorrow, to all a good night while I go and watch the NRL.
Cheers!
Early Aviation
Discuss World War I and the early years of aviation thru 1934.
Hosted by Jim Starkweather
KotS GB 2011 Tripehound warreni
warreni
South Australia, Australia
Joined: August 14, 2007
KitMaker: 5,926 posts
AeroScale: 2,201 posts
Joined: August 14, 2007
KitMaker: 5,926 posts
AeroScale: 2,201 posts
Posted: Friday, July 01, 2011 - 10:14 PM UTC
thegirl
Alberta, Canada
Joined: January 19, 2008
KitMaker: 6,743 posts
AeroScale: 6,151 posts
Joined: January 19, 2008
KitMaker: 6,743 posts
AeroScale: 6,151 posts
Posted: Saturday, July 02, 2011 - 03:08 AM UTC
Not so much of a groan , but shaking my head in disbelief , good one you !
Will be looking forward to seeing how she turns out .
warreni
South Australia, Australia
Joined: August 14, 2007
KitMaker: 5,926 posts
AeroScale: 2,201 posts
Joined: August 14, 2007
KitMaker: 5,926 posts
AeroScale: 2,201 posts
Posted: Saturday, July 02, 2011 - 05:06 AM UTC
Thanks Terri.
wing_nut
New Jersey, United States
Joined: June 02, 2006
KitMaker: 1,212 posts
AeroScale: 468 posts
Joined: June 02, 2006
KitMaker: 1,212 posts
AeroScale: 468 posts
Posted: Saturday, July 02, 2011 - 10:47 AM UTC
Another? Really? Isn't there some kind of pill you can take or that?
warreni
South Australia, Australia
Joined: August 14, 2007
KitMaker: 5,926 posts
AeroScale: 2,201 posts
Joined: August 14, 2007
KitMaker: 5,926 posts
AeroScale: 2,201 posts
Posted: Saturday, July 02, 2011 - 10:54 AM UTC
Kornbeef
England - South East, United Kingdom
Joined: November 06, 2005
KitMaker: 1,667 posts
AeroScale: 1,551 posts
Joined: November 06, 2005
KitMaker: 1,667 posts
AeroScale: 1,551 posts
Posted: Saturday, July 02, 2011 - 08:55 PM UTC
Warren.
Yes its one of several known issues with the kit, check things like the upper wing top surfaces, towards the outside too, the wheel covers are dreadful too. A real shame, a bit more Quality control would have made this kit far better. Heres my (unfinished) build blog if you want some pointers read it through
http://aeroscale.kitmaker.net/forums/169337&ord=&page=1
http://s1011.photobucket.com/albums/af234/Jamo_kiwi/Sopwith%20Triplane/
http://picasaweb.google.com/sergey.archakov/SopwitchTriplane#
Two excellent AMS Suffererers spots to check too
HGW just released a set of seatbelts too. HGW 32011
Keith
warreni
South Australia, Australia
Joined: August 14, 2007
KitMaker: 5,926 posts
AeroScale: 2,201 posts
Joined: August 14, 2007
KitMaker: 5,926 posts
AeroScale: 2,201 posts
Posted: Saturday, July 02, 2011 - 09:57 PM UTC
Hi Keith.
Well I must have got lucky as my wheel covers are fine for me, but I don't go looking at Datafiles...
If you want to see some pictures of a beautiful replica ... http://thevintageaviator.co.nz/projects/sopwith-triplane/sopwith-triplane-walkaround
Maybe if I hadn't progressed as far as I have with mine it could have gone into my never to be built pile as well.
As someone said, we have been spoilt by WNW. But have we, or have we just suddenly got a much wider set of options of WWI kits. WNW have a Triplane in their under-development list as well...
I actually got all the wooden bits painted today and the sidewalls of the fuselage, but as I am going OOB, and no one except me will ever see the finished product, my cockpit is no where near as detailed as yours.
warreni
South Australia, Australia
Joined: August 14, 2007
KitMaker: 5,926 posts
AeroScale: 2,201 posts
Joined: August 14, 2007
KitMaker: 5,926 posts
AeroScale: 2,201 posts
Posted: Monday, July 11, 2011 - 11:56 AM UTC
Hmmm. After finally getting back to the Tripehound after my SPAD disaster I see what you mean about the wheel covers. oh well.. just a bit of texturing. Nothing a bit of sandpaper or Mr Surfacer putty won't fix.. Hopefully..Oh and I found some more 'textured' surfaces on the tailplane and middle wings.. Again, nothing lots of coats of paint won't fix. Or the aforementioned Mr Surfacer.
Then I dropped the sprue containing the Upper and lower wings. It just slipped out of my hand and it would have to land upside down. I had assembled the cockpit bits in-situ and the control coloum sort of broke off under the weight of the sprue. "Great!: I thought, well the air turned a bit blue for a moment, but the control column had not catapaulted too far away and I soon had it back in position.
Did anyone else have trouble fitting the seat into position? For some reason mine wanted to rotate each time and it took some CA glue and accelerator to calm it down a bit.
Other than that I put the rigging and control cable wires into their repective holes BEFORE glueing the fuselage together (that's BEFORE ). The fuselage went together and there is hardly any seam to fill.
I will have to refer to another source for the rigging of the tail-deathers as the Roden instruction, while extremely clear for all the other rigging, is very unclear re the rear tail/tailplane wire. There is a great site at The Vintage Aviator with beautiful pictures of a replica that I will have a look at to see if it clears things up.
Piccies anon..
JackFlash
Colorado, United States
Joined: January 25, 2004
KitMaker: 11,669 posts
AeroScale: 11,011 posts
Joined: January 25, 2004
KitMaker: 11,669 posts
AeroScale: 11,011 posts
Posted: Wednesday, July 13, 2011 - 09:52 PM UTC
The tail unit is pretty much a Sopwith standard set up. Whether is ts the larger area early type or post May 1917 smaller area version.
warreni
South Australia, Australia
Joined: August 14, 2007
KitMaker: 5,926 posts
AeroScale: 2,201 posts
Joined: August 14, 2007
KitMaker: 5,926 posts
AeroScale: 2,201 posts
Posted: Wednesday, July 13, 2011 - 10:03 PM UTC
There is only one choice in the kit so that is the one I will use. And the Vintage Aviator walk-around cleared up the rigging question.
warreni
South Australia, Australia
Joined: August 14, 2007
KitMaker: 5,926 posts
AeroScale: 2,201 posts
Joined: August 14, 2007
KitMaker: 5,926 posts
AeroScale: 2,201 posts
Posted: Thursday, July 14, 2011 - 10:23 PM UTC
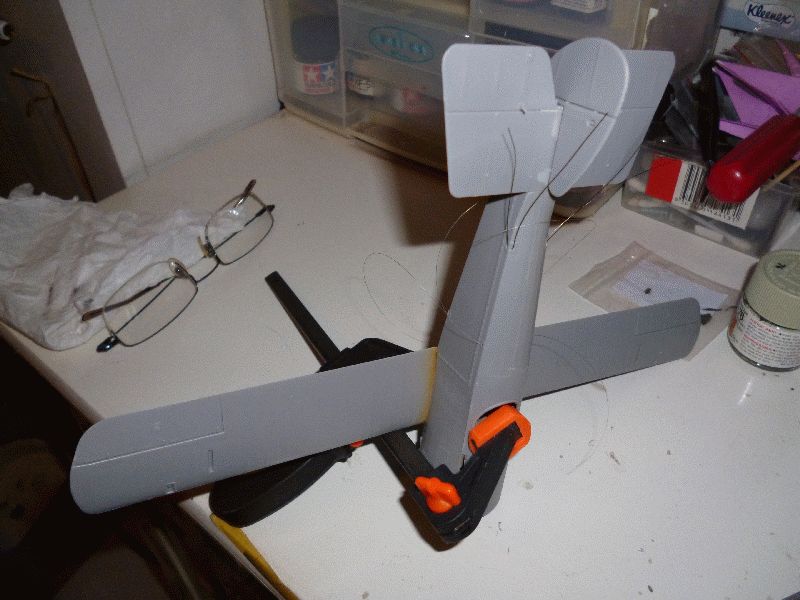
Just a quick update with a casual shot of the Tripey..
As you can see the Tripe has grown hairs from various orifices in its body, could we say it has gone through puberty? Nah, silly analogy. Anyway, the lower wing and turtledeck went on fairly easily with just a little trimming required. Not so the empennage. First up, it doesn't show the right way for it to go on the fuselage.. After I realised it could only go one way there was no real positive location for it at all so copious amounts of liquid cement were applied and it seems to have stuck in the right place.
Not a problem really, but if you are going to build this kit remember it is not a shake 'n' bake kit with 'some modelling skills helpful'.
warreni
South Australia, Australia
Joined: August 14, 2007
KitMaker: 5,926 posts
AeroScale: 2,201 posts
Joined: August 14, 2007
KitMaker: 5,926 posts
AeroScale: 2,201 posts
Posted: Friday, July 15, 2011 - 07:30 PM UTC
Some progress after a week with very little..
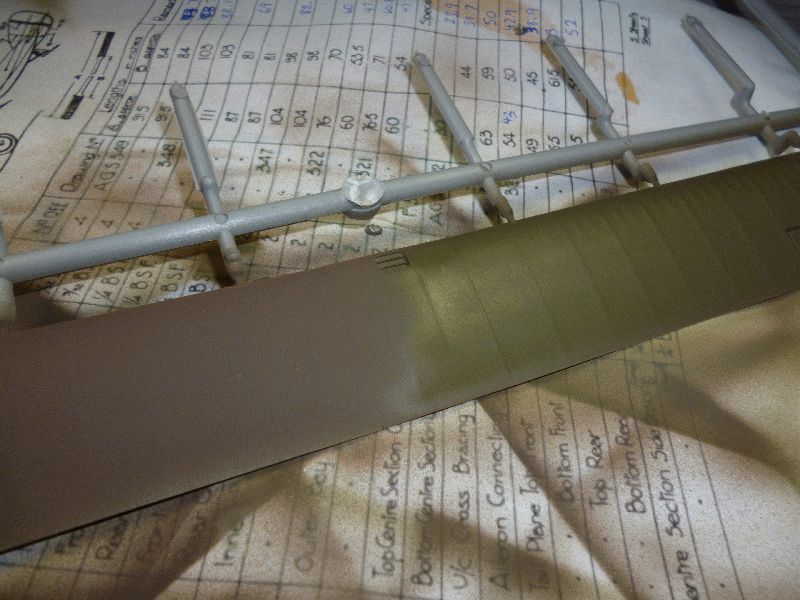
The first coat I gave the Tripe came out very brown, nothing like the Tamiya XF-53 it was supposed to be. I think the paint may have gone off over the decades. At first I thought it could have been a variation on PC10, but after due consideration I gave it a coat or three of Gunze H78. Much more like it, and given a bit of variation with the brownish undercoat. It looks yellowish in the centre as it was still wet and reflecting.
So all parts have been drilled for eyelet mounting and to allow wires too pass through the wing as necessary. Also, there are four rigging wires from within the fuselage, and six control wires that I installed with CA glue before closing up the fuselage.
More progress tomorrow? Maybe..
thegirl
Alberta, Canada
Joined: January 19, 2008
KitMaker: 6,743 posts
AeroScale: 6,151 posts
Joined: January 19, 2008
KitMaker: 6,743 posts
AeroScale: 6,151 posts
Posted: Saturday, July 16, 2011 - 01:51 AM UTC
Your making good progress on this one Warren , even like your shade for PC 10 ....well done so far my friend !
warreni
South Australia, Australia
Joined: August 14, 2007
KitMaker: 5,926 posts
AeroScale: 2,201 posts
Joined: August 14, 2007
KitMaker: 5,926 posts
AeroScale: 2,201 posts
Posted: Tuesday, July 19, 2011 - 03:48 PM UTC
Hi Everyone!
A quick update, I have the decals on and the wing struts in place.
I had to fill some yawning chasms around the struts where they pass through the wings. As it turns out I needn't have painted the wings so early as I have destroyed most of the PC10 on the upper parts of the middle wings sanding back the gap filling CA I used. I didn't think to cover the areas in the immediate vicinity with masking tape..
But that is OK as I needed to touch up the leading edges anyway. Struts are masked and I will squirt the green, sorry, PC10 on tonight.
More piccies then!
thegirl
Alberta, Canada
Joined: January 19, 2008
KitMaker: 6,743 posts
AeroScale: 6,151 posts
Joined: January 19, 2008
KitMaker: 6,743 posts
AeroScale: 6,151 posts
Posted: Tuesday, July 19, 2011 - 04:05 PM UTC
Looking good so far Warren , like the shade of PC 10
wing_nut
New Jersey, United States
Joined: June 02, 2006
KitMaker: 1,212 posts
AeroScale: 468 posts
Joined: June 02, 2006
KitMaker: 1,212 posts
AeroScale: 468 posts
Posted: Thursday, July 21, 2011 - 01:22 AM UTC
Quoted Text
More piccies then!
We are going to hold you to that!
warreni
South Australia, Australia
Joined: August 14, 2007
KitMaker: 5,926 posts
AeroScale: 2,201 posts
Joined: August 14, 2007
KitMaker: 5,926 posts
AeroScale: 2,201 posts
Posted: Friday, July 22, 2011 - 11:46 PM UTC
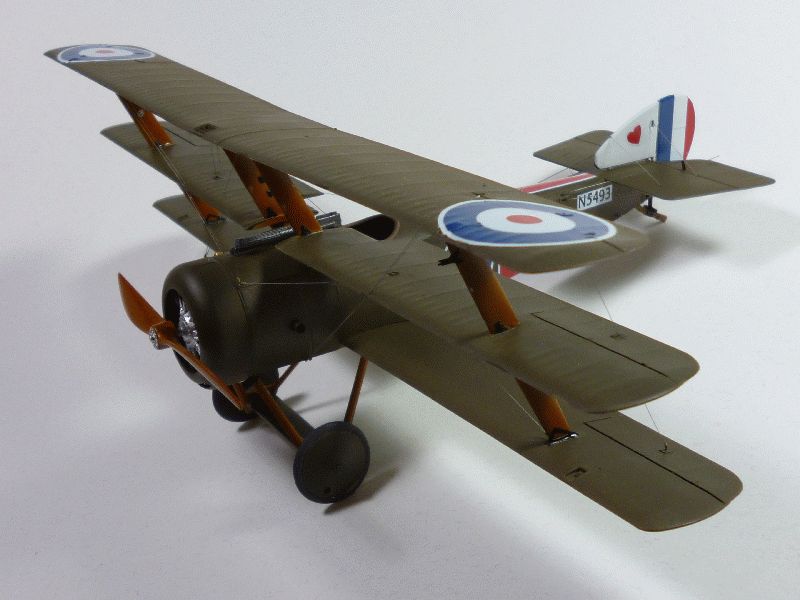
The Tripey is finished. Even as WNW tease us with built-up prototypes here is a Roden one in the finished state, not sitting in a cupboard in its box.
It looks a bit delicate, but is very rigid when it is all glued together. The rigging was relatively simple with some unusual things like wires going through the middle of wings, and quite a number of wires disappearing into the fuselage from points on wings and empenage. I didn't get all the holes through the wings quite right. It will be interesting to see how WNW does the wing penetrators.
Anyway, finally time to start the Roland, and after that it is the Harry Tate is AFC colours.
Thanks for looking.
wing_nut
New Jersey, United States
Joined: June 02, 2006
KitMaker: 1,212 posts
AeroScale: 468 posts
Joined: June 02, 2006
KitMaker: 1,212 posts
AeroScale: 468 posts
Posted: Saturday, July 23, 2011 - 01:25 AM UTC
3 weeks start to finish? The speed has not affected the quality. Well done. One observation if I may... you need to cut the roundel on the upper wing where it spans the hinge line.
thegirl
Alberta, Canada
Joined: January 19, 2008
KitMaker: 6,743 posts
AeroScale: 6,151 posts
Joined: January 19, 2008
KitMaker: 6,743 posts
AeroScale: 6,151 posts
Posted: Saturday, July 23, 2011 - 02:58 AM UTC
Another fine job on a wonderful build Warren .
warreni
South Australia, Australia
Joined: August 14, 2007
KitMaker: 5,926 posts
AeroScale: 2,201 posts
Joined: August 14, 2007
KitMaker: 5,926 posts
AeroScale: 2,201 posts
Posted: Saturday, July 23, 2011 - 09:14 AM UTC
@ Marc, yes Marc I agree. I would but these decals are very brittle and no matter how sharp your knife is they shatter rather than cut, hence why I reluctant to do it.
@ Terri, thanks for that. This build sort of lost its way for a while during the SPAD debacle.
Can't wait for the WNW release. Hopefully they will overcome the dimension issues this kit has. One thing I did notice is that the SPAD and this one seem to have too narrow tyres..
@ Terri, thanks for that. This build sort of lost its way for a while during the SPAD debacle.
Can't wait for the WNW release. Hopefully they will overcome the dimension issues this kit has. One thing I did notice is that the SPAD and this one seem to have too narrow tyres..