_GOTOBOTTOM
World War II
Discuss WWII and the era directly before and after the war from 1935-1949.
Hosted by Rowan Baylis
1:72 Revell Horten Go 229 "Blitzbau"
Middle_Franconian
_VISITCOMMUNITY
Bayern, Germany
Joined: January 02, 2011
KitMaker: 279 posts
AeroScale: 239 posts
Posted: Thursday, July 21, 2011 - 09:21 AM UTC
Hello all ,

this is a report about a Blitzbau of a Horten Go 229 in 1:72 from Revell.
Me and my modelling buddy Rebilda (please see also his report here in the Total Tamiya Campaign) accepted the challenge and wanted to see whether we are capable of building a model within 24 hrs (including some necessary sleep).

My choice for this Blitzbau:

Revellīs 1:72 Horten Go 229.

This is a nice little kit, initially produced in 2004 but currently in production again. Its main features:
• fine recessed panel lines
• very reasonable level of detail: cockpit, landing gear, fuselage framing
• nice decal sheet with 2 fictitious options

I was never really into Luft ī46 and its often “fantastic” projects, but the Horten has always been fascinating me. Although it never went operational at least a prototype flew compared to a lot of other Luft 46 projects.

I like the thought that this plane was capable of going into operational use if there would had been more time (which on the othr hand fortunately not was as we all know). I must admit that it is very pleasing not to have the obligation to follow a certian paint scheme. With such a plane, you are completely free to choose the paint scheme you want. And that was also a reason to "blitzbuild" this kit. No strings attached...

But enough of tedious prologue, letīs start with the kit building:
Rebilda and I started with building on Friday, July 15 at about 10:00 PM.


Thatīs all so far. To be continued...

Servus,

Sebastian
Siderius
_VISITCOMMUNITY
Tennessee, United States
Joined: September 20, 2005
KitMaker: 1,747 posts
AeroScale: 1,673 posts
Posted: Thursday, July 21, 2011 - 10:03 AM UTC
Hi Sebastian, I agree, not being restricted to a particular paint scheme is nice indeed! Thought I would show you what I did with this kit, a build I finished a couple years back. Really enjoy the Horten wing design, amazing how Jack Northrop tried to field the XB-35 (another favorite machine of mine) at the same time that the Horten brothers tried to put into service their concept. Enjoy the kit. Russell


P.S. I used a splinter camoflauge scheme and I believe I used RLM 81/82 for the top of the aircraft, RLM 76 for the bottom.
flitzer
_VISITCOMMUNITY
England - North West, United Kingdom
Joined: November 13, 2003
KitMaker: 2,240 posts
AeroScale: 743 posts
Posted: Friday, July 22, 2011 - 02:44 AM UTC
Very nice job Sebastian.
P
Middle_Franconian
_VISITCOMMUNITY
Bayern, Germany
Joined: January 02, 2011
KitMaker: 279 posts
AeroScale: 239 posts
Posted: Friday, July 22, 2011 - 08:16 AM UTC
-------Horten Go 229 Blitzbau Part Two-------

@ Flitzer: Thanks for dropping in! BTW, a Flitzer would be another nice Luft 46 project...

@ Rusell: Cool looking Horten! Thanks for posting a pic! Was the swastika included in the kit? I remember there is a kit out there of Northrops flying wings. Here in Germany those kits were available from Italeri, both the piston and jet propelled one.

===========================

Ok, going on with my report:

After having taken a look at the sprues I started glueing the middle wing part. Due to the rendering of the tubular framing this is a rather complex component.


I think you get a good impression of the nice level of detail...

On early morning on July 16th the fuselage was completed and all fiddly bits removed from the sprues, prepared for sanding. But we decided to call it a day and to have some rest .


Thatīs all for part 2. To be continued...

Servus,

Sebastian
Siderius
_VISITCOMMUNITY
Tennessee, United States
Joined: September 20, 2005
KitMaker: 1,747 posts
AeroScale: 1,673 posts
Posted: Friday, July 22, 2011 - 11:31 AM UTC
Hi again Sebastian; the swastika was part of an aftermarket decal set of various sized swastika's. Yes, the flying wing from Italeri is a bit of work to build but I'll post of picture of it here to show you what it looks like. Testors originally had the molds for the kit but must of passed them along to Italeri. Keep up the good work your Horten is coming along nicely!! Russell


P.S. The second photo is the top of my refrigerator where part of my collection resides!!
Middle_Franconian
_VISITCOMMUNITY
Bayern, Germany
Joined: January 02, 2011
KitMaker: 279 posts
AeroScale: 239 posts
Posted: Saturday, July 23, 2011 - 07:41 AM UTC
Hello Russell,

thanks for reply. Yes, that was the kit I had in mind... a rather big plane! Nice model!

-------Horten Go 229 Blitzbau Part Three-------

The next part of my report...
Continuing after breakfast with sanding the Horten:


Rescribing the panel lines:


Final coat of primer: After having checked the surface, I put on several coats of Tamiya Fine Surface Primer. Any imperfections will come up after that. It dries very hard and smooth. As you can see time was running rather fast...


Going on with the camo: I used the grey primer coat as the underside coat to speed things up. As I am a fan of the UHU/Blue Tac method, I used it to create a wavy demarcation line in the camo. This was also the first try to use small blobs of this sticky stuff to apply some kind of "mottling".


Applying a coat of dark green color:


Proceeding with the splinter camo: After a short period which allowed the green coat to dry I painted the splinter camo.


On the last picture you can see my buddy Rebilda (also a member of our community) painting his 1:48 Tamiya Spitfire...

Thatīs all for part 3. To be continued...

Servus,

Sebastian
Middle_Franconian
_VISITCOMMUNITY
Bayern, Germany
Joined: January 02, 2011
KitMaker: 279 posts
AeroScale: 239 posts
Posted: Wednesday, July 27, 2011 - 08:43 AM UTC
-------Horten Go 229 Blitzbau Part Three-------

Some small mid-week update...

Finished camo:


Preparing the wheel wells for painting in RLM 02 and the engine outlets in silver:


The result:


Thatīs all for part 4. To be continued...

Servus,

Sebastian
Middle_Franconian
_VISITCOMMUNITY
Bayern, Germany
Joined: January 02, 2011
KitMaker: 279 posts
AeroScale: 239 posts
Posted: Friday, August 26, 2011 - 07:51 PM UTC
-------Horten Go 229 Blitzbau Part Four-------

Sorry for the discontinuance... was busy with other things

Ready for oil wash: To highlight the panel lines I applied a wash of brown-greyish diluted oil paint.


As you can see in the last pictures, time was running too fast. I did not make it in time to finish the build. But I learned a lot of new techniques during this build (a resumé will follow).

Servus,

Sebastian
Middle_Franconian
_VISITCOMMUNITY
Bayern, Germany
Joined: January 02, 2011
KitMaker: 279 posts
AeroScale: 239 posts
Posted: Saturday, September 03, 2011 - 09:23 AM UTC
-------Horten Go 229 Blitzbau Part Five-------


Those who have read the thread carefully have already noticed that there was no time left to finish the Horten within 24 hrs. It took some hours more...

Here is the result:


Servus,

Sebastian


Siderius
_VISITCOMMUNITY
Tennessee, United States
Joined: September 20, 2005
KitMaker: 1,747 posts
AeroScale: 1,673 posts
Posted: Saturday, September 03, 2011 - 09:32 AM UTC
Sebastian! Just marvelous work there! I really enjoyed looking at your finished product. The flying wing is a beautiful design, I must build another one soon. Russell
Middle_Franconian
_VISITCOMMUNITY
Bayern, Germany
Joined: January 02, 2011
KitMaker: 279 posts
AeroScale: 239 posts
Posted: Saturday, September 03, 2011 - 09:40 AM UTC
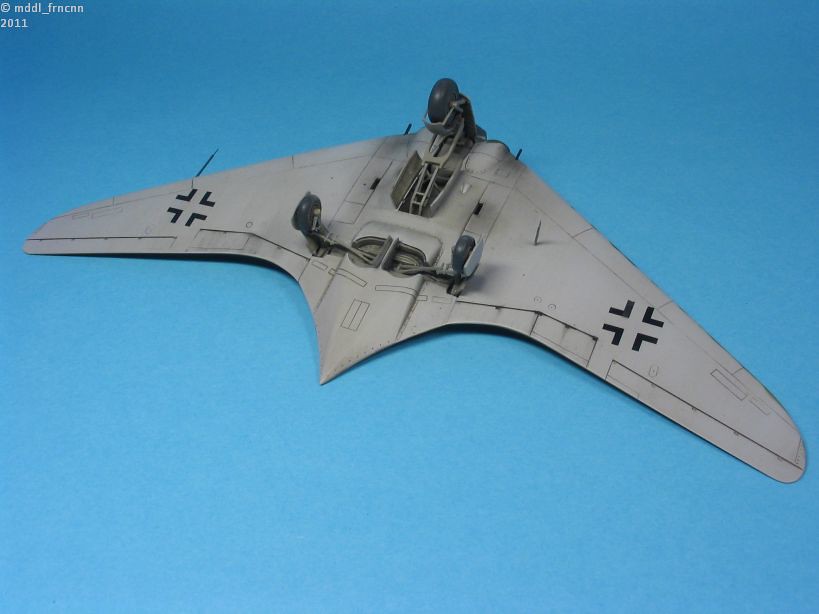
-------Horten Go 229 Blitzbau Part Six: Resumé-------

@ Russell: thanks! That was a quick reply by the way...

Resumé: Some thoughts about this Blitzbau...

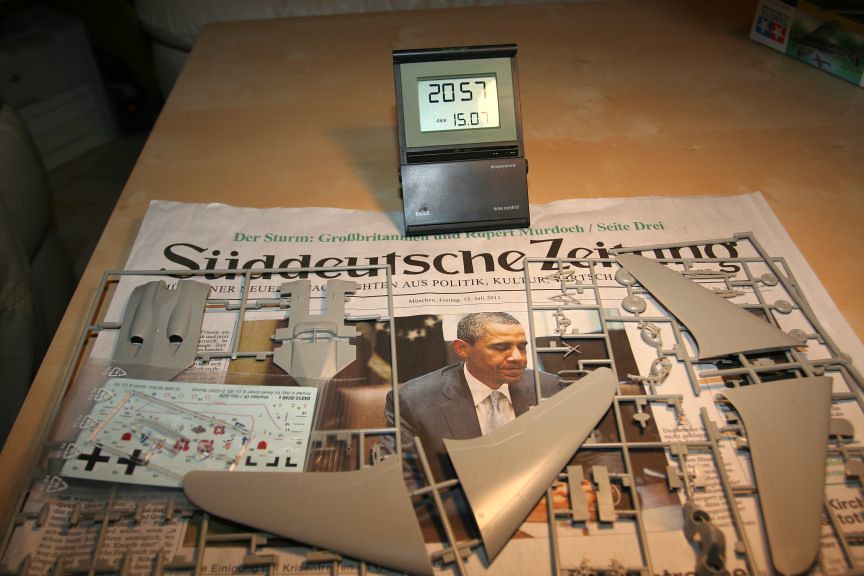
Although we did not make it in time it was GREAT fun!!!

Some techniques which had been applied due to time pressure proved to be very helpful also for "normal" builds to me:

Using cyanoacrylate glue together with a "kicking" solvent:
This is a technique which I have learned from Rebilda. He trusts the Zap-A-Gap kicker in use with the respective glue.

(please look also at his step-by-step building blog of Revells 1:48 F-15 E:)

With the kicker, the glue cures imediately. So you can parts together very fast. Furthermore, puttying small seams and holes can be done very fast with superglue and kicker.

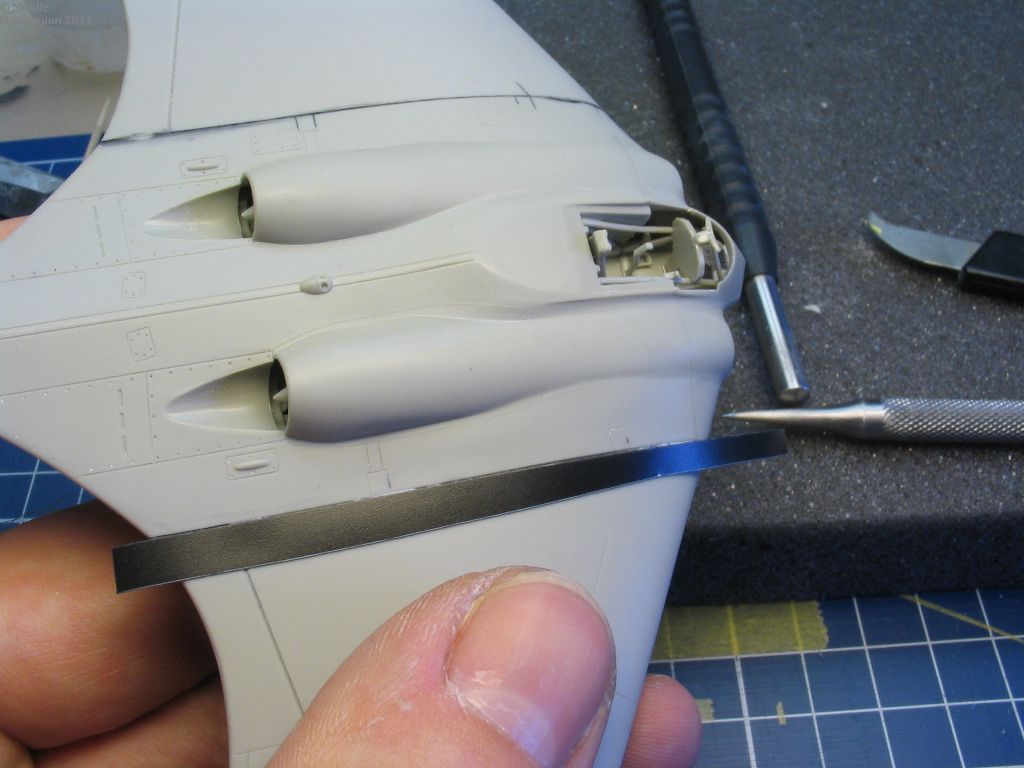
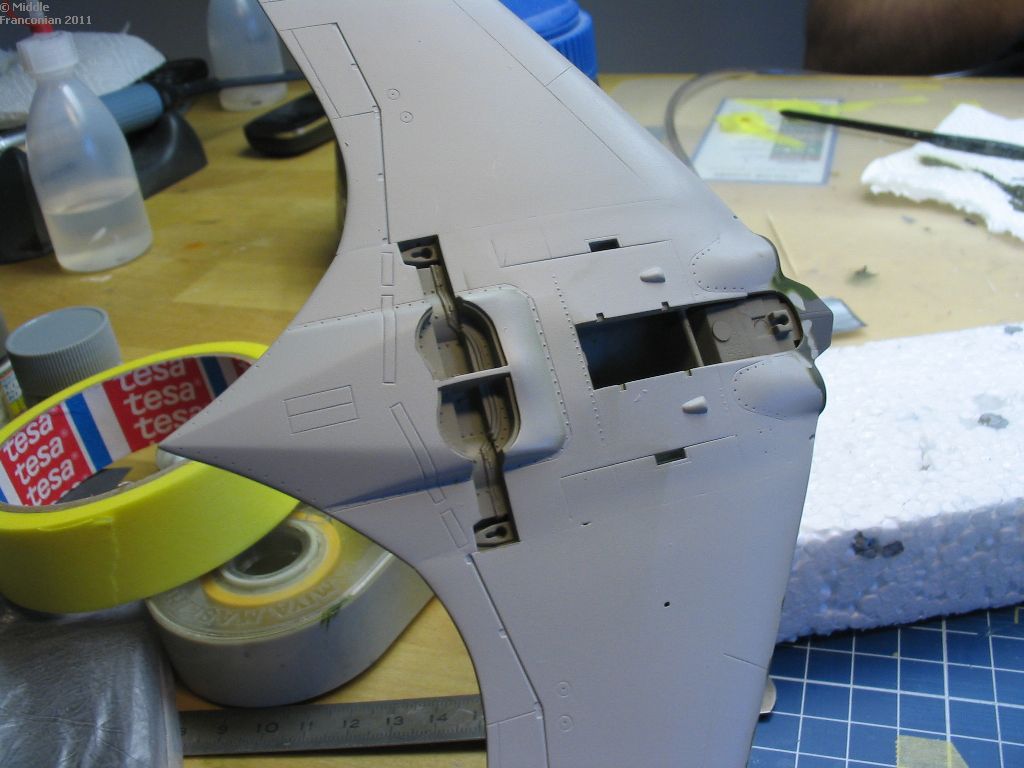
Using a sharp pencil to create panel lines:
This avoids the often tedious rescribing...

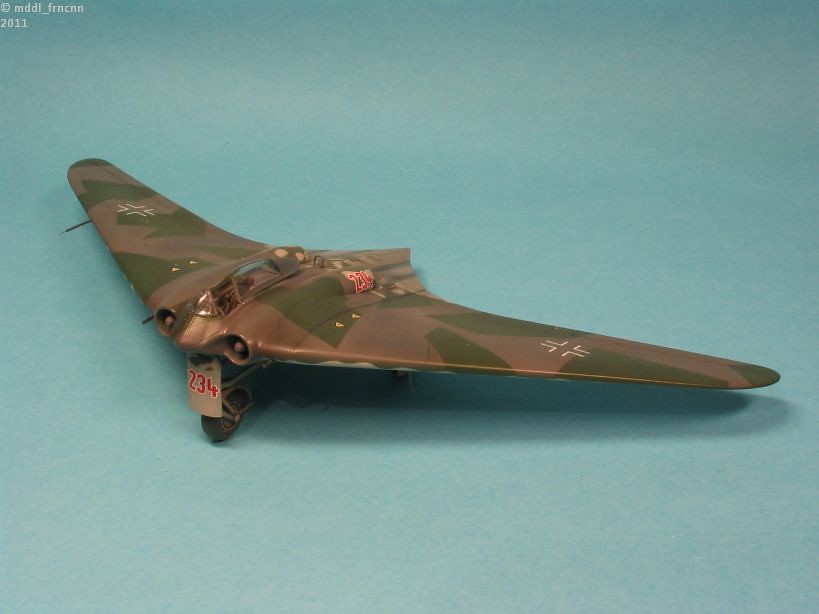
Using mircromesh cloths to get rid of imperfections in the paint coat :
I used them first time. Due to the fine grid you does not scratch the surface and damage the paint. Just the raw top layer of the paint coat coat is removed and you get a smooth finish. In my case the finish was so good that I even could do without applying a clear cote before decaling.

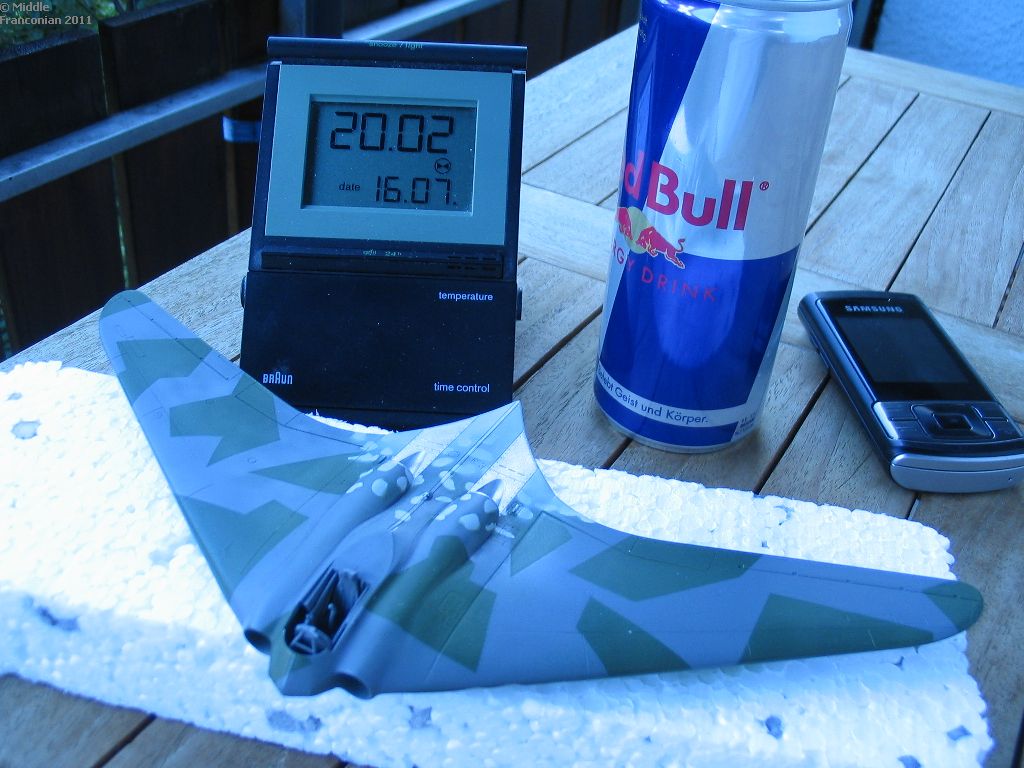
Using Tamiya Fine Surface Primer straight from the rattle can:
Dries fast and hard (approx. 20 min.) and gives you an absolutely smooth finish (also a tip from Rebilda, many thanks my friend!!). In my case, I even used this color as RLM 76.

Using a black broad permant marker for checking the seams: Another precious tip from Rebilda. He makes a short sweep with the marker on the area which has the seam (e.g. trailing edge of the wing). This makes it easier to discover any imperfections. After applying some superglue and kicker and sanding the marker must have been gone. So you have a seamless trailing edge.

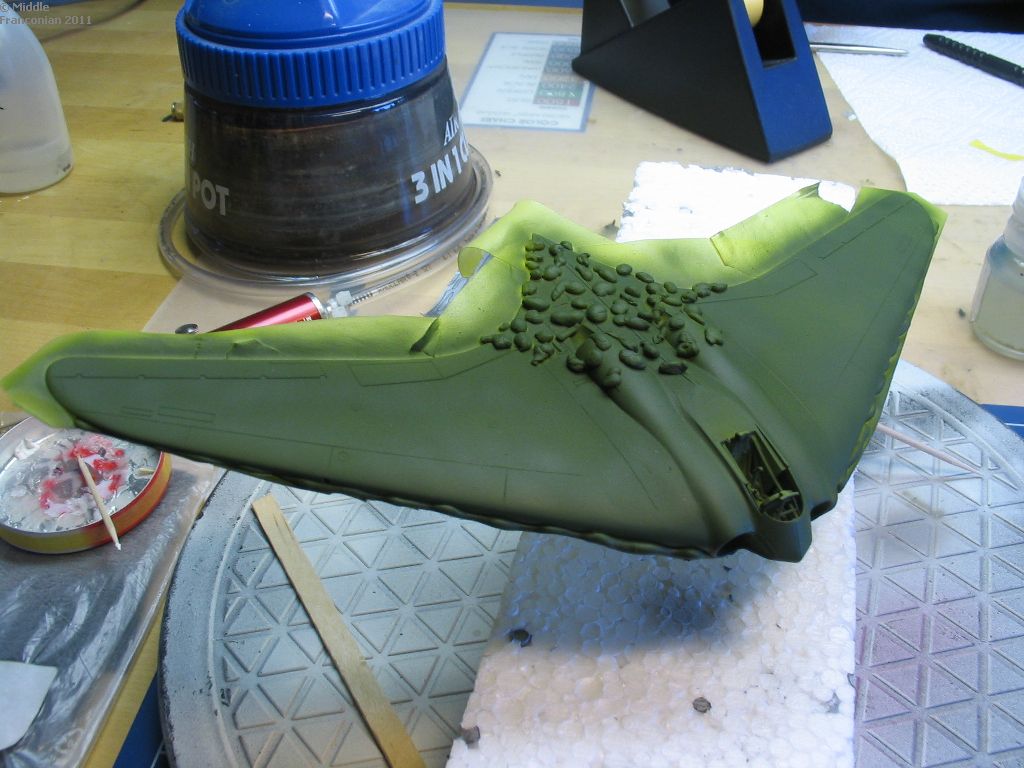
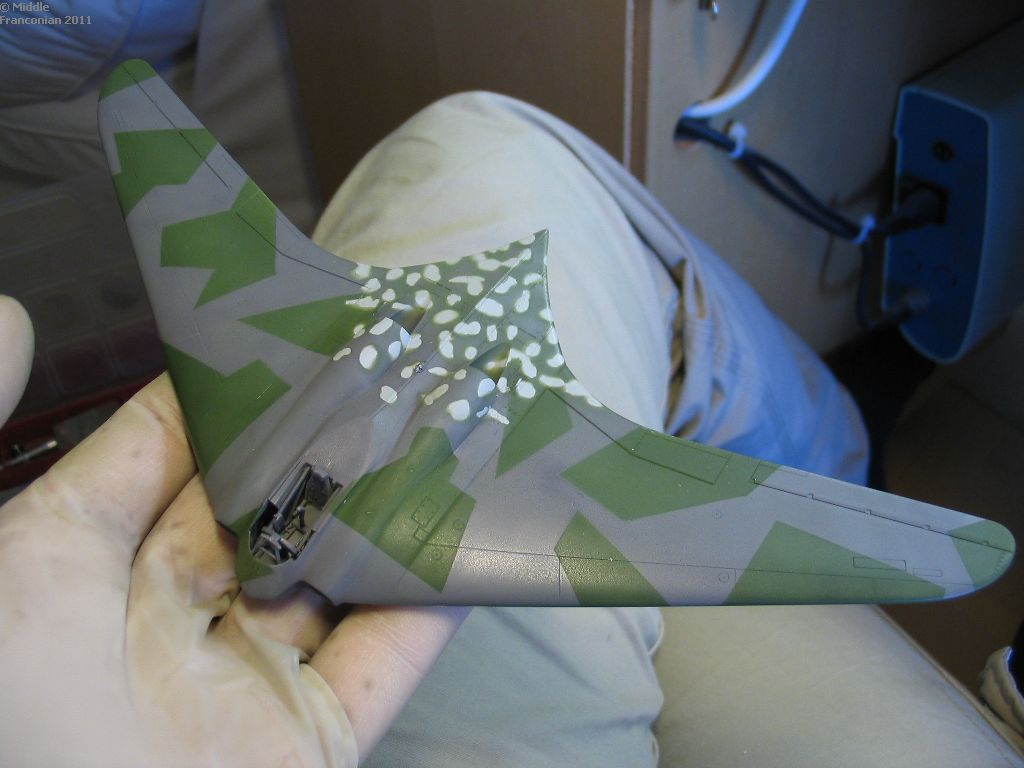
Using UHU-tack for mottling or creating soft demarcation lines:
An often posted tip, but very efficient method. See the photos in the blog above.

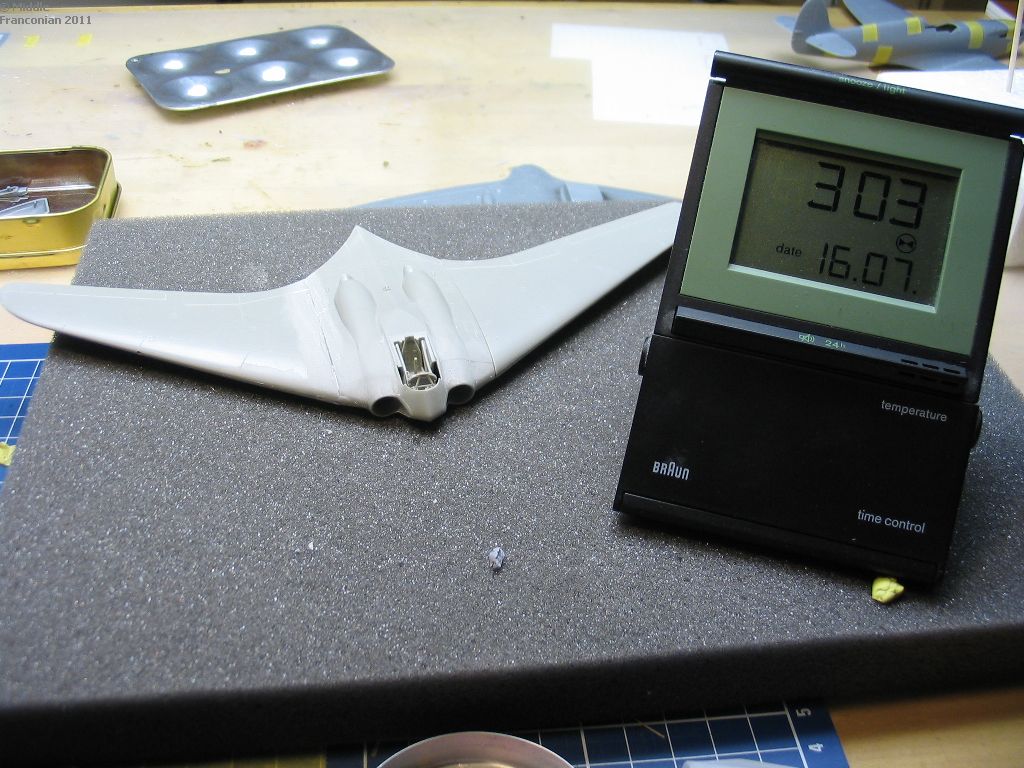
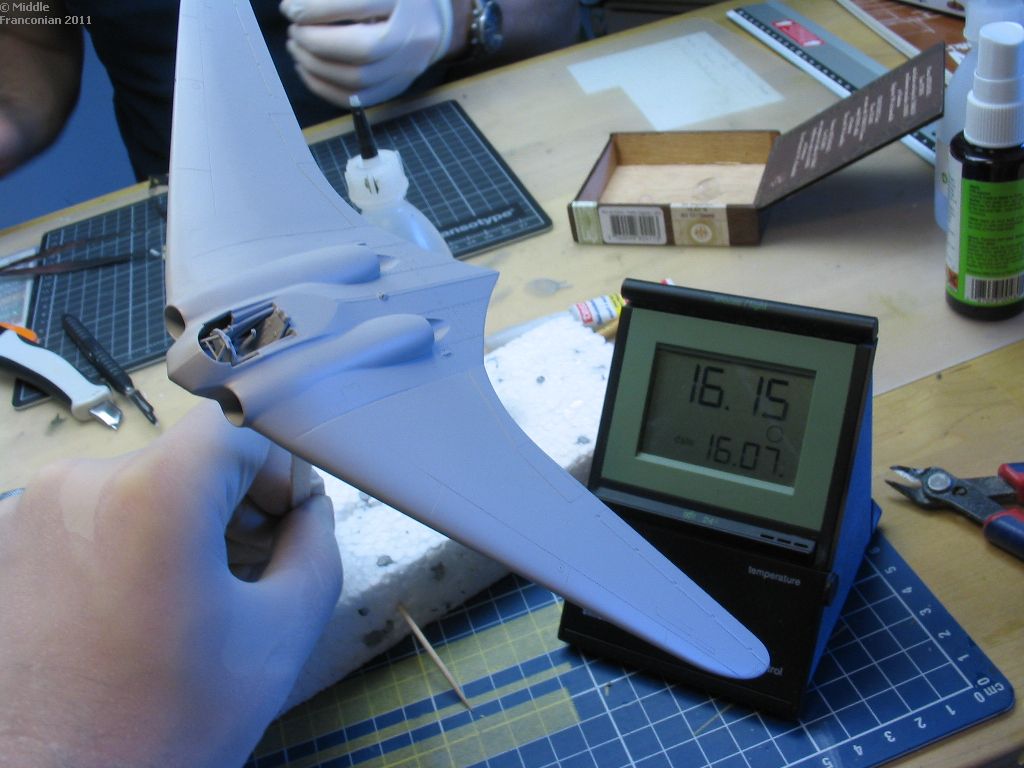
Estimating the time when the paint coat is dry:
Depends on your own experience with the color system you use. For me (using Gunze acrylic paint thinned with isopropanol and Revell Aqua Color with its special thinner), I could go on with masking and applying the next coats of paint withing a short period of time (approx. 20 min.). You have to try this yourself to get a feeling what it is possible or not. Of course, mat colors dry much faster than high gloss colors.

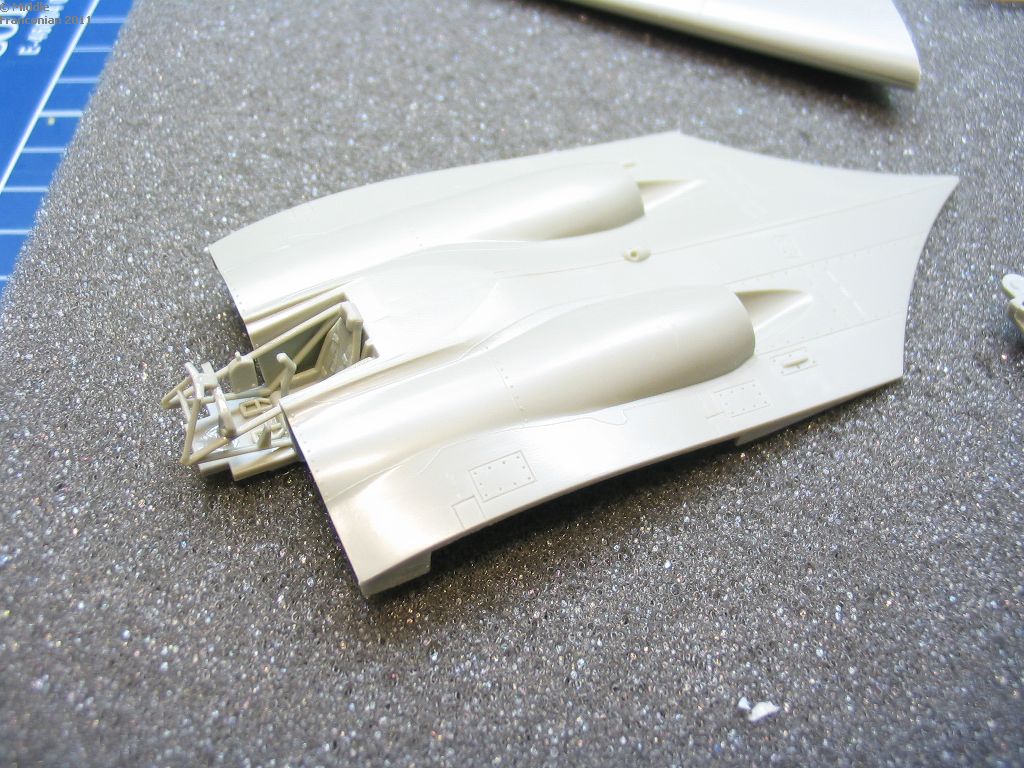
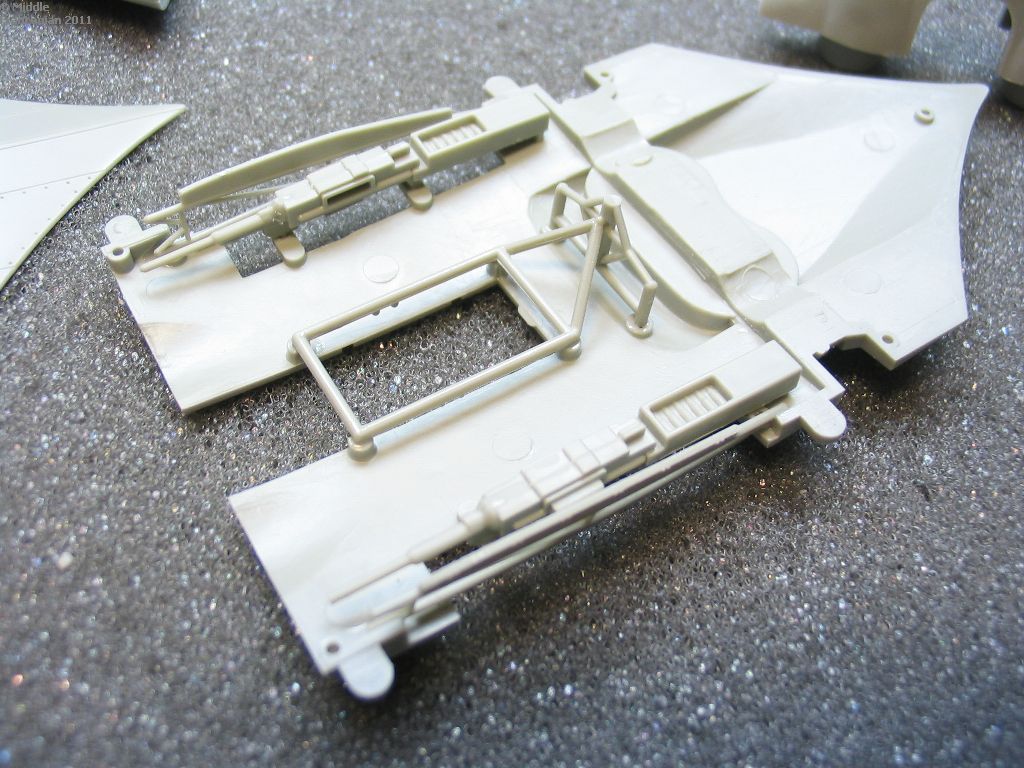
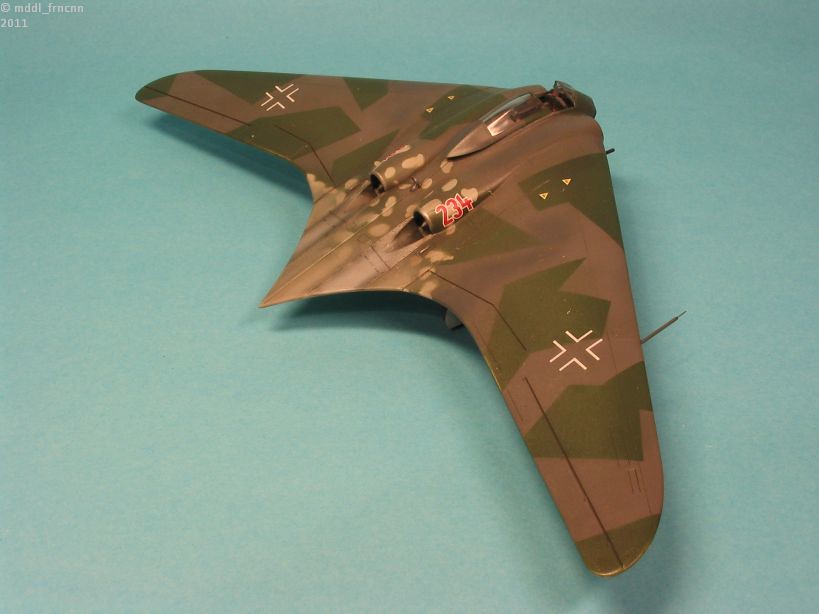
Make an effort and kick your AMS over-detailing attitude (that was hard for me...):
- Areas which are not visible do not need sanding, further detailling and painting! In my case: the guns. They hide behind a cover which I decided to close
- Areas which are barely visible: it is the same with that. Why putting much effort into a small 1:72 cockpit when it will be covered with the canopy anyway? The main aim in my eyes is a create a good overall looking model. The cockpit interiorīs addition is only small in this case.
Of course this depends on the model and everybody has to decide on its own how much he details his model. For me, I look from the speed build point of view on that subject.

Hope you find some hint useful. Questions and comments welcome!

Servus,

Sebastian
Jessie_C
_VISITCOMMUNITY
British Columbia, Canada
Joined: September 03, 2009
KitMaker: 6,965 posts
AeroScale: 6,247 posts
Posted: Saturday, September 03, 2011 - 10:59 AM UTC

Quoted Text


Although we did not make it in time...


I seem to recall that the Horten company had similar problems with their 1:1 version a few years ago.
Buckeye198
_VISITCOMMUNITY
Ohio, United States
Joined: May 02, 2010
KitMaker: 596 posts
AeroScale: 197 posts
Posted: Saturday, September 03, 2011 - 06:55 PM UTC
Great Blitzbau, Sebastian! I've always loved the Horten too...most of Luft '46 is cool for a break from reality, but when I saw the REAL Ho IX in the Smithsonian Air/Space Museum, I was completely blown away and have stayed that way about the aircraft ever since! Revell's kit looks pretty good all around (I have sworn many times to stay away from Revell, but I always try just one more kit...)

Jessie...got a good laugh out of that one
ludwig113
_VISITCOMMUNITY
England - South East, United Kingdom
Joined: February 05, 2008
KitMaker: 1,381 posts
AeroScale: 1,110 posts
Posted: Saturday, September 03, 2011 - 07:35 PM UTC
very nice, i hope my 1/48 version comes out as nice as your one.

paul
Middle_Franconian
_VISITCOMMUNITY
Bayern, Germany
Joined: January 02, 2011
KitMaker: 279 posts
AeroScale: 239 posts
Posted: Saturday, September 03, 2011 - 10:40 PM UTC
Thanks for the replies!

@ Jessie: , yep, 1000 years can be short... but I am very, very happy with that!

@ Paul: Thatīs the Dragon kit, right?

@ Robby: YOU have seen the original?? I envy you... The aircraftīs design is really amazing.
Regarding the Revell kits: To me, Revell kits are not that "cool" like Tamiya or Hasegawa kits. They are available almost everywhere here in Germany and are not that "exotic". But when I start to think about it I must admit that Revell (of Germany in this case) makes kits of great quality, with great decals and of subjects which are not always mainstream. I think of the BV-222, C-160 Transall, BAe Hawk in 1:32...
But they are not that cool, yes... Maybe the Volkswagen of the modelling industry?
ludwig113
_VISITCOMMUNITY
England - South East, United Kingdom
Joined: February 05, 2008
KitMaker: 1,381 posts
AeroScale: 1,110 posts
Posted: Sunday, September 04, 2011 - 12:57 AM UTC

Quoted Text

Thanks for the replies!

@ Paul: Thatīs the Dragon kit, right?


yes,looks like a good kit ...in the box! :-)
Buckeye198
_VISITCOMMUNITY
Ohio, United States
Joined: May 02, 2010
KitMaker: 596 posts
AeroScale: 197 posts
Posted: Sunday, September 04, 2011 - 04:33 AM UTC
Sebastian, my mistake...I only saw an H III on display Gimme a break though, I was only 14 or so when I saw it! Their Ho229V3 is still undergoing renovation. you can do a Google image search for "Smithsonian Horten" and you'll find shots of the H III as well as of the V3 in their workshop. Still, to see the H III fuselage right in front of your face is a VERY chilling experience! If you ever some to the US (highly recommended ) try to visit the Smithsonian National Air and Space Museum in Washington DC. Or if you're in the midwest, come to Dayton Ohio, the home of the National Museum of the Air Force. They have some outstanding pieces on display!

Concerning Revell, I really haven't built a kit of theirs in a long time...it was probably personal error that turned me off from their kits. I think that this one will be the kit for me to seriously try out Revell!
Jessie_C
_VISITCOMMUNITY
British Columbia, Canada
Joined: September 03, 2009
KitMaker: 6,965 posts
AeroScale: 6,247 posts
Posted: Sunday, September 04, 2011 - 04:55 AM UTC
Any new-tooled kit Revell has issued in the past 10 years or so will be very good. But be careful; Revell (both USA and Germany) has a tendency to re-issue their older kits in new boxes and they have some real dogs in the catelogue. It's disappointing to open a new box to find something from the 1950s in it. When in doubt, ask in the forums. Someone will know whether to stay away from a particular kit or not.

As far as this Horten goes, it's excellent. You will enjoy building it.
SGTJKJ
#041
_VISITCOMMUNITY
Kobenhavn, Denmark
Joined: July 20, 2006
KitMaker: 10,069 posts
AeroScale: 3,788 posts
Posted: Monday, September 05, 2011 - 05:14 AM UTC
Very nice build, Sebastian. Blitz build for a blitz bomber

This kit definitely looks like it is something for the stash.

Thanks for sharing
Middle_Franconian
_VISITCOMMUNITY
Bayern, Germany
Joined: January 02, 2011
KitMaker: 279 posts
AeroScale: 239 posts
Posted: Monday, September 05, 2011 - 09:33 AM UTC

Quoted Text

But be careful; Revell (both USA and Germany) has a tendency to re-issue their older kits in new boxes and they have some real dogs in the catelogue. It's disappointing to open a new box to find something from the 1950s in it.


Yeah. The 1/72 Revell of Germany P-51D and the Me-109E are such examples for "dog kits". I cannot understand why RoG has reissued those two dinosaurs . The new decal sheets make those kits not more attractive.

@ Paul: I have heard that the Dragon has, ehm, some shortcomings regarding the overall fit... But this plane in 1/48 should look even better!

@ Robby: A journey to the U.S. is one of my wishes... but my next holiday is already planned
A visit of the National Air and Space Museum in Washington DC would be great!! Maybe next year...

@ Jesper: Yep, winter comes, increase your stock!

@ all: thanks for dropping in!!
Rebilda
#057
_VISITCOMMUNITY
Bayern, Germany
Joined: May 11, 2010
KitMaker: 248 posts
AeroScale: 123 posts
Posted: Tuesday, September 13, 2011 - 09:37 PM UTC
Yeah, man!

GREAT build!!! Especially since I seen it being born!

Someday you'll have to stand by me and I'll that Dragon box......

See you soon!
matrixone
_VISITCOMMUNITY
Oregon, United States
Joined: February 07, 2004
KitMaker: 869 posts
AeroScale: 862 posts
Posted: Wednesday, September 14, 2011 - 07:08 AM UTC
Very nice Horten!

I agree with the idea of not wasting time painting and detailing some of the hidden or hard to see areas on these smaller scale models. Years ago I spent much time adding extra detail and painting and weathering to many of my 1/72 scale models but after a while got tired of not being able to see all the extra work I put into them. Now I spend more of my time trying to get a good exterior finish and correct weathering for the models...at least its easy to see the effort I put into the models.

Matrixone
 _GOTOTOP