Colorful Pilatus Porter PC-6 build
California, United States
Joined: April 01, 2002
KitMaker: 4,287 posts
AeroScale: 1,164 posts
Posted: Friday, July 22, 2011 - 04:01 PM UTC
Finally getting started on this build. Should move along rather quickly as I have already built one of these before. Could not resist these markings!! They are just too cool. Not a lot done this evening, but it's a start. More to follow soon. "Q"

Box Art-

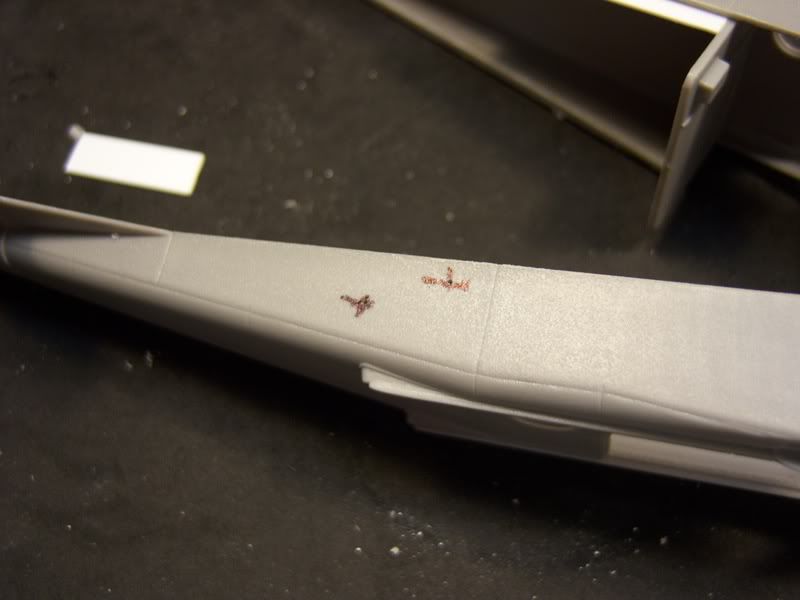
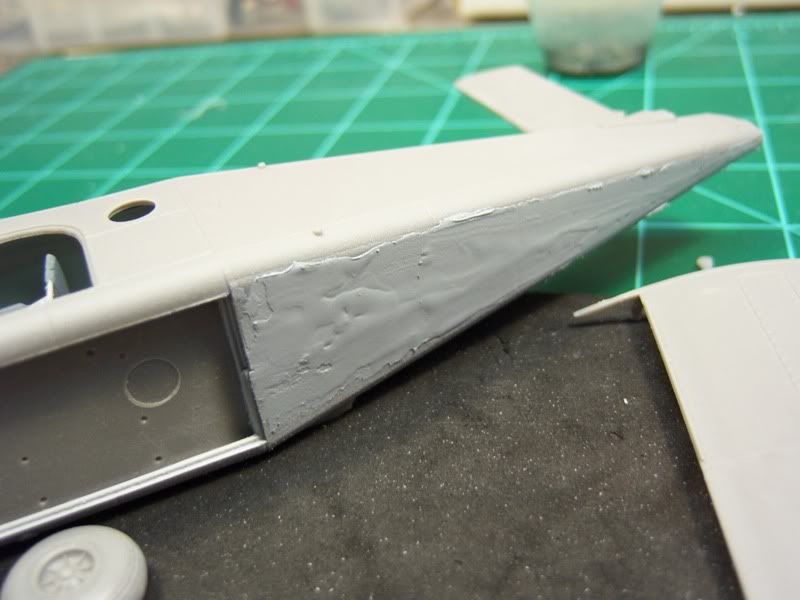
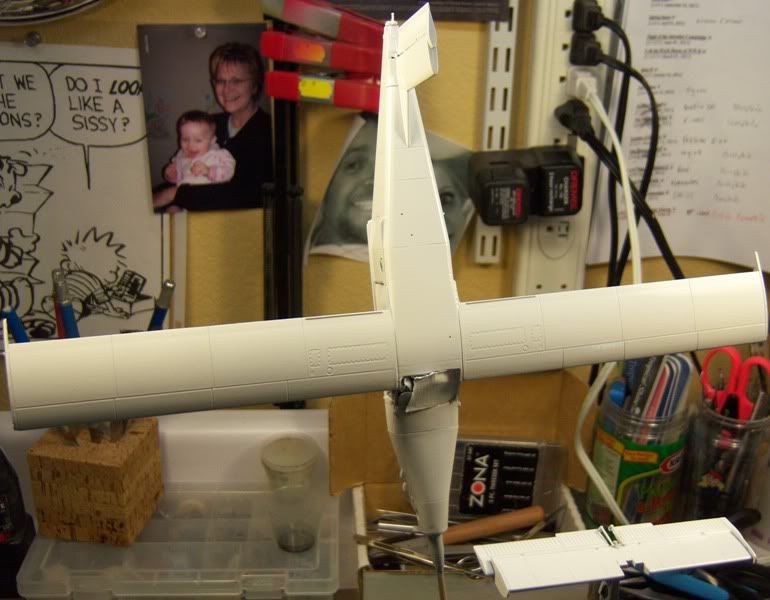
Holes plotted and drilled along the top of the fuselage and rear bulk head installed

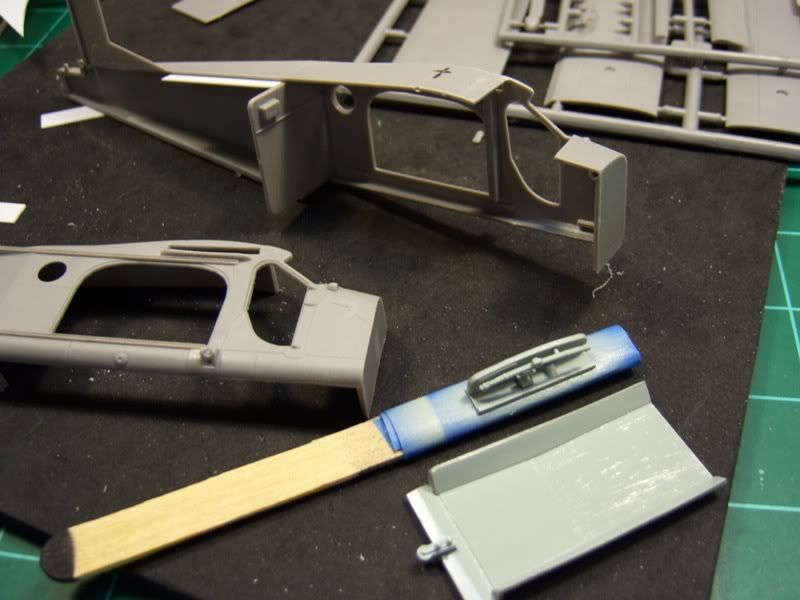
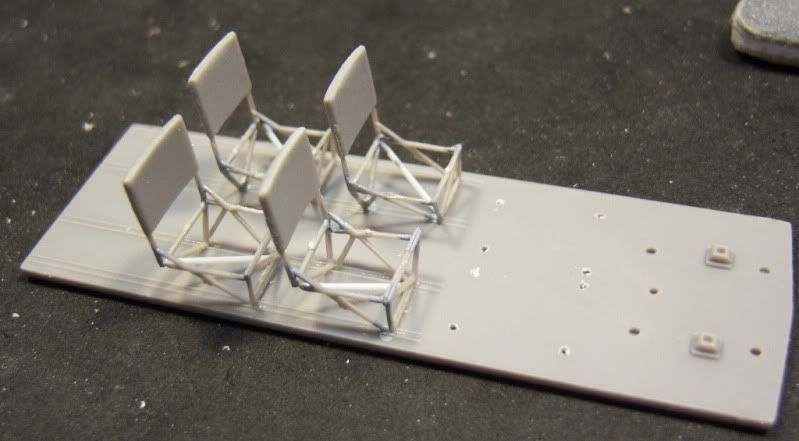
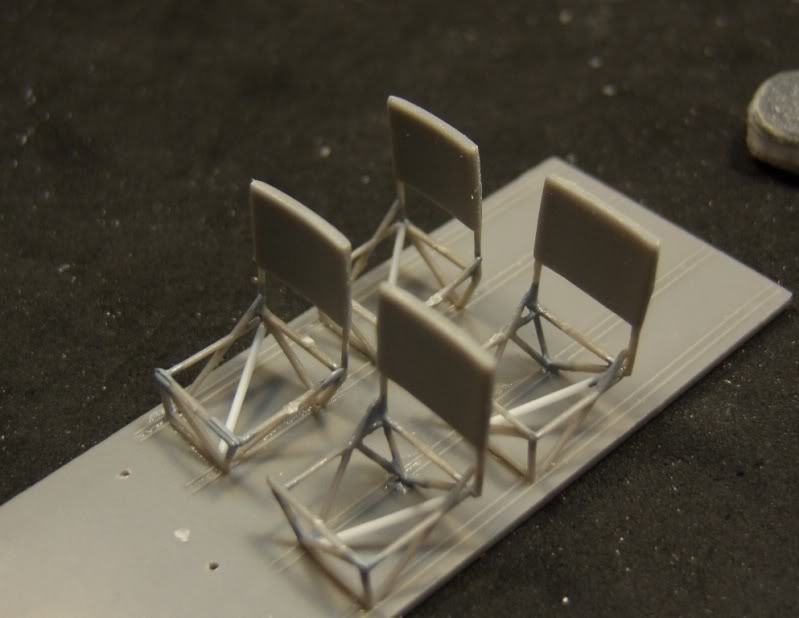
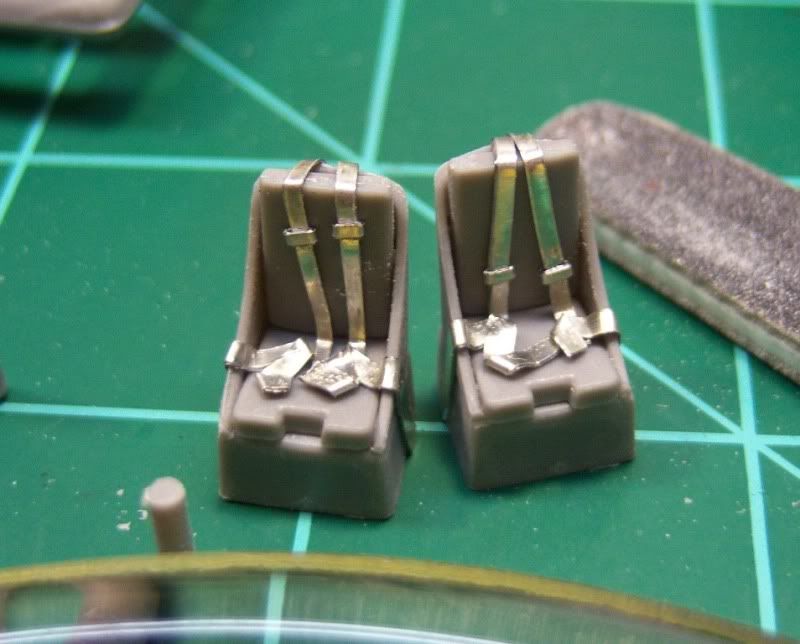
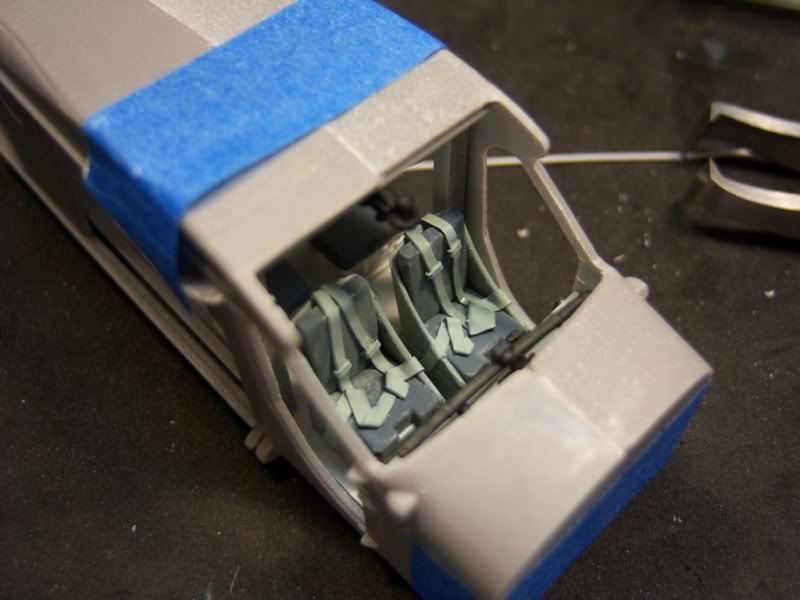
Interior roof and IP painted...
"Don't fear the night, fear what hunts at night"
litespeed
 News Reporter
England - North West, United Kingdom
Joined: October 15, 2009
KitMaker: 1,976 posts
AeroScale: 1,789 posts
Posted: Friday, July 22, 2011 - 11:00 PM UTC
Looking forward to seeing this build Matt.
All the best.
tim
California, United States
Joined: April 01, 2002
KitMaker: 4,287 posts
AeroScale: 1,164 posts
Posted: Monday, July 25, 2011 - 03:34 PM UTC
"Don't fear the night, fear what hunts at night"
Colorado, United States
Joined: January 25, 2004
KitMaker: 11,669 posts
AeroScale: 11,011 posts
Posted: Monday, July 25, 2011 - 04:02 PM UTC
Q its great to see you get to this. Roden will be notified. Model On!
". . .The most important thing is to know why you build and then get the most that you can out of building." via D.D.
California, United States
Joined: April 01, 2002
KitMaker: 4,287 posts
AeroScale: 1,164 posts
Posted: Monday, July 25, 2011 - 04:35 PM UTC
No problem. Didn't want to wait too awful long...I've had it awhile now. More to follow soon. I got the cockpit painted this evening. Will post pics tomorrow. "Q"
ps. DC-6 to follow shortly...
"Don't fear the night, fear what hunts at night"
California, United States
Joined: April 01, 2002
KitMaker: 4,287 posts
AeroScale: 1,164 posts
Posted: Tuesday, July 26, 2011 - 03:51 AM UTC
"Don't fear the night, fear what hunts at night"
California, United States
Joined: April 01, 2002
KitMaker: 4,287 posts
AeroScale: 1,164 posts
Posted: Tuesday, July 26, 2011 - 12:15 PM UTC
"Don't fear the night, fear what hunts at night"
California, United States
Joined: April 01, 2002
KitMaker: 4,287 posts
AeroScale: 1,164 posts
Posted: Saturday, July 30, 2011 - 02:04 AM UTC
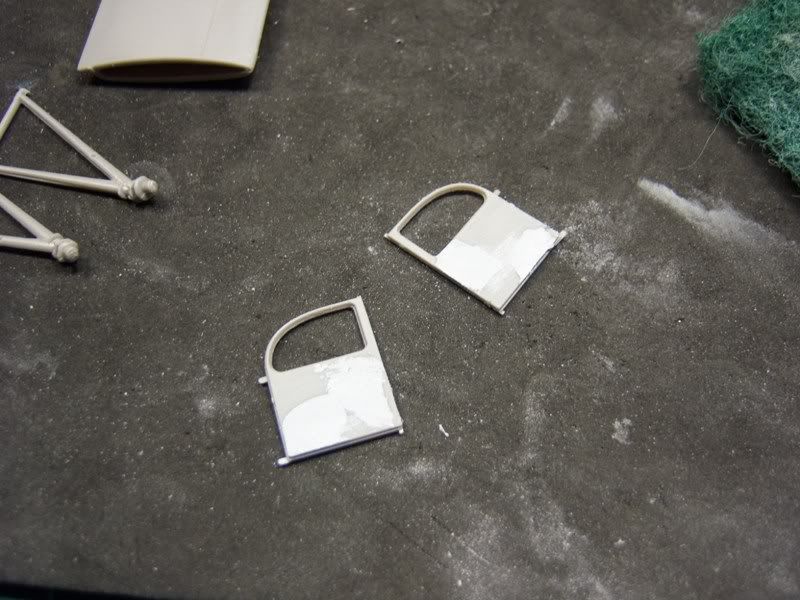
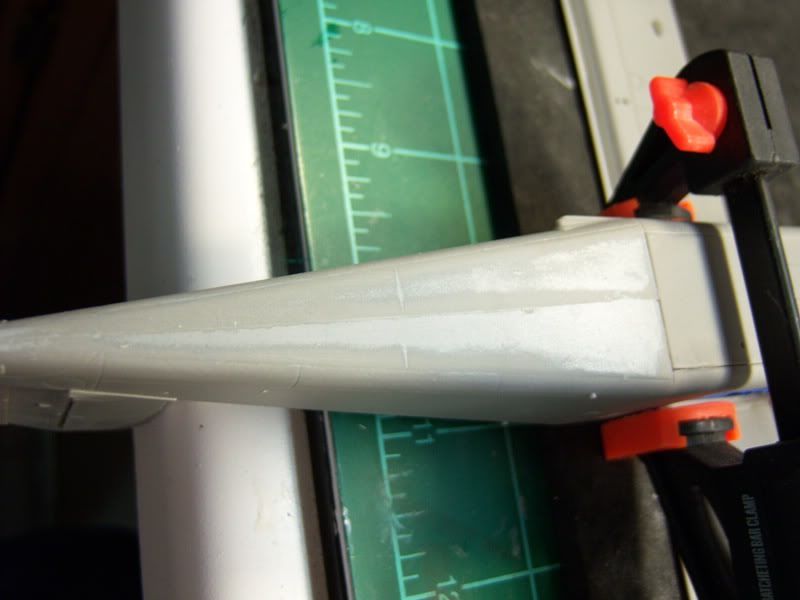
Taking a slight break from the Pilatus for a few days. Had to do some putty work which is drying and I'm getting ready for the IPMS National's in Omaha next week. Will pick it back up once I return. Thanks for following along... "Q"
"Don't fear the night, fear what hunts at night"
California, United States
Joined: April 01, 2002
KitMaker: 4,287 posts
AeroScale: 1,164 posts
Posted: Tuesday, August 23, 2011 - 03:38 PM UTC
"Don't fear the night, fear what hunts at night"
California, United States
Joined: April 01, 2002
KitMaker: 4,287 posts
AeroScale: 1,164 posts
Posted: Friday, August 26, 2011 - 02:31 PM UTC
"Don't fear the night, fear what hunts at night"
California, United States
Joined: April 01, 2002
KitMaker: 4,287 posts
AeroScale: 1,164 posts
Posted: Monday, August 29, 2011 - 10:01 AM UTC
"Don't fear the night, fear what hunts at night"
California, United States
Joined: April 01, 2002
KitMaker: 4,287 posts
AeroScale: 1,164 posts
Posted: Thursday, September 01, 2011 - 05:11 AM UTC
"Don't fear the night, fear what hunts at night"
California, United States
Joined: April 01, 2002
KitMaker: 4,287 posts
AeroScale: 1,164 posts
Posted: Friday, September 02, 2011 - 11:33 AM UTC
"Don't fear the night, fear what hunts at night"
British Columbia, Canada
Joined: September 03, 2009
KitMaker: 6,965 posts
AeroScale: 6,247 posts
Posted: Friday, September 02, 2011 - 12:02 PM UTC
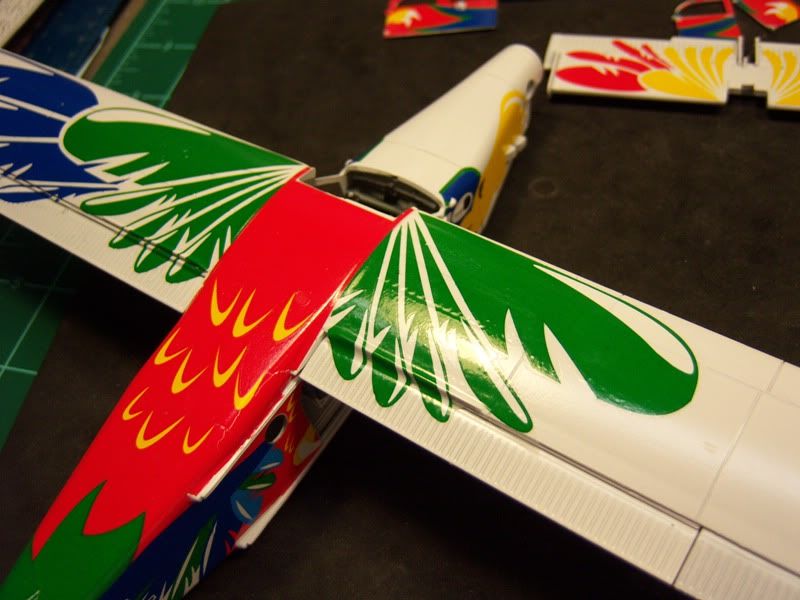
Aren't those Roden decals fun?
When once you have tasted flight you will walk the Earth with your eyes turned skyward.
For there you have been, and there you will always long to return.
-Leonardo Da Vinci
California, United States
Joined: April 01, 2002
KitMaker: 4,287 posts
AeroScale: 1,164 posts
Posted: Friday, September 02, 2011 - 02:21 PM UTC
Yep. Just like a root canal...

Think I'm going to try a hair dryer first and see how that works. Have done that in the past with good results. "Q"
"Don't fear the night, fear what hunts at night"
British Columbia, Canada
Joined: September 03, 2009
KitMaker: 6,965 posts
AeroScale: 6,247 posts
Posted: Friday, September 02, 2011 - 04:59 PM UTC
The boiling water trick worked wonders for my AN-12.
When once you have tasted flight you will walk the Earth with your eyes turned skyward.
For there you have been, and there you will always long to return.
-Leonardo Da Vinci
Colorado, United States
Joined: January 25, 2004
KitMaker: 11,669 posts
AeroScale: 11,011 posts
Posted: Friday, September 02, 2011 - 07:38 PM UTC
Boiling water trick - Been there done that on a Roden 1:48 Fokker D.VII - fully covered using the Roden 5 colour lozenege decals.
". . .The most important thing is to know why you build and then get the most that you can out of building." via D.D.
California, United States
Joined: April 01, 2002
KitMaker: 4,287 posts
AeroScale: 1,164 posts
Posted: Saturday, September 03, 2011 - 12:09 PM UTC
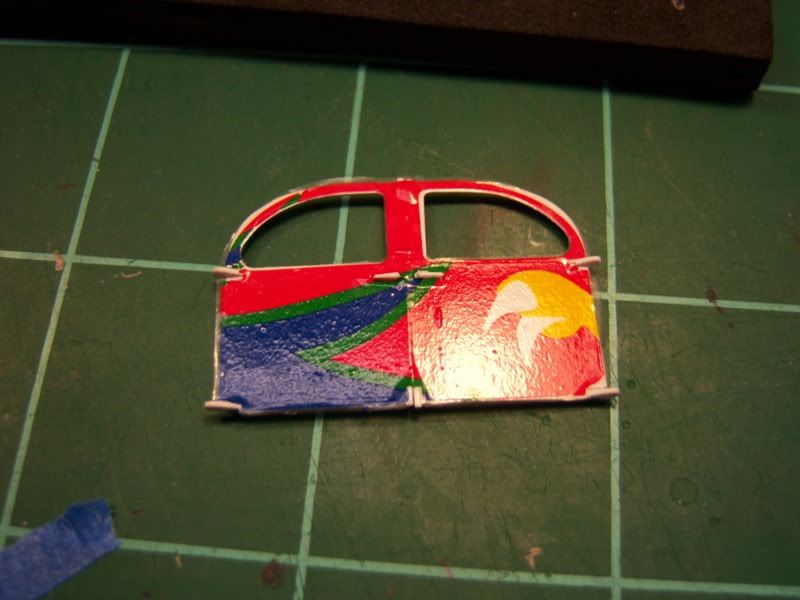
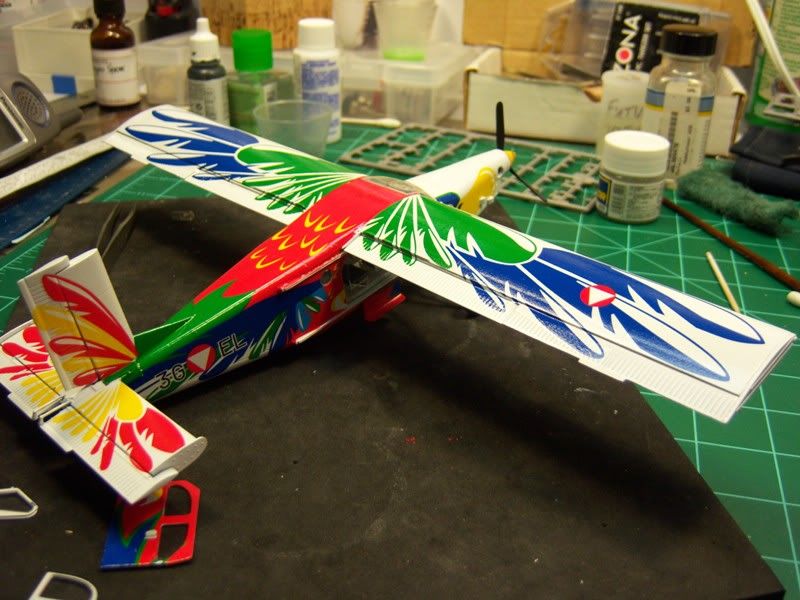
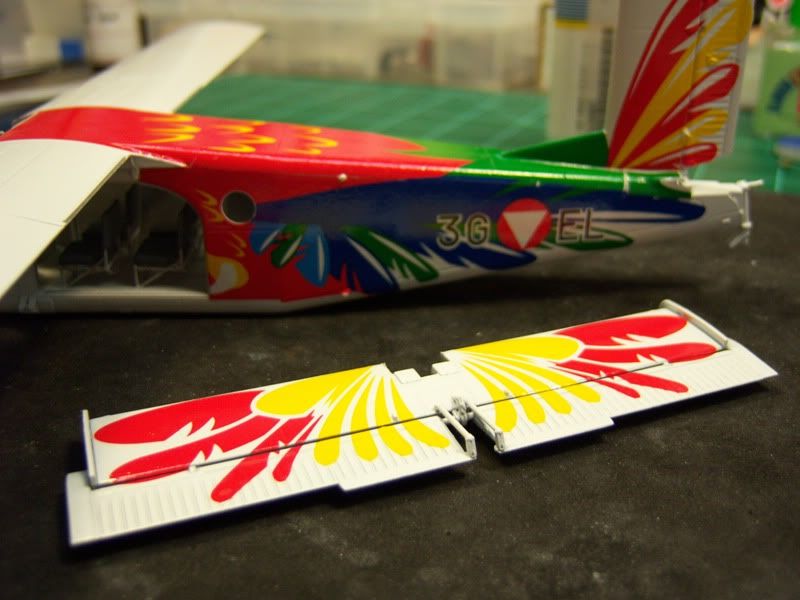
I found that my hair dryer technique works well with these stubborn things. I tried it out on the elevators and was really happy with how things came out. I laid them in place, worked them to where they needed to be, removed any excess water with a Q-tip, then hit it with the hair dryer set on low. I could actually see the decal begin settling into the nooks and crannies. While it was still softened I applied my Solvaset and things went well from there. I noticed that Roden thoughtfully provided some extra strips of decal material on the sheet for touch ups. Now I shouldn't have to match any paint
Going to let this set for awhile so I don't screw anything up. More to follow soon.
Thanks, "Q"
ps. I also used it to fix some of the problem areas I encountered at the beginning.


"Don't fear the night, fear what hunts at night"
California, United States
Joined: April 01, 2002
KitMaker: 4,287 posts
AeroScale: 1,164 posts
Posted: Sunday, September 04, 2011 - 05:06 AM UTC
"Don't fear the night, fear what hunts at night"
California, United States
Joined: April 01, 2002
KitMaker: 4,287 posts
AeroScale: 1,164 posts
Posted: Sunday, September 04, 2011 - 02:41 PM UTC
"Don't fear the night, fear what hunts at night"
Lisboa, Portugal
Joined: August 27, 2010
KitMaker: 679 posts
AeroScale: 669 posts
Posted: Sunday, September 04, 2011 - 03:12 PM UTC
How! Figure placing some lozenge is childs play compared to this. Great work Matthew
British Columbia, Canada
Joined: September 03, 2009
KitMaker: 6,965 posts
AeroScale: 6,247 posts
Posted: Sunday, September 04, 2011 - 03:54 PM UTC
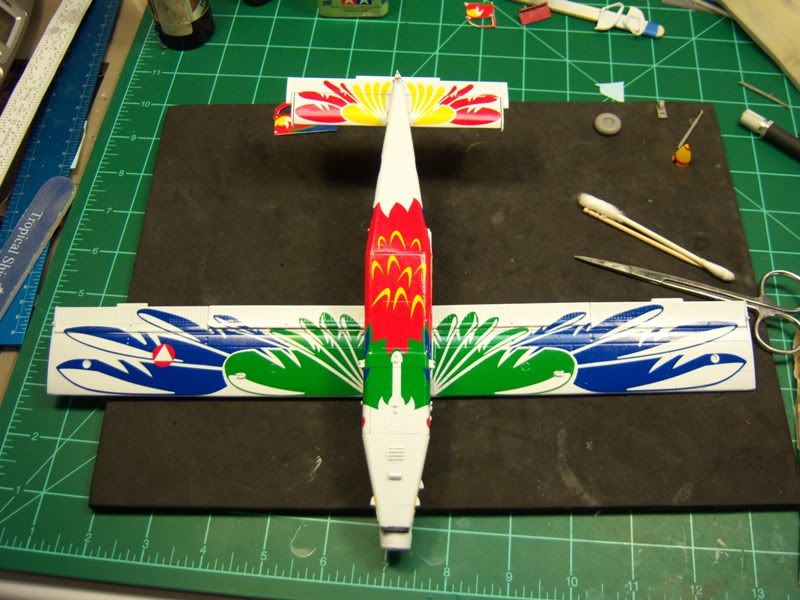
Those decals so completely change the character of this aircraft! It's going to be spectacular when it's done.
When once you have tasted flight you will walk the Earth with your eyes turned skyward.
For there you have been, and there you will always long to return.
-Leonardo Da Vinci
California, United States
Joined: April 01, 2002
KitMaker: 4,287 posts
AeroScale: 1,164 posts
Posted: Tuesday, September 06, 2011 - 09:32 AM UTC
Okay, lets try this again...for some reason my reply went into a black hole...

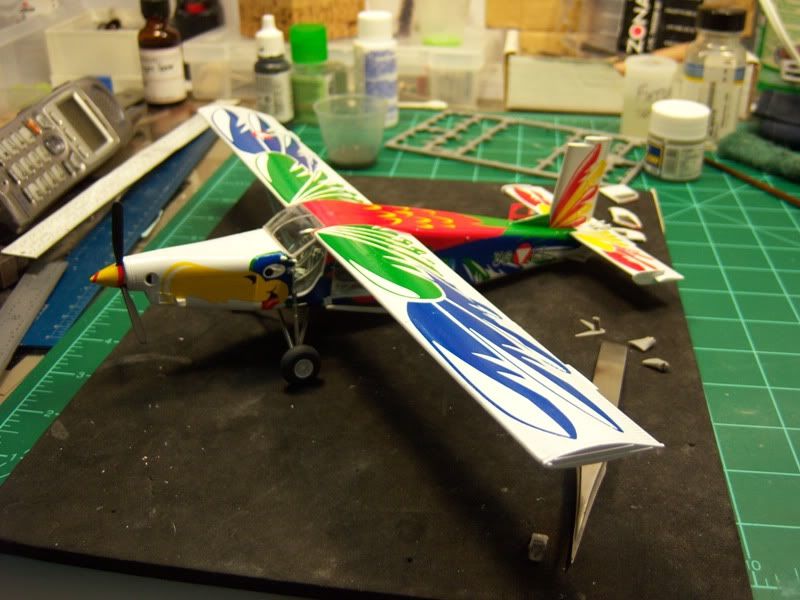
Thanks for the kudos all. Trying to get the rest of the fiddly bits tackled today along with the remaining decals. Rather than have to deal with using the spare decal pieces Roden included, I managed to find a suitable paint for touch ups. Chevy engine red is an almost exact match for this. The small square bottle of "Green" from Testors worked well for the green portions. I plan on gloss coating the entire plane which will help tie everything t together. Just a few more small decals to do and then I can add all the fiddly bits. More to follow soon..."Q"
"Don't fear the night, fear what hunts at night"
California, United States
Joined: April 01, 2002
KitMaker: 4,287 posts
AeroScale: 1,164 posts
Posted: Tuesday, September 06, 2011 - 02:51 PM UTC
"Don't fear the night, fear what hunts at night"
California, United States
Joined: April 01, 2002
KitMaker: 4,287 posts
AeroScale: 1,164 posts
Posted: Sunday, September 11, 2011 - 07:01 AM UTC
"Don't fear the night, fear what hunts at night"


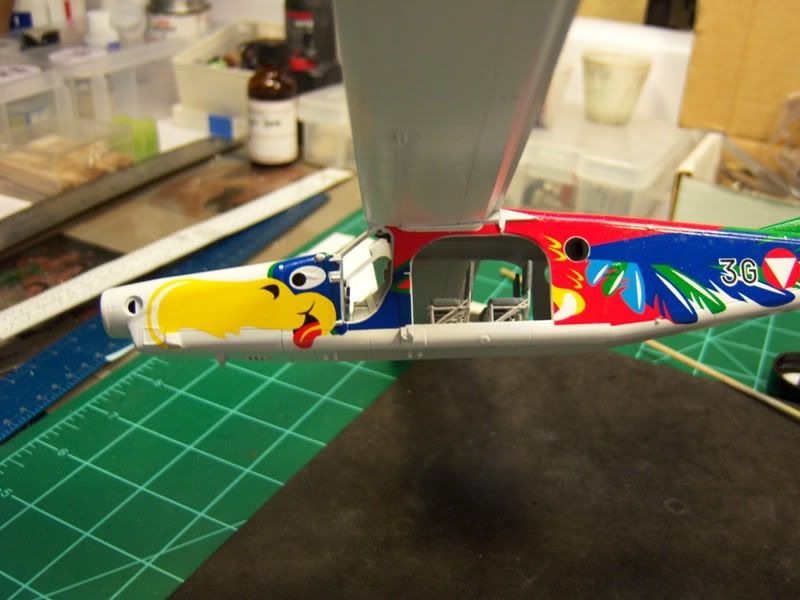
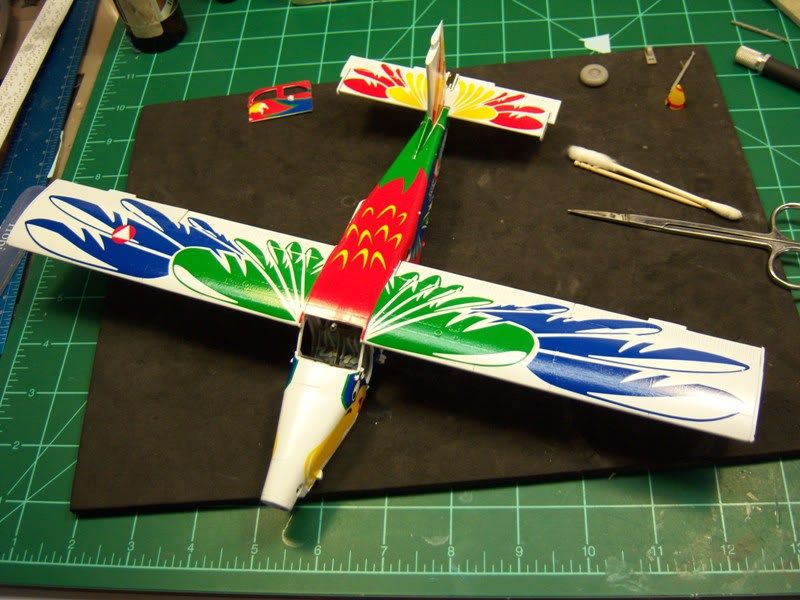
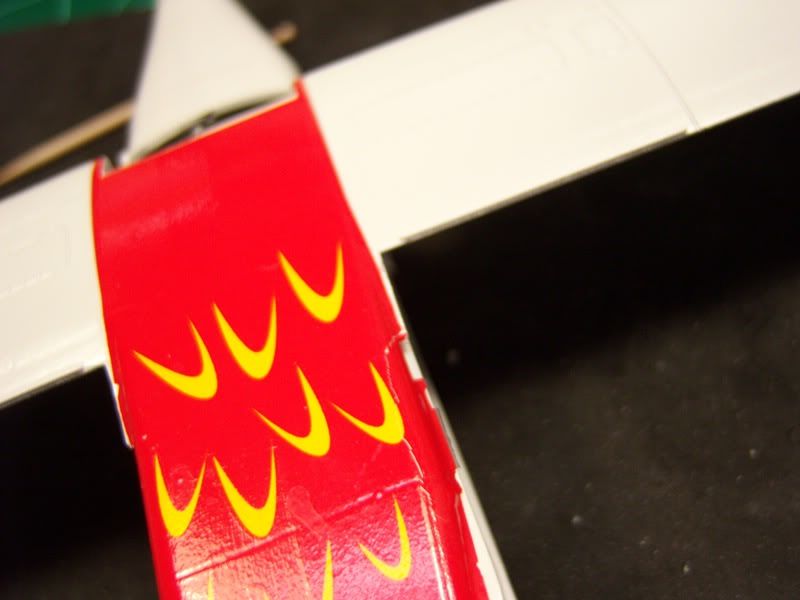
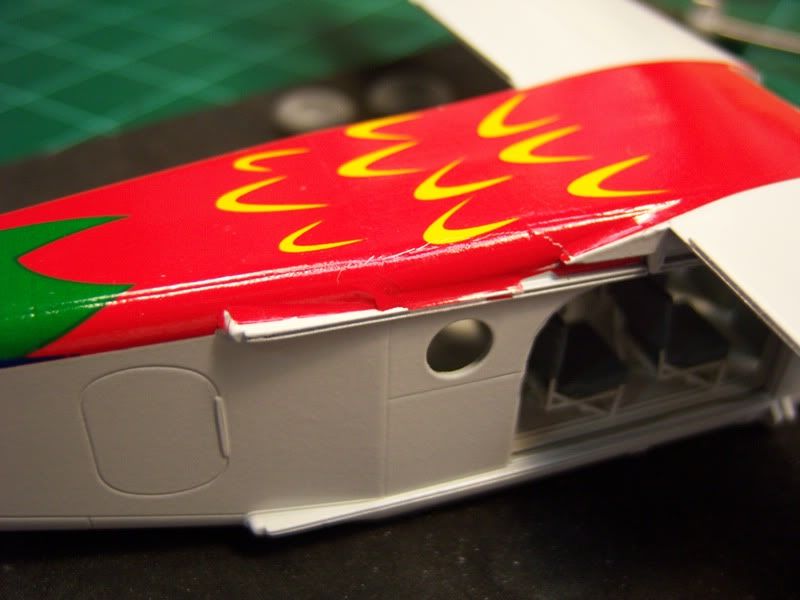
 The decals are brittle and tear easily. I started with the large red portion on the top of the fuselage. It tore on me immediately so I slowed way down. Fitting it correctly was no easy chore as it wanted to stick immediately wherever is touched. I got it on, but it still isn't 100%. However, I can live with it and fix what is "off" with carefully applied painting. I can see where this is going to take a lot of post dry poking and prodding along with copious amounts of decal solvent. I am using Solvaset and it is taking repeated coats to get the decals to even start to conform. I might resort to the boiling hot water and towel/wash cloth treatment if things don't improve. As you can see, there is lots to do yet. Everything that isn't white is a decal. There are only 4 on the model at this point; the fuselage top, angled piece at the base the tail, small green section on rear of fuselage and the tail...which will require slicing and more setting solution. yay... I should be able to match my paint where needed, I know I got enough on hand to.....More to follow soon.
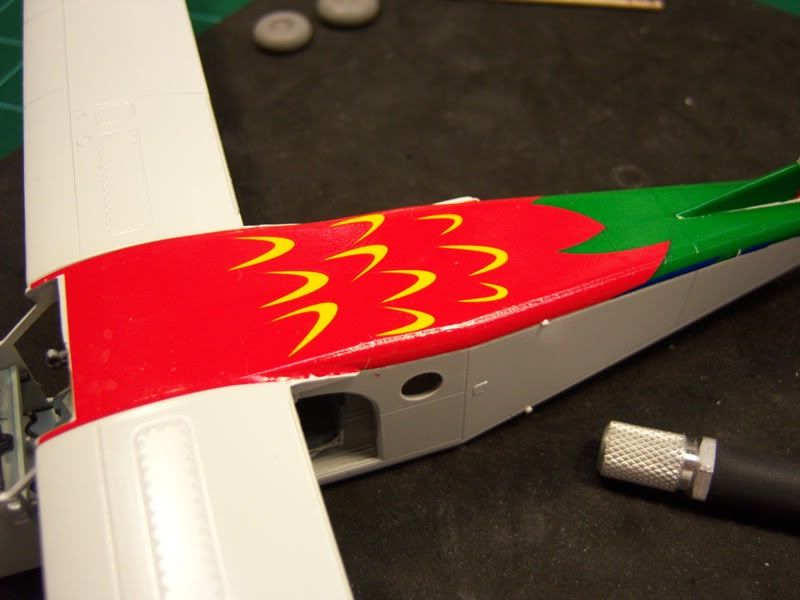


 The spiral on the spinner does not fit well at all. I tried several different ways to get it to wrap around the spinner more than once, and it wasn't having any of it. I finally got it on and it looks alright. The decal placement guide has it wrapping around the spinner 2 maybe 3 times...Oh well, can't win them all. More to follow soon. Thanks, "Q"