_GOTOBOTTOM
World War II: Germany
Aircraft of Germany in WWII.
Hosted by Rowan Baylis
First ever model- Monogram Me-109G 1:48 build
JayShack
_VISITCOMMUNITY
Victoria, Australia
Joined: August 11, 2011
KitMaker: 42 posts
AeroScale: 30 posts
Posted: Tuesday, August 16, 2011 - 12:30 AM UTC
so ive decided to get into modelling and thought this was as good a place as any to start.
unfortunately i found this forum half way through the build so this will focus more on the painting side then the construction.


i will be painting this with brushes only as my airbrush is in transit.

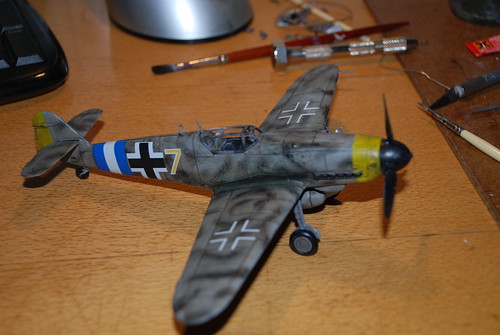
im not taking the model too seriously in terms of historical-correctness but i am aiming for a mix of these 2 colour schemes:


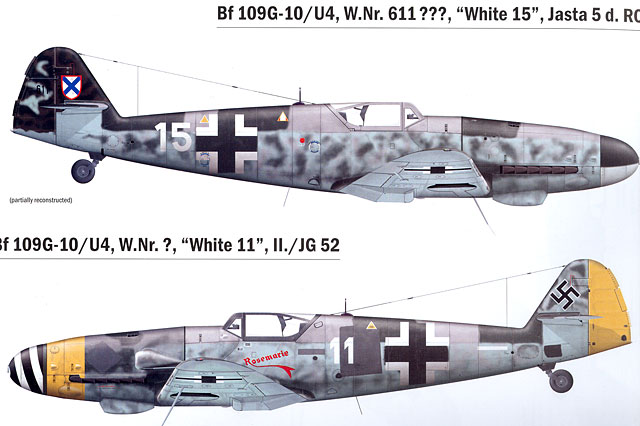
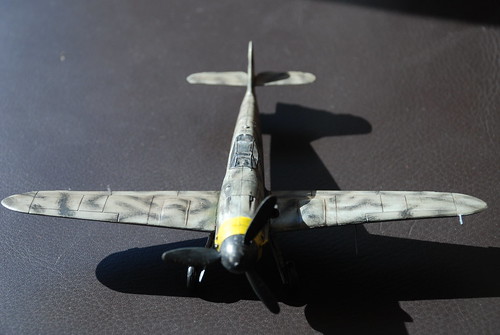
im aiming for the top models colour scheme, with the bottoms yellow and nosecone, however as stated im not being too pedantic about it, this model is mainly to get a feel for making planes.

the only real issue ive had with the kit was that there was about a half a mm overlap where the fuselage meets the wings. i double checked everything was in its place (which it was) and tried again to no avail, this resulted in me having to file back the fuselage joint, which was annoying to say the least.

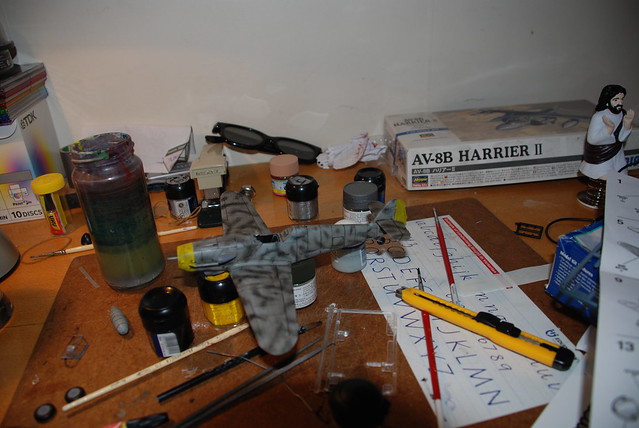
anyway onto the pictures:


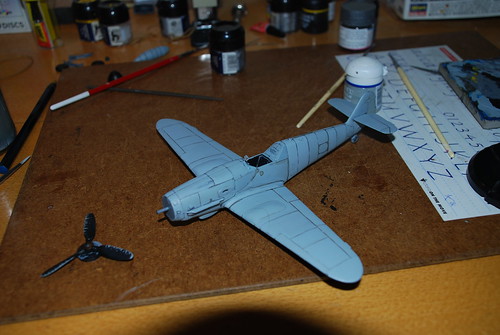
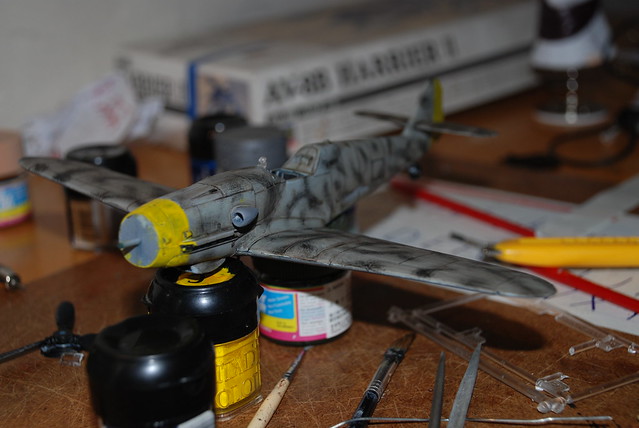
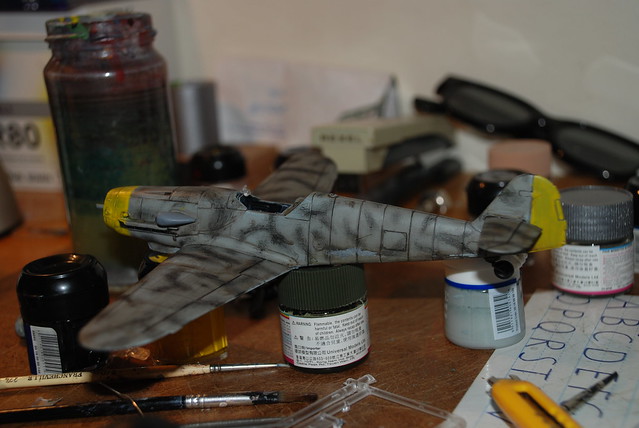
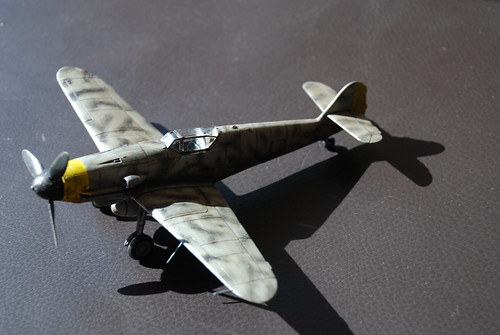
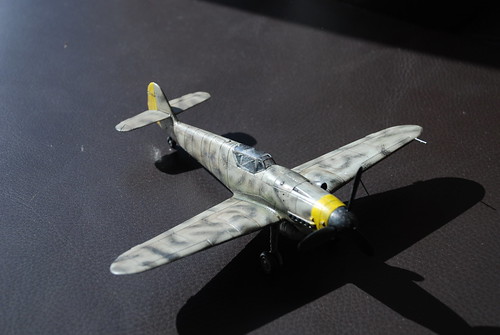
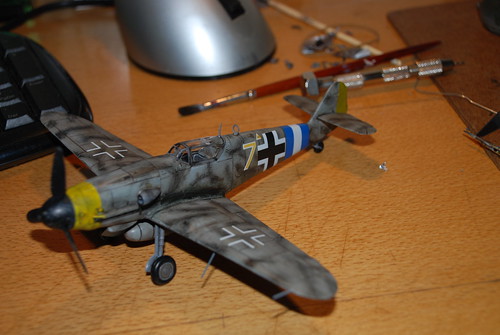
after a basecoat, wash and touchup in preperation for the camoflague


pretty ugly mould line going down the middle but hey, im still learning so go easy on me


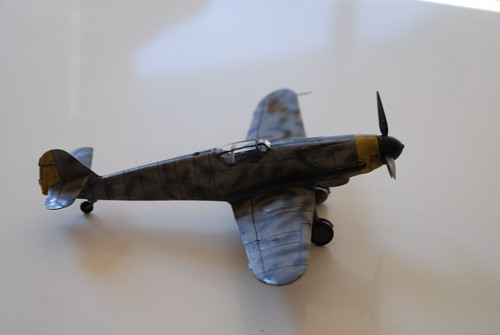
the props, unforunately the flash on teh made the chipping effect look ALOT brighter than it is.

more images to come.

anyway thanks for having a browse, any feedback and criticism would be more than appreciated, i wouldnt have uploaded it if i didnt want it and i need it.

cheers
jay shack
JayShack
_VISITCOMMUNITY
Victoria, Australia
Joined: August 11, 2011
KitMaker: 42 posts
AeroScale: 30 posts
Posted: Wednesday, August 17, 2011 - 02:30 AM UTC
updates:
today i painted the camouflage scheme and the yellow. i realised that yellow sucks at covering surfaces evently but oh well, it doesnt look too bad after the brown wash covered the plane with.
air intake still has to be camoflaged as well as a few touchups.
cmon guys, any feedback is good feedback
jay


Snorri23
_VISITCOMMUNITY
Ontario, Canada
Joined: March 25, 2010
KitMaker: 514 posts
AeroScale: 244 posts
Posted: Wednesday, August 17, 2011 - 03:19 AM UTC
Just an idea, that seam line running down the dorsal surface should be there. The engine covers hinged upwards, the fuselage after the cockpit was built like a clam shell. The two sides were riveted together then riveted to the previous section. The molds are getting long in the tooth so that may answer your wing fit issues. A hint the top wing sections should be mated to the fuselage first than the lower half mated. Hope this helps as for the yellow it needs a white undercoat, as does red.
Jessie_C
_VISITCOMMUNITY
British Columbia, Canada
Joined: September 03, 2009
KitMaker: 6,965 posts
AeroScale: 6,247 posts
Posted: Wednesday, August 17, 2011 - 03:19 AM UTC
A hint for yellow: Paint the area white first, then do the yellow. This also works for red and green.
Bronze4
_VISITCOMMUNITY
Florida, United States
Joined: December 20, 2009
KitMaker: 53 posts
AeroScale: 11 posts
Posted: Thursday, August 18, 2011 - 08:26 PM UTC
Are you sure this is your first model? I think it is coming along quite nicely. Your construction looks okay from what I can see and your painting so far looks fine too. The other folks have already pointed out some good things to consider so I don’t have a lot to add.

I understand that this is not a particular aircraft that you are doing but I will say to be sure and look at as many war time photos as you can of your subject aircraft. When I say look I really mean study them, look at how and where the paint chips off. Paint chipping is easy to over do. If you think you need a little more…STOP. Look for any oil and grease stains. Look for exhaust stains. What color are they, black, brown, gray, or a light tan color? How far back do they go? Try your best to copy what you found in the photos. Remember it is always best err on the side of too little than too much with any weathering. What you have so far looks really good. Keep going you’re almost there.

I’ll be looking forward to seeing your future projects.

Dave Shaw
JayShack
_VISITCOMMUNITY
Victoria, Australia
Joined: August 11, 2011
KitMaker: 42 posts
AeroScale: 30 posts
Posted: Monday, August 29, 2011 - 01:47 PM UTC
Gday Dave, yeah its my first model thanks for the tips on weathering and details, ive ordered a 1:32 scale 109-e which i plan on not rushing and getting as historically accurate as possible, so we shall see how i go

Ok, updates (sorry its been so long, i lost my camera in the rubble heap which is my house ) model is almost finished, just about to add the decals. If anyone has any tips or tricks for adding decals it would be greatly appreciated, im just going off the instructions on the back of the sheets.

anyway, latest pics:


im pretty happy with it at teh moment, any feedback would be very much appreciated as always
Jay
Siderius
_VISITCOMMUNITY
Tennessee, United States
Joined: September 20, 2005
KitMaker: 1,747 posts
AeroScale: 1,673 posts
Posted: Monday, August 29, 2011 - 02:06 PM UTC
Looks good Jay! Has your Aztek arrived, been used yet? Russell
JayShack
_VISITCOMMUNITY
Victoria, Australia
Joined: August 11, 2011
KitMaker: 42 posts
AeroScale: 30 posts
Posted: Monday, August 29, 2011 - 02:39 PM UTC
the airbrush set arrived today with me next model, just waiting on the compressor and looking around for some different nozzles an ill be all sweet
Jessie_C
_VISITCOMMUNITY
British Columbia, Canada
Joined: September 03, 2009
KitMaker: 6,965 posts
AeroScale: 6,247 posts
Posted: Monday, August 29, 2011 - 03:23 PM UTC

Quoted Text

If anyone has any tips or tricks for adding decals it would be greatly appreciated, im just going off the instructions on the back of the sheets.


Make sure your model is nice and glossy, to prevent "silvering". Cut the decals out out and soak each one seperately. Soak the decal for about 30 seconds or so, just until it starts moving on the backing paper. Then slide the backing paper out from under the decal while you hold one edge in place where it's supposed to go. Press out any air bubbles that get under the decal with a piece of soft foam or paper towel. Setting solutions like Micro Sol or Solvaset "melt" the decal to make it conform exactly to the model's surface. (Micro Set is best used to wet down the area the decal will go). The decal will start to look wrinkly but that's supposed to happen. Resist the temptation to touch it when it's wrinkly! That's a recipe for a mangled decal. As it dries the wrinkles should smooth out and then the decal will look like it's been painted on.

Once the decals are dry, wash off the leftover decal glue, and then do a final finish coat of gloss, semi-gloss or flat, whichever you like.
JayShack
_VISITCOMMUNITY
Victoria, Australia
Joined: August 11, 2011
KitMaker: 42 posts
AeroScale: 30 posts
Posted: Monday, August 29, 2011 - 05:20 PM UTC
thanks for the tansfer tips, was very helpful

tansfers added:


now all i need to do is head into town and find a good matte varnish to cover it with
Siderius
_VISITCOMMUNITY
Tennessee, United States
Joined: September 20, 2005
KitMaker: 1,747 posts
AeroScale: 1,673 posts
Posted: Tuesday, August 30, 2011 - 08:12 AM UTC
Looks really good, keep up the good work! Russell
 _GOTOTOP