California, United States
Joined: July 30, 2010
KitMaker: 133 posts
AeroScale: 94 posts
Posted: Friday, September 09, 2011 - 04:00 AM UTC
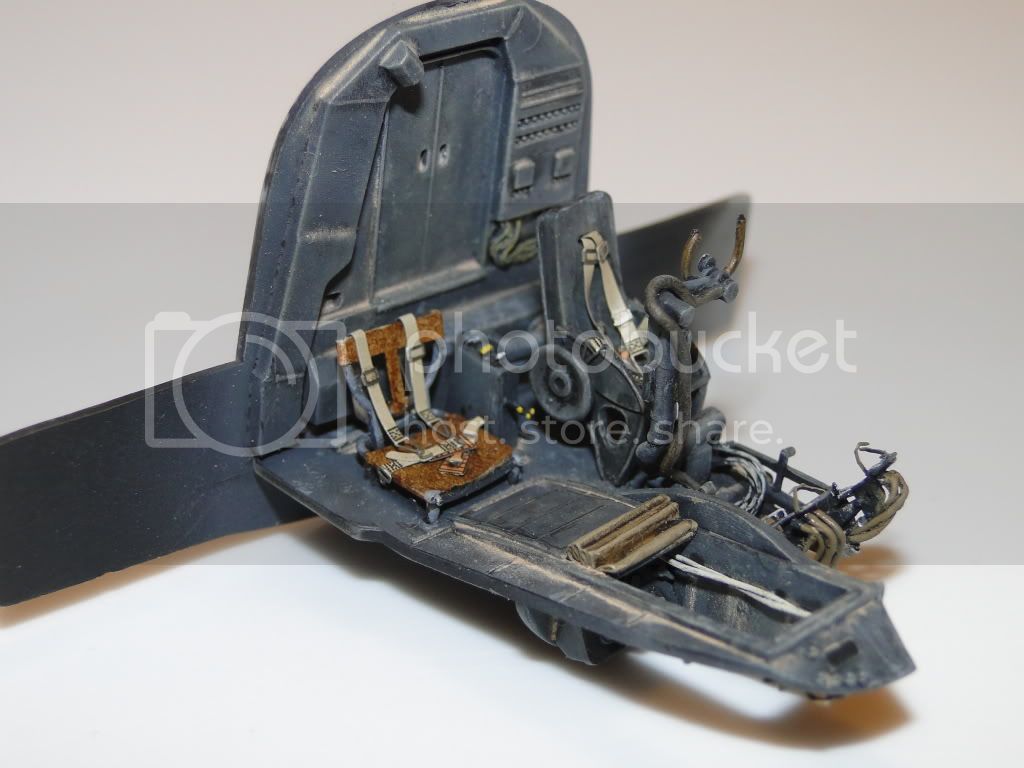
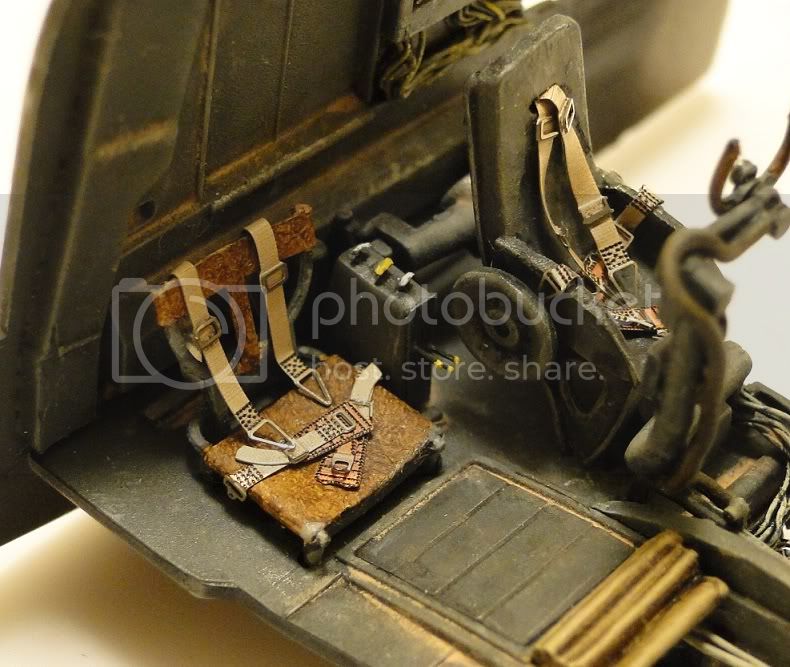
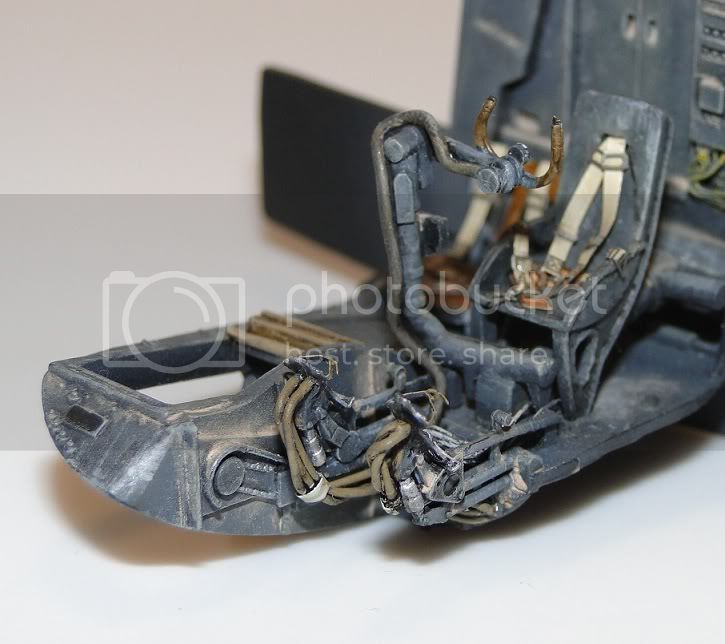
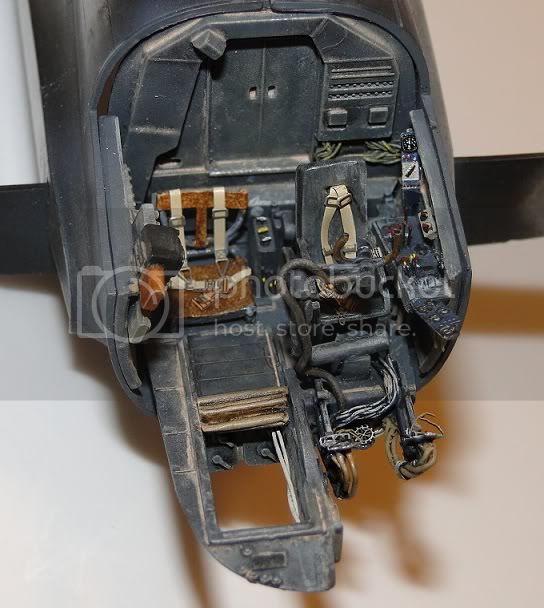
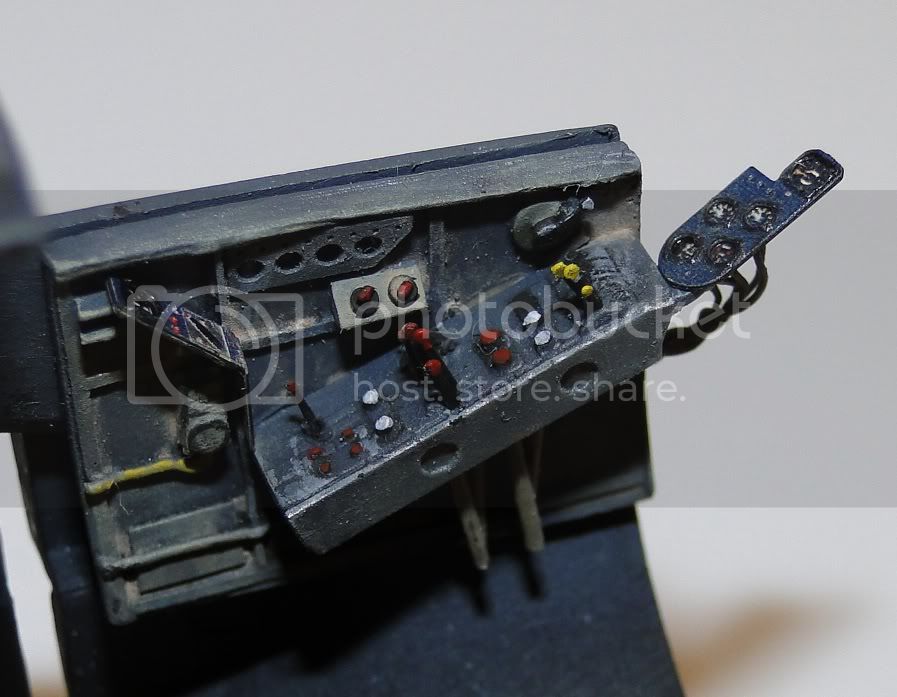
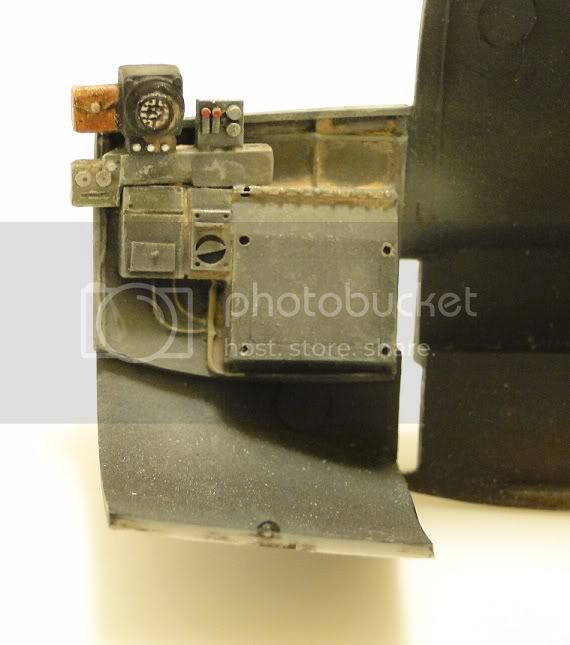
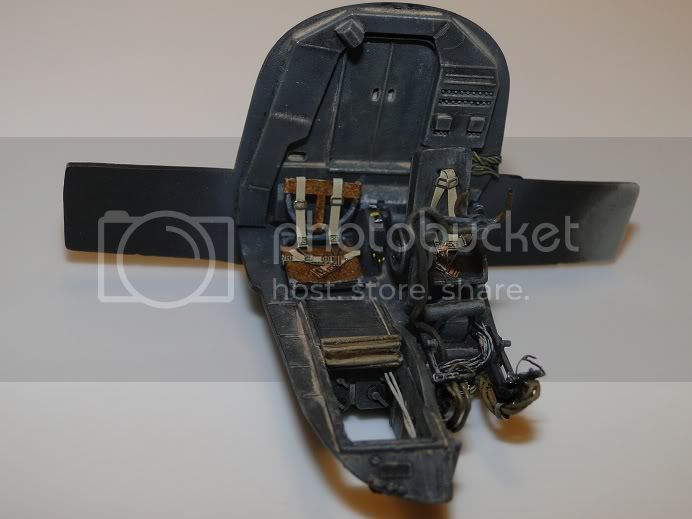
Hello all. Here are some photos of the work so far on my Revell/Monogram He111 H4/6. I'm not an aircraft modeller, I've been doing armor for the past 20yrs, and this is my second airplane. Well, I don't know much about painting and weathering aircraft, so I'm just doing it like it were a tank. I assume that an active duty bomber seeing constant service would get dirt and dust in the knooks and crannies, and paint would chip here and there, just like on an AFV.
So I'm posting some initial shots to get some feedback. I'm using the almost worthless Verlinden upgrade (doesn't fit, and really isn't much better than the kit pieces, and those God awful instructions that don't even show where everything goes!!) and I'm using the Eduard interior PE set. I also purchased Eduard express masks, resin prop and spinner upgrade, and Squadron crystal-clear canopies. Ok, now for the pics:
I'm lactose intolerant, but I love milk and I love cheese. It causes problems...
California, United States
Joined: July 30, 2010
KitMaker: 133 posts
AeroScale: 94 posts
Posted: Friday, September 09, 2011 - 04:03 AM UTC
I'm lactose intolerant, but I love milk and I love cheese. It causes problems...
California, United States
Joined: July 30, 2010
KitMaker: 133 posts
AeroScale: 94 posts
Posted: Friday, September 09, 2011 - 04:05 AM UTC
I have a question for anyone who has built this kit and has used the Verlinden set: how is the bomb sight supposed to go in? From the Verlinden box cover, it looks like its sideways, it doesn't make much sense to me but then again I don't know much about this aircraft, plus I have no references. Does anyone have any info? Thanks.
I'm lactose intolerant, but I love milk and I love cheese. It causes problems...
California, United States
Joined: July 30, 2010
KitMaker: 133 posts
AeroScale: 94 posts
Posted: Friday, September 09, 2011 - 11:42 AM UTC
Leeeetle more progress today. I bit the bullet and closed up the fuselage. I rediscovered a lesson that I supposedly learned as a kid: Never trust the alignment of the pins. If I had taken a few seconds to shave them off, I wouldn't have to deal with the half millimeter misalignment of the two halves. Oh well, nothing that can't be fixed, the only pain is going to be the leading edge of the tail.

I'm lactose intolerant, but I love milk and I love cheese. It causes problems...
California, United States
Joined: July 30, 2010
KitMaker: 133 posts
AeroScale: 94 posts
Posted: Friday, September 09, 2011 - 01:33 PM UTC
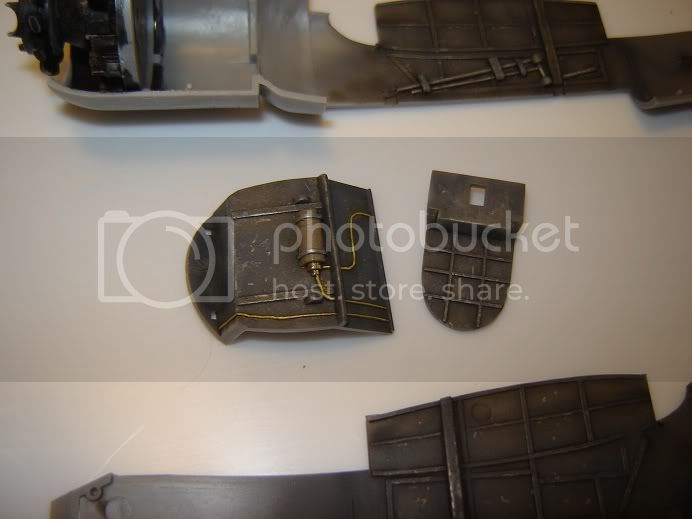
Getting on with the fiddly bits. Gotta get some grey in the wheel bays. I'm debating on whether or not I want to put any effort into them, since they'll pretty much be impossible to see inside once the gears are in. Perhaps a simple job.
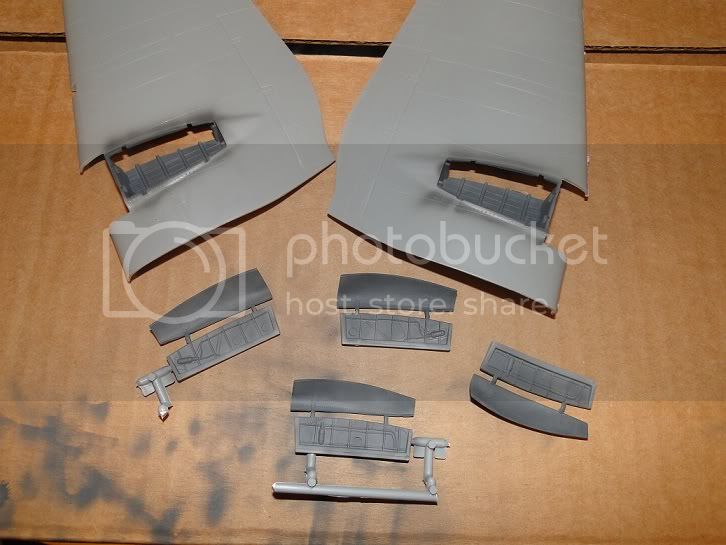
Below is a vanity shot I took of the wheel well on my Do217 that I did, which would be my first airplane. It's a dark pic, but you get the idea of the work I put in, and now its all but invisible. At least I know its there!
I'm lactose intolerant, but I love milk and I love cheese. It causes problems...
CMOT
 Editor-in-Chief
England - South West, United Kingdom
Joined: May 14, 2006
KitMaker: 10,954 posts
AeroScale: 290 posts
Posted: Friday, September 09, 2011 - 02:18 PM UTC
Of all the German aircraft of World War two the He111 is my favourite due to the very aerodynamic look of it which is almost futuristic. I had not realised that a 1/48th scale kit had been released of this aircraft and will have to hunt one down. I will watch with interest your progress.
JPTRR
Managing Editor 
#051
Tennessee, United States
Joined: December 21, 2002
KitMaker: 7,772 posts
AeroScale: 3,175 posts
Posted: Saturday, September 10, 2011 - 02:44 AM UTC
Domminic,
Great start!

Sorry to read of the poor quality of the Verlinden set -- now I know to be leery about it.

If they demand your loyalty, give them integrity; if they demand integrity, give them your loyalty.--Col John Boyd, USAF
Any plan where you lose your hat is a bad plan.
California, United States
Joined: November 28, 2007
KitMaker: 817 posts
AeroScale: 729 posts
Posted: Saturday, September 10, 2011 - 07:11 AM UTC
Very nice, Dominic! Looks great so far- I would advise you to put the wheel wells together as suggested in the instructions- I glued the wings first and had a devil of a time getting the sides and doors in properly.
Cheers!
chuk
[url]http://chukw.blogspot.com/[/url]
California, United States
Joined: July 30, 2010
KitMaker: 133 posts
AeroScale: 94 posts
Posted: Saturday, September 10, 2011 - 02:52 PM UTC
Thanks for the replies guys. This kit is a little old I think, I actually received it as payment for some paint work I did on a co-workers PT109 model

.
The Verlinden set really is bad, in my opinion

. It mainly has a resin engine if you want to leave one of the nacelles open, but that's a little outside of my comfort zone at the moment. I have a Verlinden interior kit for the Tamiya PzIII L, it has the same problems. Takes a lot of chopping to get it to fit, and they instructions get lazy and give up half way through!

As for the landing gear doors, I'll definitely take your advice. From the way they glue together, I can tell they'll be a pain. My biggest concern now is getting the wing halves lined up and keeping them symmetrical.
I'm lactose intolerant, but I love milk and I love cheese. It causes problems...
British Columbia, Canada
Joined: September 03, 2009
KitMaker: 6,965 posts
AeroScale: 6,247 posts
Posted: Saturday, September 10, 2011 - 04:50 PM UTC
Quoted Text
Thanks for tMy biggest concern now is getting the wing halves lined up and keeping them symmetrical.
Actually the wings go together quite well. I can't remember having any problems when I did mine. I didn't even need any filler at the wing roots.
When once you have tasted flight you will walk the Earth with your eyes turned skyward.
For there you have been, and there you will always long to return.
-Leonardo Da Vinci
California, United States
Joined: July 30, 2010
KitMaker: 133 posts
AeroScale: 94 posts
Posted: Sunday, September 11, 2011 - 11:37 AM UTC
Jessie, thank you for the encouragement, but I think you may be a little more savvy than I am. I've been dry fitting the wings and I feel like I'll have to be very careful to make sure they look right.
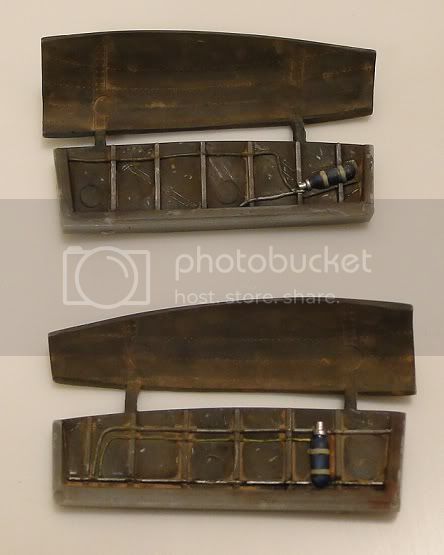
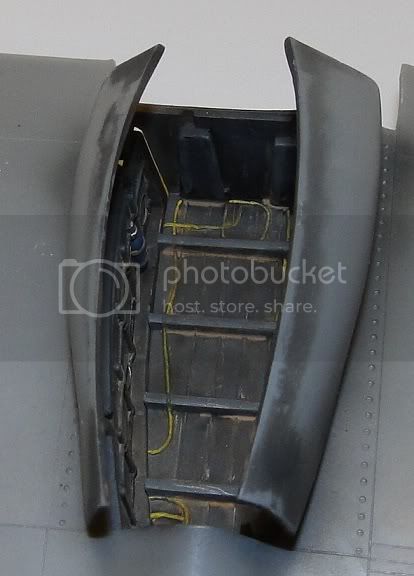
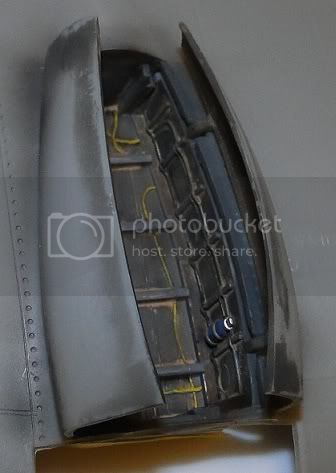
Well here is an update on the wheel wells. I feel victim to the "at least I know it's there" syndrome and decided to do a bit of paint work which will probably never been seen

. Especially the weathering on the inside of the doors, which by their angle will be mostly out of view. Anyhow, here they are, I wish I had more finesse and could get some pretty results like I've seen on this site, but I'm still a rough and dirty AFV modeller at heart
.
I'm lactose intolerant, but I love milk and I love cheese. It causes problems...
California, United States
Joined: July 30, 2010
KitMaker: 133 posts
AeroScale: 94 posts
Posted: Sunday, September 18, 2011 - 05:56 PM UTC
Well, I'm on my least favorite part: filling and sanding, then filling, sanding some more, sanding out all the filler on accident, then filling and sanding some more. I did discover a new technique from reading one of the other blogs, using liquid paper, or white-out, as a gap filler. It works really well and is a lot easier to get right where I want it. Never would have thought of it on my own, it's perfect for filling those small imperfections. So here are some shots of my progress so far.
Here is a close up of the work.
This step would be a lot easier if I had payed more attention and realized that my alignment was slightly off on the fuselage halves.
My process has involved throwing on a coat of black paint to check my work. The pain is that the Mr. Surfacer and white-out absorbs paint slightly differently than the plastic, so it's giving a bad appearance. I'm pretty sure it should vanish on the final coats of paint. This is stuff I should know by now, after building models for around 15yrs, but I guess I never really payed attention when building AFVs.
I'm lactose intolerant, but I love milk and I love cheese. It causes problems...
California, United States
Joined: July 30, 2010
KitMaker: 133 posts
AeroScale: 94 posts
Posted: Sunday, October 09, 2011 - 12:57 PM UTC
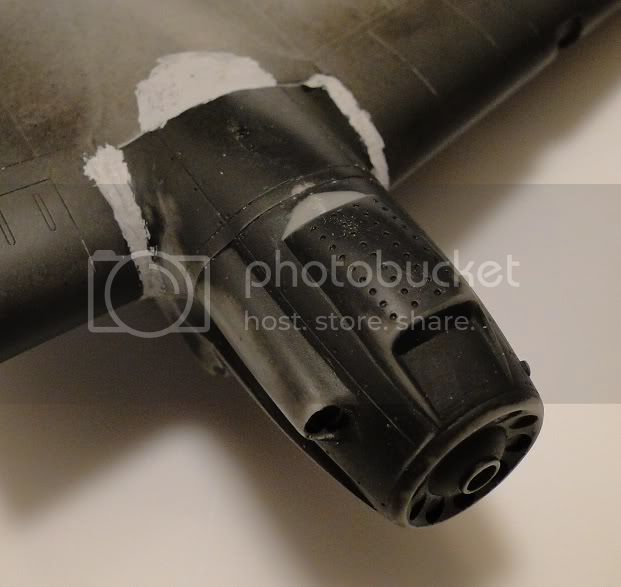
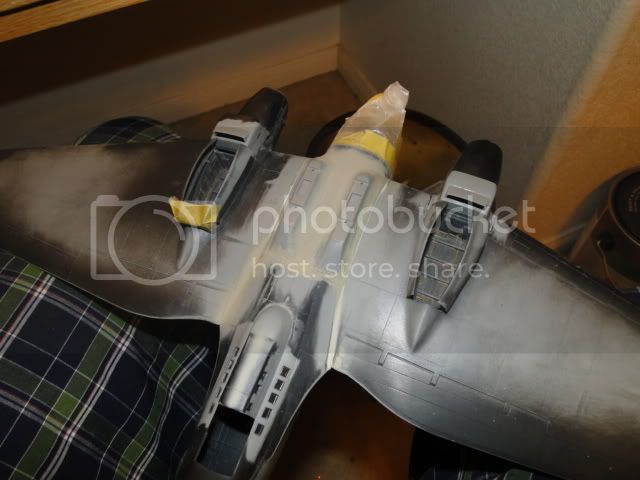
Oh man, its been a little bit since i put anything up. Don't worry, i have been working on this kit slowly but surely. Up to now i've been on a steady diet of filling and sanding. I thought it would be easier to glue the wing halves together, fill them, sand them, and then attach the engines, fill and sand, and at the end attach the wings to the fuselage. What ended up happening is that i sanded off enough of the wing to change the contour ever so slightly, which means i have more work to do to get everything to blend in with each other.
here are a few pics of the progress so far.
I'm lactose intolerant, but I love milk and I love cheese. It causes problems...
California, United States
Joined: July 30, 2010
KitMaker: 133 posts
AeroScale: 94 posts
Posted: Sunday, October 09, 2011 - 12:59 PM UTC
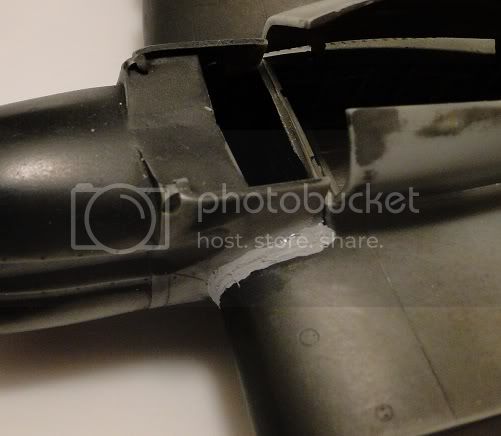
The underside. As you can see, I've really globbed on the mr. surfacer to fill the gaps here. On this engine, I tried something different. Instead of wedging in a styrene shim, I used some superglue to fill the gap. As you can see, there was shrinkage and a depression has been left that will still need to be filled.
I'm lactose intolerant, but I love milk and I love cheese. It causes problems...
California, United States
Joined: July 30, 2010
KitMaker: 133 posts
AeroScale: 94 posts
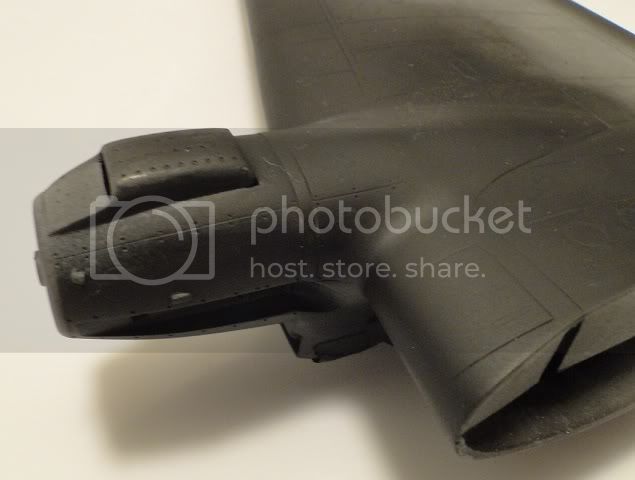
Posted: Sunday, October 09, 2011 - 01:05 PM UTC
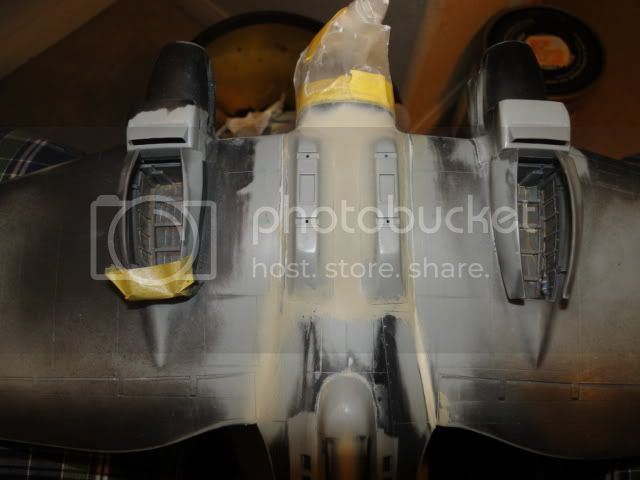
A couple pics of the opposite wing, where I've come along farther in the process. So far my method has been to fill with different material, either mr. surfacer, white-out, or squadron putty. I then sand for dear life with some high grit paper. When it feels smooth to the touch, I give it a coat of future to see if i can find any imperfections (i also hope that the future will fill the smaller scratches and dings), then rub smooth with a piece of paper. Finally, I give it a shot of black from a spray can for one final check. This is usually where I really see the problems pop out. Something is wrong with my sanding method, because i've had a real tendency to sand all the filler out of the crack. I don't know why and I haven't quite figured out how to prevent it. I wet sand, i dry sand, i use super high grit to take off only a little at a time, i sand with the grain or against the grain, but i always have the same issue. Any suggestions?
I'm lactose intolerant, but I love milk and I love cheese. It causes problems...
California, United States
Joined: July 30, 2010
KitMaker: 133 posts
AeroScale: 94 posts
Posted: Sunday, October 09, 2011 - 01:07 PM UTC
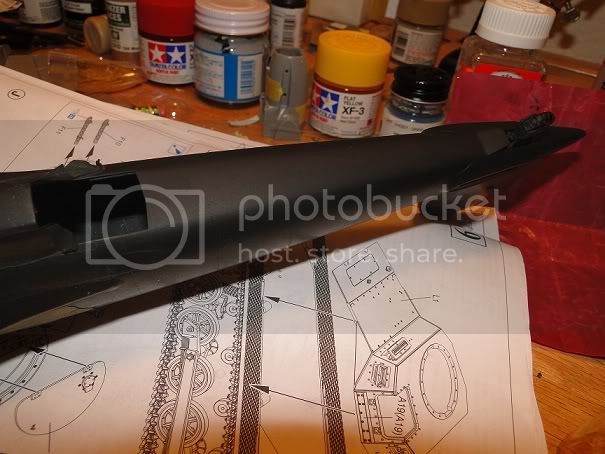
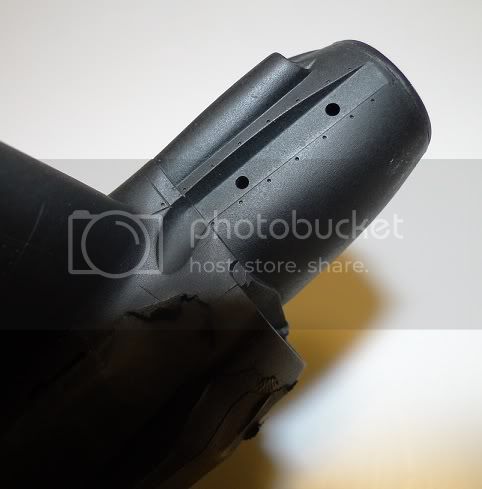
Quick photo just to show that I've also got the tail on.
I'm lactose intolerant, but I love milk and I love cheese. It causes problems...
Victoria, Australia
Joined: March 14, 2006
KitMaker: 1,973 posts
AeroScale: 59 posts
Posted: Sunday, October 09, 2011 - 05:57 PM UTC
Great attention to detail Dominic - love your work.
I've subscribed

Cheers
Paul
OddBall: "It's a wasted trip baby. Nobody said nothing about locking horns with no Tigers"
KIlgore: " I love the smell of napalm in the morning. ...The smell, you know that gasoline smell, the whole hill. Smelled like... victory."
California, United States
Joined: July 30, 2010
KitMaker: 133 posts
AeroScale: 94 posts
Posted: Thursday, December 22, 2011 - 03:49 PM UTC
Oh my word, it's been a while since I've put anything up. You know how it goes, holidays and all. I have been doing work here and there, but it's been pretty mundane and not worthy of photography. Mainly I've attached the wings and have been having a devil of a time trying to fill the gaps. For some reason, one of the wings was thinner a the wing root than the attachment point, so I had to do a lot of grinding. Then, I went overboard on filling, only to find out that there is supposed to be a seamline where the wing attaches to the fuselage, duh. So now I have to rescribe a lot of the seams that I fought to eliminate. I guess it pays to do my research, hah!
Here are some pictures just to prove that I've been doing something.
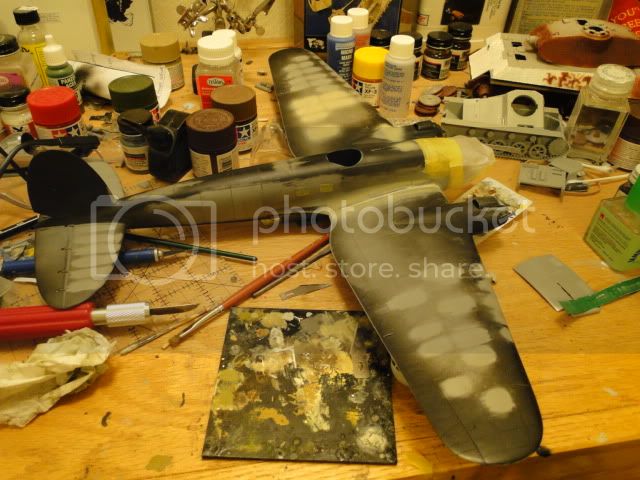
On this pic you'll notice the marks on the wings and stabs. I'm going with a theory here, and I may be completely wrong because I really don't know much about aircraft. But here it goes, on subs they get the fuel drum effect, or whatever its called, where the hull dents in between the ribs. Well, every pic I see of these old aircraft looks like they get the same thing. There is a lot of where and tear, a lot of flex and waves in the wings and body. Perhaps this is cause I'm looking at museum pics of refurbished hulks, but I think the dents and dings look better than a perfectly flat surface. I guess that's that tank modeller in me!
I'm lactose intolerant, but I love milk and I love cheese. It causes problems...
Removed by original poster on 12/23/11 - 03:54:50 (GMT).
British Columbia, Canada
Joined: September 03, 2009
KitMaker: 6,965 posts
AeroScale: 6,247 posts
Posted: Thursday, December 22, 2011 - 05:53 PM UTC
Quoted Text
on subs they get the fuel drum effect, or whatever its called
A lot of aircraft modellers do that. We call it the "stressed skin" effect. As long as you don't go overboard it looks really good, especially under semi-gloss paint.
Hang in there, your progress is looking really good

When once you have tasted flight you will walk the Earth with your eyes turned skyward.
For there you have been, and there you will always long to return.
-Leonardo Da Vinci
California, United States
Joined: July 30, 2010
KitMaker: 133 posts
AeroScale: 94 posts
Posted: Thursday, December 22, 2011 - 06:57 PM UTC
Oh cool, so i'm not too far off the mark. Thank you for the tip Jessie. Thankfully the effect on the wings looks worse now than it really is, after a paint coat it should be sufficiently subtle. Now i just have to work up some courage/energy to do a little bit on the main body. However, as you said, i'll keep it slight.
I'm lactose intolerant, but I love milk and I love cheese. It causes problems...
Croatia Hrvatska
Joined: November 06, 2009
KitMaker: 624 posts
AeroScale: 609 posts
Posted: Thursday, December 22, 2011 - 08:25 PM UTC
Hi Dominic,
I a watching your build closely... and keep the good work! It is progressing very well, if you ask me! However, I couldn't agree more with Jessica on the "stressed skin" effect. I didn't try it yet, but I did practice on some srap items (I have one or two "hangar queens" to practice all building and coloring techniques) - unless you "overstress" it, you can yield some rather convincing effect. I am very interested to see how this will look in the end. Just to encourage you: The aircraft builders community owe much to the "tank boys and gals", because some of the techniques that we are using were first applied on the armour kits
Well done, Dominic!
"When everything else fails, read the instructions"
California, United States
Joined: July 30, 2010
KitMaker: 133 posts
AeroScale: 94 posts
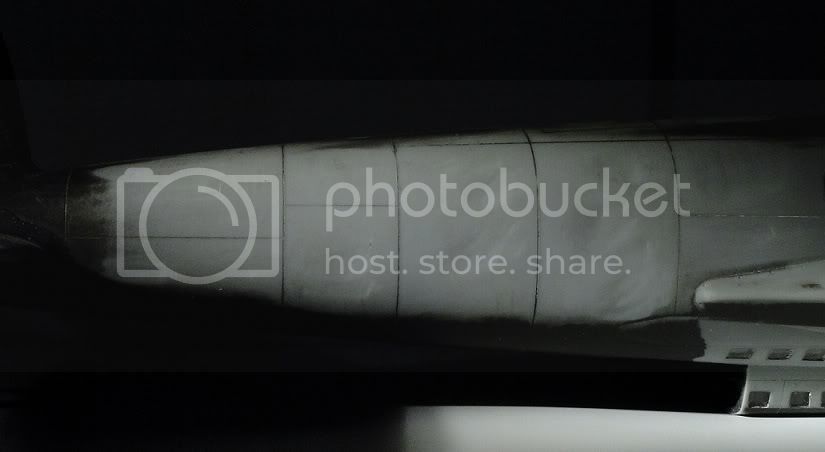
Posted: Saturday, December 24, 2011 - 06:14 AM UTC
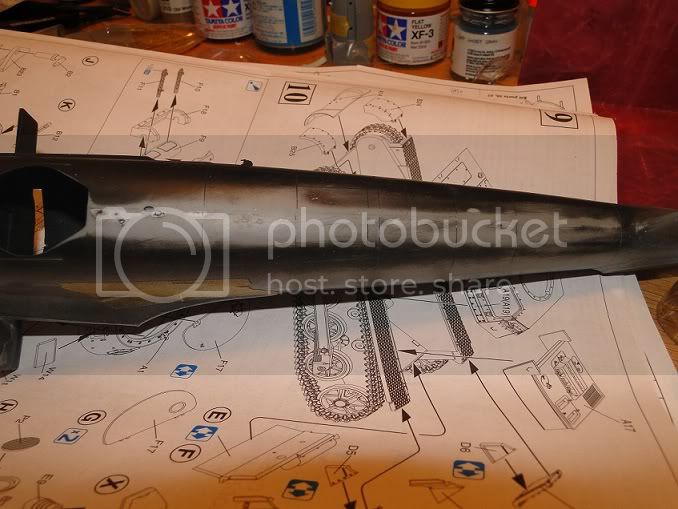
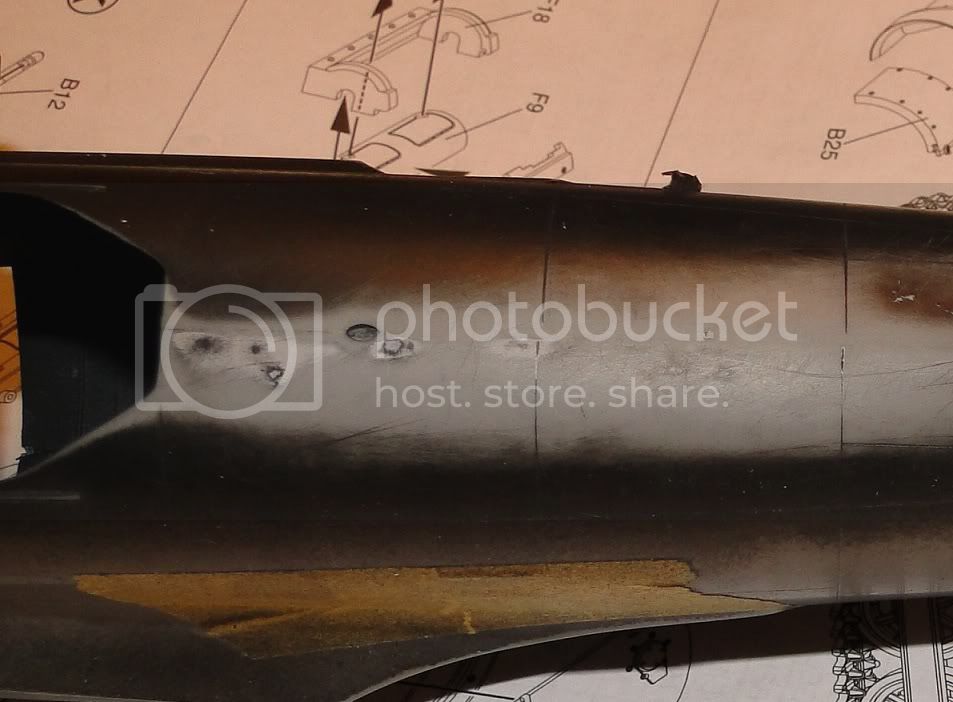
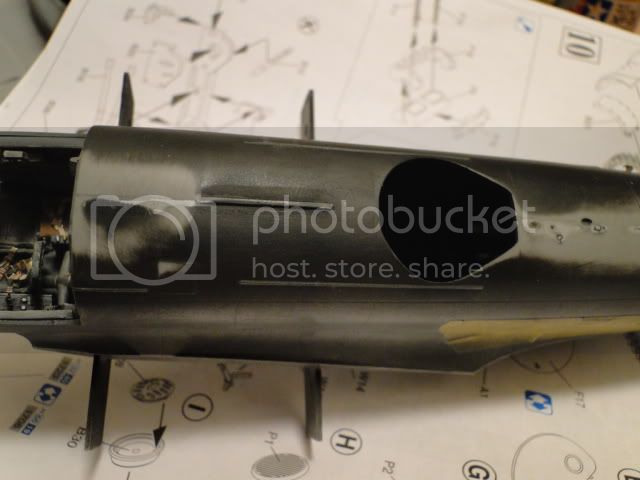
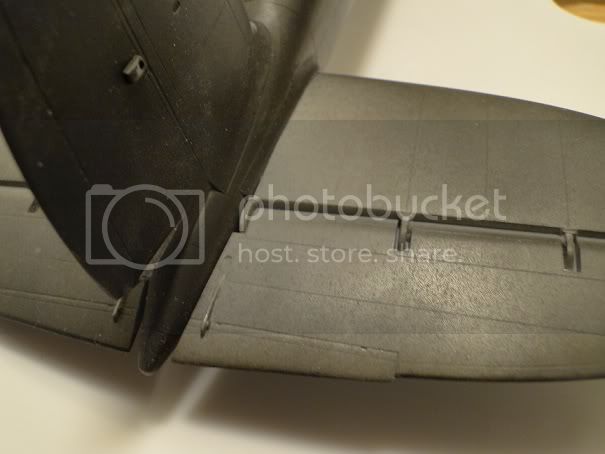
The stress of stressing skin. Ok, so I am going into this cold with no concept of how to achieve the look, and only a vague concept of what the look actually is. Basically flexes and waves in the metal skinning. How do I make it? Well, I learned that I do NOT make it by using a grinding bit in my dremel, the same technique used to make the pitted surface of cast armor. Guess what? Now my 111 looks like it's made of cast armor. Hmmm, may have a hard time getting off the ground, so back to the drawing board. Figured out that it was easier to do on the curved sides of the fuselage, just some scraping with an X-acto blade and liberal sanding to smooth out the rough patches. The flat surfaces of the wings are a bit harder, so I've prudently decided to keep it very, very, VERY subtle (some would say non-existent, some may be right). So, here are a couple photos to show what I'm talking about.
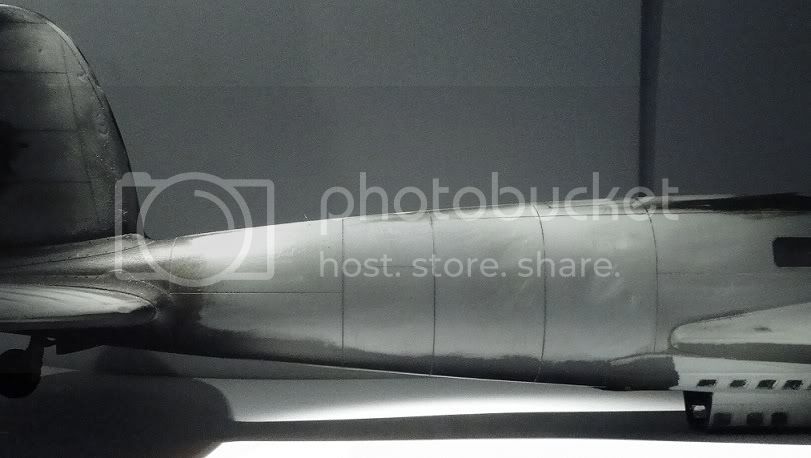
In order for the effect to show up on camera, I had to employ some extreme lighting effect. Believe me, it is not really as obvious as it looks, I just wanted it to show up. Once the paint goes on, we'll see how it looks then.
I'm lactose intolerant, but I love milk and I love cheese. It causes problems...
California, United States
Joined: July 30, 2010
KitMaker: 133 posts
AeroScale: 94 posts
Posted: Saturday, December 24, 2011 - 06:16 AM UTC
Keep in mind, I always retain the "nuclear option," which is to bust out the mr surfacer and really tone down the work. I'll make my decision once I've put on a primer coat and can get a better idea of how it looks with paint on it. The surfacer is definitely going to be used to ease out the marks on the wings.
I'm lactose intolerant, but I love milk and I love cheese. It causes problems...
Croatia Hrvatska
Joined: November 06, 2009
KitMaker: 624 posts
AeroScale: 609 posts
Posted: Saturday, December 24, 2011 - 06:17 AM UTC
Well, Dominic, it might be late now, but look for the concept developed
here. Maybe it can help you a bit, or you might consider it for some future builds.
Personally, I think it is a bit "overstressed". To be honest, I didn't see too much photos of those birds with so many bumps... A bit of stress skin and usual tear and wear, but not so many dents and bumps. Yes, some Eastern European airports were nothing more than a bumpy road ahead, but still... those birds had to fly!
All the best!
"When everything else fails, read the instructions"