California, United States
Joined: April 01, 2002
KitMaker: 4,287 posts
AeroScale: 1,164 posts
Posted: Sunday, September 11, 2011 - 10:13 AM UTC
"Don't fear the night, fear what hunts at night"
British Columbia, Canada
Joined: September 03, 2009
KitMaker: 6,965 posts
AeroScale: 6,247 posts
Posted: Sunday, September 11, 2011 - 10:54 AM UTC
I see you're running into the very same fit issues I did. Roden is nothing if not consistent

Strangely enough I've been having the urge to do my PAA kit in flight as well. What technique are you considering to portray the spinning propellers?
When once you have tasted flight you will walk the Earth with your eyes turned skyward.
For there you have been, and there you will always long to return.
-Leonardo Da Vinci
California, United States
Joined: April 01, 2002
KitMaker: 4,287 posts
AeroScale: 1,164 posts
Posted: Sunday, September 11, 2011 - 12:15 PM UTC
Either leaving them off entirely, or cutting clear discs and painting faint indications of the props on them. Haven't decided as yet. "Q"
"Don't fear the night, fear what hunts at night"
Colorado, United States
Joined: January 25, 2004
KitMaker: 11,669 posts
AeroScale: 11,011 posts
Posted: Monday, September 12, 2011 - 01:14 PM UTC
Why not set them up so they really spin? Ok I'll go sit in the corner. . .

". . .The most important thing is to know why you build and then get the most that you can out of building." via D.D.
California, United States
Joined: April 01, 2002
KitMaker: 4,287 posts
AeroScale: 1,164 posts
Posted: Monday, September 19, 2011 - 02:02 AM UTC
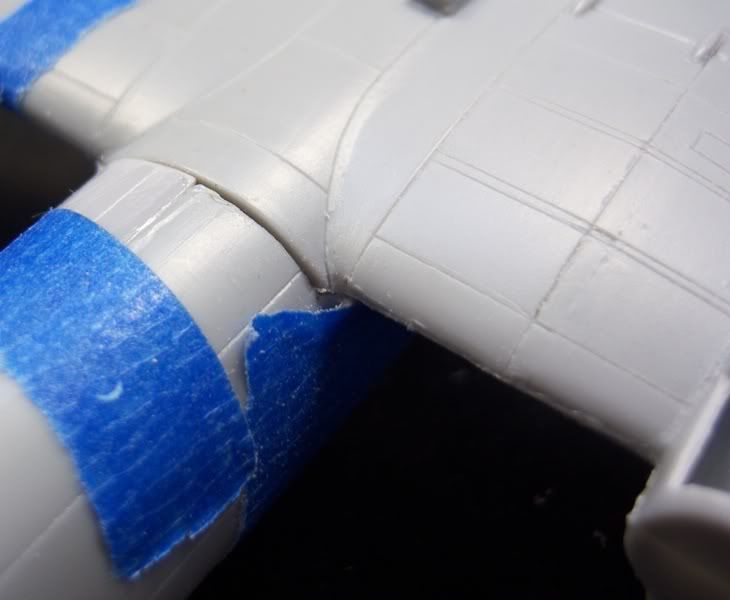
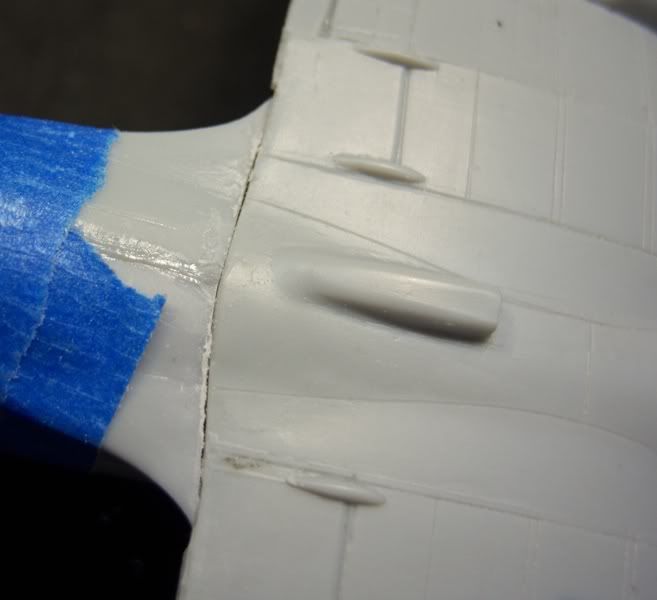
A small update..alas with no pics, but those will follow shortly. This is beginning to become a putty sponge. Seams along top and bottom have been filled, wing roots, leading edges, and where the wings meet the fuselage underneath have all been lathered up to fill the voids. I'll get some pics up soon and hopefully get to sanding this afternoon....
Thanks, "Q"
"Don't fear the night, fear what hunts at night"
Illinois, United States
Joined: September 26, 2011
KitMaker: 125 posts
AeroScale: 115 posts
Posted: Tuesday, September 27, 2011 - 11:22 AM UTC
Regarding the spinning props, have you considered Propblur....?
http://www.propblur.com/ On the Bench:
Revell 1/48 F-86D
California, United States
Joined: April 01, 2002
KitMaker: 4,287 posts
AeroScale: 1,164 posts
Posted: Thursday, September 29, 2011 - 03:49 AM UTC
"Don't fear the night, fear what hunts at night"
California, United States
Joined: April 01, 2002
KitMaker: 4,287 posts
AeroScale: 1,164 posts
Posted: Saturday, October 08, 2011 - 07:57 AM UTC
"Don't fear the night, fear what hunts at night"
California, United States
Joined: April 01, 2002
KitMaker: 4,287 posts
AeroScale: 1,164 posts
Posted: Saturday, October 08, 2011 - 09:20 AM UTC
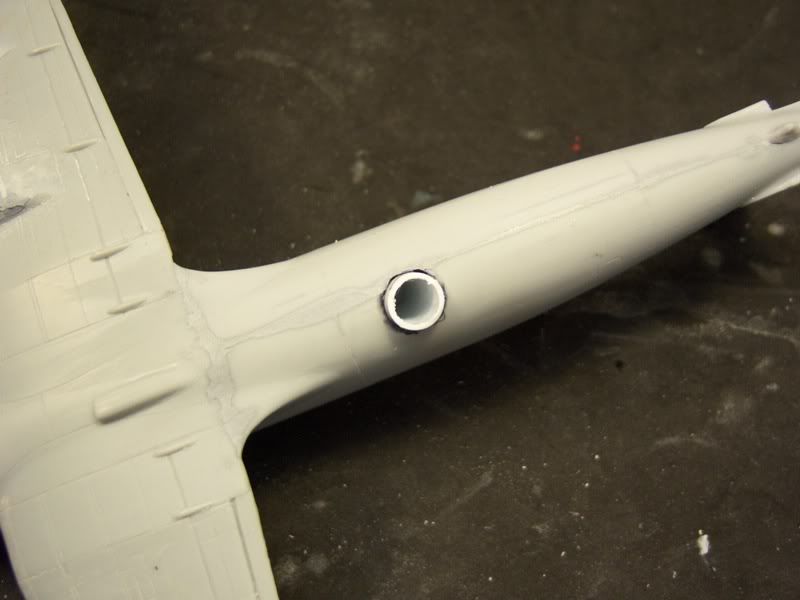
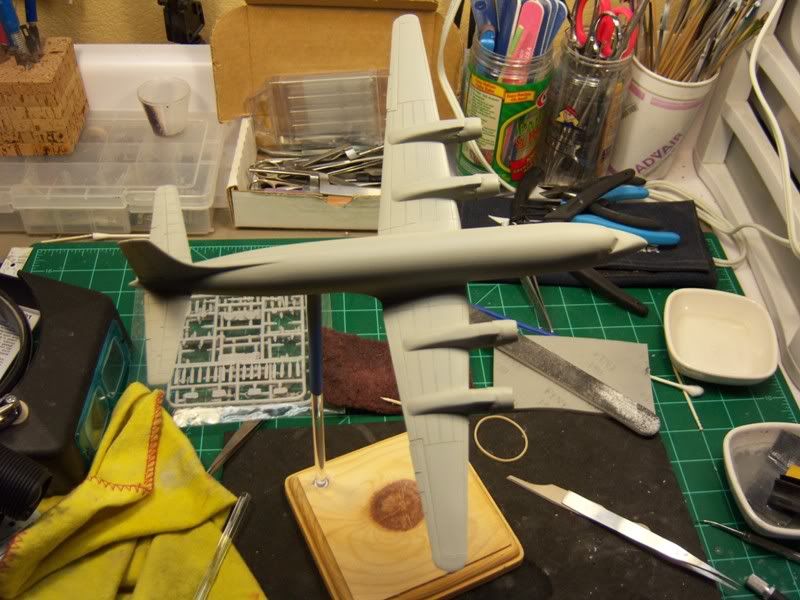
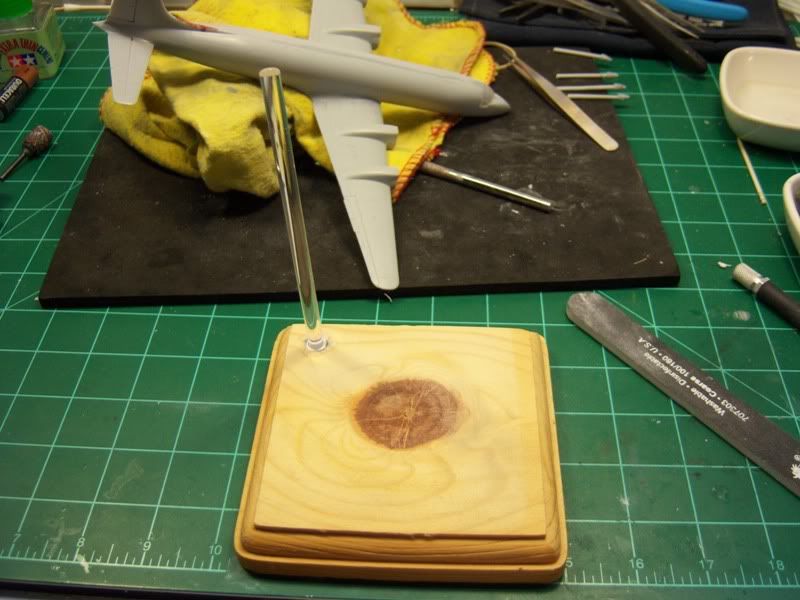
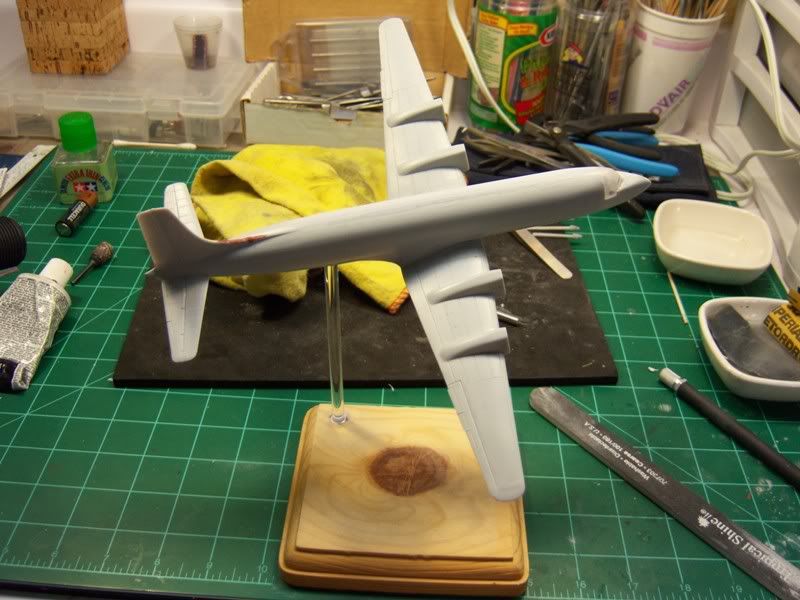
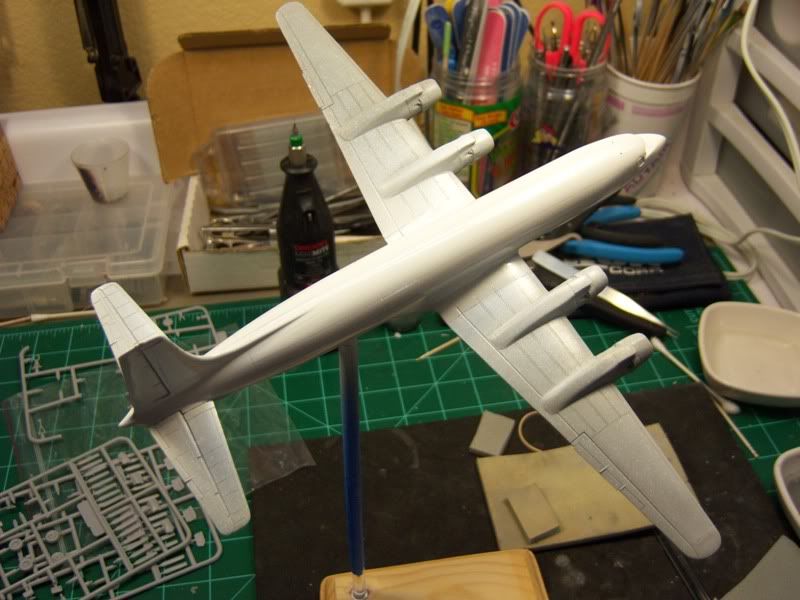
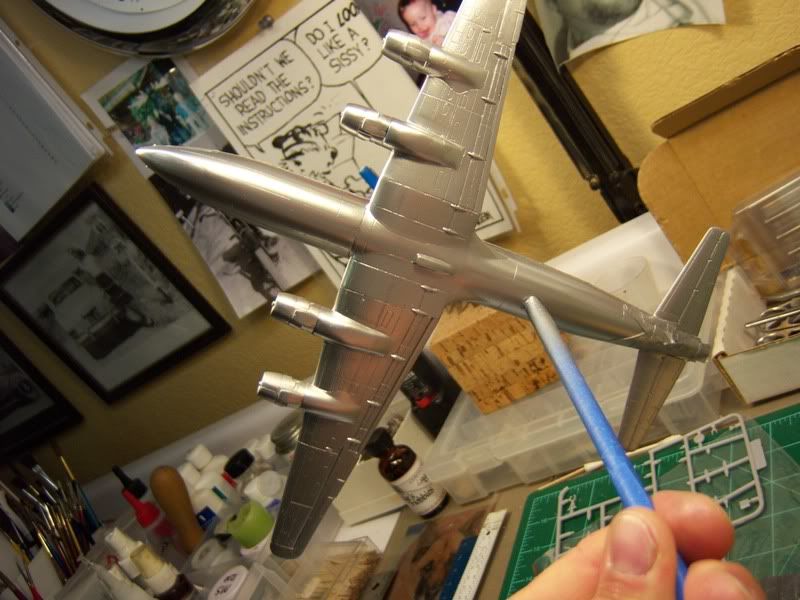
While waiting for some additional putty work to dry I knocked out the display base. A small piece of pine was selected from several I have on hand. A hole the same size as the tubing used on the bottom of the plane was then drilled in one corner of the wooden base using several different sized bits and then finally smooth/honed out with a fine sanding drum. A piece of styrene tubing was then glued into the hole using CA and some filler to bond everything securely.
The clear acrylic rod slips into the base and also the bottom of the plane. I made the insert on the plan at an angle to give it a little more character. As you can see by the pics, it all fits well. More to follow soon.
"Q"

"Don't fear the night, fear what hunts at night"
California, United States
Joined: April 01, 2002
KitMaker: 4,287 posts
AeroScale: 1,164 posts
Posted: Saturday, October 08, 2011 - 12:07 PM UTC
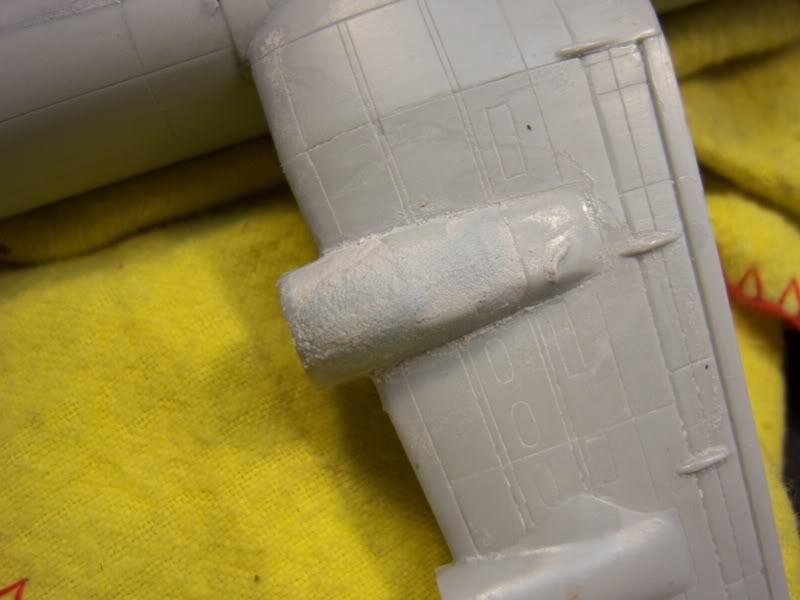
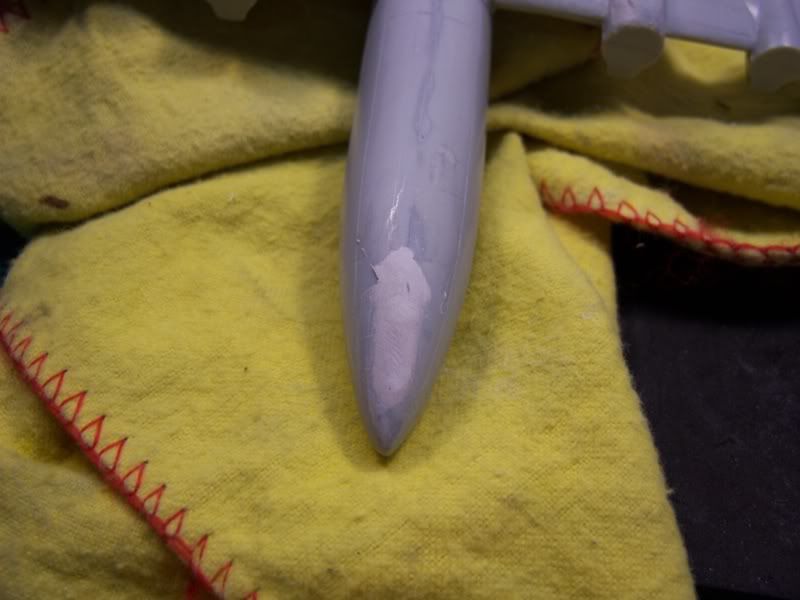
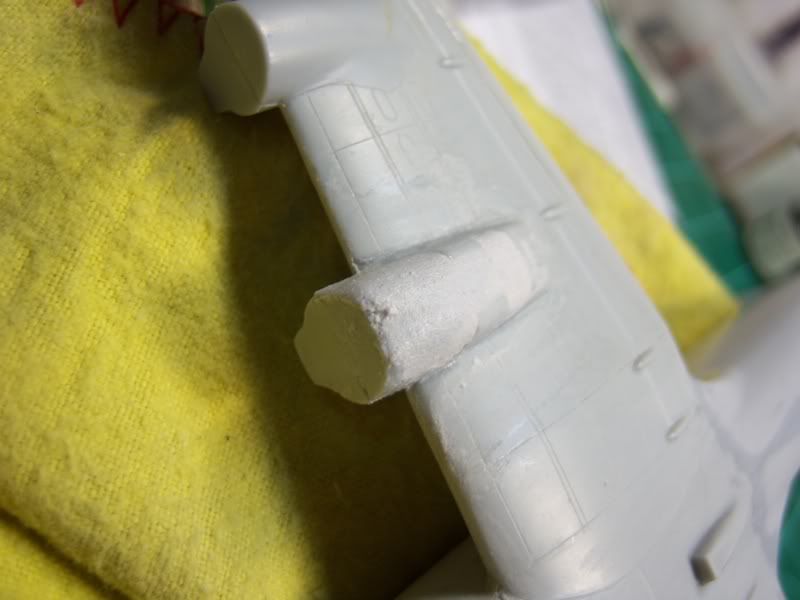
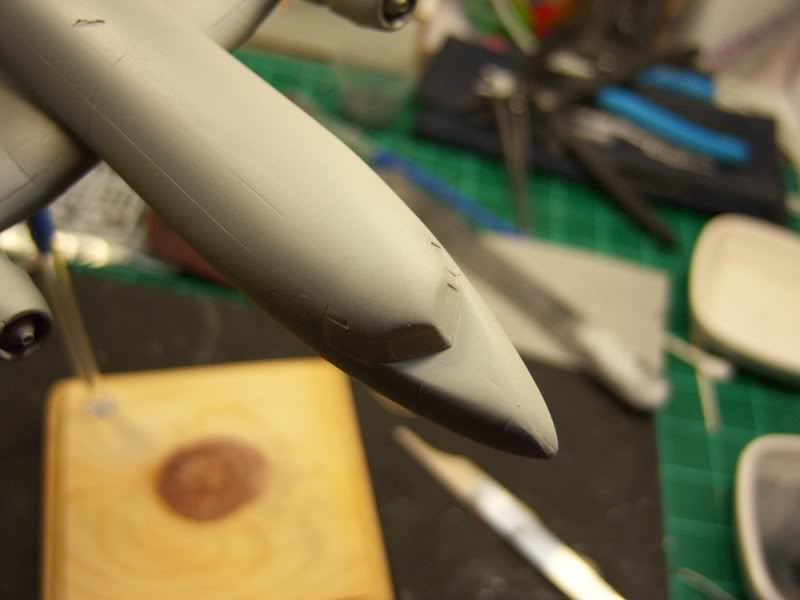
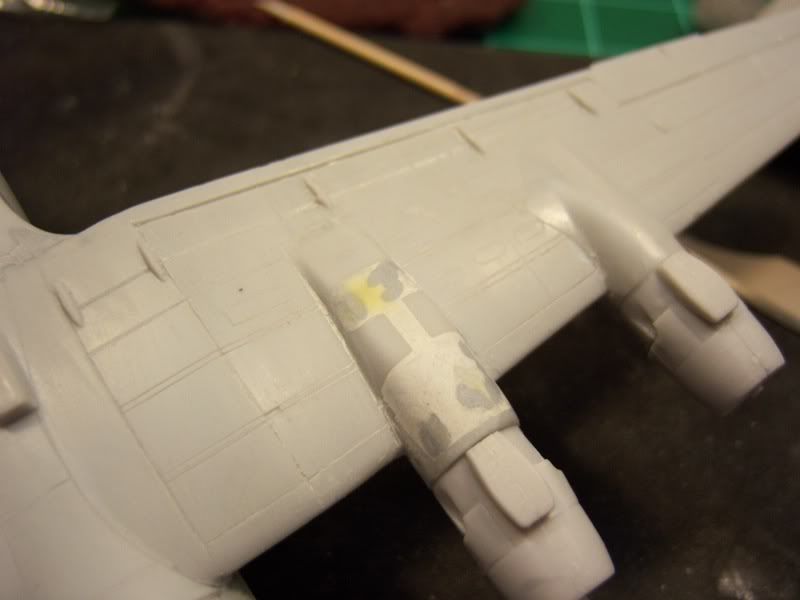
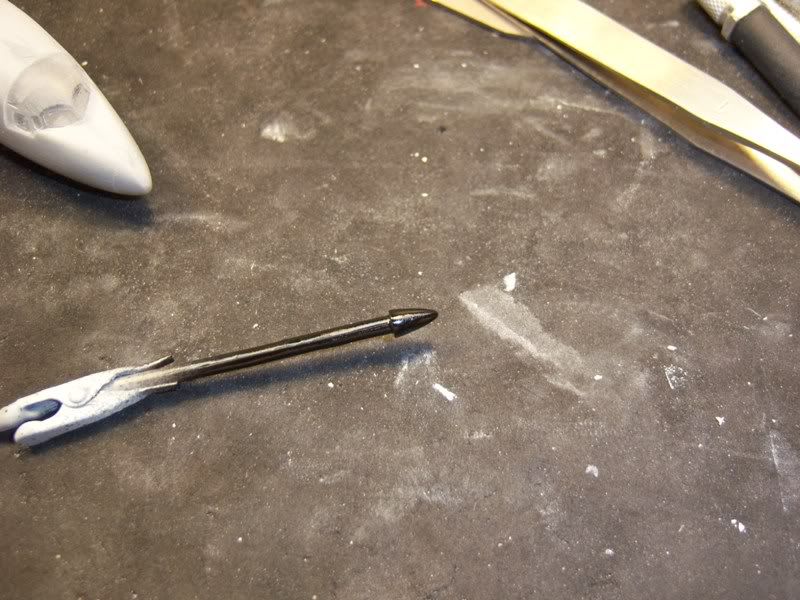
More progress..yay. I had some small divots where the putty was used to fill in the landing gear wells. Rather than use more of the same, I opted to use Tamiya's light curing putty. It is the small yellow patch in the picture. Great stuff. Apply, then hold the part up to a light for a few seconds and viola, it's cured and ready to sand shortly there after....
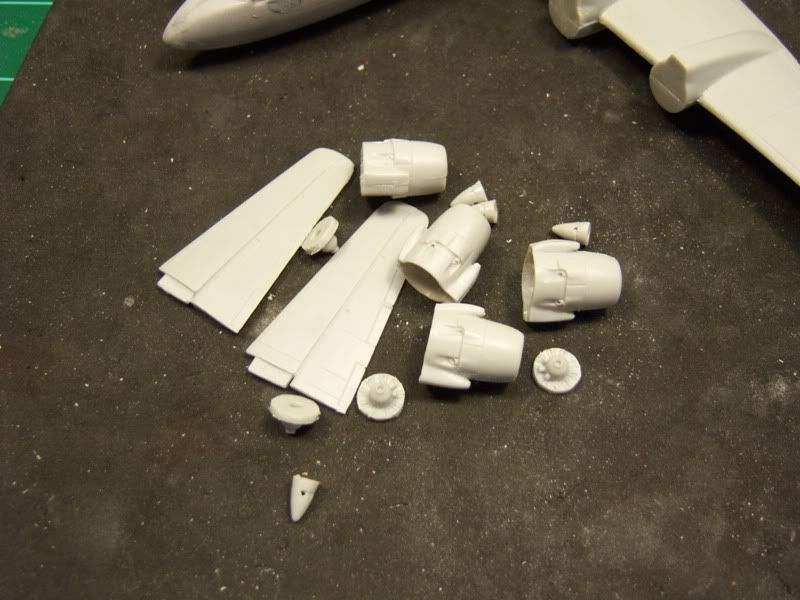
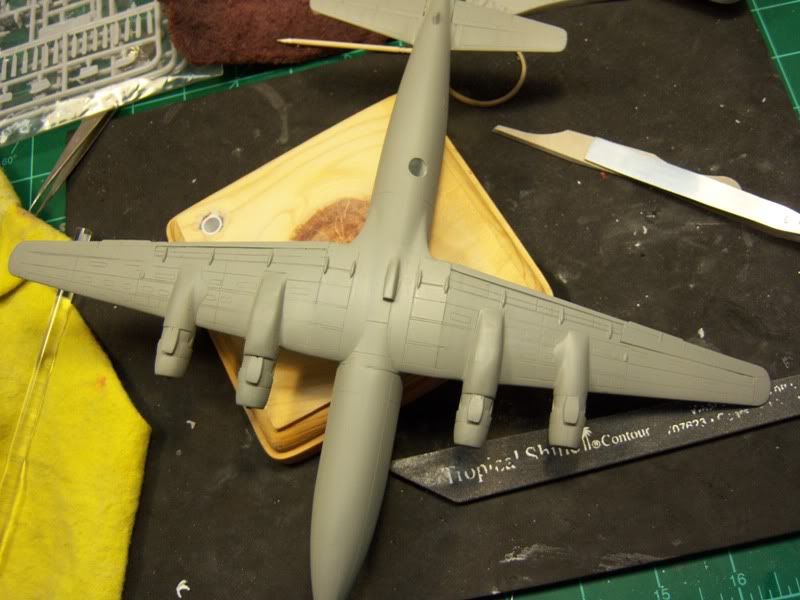
Engines are assembled, cleaned up and installed. I assembled the spinners, filled the holes for the prop blades with the same putty, sanded them to shape using my Dremel, the hit them with a coat of gloss black in preparation for the Alclad II Chrome that is going over them. Should be shooting some scratch filling primer over the entire thing here in the next couple of hours. More to follow soon.
Thanks, "Q"
"Don't fear the night, fear what hunts at night"
California, United States
Joined: April 01, 2002
KitMaker: 4,287 posts
AeroScale: 1,164 posts
Posted: Saturday, October 08, 2011 - 03:22 PM UTC
"Don't fear the night, fear what hunts at night"
Colorado, United States
Joined: January 25, 2004
KitMaker: 11,669 posts
AeroScale: 11,011 posts
Posted: Saturday, October 08, 2011 - 03:59 PM UTC
I like it!

". . .The most important thing is to know why you build and then get the most that you can out of building." via D.D.
California, United States
Joined: April 01, 2002
KitMaker: 4,287 posts
AeroScale: 1,164 posts
Posted: Sunday, October 09, 2011 - 03:29 AM UTC
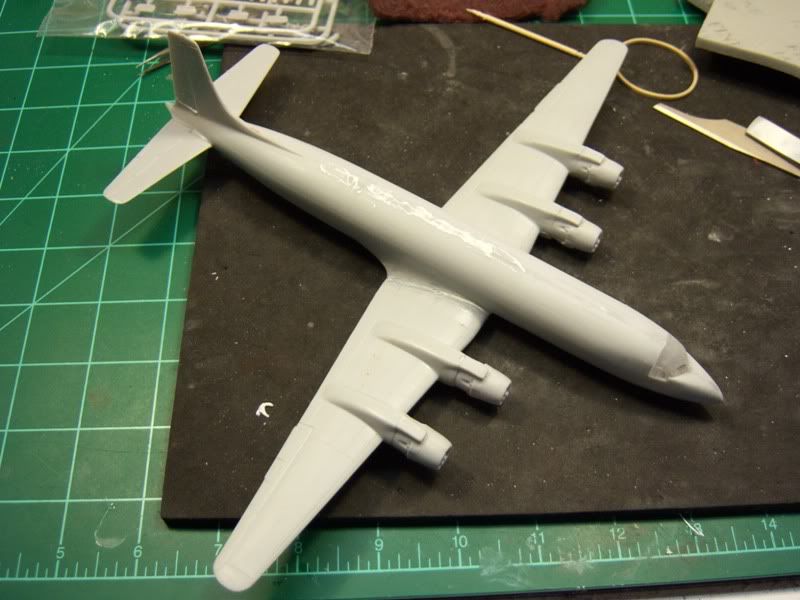
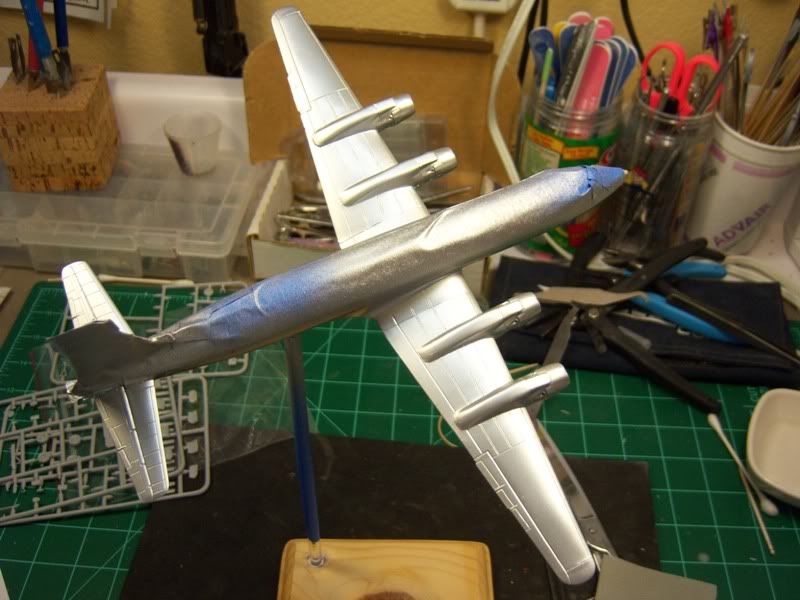
Thanks Stephen. After letting the primer set overnight, she is ready for some knock down sanding, touch up filler and hopefully a coat or two of color. More to follow soon.
"Q"
"Don't fear the night, fear what hunts at night"
British Columbia, Canada
Joined: September 03, 2009
KitMaker: 6,965 posts
AeroScale: 6,247 posts
Posted: Sunday, October 09, 2011 - 03:56 AM UTC
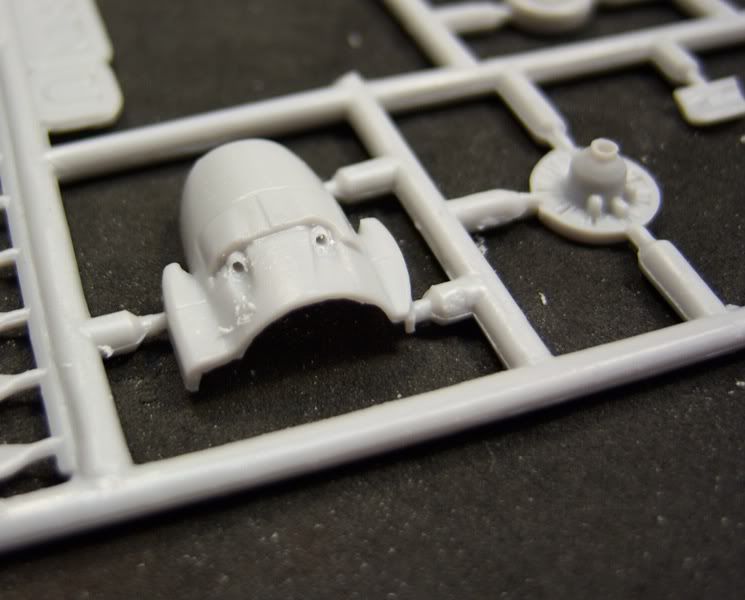
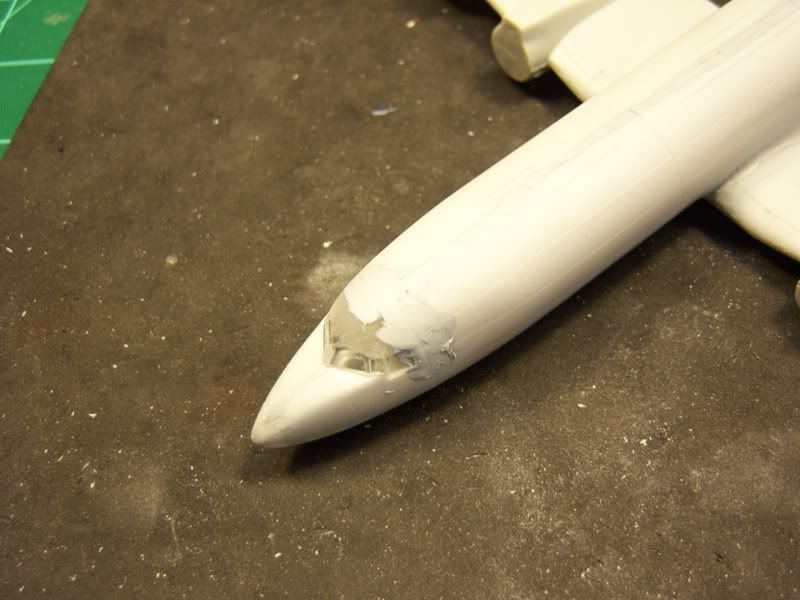
It looks as though that divot above the copilot's side window is another mould signature for this kit. Take a look at
this nose section; it's not there in real life.
When once you have tasted flight you will walk the Earth with your eyes turned skyward.
For there you have been, and there you will always long to return.
-Leonardo Da Vinci
Tennessee, United States
Joined: September 20, 2005
KitMaker: 1,747 posts
AeroScale: 1,673 posts
Posted: Sunday, October 09, 2011 - 05:14 AM UTC
Good work Matt on a less than perfect kit for sure. Russell
To Thine Own Self Be True
Siderius
A.K.A., RTA
California, United States
Joined: April 01, 2002
KitMaker: 4,287 posts
AeroScale: 1,164 posts
Posted: Sunday, October 09, 2011 - 05:47 AM UTC
Thanks all. Jessie, you are correct about the divot, but I just shot the gloss white and I'm not relishing having to dress that area to fix it so it will be a one off for this go round. Going to let this set awhile to cure out then mask for the gray and aluminum. I shot the spinners in Alclad II chrome as well, but couldn't get my little point and shoot to focus on them hence no pics. They look good though.
More to follow soon.
"Q"
"Don't fear the night, fear what hunts at night"
California, United States
Joined: April 01, 2002
KitMaker: 4,287 posts
AeroScale: 1,164 posts
Posted: Sunday, October 09, 2011 - 07:00 AM UTC
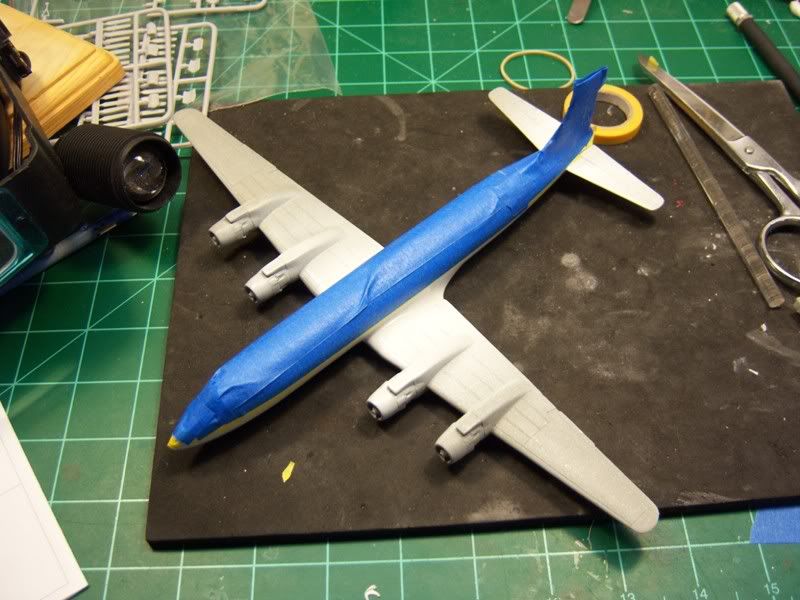
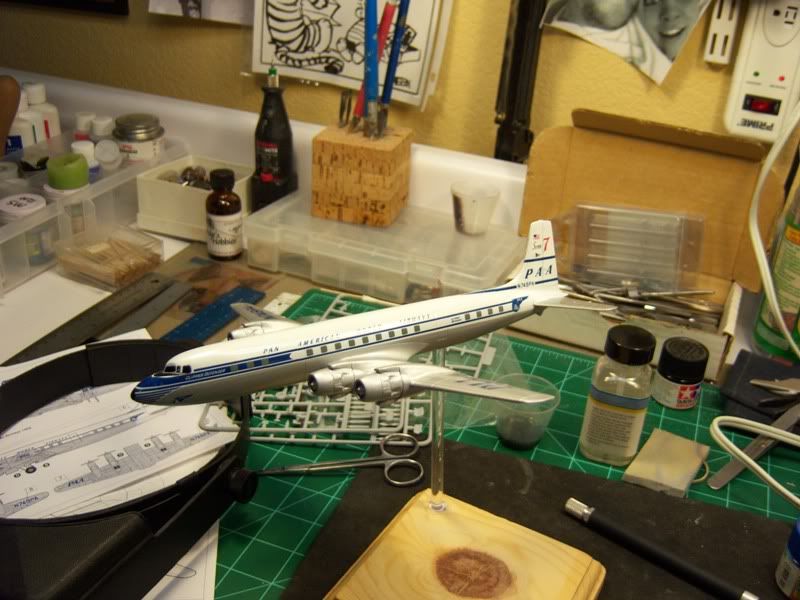
The great thing about Tamiya lacquers is their fast drying time
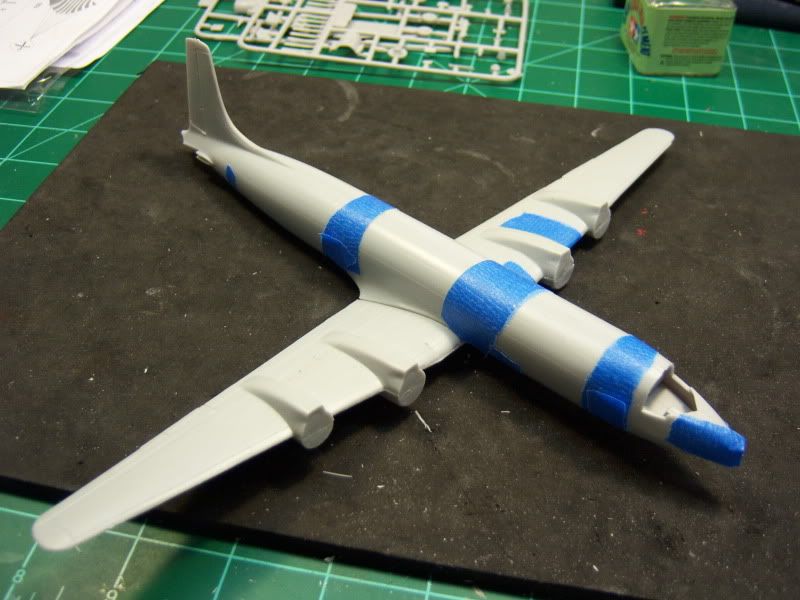
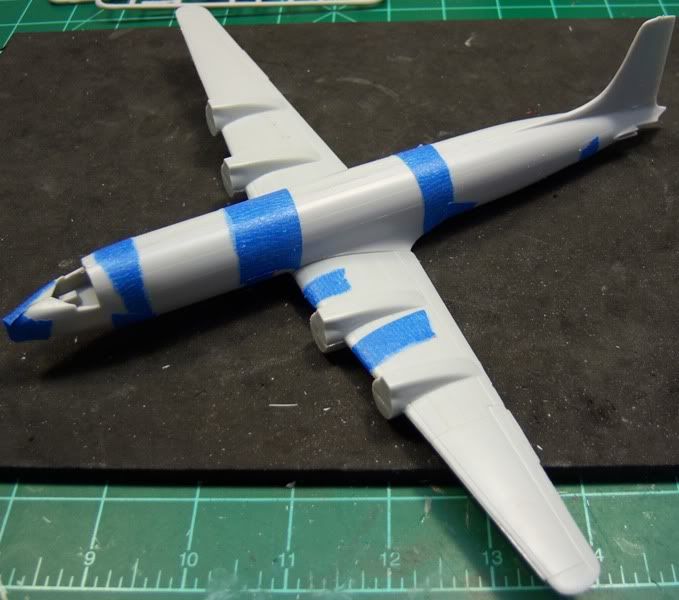
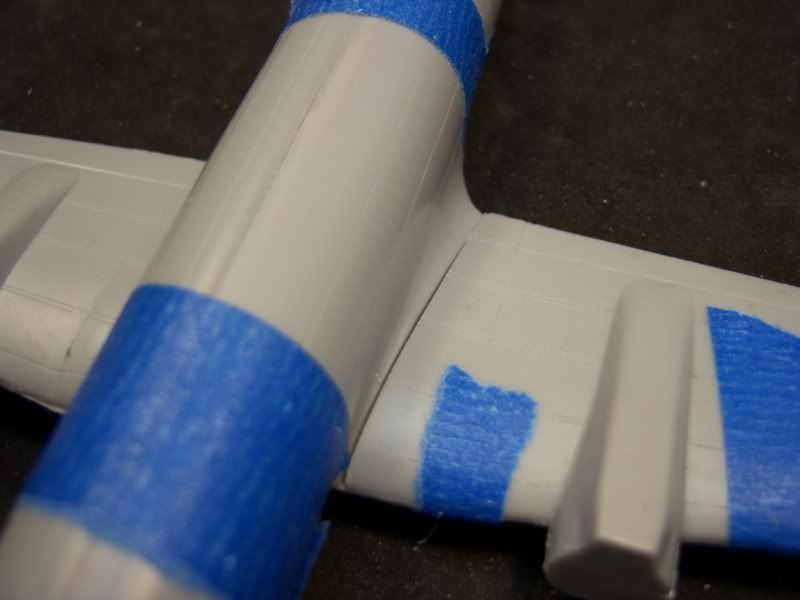
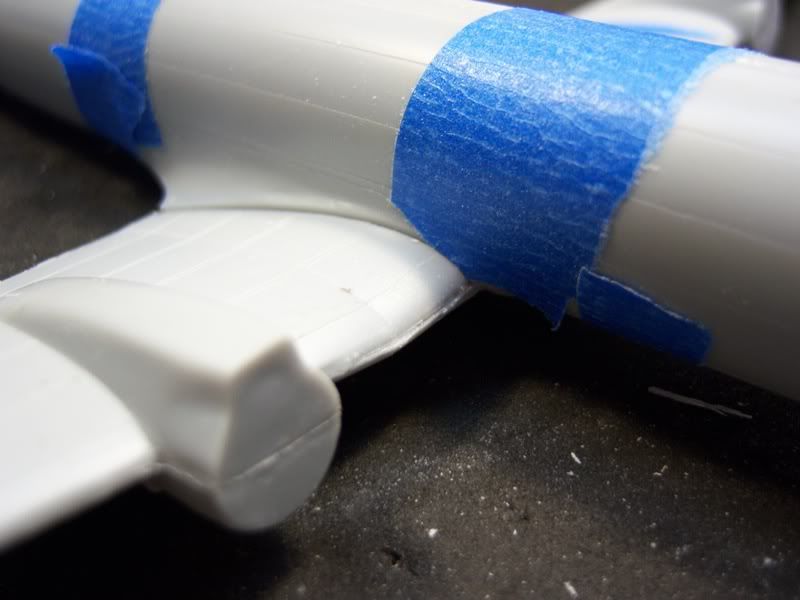
I masked of the white upper fuselage sections, sprayed the gray lower rear section of the fuselage, masked that off, then shot the aluminum over the remaining areas. I'll give this 30 minutes or so to dry so I can safely handle things to unmask everything. Hoping to have some decals making their way onto this thing by the end of the day. More to follow soon.
"Q"
"Don't fear the night, fear what hunts at night"
California, United States
Joined: April 01, 2002
KitMaker: 4,287 posts
AeroScale: 1,164 posts
Posted: Sunday, October 09, 2011 - 09:42 AM UTC
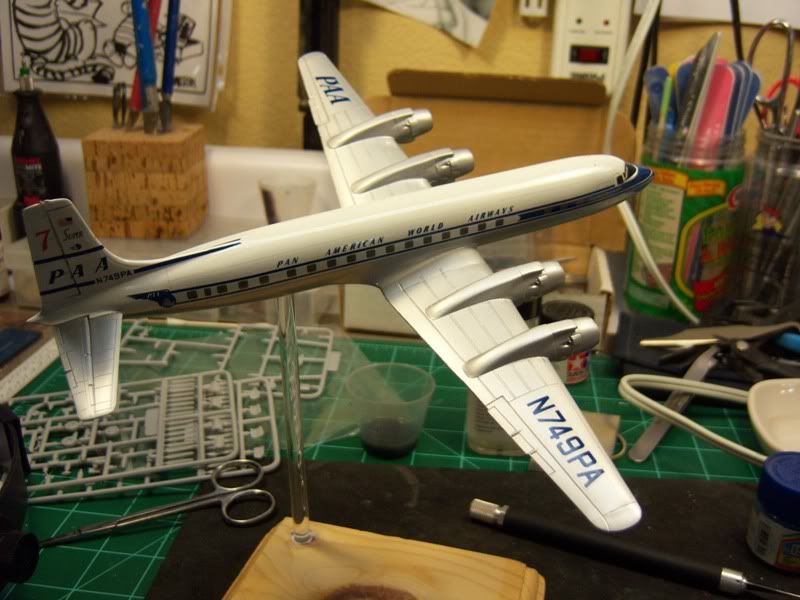
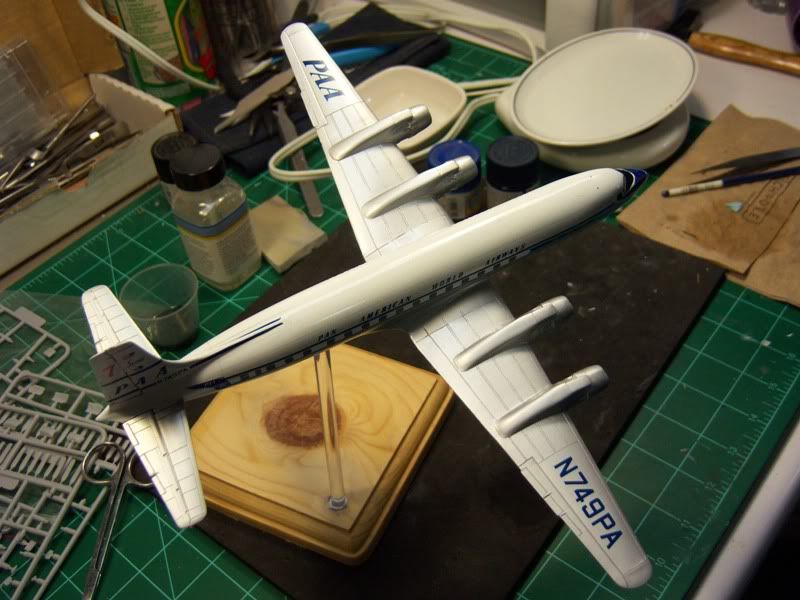
It's beginning to look like an airliner.
I need to do some spot sanding as I ended up with several red micro fibers on the plane. Not sure where they came from as I don't have any red cloth or red anything for that matter around my paint booth. Will gloss back over the entire model to tie everything back together once that has been taken care of. The decals performed better than the last set of Roden decals I used still had me making up new colorful words. As soon as they hit the model they stuck. Even with a liberal dose of water slid underneath them, they were reluctant to move. A couple of them broke and I had to piece them back together. The stripes around the nose were particularly tedious to get to conform. I ended up having to paint match a small strip right down the middle. Luckily it blends pretty well with the decal material and should look the part when tucked into the back corner of my display case.

Once she is clear coated I'll add the spinners and she'll be done. More to follow soon,
Thanks, "Q"
"Don't fear the night, fear what hunts at night"
California, United States
Joined: April 01, 2002
KitMaker: 4,287 posts
AeroScale: 1,164 posts
Posted: Sunday, October 09, 2011 - 10:43 AM UTC
"Don't fear the night, fear what hunts at night"
Colorado, United States
Joined: January 25, 2004
KitMaker: 11,669 posts
AeroScale: 11,011 posts
Posted: Sunday, October 09, 2011 - 02:14 PM UTC
Wow! Matt you really did this one justice! Nicely done!
". . .The most important thing is to know why you build and then get the most that you can out of building." via D.D.
California, United States
Joined: April 01, 2002
KitMaker: 4,287 posts
AeroScale: 1,164 posts
Posted: Wednesday, October 12, 2011 - 09:36 AM UTC
Thanks Stephen, much appreciated.
"Q"
"Don't fear the night, fear what hunts at night"
litespeed
 News Reporter
England - North West, United Kingdom
Joined: October 15, 2009
KitMaker: 1,976 posts
AeroScale: 1,789 posts
Posted: Wednesday, October 12, 2011 - 11:38 AM UTC
Stunning builds Matt, excellent work and many thanks for the build log. I enjoyed seeing your work immensely.
All the best.
tim
California, United States
Joined: April 01, 2002
KitMaker: 4,287 posts
AeroScale: 1,164 posts
Posted: Thursday, October 13, 2011 - 03:02 AM UTC
Thanks Tim. Glad you liked it.
"Q"
"Don't fear the night, fear what hunts at night"