United Kingdom
Joined: April 22, 2010
KitMaker: 20 posts
AeroScale: 19 posts
Posted: Saturday, September 17, 2011 - 11:17 PM UTC
New Jersey, United States
Joined: June 02, 2006
KitMaker: 1,212 posts
AeroScale: 468 posts
Posted: Sunday, September 18, 2011 - 02:28 AM UTC
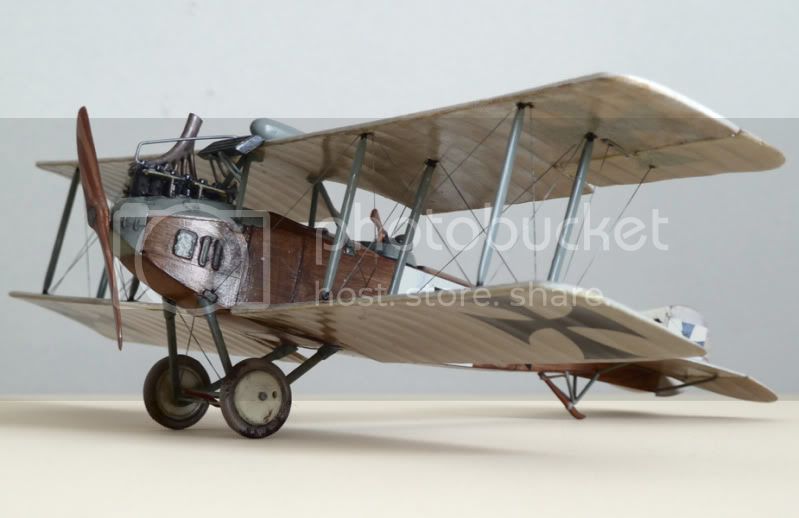
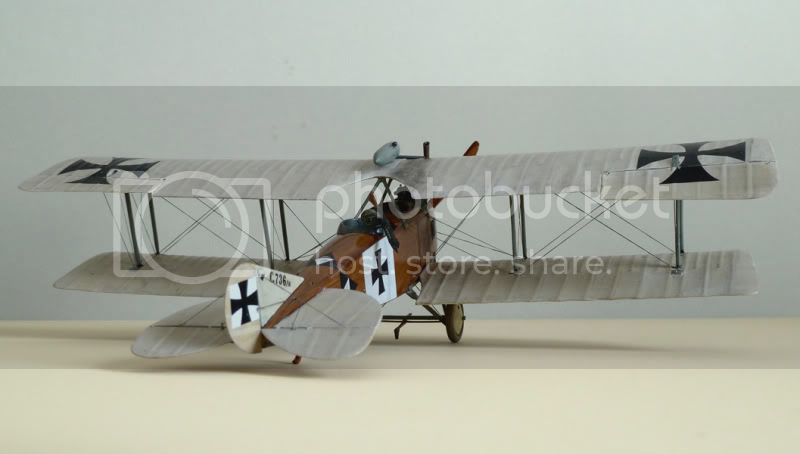
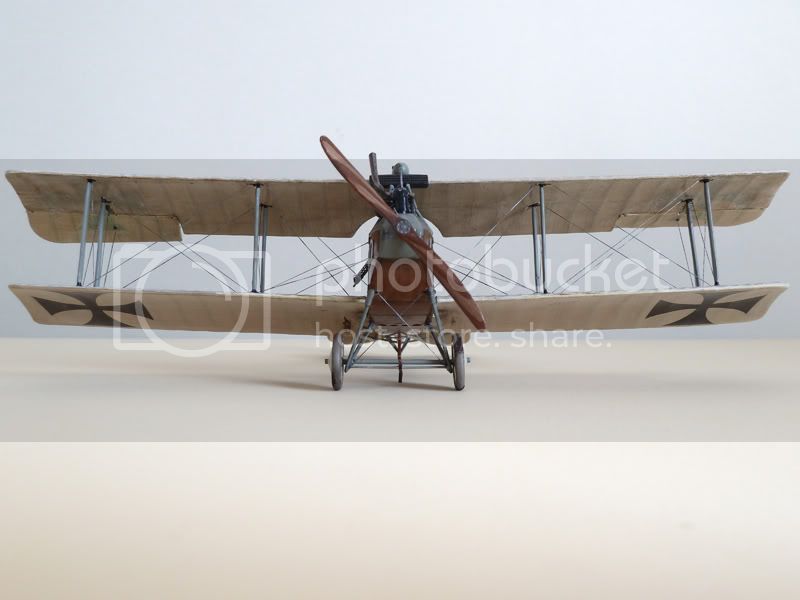
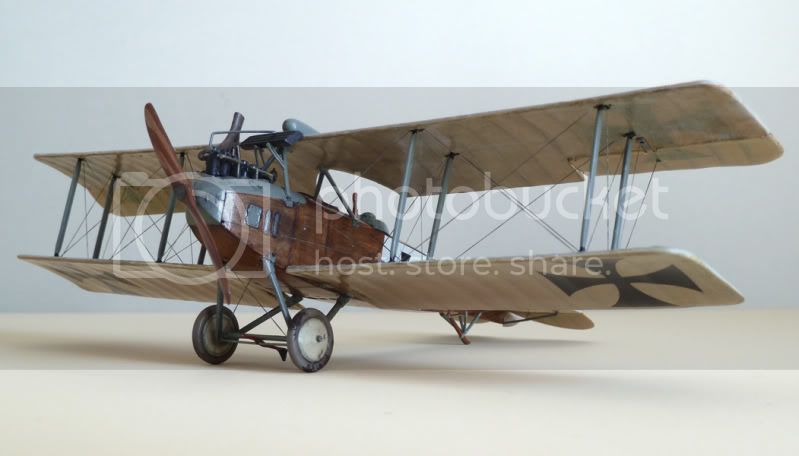
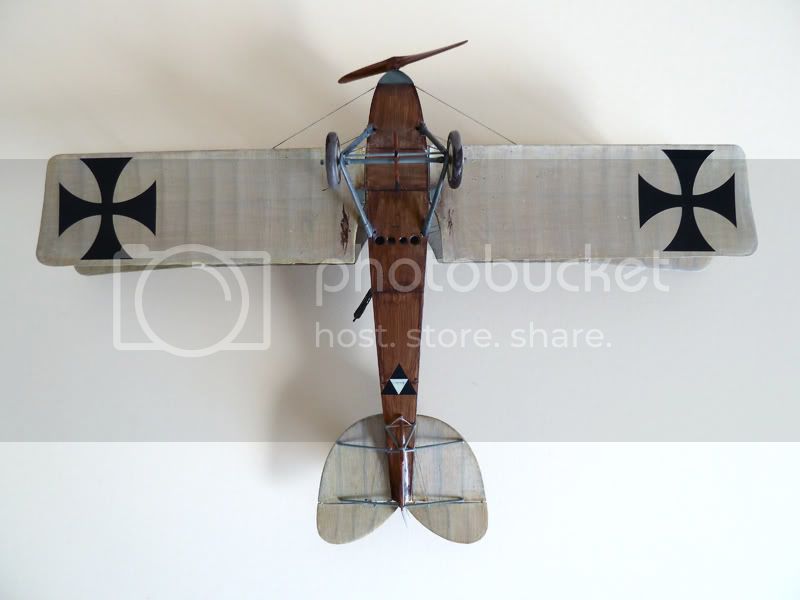
Now that's nice. I think you really pulled off the translucent look really wel. The crosses under the upper wing is a fantastic touch.
United Kingdom
Joined: April 22, 2010
KitMaker: 20 posts
AeroScale: 19 posts
Posted: Sunday, September 18, 2011 - 08:02 AM UTC
Thanks Marc, I got the under-wing decal trick from somewhere online, quite probably here! At some point I'll have another go at translucency, there's a Fokker E III and a Vickers Gunbus in the stash.
Alberta, Canada
Joined: January 19, 2008
KitMaker: 6,743 posts
AeroScale: 6,151 posts
Posted: Sunday, September 18, 2011 - 09:03 AM UTC
David , you did a wonderful job on your build !

Colorado, United States
Joined: January 25, 2004
KitMaker: 11,669 posts
AeroScale: 11,011 posts
Posted: Sunday, September 18, 2011 - 09:42 AM UTC
Nicely done! Thank you sincerely for sharing this.
". . .The most important thing is to know why you build and then get the most that you can out of building." via D.D.
South Australia, Australia
Joined: August 14, 2007
KitMaker: 5,926 posts
AeroScale: 2,201 posts
Posted: Sunday, September 18, 2011 - 10:58 AM UTC
Excellent, David. 1/48th?
You may be right, I may be crazy.
Alberta, Canada
Joined: July 26, 2010
KitMaker: 1,032 posts
AeroScale: 1,025 posts
Posted: Sunday, September 18, 2011 - 11:32 AM UTC
David,
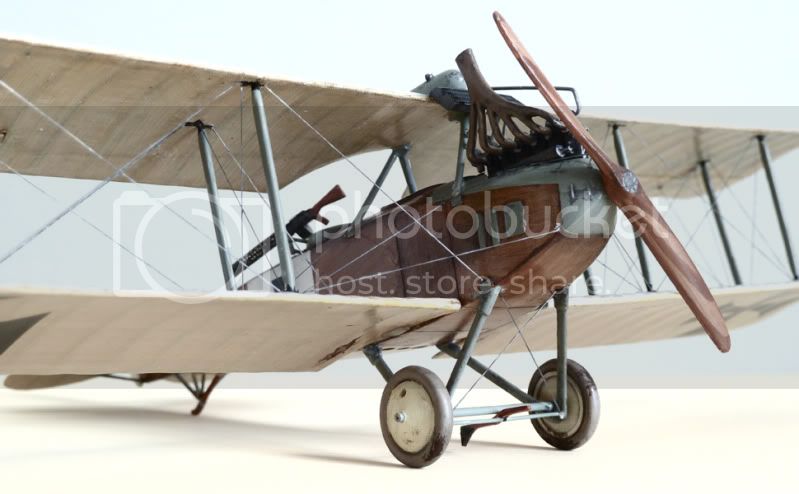
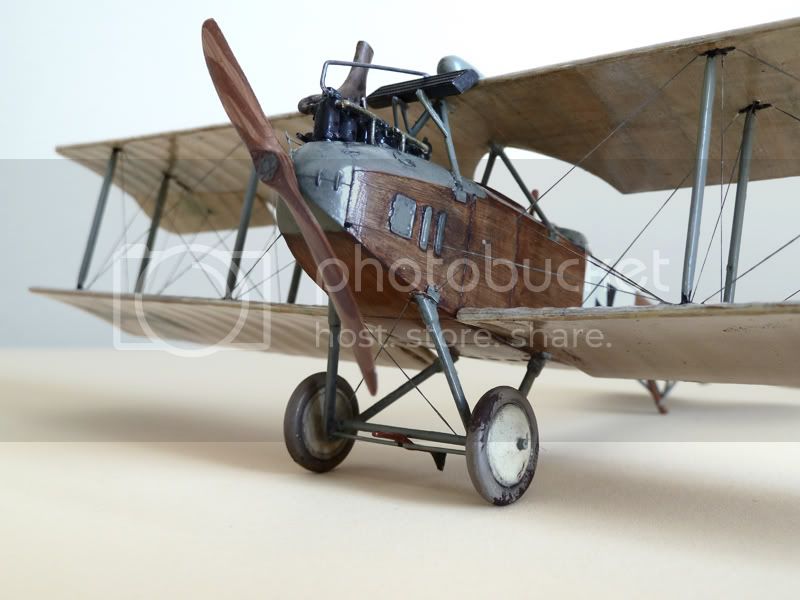
Very very nice all round. I am particularly impressed by your transparency results. The bottoms of the wings appear to have some texturing in a few of the photos; the color effect comes off as a clear doped fabric more succesfully then I've seen prior to this build. Can you tell us more on the details?
In the interim, congratulations on a beautiful model.
Cheers,
Lance
Officially Retired as of 20 August 2013 and looking forward to some un-interrupted bench time. Currently starting Roden's Nieuport 28 and hoping to follow that with another WNW Fokker DVII.
United Kingdom
Joined: April 22, 2010
KitMaker: 20 posts
AeroScale: 19 posts
Posted: Sunday, September 18, 2011 - 08:29 PM UTC
Hi Lance,
thanks for your comments. The effect was achieved somewhat serendipitously but I'll try to explain! First off I'm using brushes which is a definite advantage here.
1. put a white coat over the whole wing surface (not necessarily perfectly opaque)
2. put on rib patterns and decals of crosses (or roundels of course!). I actually did this free-hand but next time I think masking will have to be done. Once it's painted I blurred the edges of ribs and crosses a bit with some pastel dust
3.Mix together a gloss coat with various yellows/browns and brush on leaving a bit a of a streaky effect, probably need a couple of coats
4.Mix together a gloss coat with a little white and thin quite a bit. Brush this on by placing a small amount of paint on the surface, spreading it out over the whole wing and then brushing vigorously first across the length of the wing, then across the chord. Repeat until paint has dried and won't move anymore. I put on two of these coats. They give a good translucent kind of woven effect.
5. I then added a coat the same as above but with yellow instead of white in the thinned gloss paint. Gives a bit of a glow.
It's quicker to do than it is to describe! The top wing was done quite by accident to rescue a too brown-yellow coat over the decals etc. Of course when I tried to mimic the effect on the bottom wing it wasn't quite as effective in my opinion. Murphy's law. Hope that helps and thanks again!
David